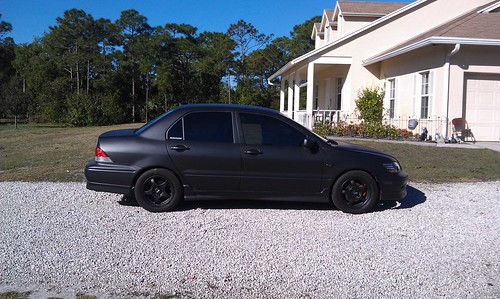
Little show and no shine... yet.
 Jan 28, 2013, 03:48 PM
#31
Evolved Member
Thread Starter
iTrader: (5)

Join Date: Apr 2010
Location: Jupiter
Posts: 663
Likes: 0
Received 0 Likes
on
0 Posts
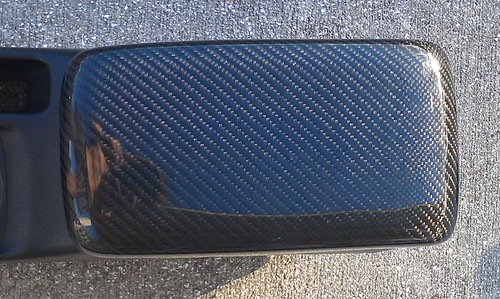
My story on the Rexpeed Carbon Fiber Armrest 2x2 weave:
Originally purchased it thinking that the evo and lancer armrest consoles were the same... of course I was wrong and the evo doesn't have the little plastic divider under the armrest that makes it two compartments (the top one being best for cash/sunglasses/cigarettes.. the list could go on). So a week goes by and I decide the look is worth my losing my precious "compartment" and I order a evo armrest console from a fellow member on here and got it today.
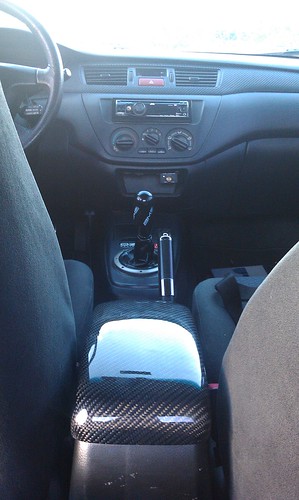
So overall I would say it wasn't worth the hassle, I had to shave down some of the stock plasti armrest piece that the replacement attaches to because the fit is questionable... but what's done is done I guess and I do like the look
Comparison between stock OZ armrest console and Evo console:
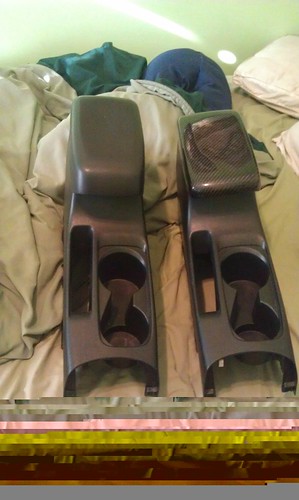
edit: Looks like megatron ate the bottom of my picture
It is a Evo center console with the Rexpeed full replacement armrest. (about $175 total )
)
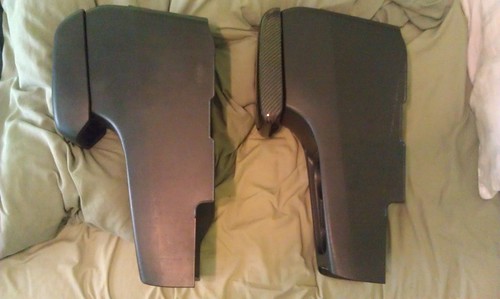
On the left there are two 4-pronged plasti pieces that come out of the armrest piece, I had to shave these down. I also had to shave down the little knob on the right side in the middle.
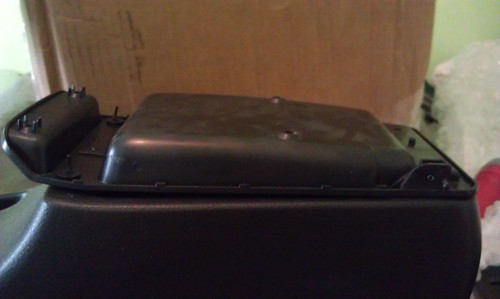
Comparing the underside of rexpeed full replacement armrest to stock evo armrest:
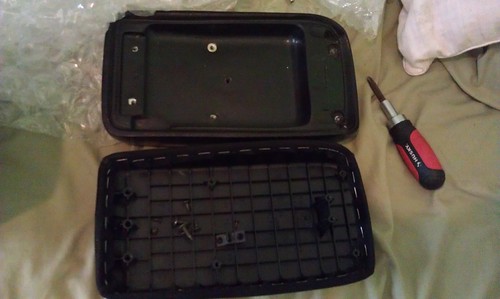
You can see I don't have screws in the top 2 holes because the screws provided weren't long enough but it still looks nice I think.
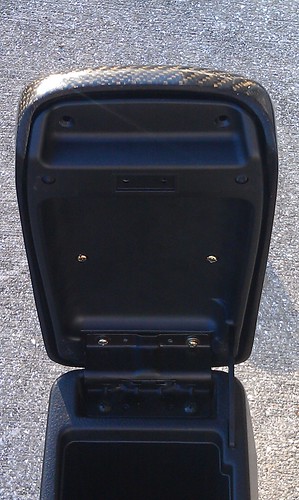
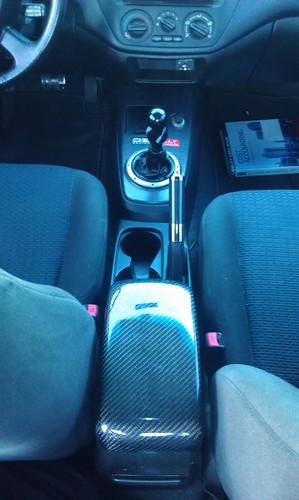
Finished product:
edit2: I really need to get some pictures of my current audio system. I got rid of that ugly rack thing on the first page a long while ago.
Originally purchased it thinking that the evo and lancer armrest consoles were the same... of course I was wrong and the evo doesn't have the little plastic divider under the armrest that makes it two compartments (the top one being best for cash/sunglasses/cigarettes.. the list could go on). So a week goes by and I decide the look is worth my losing my precious "compartment" and I order a evo armrest console from a fellow member on here and got it today.
So overall I would say it wasn't worth the hassle, I had to shave down some of the stock plasti armrest piece that the replacement attaches to because the fit is questionable... but what's done is done I guess and I do like the look
Comparison between stock OZ armrest console and Evo console:
edit: Looks like megatron ate the bottom of my picture
It is a Evo center console with the Rexpeed full replacement armrest. (about $175 total
)On the left there are two 4-pronged plasti pieces that come out of the armrest piece, I had to shave these down. I also had to shave down the little knob on the right side in the middle.
Comparing the underside of rexpeed full replacement armrest to stock evo armrest:
You can see I don't have screws in the top 2 holes because the screws provided weren't long enough but it still looks nice I think.
Finished product:
edit2: I really need to get some pictures of my current audio system. I got rid of that ugly rack thing on the first page a long while ago.
Last edited by eusgen; Jan 28, 2013 at 03:58 PM.
 Feb 2, 2013, 01:57 PM
#32
Evolved Member
Thread Starter
iTrader: (5)
Join Date: Apr 2010
Location: Jupiter
Posts: 663
Likes: 0
Received 0 Likes
on
0 Posts
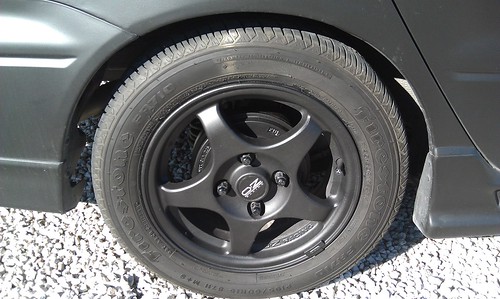
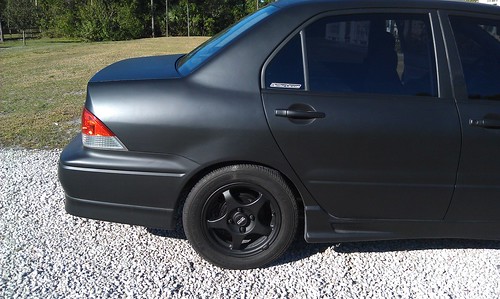
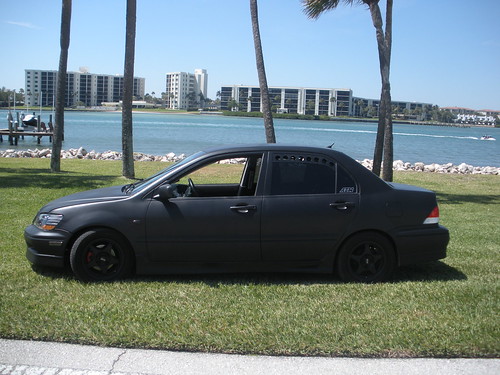
Dipped my rims yesterday, the results:
Cleaning with Pre Dip spray after sanding
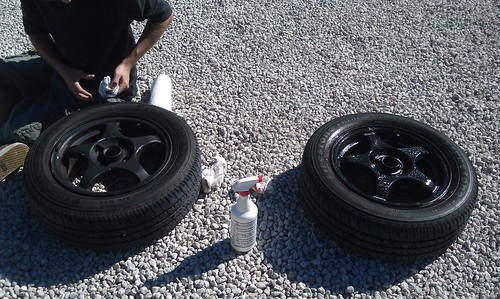
For the center caps I did 3-4 light coats and used a razor blade to scrape the dip off the "OZ Rally Racing" after each coat.
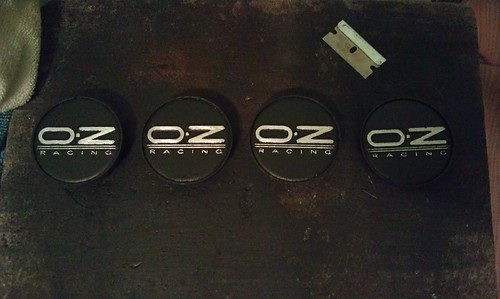
Finished:
Cleaning with Pre Dip spray after sanding
For the center caps I did 3-4 light coats and used a razor blade to scrape the dip off the "OZ Rally Racing" after each coat.
Finished:
Feb 25, 2013, 07:58 AM
#33
I am loving the matte black. I think i will dip mine after this semester is done and i get the body work done. haven't decided on what color yet. I checked out dipyourcar.com, nice site.
Also love the CF armrest. I am going to try to stick with the 3M dI NOC material for the interior parts i want CF'd. Going to do the door panels next, not the whole thing, just the areas that have the weird material on it. Gonna remove them sand them down then apply the vinyl. I'll post pics once everything is done. ^.^ keep up the great work man.
Also love the CF armrest. I am going to try to stick with the 3M dI NOC material for the interior parts i want CF'd. Going to do the door panels next, not the whole thing, just the areas that have the weird material on it. Gonna remove them sand them down then apply the vinyl. I'll post pics once everything is done. ^.^ keep up the great work man.
Feb 26, 2013, 04:20 AM
#35
Mar 11, 2013, 07:25 AM
#36
Evolved Member
Thread Starter
iTrader: (5)
Join Date: Apr 2010
Location: Jupiter
Posts: 663
Likes: 0
Received 0 Likes
on
0 Posts
Fixed my headlight beams thanks to Ace King and Avirex
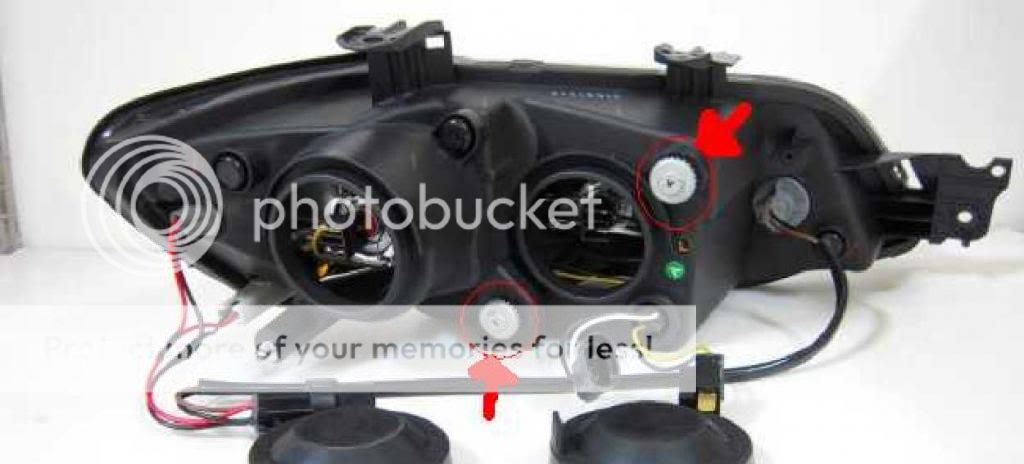
The screws adjust the low beams. To be honest, i do not remember which way i turned the screws when i lowered my passenger headlight. But as i said before, it was ALOT of turns.
I actually tried something similar with the anchors when i noticed my headlights pointing to high. After ALOT of digging i found the adjustment screws. Hope this helps.
Ok, found a photo i took when i adjusted the headlights.
The part on the right was up almost to the second floor window. I kept turning screw until it lined up with the light from the driver side.
Remember, the beam is supposed to be at the angle shown.
Mar 11, 2013, 04:52 PM
#39

 Mar 21, 2013, 01:25 PM
#43
Evolved Member
Thread Starter
iTrader: (5)
Join Date: Apr 2010
Location: Jupiter
Posts: 663
Likes: 0
Received 0 Likes
on
0 Posts
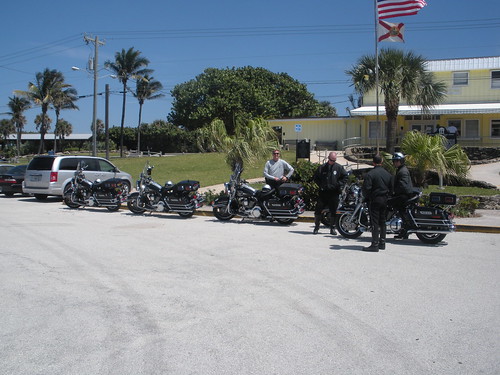
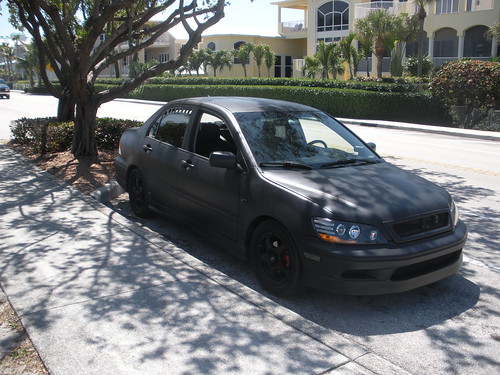
Went to the beach today and took a few shots with a 10mp Nikon Coolpix camera I got lying around.
Also got a pic of some motorcycle cops who were riding together

Also got a pic of some motorcycle cops who were riding together
Mar 25, 2013, 07:02 AM
#45
Evolved Member
Thread Starter
iTrader: (5)
Join Date: Apr 2010
Location: Jupiter
Posts: 663
Likes: 0
Received 0 Likes
on
0 Posts