When you click on links to various merchants on this site and make a purchase, this can result in this site earning a commission. Affiliate programs and affiliations include, but are not limited to, the eBay Partner Network.
About 6 or 7 months ago I built my own sub box. However i was never really happy with how it turned out. It was meant to be a wedge box however due to bad planning and lack of proper tools, it ended up being a cube box. Although it did the job and sounded okayish, I knew i could do better than that. So this weekend I started the new build. Now I had invested in a circular saw, a decent jigsaw, and some acrylic gap filler along side some fiberglass insulation we had lying around.
Coming home with the MDF, sealant and spray paint. Plus you can see my plans as well.
I had already planned and figured out the lengths and angles, and I had gotten my local hardware store to cut the pieces to length to help fit them in my car, so it was all rather easy. After a little but of cutting, gluing, screwing and swearing, I ended up with this:
I was pretty happy with how it turned out
Seriously, having a circular saw makes its so much easier, and cutting angles was a piece of cake. Just goes to show, if you have the right tools, you can get the job done right.
So that was the end of day one.
This morning, I woke up and started on sealing the inside with the acrylic as well as putting the terminal in the side of the box. Unfortunately I didn't take any photos at this time. After I sanded it down i gave it a couple coats of matte black spray paint. Being on a bit of a budget I didn't wanna spring for carpet plus, its been kinda hard to find cheap automotive use carpet. At least for me anyways.
After a few coats of matte black and some creative stenciling with some left over caliper paint and an old cereal box, I ended up with this:
Yes, I know I messed up one of the speaker holes, but the sub still fits snug so it should be all good.
From this angle you can see the acrylic sealant on the inside of the box. Very messy to put in, and kinda tedious, but I know the end result will be well worth it in terms of sound quality and overall bass.
Just a close up of the speaker terminal. I know a lot of people don't like to use them because they weaken the walls of the box but my subs aren't quite that powerful enough for me to justify not using it.
I'm really really happy with this box. Not only does it have more volume on the inside but it just looks nice and cleaner and it fits a lot more flush together than the other
And of course, that symbol finishes it off and i feel its the perfect finishing touch.
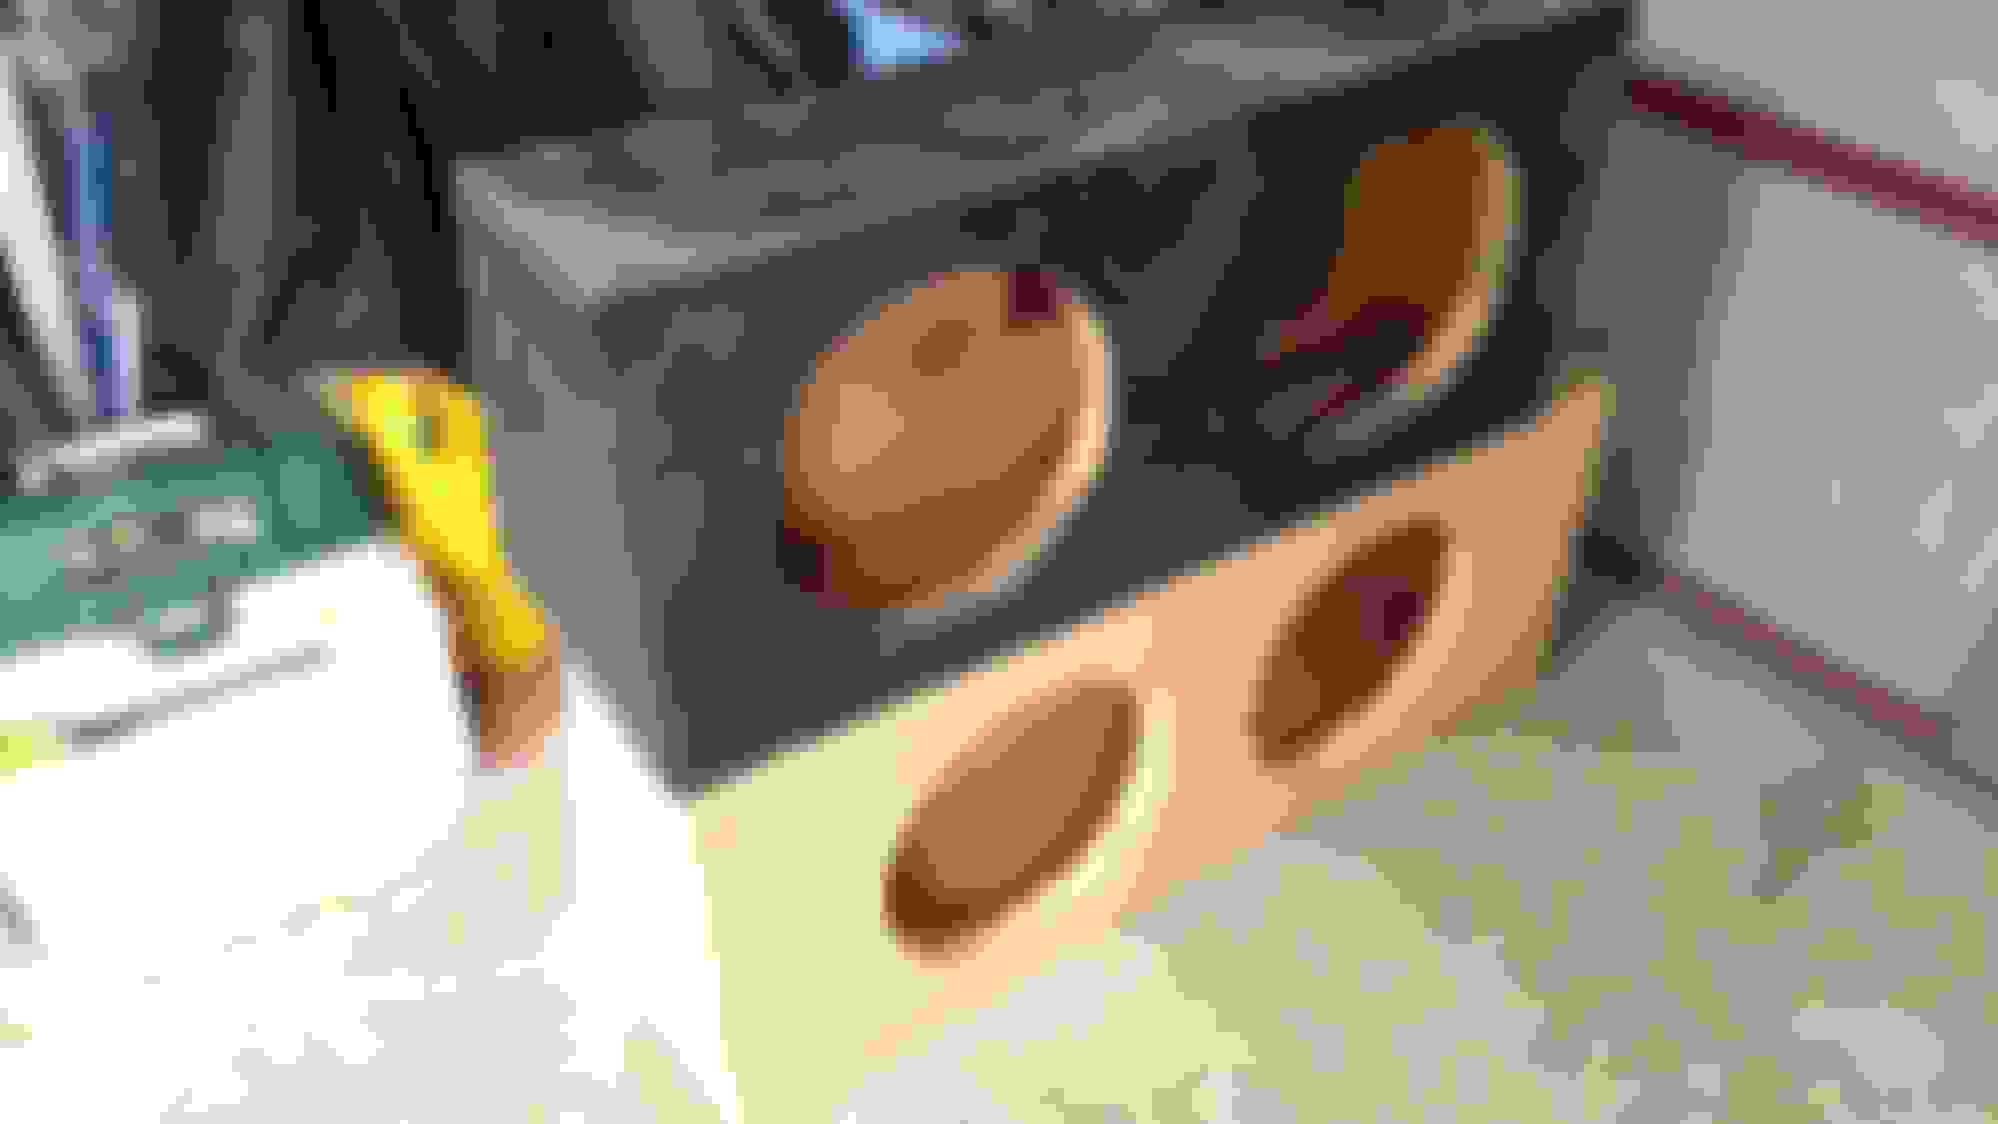
Here's some comparisons of the old box to the new box:
From here you can see how my old box was actually just a cube with the sides having a bit of an angle. I ran out of material and couldn't quite cut the angles for the back panel.
You can see that new box is slightly wider. Not only does it provide more air for the subs, this means that it actually fits quite snug right up between the wheel wells in the boot and with the angle that I chose, the back of the box fits flush with the back of the back seats (lol, alliteration)
Just another picture of my first attempt. It served me well though, that's for sure.
Once the sealant is cured, which should take about 3-5 days, (I'm gonna wait 5 just to be on the safe side), Ill put in some fibre glass insulation that we had lying around. This will help 'increase' the air volume of the box (it slows down sound waves and creates the illusion of more air volume). I've got plenty and it should be easy to put in
Since I have plenty of the stuff, I decided to get rid of the biggest reason for rattling in the boot. The licence plate. It was rather easy
The licence plate is only attached with two crew, plus the frame only sits lightly over the top, so when you have a couple subs blasting into your trunk, a lot of rattling happens.
I took off the license plate and measure a piece slightly smaller that the plate itself.
I then screwed the plate back into the boot. from here you can see a tiny bit of insulation plus you can notice that the plate tilts a little bit.
But seriously the difference this makes is amazing! You don't have to use insulation either, you can use some sponge or any soft material that will dampen vibrations. My plate used to rattle just from the volume of my exhaust, now there's no rattling at all. Its fantastic.
Hopefully this time next week, i'll have my subs back in my car and i'll be making my friends jealous and my neighbors annoyed :P
One more pic, just a sneaky shot from behind in the dark
Ive been thinking about making a custom sub enclosure in my Evo. I never did on my RA because of the rear strut brace being right on the floor, and in the way.
Also I did something similar to my licence plate. I didnt have anything handy like you tho. Used some rolled up paper towels and duck tape. Had a friend who drove an Eclipse with two 12s he rolled up a used pack of cigarettes and stuffed it under his plate. LOL
No pics of the sub in my trunk just yet, gonna put my subs in to the box later today now that the sealant has cured and then I'll make sure to snap a few pics.
I did test fit the box and it fits like a glove... almost :P
I kinda forgot to account for the amp and wiring on the back of the box so the box is forward towards the trunk lid by about an inch, but its barely noticable so meh
Oh yeah! I reckon having a custom enclosure is more fulfilling and more satisfying. Especially if you make your own. Cause then you can literally say "no one else has anything like this" haha
Ah true! paper towels and duct tape? a used pack of cigarettes? now that's ingenuity! Lol
Was meaning to post pictures of how the sub box looks in my boot, but my PC got sent of to repairs and only just got it back so now I'm back on here, yay!


 Jan 23, 2016, 11:14 PM


 symbol finishes it off and i feel its the perfect finishing touch.