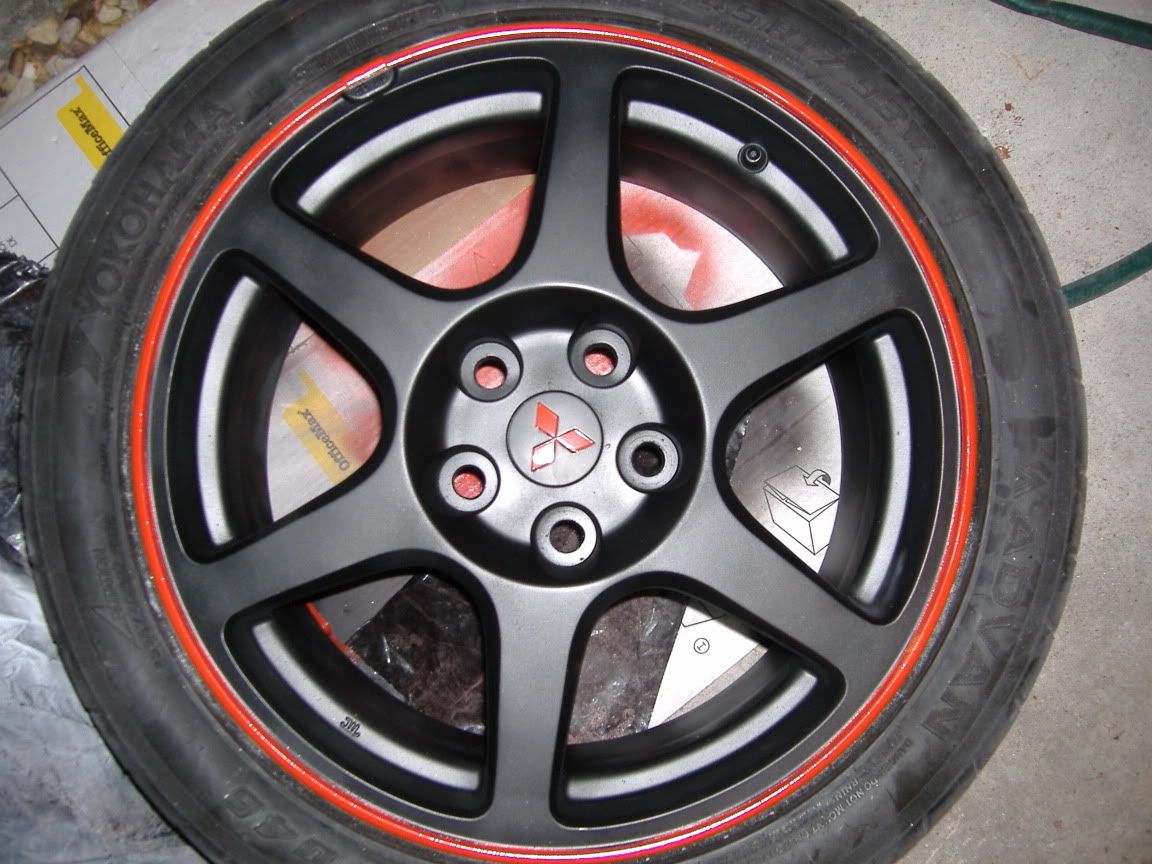
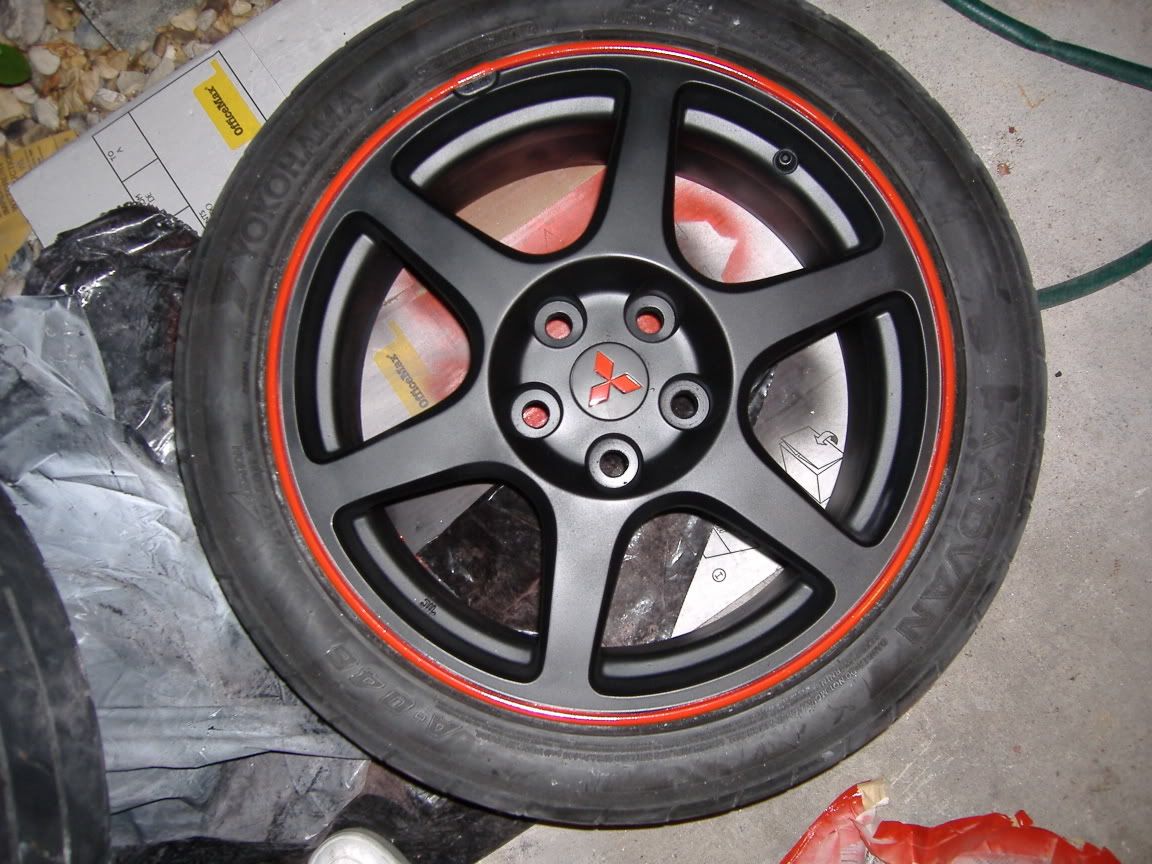
DIY - Paint Custom Paint Your Rims! Red Lip (Lots of Pictures)

 May 1, 2006, 12:51 PM
#32
Gloss black would look nice. With or without the red lip? I say with. Hey guys I have some old Racing Hart C5's that I may put on my car if I car repaint them a light gold or bronze. The white paint that is on them now looks pretty tough so I might have them sand blasted to save time and because I am lazy.
Where can I get light bronze wheel paint? I want the same color as the Advan's on this evo.
Where can I get light bronze wheel paint? I want the same color as the Advan's on this evo.
May 2, 2006, 12:28 AM
#33
Newbie
iTrader: (1)

Join Date: Feb 2004
Location: Northern California
Posts: 29
Likes: 0
Received 0 Likes
on
0 Posts
Originally Posted by KiRrSAcE
1. Yeah thats fine you just want to ruff it up.
2. I didnt strip them i dont like using that stuff
1. Just keep the sand paper wet because it likes to wear out fast without water. i only used water because i had 600grit no need if you had a low grit
2.yes
2. I didnt strip them i dont like using that stuff
1. Are you saying to dip the sandpaper into water before starting to sand?
2. Do you sand "after" the primer ONLY if you have bubbles, right?
2. Do you sand "after" the primer ONLY if you have bubbles, right?
2.yes
May 2, 2006, 07:33 PM
#34

Day Two of Adventure
OK fellahs. Day Two is now complete.
I know that some of you went with either the stripping, no stripping, sanding, no sanding, primer, no primer route. I personnaly decided that if I was going to do anything, then I'd better take my time and do it with old fashioned blood, sweat, and tears. Not really tears! I decided to strip each wheel as close as I could get them using aircraft stripper and then wet-sand them using a 400-grit sponge that I bought at Autozone for about two bucks. I must say that for those of you who have never used the aircraft stripper, it's absolutely marvelous. I could see the aluminum on after the first coat was sprayed. As I was washing dishes last night, I noticed that my wife has a "knife looking" thing I thought could help me out with the scraping duties of the wheels. I'm glad I did. That little thing worked like a charm. I'm sorry that I don't know what it's called. It looked like one of those jailhouse knives seen in movies. On day one, I was forced to use an ice scraper. It was pretty good but it doesn't compare to this "knife thing". This thing was able to get even those small parts of the wheels where the bolts go. I'll just have to post a picture of it later.
I was finally able to get a standard shop jack so that I could start on wheels three and four this morning. It's been two days (4-5 hours each) for me to get where I am now.
And where's that?
I was able to get one wheel completely stripped down to the aluminum using aircraft stripper and then wet-sanded to smooth things out. The only thing I have left to do on wheel two is wet-sanding. That should take me about 20 minutes tomorrow morning. It's taking about 5-6 coats of aircraft stripper to get each wheel down to the aluminum. After the stripping is complete, I used a 400-grit sandpaper sponge to remove the "glue" type substance remaining on the outside of the wheel. And for the inside of the wheel, I used a piece of steel wool. I'm not too concerned about the inside being as smooth as the outside. The outside feels like a baby's behind.
Here are a few pictures of the wheels before the primer and gloss black paint is added. I should be done in about three days if the Washington weather stays as nice as it has.
If these pictures don't show up, I can email them to anyone wanting to see them.
May 2, 2006, 07:42 PM
#35
Evolved Member
Join Date: Nov 2005
Location: benson, nc
Posts: 905
Likes: 0
Received 0 Likes
on
0 Posts
Hey kirrsace, you ended up painting over the wheel weight thats used to balance your tires, what if you change your tires and have to rebalance, then you'd have to adjust the paint which ends up in a big mess.
not for me but nice color scheme
not for me but nice color scheme
May 3, 2006, 06:43 AM
#36
Fellahs.
I'll be done stripping my wheels today. I plan on masking/taping the entire tire for the priming and paining parts. Would any of you disagree with that approach or should I re-tape the tire before starting each section?
For example, tape, primer, dry, un-tape, re-tape, paint, dry, un-tape, re-tape, clear coat, dry, untape, FINISH!
 May 6, 2006, 08:34 PM
#39
Evoryder.
Those wheels of yours look pretty good.
Fellahs.
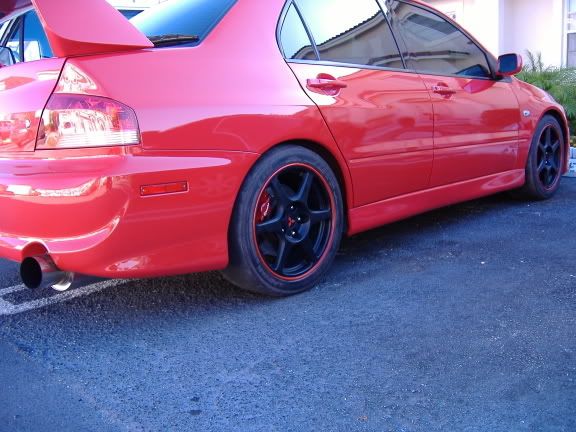
Well I finally finished my wheels after five days. I went the aircraft stripper route down to the aluminum, four coats of Duplicolor black primer inside and outside, four coats of Duplicolor gloss black engine paint, and four coats of Duplicolor clear. The wheels didn't come out perfect but for right now they'll have to do until the next great idea comes to my empty head.
In retrospect, I'd do things like this:
1. Maybe a shot or two of a high-power sprayer at my local car wash to remove some of the yet remaining residue.
2. Without using the aircraft stripper and just go with using the 320-grit sandpaper on the wheels followed by the primer and paint. Why? If the paint starts to chip, I could've just gone with the aircraft stripper using Point #1. Again, a learning experience.
BOTTOM LINE:
Route #1 - I'd start with Point #2 that way if/when the paint chips, the option of stripping the wheel down to the aluminum using aircraft stripper is still an option as Route #2. Again, saving money in the process. If the paint starts chipping after Route #2, then I'd go the powdercoating as Route #3.
I hope this helps you fellahs out. It was certainly a learning experience and a test of patience for me. I can't post my pictures for some strange reason so please PM me if you'd like to see them through email.
Those wheels of yours look pretty good.
Fellahs.
Well I finally finished my wheels after five days. I went the aircraft stripper route down to the aluminum, four coats of Duplicolor black primer inside and outside, four coats of Duplicolor gloss black engine paint, and four coats of Duplicolor clear. The wheels didn't come out perfect but for right now they'll have to do until the next great idea comes to my empty head.
In retrospect, I'd do things like this:
1. Maybe a shot or two of a high-power sprayer at my local car wash to remove some of the yet remaining residue.
2. Without using the aircraft stripper and just go with using the 320-grit sandpaper on the wheels followed by the primer and paint. Why? If the paint starts to chip, I could've just gone with the aircraft stripper using Point #1. Again, a learning experience.
BOTTOM LINE:
Route #1 - I'd start with Point #2 that way if/when the paint chips, the option of stripping the wheel down to the aluminum using aircraft stripper is still an option as Route #2. Again, saving money in the process. If the paint starts chipping after Route #2, then I'd go the powdercoating as Route #3.
I hope this helps you fellahs out. It was certainly a learning experience and a test of patience for me. I can't post my pictures for some strange reason so please PM me if you'd like to see them through email.
May 8, 2006, 01:30 AM
#42
Originally Posted by pure_evo
^ I appreciate it bro. I'm glad that you like the pictures. It's a memorial to my mother who suddenly passed away on 6 January.
I got the aircraft stripper from Autozone for about $4.50/can.
I got the aircraft stripper from Autozone for about $4.50/can.
sorry to hear about your mom...glad you're using something you love to remember someone you love
Jun 5, 2006, 08:42 AM
#43
Evolving Member
iTrader: (1)
Join Date: Oct 2003
Location: Indiana
Posts: 415
Likes: 0
Received 0 Likes
on
0 Posts
Duplicolor makes an actual wheel coating/paint...... I did my stock wheels over a year ago and they still look just as good as the day i did them. I posted a writeup someware on her back then...
http://www.duplicolor.com/products/wheel.html


http://www.duplicolor.com/products/wheel.html
Jun 13, 2006, 06:00 PM
#44
Newbie
iTrader: (3)

Join Date: Jul 2005
Location: Bay Area, Cali4nia.
Posts: 74
Likes: 0
Received 0 Likes
on
0 Posts
Originally Posted by GOT EVO
Duplicolor makes an actual wheel coating/paint...... I did my stock wheels over a year ago and they still look just as good as the day i did them. I posted a writeup someware on her back then...
http://www.duplicolor.com/products/wheel.html
http://www.duplicolor.com/products/wheel.html
I noticed that ur rims are glossy. I am not much fond of Flat black. I wanted to paint mine, but wanted to find out which paint comes out glossy. Guess I have to try the Dupli-Color.
BTW: Very Nice Write Up.
 Jun 13, 2006, 07:25 PM
#45
Evolving Member
iTrader: (1)
Join Date: Oct 2003
Location: Indiana
Posts: 415
Likes: 0
Received 0 Likes
on
0 Posts
Originally Posted by lncrevoviii
I noticed that ur rims are glossy. I am not much fond of Flat black. I wanted to paint mine, but wanted to find out which paint comes out glossy. Guess I have to try the Dupli-Color.
BTW: Very Nice Write Up.
BTW: Very Nice Write Up.
go with the black duplicolor wheel coating and the duplicolor wheel clear coat. Putting clear coat on makes it glossy and also protects the paint. The more clear the glossier it will be, but be carefull as the more clear you apply the more it will change the base color you put on.