Installing Ralliart Accent Plate
#1
Newbie
Thread Starter
Join Date: Aug 2005
Location: Sydney, Australia
Posts: 9
Likes: 0
Received 0 Likes
on
0 Posts
Installing Ralliart Accent Plate
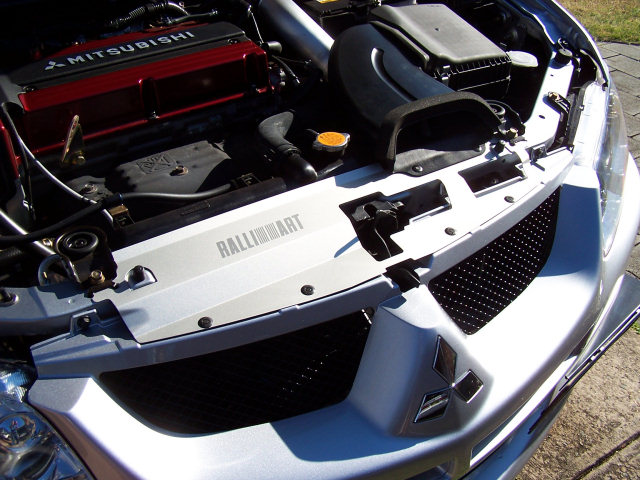
Just installed this one myself today, and it looks great. Mine came with the instructions in Japanese, so I have translated and re-written them so they make sense in English.
I hope someone finds it useful
--------------------------------------------------------------------------------------------
To avoid burns, only install this item with the vehicle turned off, and with the engine completely cooled down.
After installing this accessory, ensure that it does not interfere with the hood latch, and that the hood closes completely.
It is recommended you wash and dry the top of the bumper bar before installing the accent plate, as you won’t want dirt or water trapped underneath it once it is installed.
1. Air duct and radiator upper support removal
2. Accent plate installation
This is what the finished product should look like. Enjoy!

I hope someone finds it useful

--------------------------------------------------------------------------------------------
To avoid burns, only install this item with the vehicle turned off, and with the engine completely cooled down.
After installing this accessory, ensure that it does not interfere with the hood latch, and that the hood closes completely.
It is recommended you wash and dry the top of the bumper bar before installing the accent plate, as you won’t want dirt or water trapped underneath it once it is installed.
1. Air duct and radiator upper support removal
- Remove the two air duct installation clips. This can be done by pressing down on the centre of each clip. The centre section will “click” downwards, and you will then be able to remove the entire clip. Retain these clips for usage later.
- Remove the radiator upper support by removing the bolts as indicated in the diagram below. You will need a 12mm socket and torque wrench for this. Once the bolts have been removed, lift both the left and right supports upwards and off the radiator. Put these in a safe place.
- Remove the four clips above the grille. This can be done by lifting the centre piece out with your fingernails or using a screwdriver to lever them out gently.
2. Accent plate installation
- Position the accent plate as pictured, fitting the air duct on top of the accent plate. Line up all the holes. Once you are happy, continue to the next step.
- Replace the radiator supports. Insert the bolts and loosely tighten them using your fingers.
- Carefully slide the four included washers under each of the holes above the grille. Insert each of the four included clips into the holes above the grille. Press the centre piece down until it “clicks” in to place, flush with the surround.
- Securely tighten the radiator support bolts with a torque wrench.
- Replace the air duct clips you removed in step 1a. This can be done by pressing the centre piece down until it “clicks” in to place, flush with the surround.

This is what the finished product should look like. Enjoy!

Last edited by \\MREVO8; Aug 6, 2005 at 04:07 AM.
Thread
Thread Starter
Forum
Replies
Last Post
09GTSLancer
Lancer How Tos / Installations
22
May 24, 2009 11:24 AM
bluewaterDEMON
Lancer How Tos / Installations
1
Sep 19, 2007 07:17 PM


