How To: Open Tail Lights Without A Dremel
 Mar 14, 2009, 02:06 PM
#1
Evolved Member
Thread Starter
iTrader: (8)
Join Date: Sep 2007
Location: Baltimore, MD
Posts: 1,019
Likes: 0
Received 0 Likes
on
0 Posts
How To: Open Tail Lights Without A Dremel
As promised I made a video while opening up my tail lights.
http://www.youtube.com/watch?v=uM9UwHOjB7k
http://www.youtube.com/watch?v=fohvo_liHkY
I believe the video gives a pretty good description itself of how to open them up. The only thing I left out was the prepping of the chrome insert and some of the prepping before gluing which I will describe below. A few corrections from the video: i would not attempt this using an oven as the glue cools off too fast and hardens, the other is it is more like a 20min job.
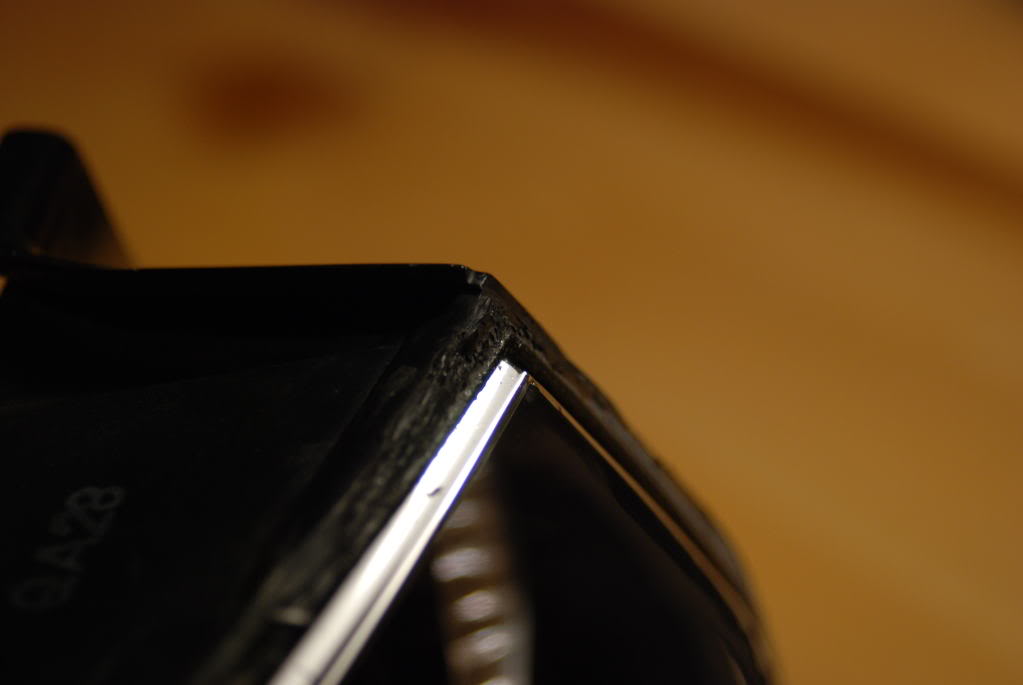
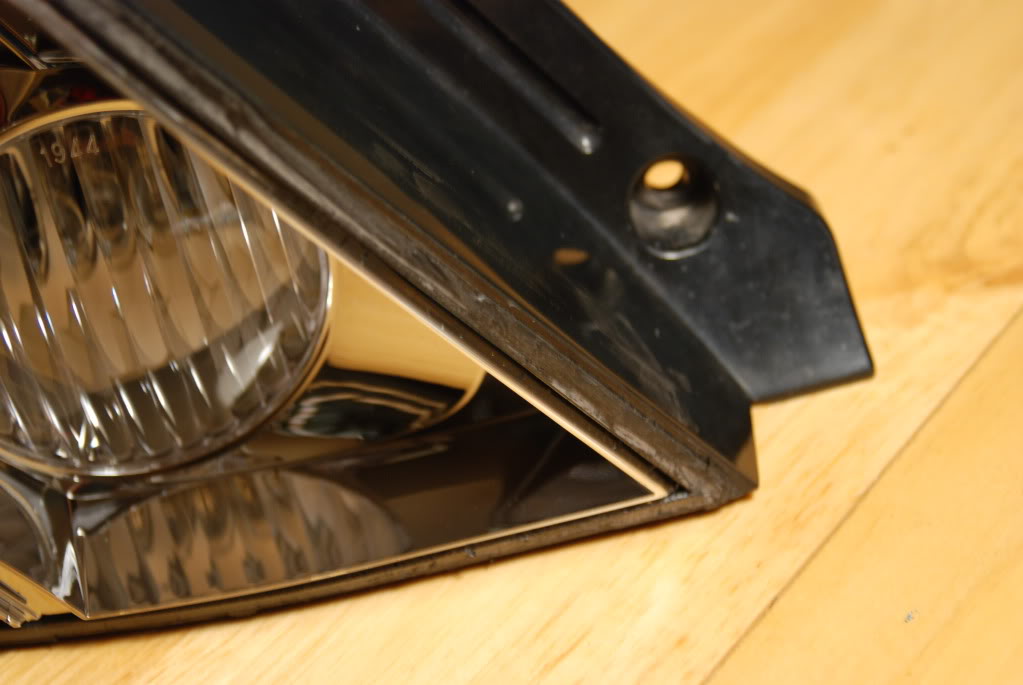
These are shots of the light housing with the chrome piece still attached to it. As I mentioned in the video, the chrome piece is glued/held in by the glue and that's what I wanted to show in these pictures. To get it out you will have to cut some of the glue down and at an angle depending on the area. You'll have to keep playing with it and trying to get it out but eventually it will come right out. Remember that clip as well.
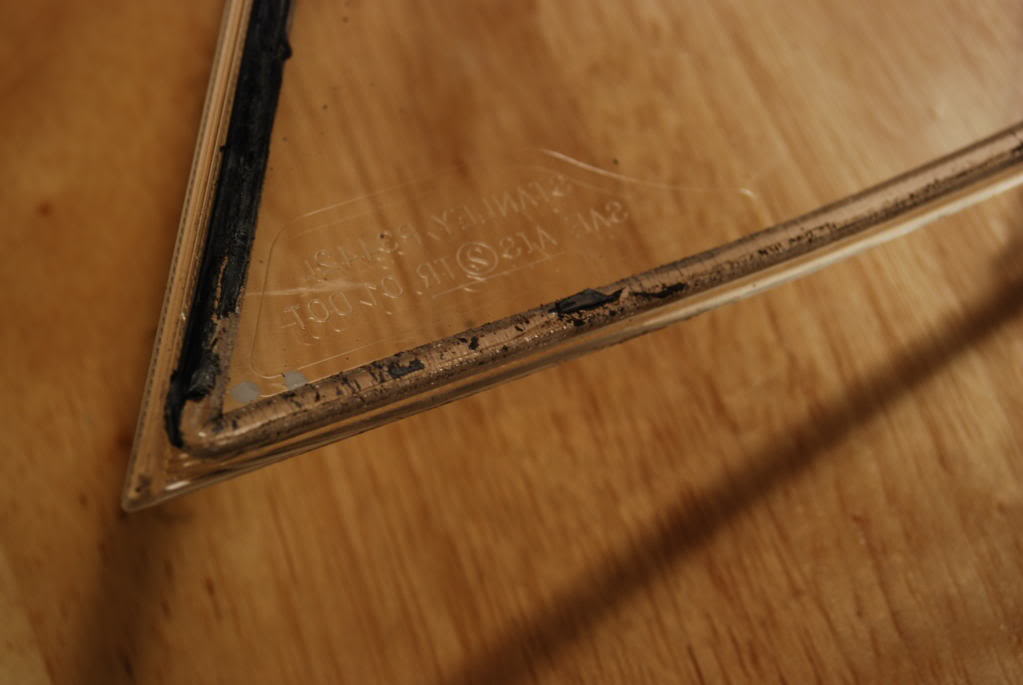
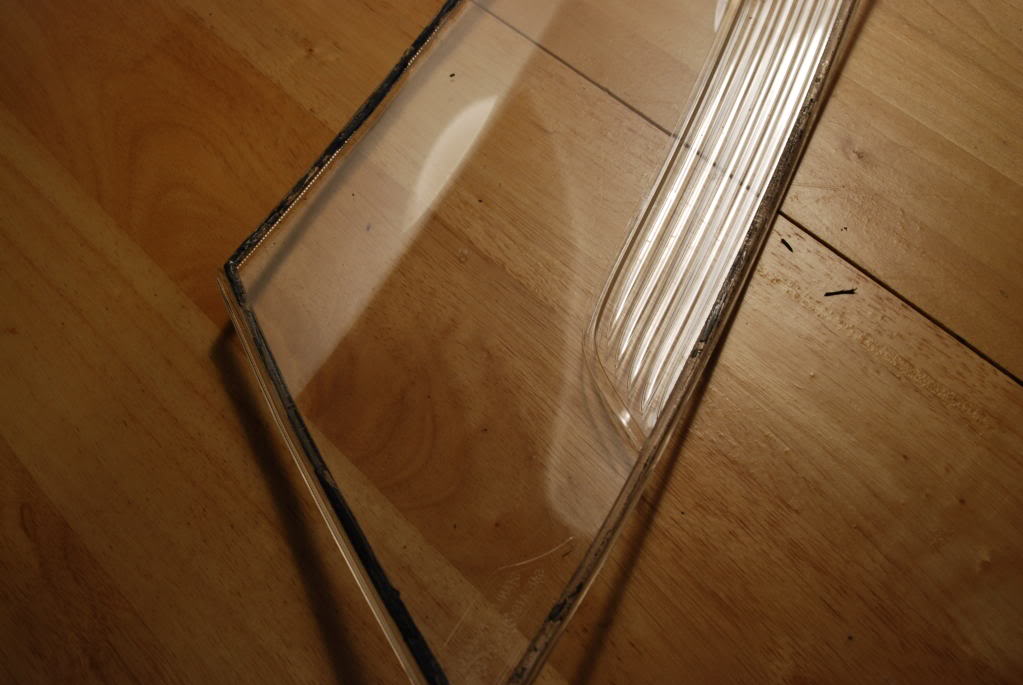
Here is the clear lens of the tail light. I want to show you this because it makes the process of cutting it open a lot easier if you know how it attaches. In the pictures you can see that the whole way around the lens the glue is adhered to that flat lip sticking up. Obviously to cut it away from the glue all you have to do is cut with the blade along that lip and it should come right off.
BTW I did not cut the glue as close to the lens as I should on this one. You can tell because there is a lot of the glue still on the lens. This was the first light I did. The second one came out a lot better with only a little glue left. However I didn't take any pictures from the second light. The video is from the second one thou.
After you have the chrome piece out all you have to do is sand and paint that... no big deal, I don't need to describe that. The next thing I think I should describe is how I cleaned up that plastic lip on the lens. First, I used a razor blade to gently cut as much of the black glue off of it as possible without cutting into the plastic of the lens. After that I used the same sand paper that was used on the chrome and sanded the lip. I used first, something like a 400 or 350 to get the remaining black glue off quickly then went to an 800 to smooth it out. Be careful with the high grit paper because you can easily sand the plastic of the lip making it rounded instead of flat. Therefore affecting it when you glue it back together... but this should be common sense anyway. After sanding the whole way around and getting all the remaining black glue off I taped off about 2 inches of the inside of the lens. I used the same black paint on the lip of the lens that was used on the chrome. When taping i made sure i curled the tape up so that it was stuck on the side of that lip and so that no paint at all would get on the inside part of the lens. Do the same thing on the outside of the lip, taping the side so that the ONLY thing you will be painting is the flat edge (what in my pictures still has a lot of black plastic glue... of course we just sanded this off thou) Once i had taped the whole way around like i just described i took some newspaper and covered the lens because remember i did not cover the entire inside with tape, only 2 inches. That 2 inches just gives a border so that you can tape the newspaper to and also acts as a second shield i guess. The way i painted it was by doing each side at a time. i painted, lets say the bottom, then let it dry. Then moved the newspaper and painted the slanted edge and let it dry, doing this until it was all painted. The reason I did this is because if I didn't the nasty cut up glue that is still on the housing would show through on the other side... because my glue is clear. If you get black glue... I definitely still recommend painting the lip because trust me the glue job will not look perfect. Painting the lip will give it that oem look that it had before.
Once the light insert is painted which ever color you choose and you have prepped the gluing surface all that I left is to put it back together. I used a clear epoxy (at the store I thought it was black lol) that I got at lowes. I really didn't pile on the epoxy because I didn't want it to run into the inside. It cures in 7min so it made the job nice I guess. After I gave the glue time to really cure I just added some silicon around the edges to prevent moisture and that's the end of it.
Go out there and give this a shot guys. I want to see some more people doing this themselves. Please feel free to ask me any questions on anything i may have left out and if you find out any better methods please post up!
Some people doubted. Guess it can be done.
http://www.youtube.com/watch?v=uM9UwHOjB7k
http://www.youtube.com/watch?v=fohvo_liHkY
I believe the video gives a pretty good description itself of how to open them up. The only thing I left out was the prepping of the chrome insert and some of the prepping before gluing which I will describe below. A few corrections from the video: i would not attempt this using an oven as the glue cools off too fast and hardens, the other is it is more like a 20min job.
These are shots of the light housing with the chrome piece still attached to it. As I mentioned in the video, the chrome piece is glued/held in by the glue and that's what I wanted to show in these pictures. To get it out you will have to cut some of the glue down and at an angle depending on the area. You'll have to keep playing with it and trying to get it out but eventually it will come right out. Remember that clip as well.
Here is the clear lens of the tail light. I want to show you this because it makes the process of cutting it open a lot easier if you know how it attaches. In the pictures you can see that the whole way around the lens the glue is adhered to that flat lip sticking up. Obviously to cut it away from the glue all you have to do is cut with the blade along that lip and it should come right off.
BTW I did not cut the glue as close to the lens as I should on this one. You can tell because there is a lot of the glue still on the lens. This was the first light I did. The second one came out a lot better with only a little glue left. However I didn't take any pictures from the second light. The video is from the second one thou.
After you have the chrome piece out all you have to do is sand and paint that... no big deal, I don't need to describe that. The next thing I think I should describe is how I cleaned up that plastic lip on the lens. First, I used a razor blade to gently cut as much of the black glue off of it as possible without cutting into the plastic of the lens. After that I used the same sand paper that was used on the chrome and sanded the lip. I used first, something like a 400 or 350 to get the remaining black glue off quickly then went to an 800 to smooth it out. Be careful with the high grit paper because you can easily sand the plastic of the lip making it rounded instead of flat. Therefore affecting it when you glue it back together... but this should be common sense anyway. After sanding the whole way around and getting all the remaining black glue off I taped off about 2 inches of the inside of the lens. I used the same black paint on the lip of the lens that was used on the chrome. When taping i made sure i curled the tape up so that it was stuck on the side of that lip and so that no paint at all would get on the inside part of the lens. Do the same thing on the outside of the lip, taping the side so that the ONLY thing you will be painting is the flat edge (what in my pictures still has a lot of black plastic glue... of course we just sanded this off thou) Once i had taped the whole way around like i just described i took some newspaper and covered the lens because remember i did not cover the entire inside with tape, only 2 inches. That 2 inches just gives a border so that you can tape the newspaper to and also acts as a second shield i guess. The way i painted it was by doing each side at a time. i painted, lets say the bottom, then let it dry. Then moved the newspaper and painted the slanted edge and let it dry, doing this until it was all painted. The reason I did this is because if I didn't the nasty cut up glue that is still on the housing would show through on the other side... because my glue is clear. If you get black glue... I definitely still recommend painting the lip because trust me the glue job will not look perfect. Painting the lip will give it that oem look that it had before.
Once the light insert is painted which ever color you choose and you have prepped the gluing surface all that I left is to put it back together.
I used a clear epoxy (at the store I thought it was black lol) that I got at lowes. I really didn't pile on the epoxy because I didn't want it to run into the inside. It cures in 7min so it made the job nice I guess. After I gave the glue time to really cure I just added some silicon around the edges to prevent moisture and that's the end of it.Go out there and give this a shot guys. I want to see some more people doing this themselves. Please feel free to ask me any questions on anything i may have left out and if you find out any better methods please post up!
Some people doubted. Guess it can be done.
Last edited by Oki Panoki; Mar 22, 2009 at 09:16 AM.


Thread
Thread Starter
Forum
Replies
Last Post
SnailSpeed
Evo How Tos / Installations
37
Sep 22, 2019 02:20 PM
08GTSLancerBlue
Lancer How To Requests / Questions / Tips
2
Aug 10, 2009 04:25 PM
Andrew LB
Evo How To Requests / Questions / Tips
6
Aug 18, 2006 06:15 PM