How to: switch interior bulbs to LEDs
 Mar 7, 2013, 12:45 PM
#1
How to: switch interior bulbs to LEDs
I got tired of going years without any of my assessor light working and got STM to find me a few of the stock bulbs, but they were so dim it was pointless so I decided to solder some LEDs directly to everything.
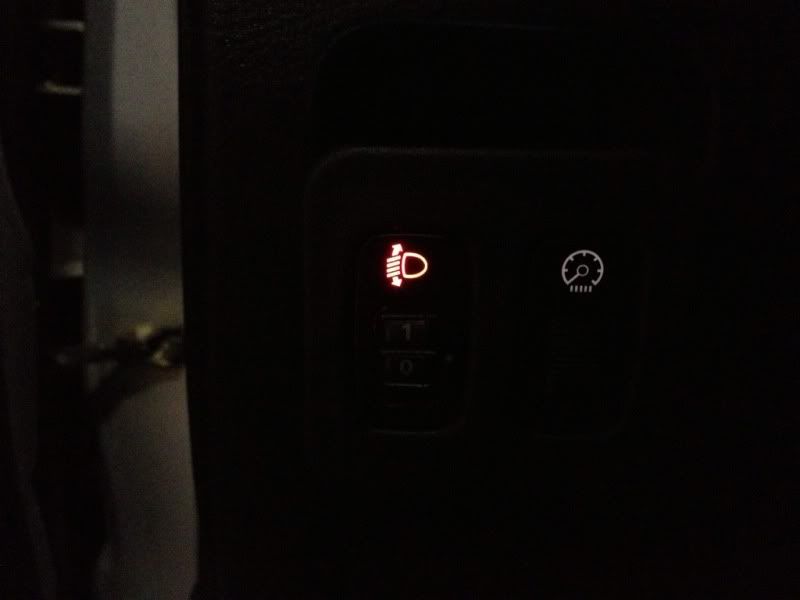
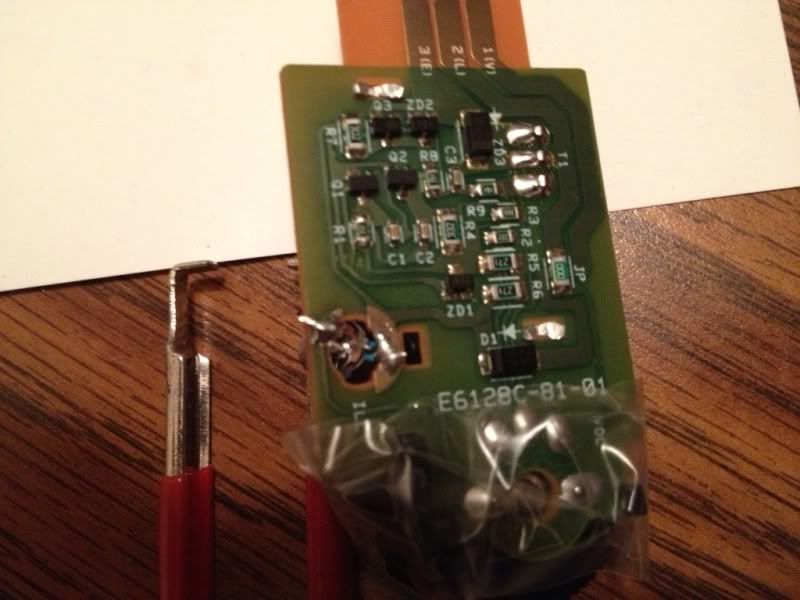
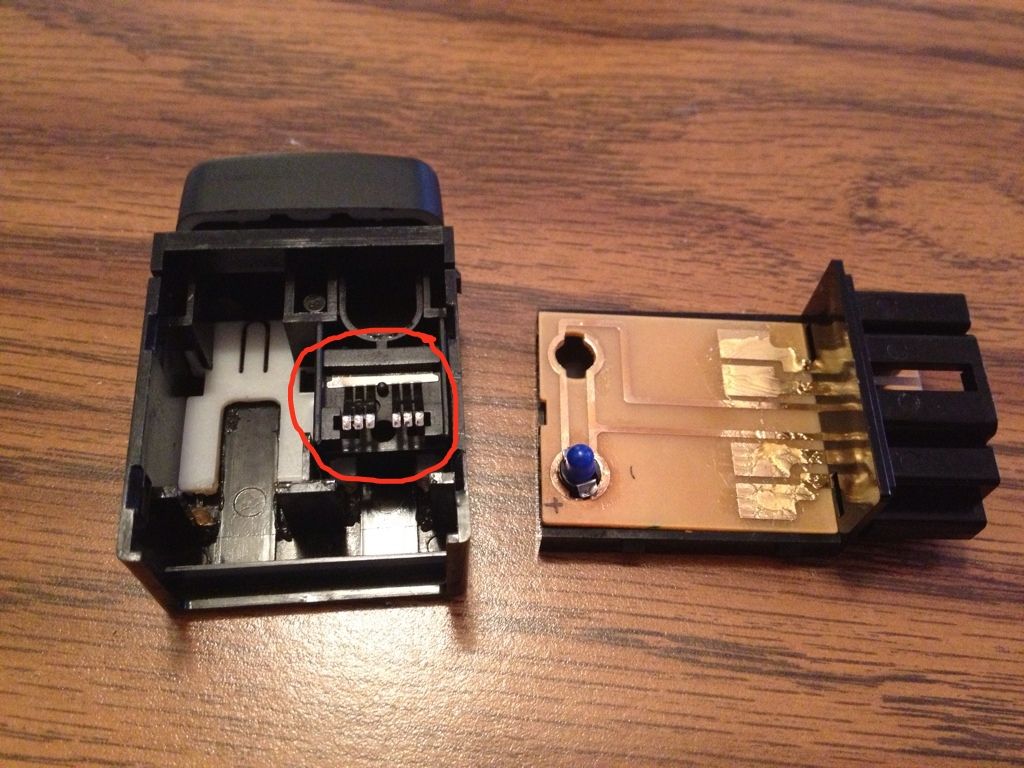
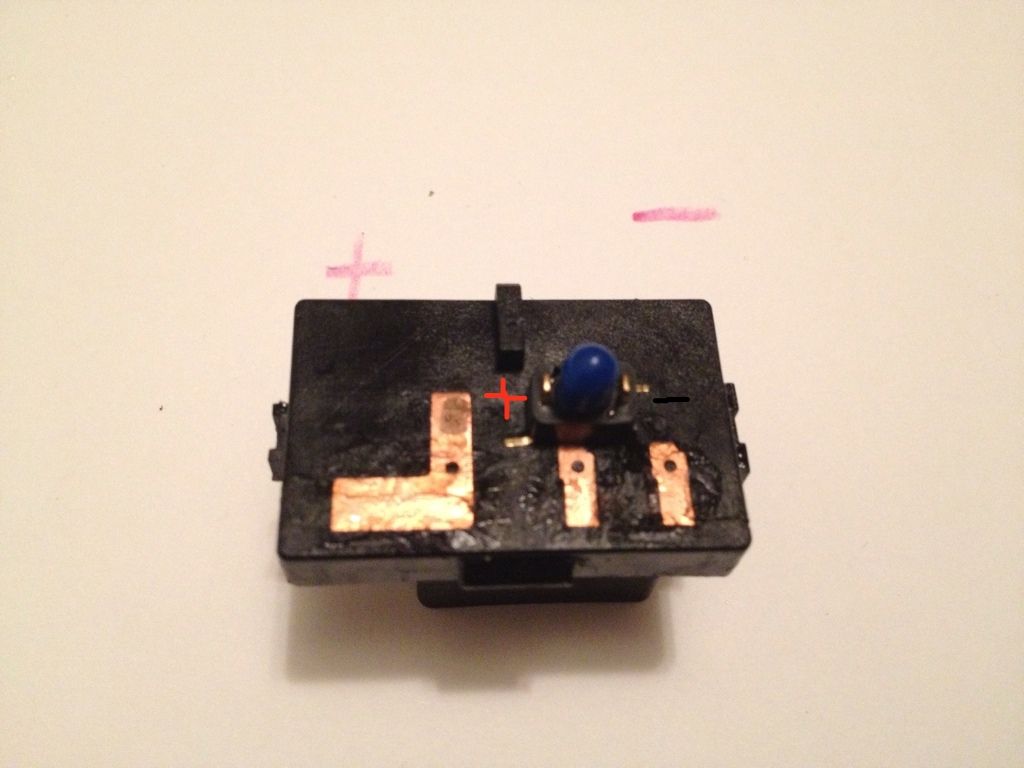
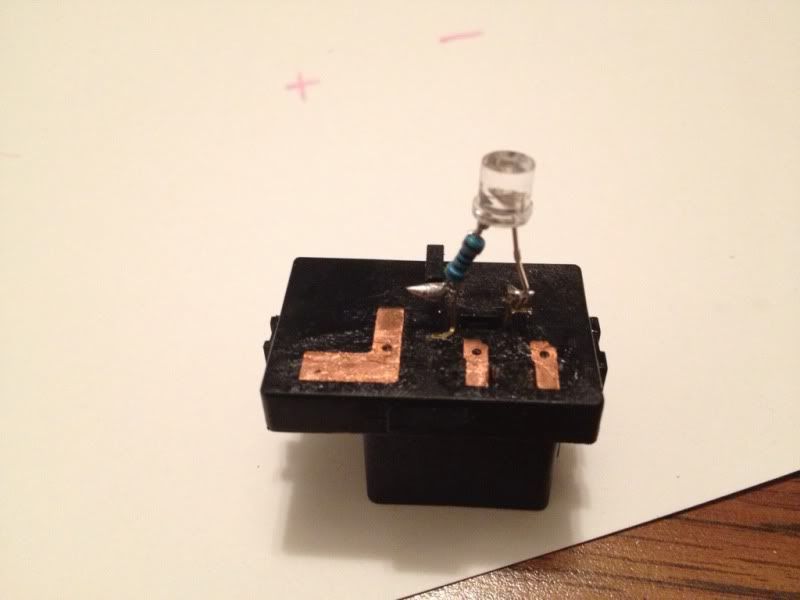
HID adjustment switch:
***Very small parts inside***
1. Take off the front cover carefully slide it out holding the wheel and do not let it come off like I did, there is a little metal trigger and a tiny spring in the wheel that will launch out if you don�t hold it down.
2. Solider LED on this side
Put it back together and slide back in
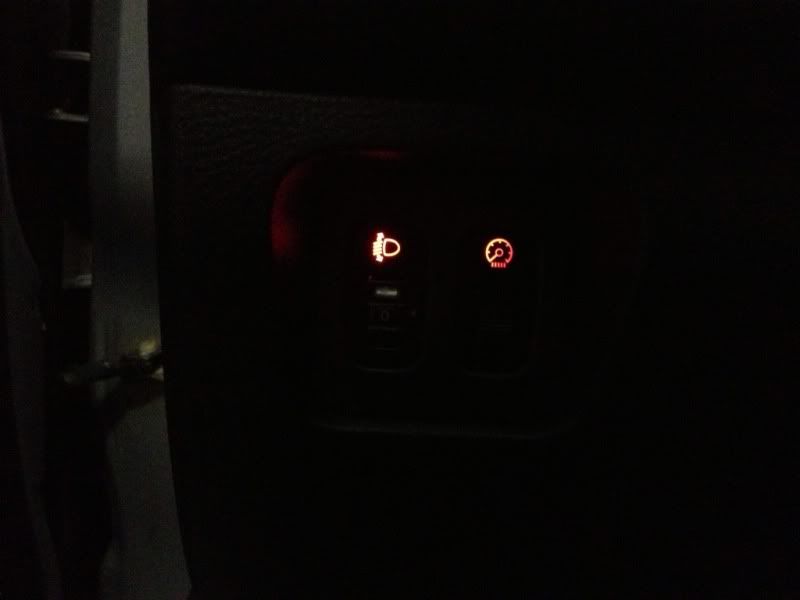
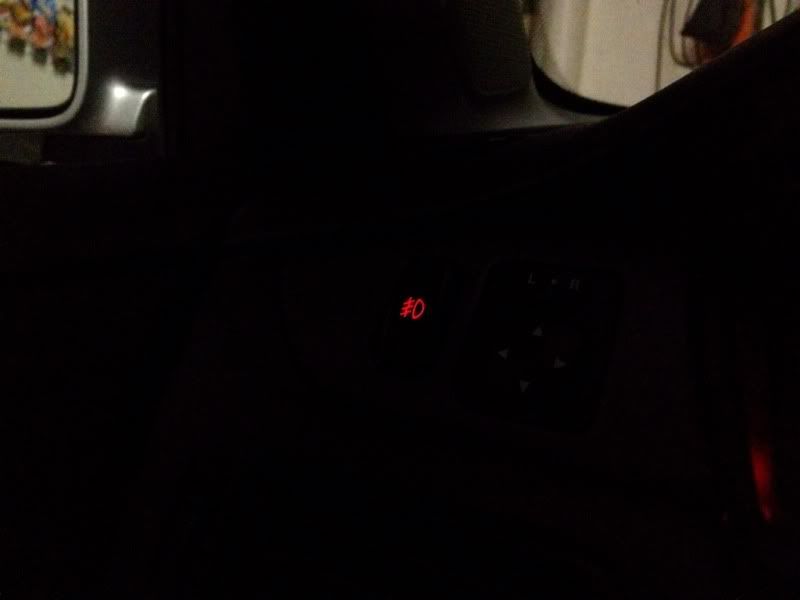
Compared to stock bulbs
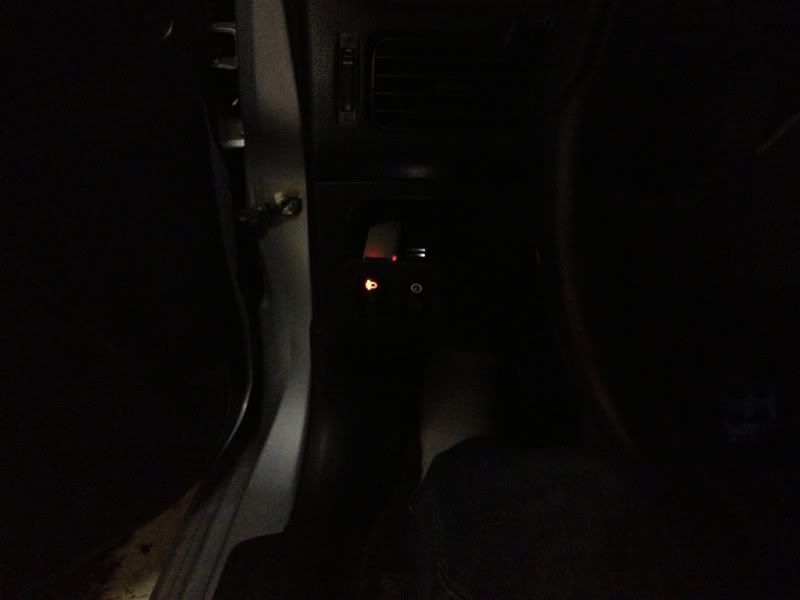
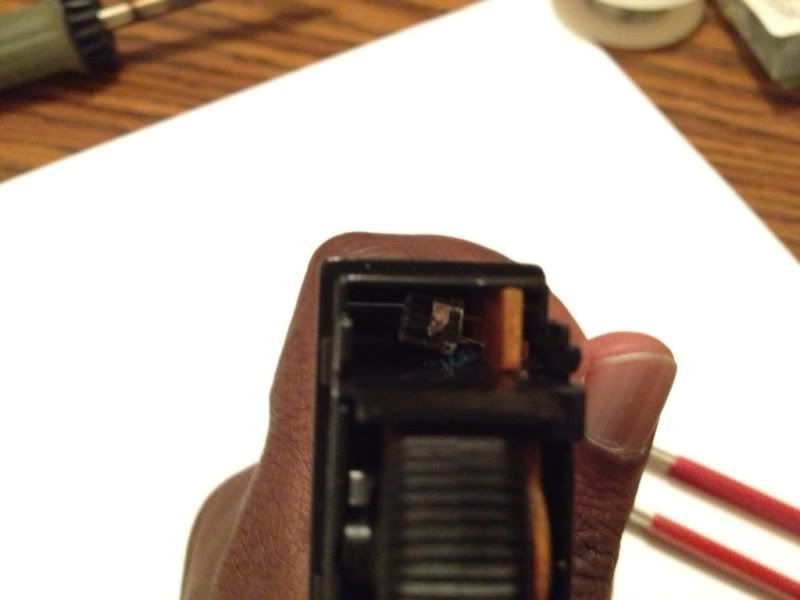
Dimmer switch:
***Be careful with this one, It controls all the other light if it�s not plugged in nothing will work***
1. Remove the bulb then carefully remove the outer case, try not to let the wheel come off, then wrap tape around it to keep the wheel down.
2. on the back side is where you will place some solder and the bulb at the other side
3. Pull the LED ends through the back side and bend them down, make sure the LED does not go too far out past that black piece or it will not fit, then solder
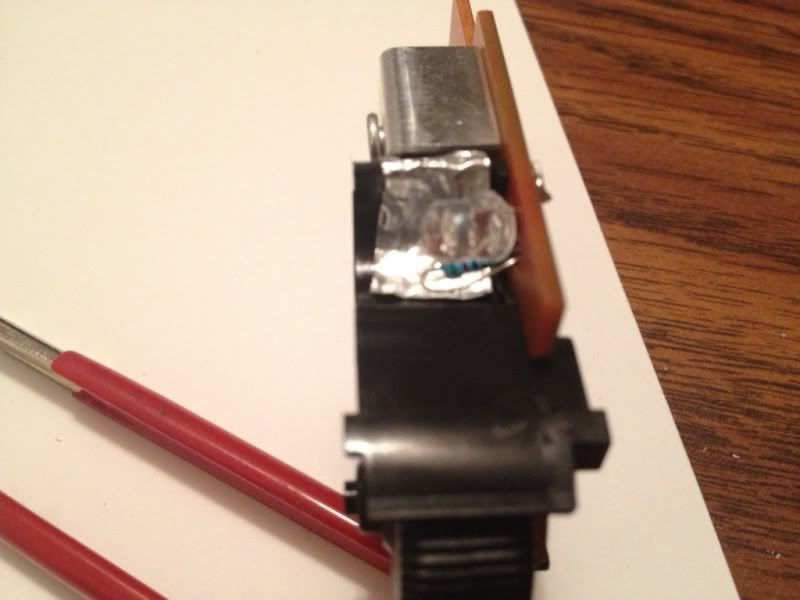
*** I didn�t like the light output so I added foil tape to the back***DO NOT LET IT TOUCH ANY LEADS***
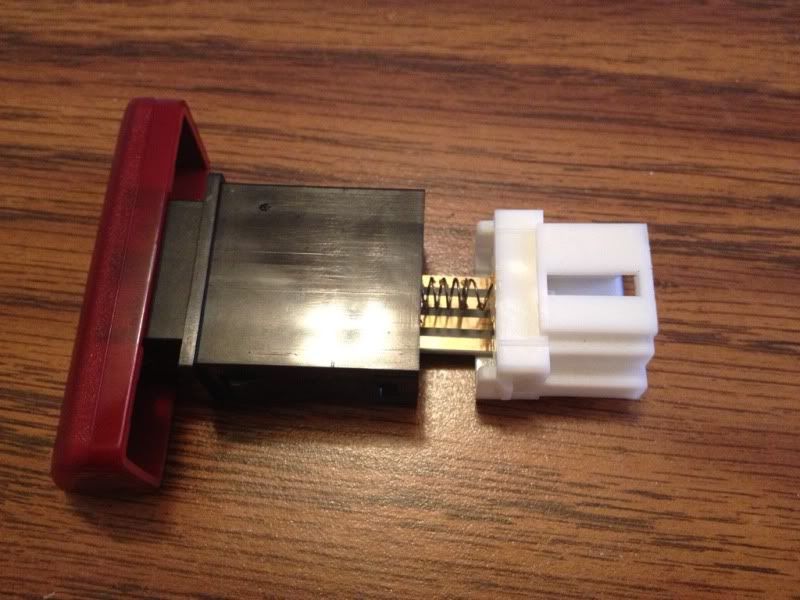
Fog light switch:
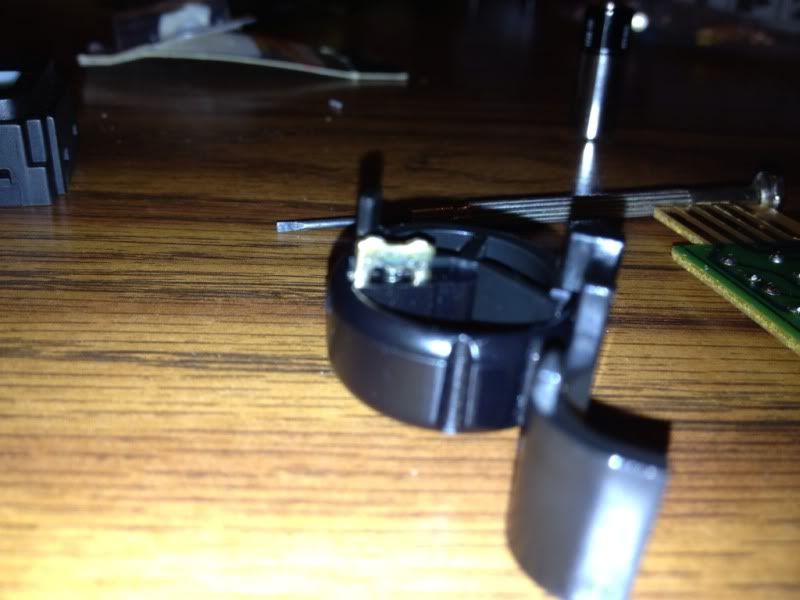
1. Remove it, be careful when separating this one, there is a spring/trigger that could pop out.
2. Mine only had one bulb but I decided to place 2 in there, I could not get the angle right to make it as bright as the other 2 so I will be adding some foil tape to this as well later on.
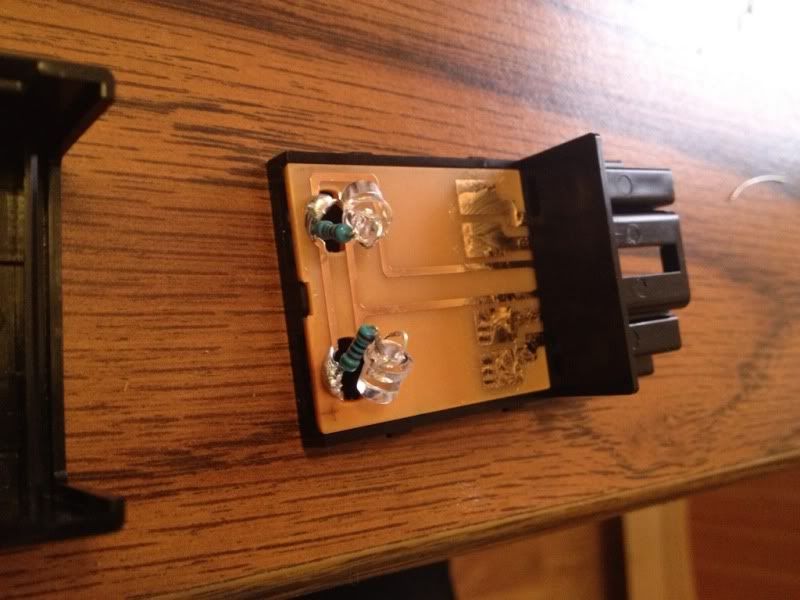
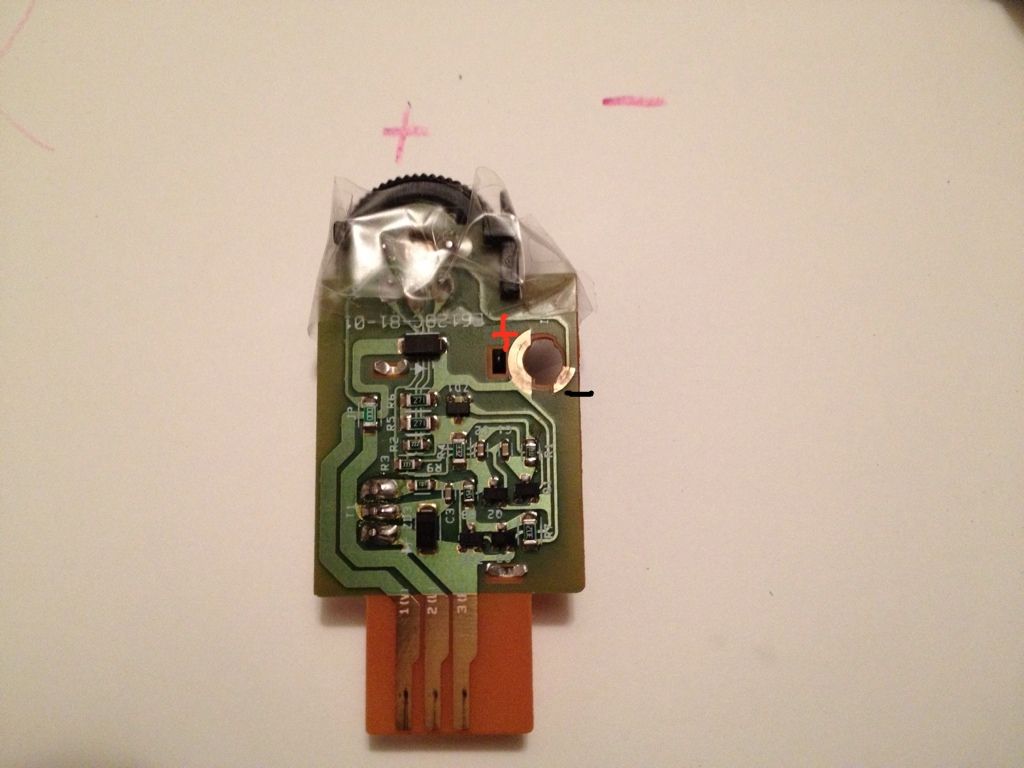
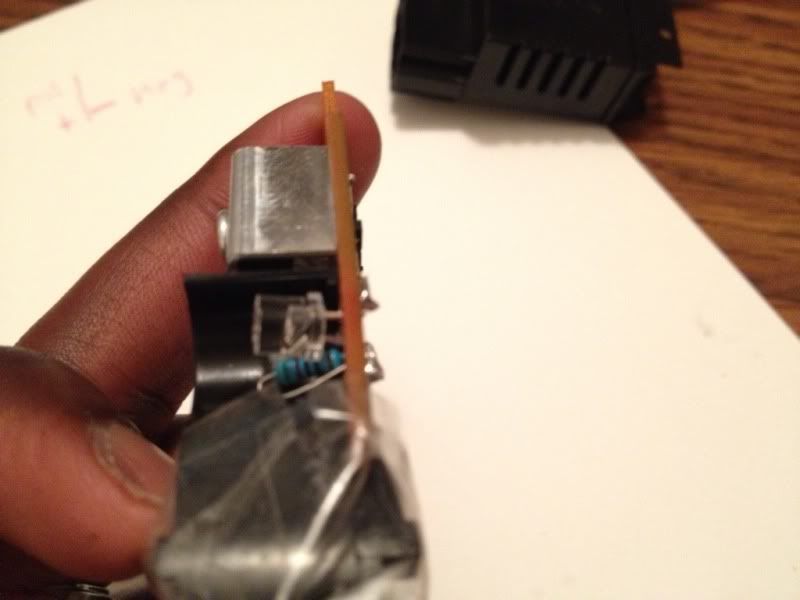
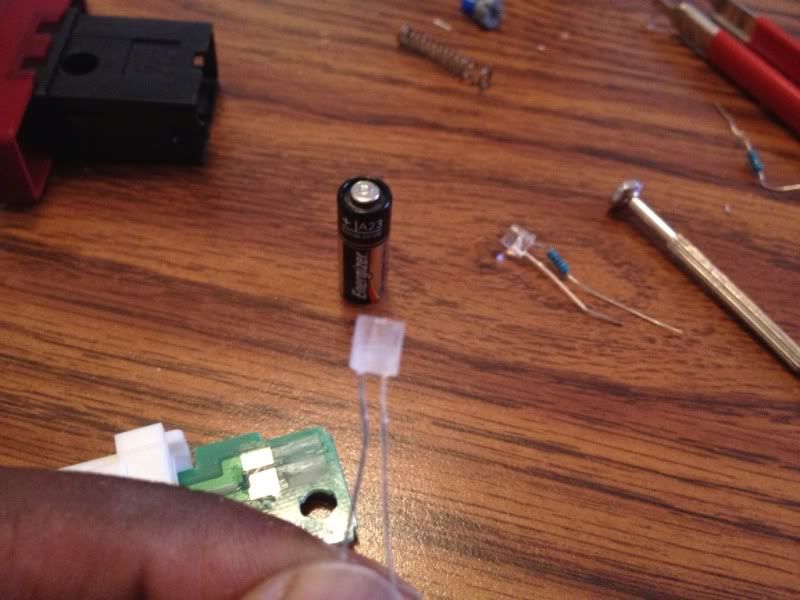
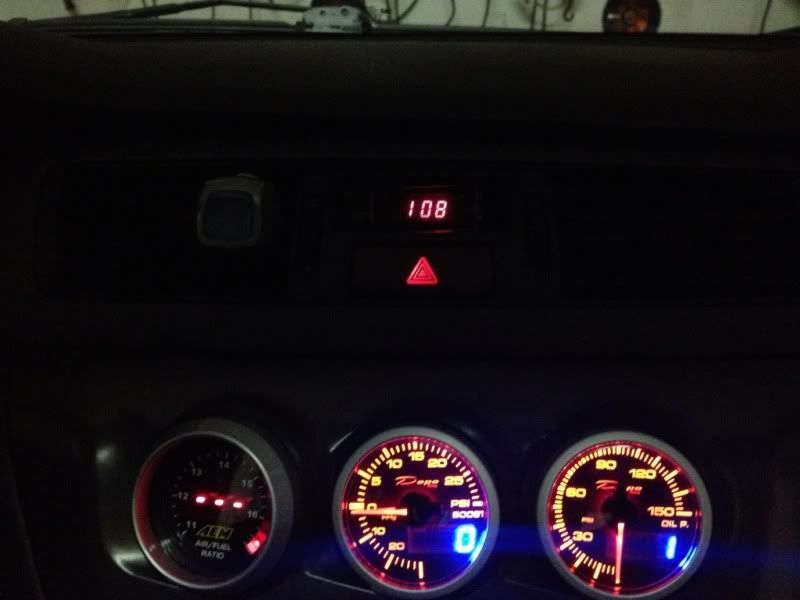
Hazard switch:
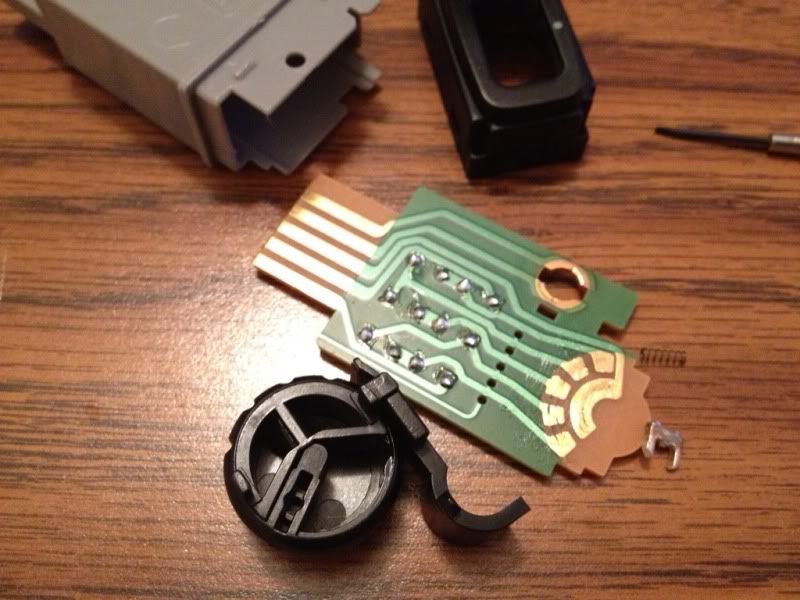
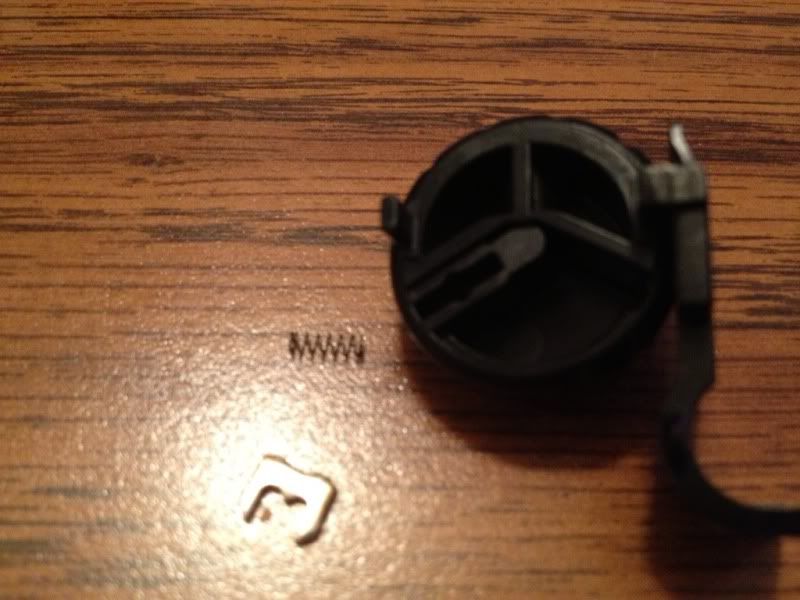
1. Remove the bulb then pull out the back end, there is a spring in there, then pull the circuit board out.
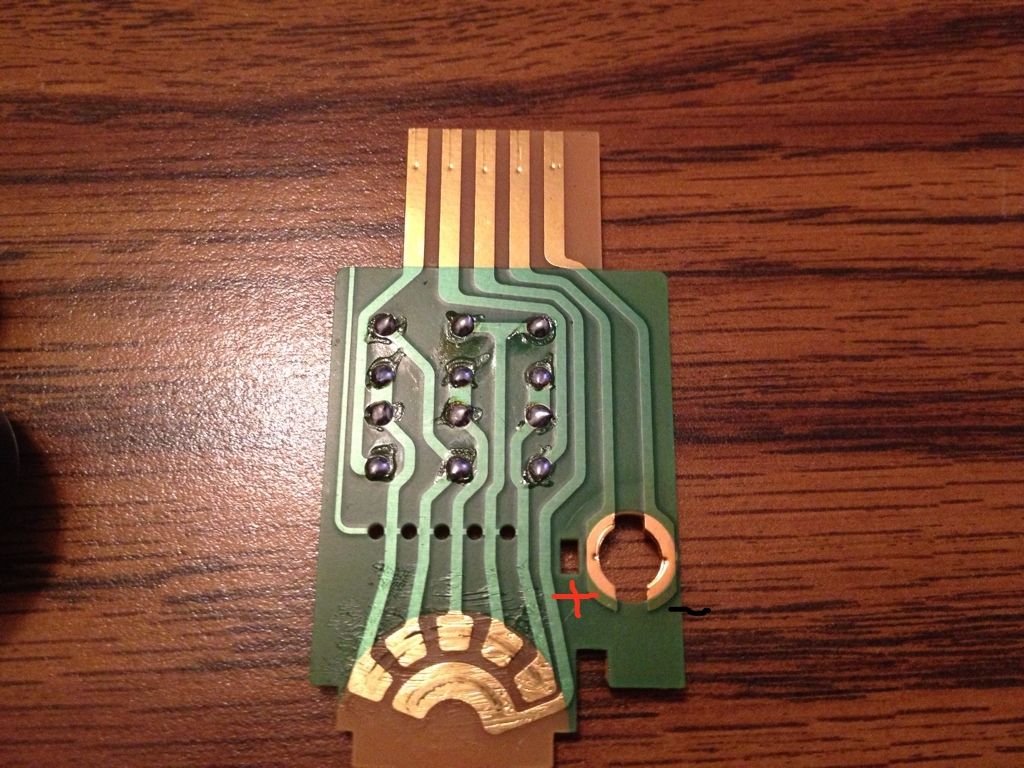
2. Here is are the leads, place some solder on them and slide it back in. it needs to be soldered from within because there is no room to slide it back in.
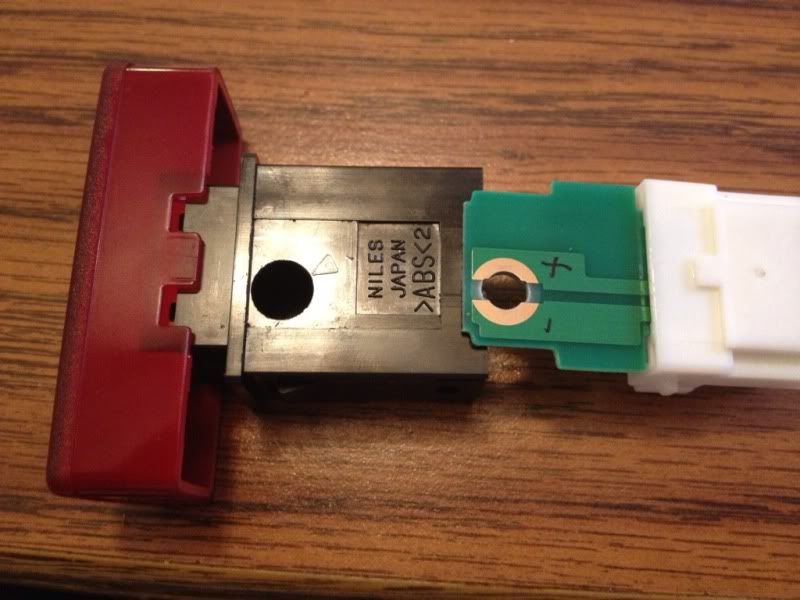
3. file down an LED and attach the resistor at the top like pictured, then slide it through and solider
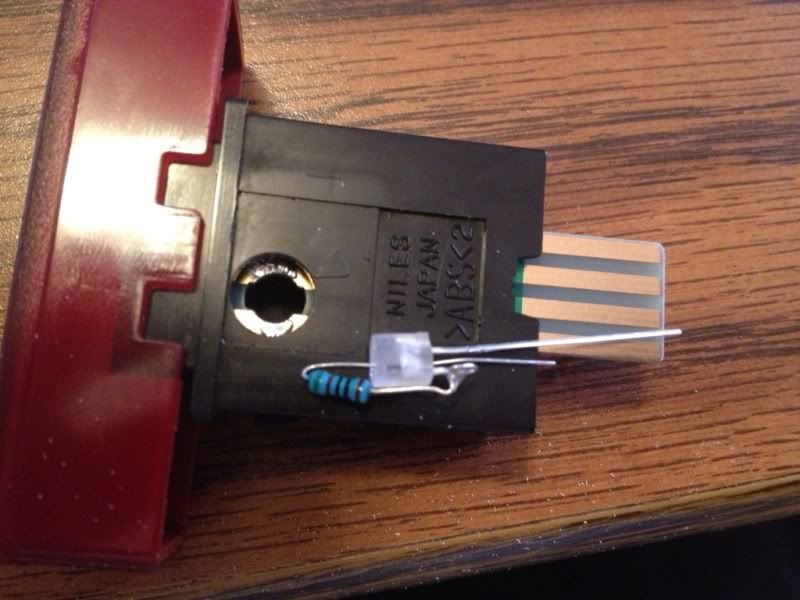
***This part is a PITA***
IC sprayer switch:
1. Lift the tabs and pull out the bottom half of the switch, bulb will be sitting on top
2. Pull off the bulb then file the leads so they are rough so solder will stick to it
Ash tray, cig lighter ring, key ring: all require #74 bulb, I bought mine for superbrightleds.com, easy to install
Window switch: coming soon�
HID adjustment switch:
***Very small parts inside***
1. Take off the front cover carefully slide it out holding the wheel and do not let it come off like I did, there is a little metal trigger and a tiny spring in the wheel that will launch out if you don�t hold it down.
2. Solider LED on this side
Put it back together and slide back in
Compared to stock bulbs
Dimmer switch:
***Be careful with this one, It controls all the other light if it�s not plugged in nothing will work***
1. Remove the bulb then carefully remove the outer case, try not to let the wheel come off, then wrap tape around it to keep the wheel down.
2. on the back side is where you will place some solder and the bulb at the other side
3. Pull the LED ends through the back side and bend them down, make sure the LED does not go too far out past that black piece or it will not fit, then solder
*** I didn�t like the light output so I added foil tape to the back***DO NOT LET IT TOUCH ANY LEADS***
Fog light switch:
1. Remove it, be careful when separating this one, there is a spring/trigger that could pop out.
2. Mine only had one bulb but I decided to place 2 in there, I could not get the angle right to make it as bright as the other 2 so I will be adding some foil tape to this as well later on.
Hazard switch:
1. Remove the bulb then pull out the back end, there is a spring in there, then pull the circuit board out.
2. Here is are the leads, place some solder on them and slide it back in. it needs to be soldered from within because there is no room to slide it back in.
3. file down an LED and attach the resistor at the top like pictured, then slide it through and solider
***This part is a PITA***
IC sprayer switch:
1. Lift the tabs and pull out the bottom half of the switch, bulb will be sitting on top
2. Pull off the bulb then file the leads so they are rough so solder will stick to it
Ash tray, cig lighter ring, key ring: all require #74 bulb, I bought mine for superbrightleds.com, easy to install
Window switch: coming soon�

 nice write up

Thread
Thread Starter
Forum
Replies
Last Post
Pssst
For Sale/WTB - Engine / Drivetrain / Power
13
Jun 26, 2014 09:07 AM
CruiseControl
08+ Lancer Show / Shine
35
Jun 4, 2014 03:49 AM