How-To retrofit Autodim/homelink rearview for cheap
#1
How-To retrofit Autodim/homelink rearview for cheap
Alright well let me start out by saying this is my first how-to so it may be a little scatter-brained, but I will try to keep it in order.
This is how-to install a rearview mirror with the autodim and homelink features for cheaper than buying a new aftermarket mirror. I picked up a rearview out of a MazdaCX-7/RX-8, or whatever else of theirs uses the same mirror, off of ebay for $45shipped, just make sure yours comes with a pigtail for the connector. These types of mirrors are really only made by two companies even for oem applications so I wasn’t too worried about the quality since the Mazda uses the Gemtex brand. The other brand supposedly has issues with the gel leaking out of the laminate so I stayed away from that one but here is what mine looked like.
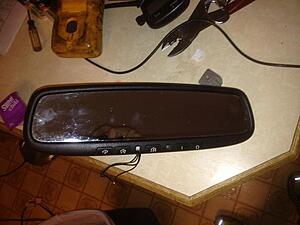
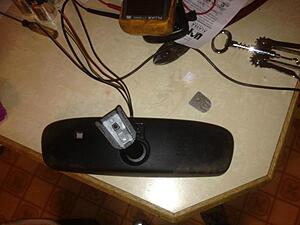
Removing OEM Mirror
As you can see in the pictures it came with the “tombstone” for mounting, but you don’t need this as it fits directly on the oem one already mounted to your glass. There is a good how-to for just a plain autodim mirror that does a good job of explaining how to remove your stock mirror, just be careful not to wrench on it too hard because you can damage your glass, and it doesn’t take too much force to remove it.
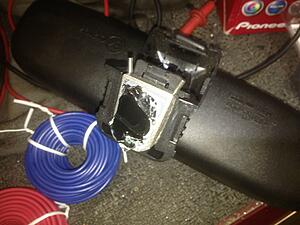
Basically all you have to do is pop the square plastic cover off the base that will reveal the tab that you see at the top of the base in the picture above. This will be at the bottom of the base when mounted to your glass. All you do is push down on the tab (away from the glass) then slide the mirror up and off the “tombstone”. If that is still confusing I suggest you check out fostytou’s how-to as he does a much better job of explaining this. https://www.evolutionm.net/forums/evo-how-tos-installations/256446-how-install-autodimming-mirror.html
But when it’s off your glass should look like this.
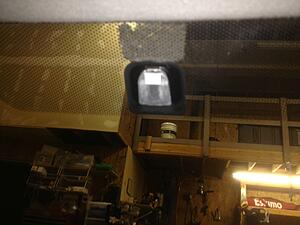
The silver thing in the middle is the “tombstone” that I keep referring to.
Installing new mirror
Now this part is fairly easy, all you have to do is slide the Mazda mirror onto your tombstone and then tighten down the locking “star”(or security or whatever it looks like a star to me so that’s what I call it)bolt in the middle of the base. Doesn’t need to be Heman tight just snug, I doubt you can break the glass thru the tombstone with the tension but I wasn’t trying to figure out.
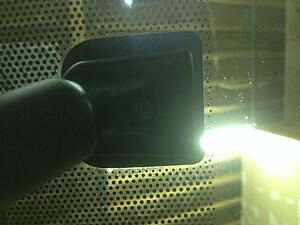
Wiring
Now onto the wiring, for this you can solder your connections if you’re decent with that, I am not so I choose to use these nifty heatshrink butt connectors.
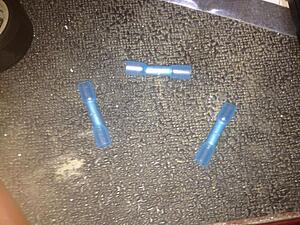
With these all you need to do is strip a little insulation off the wire, twist it nice and tight and the slide it into the connector,crimp, and then heat the shrink wrap down onto the wire which protects it from moisture and secures the wire in the connector a little better. You can use regular connectors but I prefer these for the two benefits earlier mentioned. You will also need an inline fuse holder like this guy.
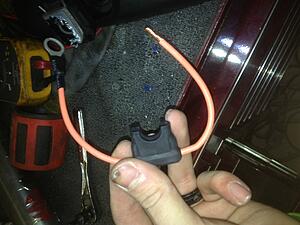
I put the ring connector and shrink wrap on already for this picture but it’s the same procedure as the butt connectors. You will also need a tap-a-fuse or you will need to splice into an ignition wire directly, I like having fuses to protect the electronics so I got this.
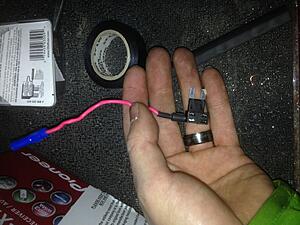
To wire up the mirror there are four wires.
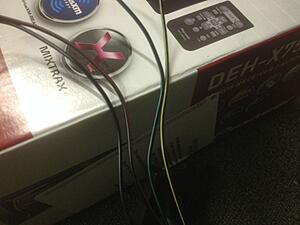
Black/Red=constant 12v W/ inline fuse (I used 15 amps seems to be fine)
Black =ignition source (I used the rear wiper fuse for this,it’s a 15 amp fuse in position 14, see pic below for location, and I used a 10amp fuse for the mirror)
Black/Yellow= ground (find a clean ground source, or run it to the battery like I did, I don’t think voltage drop is a big issue with the voltage the mirror uses)
Black/Green= reverse light switch (I didn’t use this but what it I there for is to cancel the autodim feature when you are reversing)
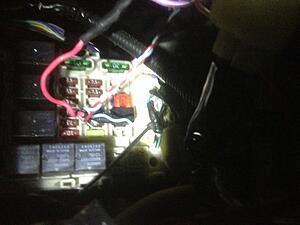
I ran all the wires from the connector up to the roof liner,then just pulled the lip down a little to slide them in then routed them down the a-pillar area so they were out of sight using some plain red, blue and black wire from O’reilly’s that you get in a spool.
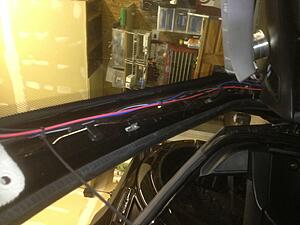
To remove the a-pillar cover you just simply pull it away from the a-pillar then rotate it down towards the steering wheel to slide the little fingers at the bottom out of their grooves. That is about as far as I’m gonna take you on the wiring routing because some people have a stock battery, some people have a small battery, and I relocated my battery to the trunk so I could run a full sized battery, so my wires run down the driver’s side under the carpet. But once that is done then you are ready to program the homelink system
Programming
Programming the home link is pretty simple but here are the directions straight from the factory:
1) Press and hold the two outer Homelink buttons-release only when the indicator light begins to flash (after 20seconds). Do Not hold the buttons for longer than 30 seconds and DO NOT repeat step one to program a second and/or third hand-held transmitter to the remaining two homelink buttons
2) Position the end of your hand-held transmitter 1-3 inches (5-14 cm) away from the homelink buttons while keeping the indicator light in view
3) Simultaneously press and hold both the homelinkand hand-held transmitter button
Do not release the buttons until step 4 has been completed
(Note:Some Gate operators and garage door openers may require you to replace this programming step 3 with procedures noted in the “gate operator and Canadian programming section.)
4) The indicator light will flash slowly and then rapidly after homelink successfully receives the frequency signal from the hand-held transmitter. Release both buttons.
5) Press and hold the just-trained homelink button and observe the indicator light.
If the indicator light stays on constantly, programming is complete and your device should activate when the homelink button is pressed and released.
Note:To program the remaining two homelink buttons, begin with programming step 2. DO NOT repeat step one.
If the indicator light blinks rapidly for two seconds and then turns to a constant light,continue with programming steps 6-8 to complete the programming of a rolling code equipped device (most commonly a garage door opener).
6) At the garage door opener receiver (motor-headunit) in the garage, locate the “learn” or “smart” button. This can usuallybe found where the hanging antenna wire is attached to the motor-head unit.
7) Firmly press and release the “learn” or “smart”button. (The name and color of the button may vary by manufacturer.)
Note:There are 30 seconds in which to initiate step eight.
8) Return to the vehicle and firmly press, hold for two seconds and release the programmedhomelink button. Repeat the “press/hold/release” sequence a second time, and, depending on the brand of the garage door opener (or other rolling code equipped device), repeat this sequence a third time to complete the programming.
Homelink should now activate your rolling code equipped device.
Note:To Program the remaining two homelink buttons, begin with programming step two. DO NOT repeat step one.
For questions or comments, please contactHomelink at www.homelink.com. Or 1-800-355-3515
Now adjust your new rearview to where you like it and enjoy. As always anything you do to your car is at your own risk (just to cover my butt) even though there is very little risk involved in this. If you have any questions or need clarification just let me know and I will try to answer your question and adjust the how-to to reflect it.
Last edited by jason42003; Jan 16, 2014 at 08:17 PM.
Thread
Thread Starter
Forum
Replies
Last Post
Psybin
Evo X Electrical / Audio / Security
8
Jul 8, 2014 08:32 PM
JDavenport
Vendor Service / Parts / Tuning Review
15
Nov 25, 2013 07:03 PM
Freddy302
Evo Engine / Turbo / Drivetrain
77
Feb 10, 2008 09:20 AM


