Wheel Stud Removal (Safe and Easy)
 Dec 5, 2010, 01:22 AM
#1
Newbie
Thread Starter
iTrader: (8)
Join Date: Jan 2006
Location: hi
Posts: 61
Likes: 0
Received 0 Likes
on
0 Posts
Wheel Stud Removal (Safe and Easy)
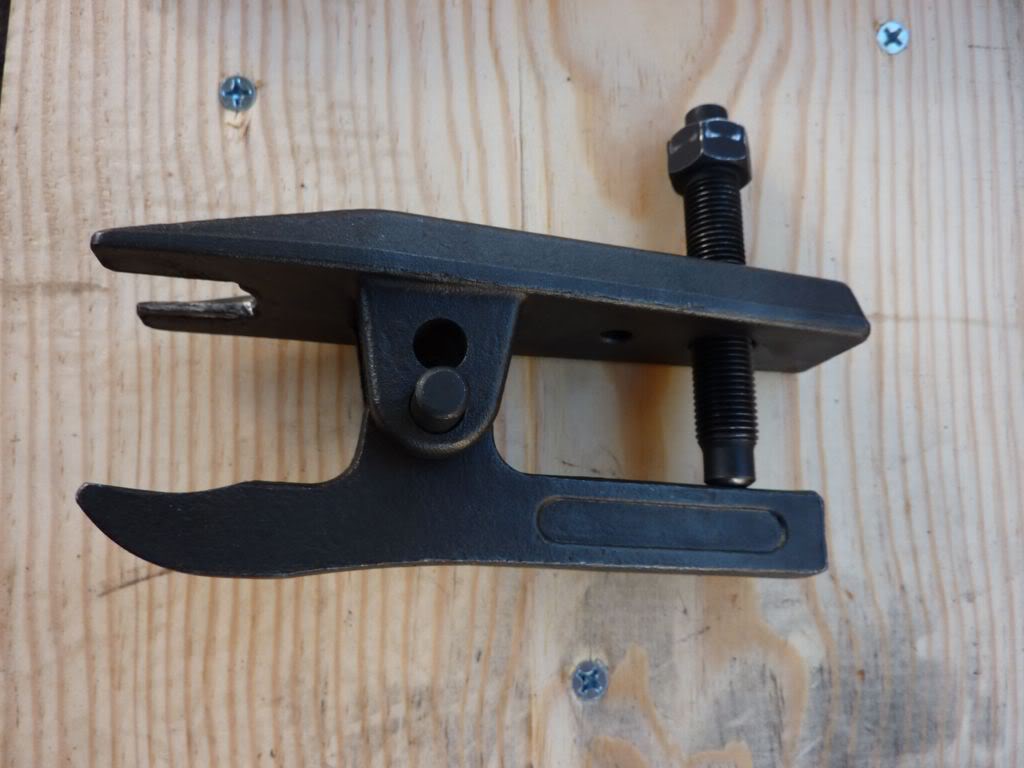
Just wanted to share my easy and safe way of removing wheel studs. I figured this out after a string of bad luck. First off a little back ground, I got a set of my dream rims- Touge Factory NT-03 and needed to install a set of the 10mm spacers in the front. So I went the lazy route and purchased a set of Kics 10mm bolt on spacers. I was unable to install them with my current Rota Grids, since there was no hub spacing for the OEM studs. So I had a shop install them when they mounted my NT-03s. I gave them the correct torque specs and installation instructions for the spacers. A couple of days later I was swapping tires for auto-x and retorqued the spacers to find out one of the bolts was stripped. Ahhhhhhhhhhh, crap! The shop I paid to do the job wouldn't take responsibility for it, so sad. After 2 hours and 1 broken drill bit, I was able to remove the stripped bolt. The Kics 10mm are not a hubcentric spacer and is annoying when swapping tires (FYI). At this point I ordered a set of ****** 10mm spacers with extended studs. For this install I purchased a ball joint press (looks like a C-clamp). Upon installation I realized the ball joint press was too big to fit behind the hub. Ahhhhhhhhh, poop! So I made the decision to hammer the studs out, which I initially wanted to avoid (due to all the controversy). I installed the new extended studs and once I put my wheels back on I noticed I only got about 6 turns of my lug nut. I thought to myself this isn't right, with the previous spacers I got about 10 turns. So after a bunch of calls and research I found out that I was sent 35mm studs, when it should have been 45mm studs. Ahhhhhhhh, turd! After I was sent the correct length studs I needed to remove the old studs, but didn't want to hammer out the studs again (poor hubs). So I figured out I could safely use my ball joint separator from Harbor Freight $25. I previously used it to separate the ball joint for my bumpsteer correction bushings and rear trailing arm bushings (this tool prevents the boot from being torn). To use it for wheel studs: attach the tool so its in contact with backside of the hub and tip of the wheel stud. Tighten the spindle with a socket until the stud slides out. POW, easy. Here's a pic of it:
tool
Here are some other pics on how to use it to remove wheel studs:
set up
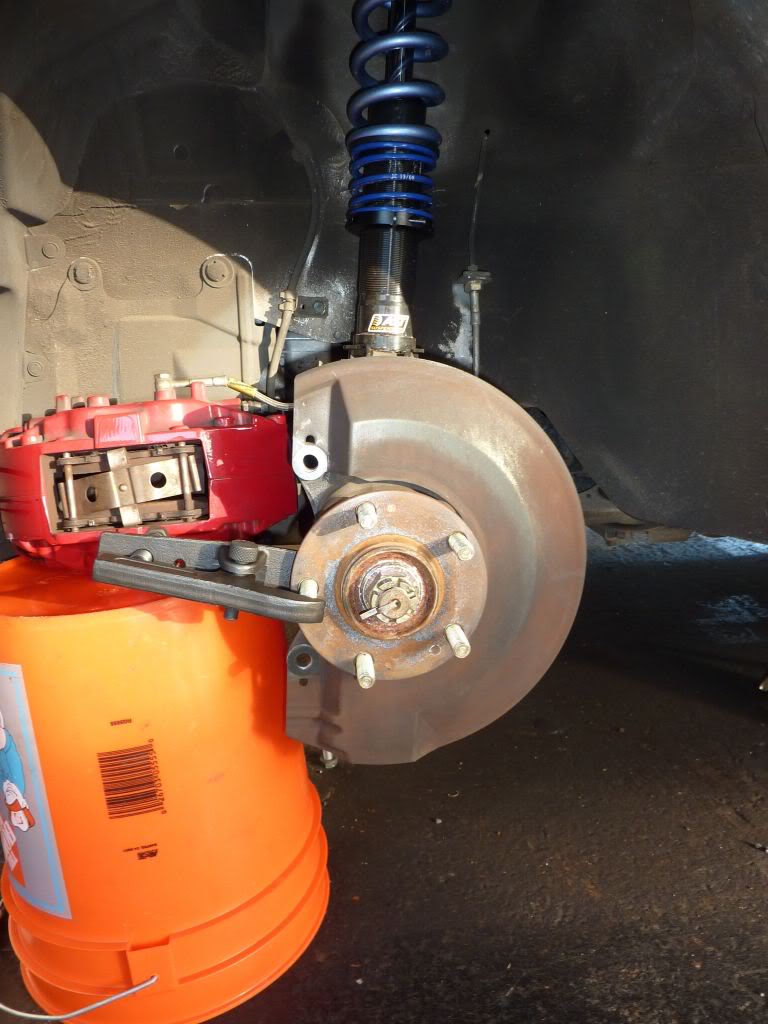
close up
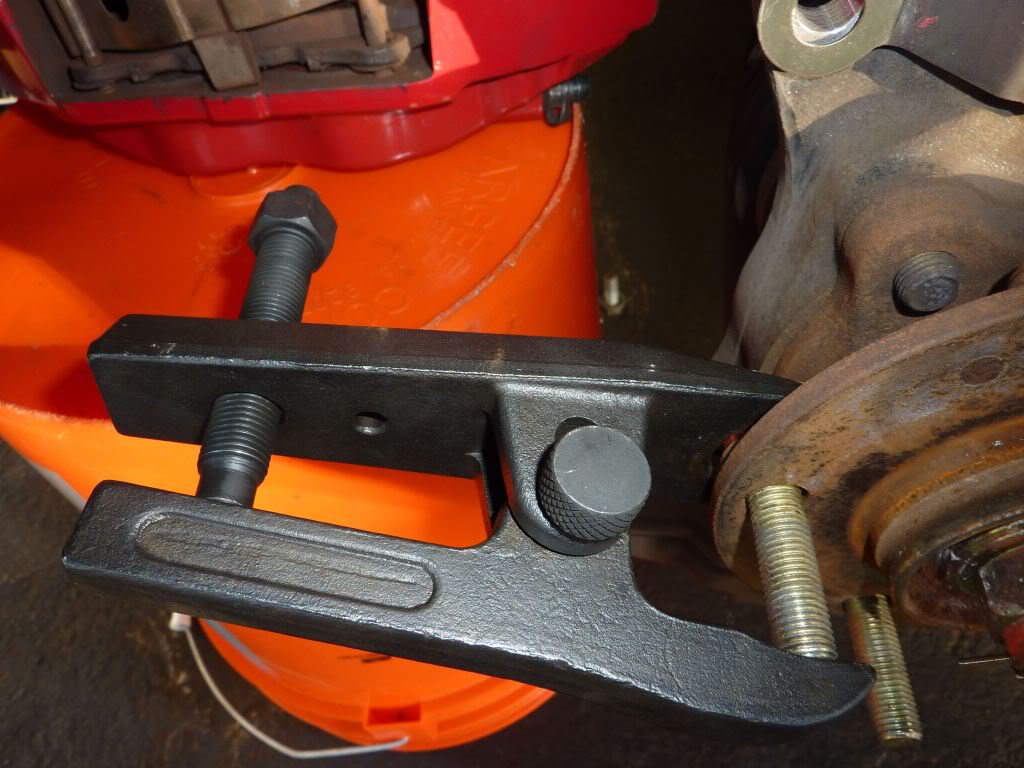
back side shot
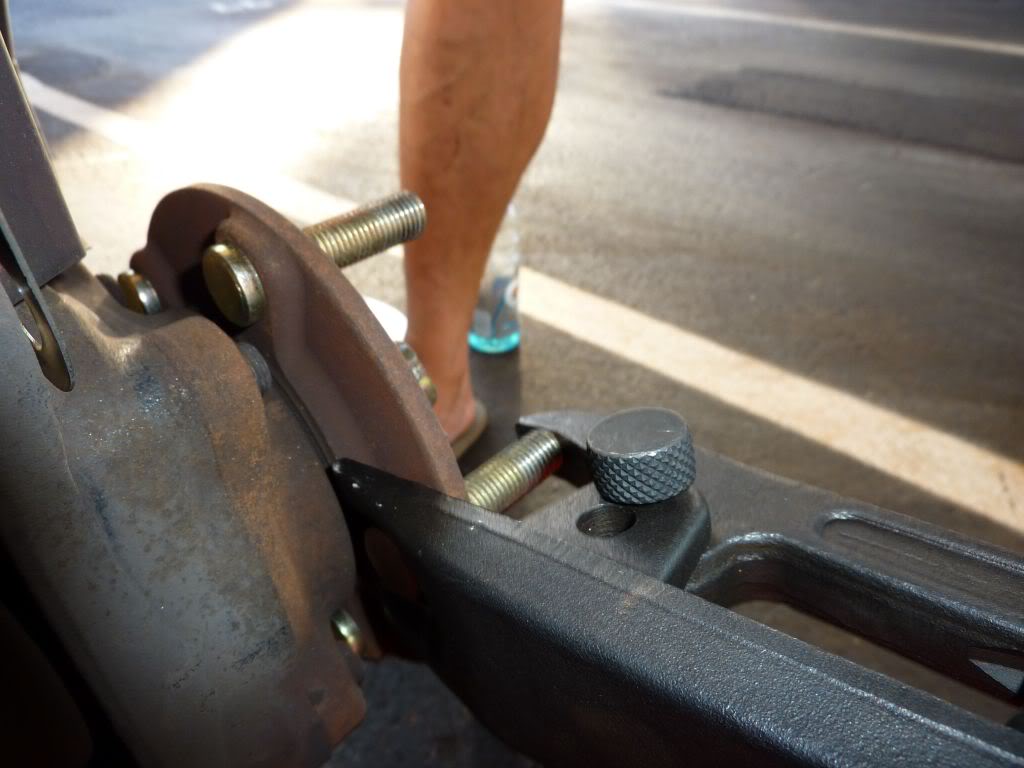
finish

From start to finish, removing and installing 10 studs took a little over an hour. Really not as hard as I first thought. Just do your research before hand and use the ball joint separator. Check out my buddies write up for more info and the entire process:
https://www.evolutionm.net/forums/ev...l-install.html
**Just want to thank o-townFLA for answering all my questions and listening to me complain and Mike at Touge Factory for all the useful info he provided.
**Helpful tip: measure your new extended studs before installing, don't just check to make sure they are longer than the OEM studs.
tool
Here are some other pics on how to use it to remove wheel studs:
set up
close up
back side shot
finish
From start to finish, removing and installing 10 studs took a little over an hour. Really not as hard as I first thought. Just do your research before hand and use the ball joint separator. Check out my buddies write up for more info and the entire process:
https://www.evolutionm.net/forums/ev...l-install.html
**Just want to thank o-townFLA for answering all my questions and listening to me complain and Mike at Touge Factory for all the useful info he provided.
**Helpful tip: measure your new extended studs before installing, don't just check to make sure they are longer than the OEM studs.
 Dec 5, 2010, 01:28 AM
#2
Newbie
Thread Starter
iTrader: (8)
Join Date: Jan 2006
Location: hi
Posts: 61
Likes: 0
Received 0 Likes
on
0 Posts
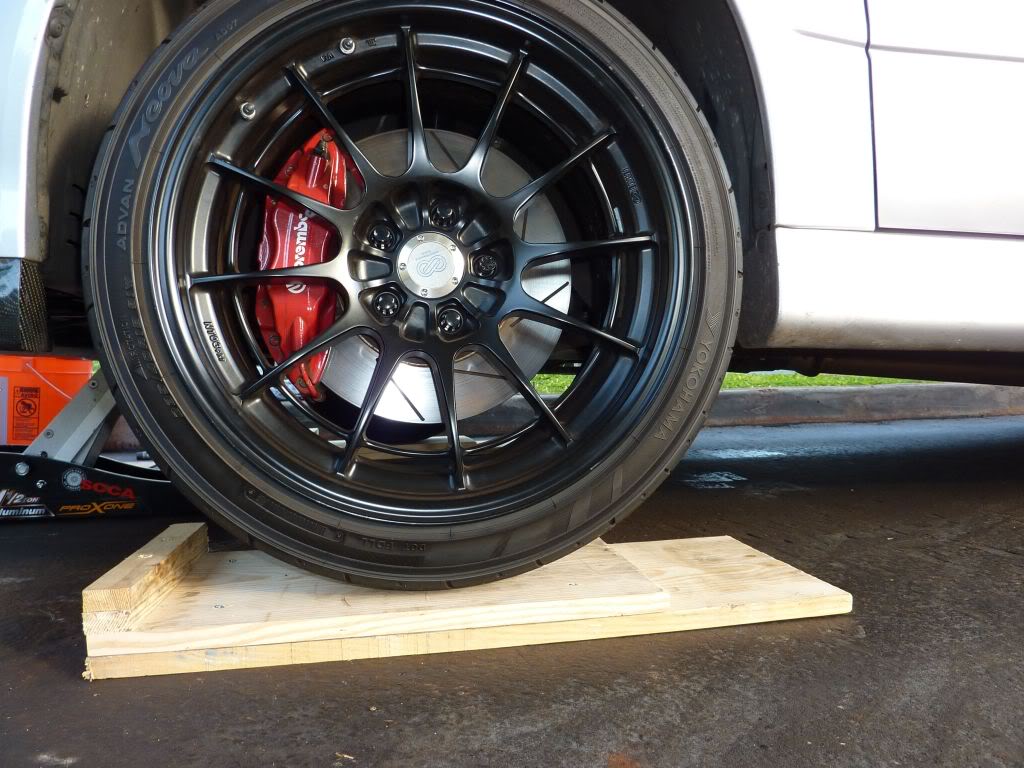
Oh yeah, before anyone asks: the coilovers are AST 4100s (tarmac killers). Swift springs 9k fronts and 10k rears. Thanks to Andrew and Myles at GTworx for the mental suspension set up. Also the homemade mini ramps are so helpful, since my jack points on the frame rails are destroyed. Gives you the option to jack the car from the front and allows for faster tire swaps, like jacking up at the rear diff. Happy Holidays!
Last edited by free ride; Dec 5, 2010 at 01:53 AM.


Trending Topics

 Dec 5, 2010, 10:30 PM
#11
Newbie
Thread Starter
iTrader: (8)
Join Date: Jan 2006
Location: hi
Posts: 61
Likes: 0
Received 0 Likes
on
0 Posts
I love the AST 4100s! Probably the best custom valved coilovers with matching spring rates available in its price range ($2200 range). If your interested in these, talk to either Myles or Andrew at GTworx (great guys, very knowledgeable). I gotta do a review on them, maybe after my next auto-x. All I can say is it really tightened up turning ability and actually made my car oversteer, which i wasn't use to. I had to play with tire pressures to tone the oversteer down. I was previously running Endura-tech 7k front and 7k rears, significant difference. If you're really interested in coilovers for performance use, don't bother with the "off the shelf coilovers." Either go with a good shock/spring combo, AST, or KW Robispec.
Dec 7, 2010, 05:50 AM
#12

So what was the method you used to pull the new studs in? use this tool as well? or did you use the lug nut/washer combo that others have used?
Great idea, and a much simplier process than pulling the whole hub off. I have been after GTWORX to get some of YOU folks to get reviews out for the 4100s!! I was incredibly close to a set as well, but than Ohlins fell in my lap. Congrats on the great setup.
Great idea, and a much simplier process than pulling the whole hub off. I have been after GTWORX to get some of YOU folks to get reviews out for the 4100s!! I was incredibly close to a set as well, but than Ohlins fell in my lap. Congrats on the great setup.
Dec 8, 2010, 12:33 AM
#14
Newbie
Thread Starter
iTrader: (8)
Join Date: Jan 2006
Location: hi
Posts: 61
Likes: 0
Received 0 Likes
on
0 Posts
So what was the method you used to pull the new studs in? use this tool as well? or did you use the lug nut/washer combo that others have used?
Great idea, and a much simplier process than pulling the whole hub off. I have been after GTWORX to get some of YOU folks to get reviews out for the 4100s!! I was incredibly close to a set as well, but than Ohlins fell in my lap. Congrats on the great setup.
Great idea, and a much simplier process than pulling the whole hub off. I have been after GTWORX to get some of YOU folks to get reviews out for the 4100s!! I was incredibly close to a set as well, but than Ohlins fell in my lap. Congrats on the great setup.
