Whiteline Rear Trailing Arm Bushing DIY
 Apr 16, 2015, 12:07 PM
#1
Whiteline Rear Trailing Arm Bushing DIY
Hey All,
Been meaning to install these for a while and finally got around to it. Thought I'd do a quick little writeup to help anyone looking.
Install is pretty basic.
Needed:
1. Evo 8/9. Not sure about the setup on the X.
2. Whiteline W0594 or equivalent in another brand.
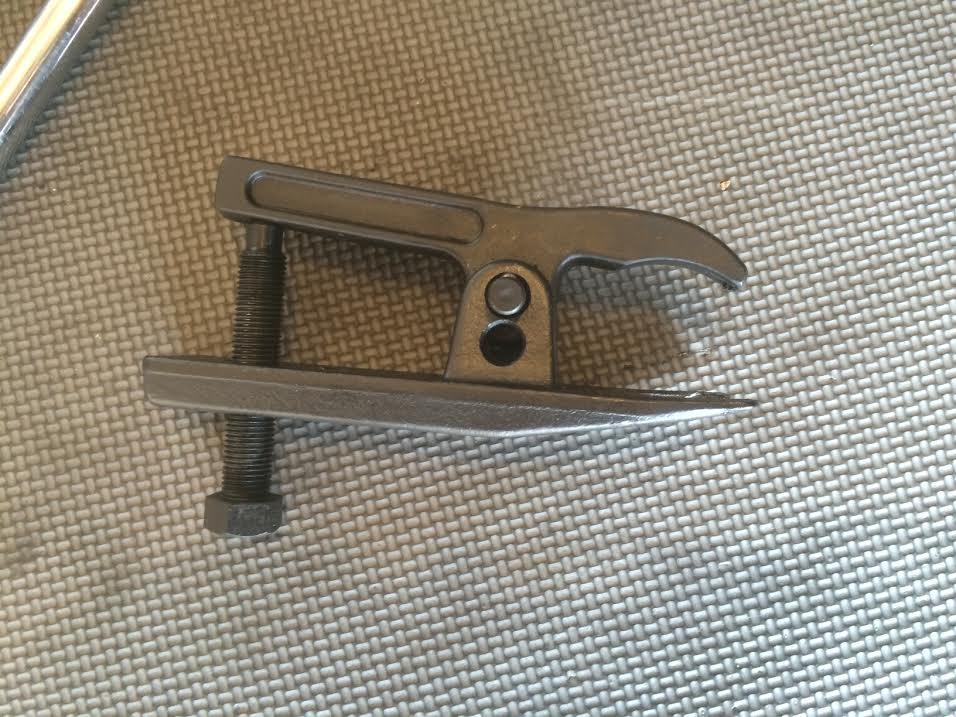
3. "Duckbill" style ball joint tool (pictured below)
4. 19mm socket
5. 21mm socket
6. 22mm socket
7. 13mm socket
8. Access to a press (you may be able to use a torch and hacksaw, and then a vice
9. Ratchets, extension, torque wrench
10. Jack and jack stand
11. Various large sockets for pressing
So, first off. This is just how I did it. If you do it this way and screw up, that's not my fault.
Step 1:
Break loose the torque on your wheels using your 21mm. If you can't do this part, stop and list your Evo for sale.
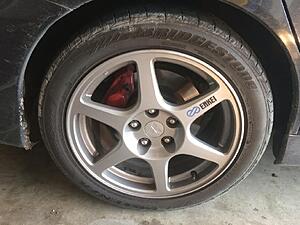
Step 2:
Jack up your dirty dirty car and support it properly with a stand. Remove your lug nuts, put them really close to you so that you kick them all over the garage when you're under the car taking pictures. Remove your wheel and set it aside.
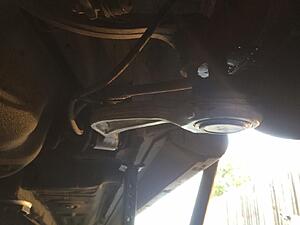
You should now be here:
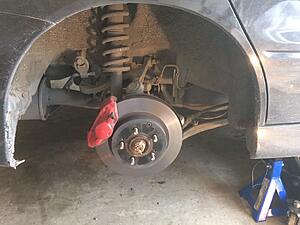
Step 3:
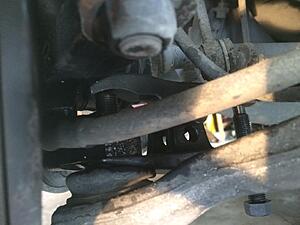
Locate your rear trailing arm. It's the one with this small bracket attached with at 13mm bolt. Loosen and remove the bolt and set aside. I didn't need any Liquid Wrench, you may.

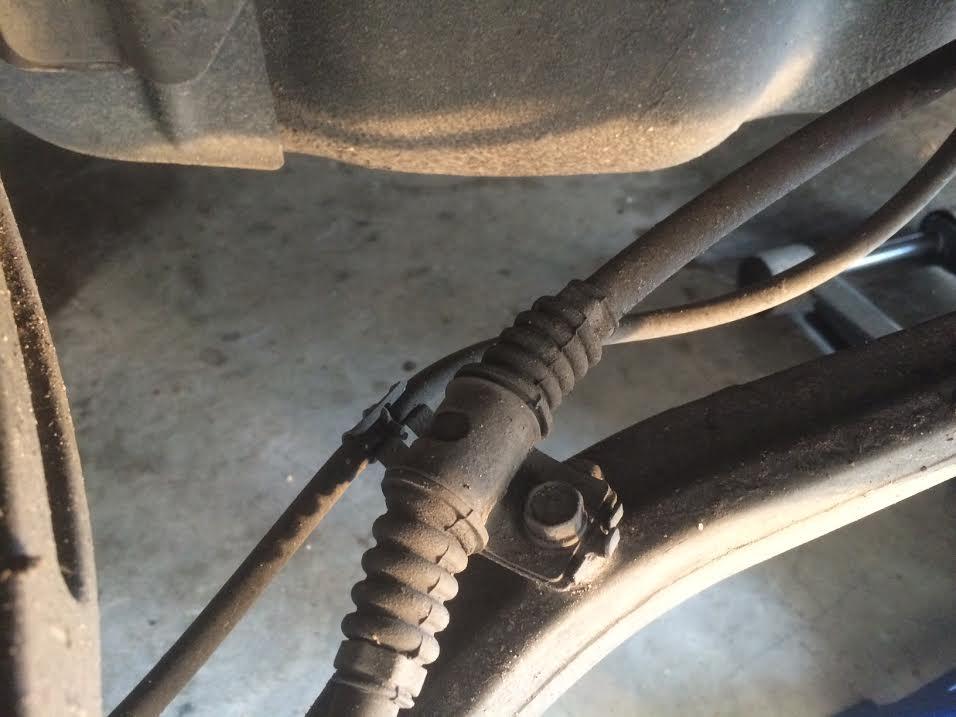
Step 4:
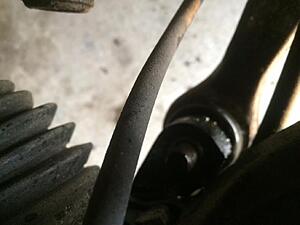
Spray down this nut. It's the nut that holds the ball joint in the hub. 22mm here. Sorry, not the best picture.
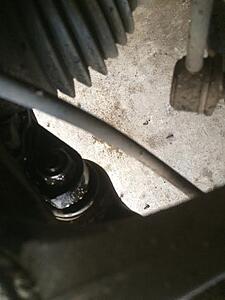
Step 5:
I suggest a 1/2 inch drive here. 22mm socket, exension, 1/2 inch drive, and a beaker bar. Make sure you are on the nut well and don't let it twist off. The last thing you want is a stripped nut and a dented fender.
Look, an even worse picture of the same dark spot, but now it's out of focus. Remove the nut.
Step 6:
Grab your SWEET new $19 Harbor Freight ball joint tool. This is similar to the Mitsu tool. I attempted to use the claw type tool, no luck.
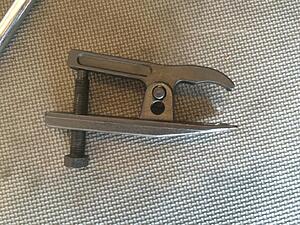
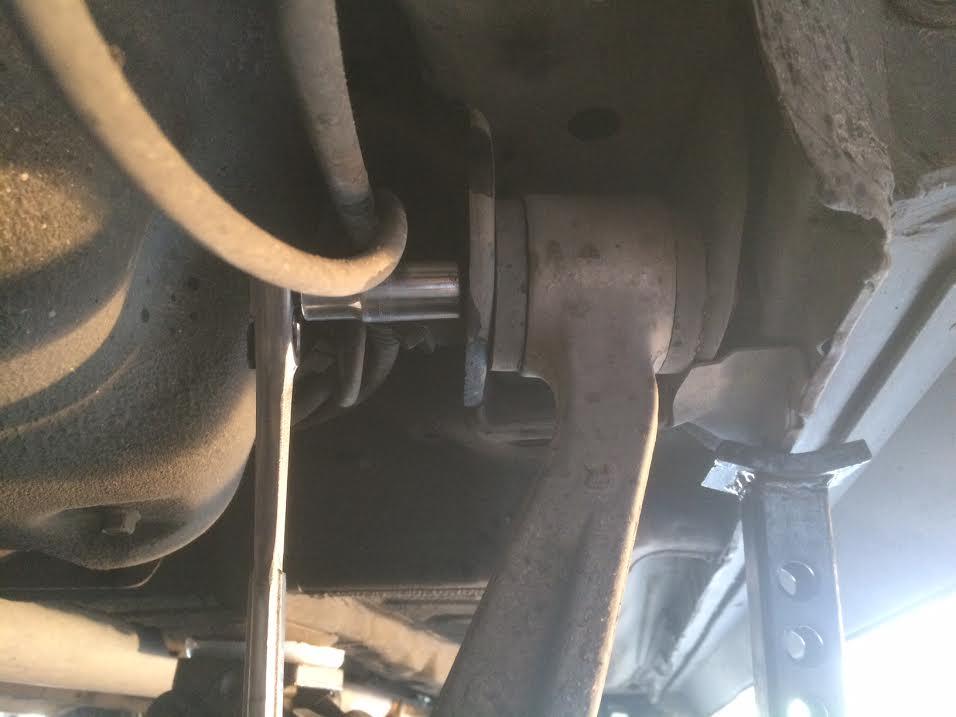
Stick it on the ball joint like below. Be CAREFUL of your boot unless you are planning to replace it. It should slide on nicely.
Move your legs and tools out of the way. Make sure you spray some lithium grease on the threads of the spreader bolt. Hand tighten and make sure the tool is secure. Then get your 19mm and begin adding pressure. It will release violently. The tool ***** fly off. If you skip ahead and loosen the other bolt holding the arm into place, the arm may come down pretty hard from the pressure.
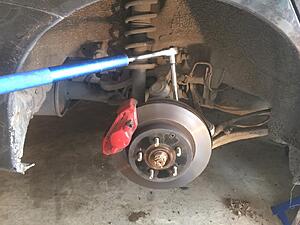
Step 7:
Recover from the shock and the bang. Assure your wife it's okay and the car didn't crush you. Then use your 19mm to remove the bolt holding the bushing end of the arm to the car.

Now you should have this in front of you:
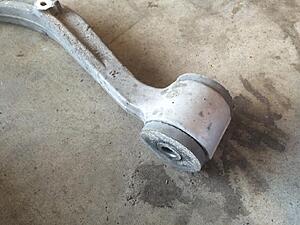
Inspect the boot for cracks or splits. If it's torn, replace it. Boots are pretty cheap. Clean it up well and repack it with wheel bearing grease. Luckily my boots are okay. Take the time to look around at your other bushings and ball joints. My upper control arm boots are both torn. I'll be replacing them in another DIY along with both of the upper bushings.
Remove the rubber spacers and check out the bushing. Mine is a little torn. Stock sucks.
Step 8:
I experimented a few ways, and here's how I did it. I used an axle nut socket and my press to remove the meat from the middle. If you are going to be using a hacksaw to cut out the metal ring, you may have to burn the middle out with a torch.
Here's the aftermath, but you can see what I'm talking about. 32mm did nicely.
Then get ready to press. I've pressed a number of bushings in and out on cars, and these were really stubborn.
I ended up using an old gear that I replaced for the base. You'll have to use whatever you can, just make sure to keep it clear of the outside metal of the bushing. I used the 2 plates that came with the press to sandwich the arm with a 1-7/16 socket. Don't ask me why I have that.
This took several swings and misses to get right. Both sides came out with the arm oriented as shown. I used liquid wrench and tapped the arm with a hammer while adding pressure. It wanted to slide around a little. Keeping it all straight was key. She finally budged and then came out easily.
You're left with a bare arm. Notice the slight bevel. Make sure you note this for installation of the new bushing. Take the time to clean up the whole arm. Wire brush and carb cleaner works wonders and leaves the arms looking nice. My was pretty caked with years of neglect.
Step 8:
Now it's time for the new hotness. I went with Whiteline, because I've always liked the brand. Yours may be yellow. Doesn't matter.
Get yourself setup like this. Make sure you get some sweat in your eyes so that you can hardly see. Spray a little WD40 around the base to ease it on in. Whiteline never suggests greasing the outside of bushings, only the inside where it's knurled. So, a little WD40 or even some soapy water will work here.
This takes some WORK. Get a little pressure on the assembly, just to hold it together, and then get the tapered edge of the bearing into the beveled surface of the arm.
Add a little pressure. Just a little at a time. It'll start to come up one side. I used a large flathead to encourage it to go in evenly. I had to do this a couple times. Eventually, with some patience, it'll go in straight.
When it get to be like this, you're pretty much home free. Just go really slowly and allow the bushing to slide in.
Insert innuendo here:
I had to pull the assembly off and make more space to finish the drive:
Step 9:
Once the bushing is all the way through, use the supplied grease on the inside knurled surface and then insert the metal sleeve. Like so:
I then lightly grease each face.
Step 10:
Time to put the arm back on the car. I wiped down the bushing bracket really well. The less dirt the better. Start the bolt. Get the ball joint back into place and start the nut. You'll probably need to get the jack under the base with a little pressure to keep the ball joint from spinning.
Torque the ball joint to the knuckle at 60ft-lb
Torque the bushing side bolt to 106ft-lb
Tighten the small 13mm bolt holding the bracket to a reasonable amount.
Admire your work, check your work.
Replace wheel. Torque to spec. I think it's 87 ft-lb, that's what I've always used for some reason.
Repeat on the other side. Enjoy better toe stability!
Been meaning to install these for a while and finally got around to it. Thought I'd do a quick little writeup to help anyone looking.
Install is pretty basic.
Needed:
1. Evo 8/9. Not sure about the setup on the X.
2. Whiteline W0594 or equivalent in another brand.
3. "Duckbill" style ball joint tool (pictured below)
4. 19mm socket
5. 21mm socket
6. 22mm socket
7. 13mm socket
8. Access to a press (you may be able to use a torch and hacksaw, and then a vice
9. Ratchets, extension, torque wrench
10. Jack and jack stand
11. Various large sockets for pressing
So, first off. This is just how I did it. If you do it this way and screw up, that's not my fault.
Step 1:
Break loose the torque on your wheels using your 21mm. If you can't do this part, stop and list your Evo for sale.

Step 2:
Jack up your dirty dirty car and support it properly with a stand. Remove your lug nuts, put them really close to you so that you kick them all over the garage when you're under the car taking pictures. Remove your wheel and set it aside.
You should now be here:

Step 3:
Locate your rear trailing arm. It's the one with this small bracket attached with at 13mm bolt. Loosen and remove the bolt and set aside. I didn't need any Liquid Wrench, you may.
Step 4:
Spray down this nut. It's the nut that holds the ball joint in the hub. 22mm here. Sorry, not the best picture.

Step 5:
I suggest a 1/2 inch drive here. 22mm socket, exension, 1/2 inch drive, and a beaker bar. Make sure you are on the nut well and don't let it twist off. The last thing you want is a stripped nut and a dented fender.

Look, an even worse picture of the same dark spot, but now it's out of focus. Remove the nut.

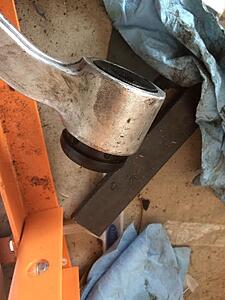
Step 6:
Grab your SWEET new $19 Harbor Freight ball joint tool. This is similar to the Mitsu tool. I attempted to use the claw type tool, no luck.
Stick it on the ball joint like below. Be CAREFUL of your boot unless you are planning to replace it. It should slide on nicely.

Move your legs and tools out of the way. Make sure you spray some lithium grease on the threads of the spreader bolt. Hand tighten and make sure the tool is secure. Then get your 19mm and begin adding pressure. It will release violently. The tool ***** fly off. If you skip ahead and loosen the other bolt holding the arm into place, the arm may come down pretty hard from the pressure.
Step 7:
Recover from the shock and the bang. Assure your wife it's okay and the car didn't crush you. Then use your 19mm to remove the bolt holding the bushing end of the arm to the car.
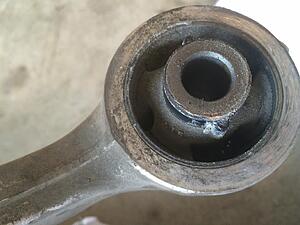
Now you should have this in front of you:

Inspect the boot for cracks or splits. If it's torn, replace it. Boots are pretty cheap. Clean it up well and repack it with wheel bearing grease. Luckily my boots are okay. Take the time to look around at your other bushings and ball joints. My upper control arm boots are both torn. I'll be replacing them in another DIY along with both of the upper bushings.
Remove the rubber spacers and check out the bushing. Mine is a little torn. Stock sucks.

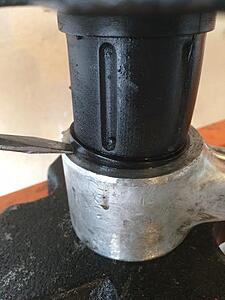
Step 8:
I experimented a few ways, and here's how I did it. I used an axle nut socket and my press to remove the meat from the middle. If you are going to be using a hacksaw to cut out the metal ring, you may have to burn the middle out with a torch.
Here's the aftermath, but you can see what I'm talking about. 32mm did nicely.
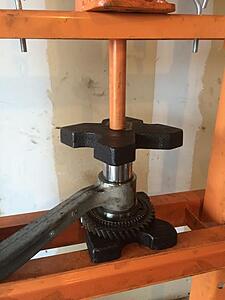
Then get ready to press. I've pressed a number of bushings in and out on cars, and these were really stubborn.
I ended up using an old gear that I replaced for the base. You'll have to use whatever you can, just make sure to keep it clear of the outside metal of the bushing. I used the 2 plates that came with the press to sandwich the arm with a 1-7/16 socket. Don't ask me why I have that.

This took several swings and misses to get right. Both sides came out with the arm oriented as shown. I used liquid wrench and tapped the arm with a hammer while adding pressure. It wanted to slide around a little. Keeping it all straight was key. She finally budged and then came out easily.
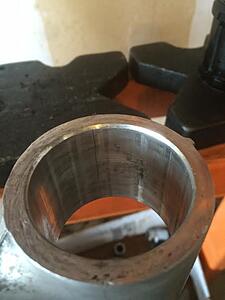
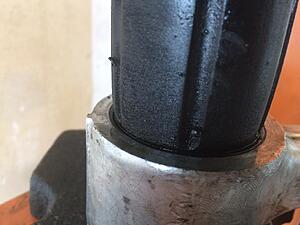
You're left with a bare arm. Notice the slight bevel. Make sure you note this for installation of the new bushing. Take the time to clean up the whole arm. Wire brush and carb cleaner works wonders and leaves the arms looking nice. My was pretty caked with years of neglect.

Step 8:
Now it's time for the new hotness. I went with Whiteline, because I've always liked the brand. Yours may be yellow. Doesn't matter.
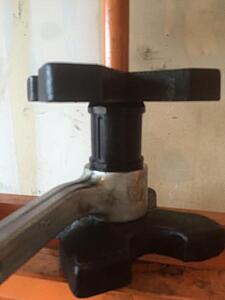
Get yourself setup like this. Make sure you get some sweat in your eyes so that you can hardly see. Spray a little WD40 around the base to ease it on in. Whiteline never suggests greasing the outside of bushings, only the inside where it's knurled. So, a little WD40 or even some soapy water will work here.

This takes some WORK. Get a little pressure on the assembly, just to hold it together, and then get the tapered edge of the bearing into the beveled surface of the arm.

Add a little pressure. Just a little at a time. It'll start to come up one side. I used a large flathead to encourage it to go in evenly. I had to do this a couple times. Eventually, with some patience, it'll go in straight.
When it get to be like this, you're pretty much home free. Just go really slowly and allow the bushing to slide in.
Insert innuendo here:

I had to pull the assembly off and make more space to finish the drive:

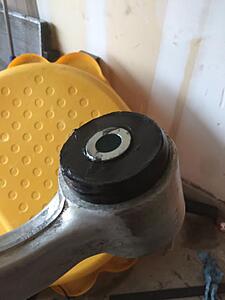
Step 9:
Once the bushing is all the way through, use the supplied grease on the inside knurled surface and then insert the metal sleeve. Like so:

I then lightly grease each face.
Step 10:
Time to put the arm back on the car. I wiped down the bushing bracket really well. The less dirt the better. Start the bolt. Get the ball joint back into place and start the nut. You'll probably need to get the jack under the base with a little pressure to keep the ball joint from spinning.

Torque the ball joint to the knuckle at 60ft-lb
Torque the bushing side bolt to 106ft-lb
Tighten the small 13mm bolt holding the bracket to a reasonable amount.
Admire your work, check your work.
Replace wheel. Torque to spec. I think it's 87 ft-lb, that's what I've always used for some reason.
Repeat on the other side. Enjoy better toe stability!
Last edited by aggieEVO; Apr 16, 2015 at 12:32 PM.
 Aug 16, 2015, 04:05 AM
#2

This is a really good write up. I got all the way to pushing the bew bushing in and it kept going wonky. Came here and saw that there was a beveled side. This was key. Taking you time is definently key. I would pump the press once, then go all around the shoulder with the flat head, then repeat. That feeling when the shoulder goes in and you can just crank it down....


Thread
Thread Starter
Forum
Replies
Last Post
hamflex
For Sale - Suspension / Brakes / Handling
17
Jun 17, 2012 02:53 PM
wjamyers
Evo Tires / Wheels / Brakes / Suspension
2
Dec 21, 2011 06:58 AM
boostedwrx
For Sale - Suspension / Brakes / Handling
5
Feb 1, 2011 06:54 AM
boostedwrx
For Sale/WTB - Engine / Drivetrain / Power
5
Jan 14, 2011 10:24 AM