Stock o2 housing removal, downpipe install. Don't be skurrred!
 May 18, 2013, 11:09 AM
#1
EVO X downpipe install - o2 housing removal. Don't be skurrred!
Looking to install a downpipe, but you are scared because of all the stories you have read? Follow my instructions for a painless guide to get your o2 housing off, the quickest and easiest way. It took me a little over 2 hours for the full job.
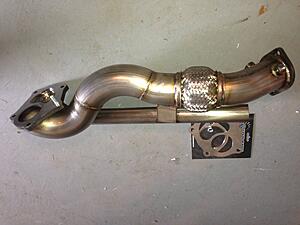
I am going to be installing an ETS dump version downpipe. The same would apply to pretty much any downpipe that replaces the stock o2 housing.
The gorgeous ETS dump downpipe!
Tools this job will require that you may not have:
1. 14mm swivel socket
2. 14mm swivel/ratcheting straight wrench. BUY A METRIC SET, they are handy. i use them all the time!
3. 18" extension for ratchet or combination of three 6" etc
4. PB Blaster (napa)
5. Never seez


-----
Part #1
Removal of stock parts from TOP:
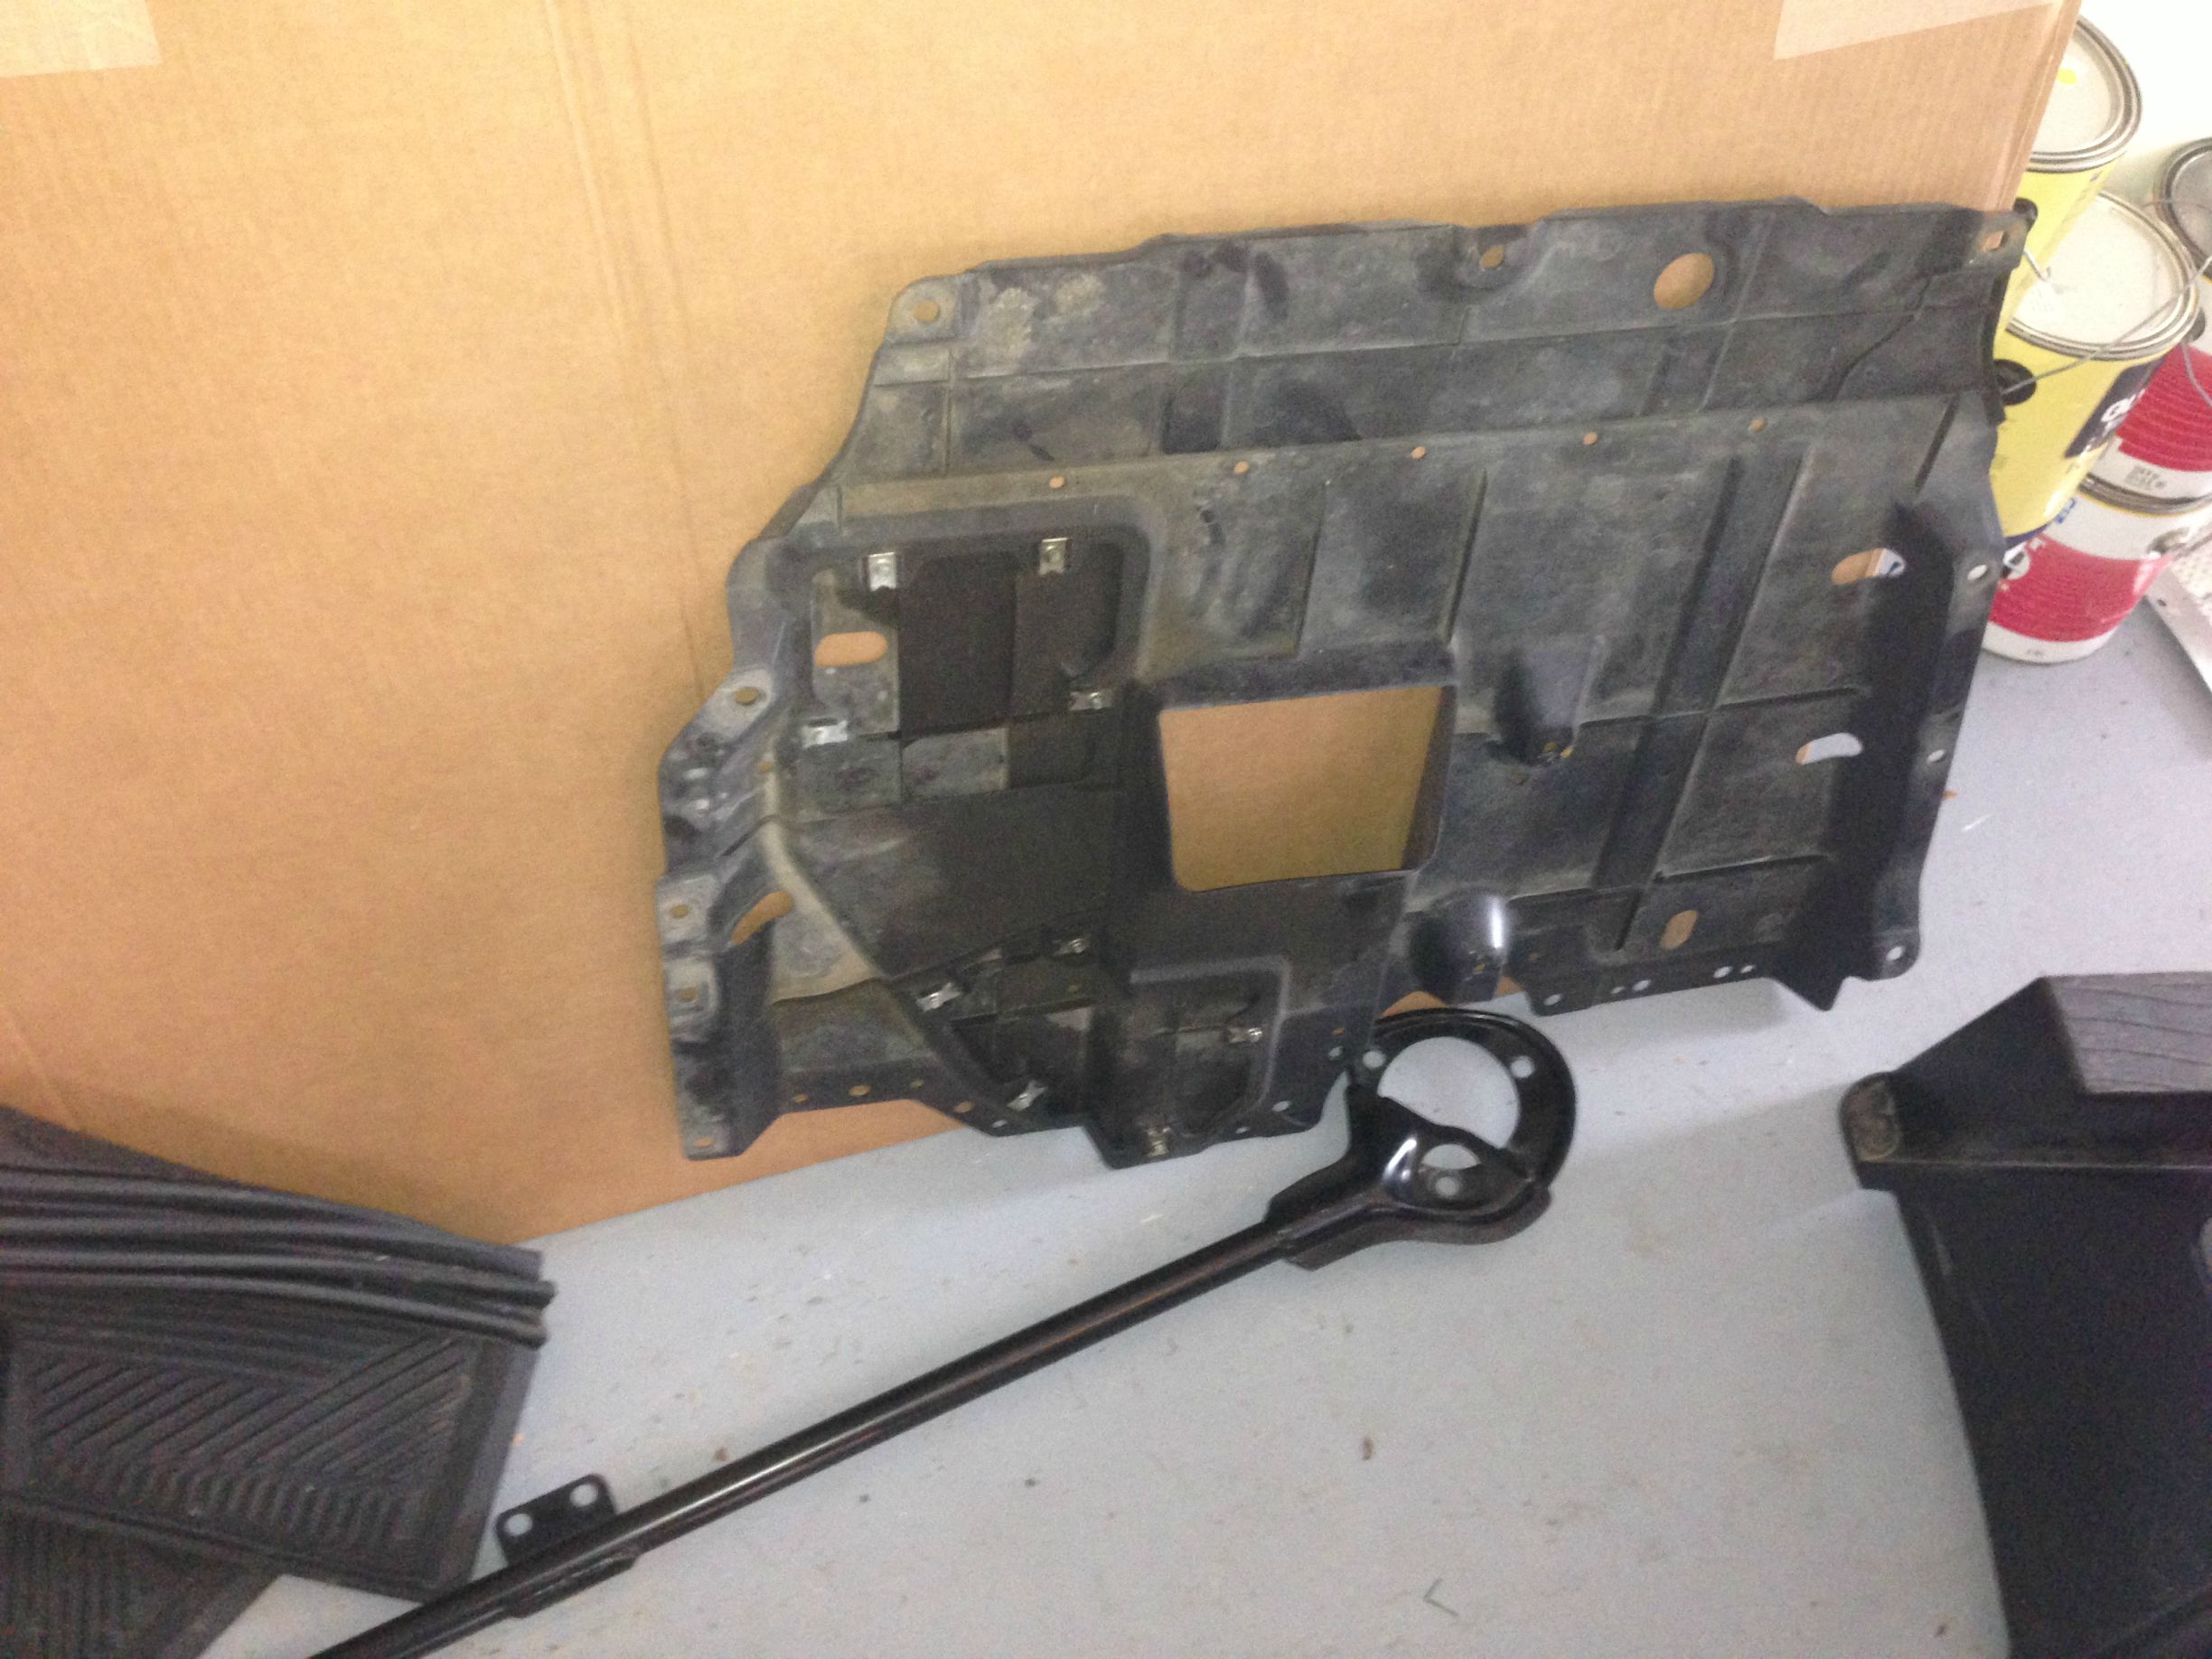
1-1. Remove the strut tower bar before jacking up the car. put two or all the bolts back onto the strut bolts before lifting the car back up. This keeps the suspension from coming out of the towers.
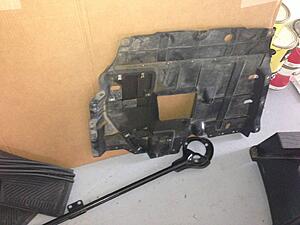
1-2. Remove the black undertray. There are probably 20 plastic clips that you just use a flathead screwdriver to remove.
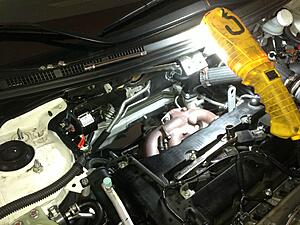
1-3. Remove the manifold/firewall heat shields with 10mm ratchet wrench or straight wrench
1-4. Remove the o2 housing heat shield. these are 10mm bolts, a 10mm ratchet wrench comes in handy here. Some of these can be tight, hit them with a shot of PB blaster and let them sit 1-2 hours if they are totally unmovable.
1-5. IMPORTANT STEP Use PB Blaster spray or other bolt helper liberally on all the o2 housing bolts. you'll have to spray some from the top, and some from the bottom.
1-6. After you feel like you have the bolts and nut covered pretty well with pb blaster, I recommend letting that sit and sink in for about 2 hours or more. Maybe hit it again and wait another 2 hours. You could even let it sit overnight if you have a lot of miles on the car. I only had 20k miles on this car.
Remove strut bar and under tray:
Remove Heat shields:
-----
Part 2
UNDER THE CAR
2-1. Raise the car, put it on jack stands or use a lift. I did this all on 4 jack stands! It's not that bad!
2-2. remove the stock cat or test pipe if you have one of those. I removed the stock downpipe and cat all in one piece to make it faster. I used a 14mm ratchet socket to remove the downpipe bolts on a 18" long extension.
2-3. Take off the 4 bolts on the o2 housing that are easy to get too... Trust me you will know which one is the tough one.
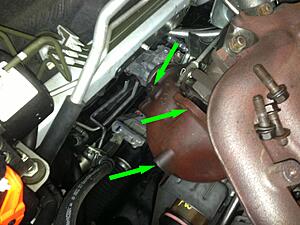
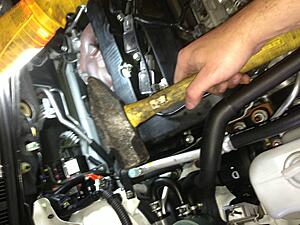
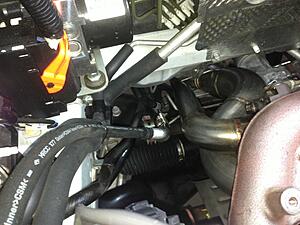
2-4. THE IMPORTANT STEP. Get a big hammer and hit the o2 housing on the "ears". The locations shown below, and in the direction shown LOTS OF TIMES. Til you are tired!!! this will help to loosen up that nut on the stud.
2-5. After you feel like your arm is dead, get back under the car with the 14mm ratchet straight wrench. bend the socket end so its 90 degrees and get it onto the stud nut. It still might be pretty tight. i had to use all my strength to get it free. The more you hammer, the better. I wish I would have taken a picture of this, but make the ratchet wrench look like and L, and come in from the wheel well up over the sway bar with one arm and in from the back with the other arm. Make sure the wrench is firmly on the nut and pull towards you with both arms!
2-6. Pull the stock o2 housing out from the top! WOO HOO the hard part is over!
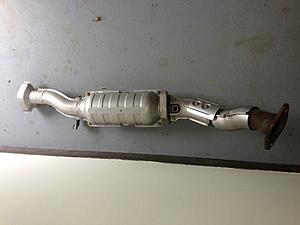
Remove cat:
Where to hit o2 housing:
Hammer:
-----
Part 3
Install the new downpipe
3-1. Pass the new downpipe in from the bottom (not sure if its possible with some from the top, but i had to do mine from below). If you have a stud in the downpipe like I did... i'd put some never seez on the stud at this point.
3-2. Put never seez on your all downpipe hardware/bolts, stud!
3-3. Get back on top. Install the gasket over the stud of your new downpipe and put on the top three bolts. If you dont have the stud, just make sure you have the gasket lined up proper and install the top 3 bolts. DO NOT TIGHTEN, just hand tight for now!
3-4. Get back under the car, and put the 4th bolt on. At this point you can tighten this bolt all the way down.
3-5. Get back up top and install the nut onto the stud. You are using all feel at this point, you wont be able to see the stud, just get the nut on there, and then use your 14mm ratchet wrench on the nut.
Install the stock top 3 bolts onto the new downpipe (start them by hand):
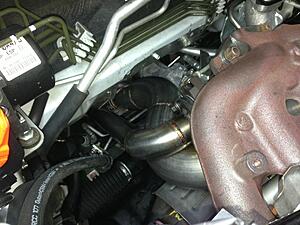
Installing the nut on the stud with 14mm ratchet wrench
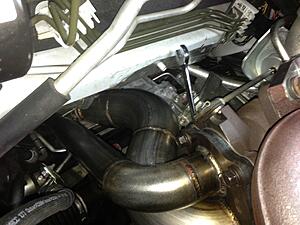
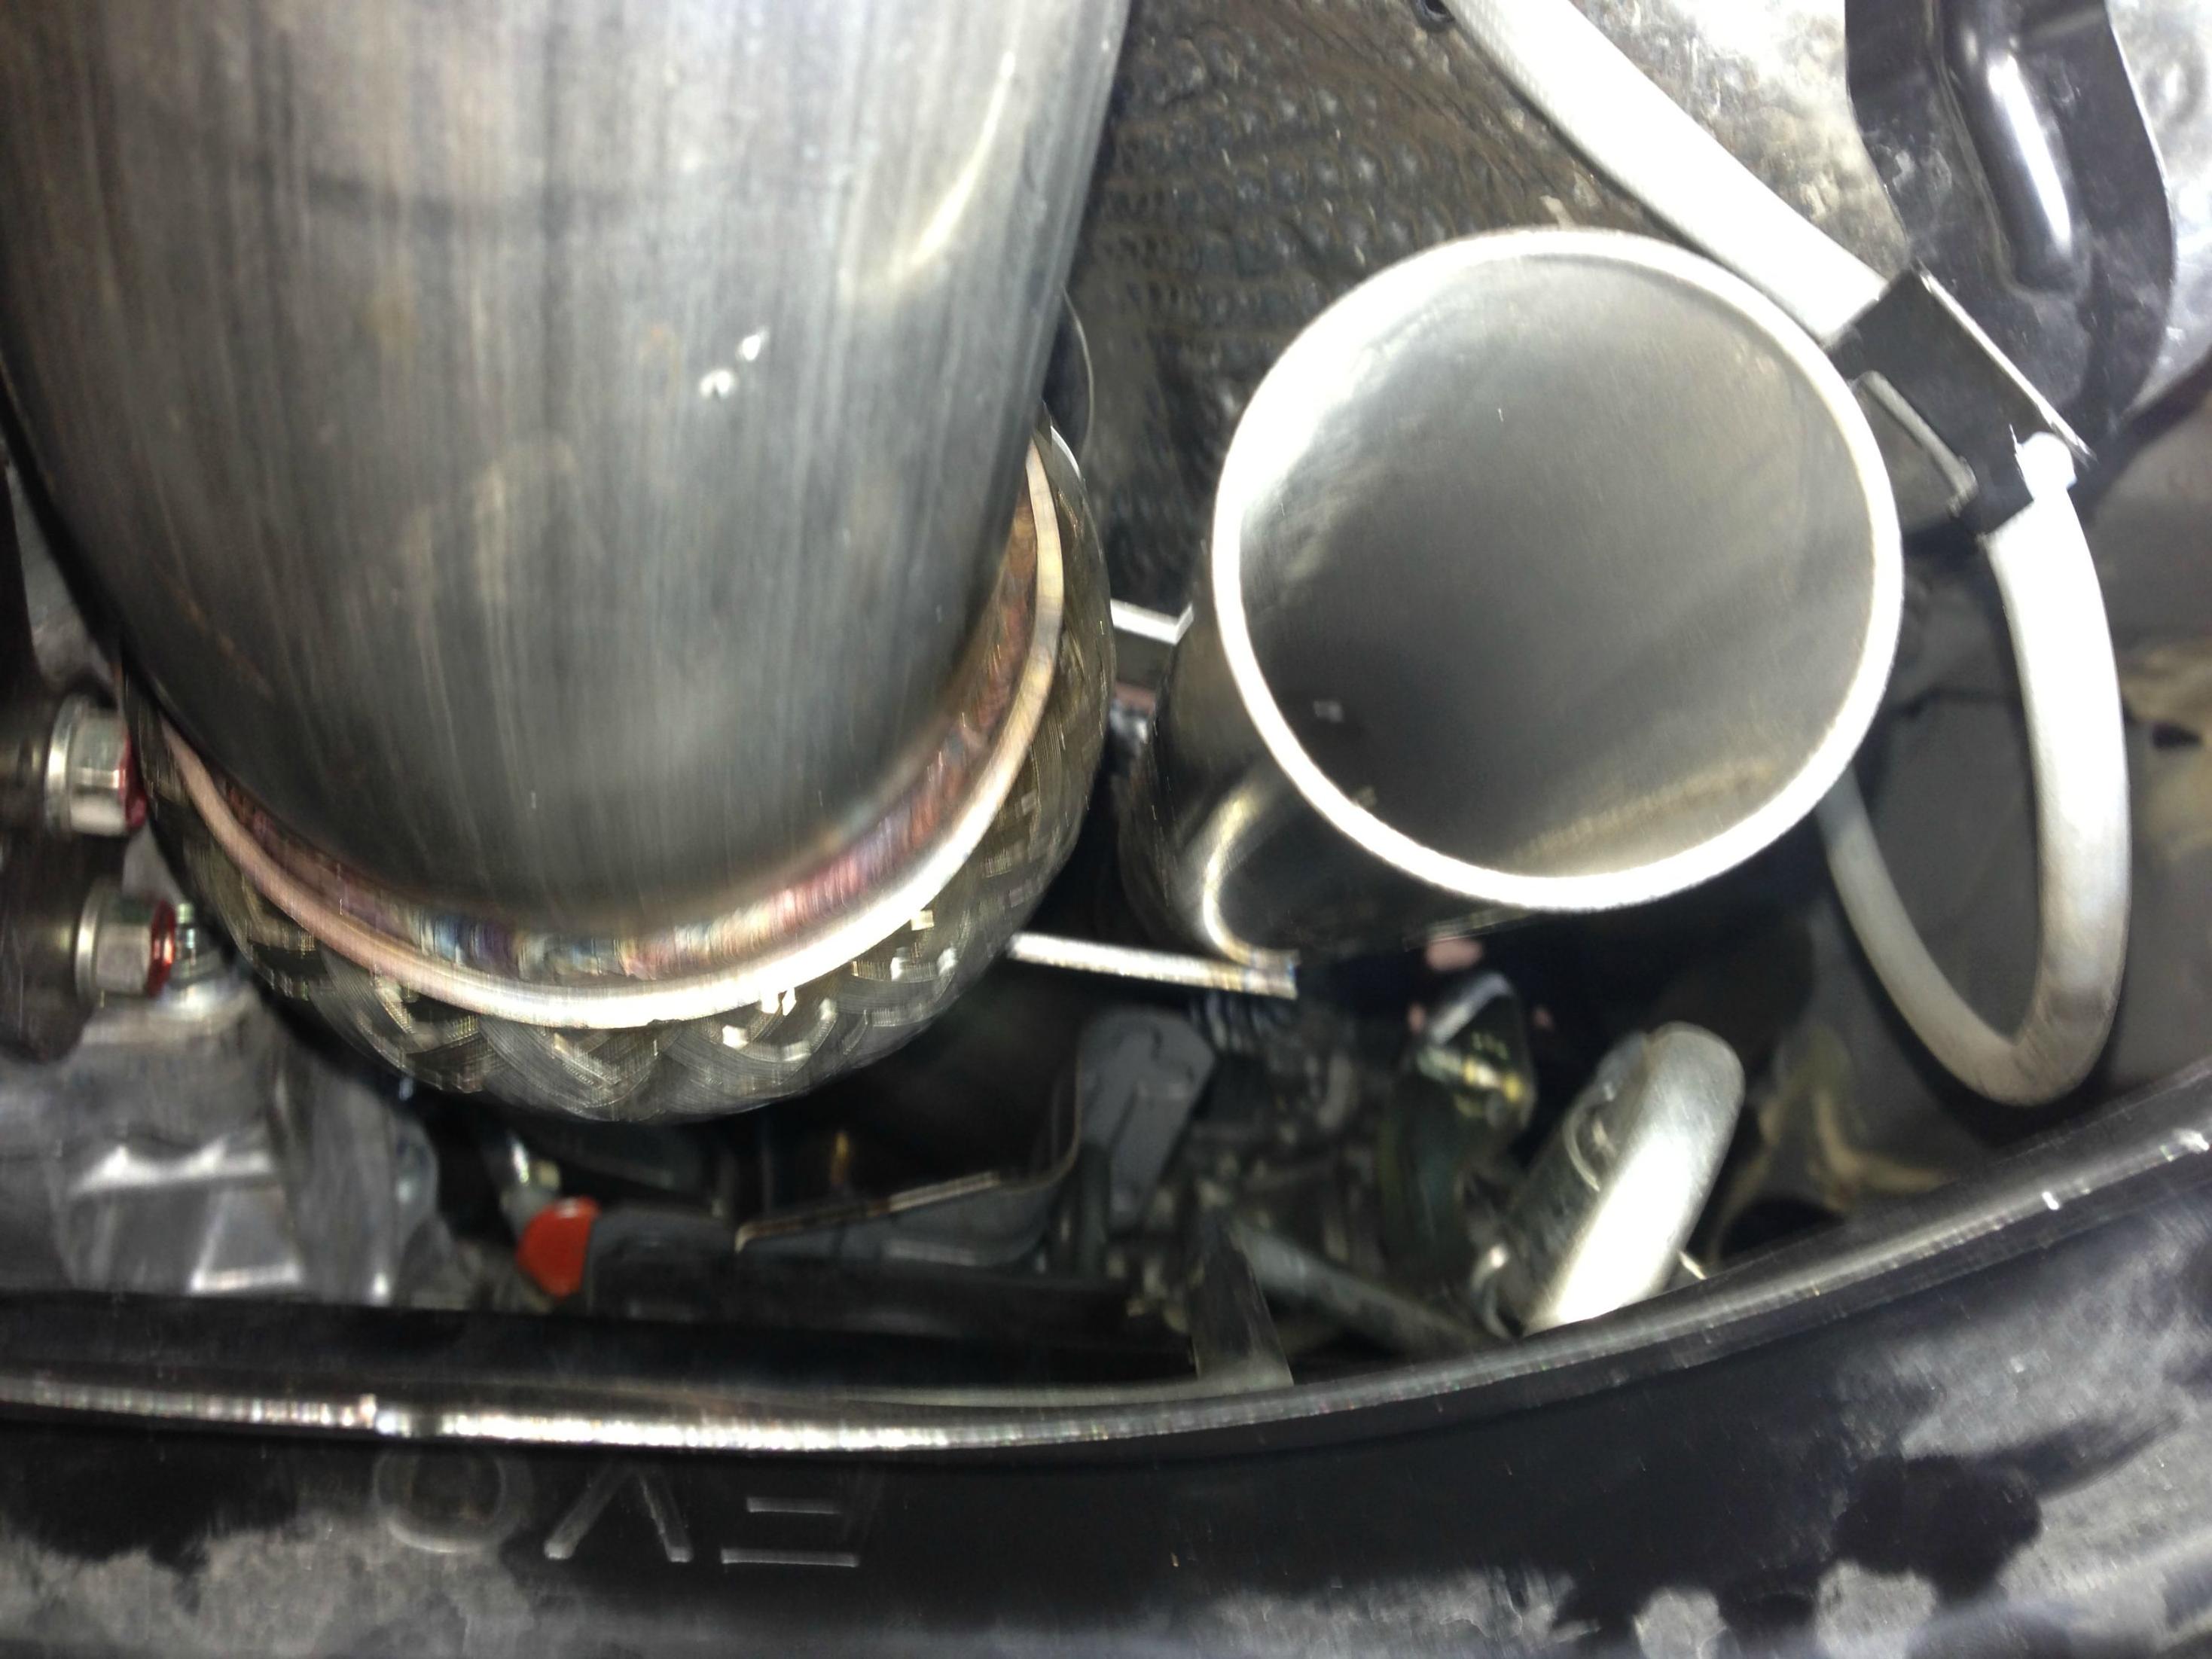
View from underside. Nice clearances with the ETS dump version!
-----
Part 4
Buttoning up ready to rock
4-1. I recommend a zip tie on the power steering line to keep it away from the heat of the downpipe
4-2. Reinstall the test pipe, cat etc. Dont forget gasket between downpipe and test pipe.
4-3. Start the car up while on the stand and check for any exhaust leaks.
4-4. Reinstall the undertray
4-5. Reinstall the heat shields. You will not be using the bottom bolts that went into the stock o2 housing
4-6. Drop the car, and then reinstall the strut bar
Zip tie on power steering:
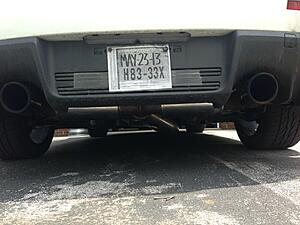
Here is the finished car with the ETS V2
I am going to be installing an ETS dump version downpipe. The same would apply to pretty much any downpipe that replaces the stock o2 housing.
The gorgeous ETS dump downpipe!

Tools this job will require that you may not have:
1. 14mm swivel socket
2. 14mm swivel/ratcheting straight wrench. BUY A METRIC SET, they are handy. i use them all the time!
3. 18" extension for ratchet or combination of three 6" etc
4. PB Blaster (napa)
5. Never seez
-----
Part #1
Removal of stock parts from TOP:
1-1. Remove the strut tower bar before jacking up the car. put two or all the bolts back onto the strut bolts before lifting the car back up. This keeps the suspension from coming out of the towers.
1-2. Remove the black undertray. There are probably 20 plastic clips that you just use a flathead screwdriver to remove.
1-3. Remove the manifold/firewall heat shields with 10mm ratchet wrench or straight wrench
1-4. Remove the o2 housing heat shield. these are 10mm bolts, a 10mm ratchet wrench comes in handy here. Some of these can be tight, hit them with a shot of PB blaster and let them sit 1-2 hours if they are totally unmovable.
1-5. IMPORTANT STEP Use PB Blaster spray or other bolt helper liberally on all the o2 housing bolts. you'll have to spray some from the top, and some from the bottom.
1-6. After you feel like you have the bolts and nut covered pretty well with pb blaster, I recommend letting that sit and sink in for about 2 hours or more. Maybe hit it again and wait another 2 hours. You could even let it sit overnight if you have a lot of miles on the car. I only had 20k miles on this car.
Remove strut bar and under tray:
Remove Heat shields:

-----
Part 2
UNDER THE CAR
2-1. Raise the car, put it on jack stands or use a lift. I did this all on 4 jack stands! It's not that bad!
2-2. remove the stock cat or test pipe if you have one of those. I removed the stock downpipe and cat all in one piece to make it faster. I used a 14mm ratchet socket to remove the downpipe bolts on a 18" long extension.
2-3. Take off the 4 bolts on the o2 housing that are easy to get too... Trust me you will know which one is the tough one.
2-4. THE IMPORTANT STEP. Get a big hammer and hit the o2 housing on the "ears". The locations shown below, and in the direction shown LOTS OF TIMES. Til you are tired!!! this will help to loosen up that nut on the stud.
2-5. After you feel like your arm is dead, get back under the car with the 14mm ratchet straight wrench. bend the socket end so its 90 degrees and get it onto the stud nut. It still might be pretty tight. i had to use all my strength to get it free. The more you hammer, the better. I wish I would have taken a picture of this, but make the ratchet wrench look like and L, and come in from the wheel well up over the sway bar with one arm and in from the back with the other arm. Make sure the wrench is firmly on the nut and pull towards you with both arms!
2-6. Pull the stock o2 housing out from the top! WOO HOO the hard part is over!
Remove cat:

Where to hit o2 housing:

Hammer:

-----
Part 3
Install the new downpipe
3-1. Pass the new downpipe in from the bottom (not sure if its possible with some from the top, but i had to do mine from below). If you have a stud in the downpipe like I did... i'd put some never seez on the stud at this point.
3-2. Put never seez on your all downpipe hardware/bolts, stud!
3-3. Get back on top. Install the gasket over the stud of your new downpipe and put on the top three bolts. If you dont have the stud, just make sure you have the gasket lined up proper and install the top 3 bolts. DO NOT TIGHTEN, just hand tight for now!
3-4. Get back under the car, and put the 4th bolt on. At this point you can tighten this bolt all the way down.
3-5. Get back up top and install the nut onto the stud. You are using all feel at this point, you wont be able to see the stud, just get the nut on there, and then use your 14mm ratchet wrench on the nut.
Install the stock top 3 bolts onto the new downpipe (start them by hand):

Installing the nut on the stud with 14mm ratchet wrench

View from underside. Nice clearances with the ETS dump version!
-----
Part 4
Buttoning up ready to rock
4-1. I recommend a zip tie on the power steering line to keep it away from the heat of the downpipe
4-2. Reinstall the test pipe, cat etc. Dont forget gasket between downpipe and test pipe.
4-3. Start the car up while on the stand and check for any exhaust leaks.
4-4. Reinstall the undertray
4-5. Reinstall the heat shields. You will not be using the bottom bolts that went into the stock o2 housing
4-6. Drop the car, and then reinstall the strut bar
Zip tie on power steering:

Here is the finished car with the ETS V2

Last edited by joel(PA); May 18, 2013 at 04:19 PM.

The following users liked this post:
Chu3wy (Apr 12, 2016)


Trending Topics
Jun 7, 2013, 11:28 AM
#8
Newbie
iTrader: (4)
Join Date: Aug 2012
Location: South Florida
Posts: 30
Likes: 0
Received 0 Likes
on
0 Posts
Completed install yesterday! Car has just over 10k took me around 3 hours total, O2 housing heat shield bolts were a PITA and the nut on the stud of the downpipe, install was every easy after doing the downpipe dance as I installed it from the top. Now I had a lift and a wide array of tools to help me out  This things sounds mean as hell under boost. Another great ETS product for my car.
This things sounds mean as hell under boost. Another great ETS product for my car.
 Jan 10, 2014, 05:11 PM
#13

So I tackled this project about two weeks ago and the hardest part, the nut on the opposite side of the o2 housing, can become the one of if not the easiest part. The only thing really required is to remove the wastegate actuator arm. That little guy sits directly above the nut so remove it and you'll have plenty of room to torque on with a close-ended wrench. It kind of looks like the gentleman above actually did this, but did not describe it in the directions because you can see a random wrench sticking out of the area when he's talking about installing the ets downpipe after the removal. Whatever works...just trying to save someone else a lot of time and pain...and yes you will need a tune after this job is done. It isn't detrimental to the engine if you don't but if you want to take advantage of that beautiful piece of metal you just spent hours installing then yes, splurge the extra money on a tune, you won't regret it  .
.
*Correction: He did not remove the actuator arm. I couldn't see the picture when I was posting this. You can however see how the actuator arm would get in the way of someone trying to get some leverage on that damn nut. Best of luck.
.*Correction: He did not remove the actuator arm. I couldn't see the picture when I was posting this. You can however see how the actuator arm would get in the way of someone trying to get some leverage on that damn nut. Best of luck
.
Last edited by badassmotha4000; Jan 10, 2014 at 05:14 PM.

The following users liked this post:
milford (Jul 3, 2016)
Jan 11, 2014, 06:08 PM
#15
Newbie

Join Date: Aug 2013
Location: Canada
Posts: 8
Likes: 0
Received 0 Likes
on
0 Posts
I never had to hit anything with a hammer. Jeremy Clarkson would be proud. In all honesty though, good write up. I bought the same downpipe and it's definitely something else.