How to Install Varis STYLE CF Rear Diffuser
 Apr 4, 2015, 02:44 AM
#1
Newbie
Thread Starter
How to Install Varis STYLE CF Rear Diffuser
This is a how to on installing a CF Rear Varis STYLE diffuser. I'll make this as simple as possible but it's a lot of mounting and un-mounting, definitely a 2 person job.
Should take ~3 hours if you take your time ~5 hours. For this we took our time to make sure it's perfect.
Tools Required:
-Jack & 2 Stands
-Dremel
-10mm socket and ratchet, and cresent wrench (may vary this was the size of my hardware)
-14mm socket and ratchet (for sway bar)
-sharpie
-phillips and flat head screwdrivers (push pins)
-short phillips (for the screw push pins if you don't take your rear wheels off)
I used a vice grip and a phillips head off my electric screwdriver.
-removable locktite (optional)
1. Jack up the rear of the car carefully and make sure you left it in gear and ebrake pulled. Get it on some jack stands please
2. Start by mounting these brackets on the diffuser and tighten them enough so they won't spin.
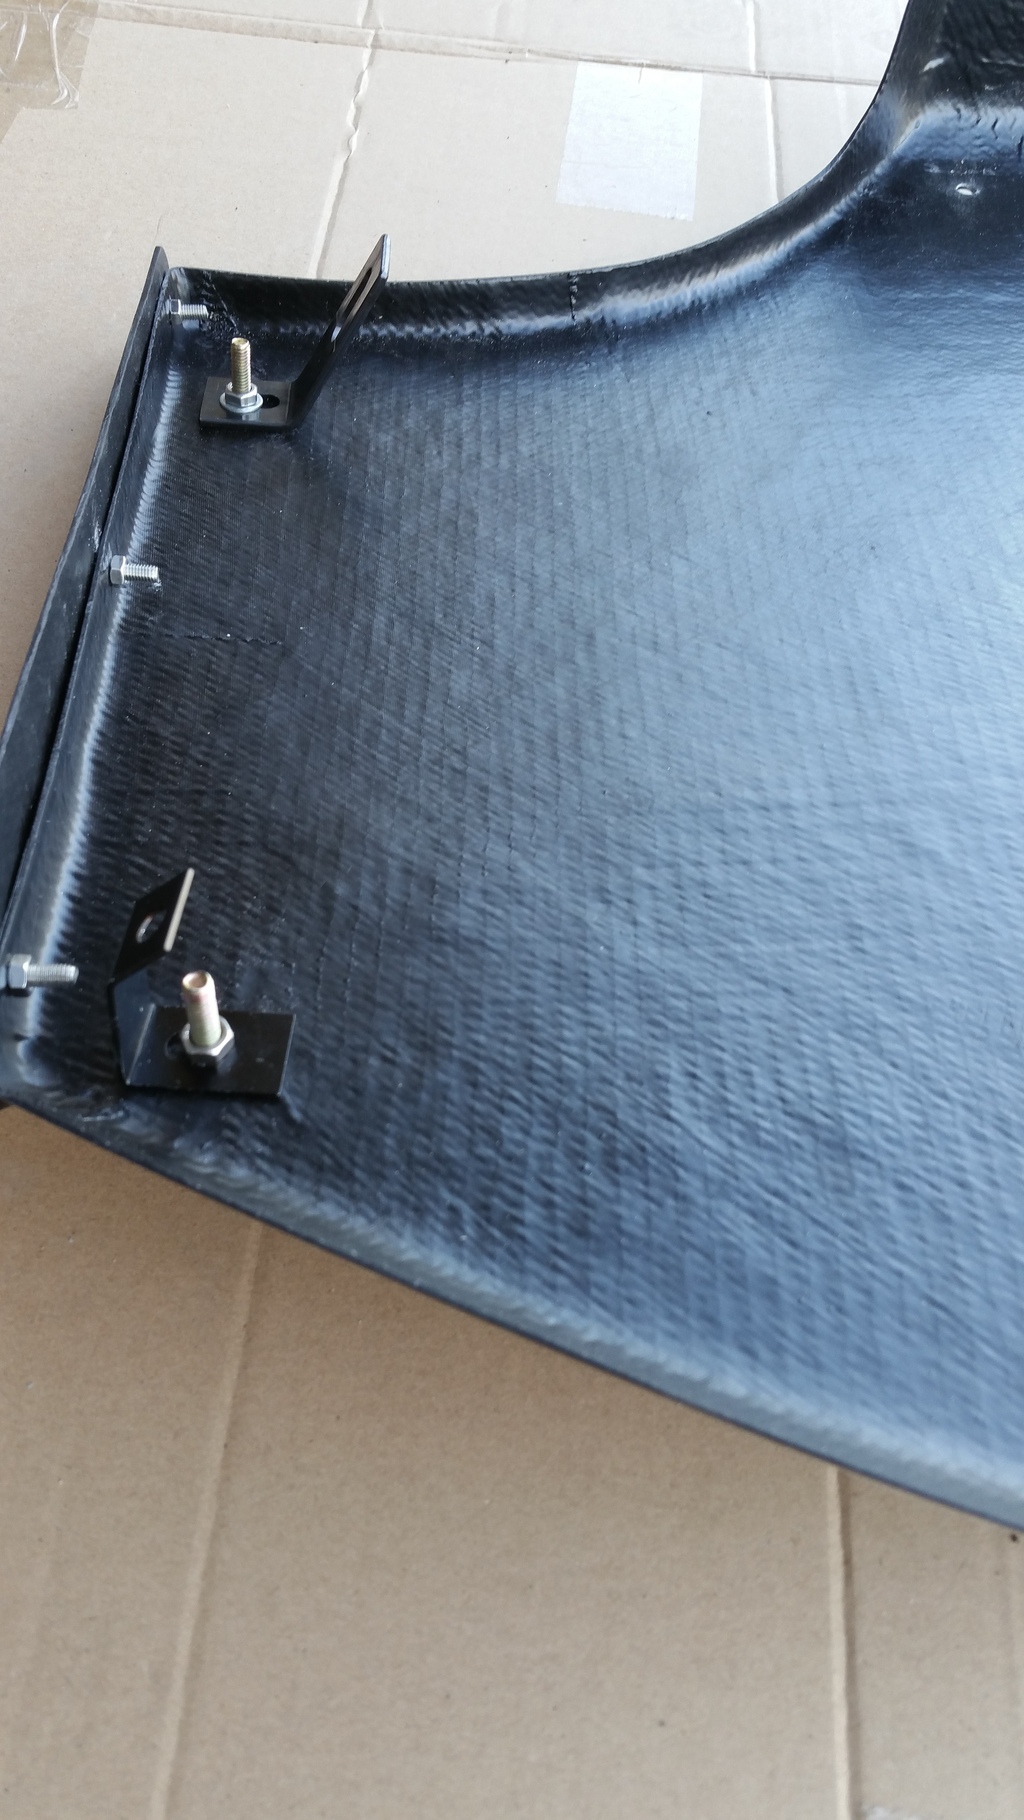
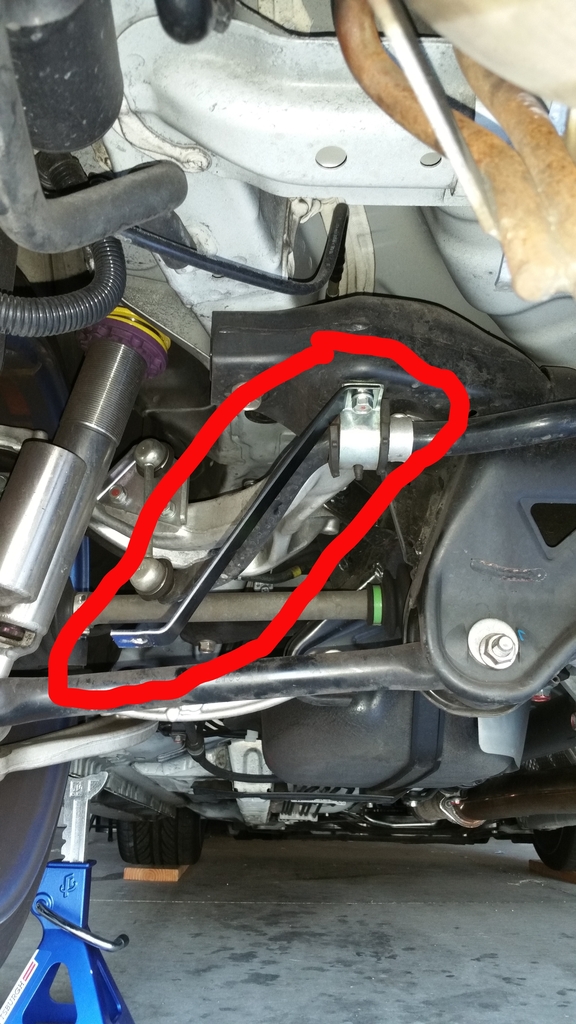
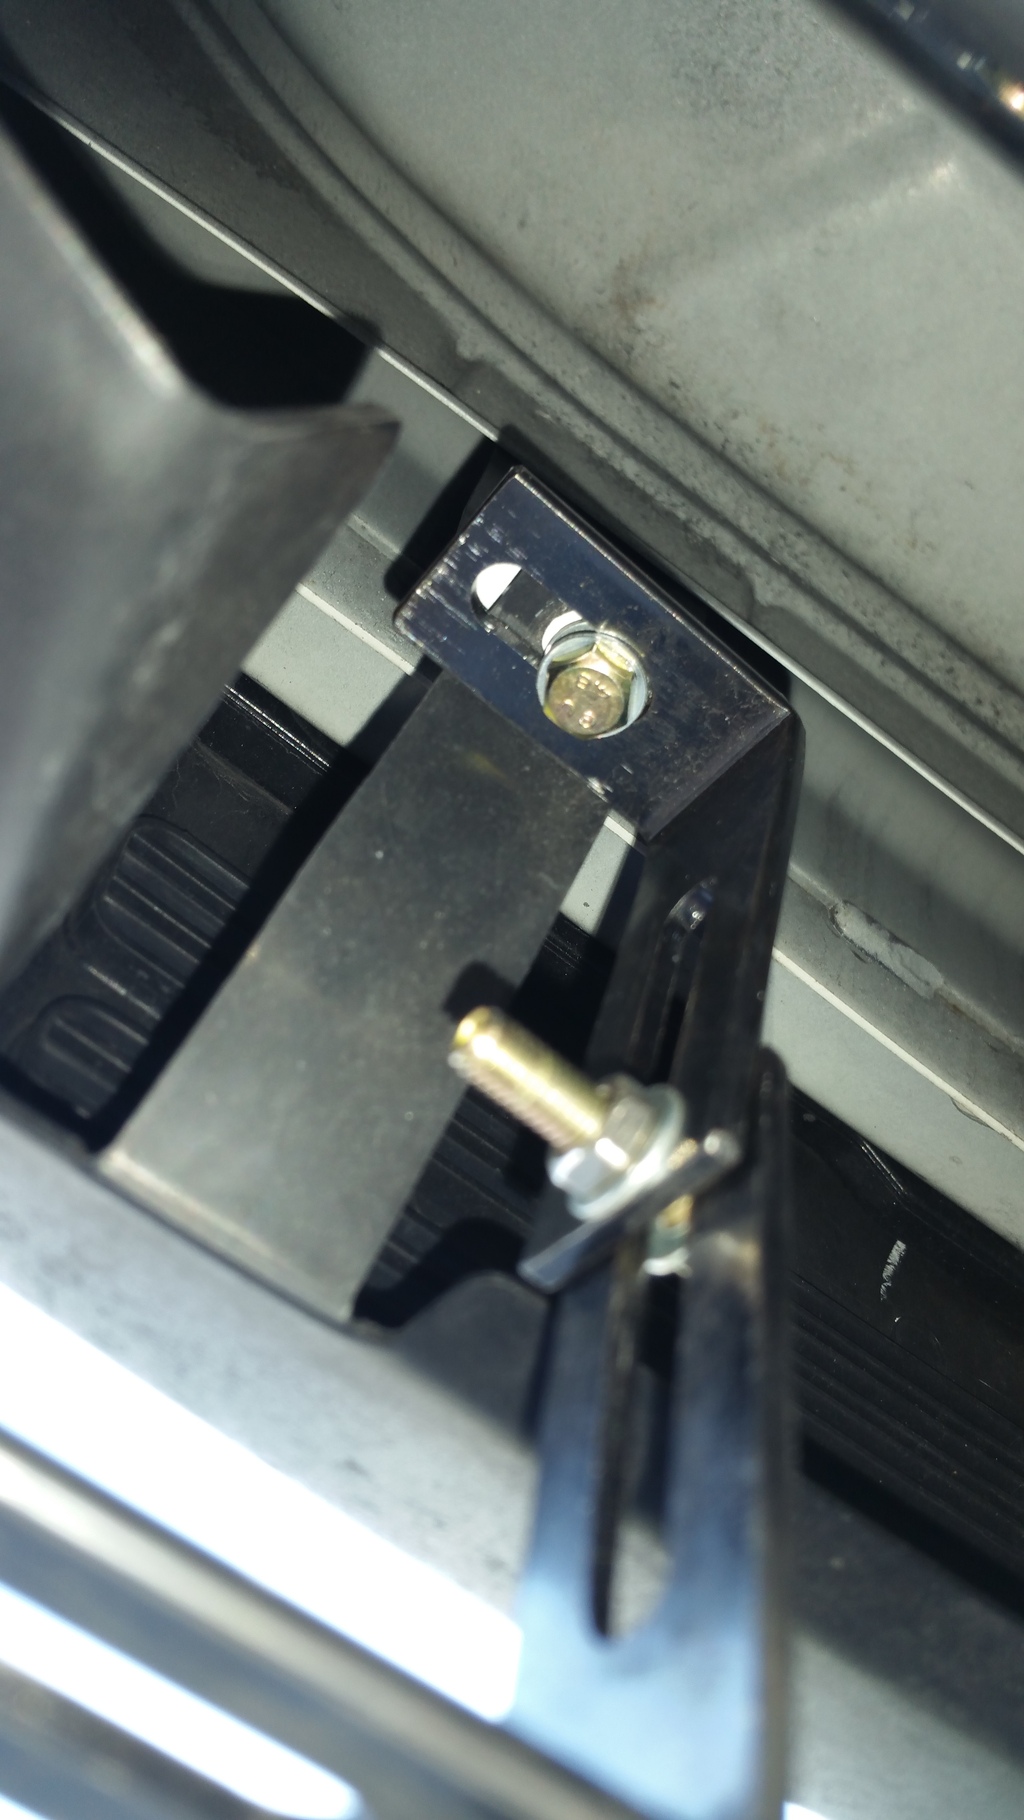
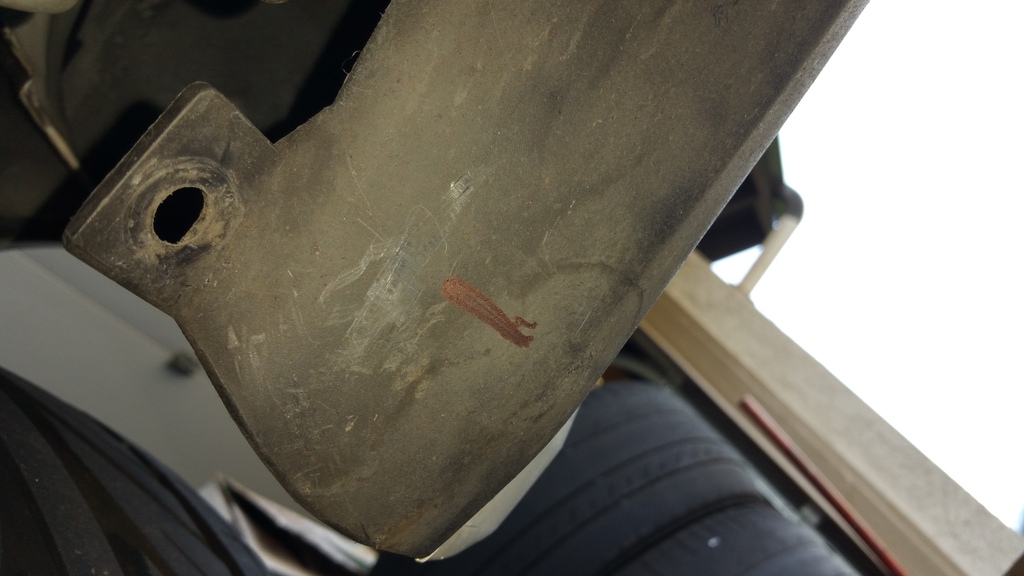
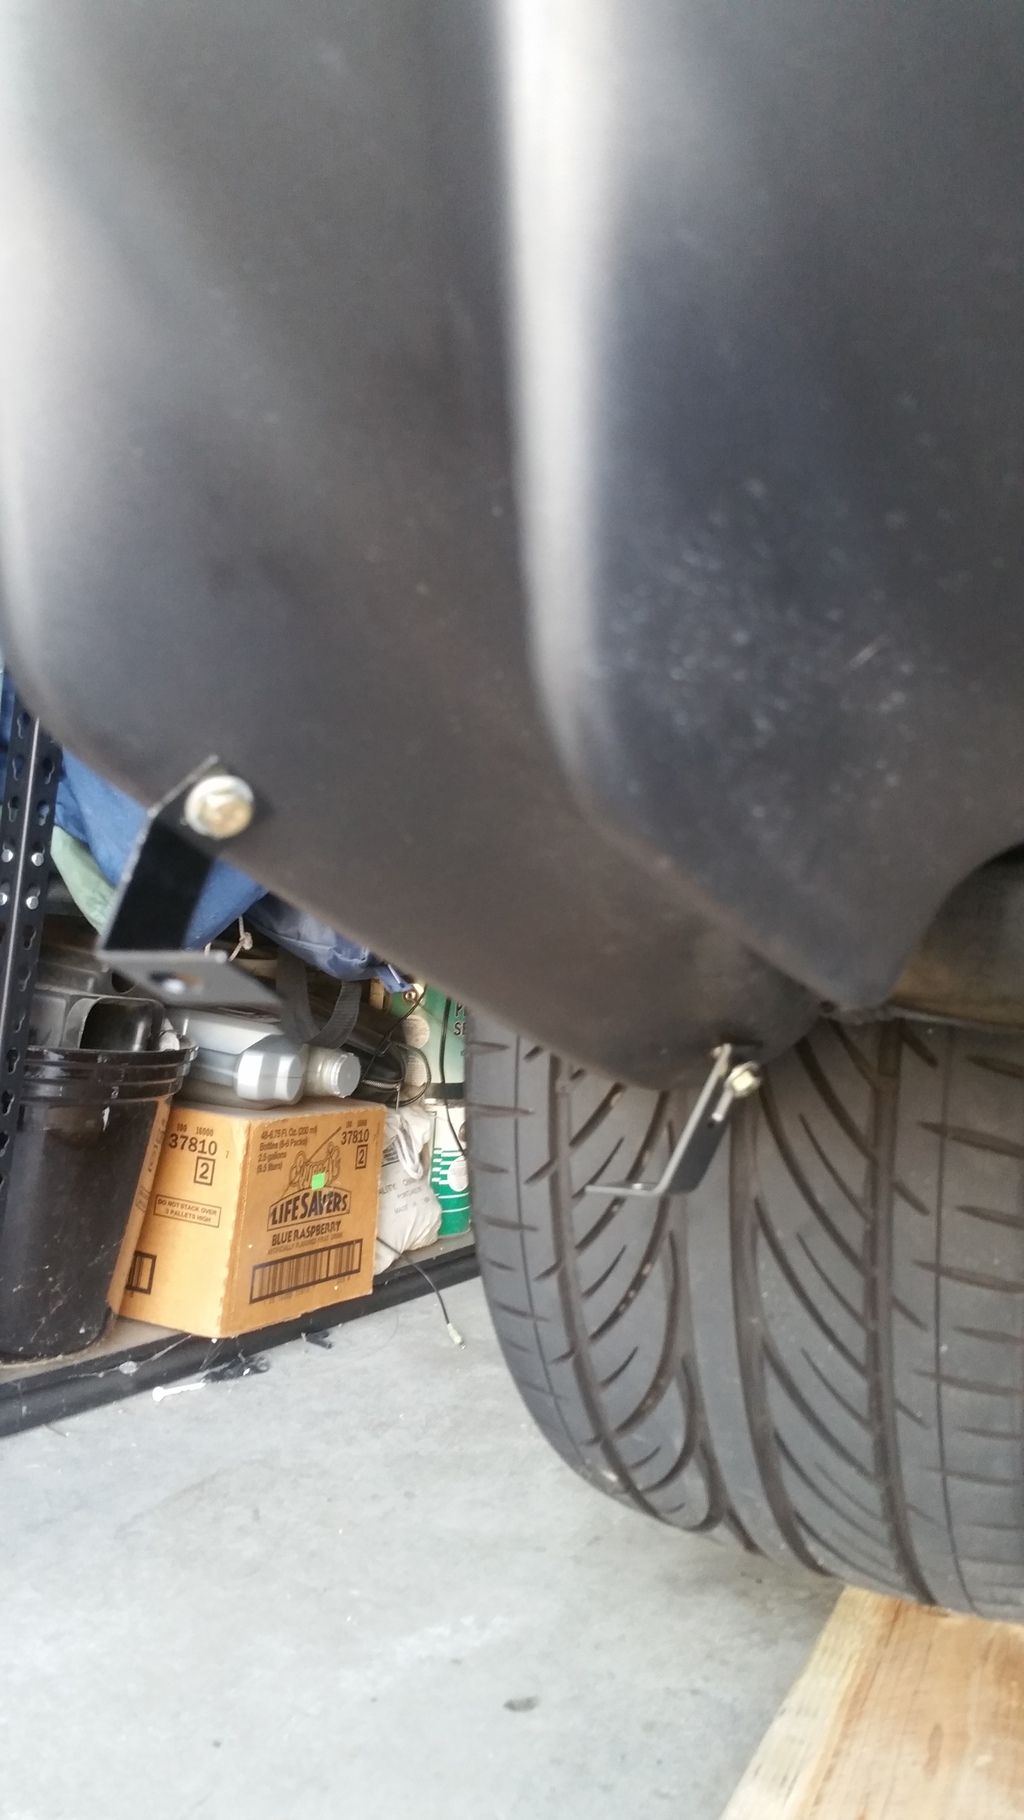
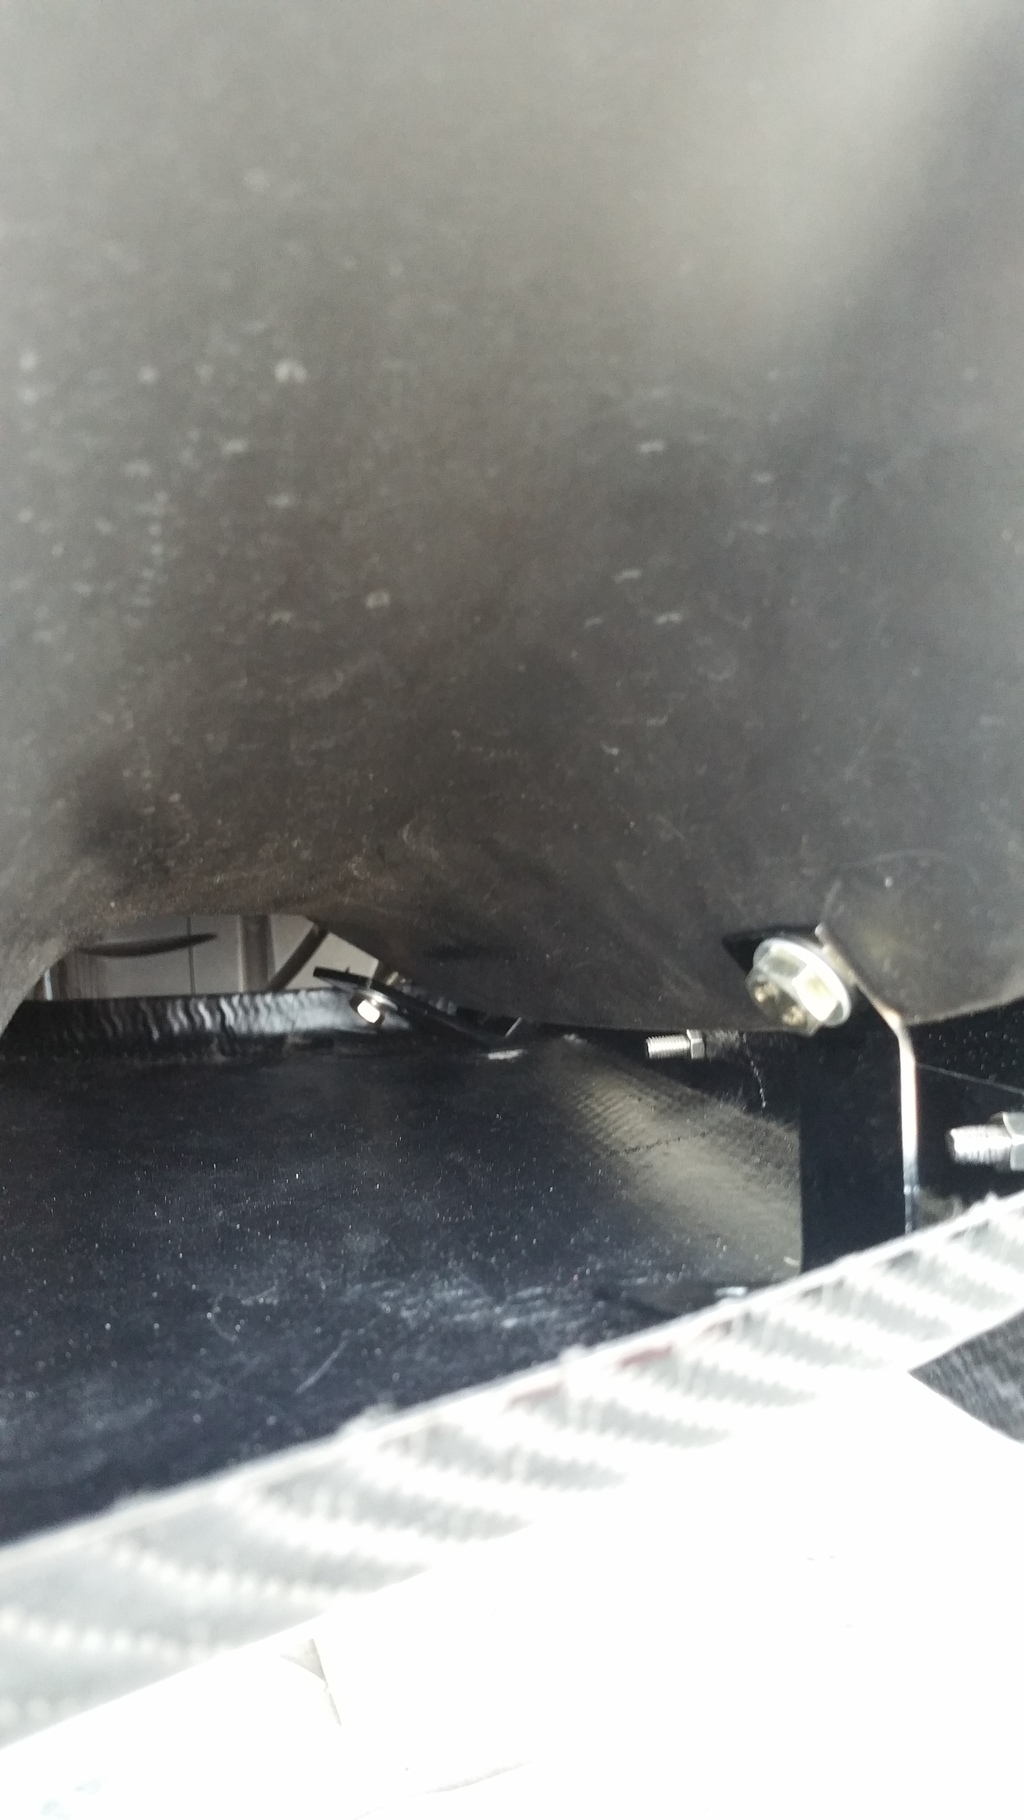
3. Mount these brackets to the car. The long one will go on the sway bar and will face outwards to the tires.
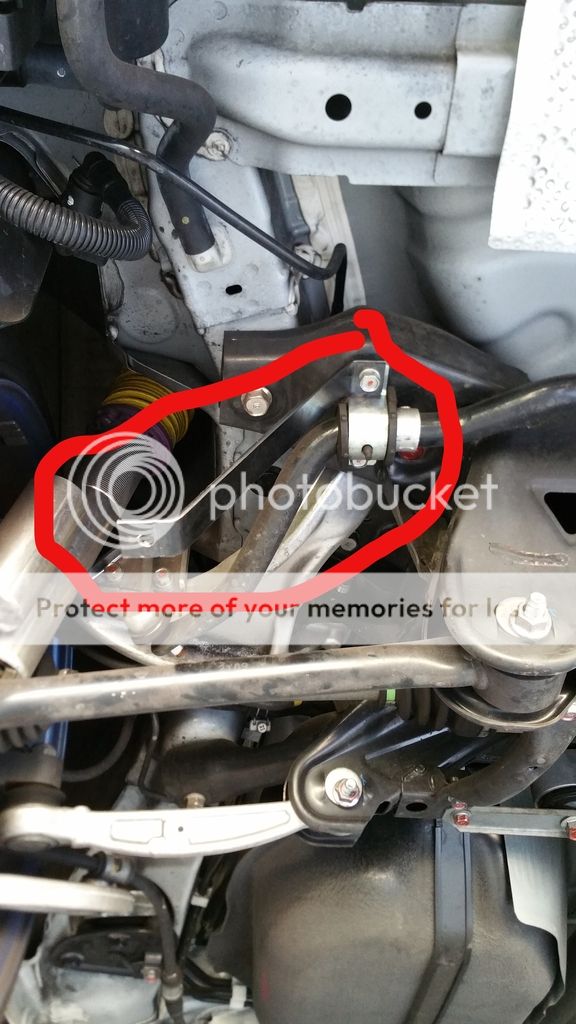
4. The shorter brackets that look more like an "L" will go to the diffuser support tab that holds the diffuser to the bumper which is closes to the rear of the car. Mount the one to the tab then mount the other "L" looking bracket to the first one already mounted. Allow them to be loose enough to easily move up and down.
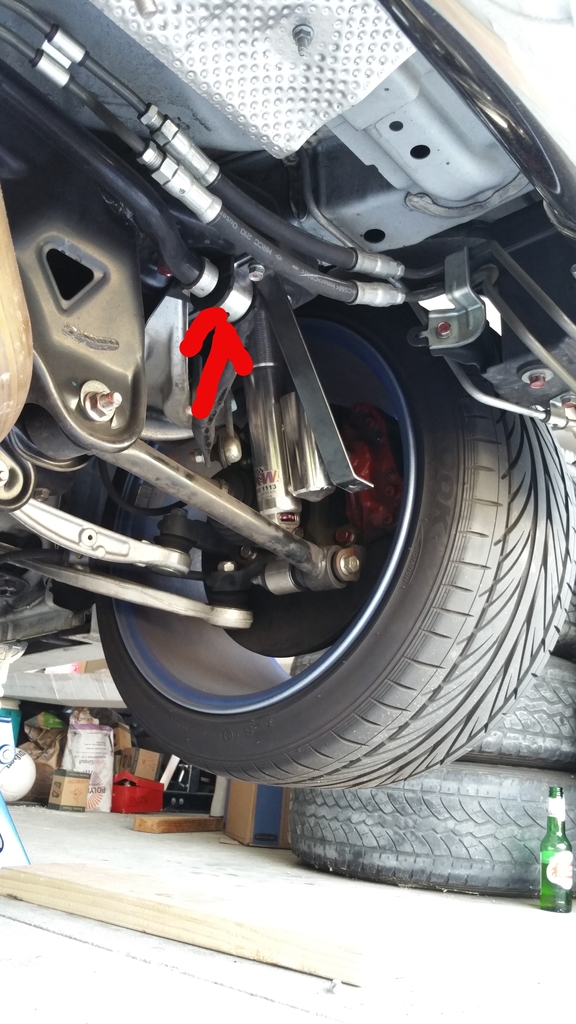
5. Now you're gonna want to test fit it so hold the bolts in the holes that are closer to the front of the car and push the bolts through the bracket mounted to the sway bar WHILE holding up the rear part to the plastic stock diffuser. If it mounts up fine and clears your exhaust and other parts you are good to skip to step 7.
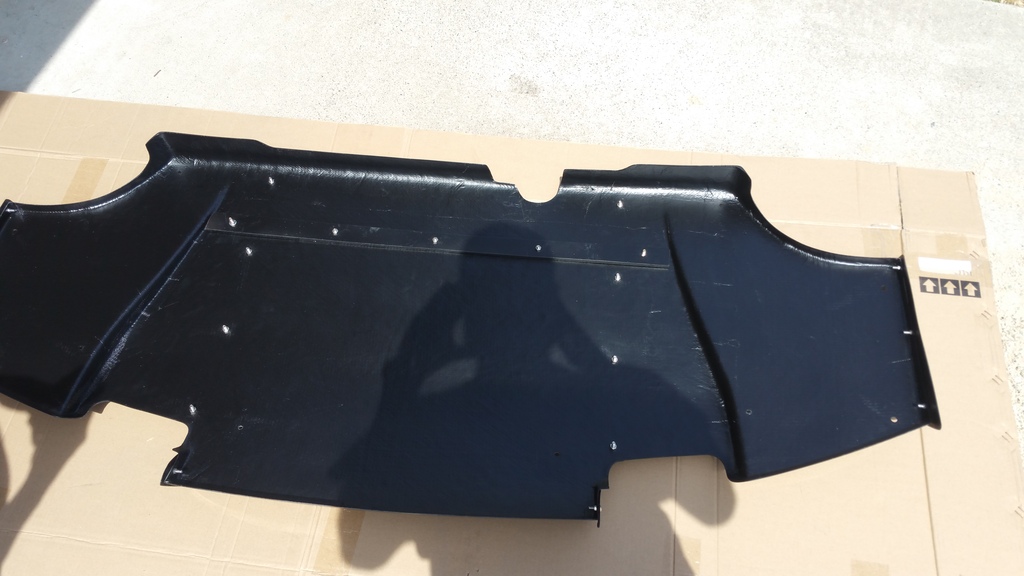
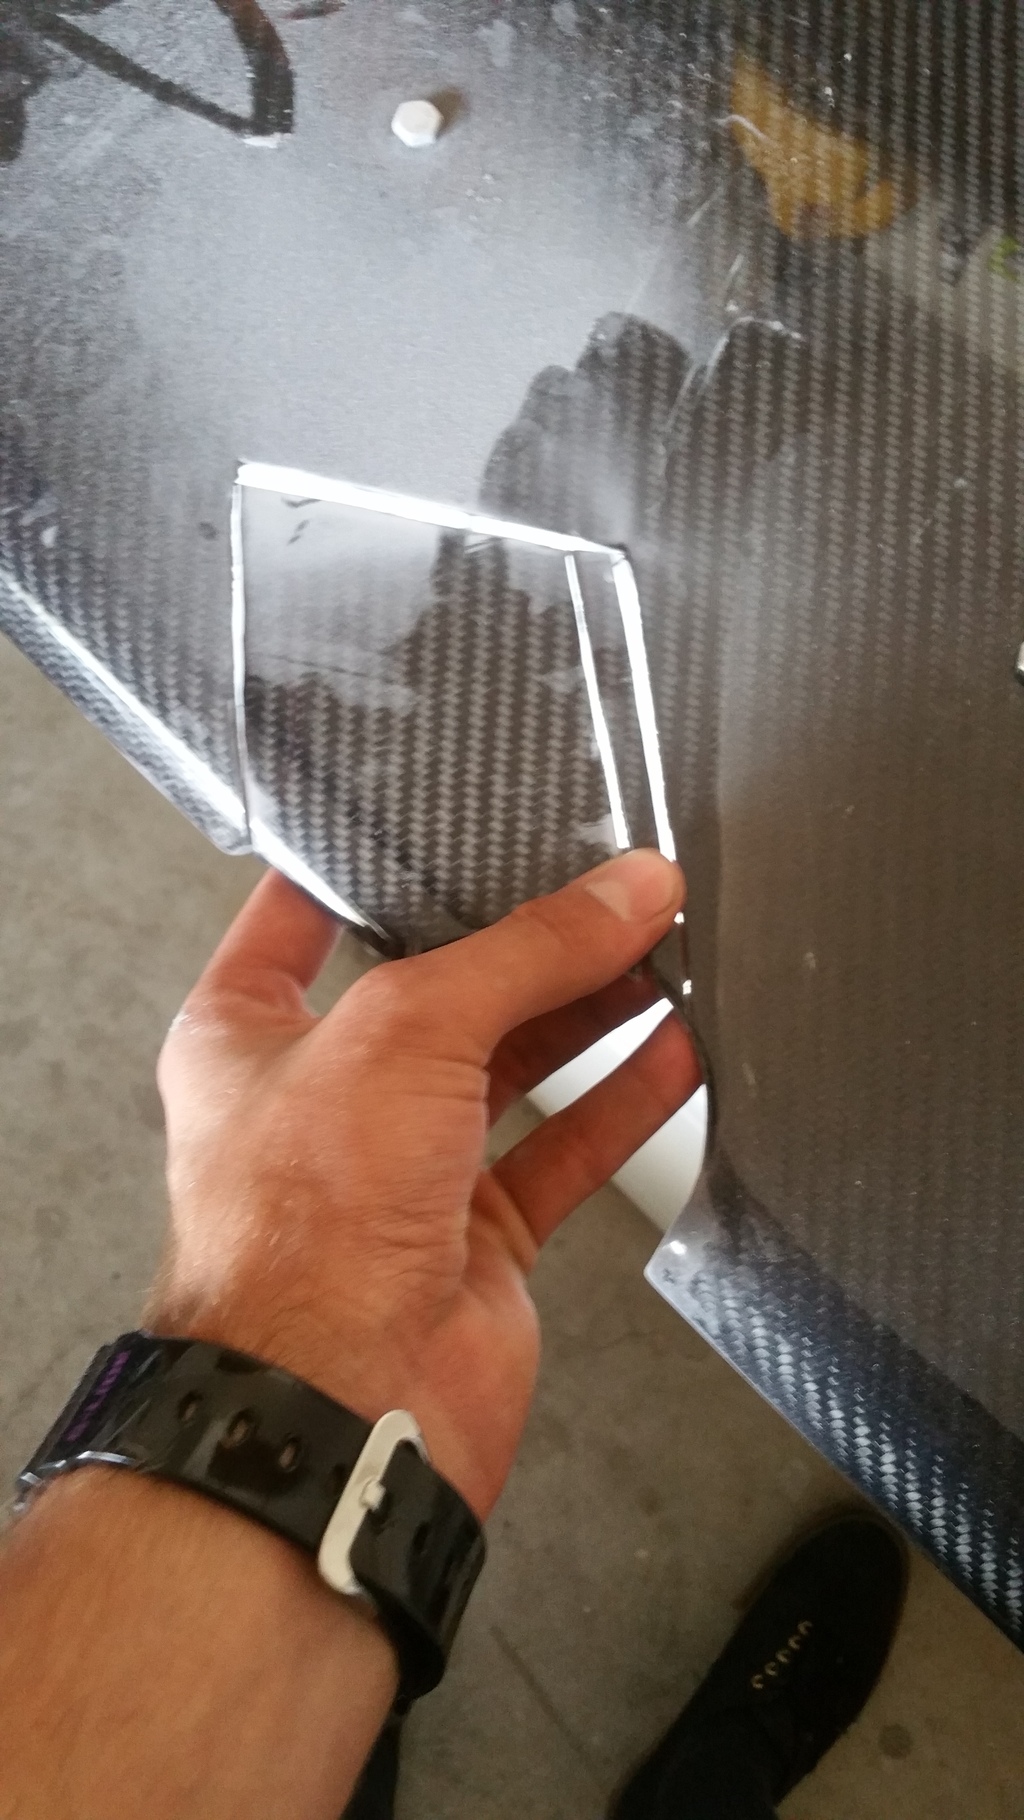
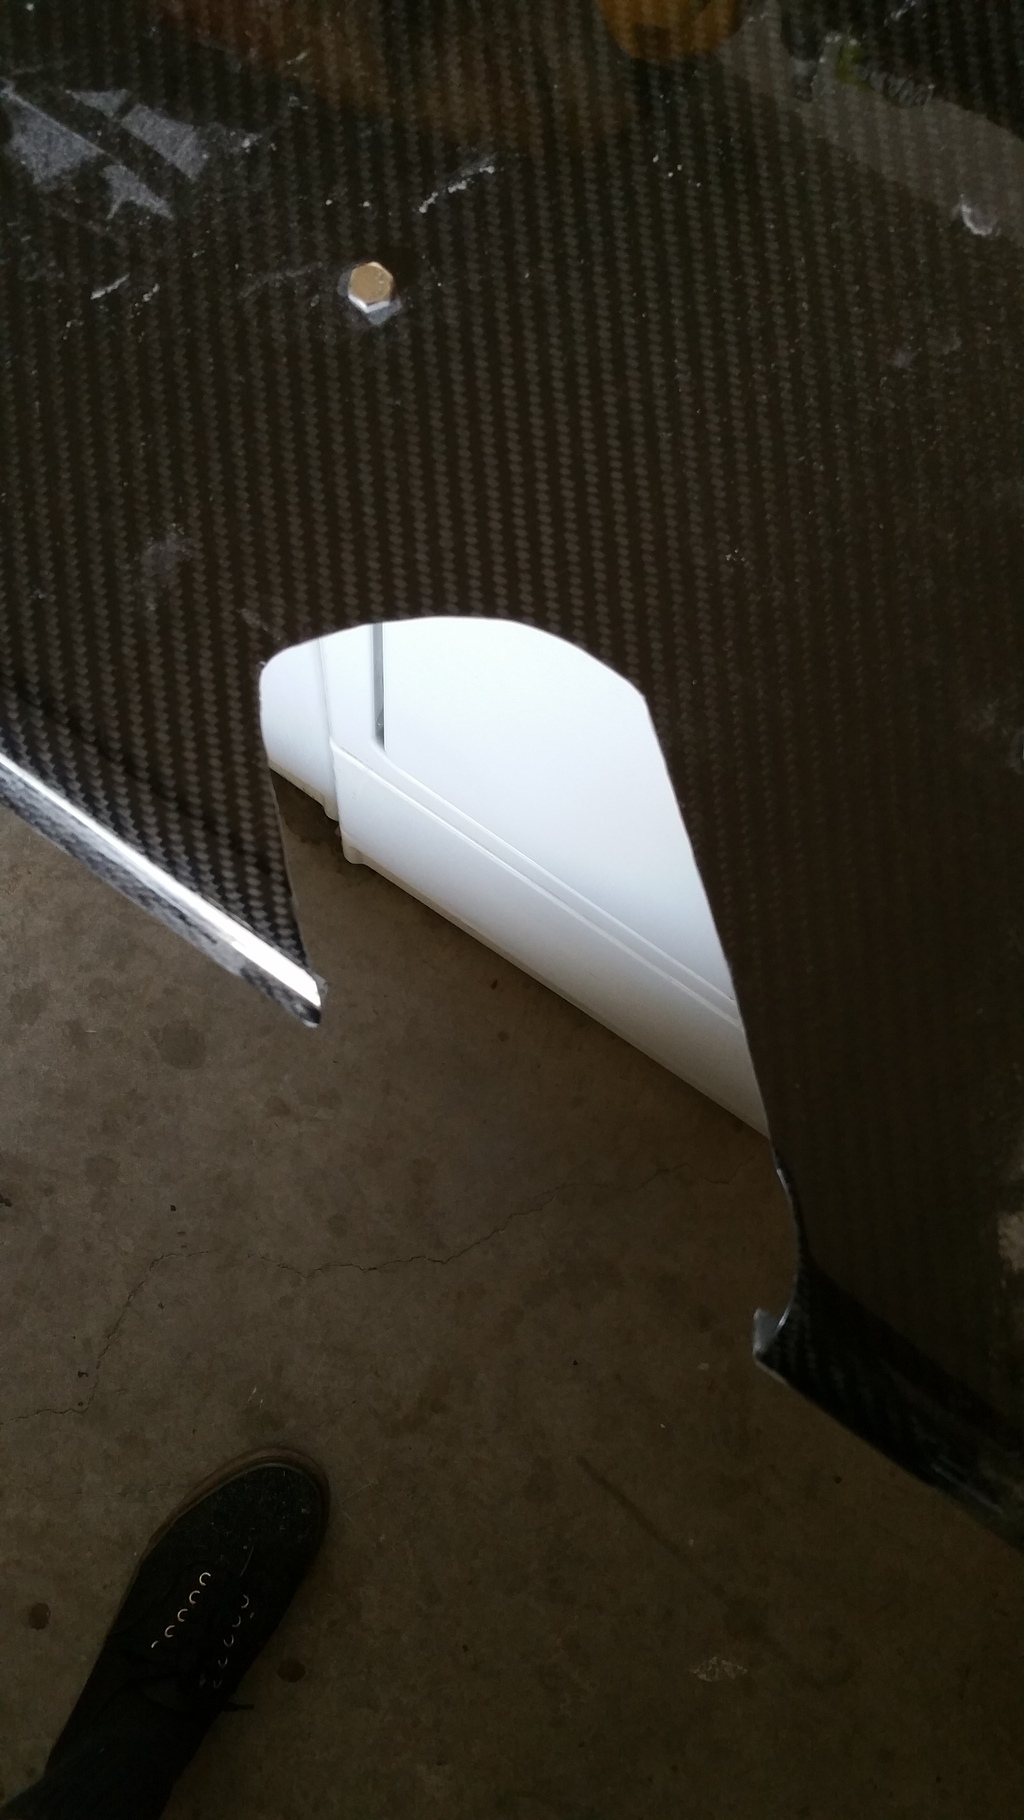
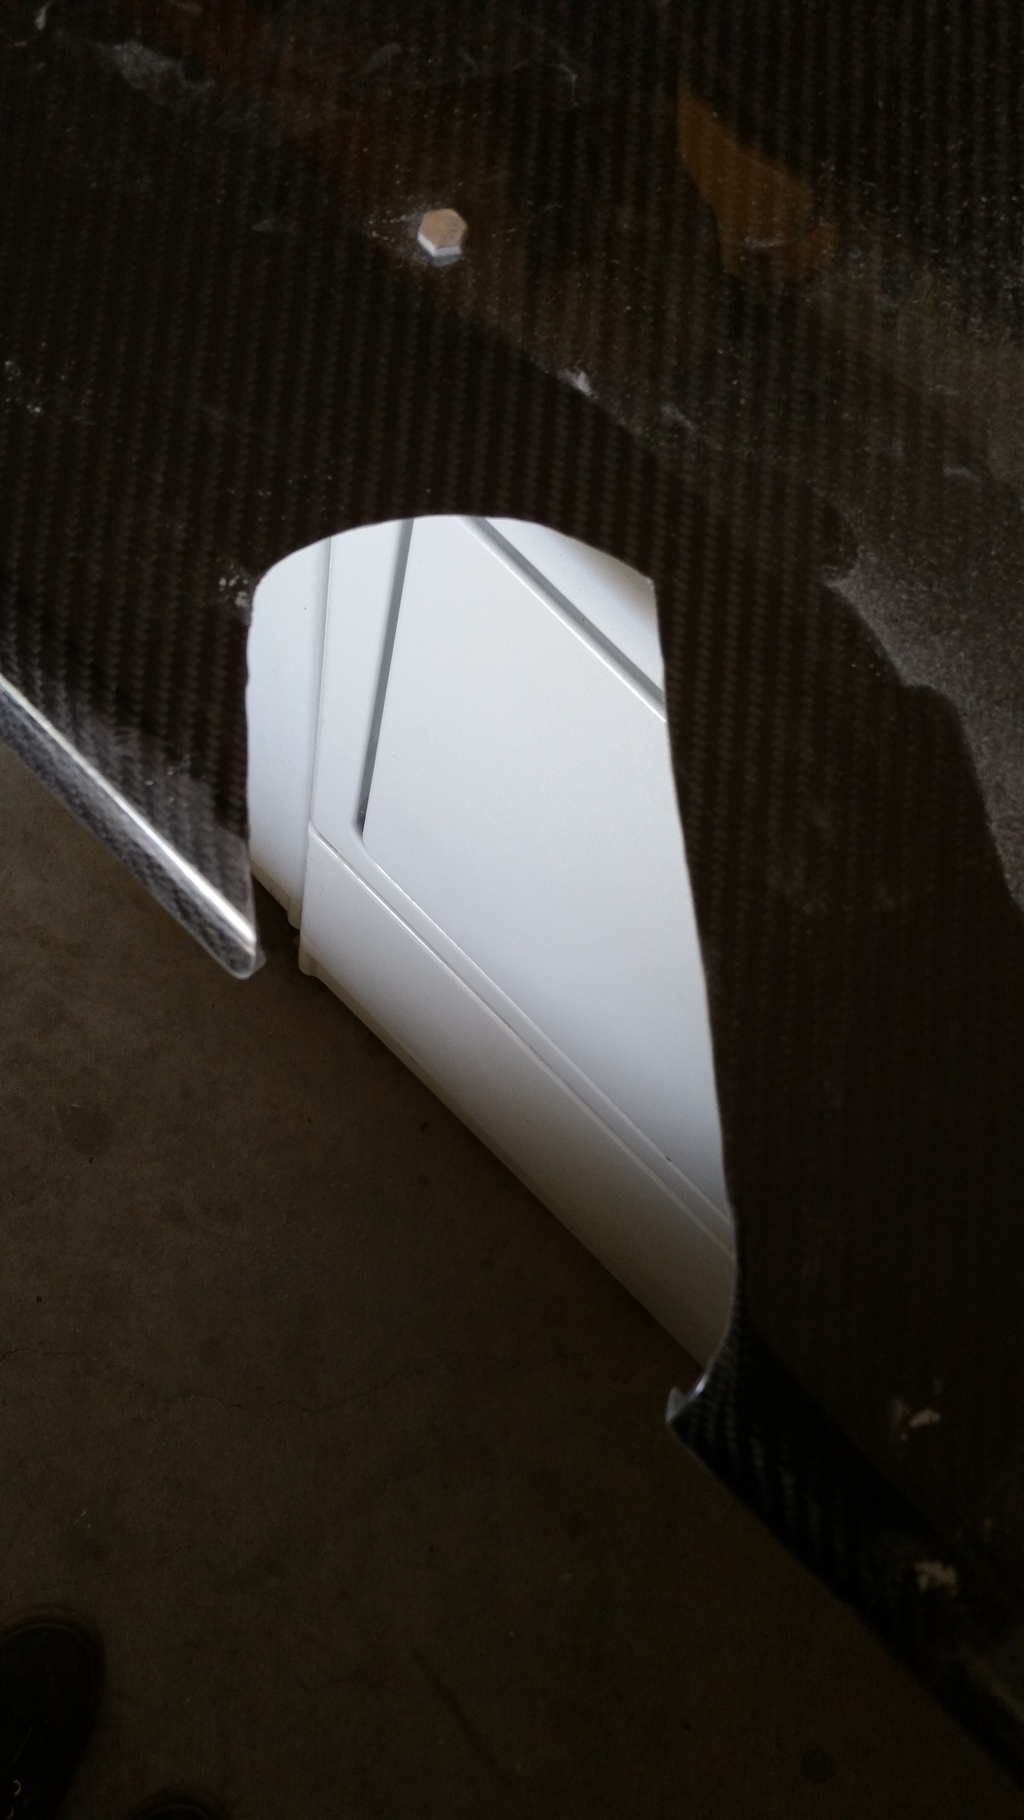
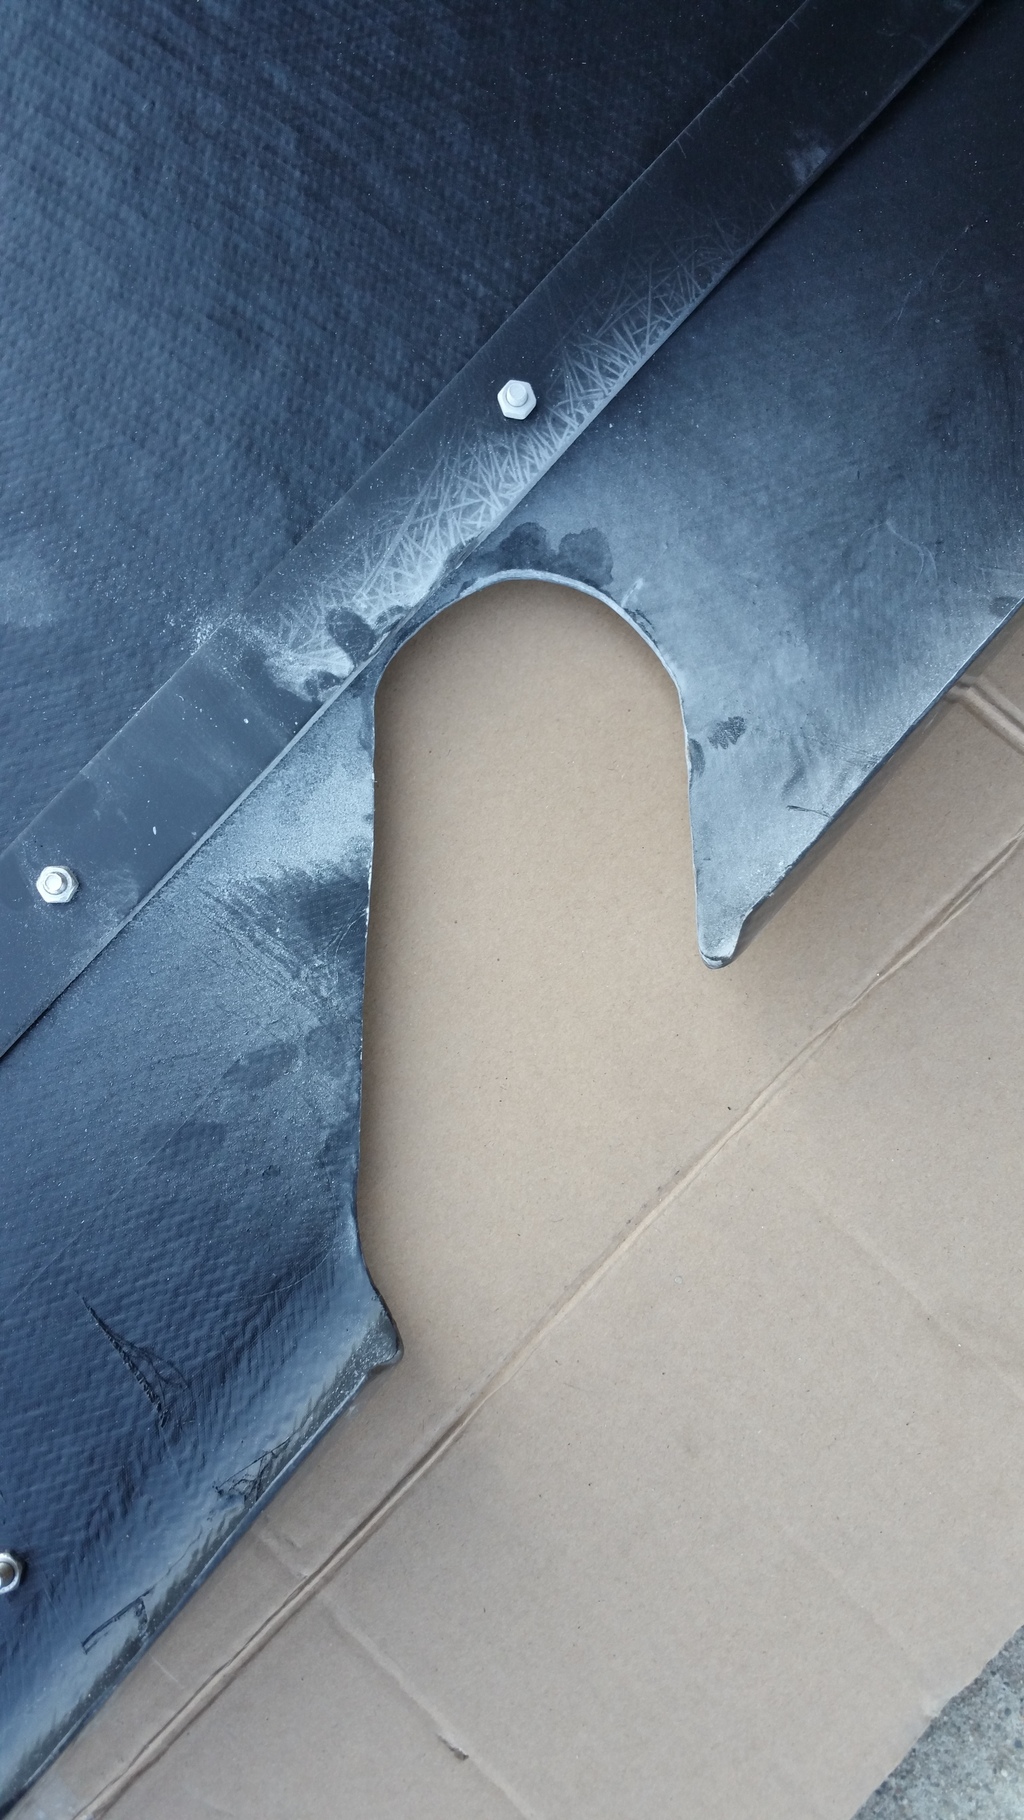
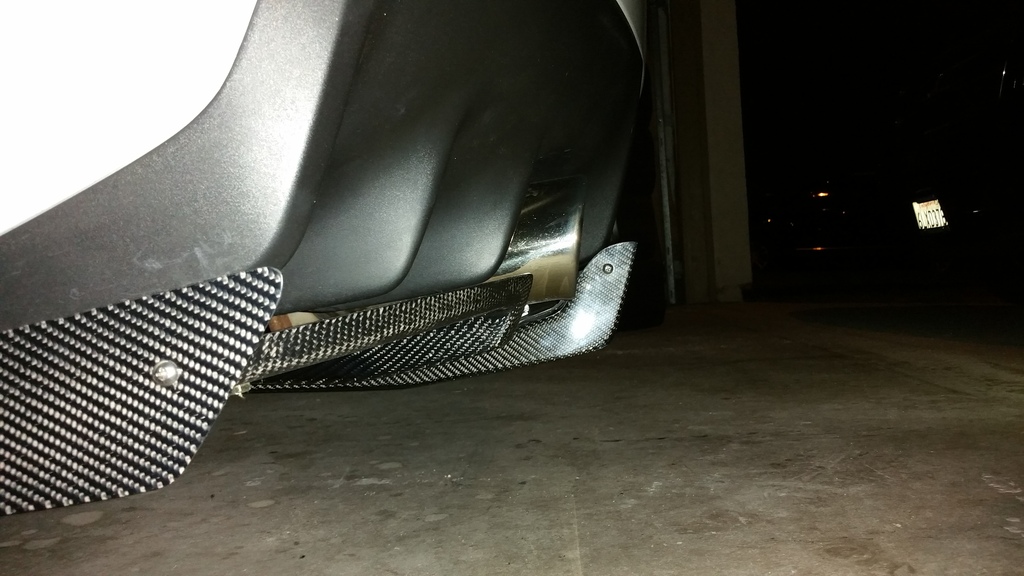
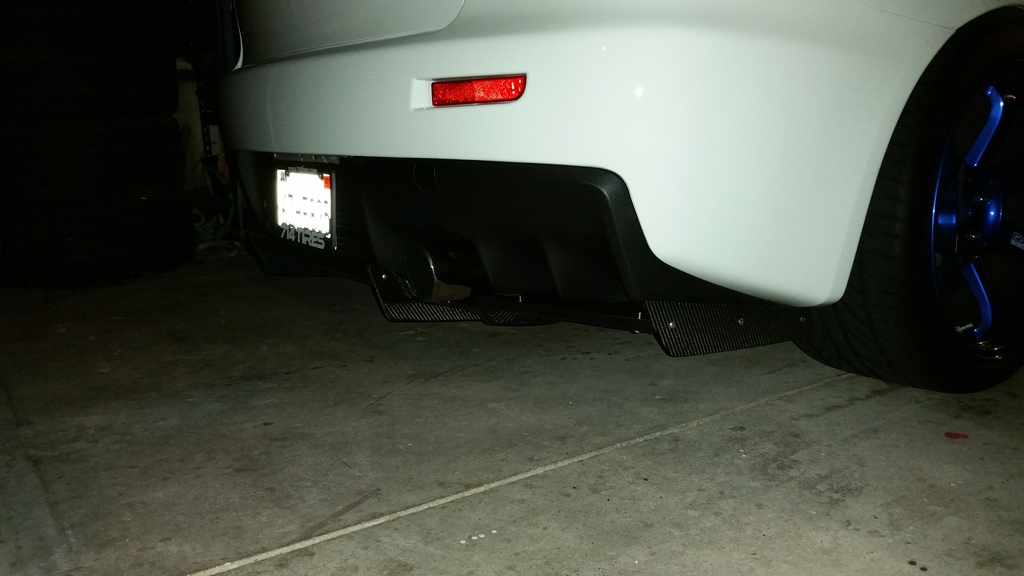
6. Pull the diffuser off. Now for the cutting. Now you have a general idea of how it will mount and where to cut the CF diffuser. I will post pics of before the cut and through each cut. I used a dremel which worked wonders and was super easy to use. After that I used the sanding bit to clean it up and round out a hole. This was fun although scary... In the 3rd pic you will notice a sharpie line that was used for reference which can be cleaned off with rubbing alcohol if necessary. I also got a little extra sharpie on the OEM diffuser which came off with simply WINDEX <3
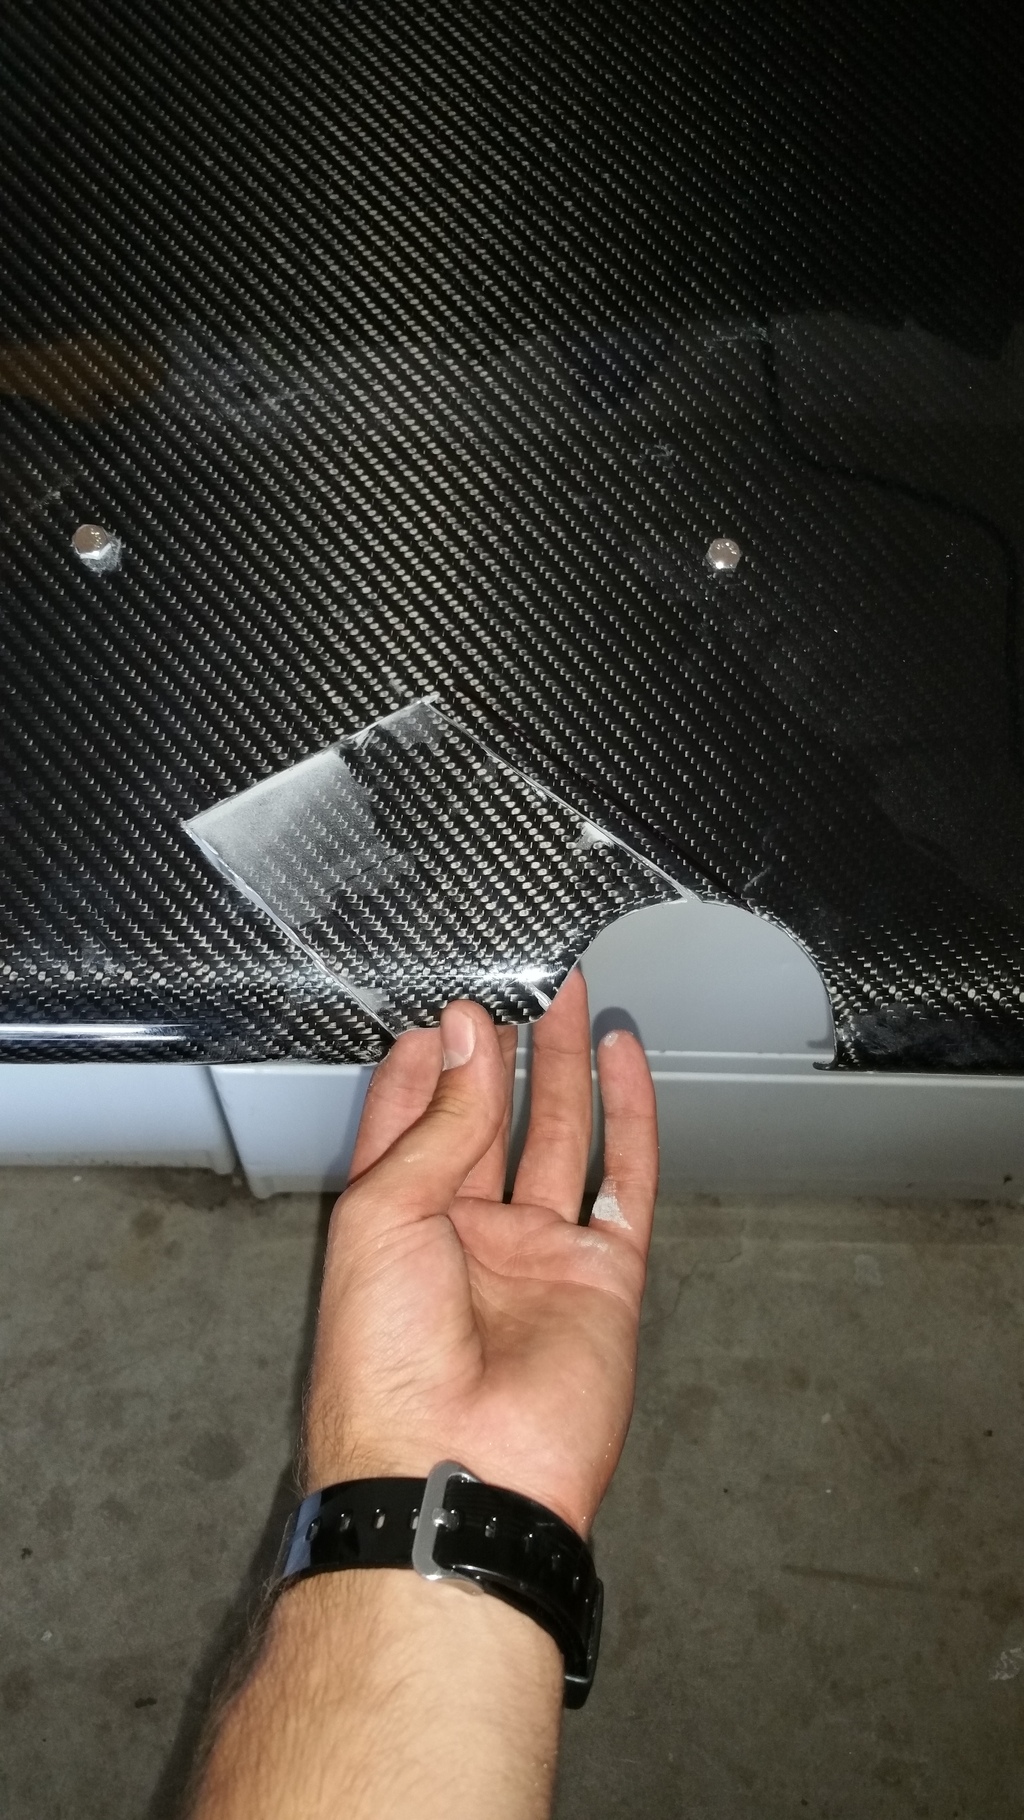
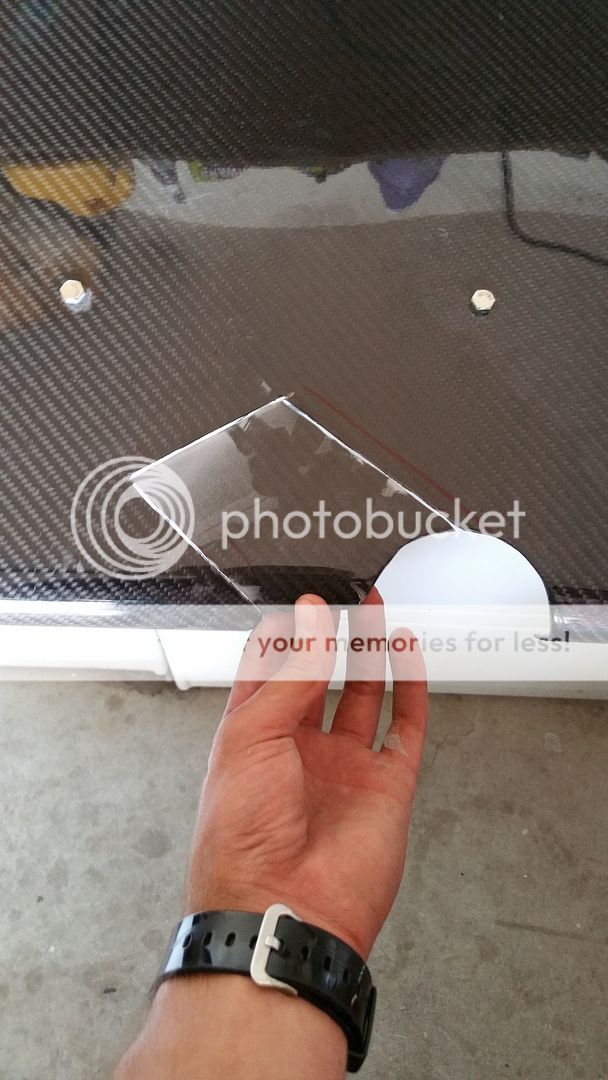
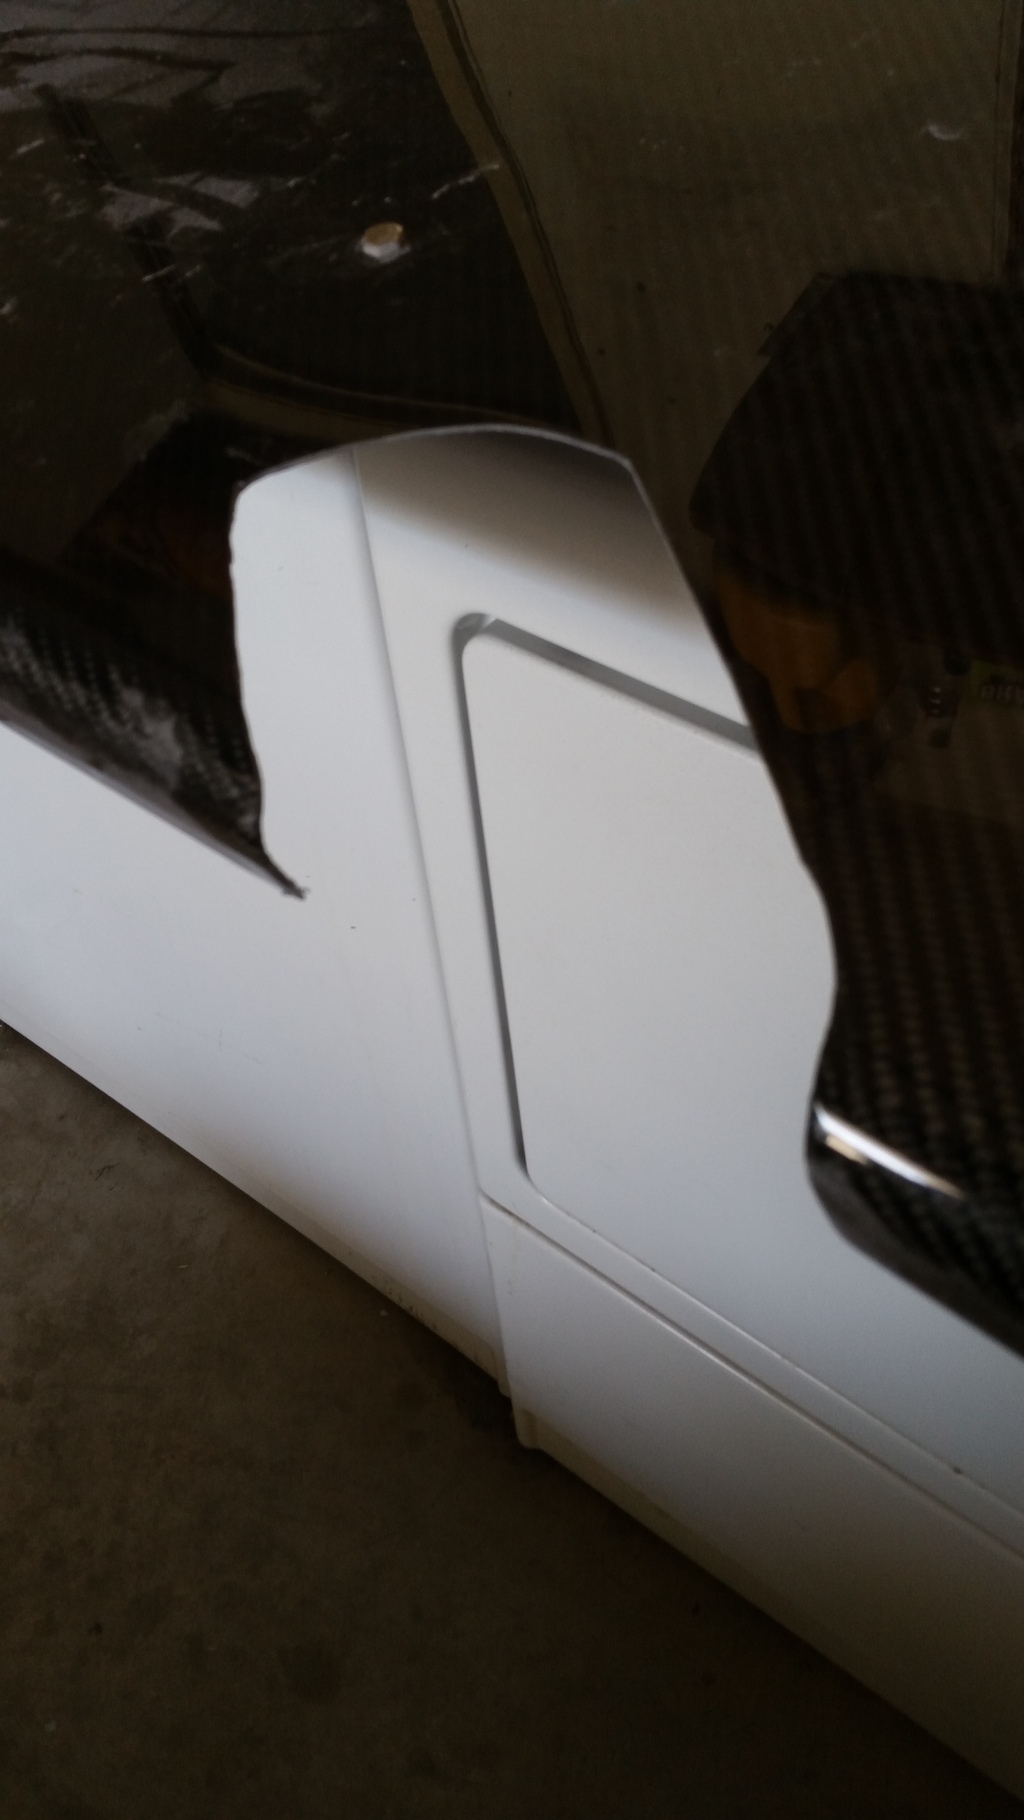
This one being the last one you can see how close I got to the support "beam" at the finished point. It look a good 6 times to make sure we got it right with the ETS v2 exhaust. It still barely touched the support beam if it did at all, but cleared the CF completely.
7. Now that it clears hold it up for a test fit again and mark with sharpie on the OEM diffuser where to drill. Take note in the difference of angle you are marking the sharpie as to the angle the bolt will be going in and adjust drilling accordingly. At this point you should also account for how the rear most brackets are angled on each other that way when you remove the diffuser you can easily torque it down to each other. Mine angled like so...
My markings looked as such.
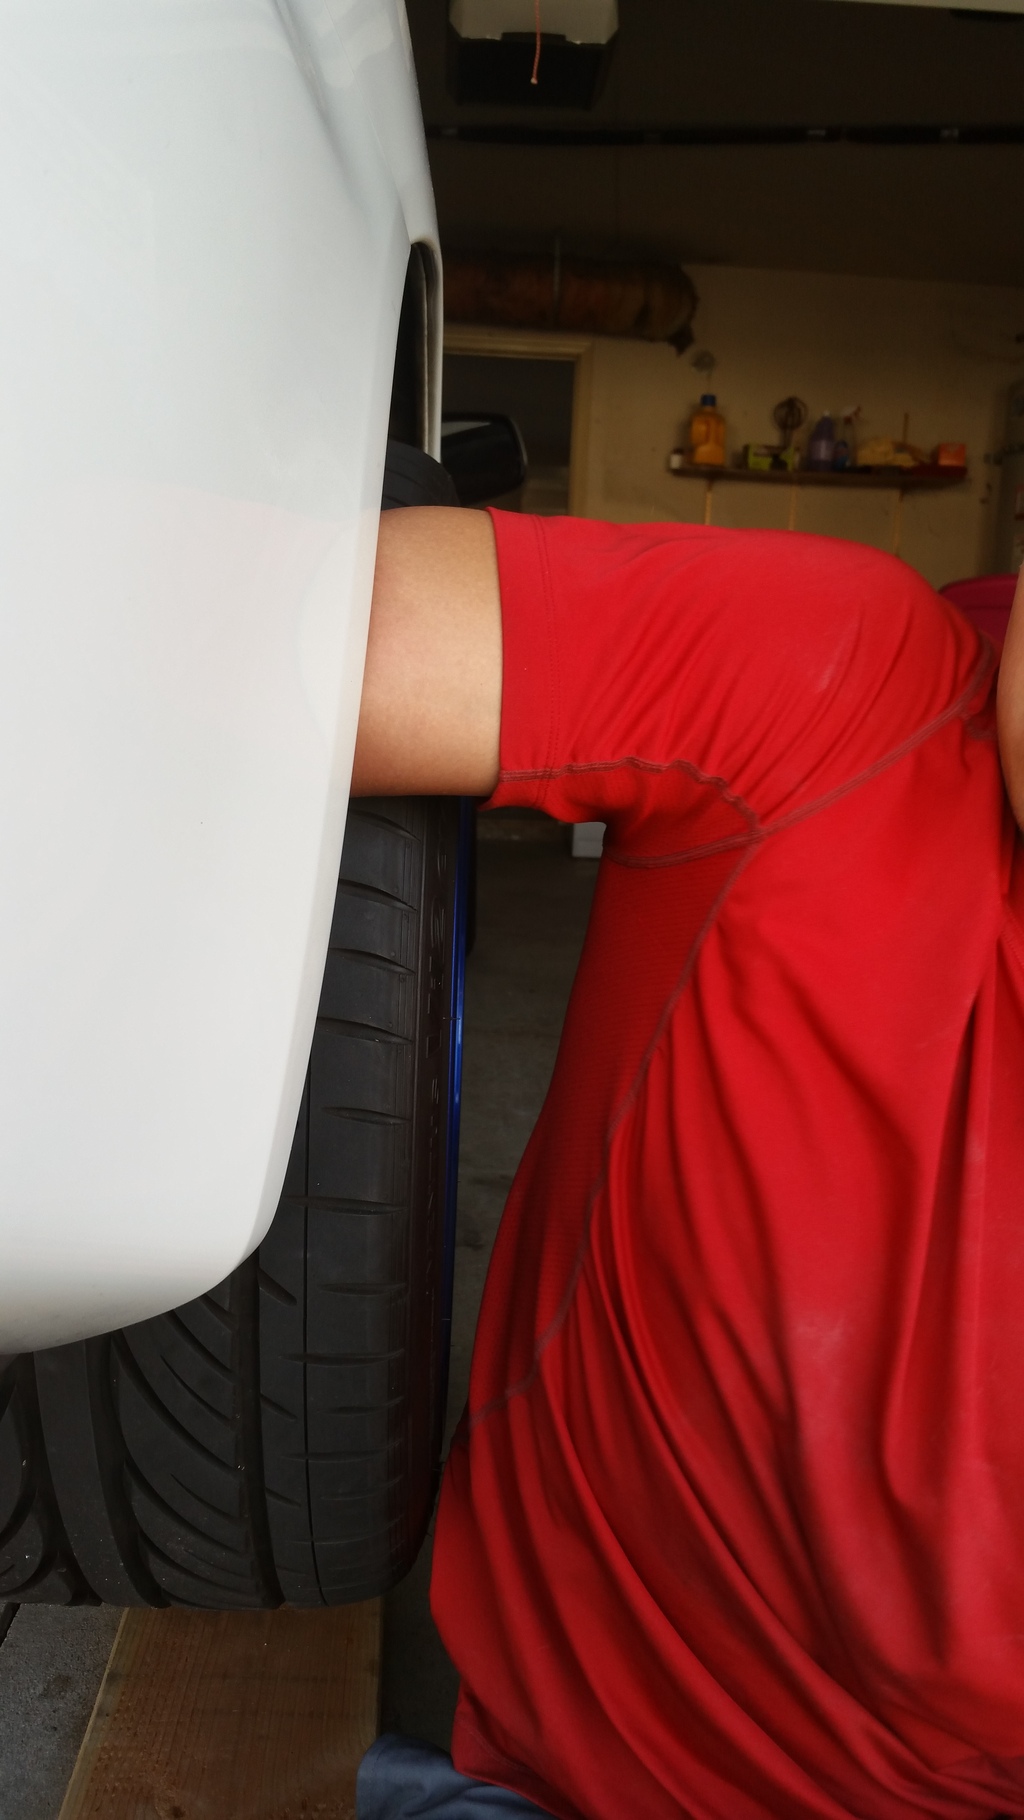
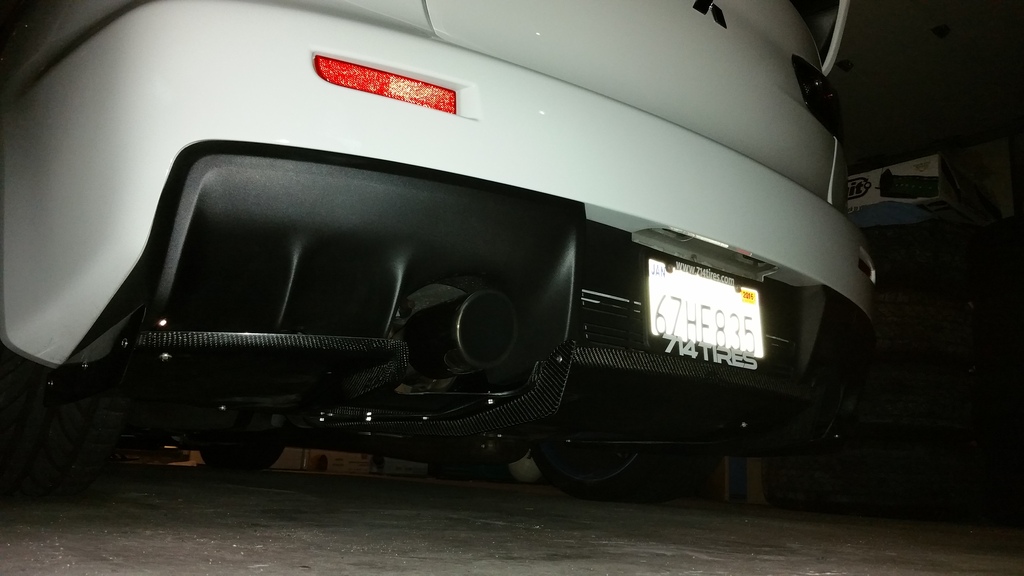
8. Remove the rear splash guards which I can post pics of later if necessary but it involves 2 10mm plastic bolts, 2 push pins, and two screw driver push pins (per side). DO NOT STRIP THE SCREW DRIVER PUSH PINS. A simple left turn 90* should do it otherwise you're doing something wrong and may strip it (push in hard and turn left watching to make sure it doesn't slip).
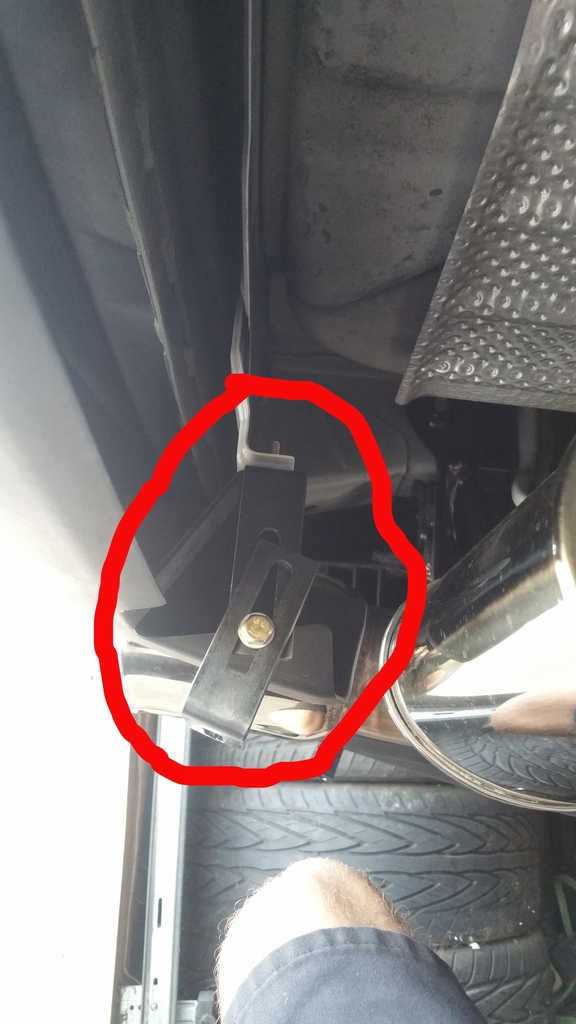
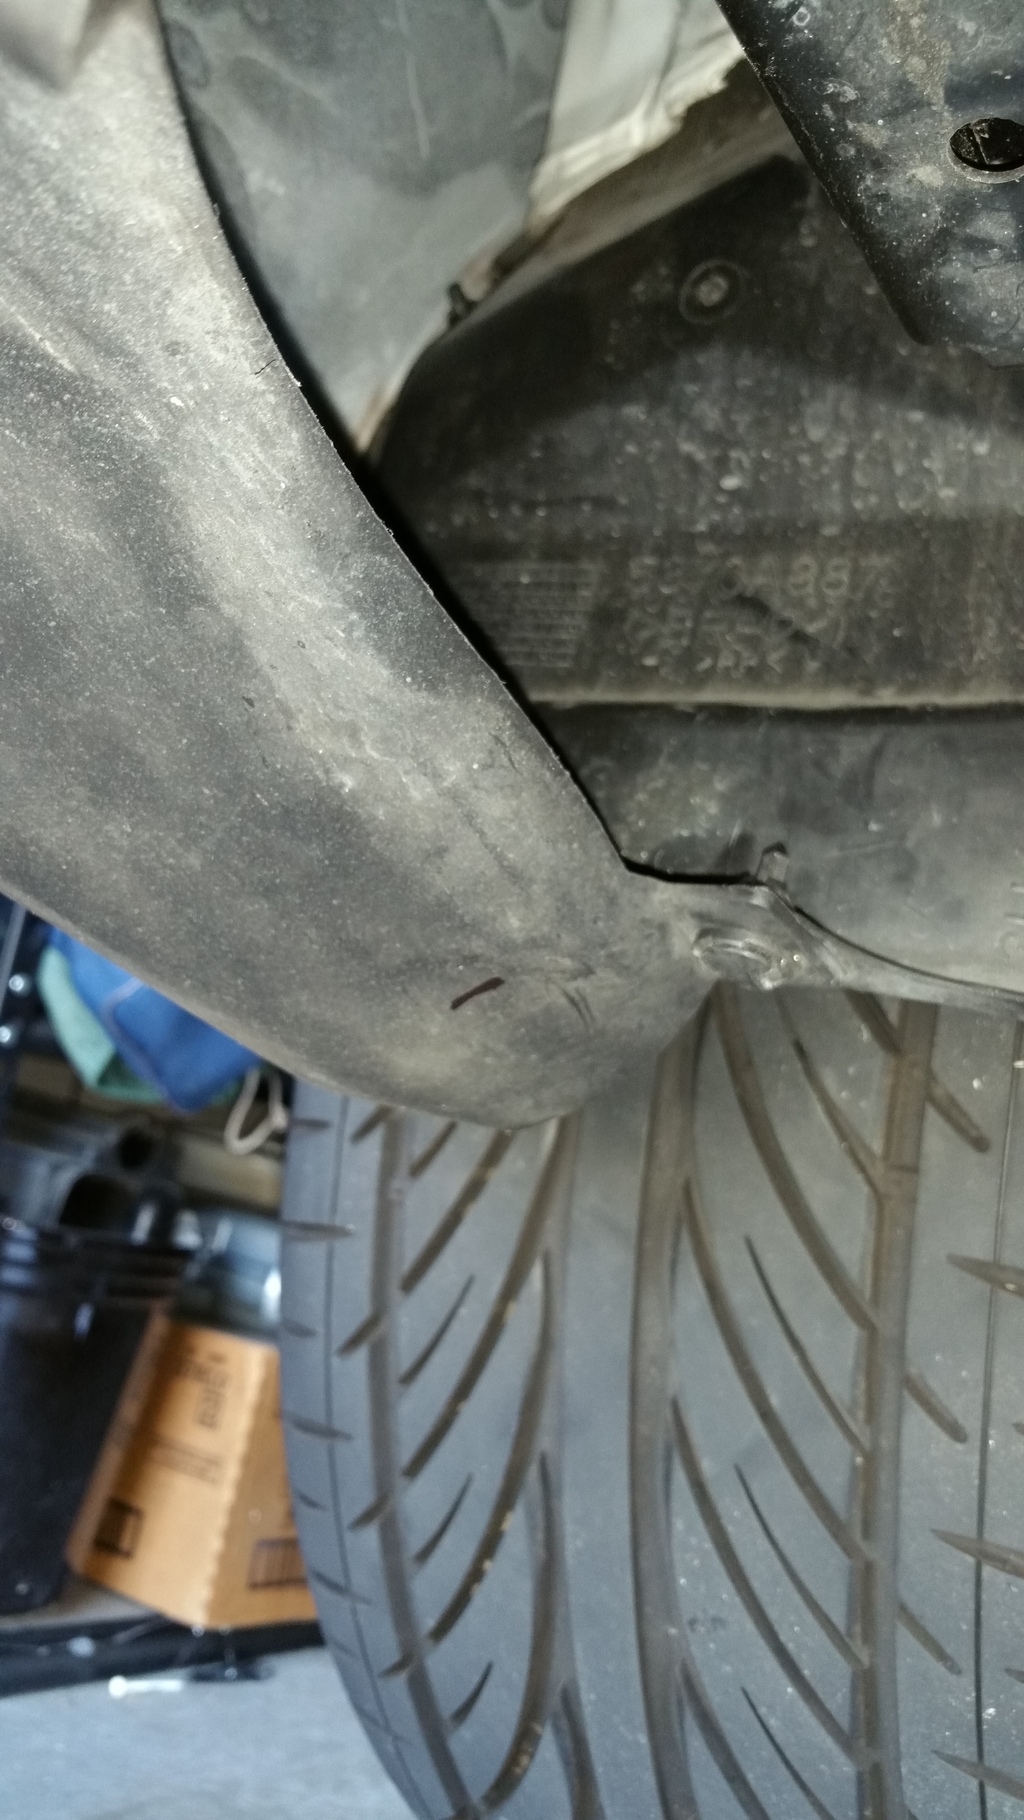
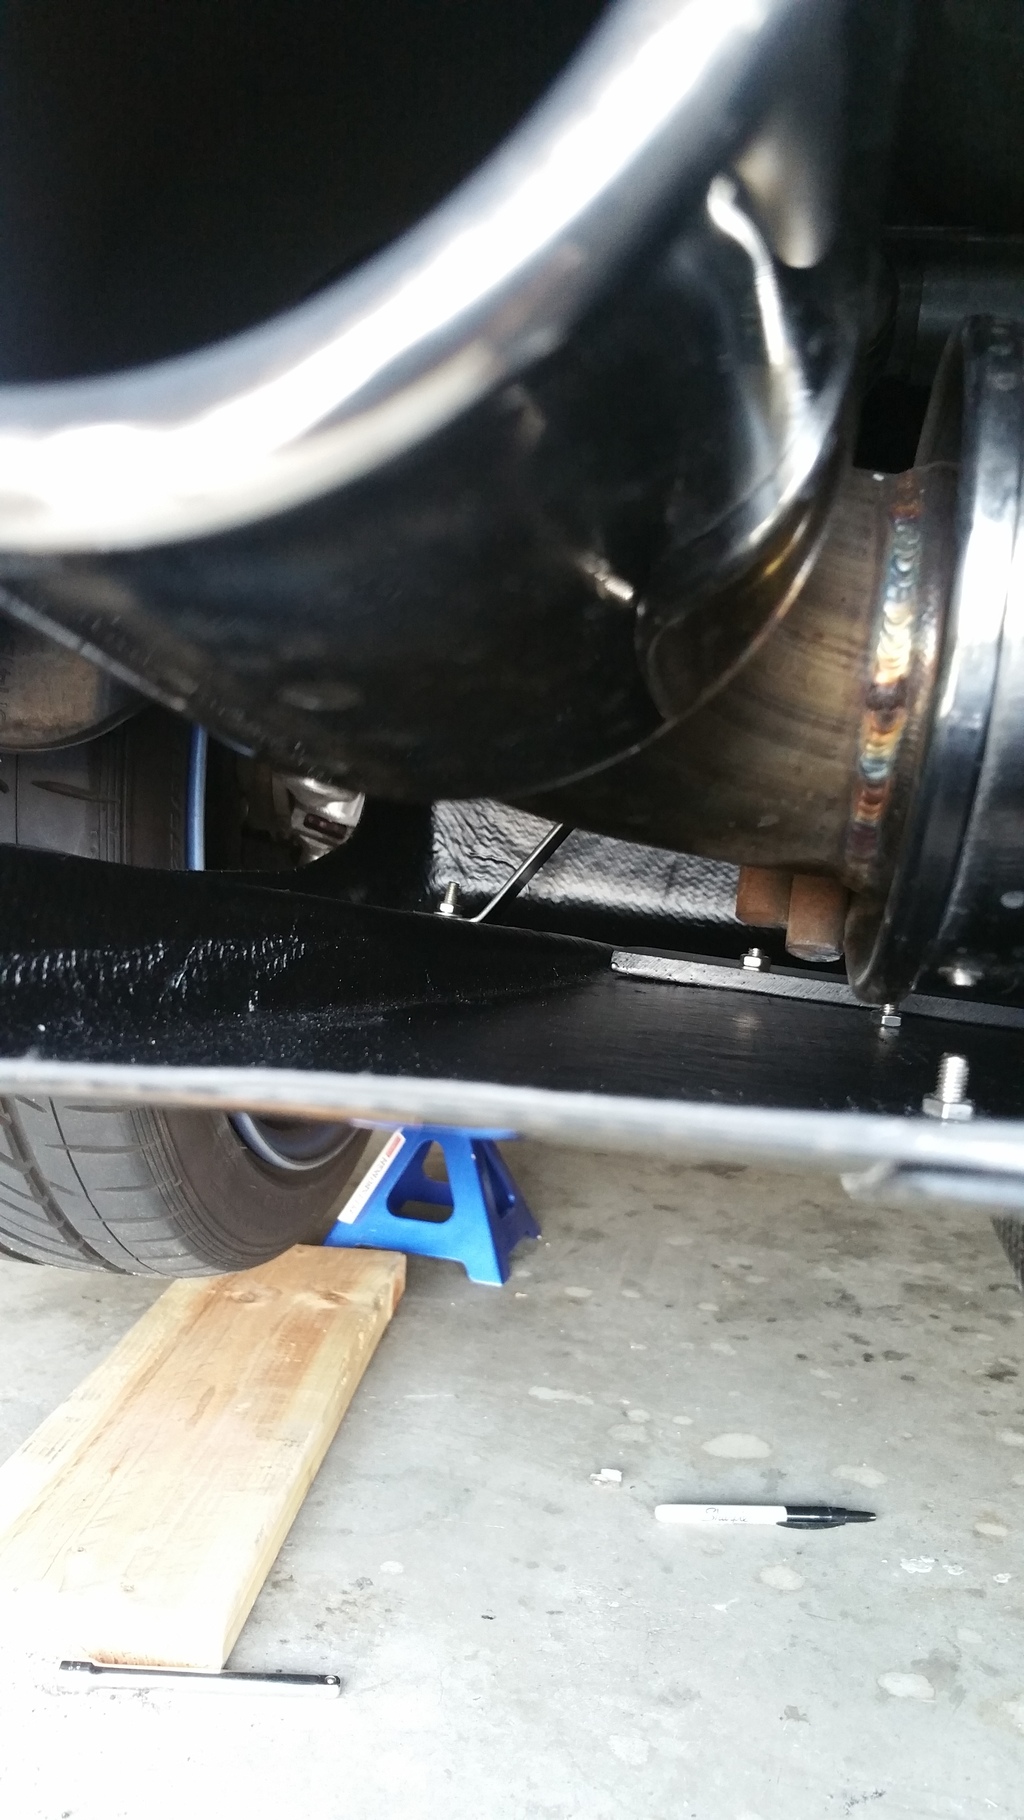
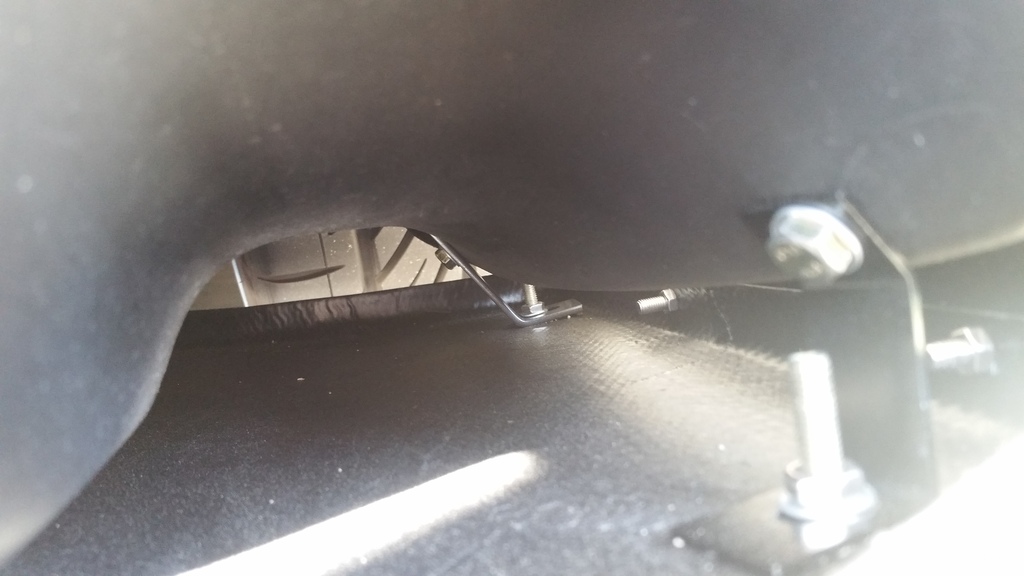
9. Drill the holes but make sure they aren't too big (washer needs to hold all bolts in anyways). Once they are drilled remove the brackets from the diffuser and transfer them onto the OEM diffuser this is hard and requires patience and small hands. I couldn't really do this but my buddy could. Mount the slanted "L" shaped bracket loosely to tighten it later but the rearmost one all the way (good luck with those ratchets and crescent wrenches in there....).

How my buddy got in there, hence to why you remove the rear splash guard.
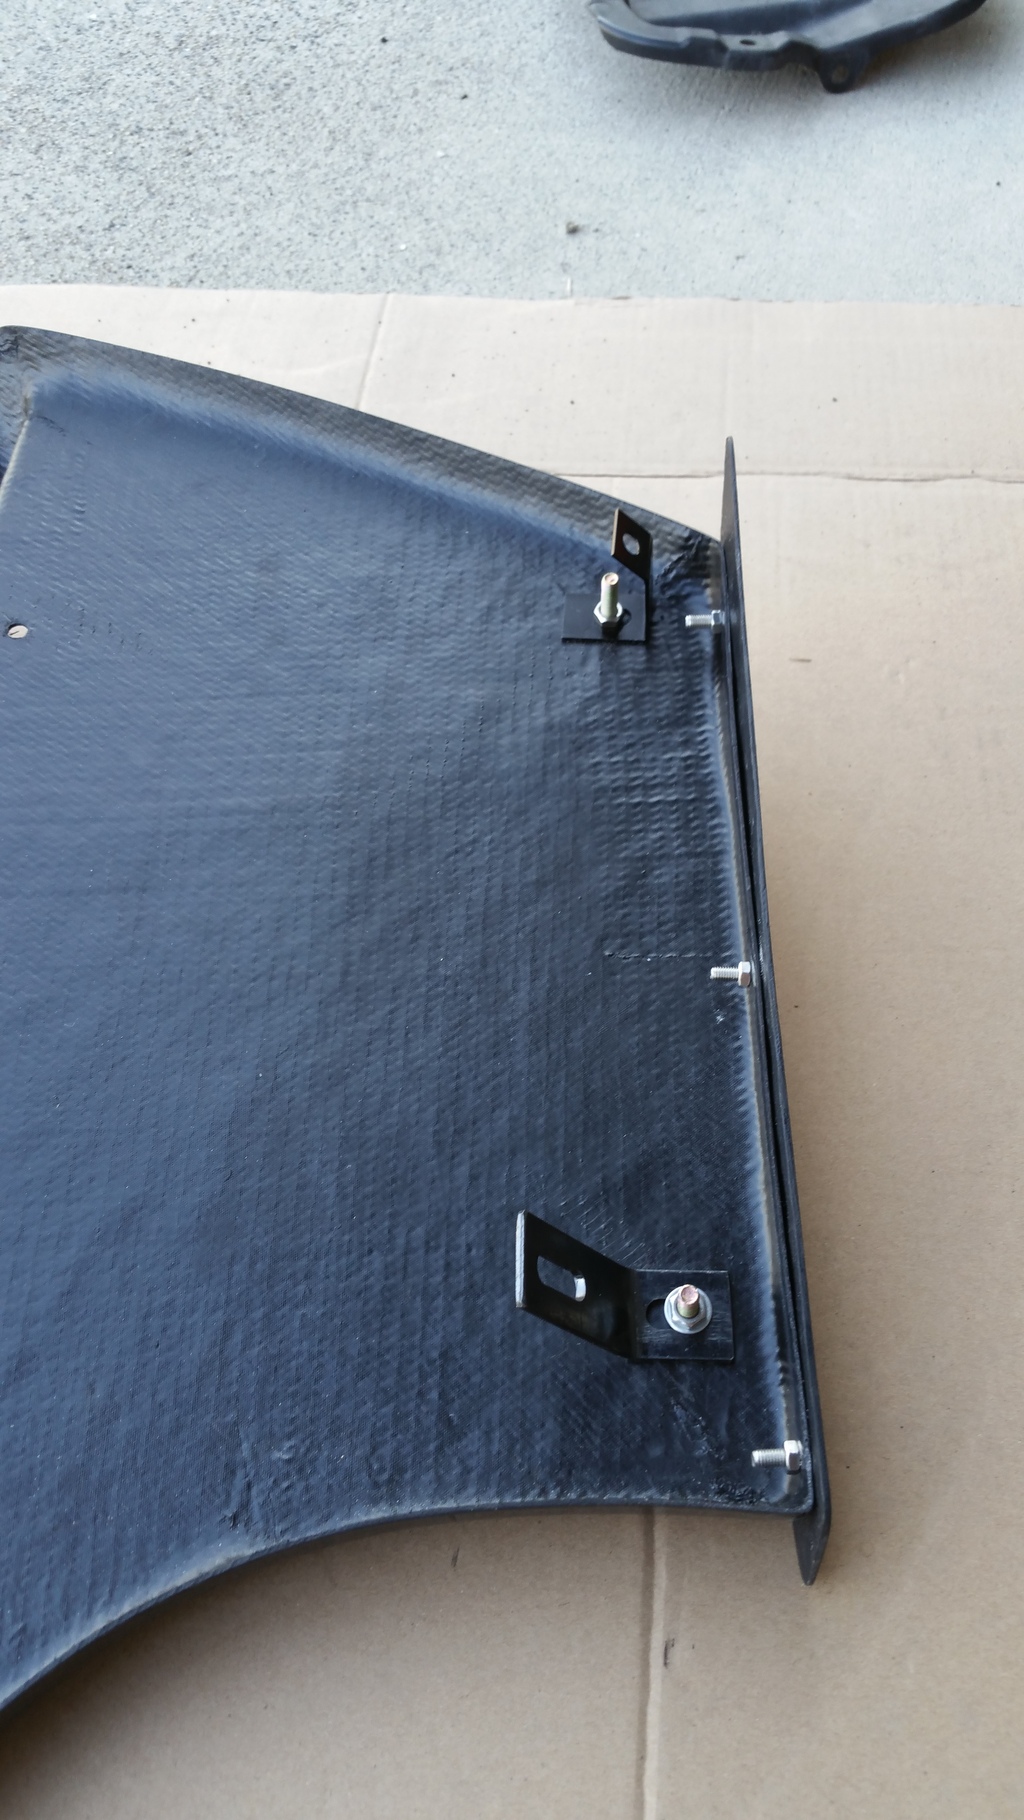
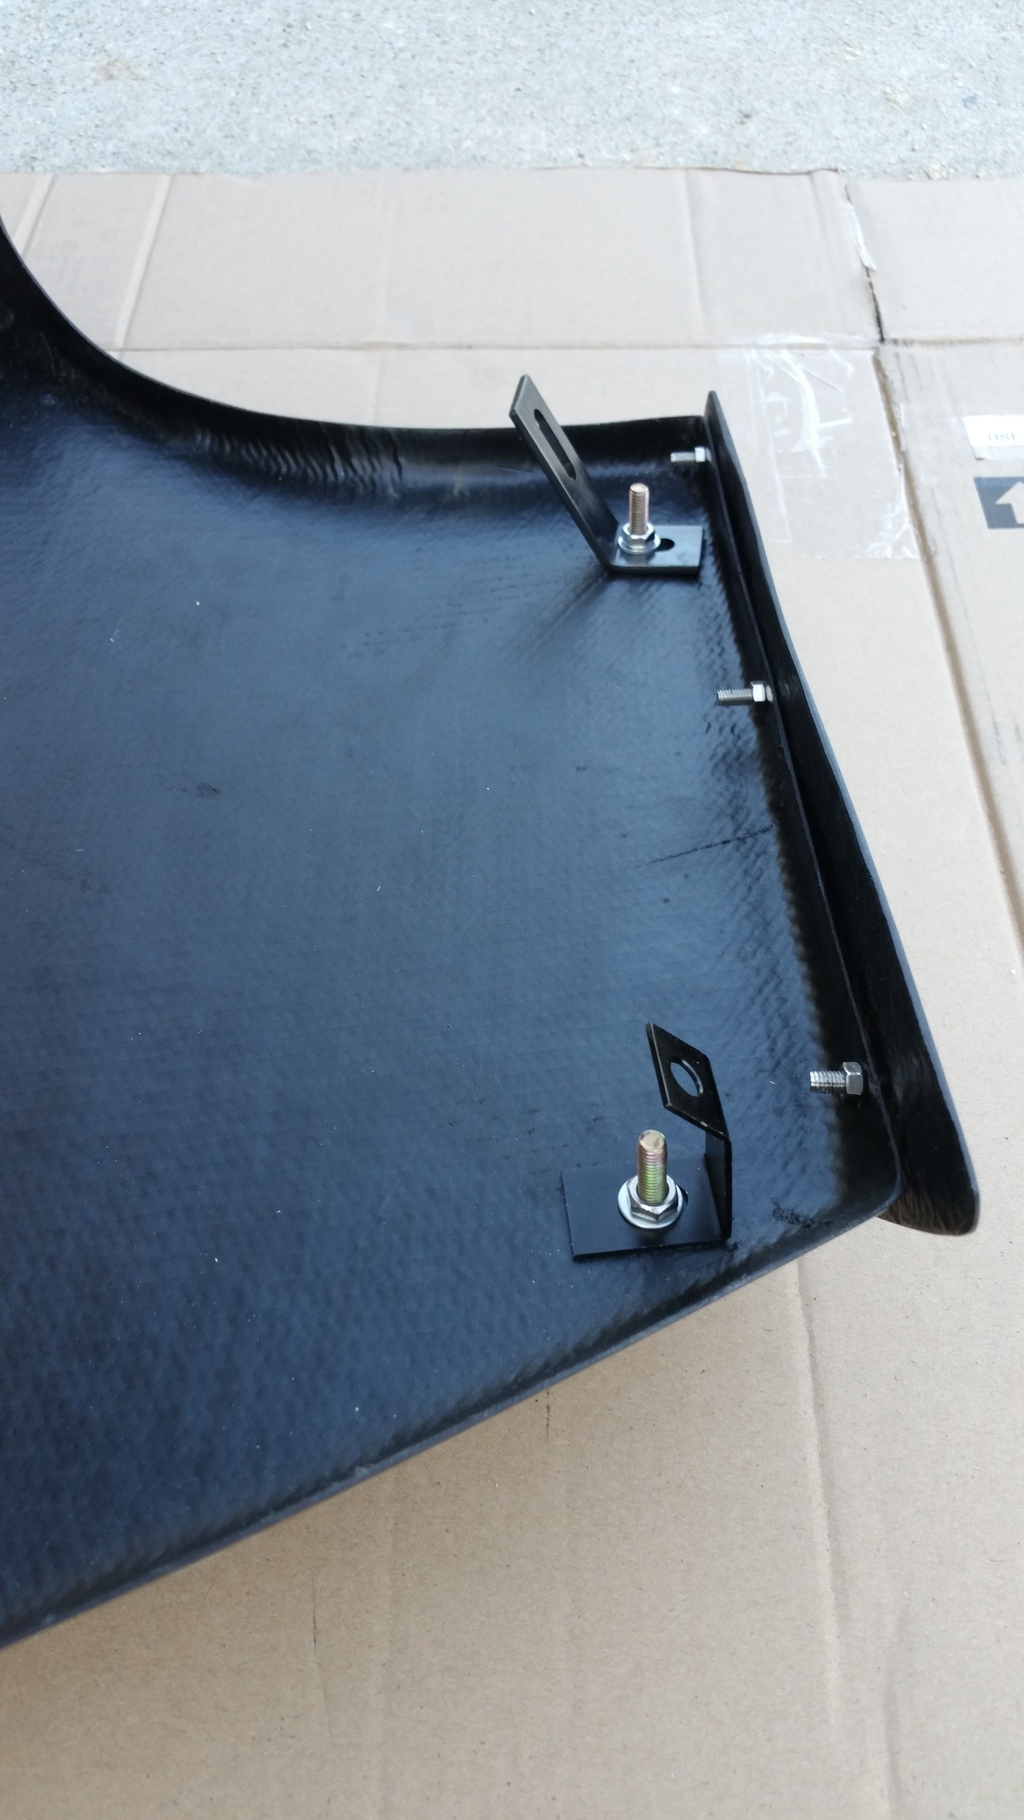
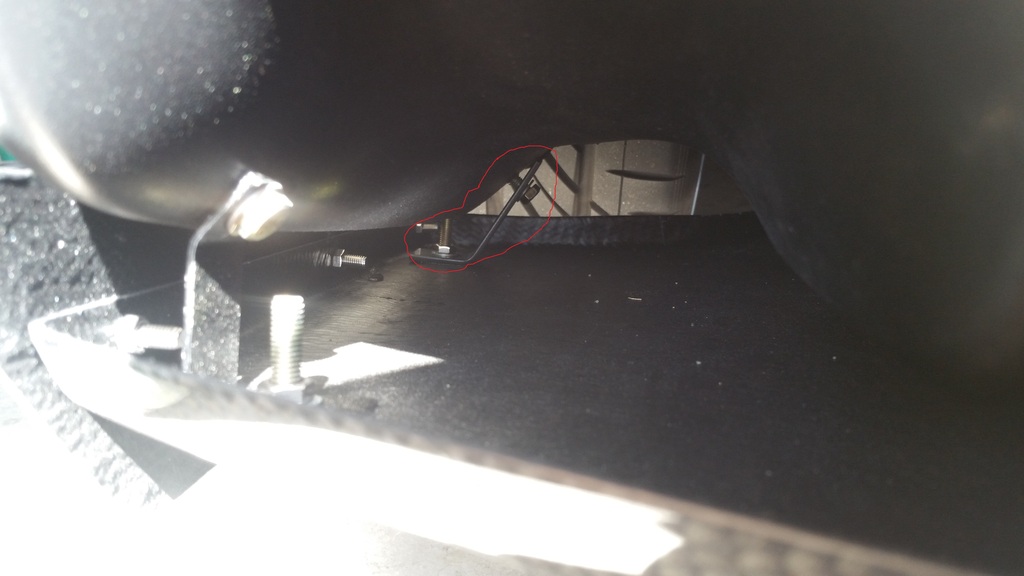
10. Mount up the long slanted bracket from the sway bar to the diffuser and the rear most dual brackets. Tighten these down as if looking to finish (the diffuser should no longer have any play and should NOT move around).
11. Attach the bolts to the rearmost side bracket and tighten all the way.
12. You have two options with the final bracket.
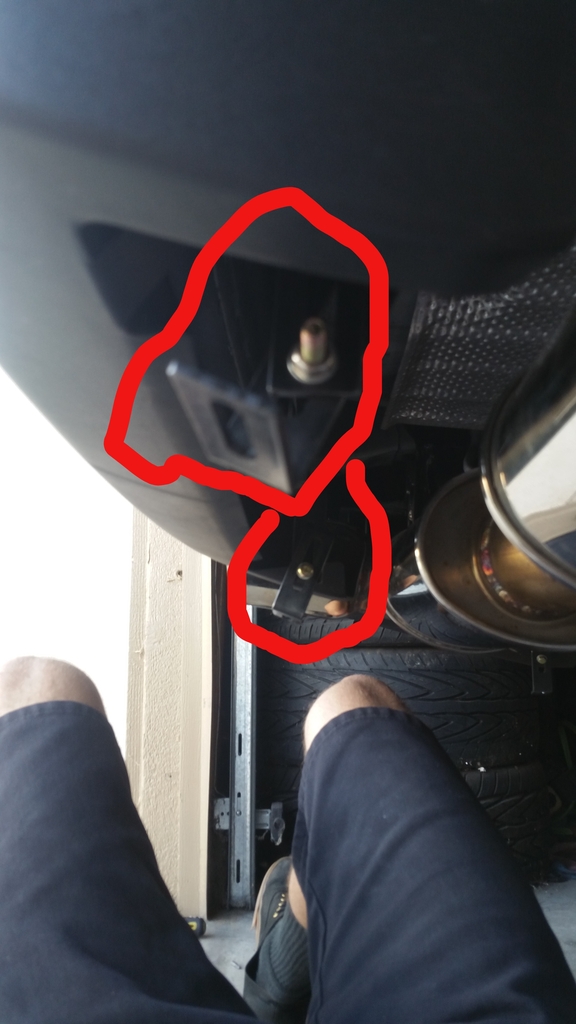
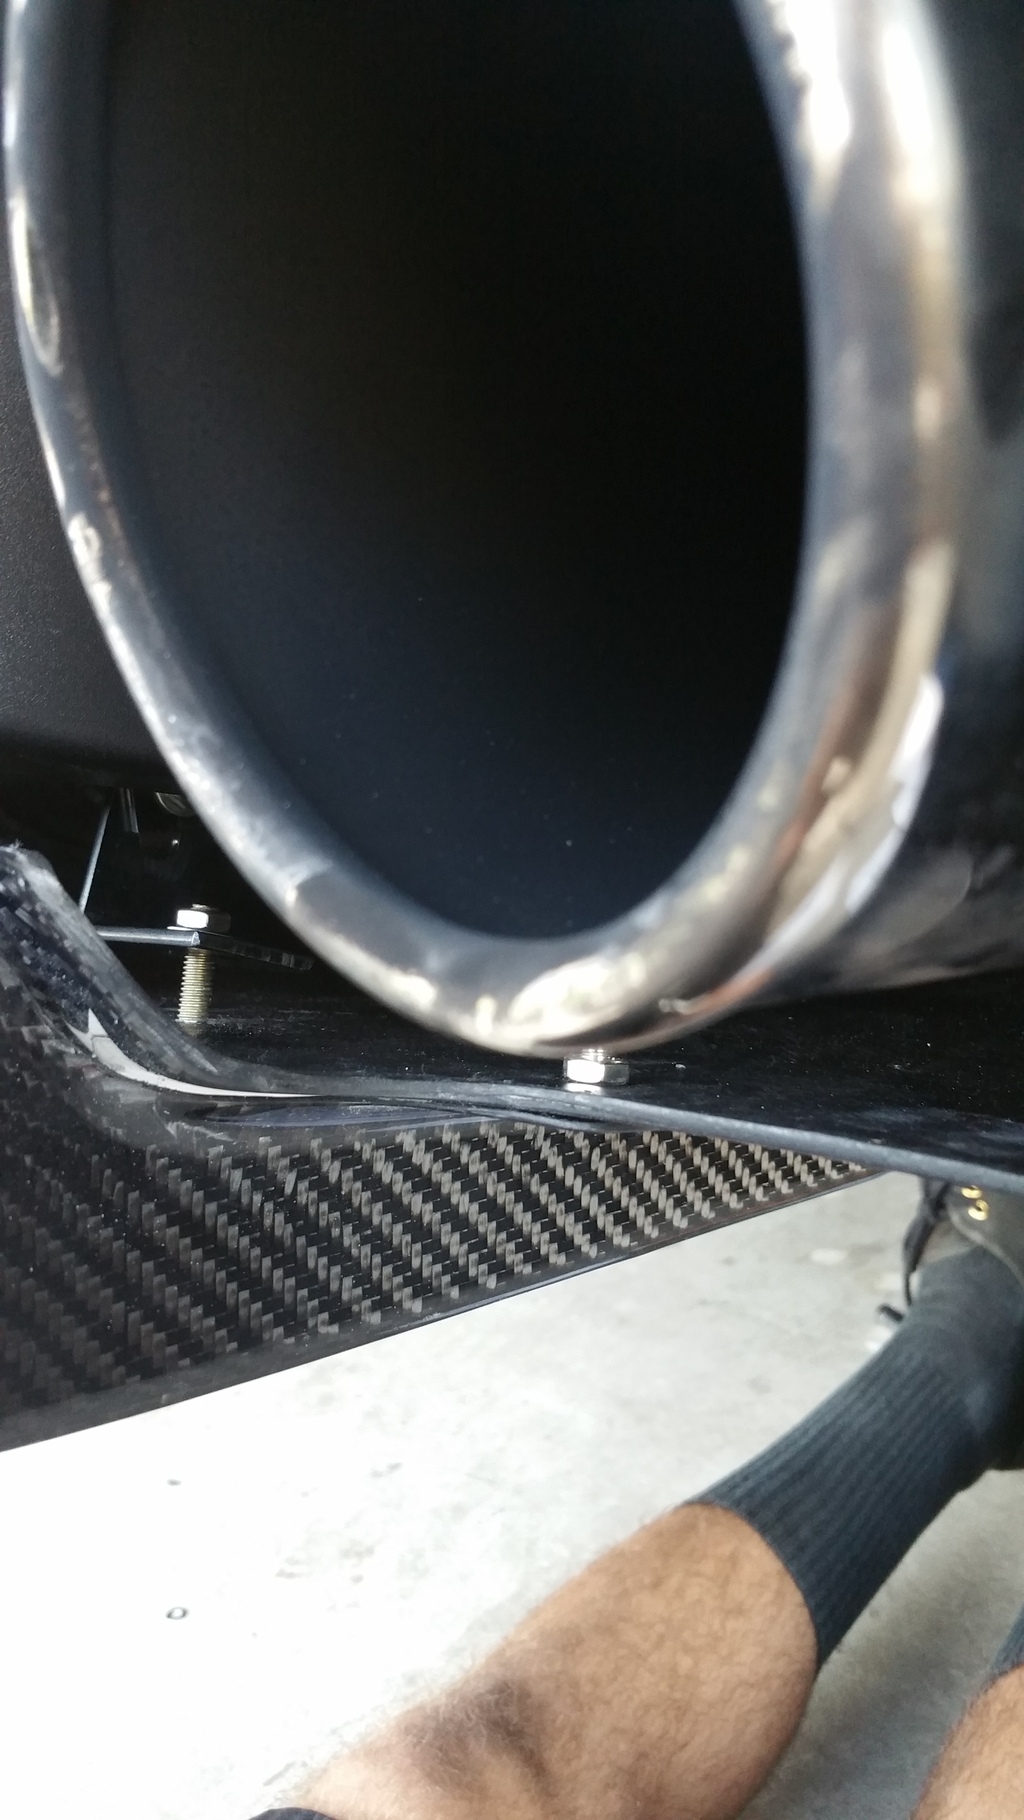
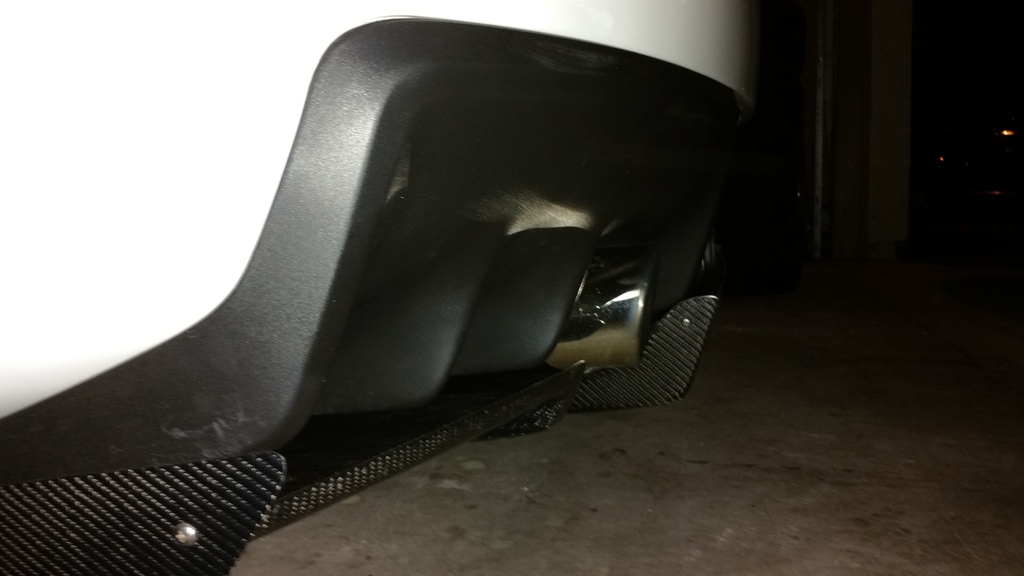
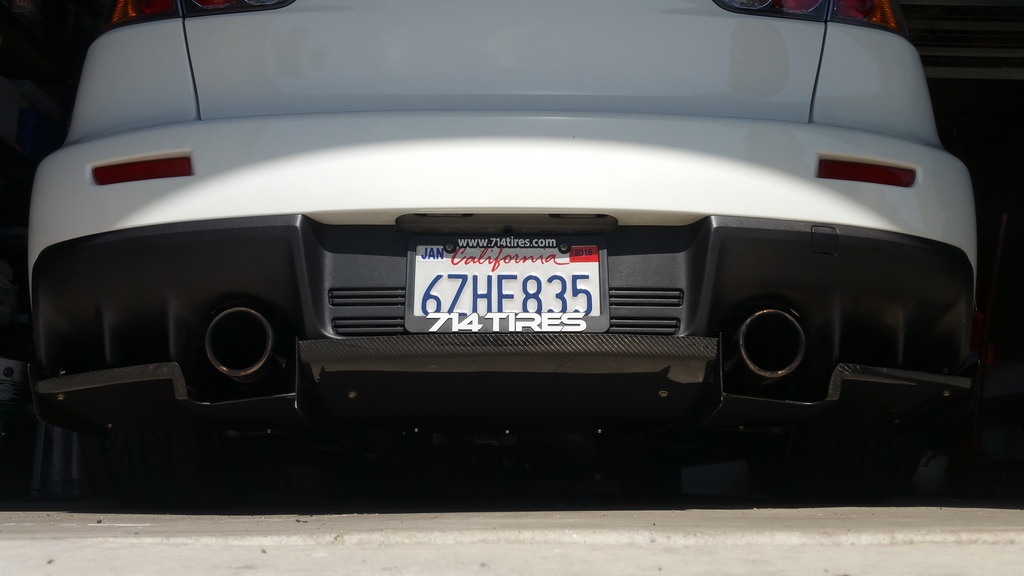
Option 1 (recommended by me): Completely tighten all bolts to the diffuser. This will result in the OEM bending and you will not be able to return 2 push pins back into the rear splash guard (does not seem to affect the car). Note how the bolt is flush with both diffusers.
Option 2 fully tighten the bolt to the CF diffuser, re-install the splash gaurd, and then fully tighten the bolt on the OEM diffuser (harder and does not seem to fasten flush to the diffuser). Note how the top bolt is not flush with the OEM diffuser.
I did both options due to my buddy stripping the Screw push pins that I told you not to strip lol!!
I can take pics of both if requested.
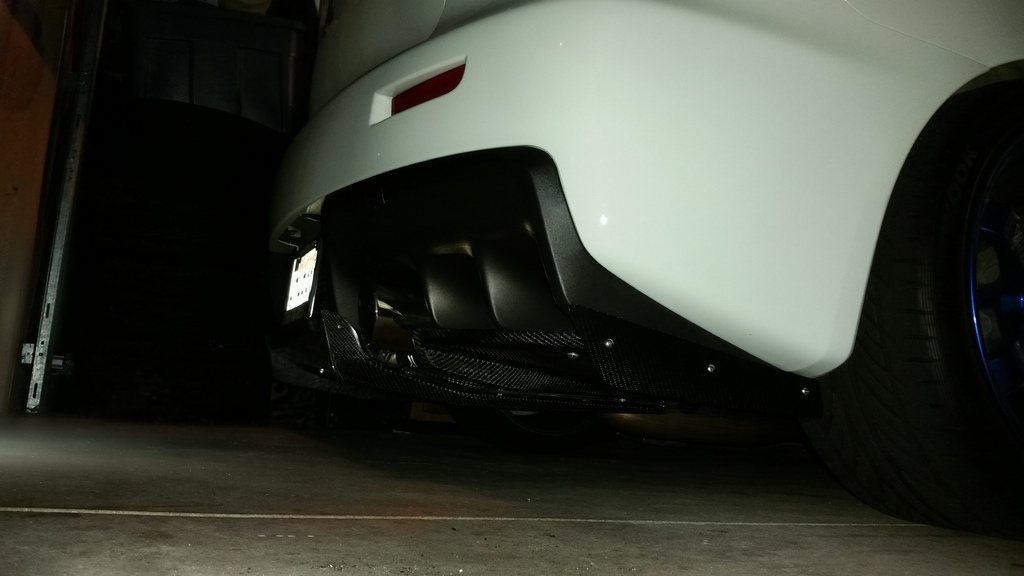
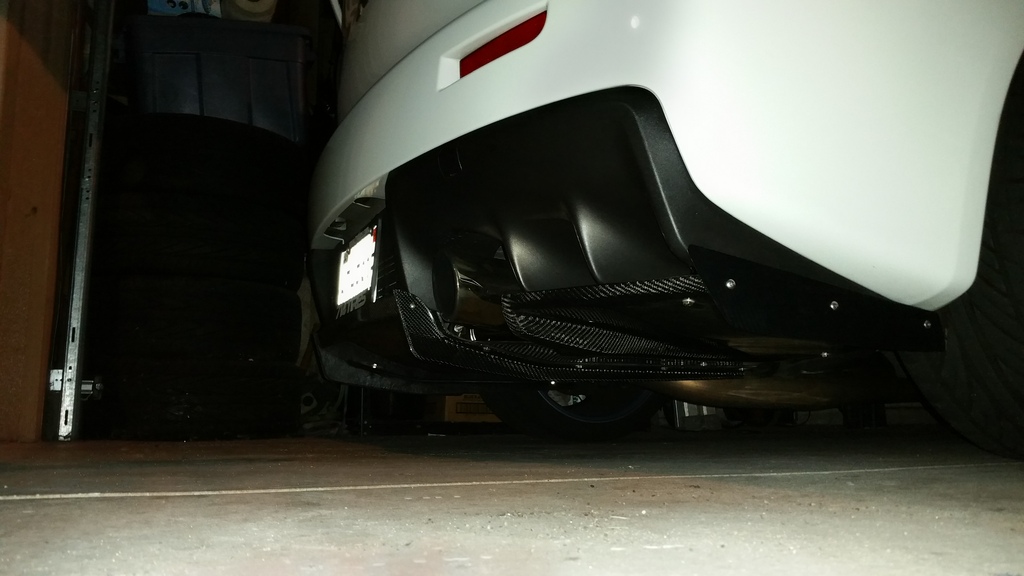
ANNNNDDDDDD DONE!!!!
Let me know if I missed anything, I'll throw it in.
Should take ~3 hours if you take your time ~5 hours. For this we took our time to make sure it's perfect.
Tools Required:
-Jack & 2 Stands
-Dremel
-10mm socket and ratchet, and cresent wrench (may vary this was the size of my hardware)
-14mm socket and ratchet (for sway bar)
-sharpie
-phillips and flat head screwdrivers (push pins)
-short phillips (for the screw push pins if you don't take your rear wheels off)
I used a vice grip and a phillips head off my electric screwdriver.
-removable locktite (optional)
1. Jack up the rear of the car carefully and make sure you left it in gear and ebrake pulled. Get it on some jack stands please
2. Start by mounting these brackets on the diffuser and tighten them enough so they won't spin.


3. Mount these brackets to the car. The long one will go on the sway bar and will face outwards to the tires.


4. The shorter brackets that look more like an "L" will go to the diffuser support tab that holds the diffuser to the bumper which is closes to the rear of the car. Mount the one to the tab then mount the other "L" looking bracket to the first one already mounted. Allow them to be loose enough to easily move up and down.


5. Now you're gonna want to test fit it so hold the bolts in the holes that are closer to the front of the car and push the bolts through the bracket mounted to the sway bar WHILE holding up the rear part to the plastic stock diffuser. If it mounts up fine and clears your exhaust and other parts you are good to skip to step 7.
6. Pull the diffuser off. Now for the cutting. Now you have a general idea of how it will mount and where to cut the CF diffuser. I will post pics of before the cut and through each cut. I used a dremel which worked wonders and was super easy to use. After that I used the sanding bit to clean it up and round out a hole. This was fun although scary... In the 3rd pic you will notice a sharpie line that was used for reference which can be cleaned off with rubbing alcohol if necessary. I also got a little extra sharpie on the OEM diffuser which came off with simply WINDEX <3


This one being the last one you can see how close I got to the support "beam" at the finished point. It look a good 6 times to make sure we got it right with the ETS v2 exhaust. It still barely touched the support beam if it did at all, but cleared the CF completely.

7. Now that it clears hold it up for a test fit again and mark with sharpie on the OEM diffuser where to drill. Take note in the difference of angle you are marking the sharpie as to the angle the bolt will be going in and adjust drilling accordingly. At this point you should also account for how the rear most brackets are angled on each other that way when you remove the diffuser you can easily torque it down to each other. Mine angled like so...
My markings looked as such.


8. Remove the rear splash guards which I can post pics of later if necessary but it involves 2 10mm plastic bolts, 2 push pins, and two screw driver push pins (per side). DO NOT STRIP THE SCREW DRIVER PUSH PINS. A simple left turn 90* should do it otherwise you're doing something wrong and may strip it (push in hard and turn left watching to make sure it doesn't slip).
9. Drill the holes but make sure they aren't too big (washer needs to hold all bolts in anyways). Once they are drilled remove the brackets from the diffuser and transfer them onto the OEM diffuser this is hard and requires patience and small hands. I couldn't really do this but my buddy could. Mount the slanted "L" shaped bracket loosely to tighten it later but the rearmost one all the way (good luck with those ratchets and crescent wrenches in there....).


How my buddy got in there, hence to why you remove the rear splash guard.

10. Mount up the long slanted bracket from the sway bar to the diffuser and the rear most dual brackets. Tighten these down as if looking to finish (the diffuser should no longer have any play and should NOT move around).


11. Attach the bolts to the rearmost side bracket and tighten all the way.

12. You have two options with the final bracket.
Option 1 (recommended by me): Completely tighten all bolts to the diffuser. This will result in the OEM bending and you will not be able to return 2 push pins back into the rear splash guard (does not seem to affect the car). Note how the bolt is flush with both diffusers.

Option 2 fully tighten the bolt to the CF diffuser, re-install the splash gaurd, and then fully tighten the bolt on the OEM diffuser (harder and does not seem to fasten flush to the diffuser). Note how the top bolt is not flush with the OEM diffuser.

I did both options due to my buddy stripping the Screw push pins that I told you not to strip lol!!
I can take pics of both if requested.
ANNNNDDDDDD DONE!!!!


Let me know if I missed anything, I'll throw it in.
Last edited by WhoDatEvo; Apr 5, 2015 at 04:56 AM.


Trending Topics
Feb 4, 2016, 01:22 PM
#9
Newbie
Thread Starter
He actually is selling his volks now and got rs05rr from enkei. It's a socal Evo and his insta is @evomanny
 Mar 28, 2016, 01:22 PM
#11
Evolving Member
iTrader: (47)
Join Date: Jan 2008
Location: WA
Posts: 135
Likes: 0
Received 0 Likes
on
0 Posts
Does anyone know if this will work while having the OEM rear side diffusers on the bumper? Doesn't look like any clearance for it in the pics since that Varis diffuser has those wings on the side.

 I Plan to do this along with the Seibon Diffuser. I'll Have to Save this for later


Thread
Thread Starter
Forum
Replies
Last Post
JayDub514
For Sale - Interior / Exterior / Sound / Styling
2
Jun 24, 2016 06:35 AM
UnionPerformance
EvoX 'For Sale' Exterior Styling
25
Aug 9, 2013 08:56 PM
UnionPerformance
Evo Vendor 'Group Buy / Specials' Classifieds
6
Jul 30, 2013 06:05 PM
LHTuning
Evo 'For Sale' Exterior Styling
146
Jun 15, 2012 08:16 AM
Cee@FDCarbon
Evo 'For Sale' Exterior Styling
18
Jan 19, 2012 07:08 AM