How to: On many things (Take a look!) MANY PICTURES
 Mar 13, 2008, 09:51 PM
#1
Evolving Member
Thread Starter

Join Date: Nov 2007
Location: Chicago, IL
Posts: 166
Likes: 0
Received 0 Likes
on
0 Posts
How to: On many things (Take a look!) MANY PICTURES
My thread will be about how to "get ricey". just kidding. Well not really. Yes all my mods on my car are ricey, imo. Oh well, I'm all in for the looks.
Few spray painting rules so I don't repeat pointless things. I written this half way and decided to add this. So don't mind the repetition .
.
ALWAYS SHAKE SPRAY PAINT CAN FOR 1 MINUTE BEFORE ANY USE.
SHAKE 10 SECONDS FOR SECOND THIRD FOURTH USE. ect..
WAIT AROUND 15 MINUTES FOR PAINT TO DRY UNTIL NEXT COATING.
50 DEGREES AND HIGHER FOR SPRAY PAINTING IS PERFECT.
DO NOT LET ANY MOISTURE TOUCH THE PAINT. MAKE SURE YOU'RE PAINTING ON DRY PARTS.
DO NOT OVERSPRAY SO GET TAPE AND CARDBOARD BOXES TO PUT ON THE FLOOR AND MASK EVERYTHING OFF.
THREE COATS FOR ANYTHING UNLESS YOU WANT MORE. YOU MAKE THE JUGDEMENTS.
ACETONE BURNS YOUR SKIN, MAKE SURE YOU WEAR GLOVES. ( I learned this the hard way.. lol. funny experience. all my hair on my hand came off.)
SPRAY PAINT CAN BE BOUGHT FROM PEPBOYS, OR ANY OTHER AUTO STORE.
ACETONE AND CLEANING PRODUCTS FROM HOME DEPOT.
I BOUGHT NIGHTSHADE ONLINE FROM EBAY. (Couldn't find any in stores)
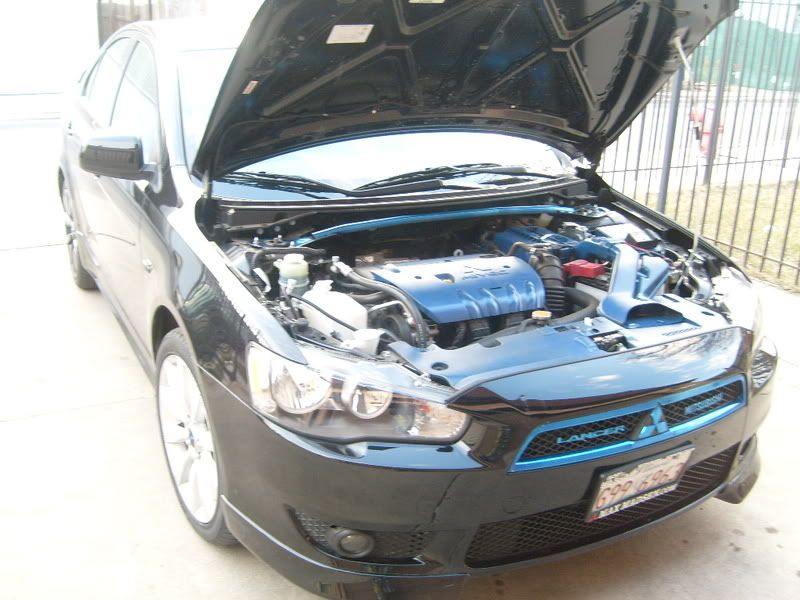
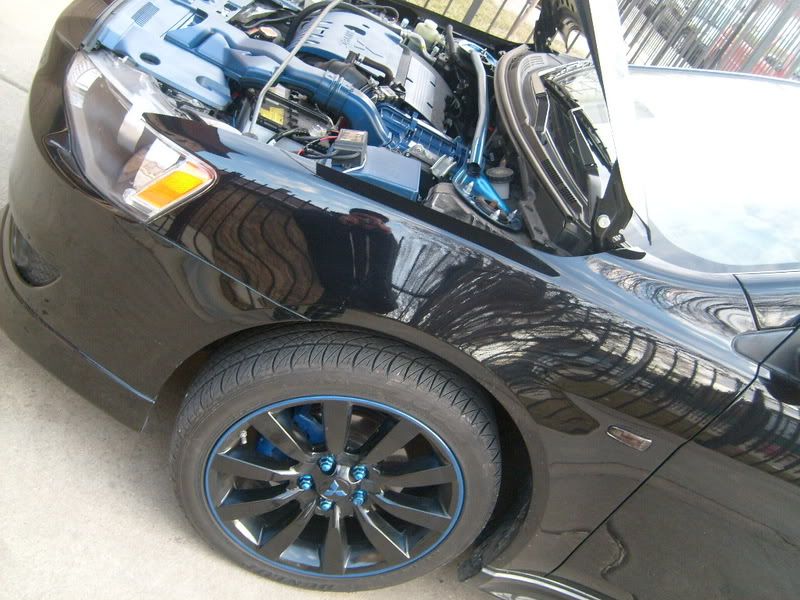
First off, I painted many parts under my hood.
Take a look:
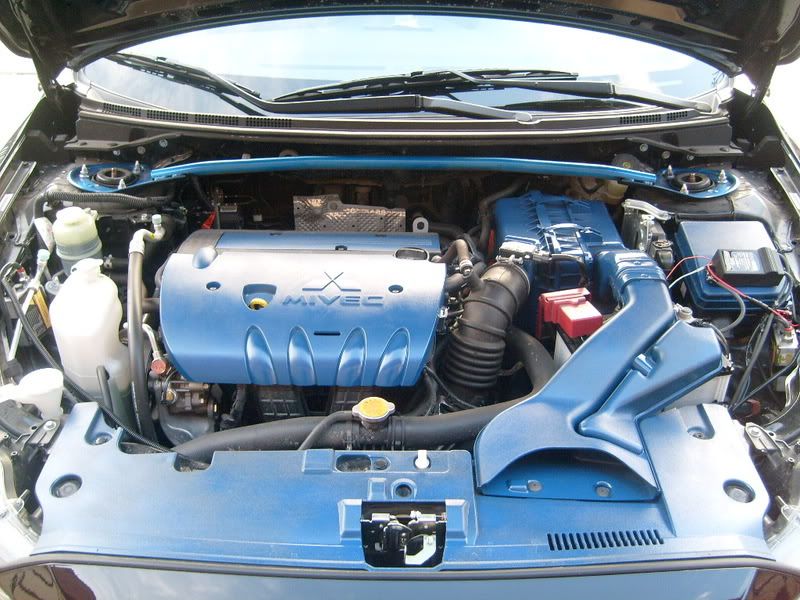
Parts that I painted: Engine cover, sparks cover, front plastic cover, intake, air filter, fuse box, and the bar (Which I don't know what's it called).
To paint these parts, I used the following:
400 grits sand paper, towel, water, soap, duplicolor spray paint (engine enamel)
First off, clean your piece to the best of your abilities. Aterwards, sand till it turns to a whitish color. Third, clean again. Then, spray paint the color of your choice. This is where you need to know the degrees to paint, humidity, amount of time to wait for each coat, and how many coats. Here it is, anything above 50 degrees is a great temperature to spray paint and let dry. Humidity.. under 30% I guess? Sorry I'm not too sure about that, but just make sure it's not raining =). haha okay. Spray paint around 3 coats, 15 minutes apart from each other. After third coat, 1 hour should be enough to put the piece back without messing up the paint job. I didn't put clear coat on my parts because I was afraid that it would melt.
for the bar, it was metal, so i used METAL CAST DUPLICOLOR PAINT. there is a difference!
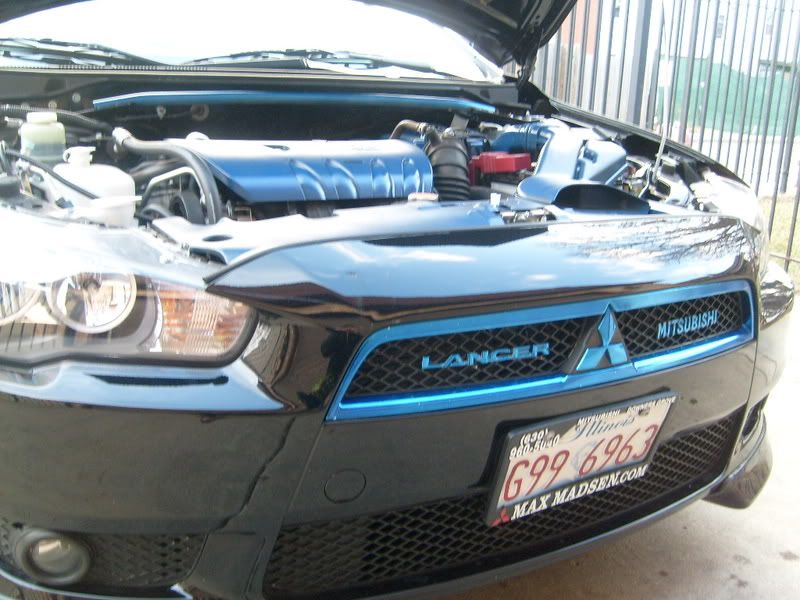
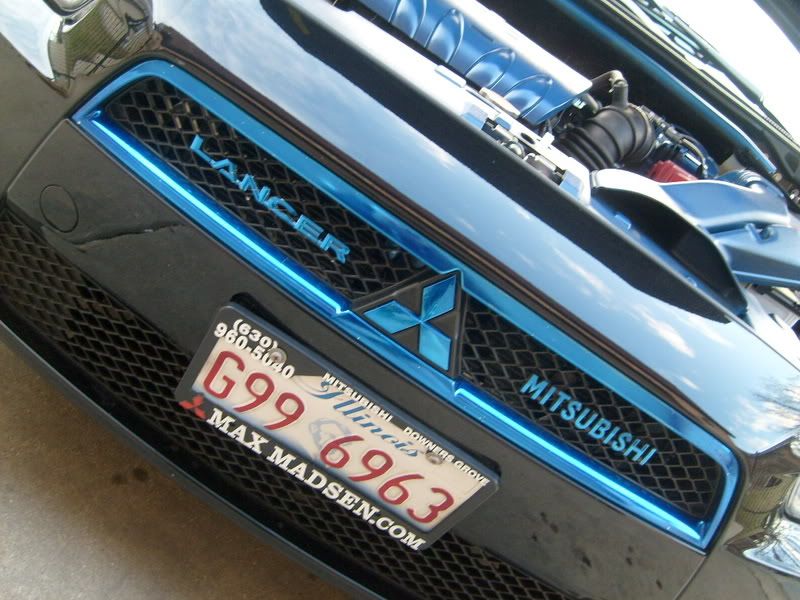
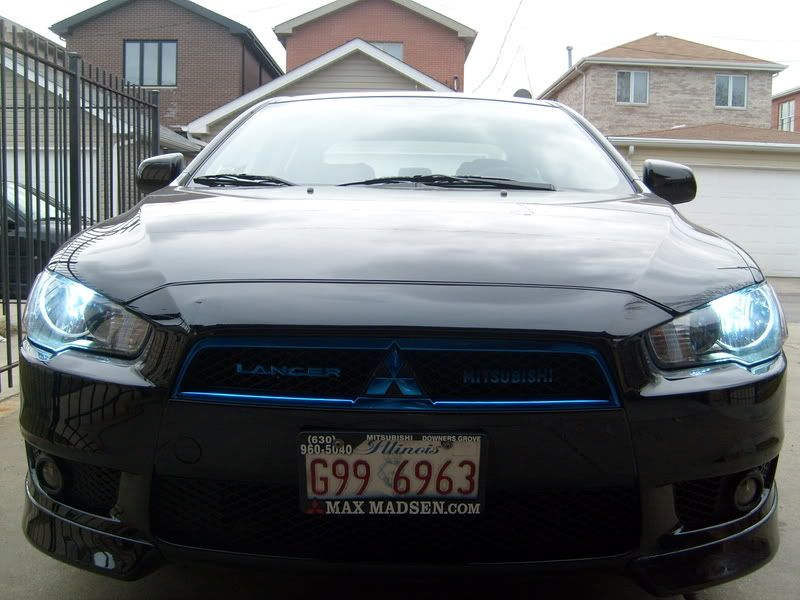
Next off, how to spray paint your grill..
Now taking off your grill is gonna be simple. You will have to take off the plastic black piece attached to the chrome emblems. There will be about 8 screws. The chrome grill is actually a part where made for us not to take out, when you do, you will break four silver clips or locks to the plastic part of the grill. I have broken them all because they really aren't any use. There are 4 screws holding the chrome chrill to the plastic grill and another four screws holding the plastic grill to the car. And therefore, your chrome grill will not fall off if you choose to do this. =)
First off, I used acetone, METALCAST DUPLICOLOR (of any color), towel, water, and clear wheel coating(Duplicolor also)
Clean your chrome grill with water, then use acetone to clean off any clear coatings put on by mitsu. Then clean your grill again with water and soap.
Get your METALCAST SPRAY PAINT and spray lightly 3 coats. then 3 more clear wheel coating on it to protect it.
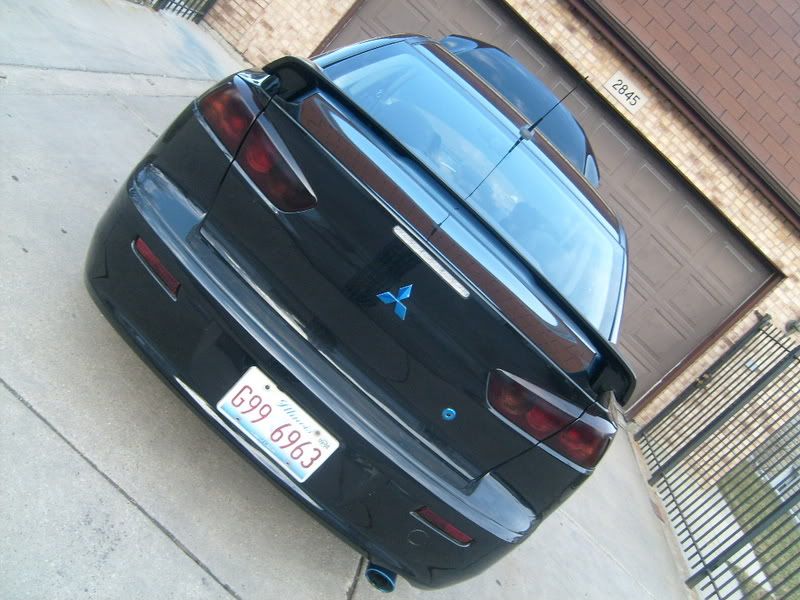
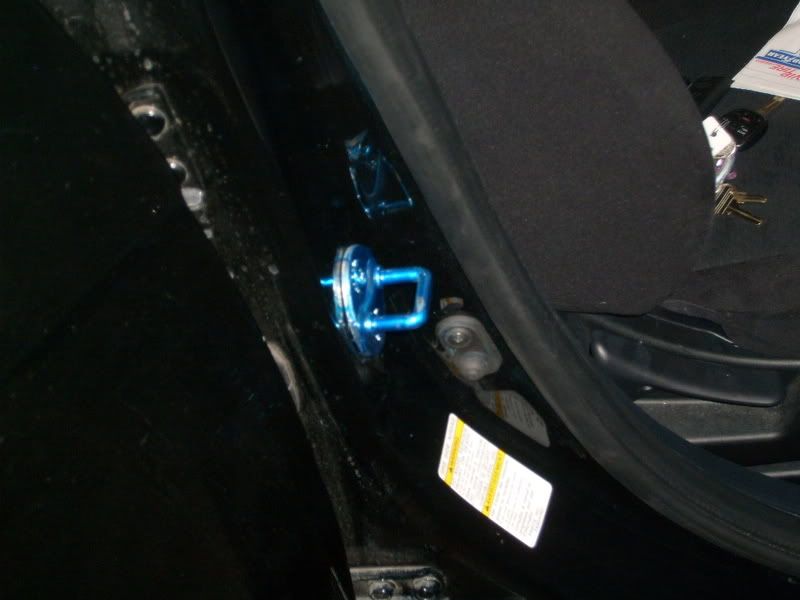
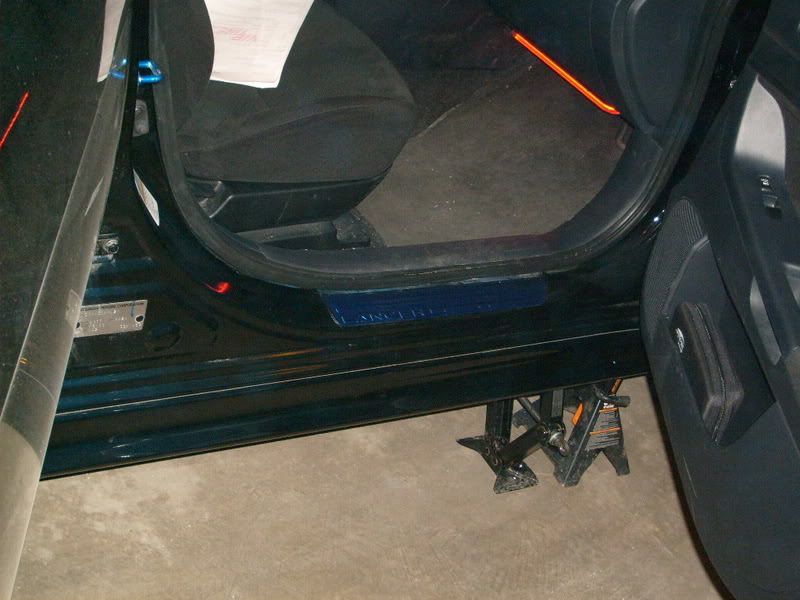
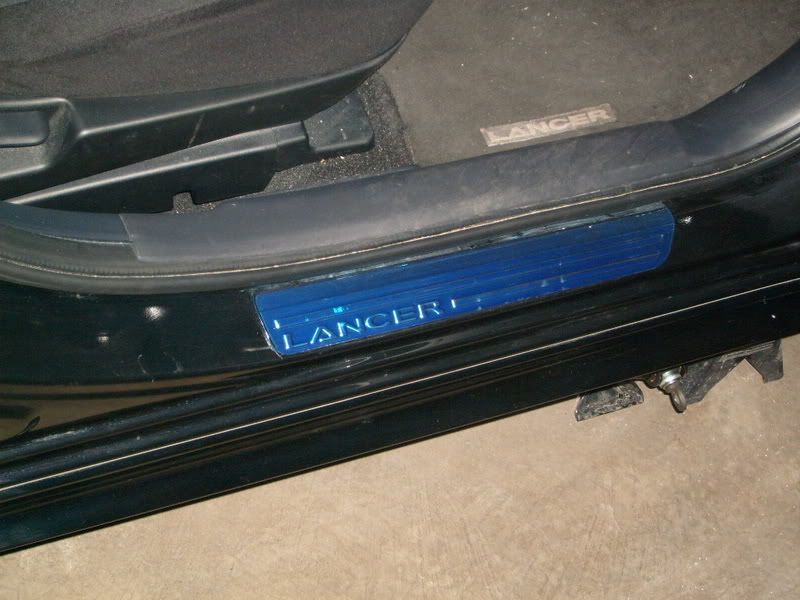

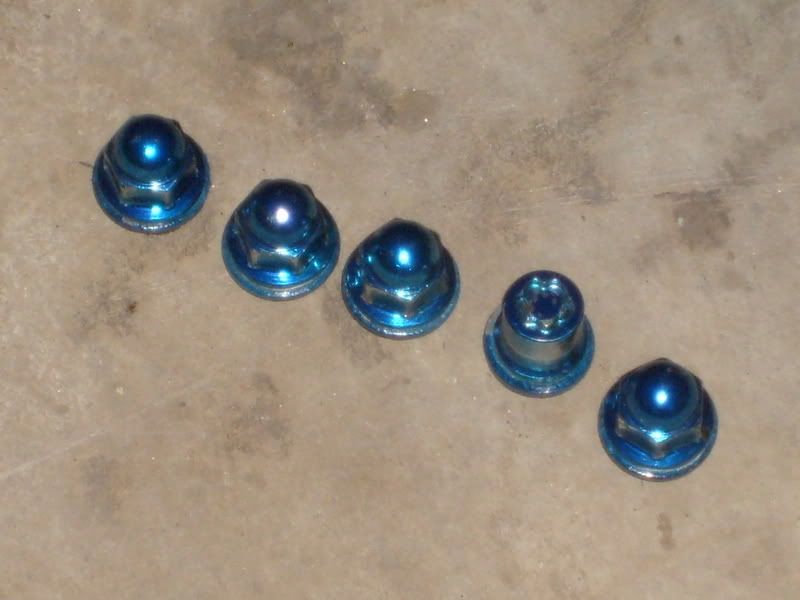
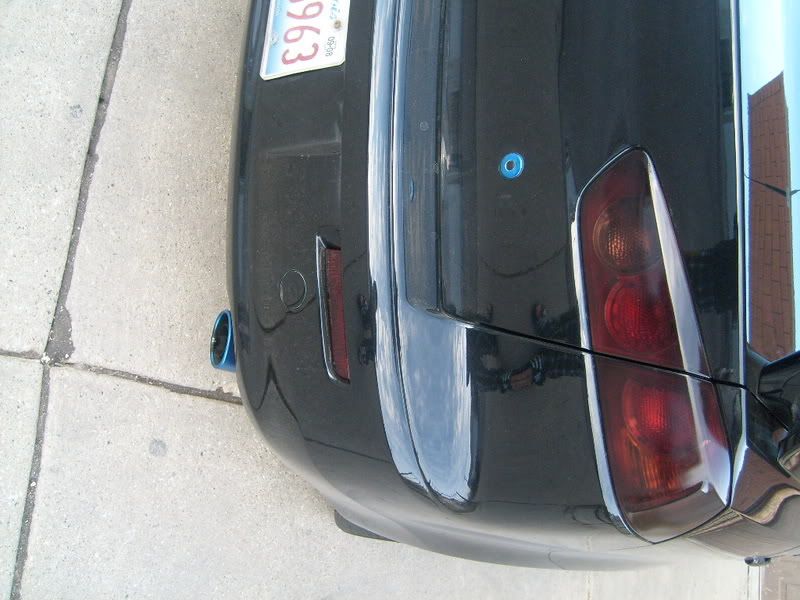
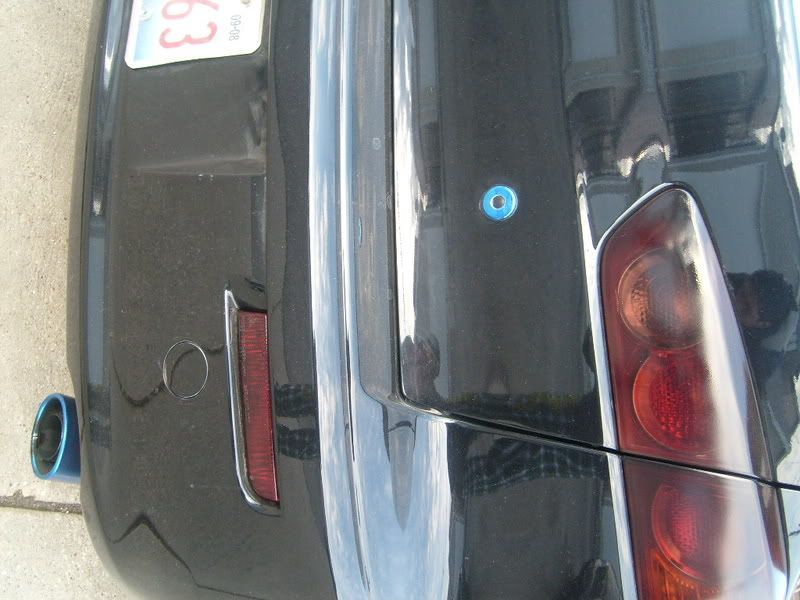
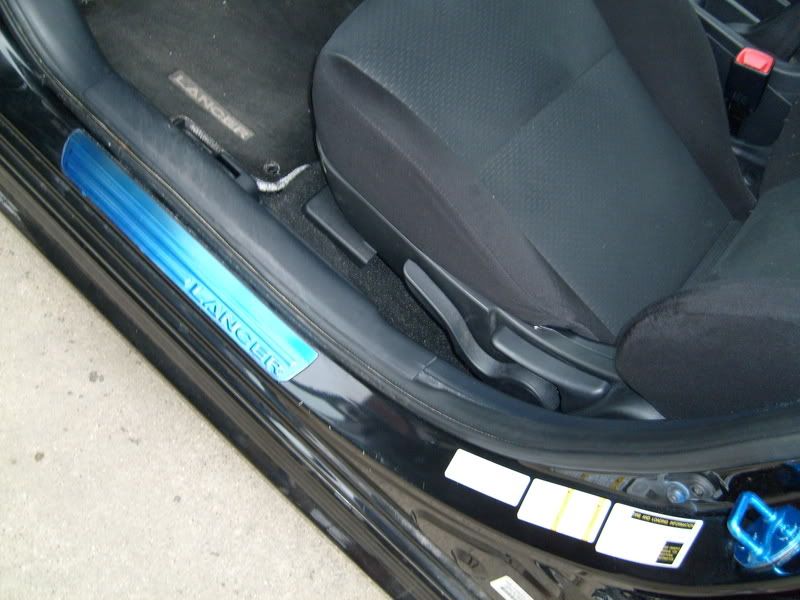
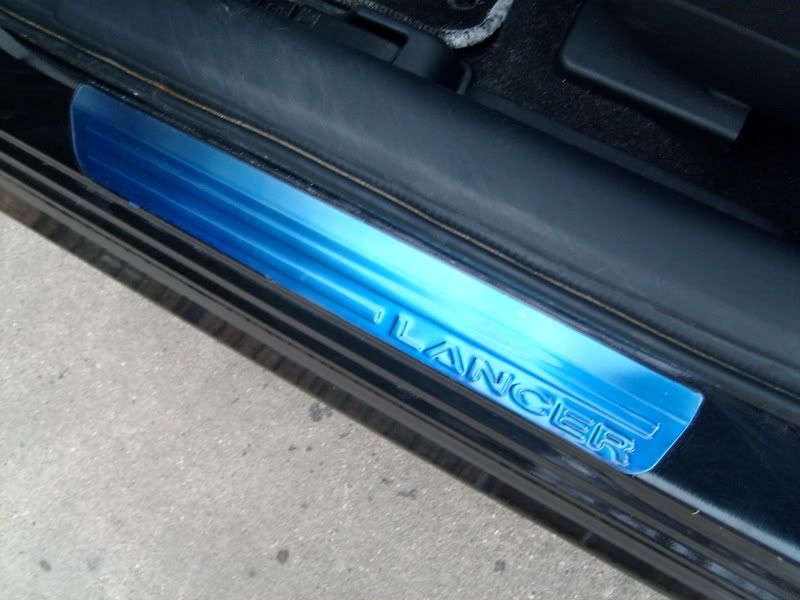
THIS IS THE SAME METHOD TO PAINT YOUR EMBLEMS, EXHAUST TIP, SCUFF PLATES, WHEEL LOCK AND BOLTS, TRUNK BUTTON AND DOOR LOCK HOOKS TO THE COLOR OF YOUR CHOICE.
To get your emblems off, you can use teeth floss to cut the adhensive off. Then using a hair dryer to get the glue off the car and use "GOOF OFF" from homedepot to scrub off. Putting the emblems back would be using M3 DOUBLE SIDED TAPE ADHENSIVE.
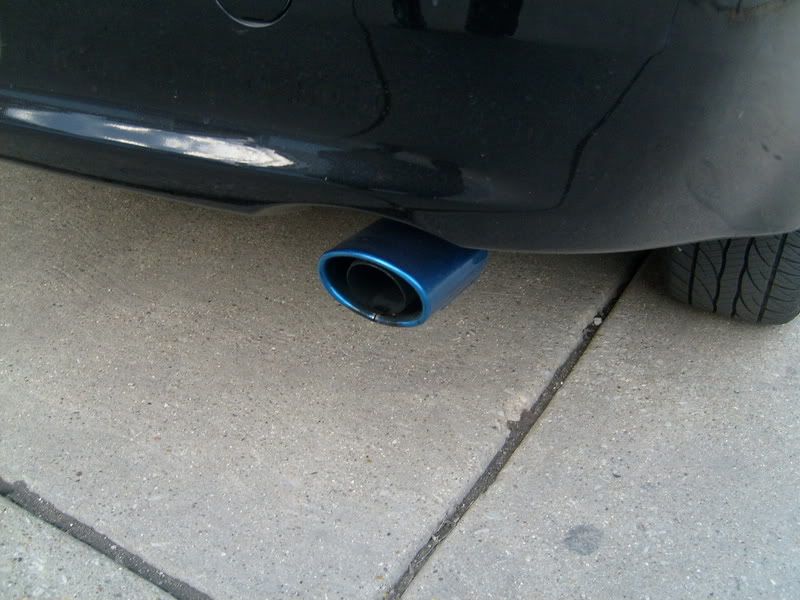
To get your exhaust tip is simple too, just two bolts.
There is a tutorial on how to spray paint your tail lights black already. read it! i sprayed the bottom lights too, just mask it off and apply around 4 coats of it. i dont suggest using clear coat. i used clear coat and i regret it. i don't think its required and it only made it look wrinkley.
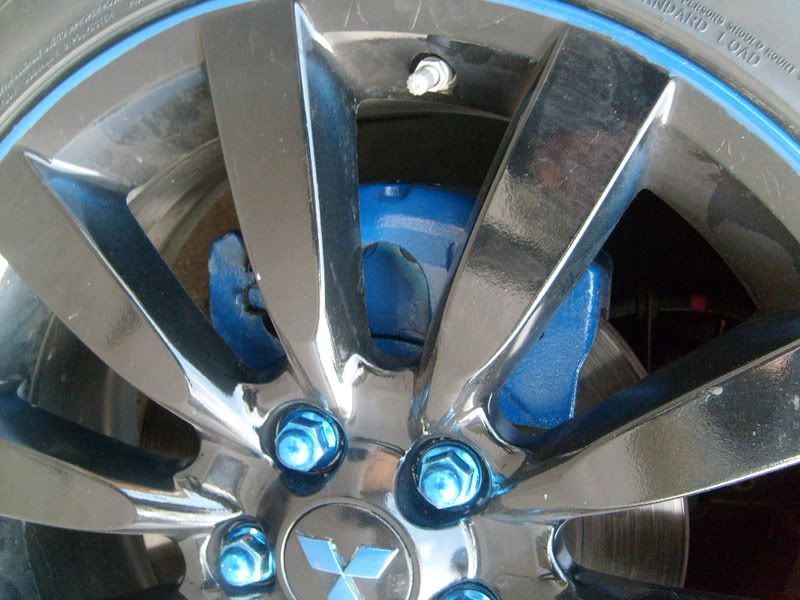
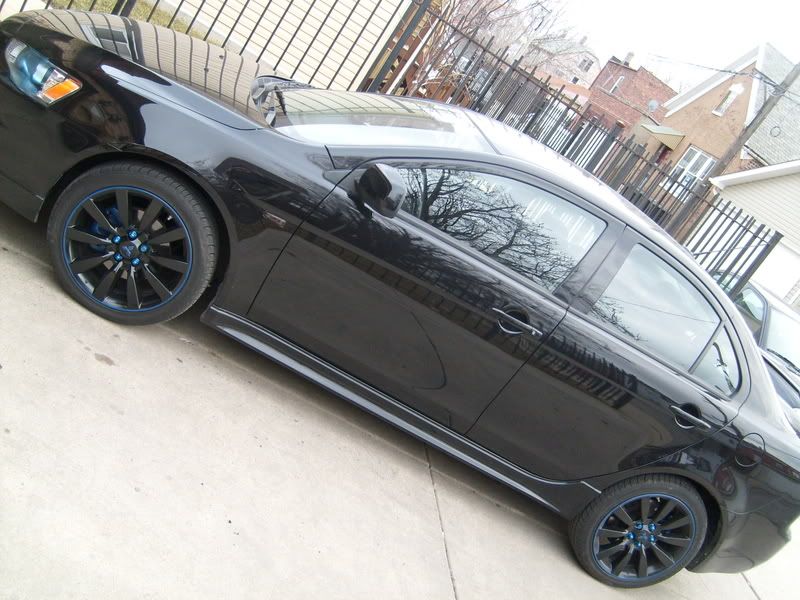
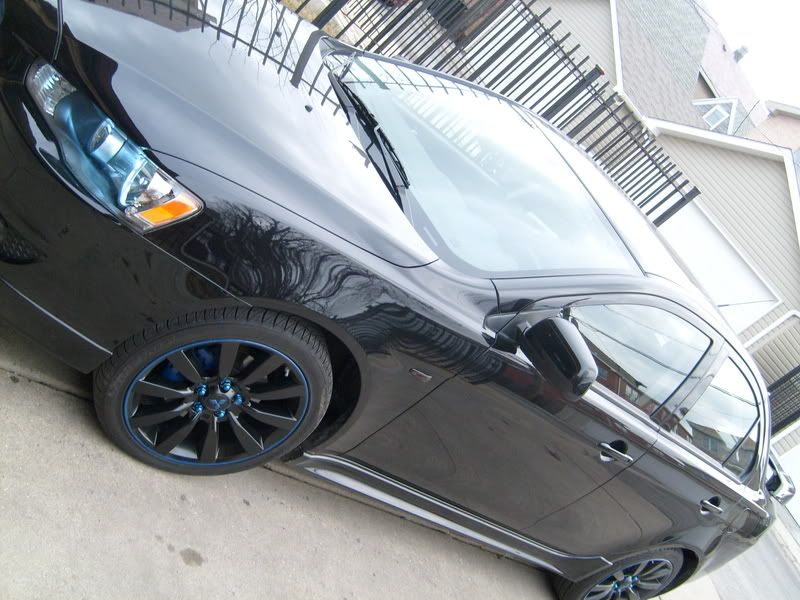
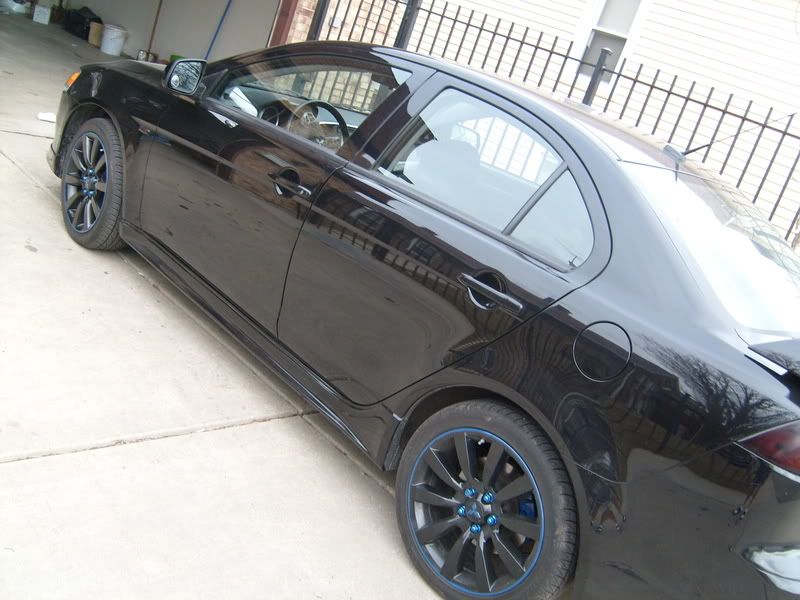
Next, to spray paint your own stock wheels, or new rims.
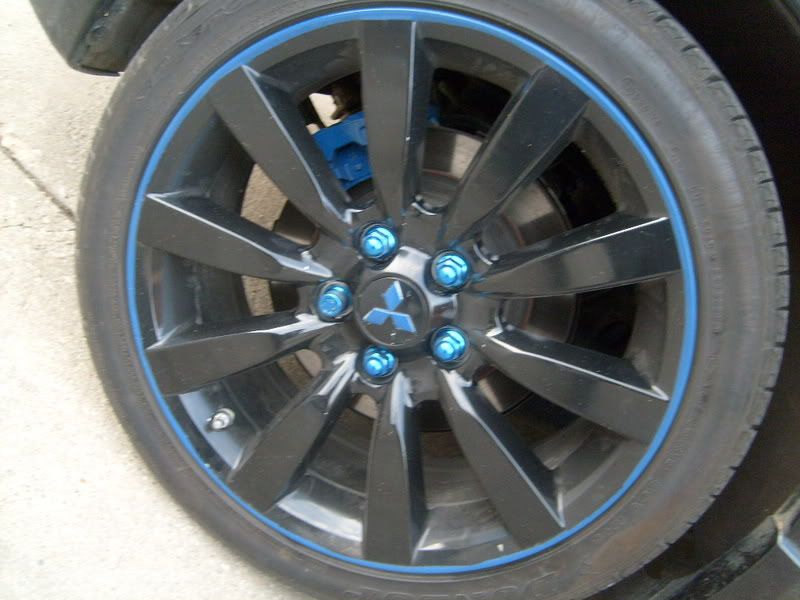
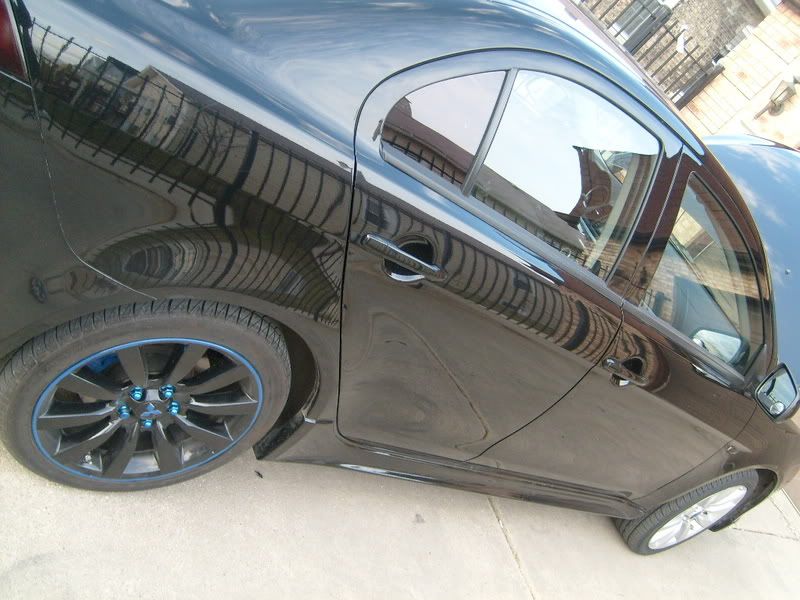
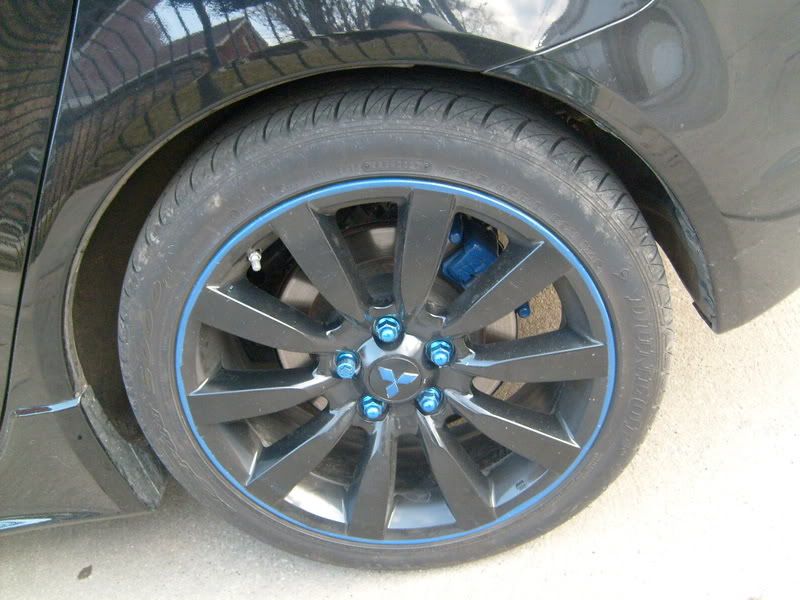
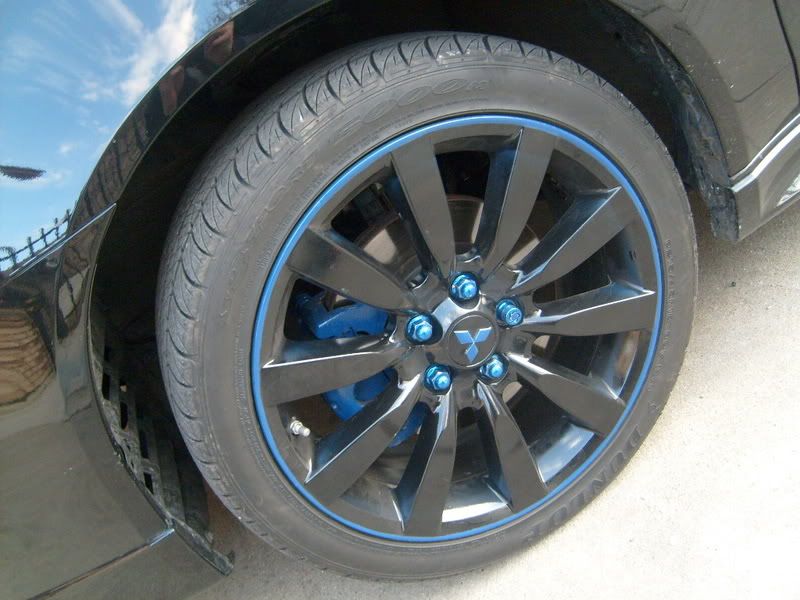

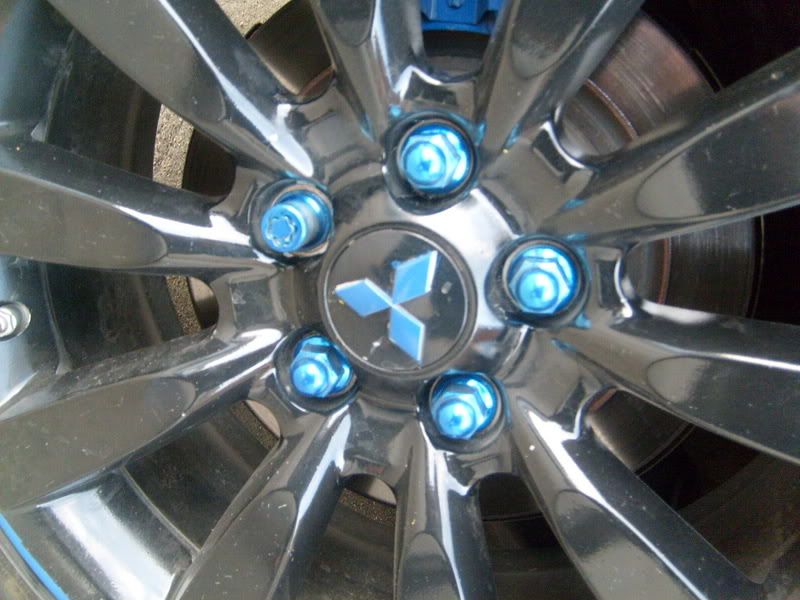
I used engine enamel duplicolor, index cards, 400 grits paper, painters tape, and sandable primer (black).
Cleaning the rims is very important, make sure you use acetone and sand paper together. ie: pour acetone on the rims, and sand at the same time. Make sure you clean all the dirt, then use sand paper + acetone, then use soap to clean one last time. Make sure you get every spoke, corner, and sides. You will need to dry the rims to the best of your abilities, NO WATER AT ALL LEFT ON THE RIMS OR INSIDE THE TIRE GAP. Using your common sense, you should know where to place your index cards. After placing the index cards, spray 3 coats of primer. Make sure to get all corners, spokes, and hole. Remember to follow my spray paint rules up there!! After 3 primer coats, wait 30 minutes, spray 3 coats of engine enamel duplicolor. I used GLOSS BLACK. Then wait 1 hour and spray 3 coats of CLEAR WHEEL COATING on the rims for protection and glossy look. Wait at least 2 days for it to dry before attempting to do the lip.
You will need to put the index cards back into the wheel gaps.
To do the lip, you will need to tape a circular shape on the rim. ie: this is how i did it, for every spoke on the stock Lancer rim, you will tape the end of each spoke like connecting the dots, and making sure you are making the circular shape with the tape. after completing the circle with your tape, mask off the middle to prevent any spray on it.
Spray 3 coats of the lip color of your choice. Engine enamel again. then 3 more coats of clear wheel coating.
To paint your rim emblems, you will need to pop it out from behind the rim. You will have it all black already. So then, tape the emblem and use a cardboard knife cutter to cut out the diamond and peel off the tape. then paint to the color of your choice, engine enamel again. 3 coats, 3 coats of wheel coating or less. This is where you can get lazy and know how much clear coats you will really need.
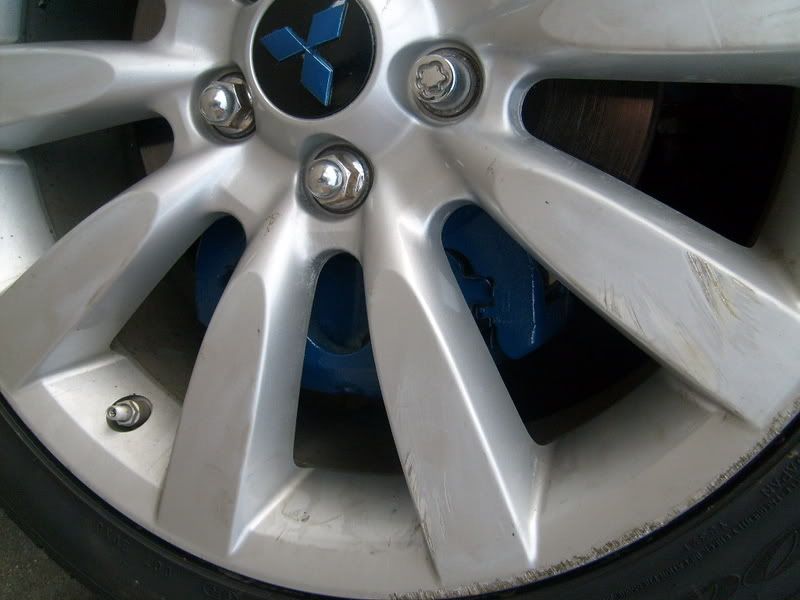
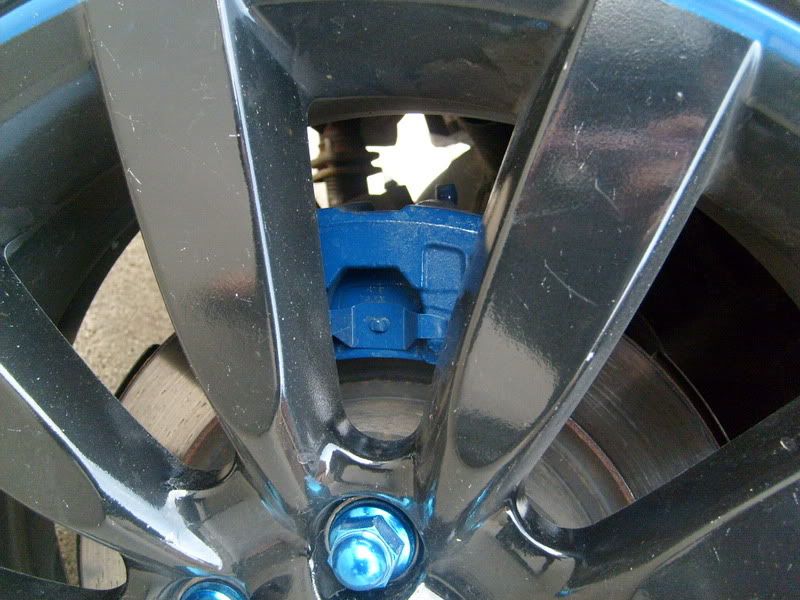
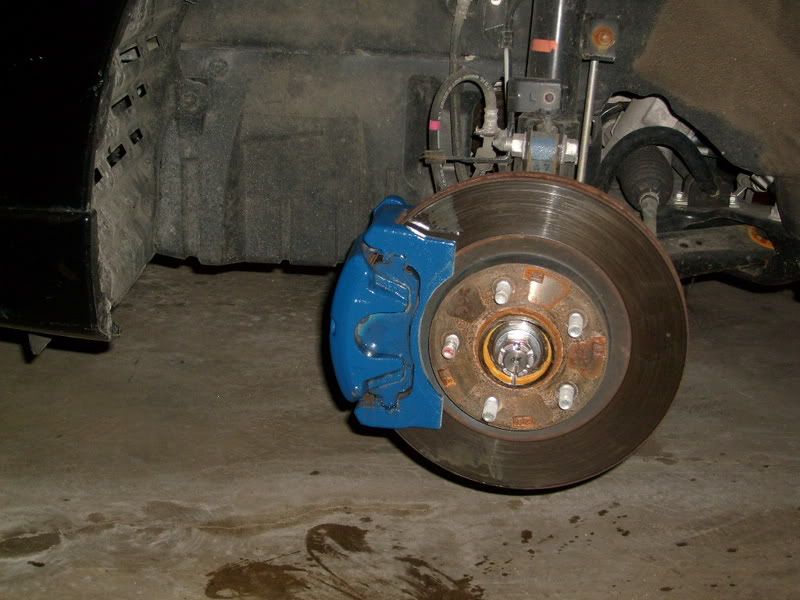
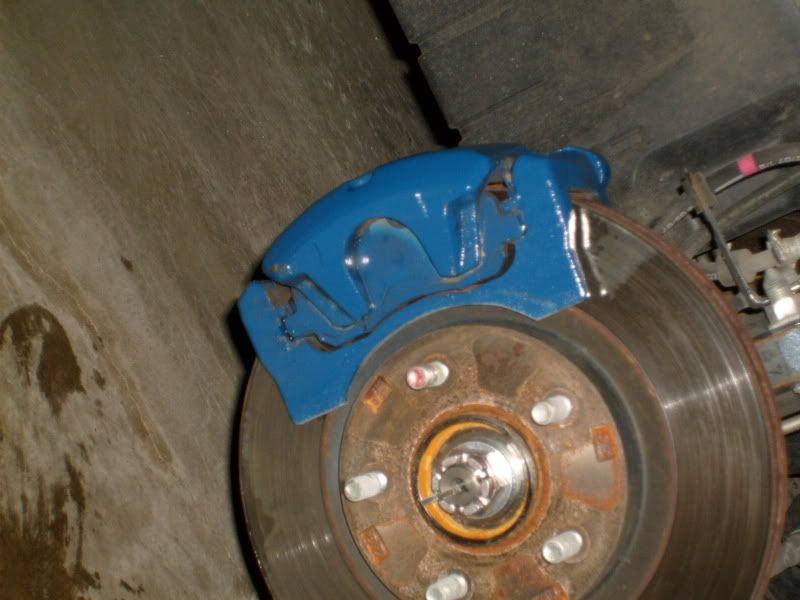
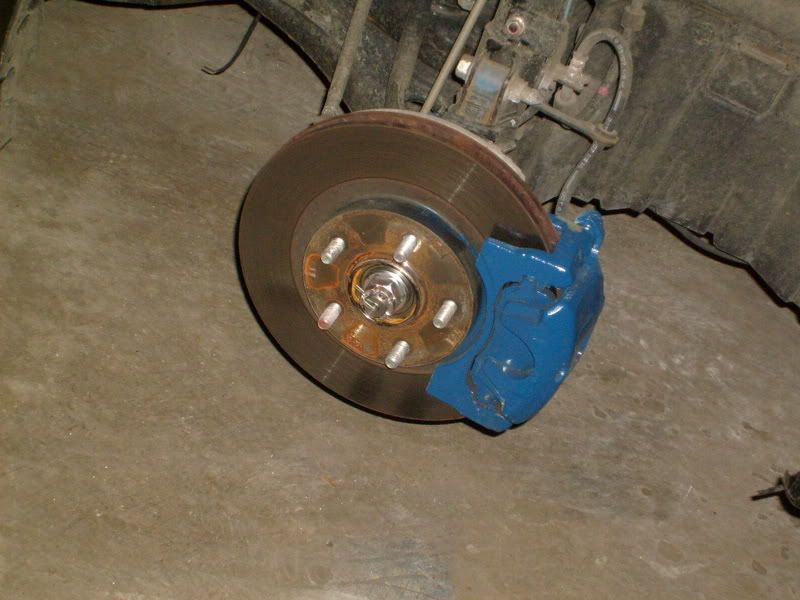
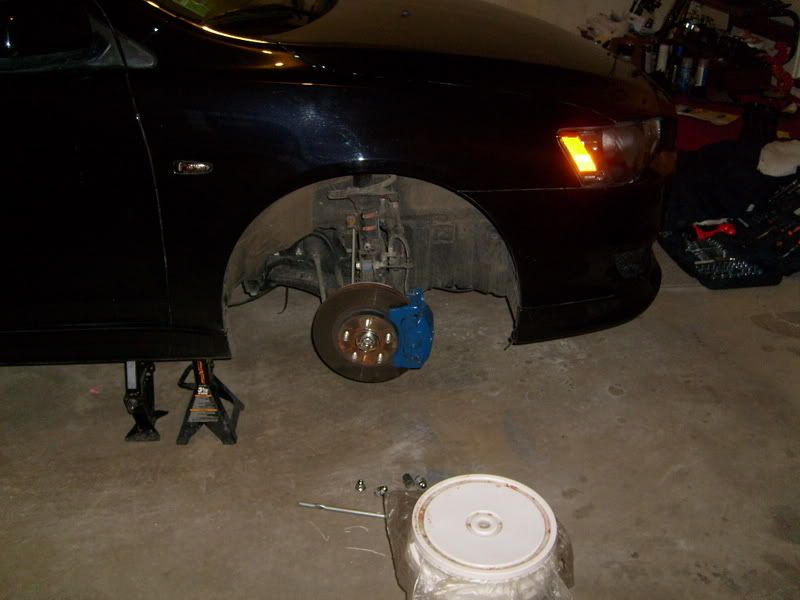
To spray paint your calipers, you will need acetone, 400 grits sand paper, water hose, and engine enamel duplicolor paint.
To clean your calipers, you will need to apply acetone and scrub with the sand paper. you'll notice that you'll have a lot of grease on your sand paper and that it may not be used anymore. NOT AT ALL. spray your sand paper with your hose and the grease will come right off. I don't know if its grease actually. Then keep sanding until you think it's clean. This is based on your own judgement if its clean. When you think it's ready for spray paint, mask off all other parts of the car from being spray painted. MAKE SURE YOU cover everything or else other things will be painting =(. I learned this the hard way too. lol. 3 layers of engine enamel duplicolor and thats it. don't use clear coating for any protection because i think it may melt.
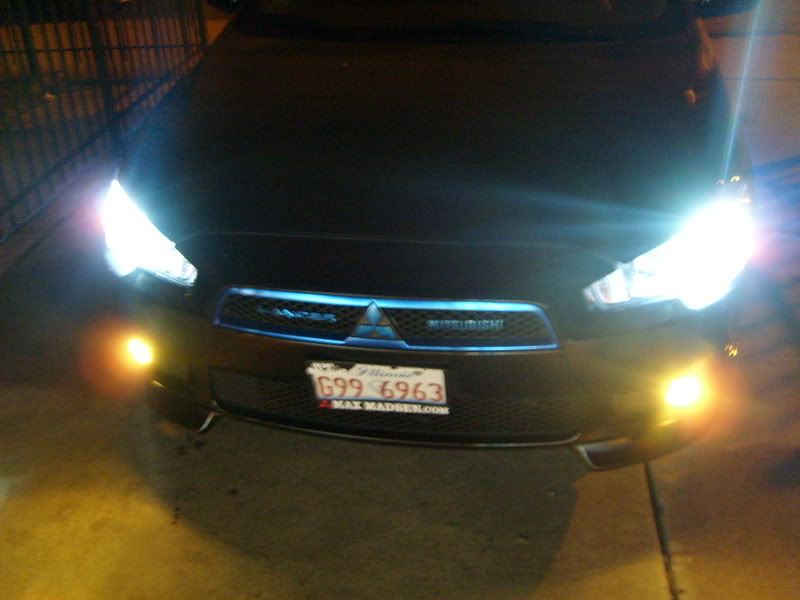
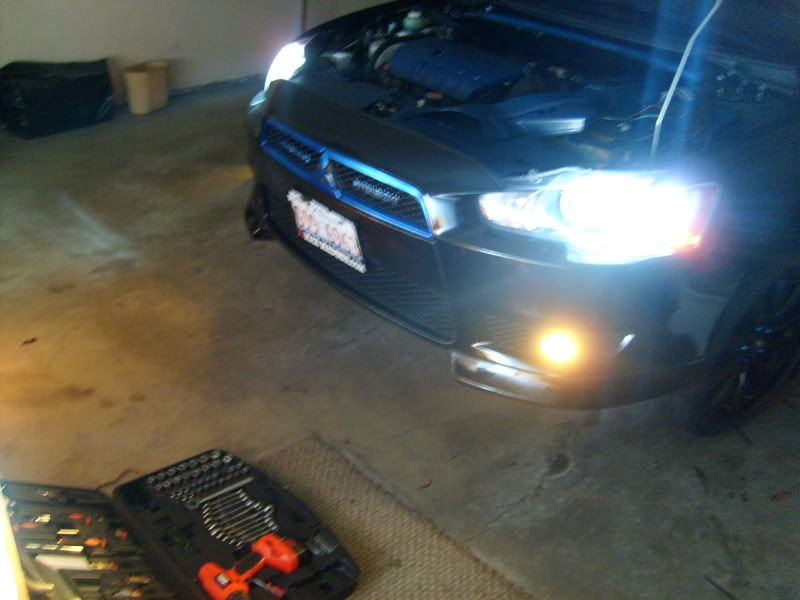
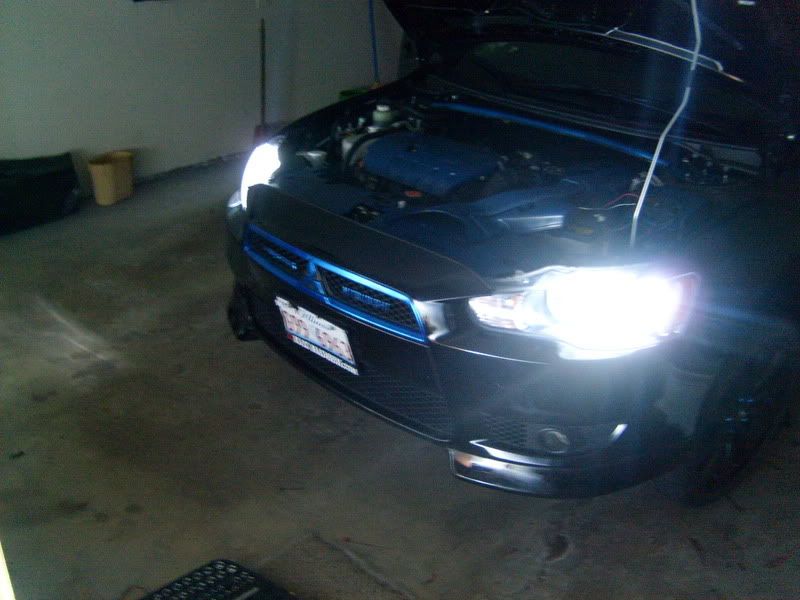
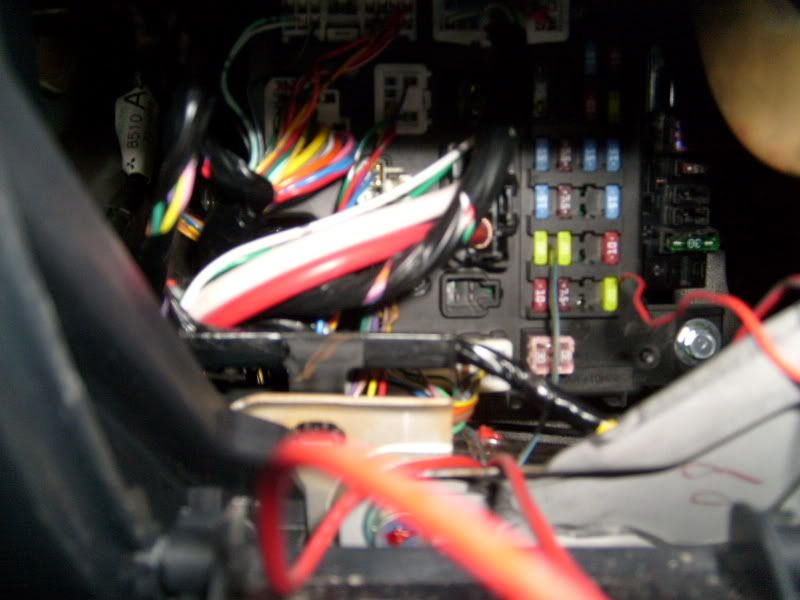
People asked WHERE DO I PUT MY HID BALLAST? WHERE TO CONNECT THE CAPACITOR? I have pictures and explaination! yay!!!
TIP: IF you're installing ANYTHING ELETRICAL. MAKE SURE TO USE GOOD ELETRICAL TAPE. MAKE SURE IT HAS SCOTCH ON IT. MUST BE STICKY!!
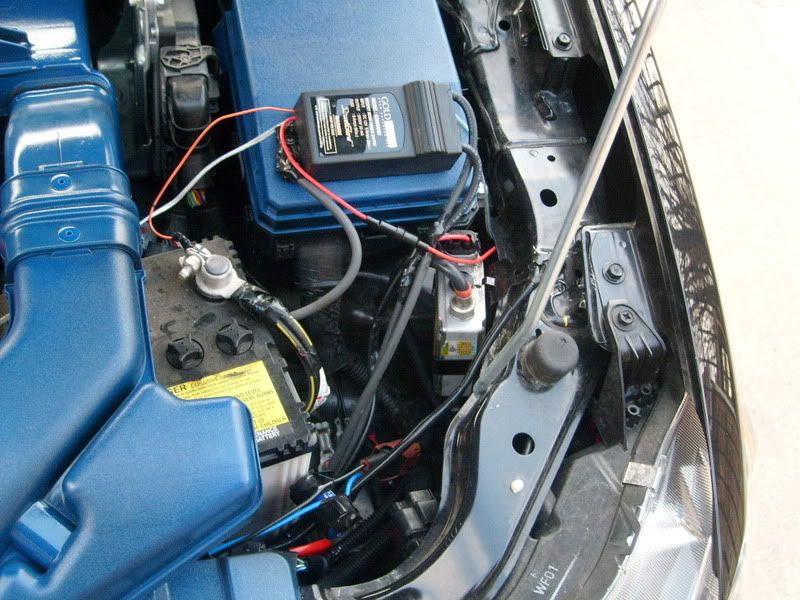

the bolts that came with my HID kit fit perfectly into these holes in the lancer. the black wire is the negative so i mount it to any car metal and bolt it down. make sure to cover it with eletrical tape. i stuff all my wires behind the battery. to connect the capacitor to which wire is explain on another tutorial on this site already. i connected my power wire directly to the battery. i hope this answered some questions for some people.

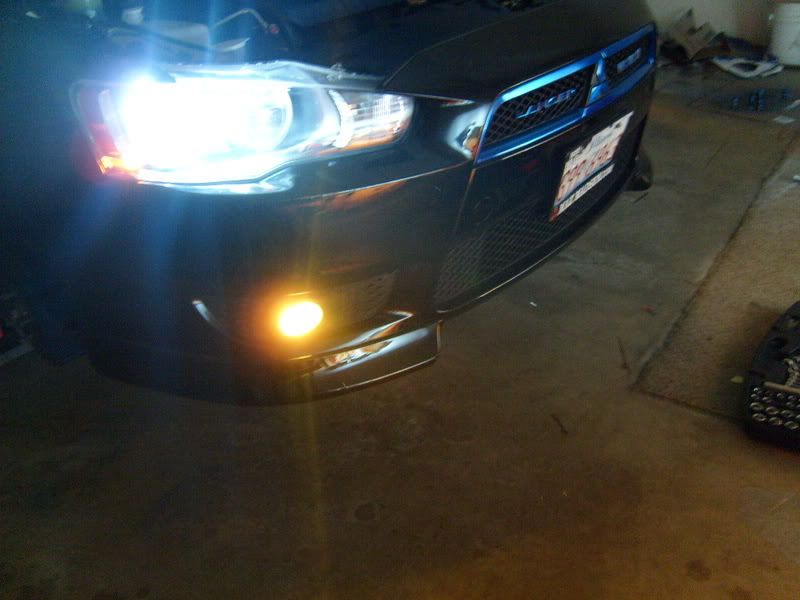
to change your fog lights, the plastic cover for the fog lights has one screw. unscrew that nail and ply off the plastic piece. then change your fog light to anything you want.
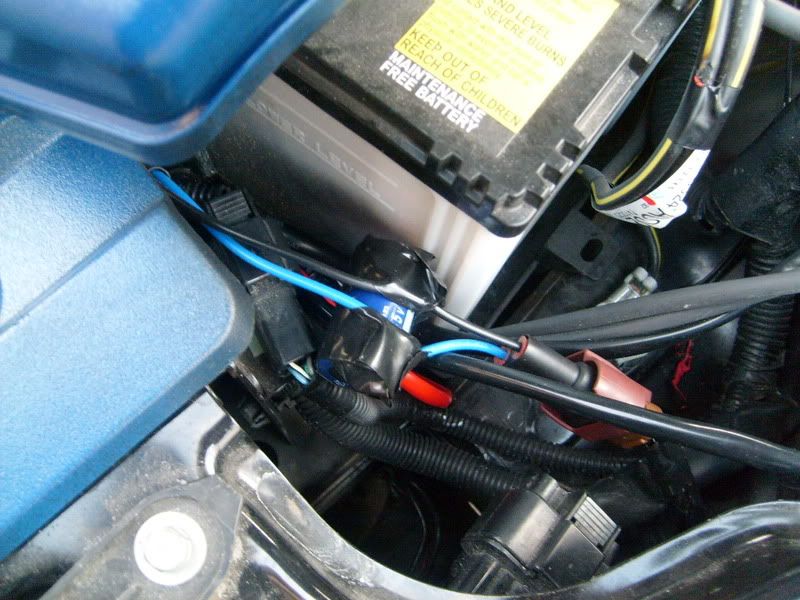
WHERE TO PUT YOUR REAR CAM, WIRE IT AND POWER IT?
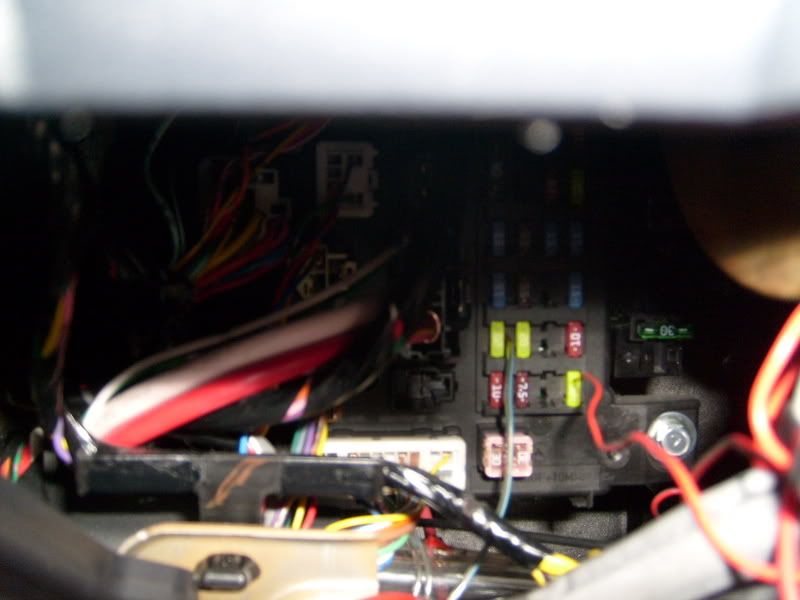
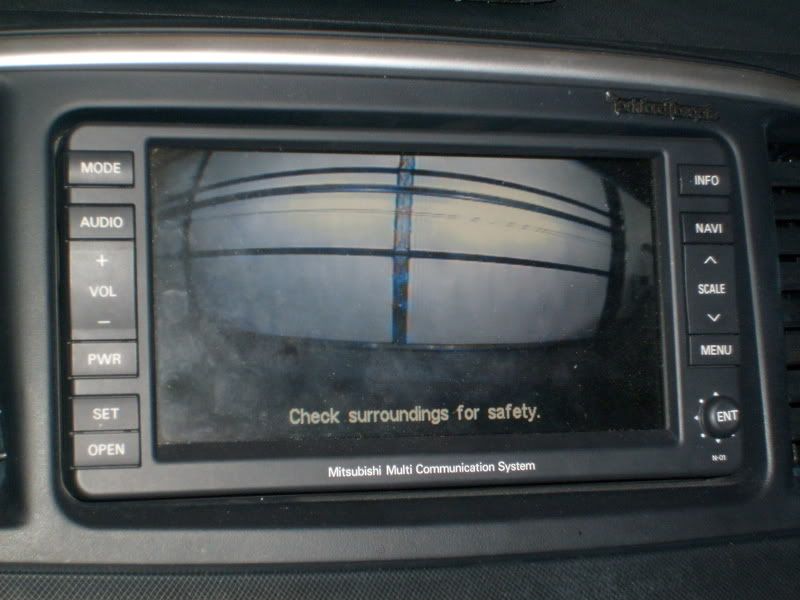
I put it right under my license plates, tucked in a little. You will need to drill a hole in your trunk. to do this, lift up the cloth and you should use your common sense to see where your hole should be drilled and where your wires will go through. DO NOT CONNECT YOUR REAR CAMERA WIRES TO THE NAVIGATION UNTIL YOU'VE DRILL THIS HOLE. THIS IS BECAUSE YOUR CAMERA IS MUCH BIGGER THAN THAT HOLE YOU'RE MAKING!! I learned the hard way... AGAIN.. so yes. drill the hole first, get the wires from the trunk to the front, then pull out your nav and wire it. I cut my camera wire in the end and put it through the hole, and then rewired it =(. i thought i messed it up, but rewiring it made it work again. hope this is clear to some people. I hot wired the power of the camera to any fuse in the driver side. the wires can be hidden easily with the lancer. stuff the wires inside the side plastic peices of the car. For further wiring of the camera, look for the other tutorial.
this is random, for anyone who uses EZ PASS, or anything with toll, if you have a sunroof, you can tape it right here
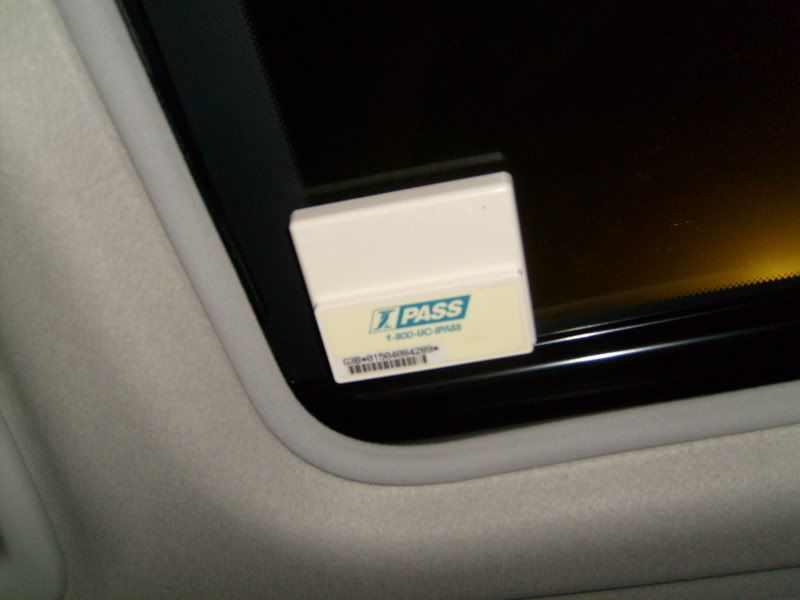
and it will work fine, even if you slide it back, it won't break or move anything. its a good hide for the hidious look. lol. and it works at toll ways fine!
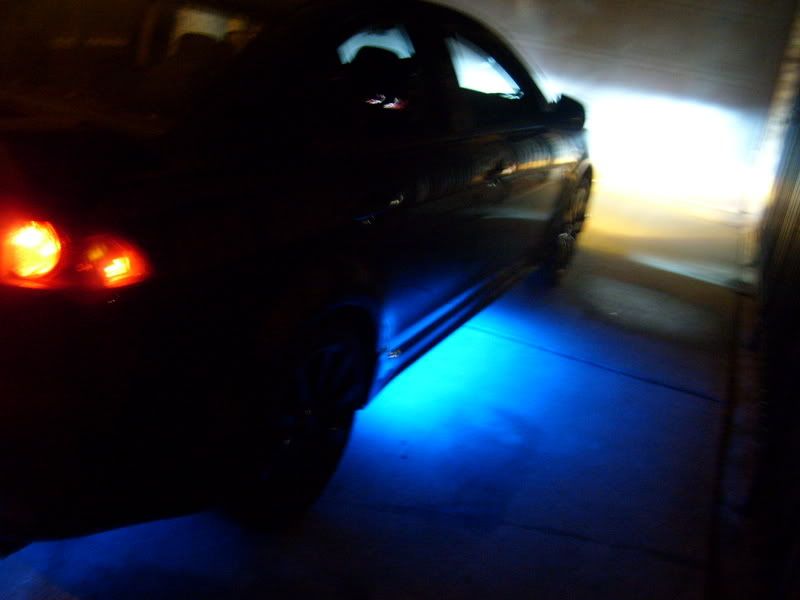
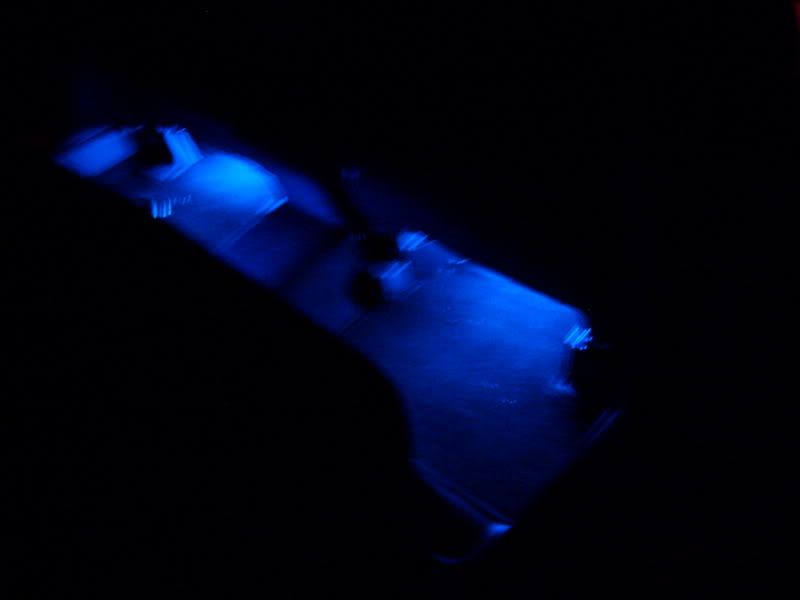
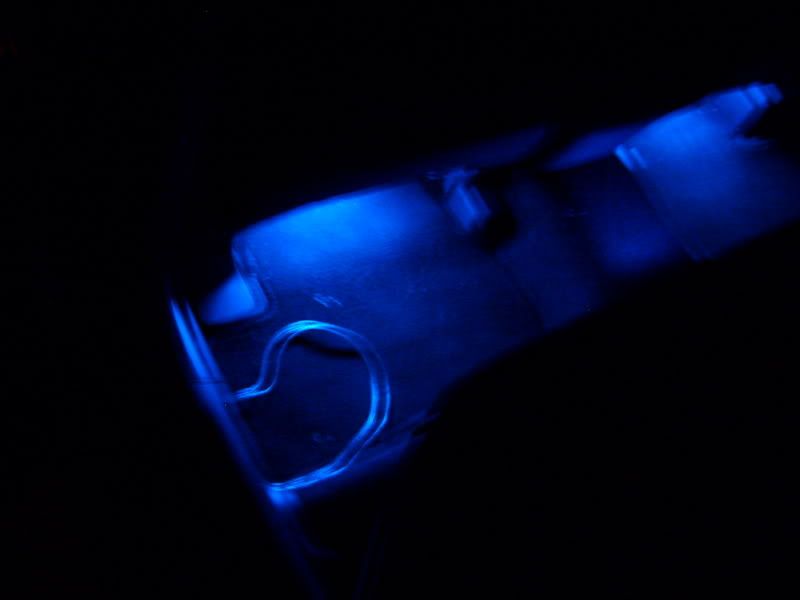
HOW TO GET MUSIC INTERFACE NEON LIGHTS, TRUNK NEON LIGHTS, UNDERCAR NEON LIGHTS
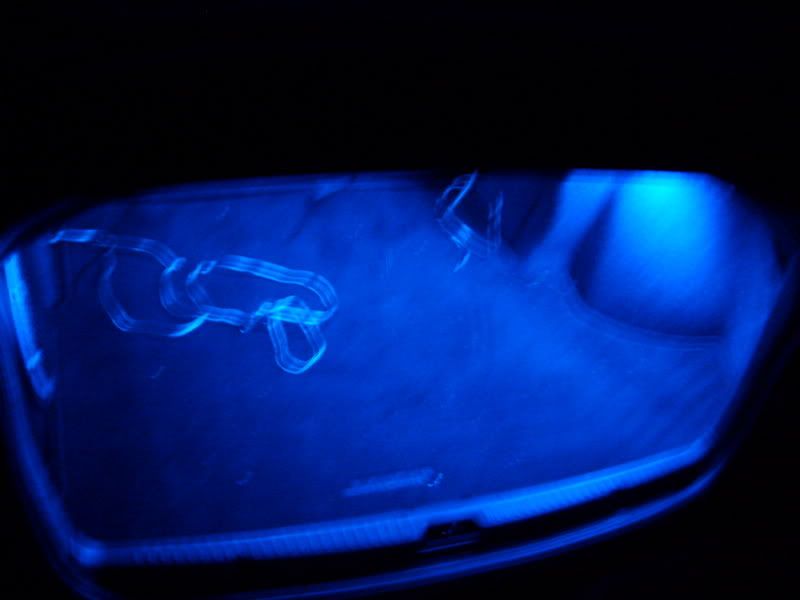
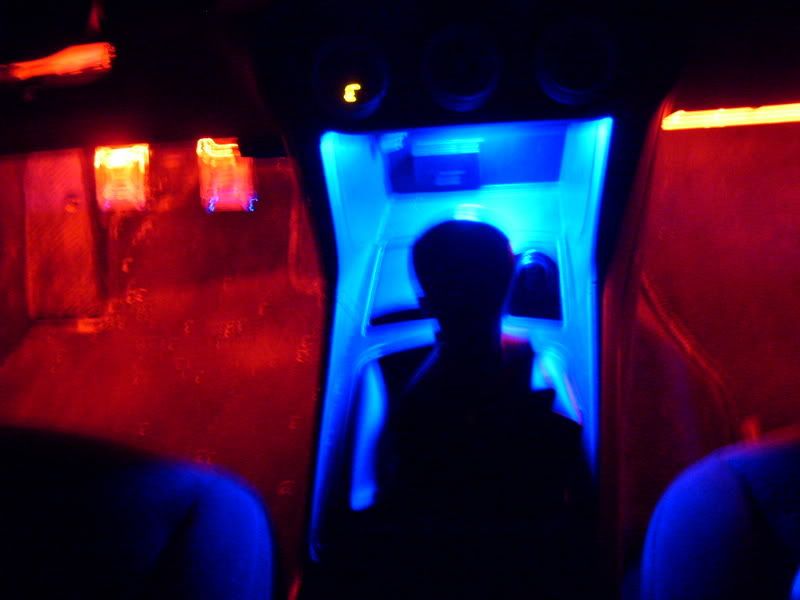
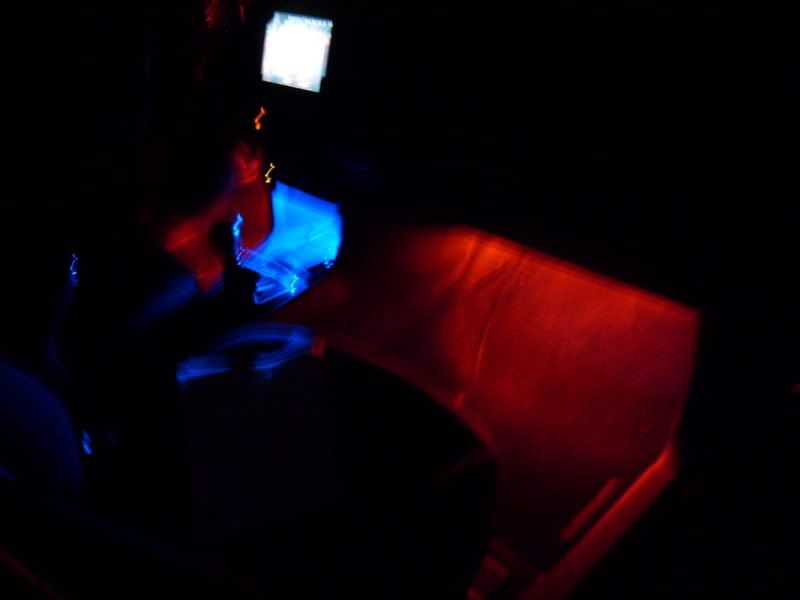
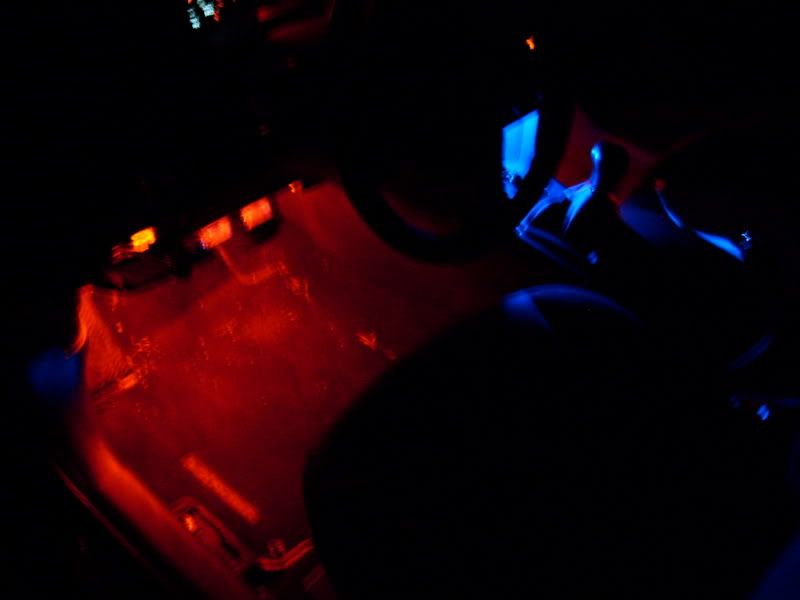
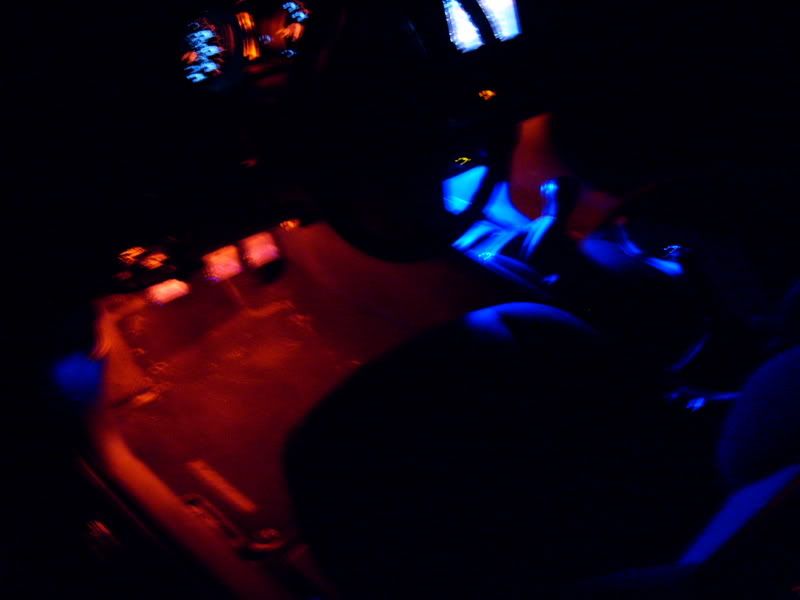
To put these neons on, you will need A LOT OF ZIP TIES. they are the best to do this job. to wire these lights, its all common sense. you will need to hide them very well and connect them to the music interface. i will have a video later on showing you how the music thing works. make sure to hide your neons so they can't be seen. they are irratating to the eye.
The music interface is called OPTIC MUSIC INTERFACE that can be found in most auto stores.
The music interface can be doublesided taped on OR zip tied to the driver side near the acceleration (Where i put it), or any where you want to put it that you can wire to. To power the music interface, i just hot wired it to the fuse box in the driver side agian. i used a music interface because the neons only come on to the BEATS of the song so it's not ALWAYS on. if not, it will drain the battery.
to add neons to the trunk, just remove the light that is on the top of the trunk. unplug the light plug and hot wired it to the plug. therefore, your neon will turn on when you pop your trunk, and shut off when you close it. also, the car auto shuts off the neon in 2 minutes if you do not connect back the light bulb, but if you connect it back to the light bulb, the light wont ever go off. weird stuff. or you can wire these to your music interface. place a neon at the right, center, and left for bright even look. lol. its all up to you.
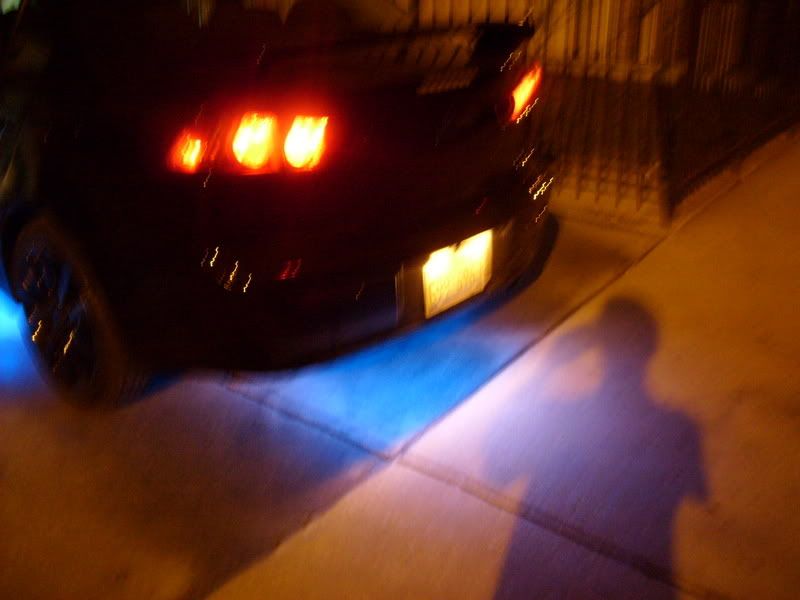
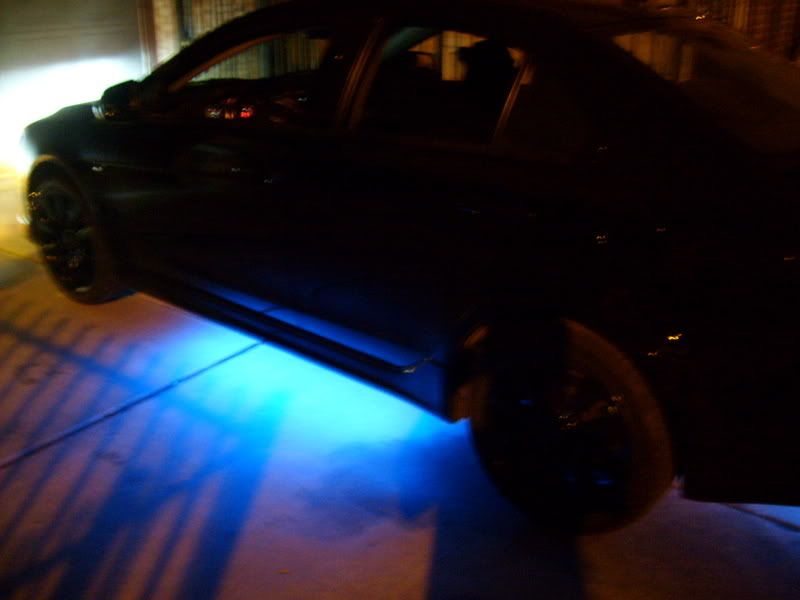
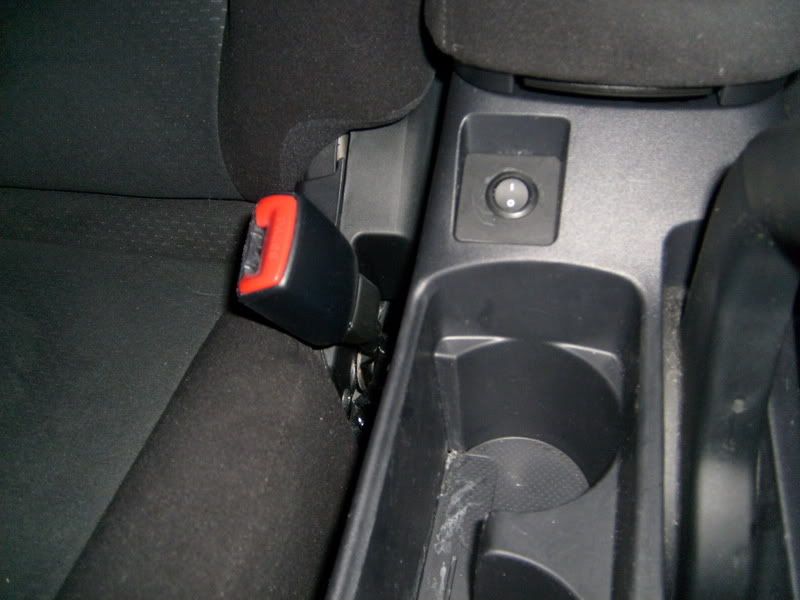
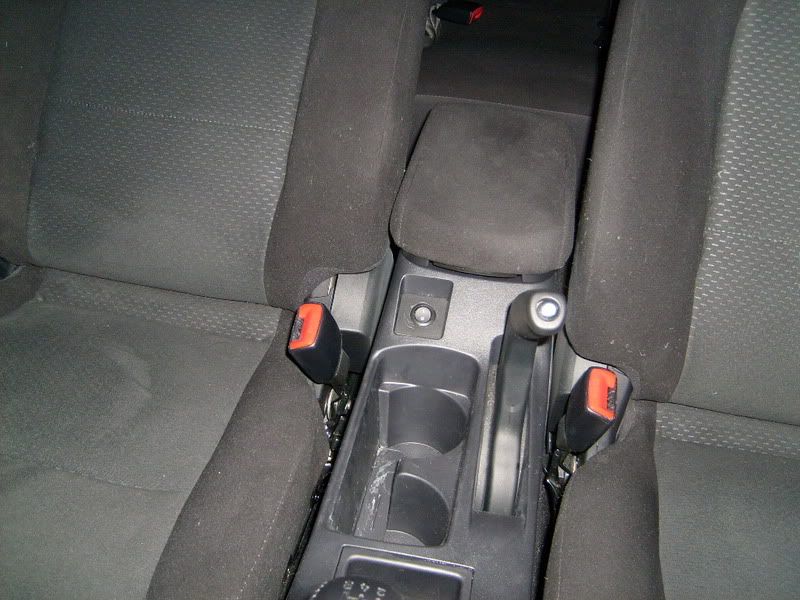
for under car kit, just buy the kit and follow the rules in the car. i got the gold series undercar kit blue. zip tie the wires under the car so they don't get caught on anything rotating. you will have to go under the car for this. you will not need to drill holes for the side of the car because the screws there seem to perfectly fit the neon clamps. you will have to drive holes for the rear though. make sure you don't install the front one because mine has cracked. it is not worth it during the winter. no matter how you drive, the fron't will rub on something, and the neon will easily crack and not work. HIDS and yellow fog lights will negate the blue color of the neon.. so its just best to put the fourth tube some where else.. maybe in the grill.. i wish i still had it =(. so i just wired three of them together. the manual pretty much explains it all, but i was just giving some heads up. I am going to move the power switch of the underkit neon to the middle compartment cup holder button. there is just a black cover it, i'm gonna carve the circle and stuff it in. i'll get pictures when i'm done with it.
heres the video..

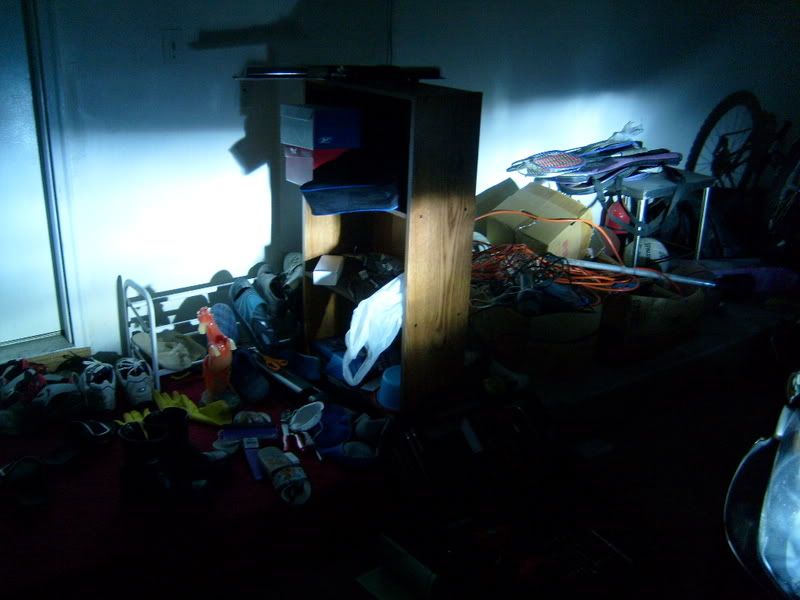
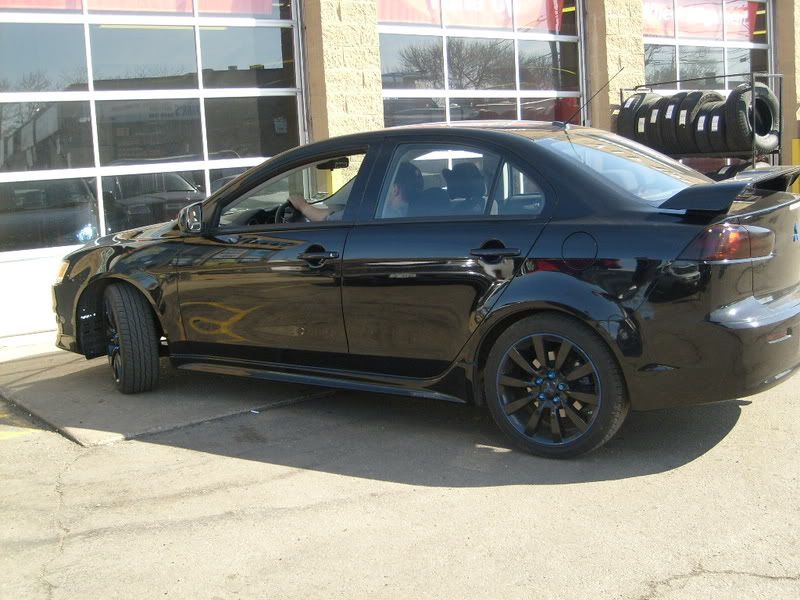
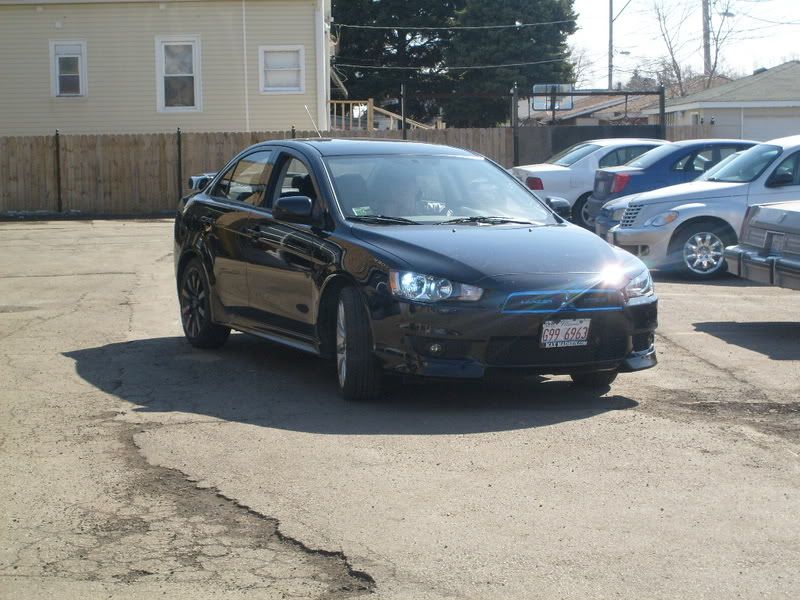
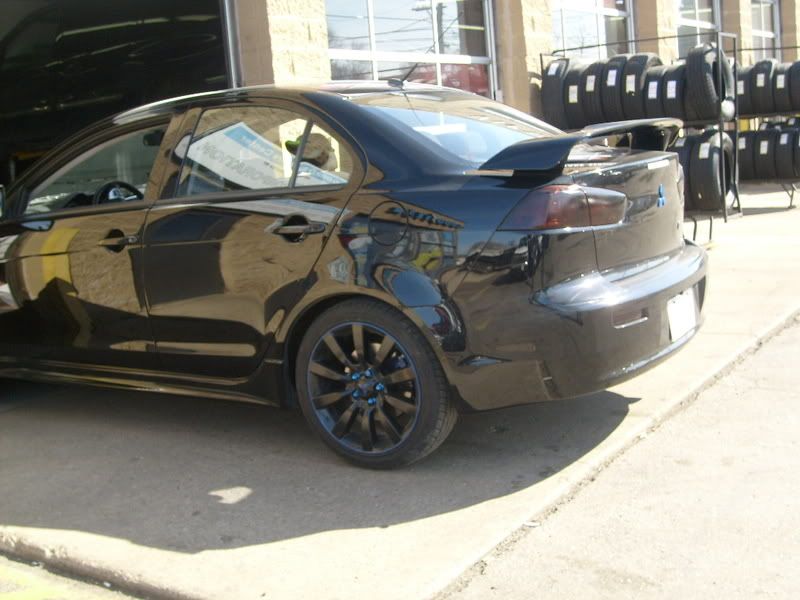
anyways, yes.. if you saw my garage and took notice. i'm a *****. chinese. lol. i know these are ricey, but i like the looks imo. i hope this will help some of you and inspire some of you to do the same to your car!
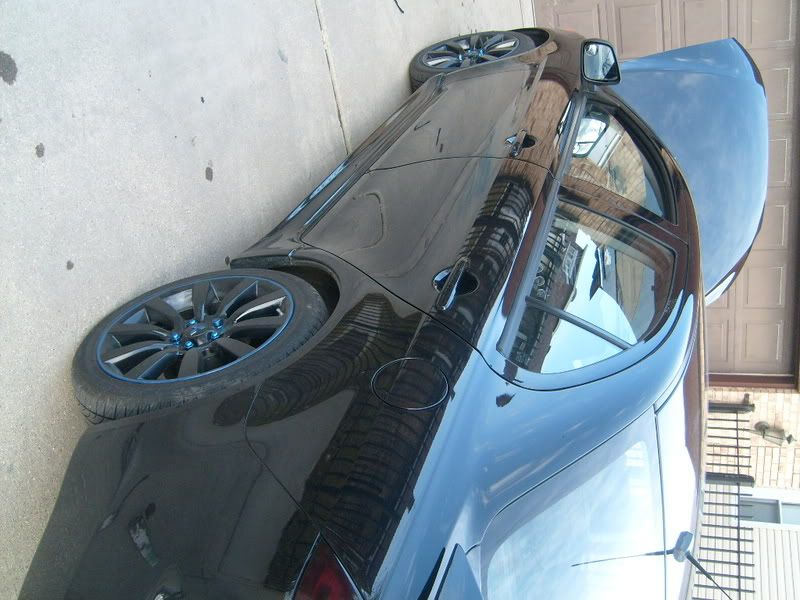
finishing looks:
Getting my tires changed at goodyear!! Warrenty!! this is for the pulling to the left problem!
i just noticed the video is ****ty as ****, if you want a better one, just hollar. ill make another one. click to watch the video! turn up your volume to hear it! goodluck
This is a new how to customize those pop out buttons!
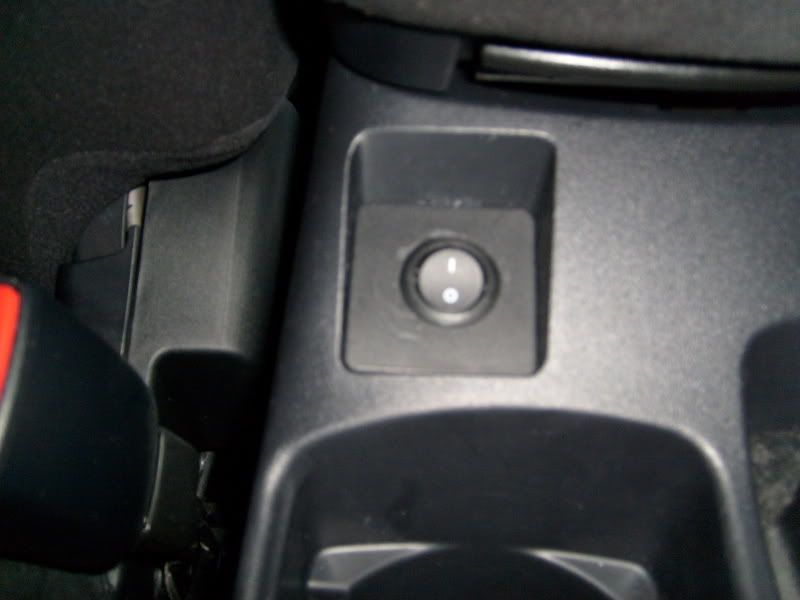
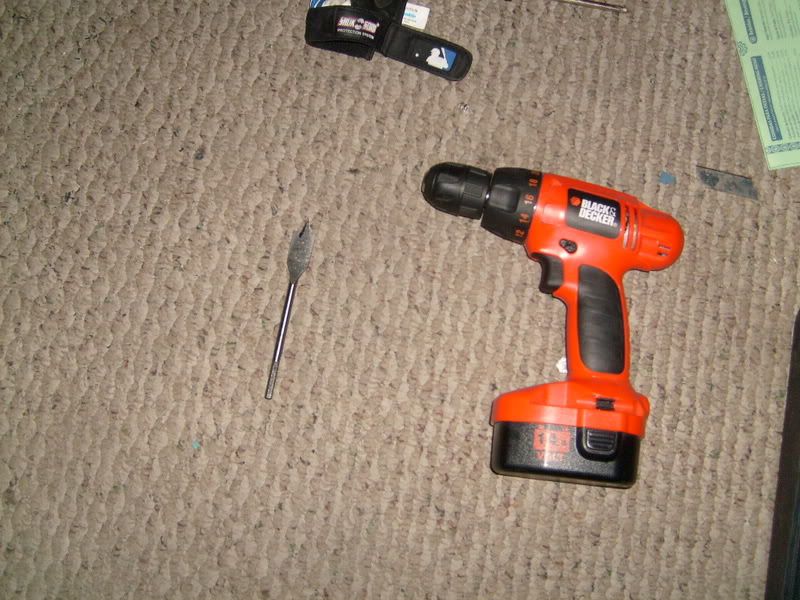
If you ever wanted to customize those empty bottons, or so i call them, here it is! the middle compartment with the little space infront of it has a black square that seems to be able to pop out! well it can! and in the pictures i will show you how it looks. i bought my gold series underglow neon lights, and the button that came with it was made for this square block. I used a drill with a hole maker of 3/4 as shown in my pictures. when drilling the hole, make sure its centered. when doing any wiring, make sure you have it all pictured in your head before attempting to wire. believe me, once agian i learned the hard way. i forgot to put the square block back onto the spot after wiring it so i had to cut it to put it back on it's spot and then re-wire in the middle. confusing eh? i hope you wont do the same. just try it yourself!

some more finishing pictures:
Few spray painting rules so I don't repeat pointless things. I written this half way and decided to add this. So don't mind the repetition
. ALWAYS SHAKE SPRAY PAINT CAN FOR 1 MINUTE BEFORE ANY USE.
SHAKE 10 SECONDS FOR SECOND THIRD FOURTH USE. ect..
WAIT AROUND 15 MINUTES FOR PAINT TO DRY UNTIL NEXT COATING.
50 DEGREES AND HIGHER FOR SPRAY PAINTING IS PERFECT.
DO NOT LET ANY MOISTURE TOUCH THE PAINT. MAKE SURE YOU'RE PAINTING ON DRY PARTS.
DO NOT OVERSPRAY SO GET TAPE AND CARDBOARD BOXES TO PUT ON THE FLOOR AND MASK EVERYTHING OFF.
THREE COATS FOR ANYTHING UNLESS YOU WANT MORE. YOU MAKE THE JUGDEMENTS.
ACETONE BURNS YOUR SKIN, MAKE SURE YOU WEAR GLOVES. ( I learned this the hard way.. lol. funny experience. all my hair on my hand came off.)
SPRAY PAINT CAN BE BOUGHT FROM PEPBOYS, OR ANY OTHER AUTO STORE.
ACETONE AND CLEANING PRODUCTS FROM HOME DEPOT.
I BOUGHT NIGHTSHADE ONLINE FROM EBAY. (Couldn't find any in stores)
First off, I painted many parts under my hood.
Take a look:
Parts that I painted: Engine cover, sparks cover, front plastic cover, intake, air filter, fuse box, and the bar (Which I don't know what's it called).
To paint these parts, I used the following:
400 grits sand paper, towel, water, soap, duplicolor spray paint (engine enamel)
First off, clean your piece to the best of your abilities. Aterwards, sand till it turns to a whitish color. Third, clean again. Then, spray paint the color of your choice. This is where you need to know the degrees to paint, humidity, amount of time to wait for each coat, and how many coats. Here it is, anything above 50 degrees is a great temperature to spray paint and let dry. Humidity.. under 30% I guess? Sorry I'm not too sure about that, but just make sure it's not raining =). haha okay. Spray paint around 3 coats, 15 minutes apart from each other. After third coat, 1 hour should be enough to put the piece back without messing up the paint job. I didn't put clear coat on my parts because I was afraid that it would melt.
for the bar, it was metal, so i used METAL CAST DUPLICOLOR PAINT. there is a difference!
Next off, how to spray paint your grill..
Now taking off your grill is gonna be simple. You will have to take off the plastic black piece attached to the chrome emblems. There will be about 8 screws. The chrome grill is actually a part where
First off, I used acetone, METALCAST DUPLICOLOR (of any color), towel, water, and clear wheel coating(Duplicolor also)
Clean your chrome grill with water, then use acetone to clean off any clear coatings put on by mitsu. Then clean your grill again with water and soap.
Get your METALCAST SPRAY PAINT and spray lightly 3 coats. then 3 more clear wheel coating on it to protect it.
THIS IS THE SAME METHOD TO PAINT YOUR EMBLEMS, EXHAUST TIP, SCUFF PLATES, WHEEL LOCK AND BOLTS, TRUNK BUTTON AND DOOR LOCK HOOKS TO THE COLOR OF YOUR CHOICE.
To get your emblems off, you can use teeth floss to cut the adhensive off. Then using a hair dryer to get the glue off the car and use "GOOF OFF" from homedepot to scrub off. Putting the emblems back would be using M3 DOUBLE SIDED TAPE ADHENSIVE.
To get your exhaust tip is simple too, just two bolts.
There is a tutorial on how to spray paint your tail lights black already. read it! i sprayed the bottom lights too, just mask it off and apply around 4 coats of it. i dont suggest using clear coat. i used clear coat and i regret it. i don't think its required and it only made it look wrinkley.
Next, to spray paint your own stock wheels, or new rims.
I used engine enamel duplicolor, index cards, 400 grits paper, painters tape, and sandable primer (black).
Cleaning the rims is very important, make sure you use acetone and sand paper together. ie: pour acetone on the rims, and sand at the same time. Make sure you clean all the dirt, then use sand paper + acetone, then use soap to clean one last time. Make sure you get every spoke, corner, and sides. You will need to dry the rims to the best of your abilities, NO WATER AT ALL LEFT ON THE RIMS OR INSIDE THE TIRE GAP. Using your common sense, you should know where to place your index cards. After placing the index cards, spray 3 coats of primer. Make sure to get all corners, spokes, and hole. Remember to follow my spray paint rules up there!! After 3 primer coats, wait 30 minutes, spray 3 coats of engine enamel duplicolor. I used GLOSS BLACK. Then wait 1 hour and spray 3 coats of CLEAR WHEEL COATING on the rims for protection and glossy look. Wait at least 2 days for it to dry before attempting to do the lip.
You will need to put the index cards back into the wheel gaps.
To do the lip, you will need to tape a circular shape on the rim. ie: this is how i did it, for every spoke on the stock Lancer rim, you will tape the end of each spoke like connecting the dots, and making sure you are making the circular shape with the tape. after completing the circle with your tape, mask off the middle to prevent any spray on it.
Spray 3 coats of the lip color of your choice. Engine enamel again. then 3 more coats of clear wheel coating.
To paint your rim emblems, you will need to pop it out from behind the rim. You will have it all black already. So then, tape the emblem and use a cardboard knife cutter to cut out the diamond and peel off the tape. then paint to the color of your choice, engine enamel again. 3 coats, 3 coats of wheel coating or less. This is where you can get lazy and know how much clear coats you will really need.
To spray paint your calipers, you will need acetone, 400 grits sand paper, water hose, and engine enamel duplicolor paint.
To clean your calipers, you will need to apply acetone and scrub with the sand paper. you'll notice that you'll have a lot of grease on your sand paper and that it may not be used anymore. NOT AT ALL. spray your sand paper with your hose and the grease will come right off. I don't know if its grease actually. Then keep sanding until you think it's clean. This is based on your own judgement if its clean. When you think it's ready for spray paint, mask off all other parts of the car from being spray painted. MAKE SURE YOU cover everything or else other things will be painting =(. I learned this the hard way too. lol. 3 layers of engine enamel duplicolor and thats it. don't use clear coating for any protection because i think it may melt.
People asked WHERE DO I PUT MY HID BALLAST? WHERE TO CONNECT THE CAPACITOR? I have pictures and explaination! yay!!!
TIP: IF you're installing ANYTHING ELETRICAL. MAKE SURE TO USE GOOD ELETRICAL TAPE. MAKE SURE IT HAS SCOTCH ON IT. MUST BE STICKY!!
the bolts that came with my HID kit fit perfectly into these holes in the lancer. the black wire is the negative so i mount it to any car metal and bolt it down. make sure to cover it with eletrical tape. i stuff all my wires behind the battery. to connect the capacitor to which wire is explain on another tutorial on this site already. i connected my power wire directly to the battery. i hope this answered some questions for some people.
to change your fog lights, the plastic cover for the fog lights has one screw. unscrew that nail and ply off the plastic piece. then change your fog light to anything you want.
WHERE TO PUT YOUR REAR CAM, WIRE IT AND POWER IT?
I put it right under my license plates, tucked in a little. You will need to drill a hole in your trunk. to do this, lift up the cloth and you should use your common sense to see where your hole should be drilled and where your wires will go through. DO NOT CONNECT YOUR REAR CAMERA WIRES TO THE NAVIGATION UNTIL YOU'VE DRILL THIS HOLE. THIS IS BECAUSE YOUR CAMERA IS MUCH BIGGER THAN THAT HOLE YOU'RE MAKING!! I learned the hard way... AGAIN.. so yes. drill the hole first, get the wires from the trunk to the front, then pull out your nav and wire it. I cut my camera wire in the end and put it through the hole, and then rewired it =(. i thought i messed it up, but rewiring it made it work again. hope this is clear to some people. I hot wired the power of the camera to any fuse in the driver side. the wires can be hidden easily with the lancer. stuff the wires inside the side plastic peices of the car. For further wiring of the camera, look for the other tutorial.
this is random, for anyone who uses EZ PASS, or anything with toll, if you have a sunroof, you can tape it right here
and it will work fine, even if you slide it back, it won't break or move anything. its a good hide for the hidious look. lol. and it works at toll ways fine!
HOW TO GET MUSIC INTERFACE NEON LIGHTS, TRUNK NEON LIGHTS, UNDERCAR NEON LIGHTS
To put these neons on, you will need A LOT OF ZIP TIES. they are the best to do this job. to wire these lights, its all common sense. you will need to hide them very well and connect them to the music interface. i will have a video later on showing you how the music thing works. make sure to hide your neons so they can't be seen. they are irratating to the eye.
The music interface is called OPTIC MUSIC INTERFACE that can be found in most auto stores.
The music interface can be doublesided taped on OR zip tied to the driver side near the acceleration (Where i put it), or any where you want to put it that you can wire to. To power the music interface, i just hot wired it to the fuse box in the driver side agian. i used a music interface because the neons only come on to the BEATS of the song so it's not ALWAYS on. if not, it will drain the battery.
to add neons to the trunk, just remove the light that is on the top of the trunk. unplug the light plug and hot wired it to the plug. therefore, your neon will turn on when you pop your trunk, and shut off when you close it. also, the car auto shuts off the neon in 2 minutes if you do not connect back the light bulb, but if you connect it back to the light bulb, the light wont ever go off. weird stuff. or you can wire these to your music interface. place a neon at the right, center, and left for bright even look. lol. its all up to you.
for under car kit, just buy the kit and follow the rules in the car. i got the gold series undercar kit blue. zip tie the wires under the car so they don't get caught on anything rotating. you will have to go under the car for this. you will not need to drill holes for the side of the car because the screws there seem to perfectly fit the neon clamps. you will have to drive holes for the rear though. make sure you don't install the front one because mine has cracked. it is not worth it during the winter. no matter how you drive, the fron't will rub on something, and the neon will easily crack and not work. HIDS and yellow fog lights will negate the blue color of the neon.. so its just best to put the fourth tube some where else.. maybe in the grill.. i wish i still had it =(. so i just wired three of them together. the manual pretty much explains it all, but i was just giving some heads up. I am going to move the power switch of the underkit neon to the middle compartment cup holder button. there is just a black cover it, i'm gonna carve the circle and stuff it in. i'll get pictures when i'm done with it.
heres the video..
anyways, yes.. if you saw my garage and took notice. i'm a *****. chinese. lol. i know these are ricey, but i like the looks imo. i hope this will help some of you and inspire some of you to do the same to your car!
finishing looks:
Getting my tires changed at goodyear!! Warrenty!! this is for the pulling to the left problem!
i just noticed the video is ****ty as ****, if you want a better one, just hollar. ill make another one. click to watch the video! turn up your volume to hear it!
goodluckThis is a new how to customize those pop out buttons!
If you ever wanted to customize those empty bottons, or so i call them, here it is! the middle compartment with the little space infront of it has a black square that seems to be able to pop out! well it can! and in the pictures i will show you how it looks. i bought my gold series underglow neon lights, and the button that came with it was made for this square block. I used a drill with a hole maker of 3/4 as shown in my pictures. when drilling the hole, make sure its centered. when doing any wiring, make sure you have it all pictured in your head before attempting to wire. believe me, once agian i learned the hard way. i forgot to put the square block back onto the spot after wiring it so i had to cut it to put it back on it's spot and then re-wire in the middle. confusing eh? i hope you wont do the same. just try it yourself!
some more finishing pictures:
Last edited by ashun22panda; Mar 15, 2008 at 04:02 PM. Reason: has more stuff to add!
 Mar 14, 2008, 04:47 AM
#3
Evolving Member
Thread Starter
Join Date: Nov 2007
Location: Chicago, IL
Posts: 166
Likes: 0
Received 0 Likes
on
0 Posts
well... are you planning to paint anything on your car? maybe a different color will attract you. i saw this multi color spray paint that was cool.. couldnt find it =(
just a few more mods.. gonna tint my windows and paint the interior CF looking trims all around to chrome most likely. what you guys think?
just a few more mods.. gonna tint my windows and paint the interior CF looking trims all around to chrome most likely. what you guys think?


Trending Topics
Mar 14, 2008, 09:04 AM
#11
EvoM Staff Alumni
iTrader: (88)
Join Date: Aug 2003
Location: Concord Township, Ohio
Posts: 8,733
Likes: 0
Received 3 Likes
on
3 Posts
Very nice writeup. We don't have the same style, but I liked a lot of the stuff you did. The engine bay painting looks really good. I'm tempted to spray some of my parts now.
Also, please avoiding typing in all caps. It's against site rules (and hard to read).
Also, please avoiding typing in all caps. It's against site rules (and hard to read).
Mar 14, 2008, 10:12 AM
#13
Evolving Member
Thread Starter
Join Date: Nov 2007
Location: Chicago, IL
Posts: 166
Likes: 0
Received 0 Likes
on
0 Posts
dont worry about being perfect. i'll take a close up picture on the lip of the wheel. the thing is as uneven as anything. but at a distance, the lip seems to be circular =) i recommend you try it. if you need help, just ask