When you click on links to various merchants on this site and make a purchase, this can result in this site earning a commission. Affiliate programs and affiliations include, but are not limited to, the eBay Partner Network.
Lancer Tires, Wheels, Brakes & Suspension - Sponsored by The Tire RackFrom suspension settings to new wheels and tires or brake upgrades... it's all covered here. Sponsored by: The Tire Rack
So, a few people on Evolutionm.net have done this swap but none have really detailed it. So, here we go! This is for you.
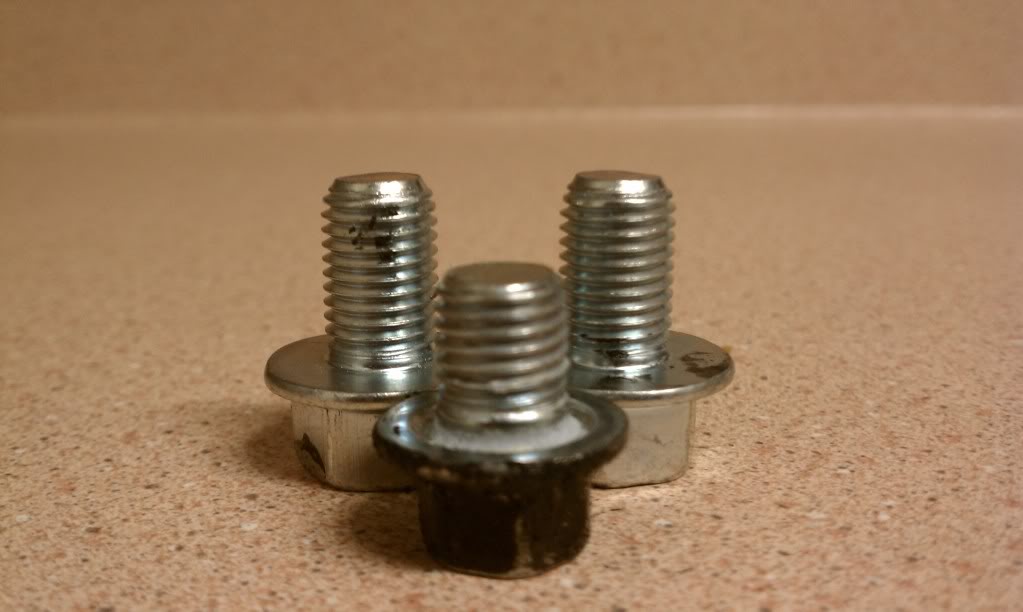
A few things before we get into the specifics though. You're going to need 12 m10 x 1.25x 16mm bolts. YOU NEED THESE if you have an O.Z.! The ES' I'm not sure what size bolts you need. If Mirage man sends you the brackets made from steel its essential you have these bolts. Too small and you're screwed, too long and you're screwed. I looked from auto parts store to store, ace Hardware and others with no luck. I eventually found a pack of 24 on Amazon for about $10. Don't start this swap without these.
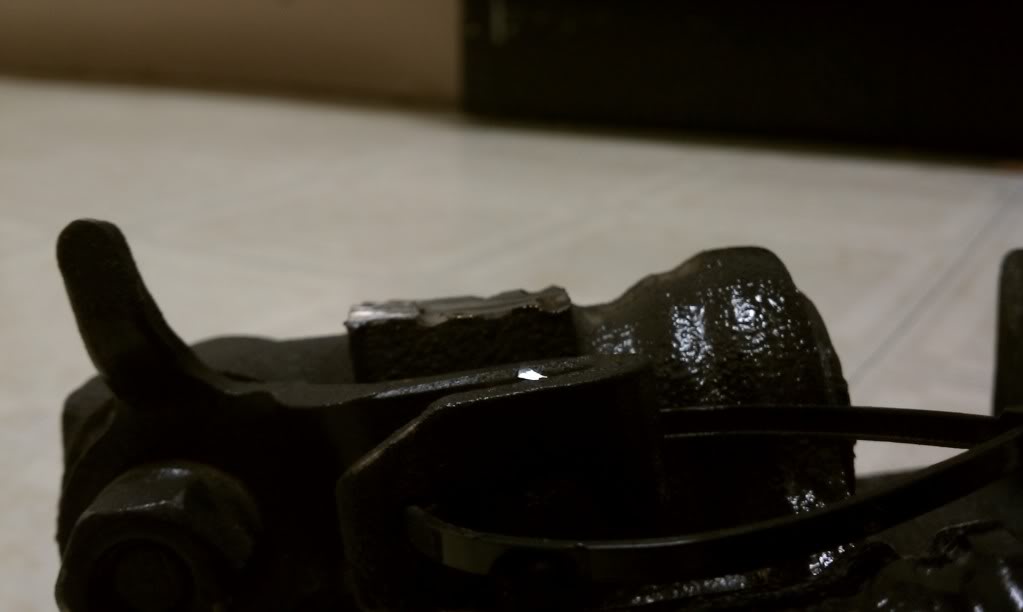
Second, on the DSM calipers, there's this nub that needs to be grinded off of the calipers. No way around it so once again before the swap do this.
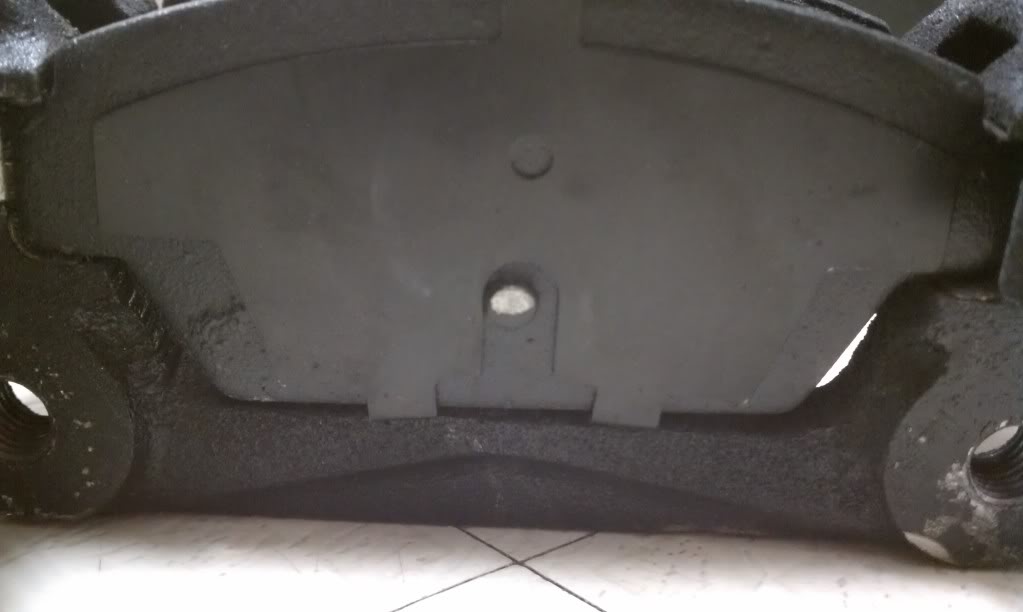
Third, these calipers are a turn and push style so you can't just take a c-clamp and push them in. You can buy the specific caliper spreader at your parts store or rent/loan the kit from them. On the calipers the pistons push and turn on the nub on the brake pads. Without the tool you can't line up the pad and piston. No biggie, like I said just rent the kit for free at your local parts store. I installed the pads and made sure they lined up before I started the swap. Put that shim grease between the pads & shims.
Finally the brake hoses that were suggested we use are 97 Galant front brake hoses. Now I swear I got the correct ones from the junk yard but I went to put them on and it didn't make a seal. The inside needed to be concave but the hoses were convex. No good. Lucky for me, I had my stock front hoses laying around and those work perfect. So lancer front hoses will work with these calipers. Now let's get on to it.
Parts: 2x 91-94 dsm rear brake calipers from a fwd car along with brake pads
2x 91-92 Galant VR-4 rear rotors
2x Front brake lines from a 94-98 Galant or 95-99 dsm with the matching banjo bolts and copper washers.
Chris' (89MirageMan) CUSTOM brackets and e-brake adapters
12 m10 x 1.25x 16mm bolts
Tools: 3/8" drive ratchet
30mm axle nut socket
19mm wheel nut socket
14mm socket
12mm socket
10mm flare nut wrench (Absolute MUST! If you don’t have a set, then buy a set!!!)
3/32" hex key
Hydraulic jack
Jack stand
Hammer
Flat Screwdriver
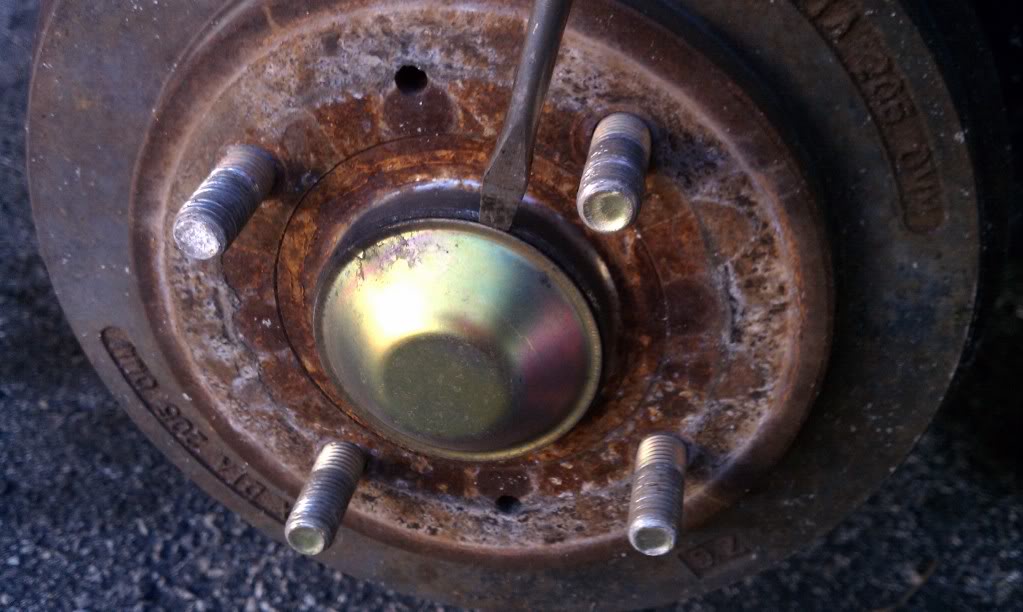
STEP 1 Remove the lug nuts, axel dust cover with a flat head screw driver, and axle nut to gain access to the drum.
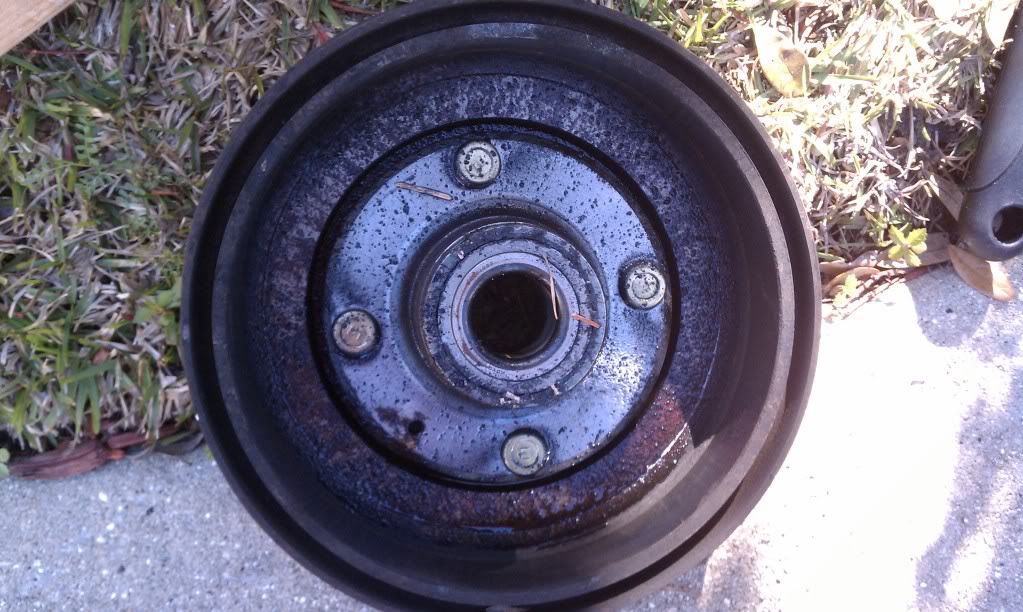
STEP 2 Making sure the e-brake cable is not engaged, remove the drum. The hub will come off as well, since it’s stuck to the drum. Turn the drum over and spray some penetrating oil on it and tap the edges with the hammer. Should come out easily.
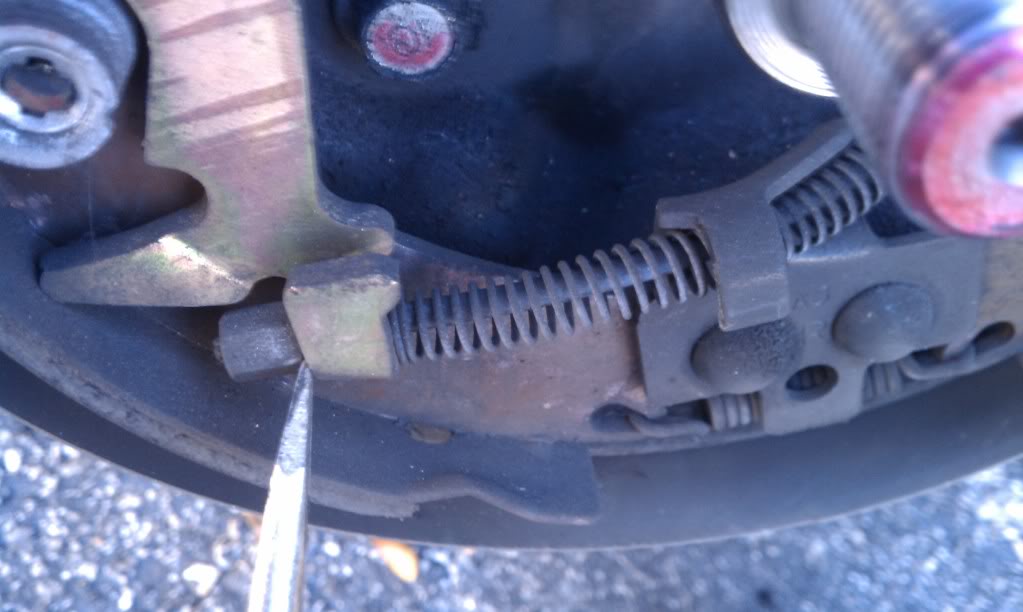
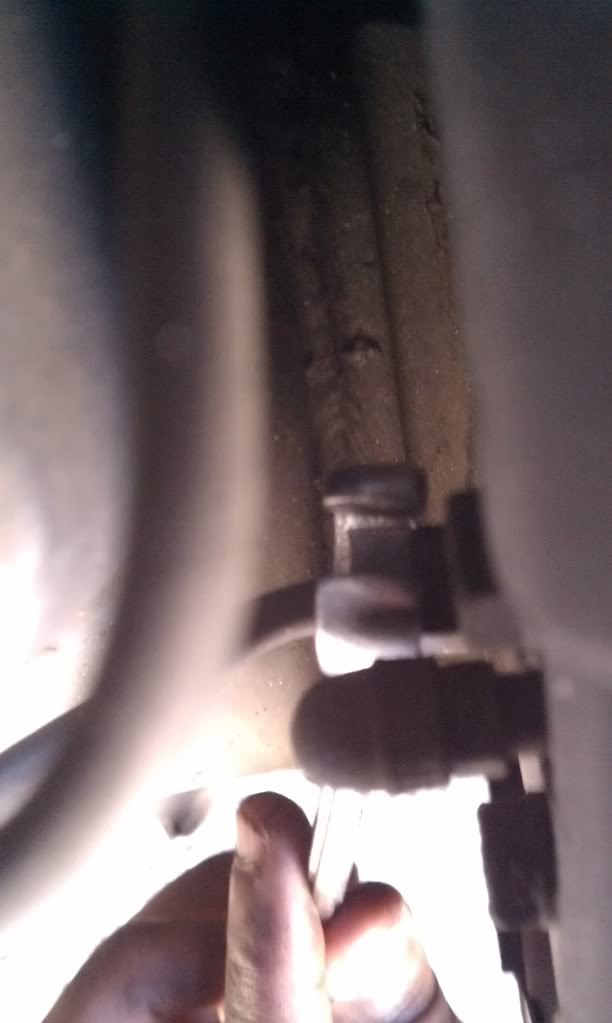
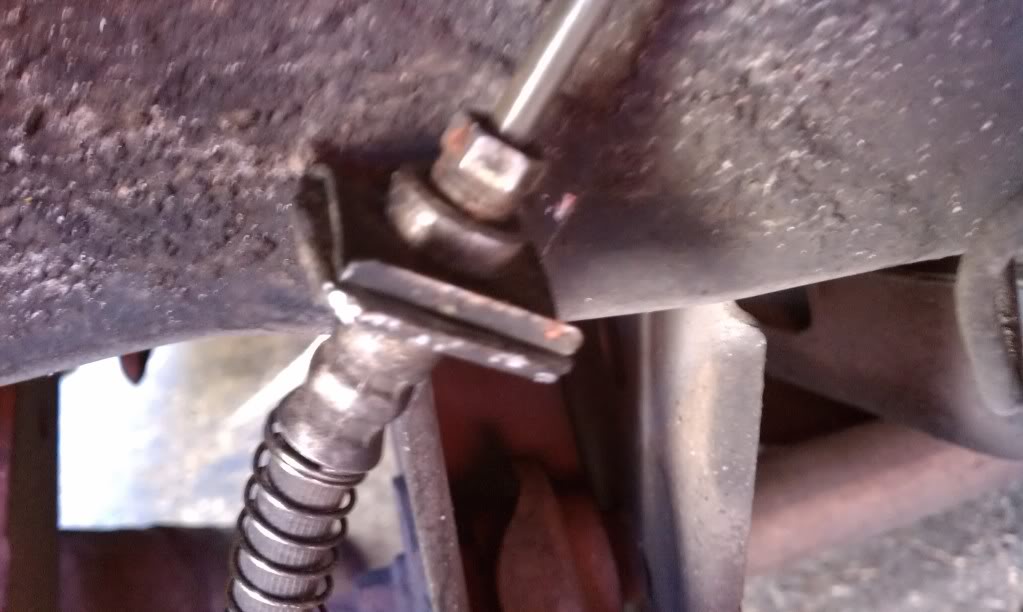
STEP 3 Remove the e-brake cable from its current position. Refer to the picture for reference. Just try and pry up with your screwdriver.
STEP 4 There is a retaining tab/bracket that prevents the cable from detaching. Remove this bracket with a flat screwdriver.
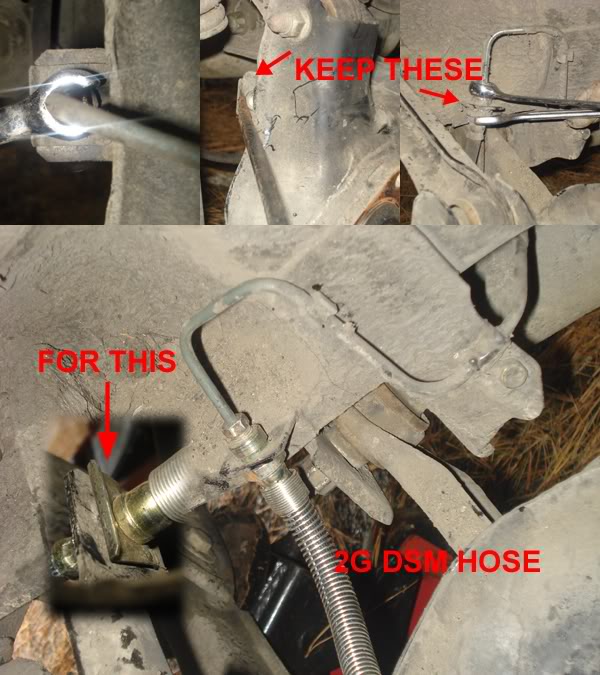
STEP 5 Remove your stock hoses/lines with the flare nut wrench. There are two tabs that will have to be removed in order to detach the hose from the brackets. Keep these tabs so that you can reuse them on the DSM hoses. At this point you can install the DSM hose if you’d like.
STEP 6 With those things out of the way, you should be able to remove the shield from the trailing arm with ease.
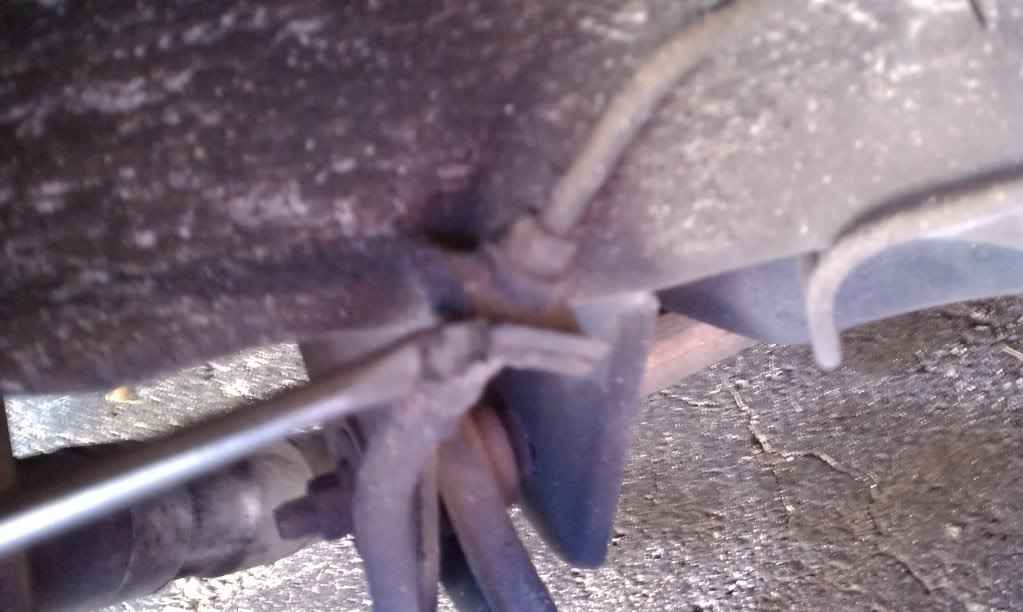
Ebrake time, take a file and file down the rubber holder on the ebrake cable. Take off the rubber stop and install the donut shaped colar. Now, install the custom bracket. Then install the other colar on the end of the ebrake cable.
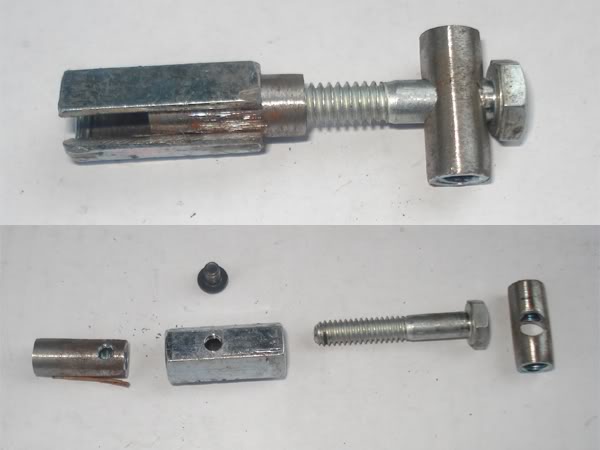
STEP 7 Refer to the pictures below on how to take apart the e-brake adapter.
That tiny black screw will require the hex key for removal. Note that one side of the ebrake cable adapter has been drilled and the other has not. You want to make sure that you install the undrilled side towards the spring on the ebrake cable. If the fit is too tight to go over the end of the cable mount half of it in a vice and gently widen the gap with a flat screwdriver. It is easier to install the ebrake cable into the bracket and attach the e-clip before you bolt it down.
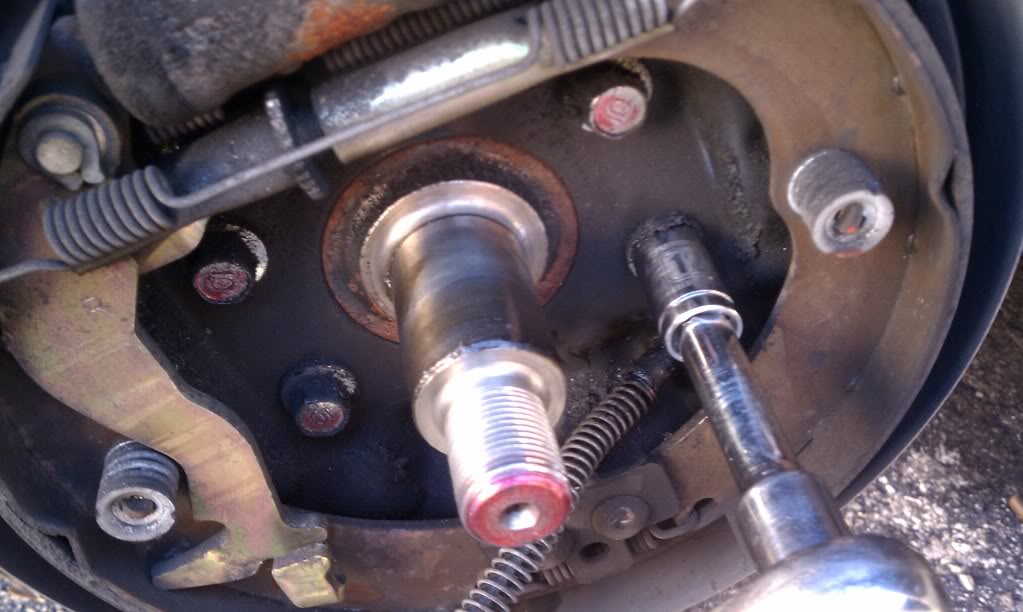
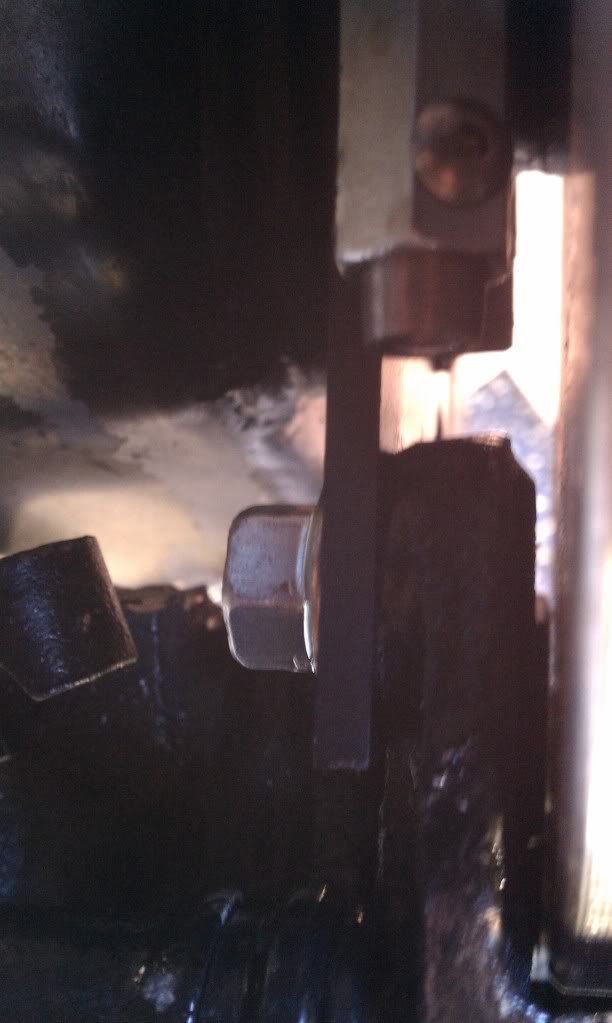
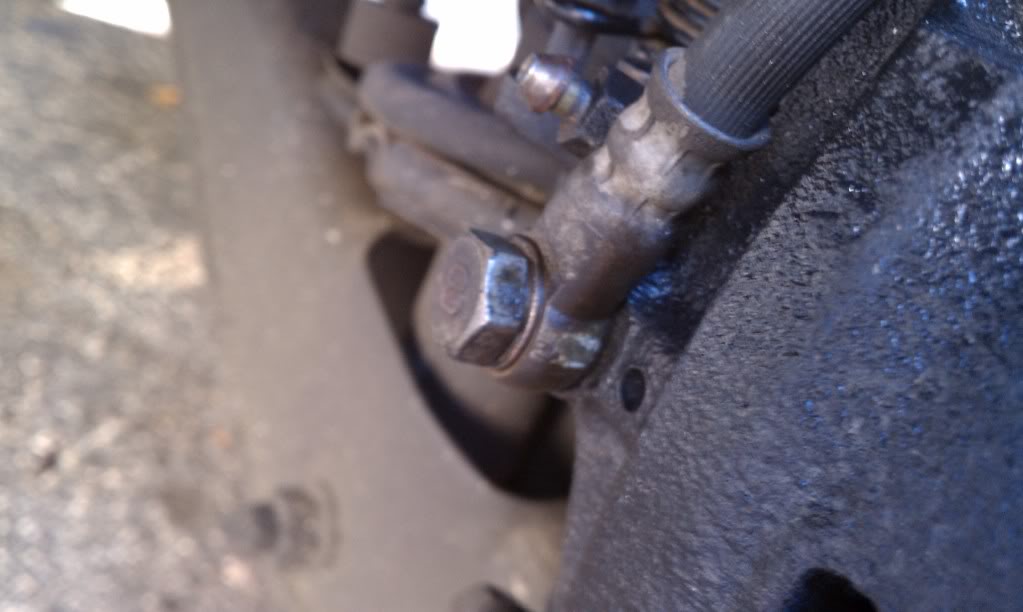
STEP 8 Install your hub, rotor, axel nut, and mount up your caliper. The bottom bolt seems like it doesn't have room to thread in but it should have enough space to go in from the top. Top bolt shouldn't be a problem. Tighten up with your box wrench. Here you can see the rotor centered.
If you got the right sized bolts dont worry about the blue text... Now locate one of the (4) flat washers
These go between the aluminum caliper bracket and the brake caliper bracket. They space the caliper out so that the rotor rides right in the middle. Take one of your caliper mounting bolts and push it through the back of the bracket, take some thick grease or silicone sealant to put on the washer to keep it from falling off of the bracket while you're starting the bolt.
(Do the same for both mounting bolts and tighten them up. Here you can see the washer being used as a spacer and the rotor centered.) *since I had the right sized bolts I didn't have to worry about this.
Note there are (6) short 10mm bolts and lockwashers and (2) longer 10mm bolts and lockwashers included in the kit. The two longer bolts go through the ebrake bracket and the caliper bracket and thread into the hole in the trailing arm.
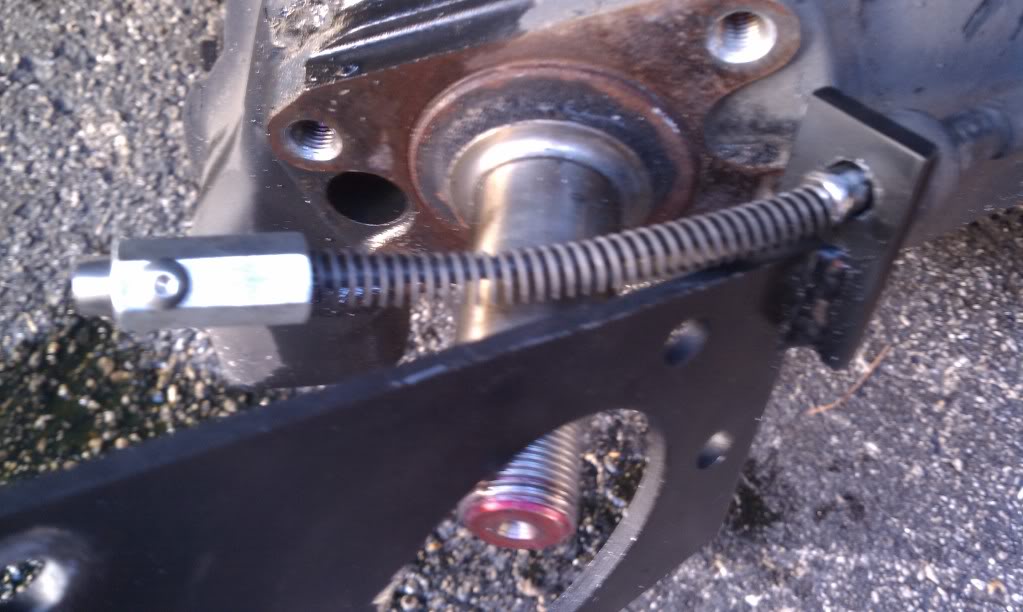
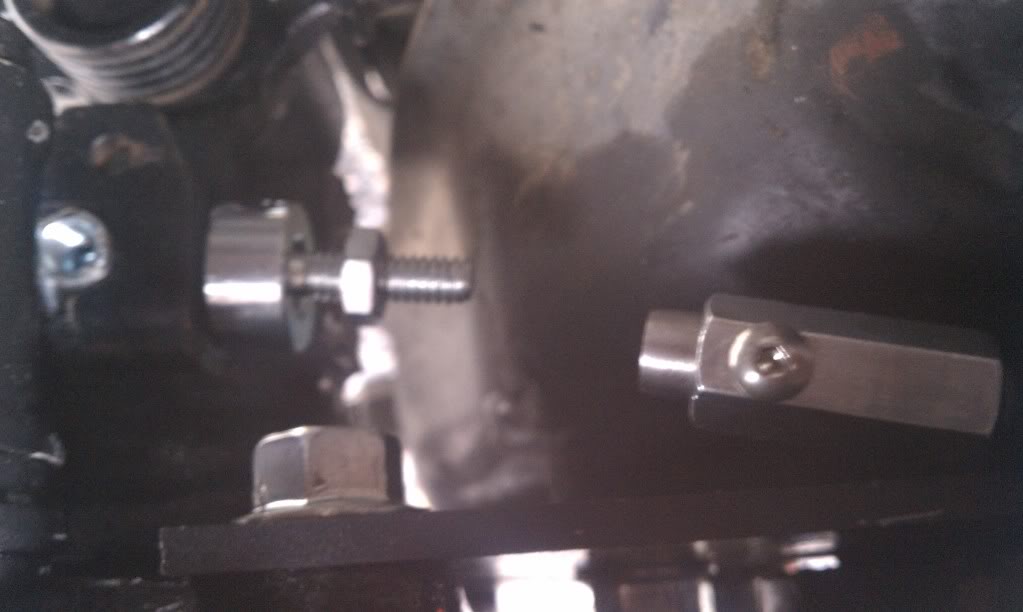
STEP 9 Adjust this bolt with a 7/16" socket and make sure the ebrake engages when you pull the handle up. Also make sure its not too tight and drags when the handle is down.
Now install the other piece and line up the holes and start the button head bolt and tighten it up. Both parts are threaded so be careful not to strip the threads. Unscrew the bolt on the back of the ebrake cable and assemble it back together in the lever for the ebrake.
STEP 10 Install the 2g brake line along with the banjo bolt and copper crush washers.
More info on the ebake collar.
Remove the rubber piece from each ebrake cable and then take a dremel or file and file the little lip off of the end of the cable. Then it will slide through the bracket and you secure it with those shaft collars."
Once you remove the lip from the end of the e-brake, the cable should be able to go in the whole in the donut piece.
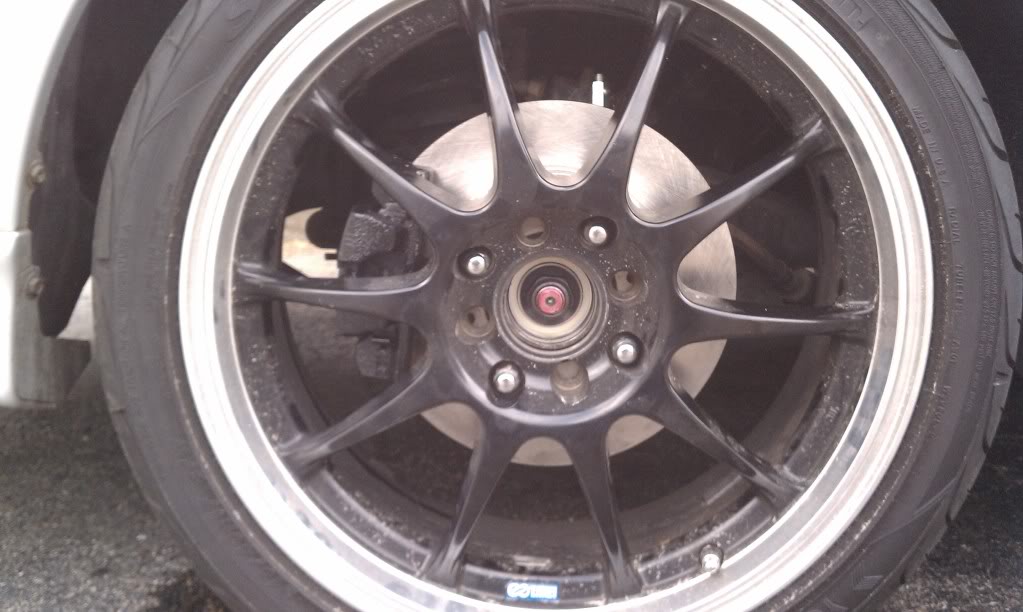
STEP 11 Repeat steps 1-10 again on the other side and then have a friend help bleed the brakes. Install the wheel. (As a note I ended up having to bleed all 4 brakes twice before I got good pressure.
AFTERWARD... Drive conservatively for about 30 miles as you break in the pads. Also, don't make any sudden stops unless necessary. This will allow the pads to wear evenly. Any other questions…post up or give Chris a holler. Once again, this conversion would not have been possible were it not for Chris (89MirageMan). All credits go to him.
Last edited by Green_Bandit; Feb 10, 2013 at 04:25 PM.
To get the brake force going to the rear you'll need a 1g DSM (non-abs, non-awd) proportioning valve. Now I've been seeing the few people who've done this swap use their Lancer Stock hoses as their hard lines for the proportioning valve. I'm going to try and find another solution.
Edit: there's not really a better solution. Unless you want to get adventurous, this is what you got.
Alright, before you attempt this just know imo, this mod was underwhelming for me. Honestly, if I had known what I know know going into this i probably wouldn't have done it. But also to take in to consideration is my front brakes haven't been stock in years. I have the big brake kit. No, not the 2 pots that a few people have but the real Willwood big brake kit, with 4 pot pistons and mandatory larger rims. So what your brakes feel like now and how they could feel in the future more than likely don't feel the same as mine. I could have gotten a different response from mine based on this.
Number two. The proportioning valve and master cylinder upgrade go together. You're not going to be doing one or the other like a initially thought. The stock MC has its PV built in. There's that.
Number three. I don't know how the few other guys did it and not mention the fine important details but there's going to be some drilling and grinding going on unless somehow you find our make the right brake hoses.
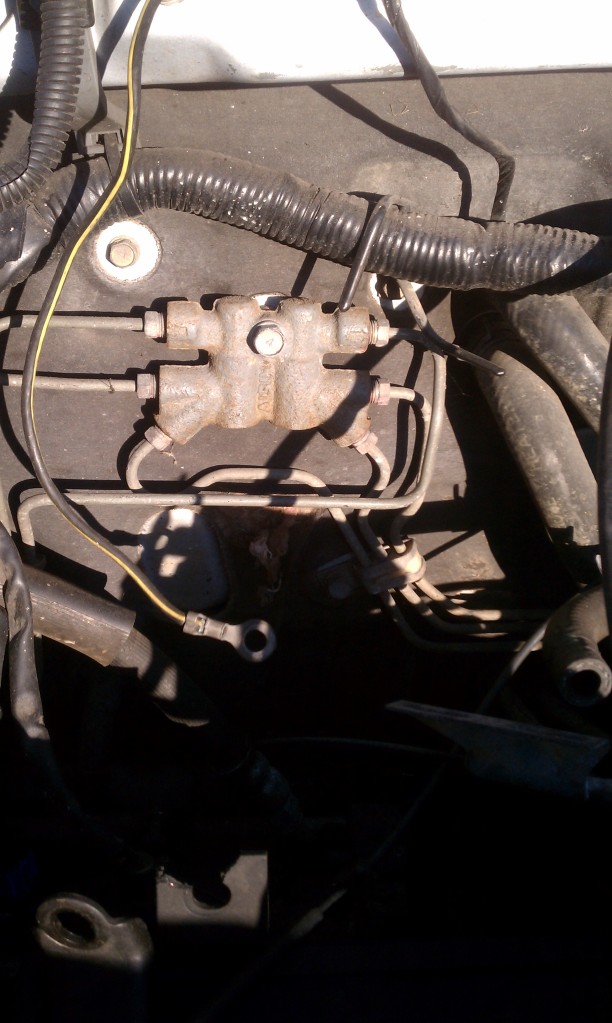
The proportioning valve is pretty much the easy part. If you're like me I had some brake lines left over and decided to use those. They were short enough so why not? Wrong! The proportioning valve you picked up seals with a concave fitting on the line the ones I have were convex. I experienced a similar problem when I did my bbk years ago so what I did in both of these situations is drill the PV to concave to match the lines I had.
Top is drilled concave bottom is non drilled convex
Finished holes. Use some WD 40 while drilling out. You don't need to take out much material
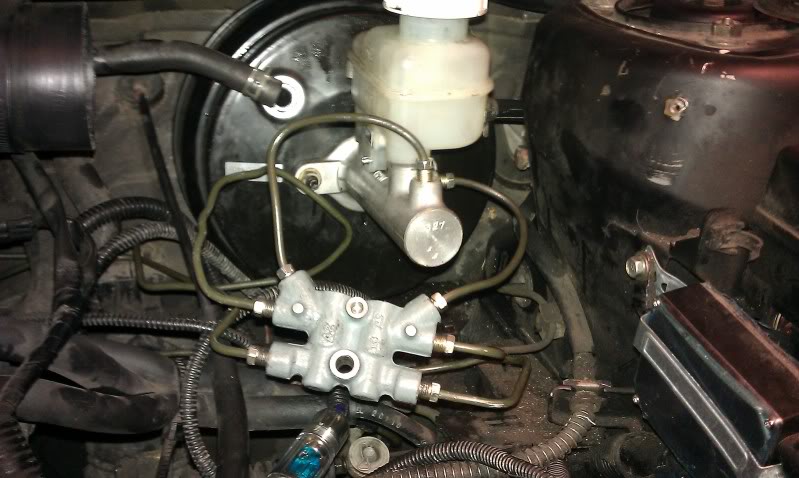
Then install. Use the diagram above and observe where the stock lines are running previously. That should guide you to running the lines correctly.
Now you may be wondering, Bandit why didn't you just put in some time and leg work to find correct lines from the PV to MC instead of drilling. That would have been all cool except your stock brake lines are convex as well. So either you're going to cut off the existing fitting and find a new one or find an adapter. When I did my brake install years ago I didn't have much luck with adapters. If you want to try that, be my guest. But like i said, I don't see how the 3 other guys did this mod but left out this detail. Unless they just torqued these pieces together like hell. I've learned my lesson doing that and with the fittings being soft metal too?! Nah, not going that route
Last edited by Green_Bandit; Sep 26, 2016 at 01:33 PM.
Now you need to be able to hold enough fluid to be pushed back there. Edit: Wrong! Wrong! Now you need this MC because your stock is 4 port and this one is two port. You have to use the two feed port on your new Proportioning valve.
If you're an auto like me. You do not need to replace the brake booster, just get a 3000GT A/T master cylinder and you'll be clear.
If you are a manual I believe you can use an Evo MC and Brake booster.
Edit: this is what gave me hell. First off there aren't really any junk yards near me since I moved so no biggie, eBay. The first matter I got was beat up and I believed piston 1 was toast. I couldn't get it to bleed. Spent hours trying to bleed the thing. Piston two worked fine. So I had to order another one.
Then I noticed that the fittings in the MC were convex too! So I had to go and drill those two out like I did the PV. (Once again I don't see how these guys left that detail out). Now back to trying to bleed this thing. I'm going to save you the trouble. You need a MC bleeder kit obviously. But shorten the hoses to where they're just long enough to reach the bottom of the reservoir. Also don't have the lines pushing the air and fluid back into the drawing chambers. You probably want to bench bleed but I'd you don't have a vice you can install it on the car and brake pump it until you discharge all the air.
The next thing is you ARE going to have to grind some material off of the brake pushrod. I'd suggest using a dremel tool. Just enough to the first line. Otherwise your brakes will overheat, lock up, and denature the fluid. Once you grind, and bleed the MC, bleed all 4 brakes starting from the wheel furthest away from the MC.
After that, you should be good to go! Good luck!
Last edited by Green_Bandit; Nov 21, 2016 at 08:31 AM.
If you are a manual I believe you can use an Evo MC and Brake booster.
For manuals you not need the brake booster but it makes it a little easier cause you done have to adjust the stock booster to work for the EVO master cylinder
Man, I am honestly shocked you guys arent all over this. I spelled it out to the T for you and I believe I'm the last guy here to have done this. So, there are 4 MAYBE 5 Lancers out here with rear disk brakes.
 Feb 10, 2013, 03:32 PM


 This should be a STICKY!! awesome write up already investigating on getting these parts.