DIY: Interior Trim Vinyl Wrap
 Jul 1, 2013, 07:14 PM
#1
Newbie
Thread Starter
Join Date: Jun 2013
Location: Indiana
Posts: 35
Likes: 0
Received 0 Likes
on
0 Posts
DIY: Interior Trim Vinyl Wrap
This was done so that I could wrap that circular chrome piece around the gear****. I've had the sun hit that piece and reflect back into my eyes....annoyed the hell out of me.
Tools needed: Vinyl of your choice, a phillips head screwdriver, a hair dryer/heat gun and an Xacto knife. I used 3M Scotchprint Carbon Fiber vinyl.
This was done of a 2013 OS SE 2WD
So this is my first DIY and I hoping to contribute to the OS community. Enjoy!
Step 1: Remove shift knob by turning it counter clockwise until it comes off. Start with the passenger side and locate the area where the 2 pieces of black and the 1 silver piece come together. Starting from the left side, pull the trim piece out until you hear a pop. Once you get the first one, work your way towards the front of the vehicle. Once you get to the front there is a phillips head screw that you need to remove. Once the screw is gone you can pull out and down and the whole piece should come out.
[IMG]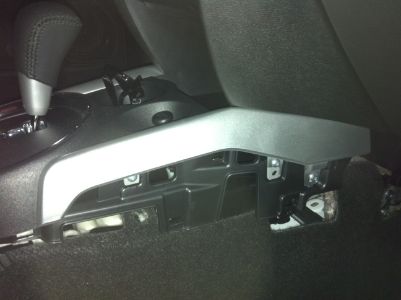 [/IMG]
Step 2: Once the trim piece is removed, you can start pulling up on the black plastic circular trim piece that surrounds the chrome piece. Work your way back towards the emergency brake. Slowly go around and pop out the tabs holding the piece on. When you get to the opposite side of where you started, you will need to pop out that same very 1st piece from the begining. Just pop it out to give your fingers some space to pop up the black circular piece. When you are done it will look like the pic below. Just disconnect the electrical connection and remove the piece of trim.
[IMG]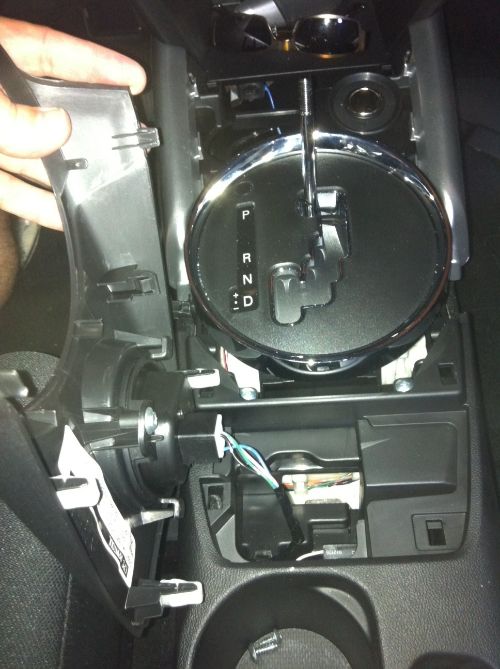 [/IMG]
Step 3: I rough cut a piece of vinyl and placed it over the chrome piece. I started pressing down on the top to get a good seal and start. I then used my hair dryer and heated up the vinyl while pressing it down on the inside of the ring. When you have that finished take your Xacto knife and go around the inside of the ring. If you do it right, you can put your blade all the way through the vinyl and just follow the inner circle. If you do this correctly the end result will look like the pic below.
[IMG]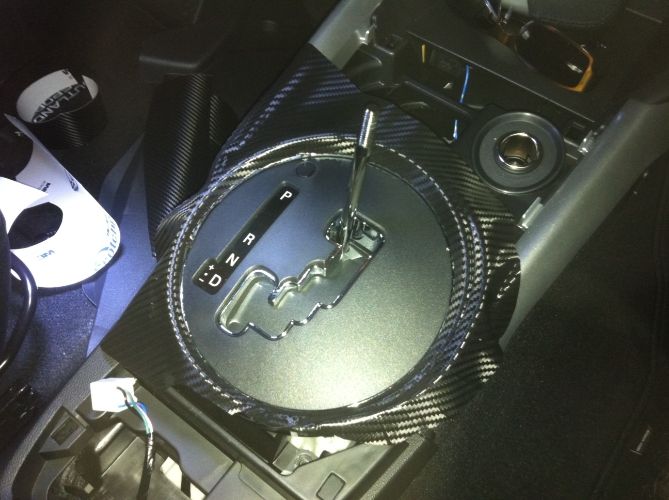 [/IMG]
Step 4: Start warming up and folding the vinyl down towards the bottom edge of the chrome piece. When you are done, it should look like this.
[IMG] [/IMG]
Step 5: Start puting the trim pieces back together in the order that you removed them and the end result should look something like this.
[IMG]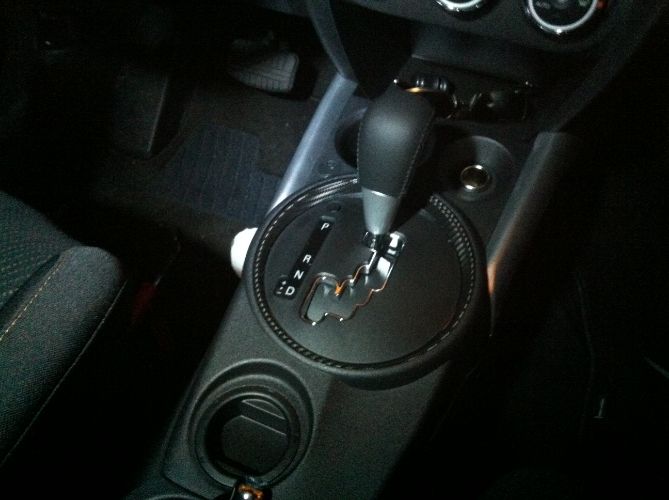 [/IMG]
I hope this helps! If you have any questions feel free to ask. I'll help out any way I can. Cheers
Tools needed: Vinyl of your choice, a phillips head screwdriver, a hair dryer/heat gun and an Xacto knife. I used 3M Scotchprint Carbon Fiber vinyl.
This was done of a 2013 OS SE 2WD
So this is my first DIY and I hoping to contribute to the OS community. Enjoy!
Step 1: Remove shift knob by turning it counter clockwise until it comes off. Start with the passenger side and locate the area where the 2 pieces of black and the 1 silver piece come together. Starting from the left side, pull the trim piece out until you hear a pop. Once you get the first one, work your way towards the front of the vehicle. Once you get to the front there is a phillips head screw that you need to remove. Once the screw is gone you can pull out and down and the whole piece should come out.
[IMG]
 [/IMG]
Step 2: Once the trim piece is removed, you can start pulling up on the black plastic circular trim piece that surrounds the chrome piece. Work your way back towards the emergency brake. Slowly go around and pop out the tabs holding the piece on. When you get to the opposite side of where you started, you will need to pop out that same very 1st piece from the begining. Just pop it out to give your fingers some space to pop up the black circular piece. When you are done it will look like the pic below. Just disconnect the electrical connection and remove the piece of trim.
[IMG]
 [/IMG]
Step 3: I rough cut a piece of vinyl and placed it over the chrome piece. I started pressing down on the top to get a good seal and start. I then used my hair dryer and heated up the vinyl while pressing it down on the inside of the ring. When you have that finished take your Xacto knife and go around the inside of the ring. If you do it right, you can put your blade all the way through the vinyl and just follow the inner circle. If you do this correctly the end result will look like the pic below.
[IMG]
 [/IMG]
Step 4: Start warming up and folding the vinyl down towards the bottom edge of the chrome piece. When you are done, it should look like this.
[IMG]
 [/IMG]
Step 5: Start puting the trim pieces back together in the order that you removed them and the end result should look something like this.
[IMG]
 [/IMG]
I hope this helps! If you have any questions feel free to ask. I'll help out any way I can. Cheers

 Jul 1, 2013, 07:41 PM
#4
Evolved Member
@cadilak78
Very nice work.
Thanks for sharing.
Agreed.
There's really no reason for that large of a donut to extend beyond the edges of the center tunnel hump. And, to be ringed with such a ridiculously large chrome bezel, gees!
Why couldn't they just left it textured black like the rest of the console!?
Very nice work.
Thanks for sharing.
There's really no reason for that large of a donut to extend beyond the edges of the center tunnel hump. And, to be ringed with such a ridiculously large chrome bezel, gees!
Why couldn't they just left it textured black like the rest of the console!?
Jul 1, 2013, 08:13 PM
#5
Evolving Member
iTrader: (1)
Join Date: Aug 2007
Location: Everywhere VISA is accepted.
Posts: 304
Likes: 0
Received 1 Like
on
1 Post
Very nice! I actually planned on doing the Piano Black section that is inside that chrome ring piece to match my double din center console. Great job with illustration!

Trending Topics
Jul 2, 2013, 08:27 AM
#9
Newbie
Thread Starter
Join Date: Jun 2013
Location: Indiana
Posts: 35
Likes: 0
Received 0 Likes
on
0 Posts
Thanks everyone! I love the 3M vinyl products. I've used them for a few years now with no issues at all. I plan on doing some other interior pieces as well and possibly doing the back of the roof with gloss black to complete the panoramic roof.

Thread
Thread Starter
Forum
Replies
Last Post
andrew_sup
For Sale - Part Outs
140
Oct 19, 2015 10:18 AM
Gods Right Hand
For Sale - Part Outs
49
Sep 8, 2013 04:40 PM