A few small LED additions
 Jul 30, 2013, 03:04 AM
#1

Thread Starter
A few small LED additions
Well, between my below average night vision, and the 20% tint all around, I was often having difficulty seeing what was behind me while backing-up. I tried the eBay crap LED bulbs in the reverse lights and those were dimmer than OEM, so then I tried V-LED's ones, and found better but still sub-par results, so I searched around a lot looking at different ways of adding LED fog lights to the back end or SOMETHING to brighten things up. Eventually I just ponied up and spent the money on this (except in black): V-LEDS.COM - HIGH POWER 18W LED BACK-UP LIGHT LICENSE PLATE FRAME LPF CHROME EDIT: Product is no longer offered by VLED's, but here is an archived copy of the product page.
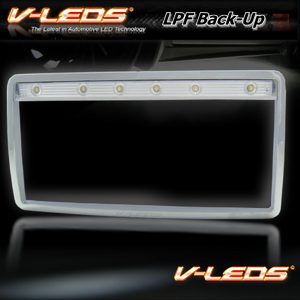
It looks like this:

and when it's all lit up, it's bright as a MF'er:


Off:


On:


Wiring was very easy. Because I have LED's in the OEM reverse bulbs and the frame is LED the total load is still under the OEM incandescent bulbs, which allowed me to just tap into the reverse light circuit. I apologize for not taking in-progress pics, but it really was easy. The wire fits between the OEM license plate light fixture and the trunk body (there's a foam gasket that still seals tightly, it's perfect) and into the cabin trunk panel. Then, it's as simple as popping off the trunk interior panel and tap in to the circuit and you're done.

It looks like this:
and when it's all lit up, it's bright as a MF'er:
Off:
On:
Wiring was very easy. Because I have LED's in the OEM reverse bulbs and the frame is LED the total load is still under the OEM incandescent bulbs, which allowed me to just tap into the reverse light circuit. I apologize for not taking in-progress pics, but it really was easy. The wire fits between the OEM license plate light fixture and the trunk body (there's a foam gasket that still seals tightly, it's perfect) and into the cabin trunk panel. Then, it's as simple as popping off the trunk interior panel and tap in to the circuit and you're done.
Last edited by Burtonrider1002; Apr 24, 2016 at 04:49 PM. Reason: Update dead link and produce image
 Jul 30, 2013, 03:33 AM
#2
Thread Starter
I also added a little sumptin' sumptin' under the hood 

See it?
No?


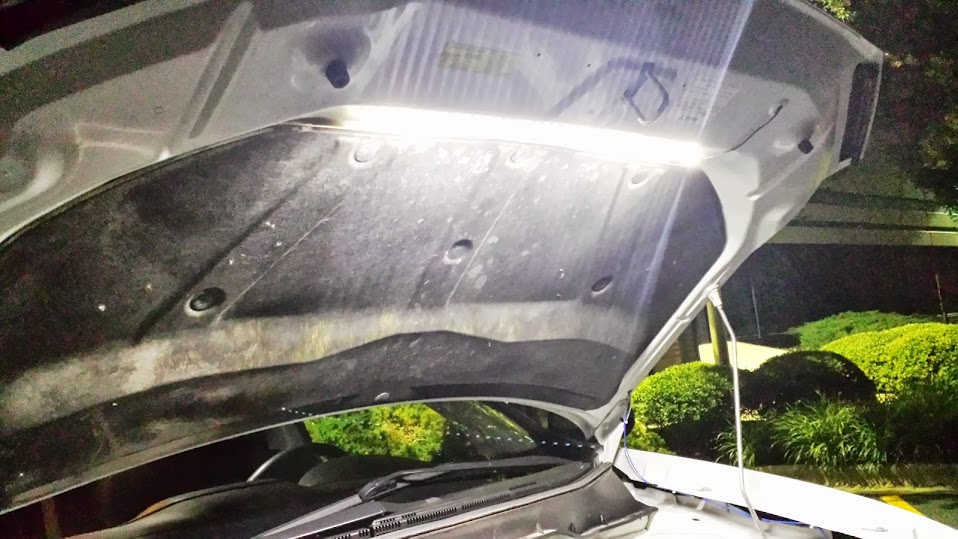
Now? I added an LED strip to the under-side of the hood. This is not just some ghetto underglow, it's wired into the OEM hood release and only comes on when the hood is popped. I don't go to car shows or anything, so this is just in case of a roadside emergency or other night time under-hood work.

Notice how the flat part on the underside of the hood is almost perfectly angled to where the LED strip points straight down upon the engine bay.
(sorry for the crappy pic):
Wiring comes off the LED strip and goes into the hood "ducting" I suppose it might be described as, just the hollow section between the hood skeleton and the hood skin:

it comes out of the hood right near the hinge:

and runs along the fender. I still have a little more tidying up to do with the wires, as of now there's only a couple "clear" zip-ties holding it there:

Just to really emphasize how bright it is neither the top picture, nor this one were taken with the flash (in the dark parking lot pictured above):

See it?
No?
Now?
I added an LED strip to the under-side of the hood. This is not just some ghetto underglow, it's wired into the OEM hood release and only comes on when the hood is popped. I don't go to car shows or anything, so this is just in case of a roadside emergency or other night time under-hood work.Notice how the flat part on the underside of the hood is almost perfectly angled to where the LED strip points straight down upon the engine bay.
(sorry for the crappy pic):
Wiring comes off the LED strip and goes into the hood "ducting" I suppose it might be described as, just the hollow section between the hood skeleton and the hood skin:
it comes out of the hood right near the hinge:
and runs along the fender. I still have a little more tidying up to do with the wires, as of now there's only a couple "clear" zip-ties holding it there:
Just to really emphasize how bright it is neither the top picture, nor this one were taken with the flash (in the dark parking lot pictured above):
Jul 30, 2013, 05:04 AM
#3
Account Disabled

I thought about doing that too with my extra set of LED strips. They're side firing, same as the ones on my headlights, but I'm sure I can find a decent angle for it. Where is the hood release power source? From the fuse box?
Jul 30, 2013, 06:34 AM
#4
Thread Starter
I kinda misspoke, I used the hood latch pressure switch/sensor. The latch itself is a standard pull cable. There is a pressure switch near the bottom of the latch mechanism that is open when the hood is up and closes the circuit when the hood is closed. The sensor is A. for the security system and B. the dash warning light.
I tapped into the silver wire that mates with the red wire from the switch inside a connector. I assumed red would be power/hot/positive, BUT it's not lol. It's the negative, so I soldered the negative wire from the strip to that and ran the positive to the battery. When the hood closes, it closes the switch, completing the circuit and allowing the LED strip a path to ground.
It works, so I'm satisfied. The strip draws such a small amount of power I you don't need to be too concerned about overloading (within reason, common sense is required here).
Trending Topics
Aug 1, 2013, 06:28 AM
#8
Account Disabled
Was it a pain to wire up the license plate frame? I've been putting off my backup camera for weeks now because I don't want to deal with fishing the wire all the way to the head unit.
Aug 1, 2013, 03:19 PM
#9
Thread Starter
Just wiring it up to the reverse lights was super, super easy. Just take your time and be patient and careful when popping the clips for the interior panels. As far as running something all the way to the dash, I'm not sure.
Aug 1, 2013, 08:37 PM
#10
Evolving Member
iTrader: (1)
Join Date: Aug 2007
Location: Everywhere VISA is accepted.
Posts: 304
Likes: 0
Received 1 Like
on
1 Post
Have you thought about running LED's in the interior for more lighting behind the front row seats? I can't remember if you have the panoramic glass or not.
As for running wire from the tailgate to the headunit, I installed my rear-view camera, fishing the wire through the left side of the tag light. I ran it through the panels routing it through the plastic boot where all the OEM wiring passes through. That leads to just inside the headliner, and I just used a squeegee(what window tint or vinyl installers use to spread the material out), to run the wiring on the driver's side where the headliner meets the C/B/A Pillars. Follow it all the way down the side of the driver's side opening, and under the dash. It took me about 13 minutes. 9 minutes of it was taking the panels off the rear hatch so I didn't break any of the stupid tabs. I'd take pictures, but it's pouring outside.
As for running wire from the tailgate to the headunit, I installed my rear-view camera, fishing the wire through the left side of the tag light. I ran it through the panels routing it through the plastic boot where all the OEM wiring passes through. That leads to just inside the headliner, and I just used a squeegee(what window tint or vinyl installers use to spread the material out), to run the wiring on the driver's side where the headliner meets the C/B/A Pillars. Follow it all the way down the side of the driver's side opening, and under the dash. It took me about 13 minutes. 9 minutes of it was taking the panels off the rear hatch so I didn't break any of the stupid tabs. I'd take pictures, but it's pouring outside.
Aug 1, 2013, 08:48 PM
#11
Account Disabled
Have you thought about running LED's in the interior for more lighting behind the front row seats? I can't remember if you have the panoramic glass or not.
As for running wire from the tailgate to the headunit, I installed my rear-view camera, fishing the wire through the left side of the tag light. I ran it through the panels routing it through the plastic boot where all the OEM wiring passes through. That leads to just inside the headliner, and I just used a squeegee(what window tint or vinyl installers use to spread the material out), to run the wiring on the driver's side where the headliner meets the C/B/A Pillars. Follow it all the way down the side of the driver's side opening, and under the dash. It took me about 13 minutes. 9 minutes of it was taking the panels off the rear hatch so I didn't break any of the stupid tabs. I'd take pictures, but it's pouring outside.
As for running wire from the tailgate to the headunit, I installed my rear-view camera, fishing the wire through the left side of the tag light. I ran it through the panels routing it through the plastic boot where all the OEM wiring passes through. That leads to just inside the headliner, and I just used a squeegee(what window tint or vinyl installers use to spread the material out), to run the wiring on the driver's side where the headliner meets the C/B/A Pillars. Follow it all the way down the side of the driver's side opening, and under the dash. It took me about 13 minutes. 9 minutes of it was taking the panels off the rear hatch so I didn't break any of the stupid tabs. I'd take pictures, but it's pouring outside.
Aug 1, 2013, 08:53 PM
#12
Evolving Member
iTrader: (1)
Join Date: Aug 2007
Location: Everywhere VISA is accepted.
Posts: 304
Likes: 0
Received 1 Like
on
1 Post
Just be careful as our headliner's are very flimsy and don't seem as forgiving. There are three tabs I believe in the very rear where you'll have to snap, to lower the headliner, so you can pull the wire through. You literally only need it low enough to pull the wire, and once you have it, you can just run it down the trailing edge keeping in mind of the curtain airbags, and honestly, you could probably use your fingers to just press the wire between the seam of the headliner and all the pillars/panels. I have confidence you can do it, if you've installed your AVIC-D3.

Thread
Thread Starter
Forum
Replies
Last Post
mRVRsport
Outlander Sport
968
Feb 25, 2021 11:58 AM
mRVRsport
Outlander Sport
26
Nov 2, 2017 09:53 AM
morethansamson
For Sale - Cars For Sale
4
Jul 9, 2015 04:45 PM
FS[Northeast]: Lots of Stock and Aftermarket parts for Evo 8/9
bbong
For Sale - Part Outs
23
May 12, 2015 01:09 PM
FS[MidWest]: Enkei RPF1 SBC 18x10.5+15 w/ Advan A048 285/30/18
Boltz.
For Sale - Wheels / Tires
15
Sep 23, 2014 12:52 PM