CrAnSwIcK's 4G69 Build: Phase 2
 Sep 27, 2011, 08:52 PM
#46
come on man, my last post was 8 days ago, i don't work on it constantly...i'd get all pissed off and lose my ambition.
So another update before i upload the video for Rob.
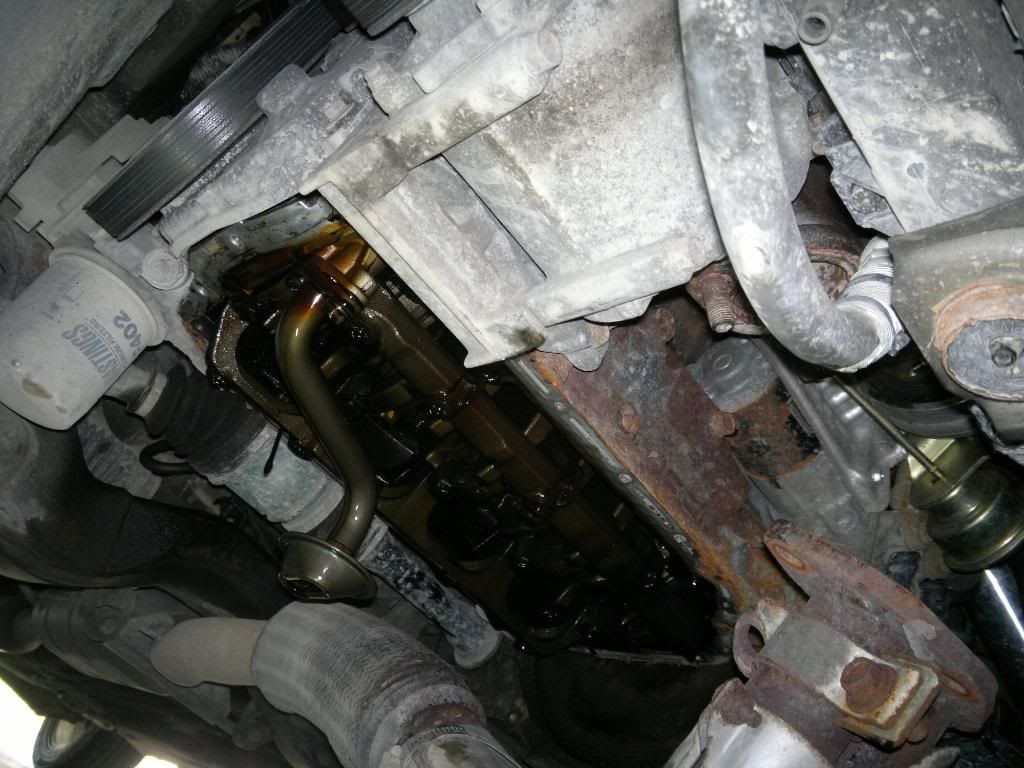
I cut the tacks and re-welded the flange on the manifold so that it is in the correct and final position to properly fit the turbo in the small space we have. So when ever I can get into the shop again, it will be ready for the final weld. Hopefully that will be soon, and then i can begin working on the downpipe and intercooler piping. Then when that's all ready to go, it's build time.
Ok, Rob, here it is...As i later found out, when the engine is warmed up to normal operating temperature, oil pressure at idle is about 15psi
http://youtu.be/mWkUC0_RBcQ
So another update before i upload the video for Rob.
I cut the tacks and re-welded the flange on the manifold so that it is in the correct and final position to properly fit the turbo in the small space we have. So when ever I can get into the shop again, it will be ready for the final weld. Hopefully that will be soon, and then i can begin working on the downpipe and intercooler piping. Then when that's all ready to go, it's build time.
Ok, Rob, here it is...As i later found out, when the engine is warmed up to normal operating temperature, oil pressure at idle is about 15psi
http://youtu.be/mWkUC0_RBcQ
Last edited by CrAnSwIcK; Sep 27, 2011 at 10:53 PM.
 Sep 28, 2011, 03:48 AM
#47
Lol nice video man. What fitting is that...size and thread wise? The sensor for the prosport premium gauge is a little different in being that it's much much much smaller that the one you have and it's basically a plug...
http://prosportgauges.com/Premium-oi...-sender-1.aspx
http://prosportgauges.com/Premium-oi...-sender-1.aspx
Last edited by roblaza; Sep 28, 2011 at 03:50 AM.
Sep 28, 2011, 06:25 AM
#48
Lol nice video man. What fitting is that...size and thread wise? The sensor for the prosport premium gauge is a little different in being that it's much much much smaller that the one you have and it's basically a plug...
http://prosportgauges.com/Premium-oi...-sender-1.aspx
http://prosportgauges.com/Premium-oi...-sender-1.aspx
I will verify the fitting sizes and thread type today or at least very soon. Your sending unit looks like it will fit the same way i mounted mine.
Last edited by CrAnSwIcK; Sep 28, 2011 at 06:27 AM.
Oct 30, 2011, 09:06 PM
#51
Been a while...
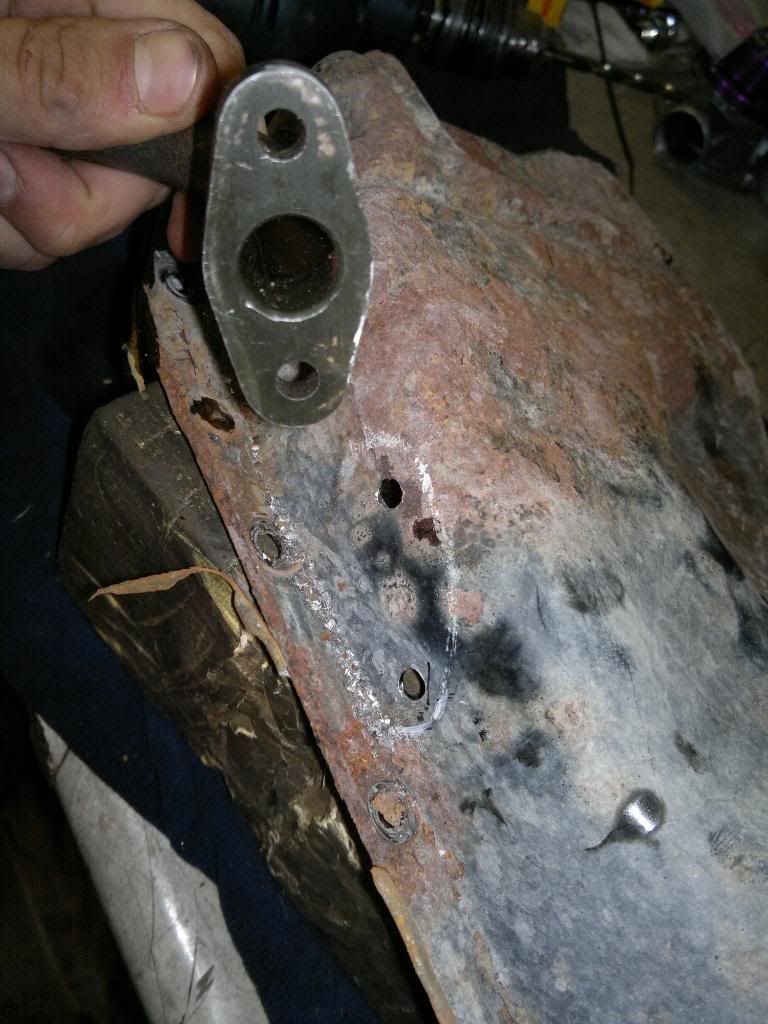
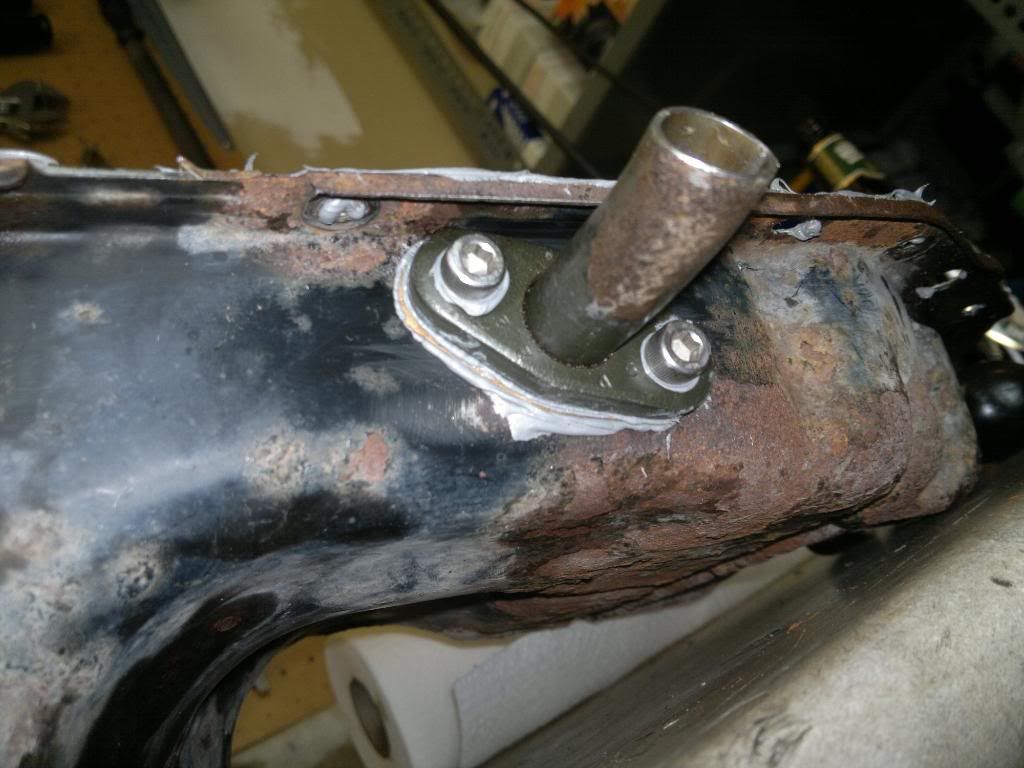
So what i did today was remove the pan, to drill it for oil return. To reduce cost, i used an OEM mitsubishi oil return line that i got for free, cut the flex section out, and used -10 stainless braid hose in its place using hose clamps. All i did was drill the holes, and using an oil return gasket and an *** load of RTV, i bolted the oil return flange to the pan like a ****...
First, removed the oil pan...
Next, i marked and drilled holes for the flange bolts...
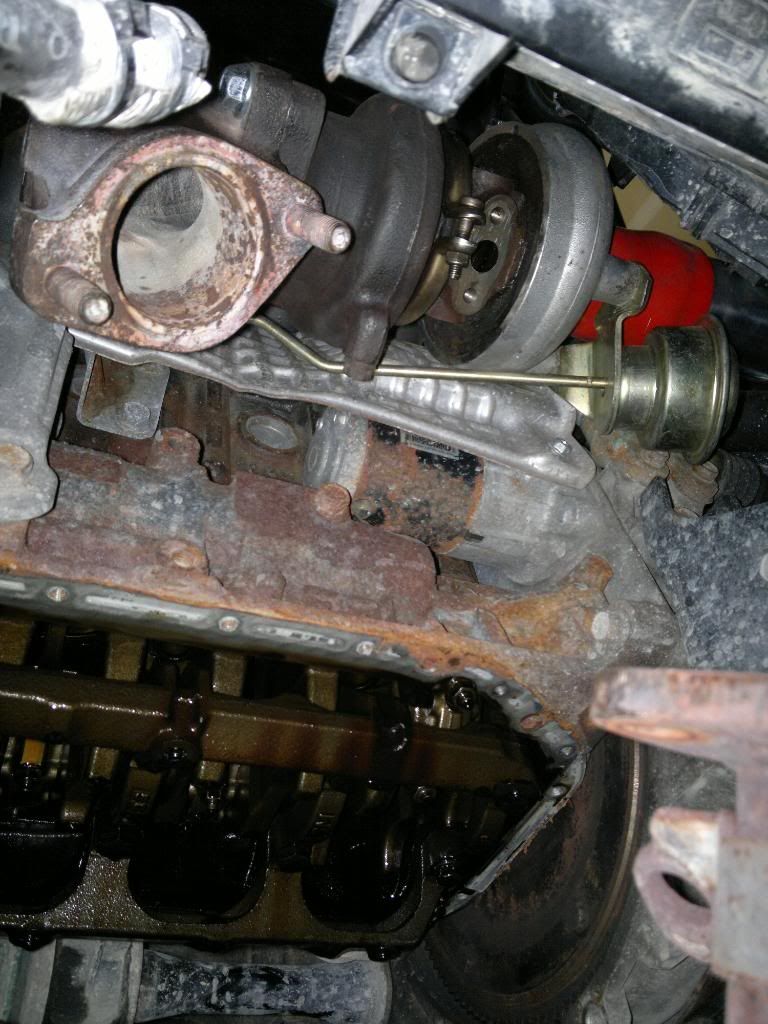
Turbo and manifold was mounted to align and measure oil return line...
Oil return hole is reamed to match inside diameter of oil return pipe...
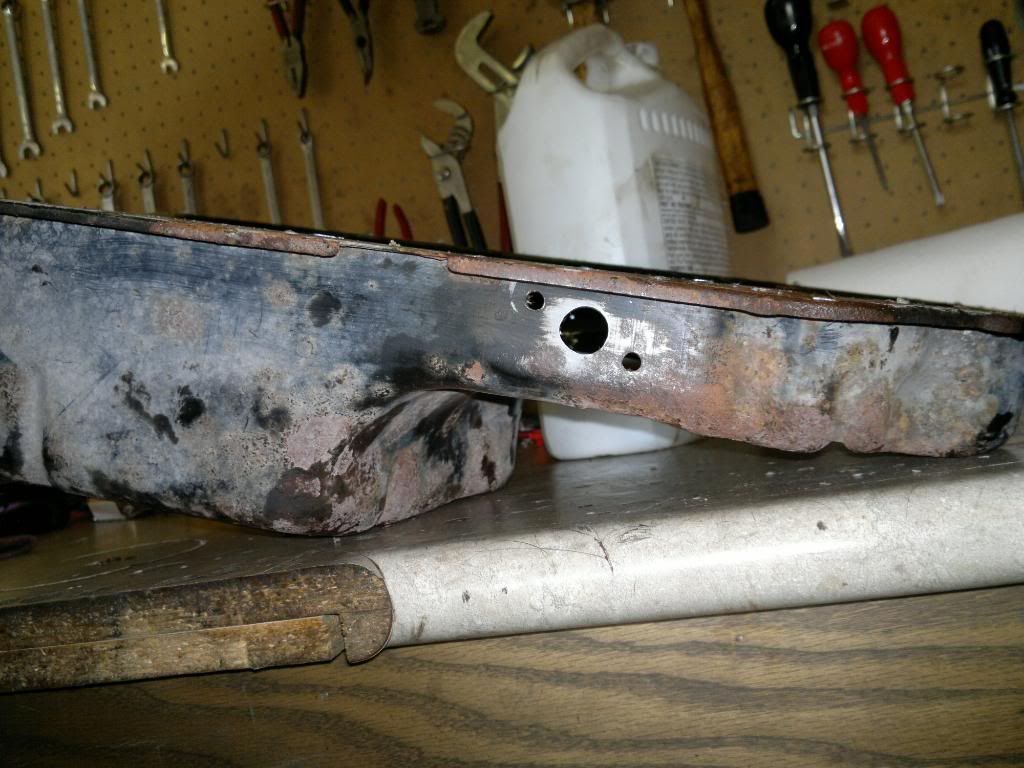
Oil pan is cleaned, all metal and dirt removed, flange bolted on...
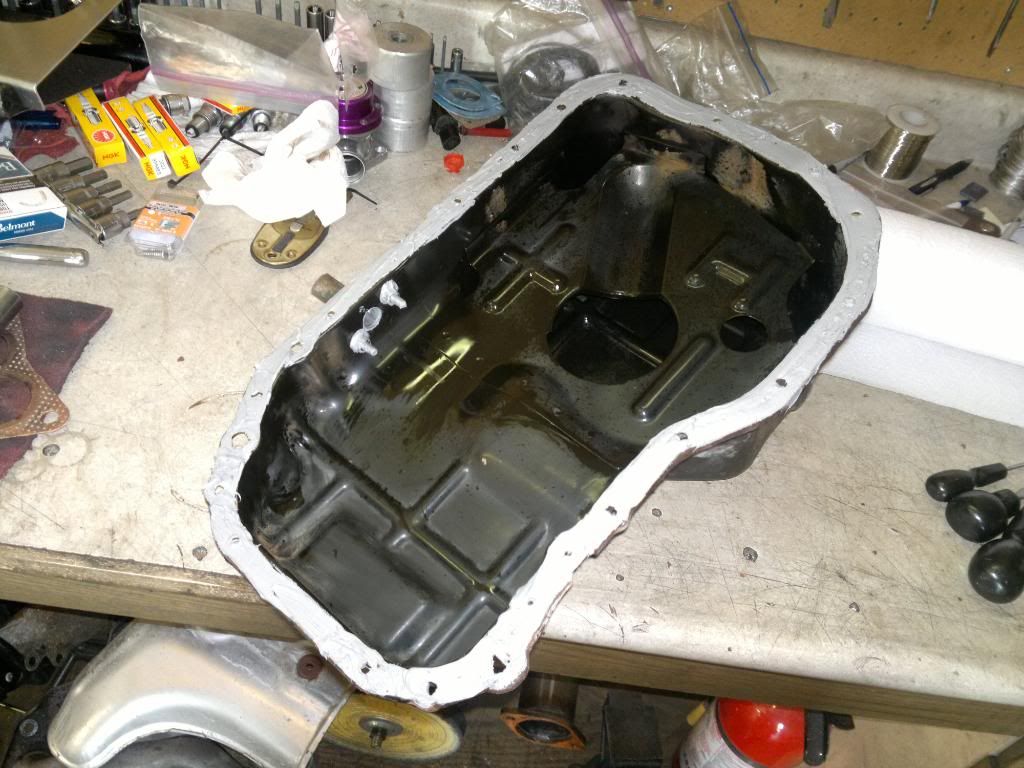
Inside...
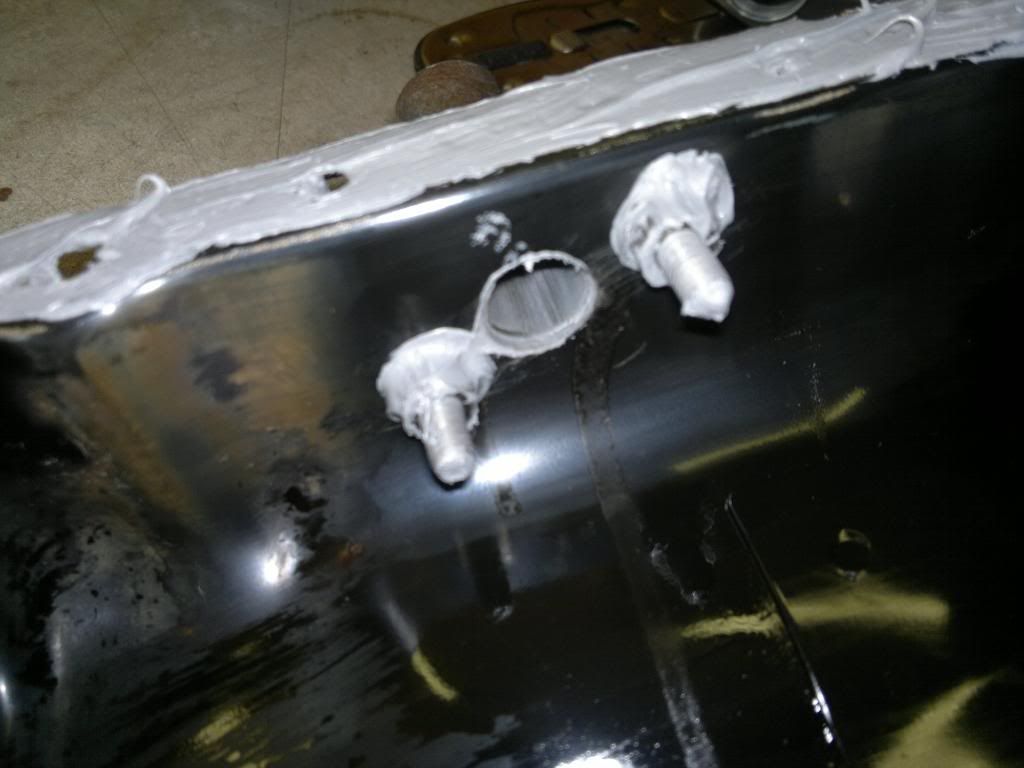
Outside...
Pepsi from the middle east...lol

I will post pics with the pan back on and the oil return line, i just have it capped off right now...
So what i did today was remove the pan, to drill it for oil return. To reduce cost, i used an OEM mitsubishi oil return line that i got for free, cut the flex section out, and used -10 stainless braid hose in its place using hose clamps. All i did was drill the holes, and using an oil return gasket and an *** load of RTV, i bolted the oil return flange to the pan like a ****...
First, removed the oil pan...
Next, i marked and drilled holes for the flange bolts...
Turbo and manifold was mounted to align and measure oil return line...
Oil return hole is reamed to match inside diameter of oil return pipe...
Oil pan is cleaned, all metal and dirt removed, flange bolted on...
Inside...
Outside...
Pepsi from the middle east...lol
I will post pics with the pan back on and the oil return line, i just have it capped off right now...


 Nov 6, 2011, 10:23 PM
#58
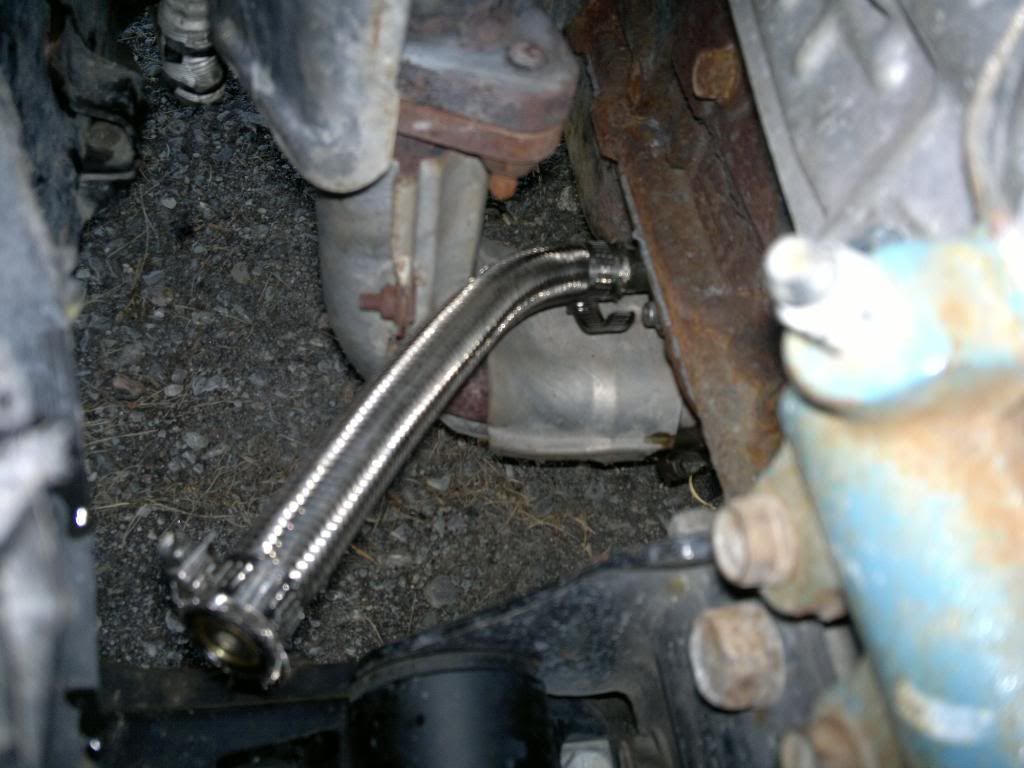
First thing, here's the horribly out of focus picture of the oil return line i promised...
And on with the next update...
well, i didn't do much this weekend...i was supposed to start working on the downpipe through the week, but because of my work schedule, i was having a hard time meeting up with the shop that's going to bend the pipe for me...i'm having it bent locally to minimize the welding i'll need to do...
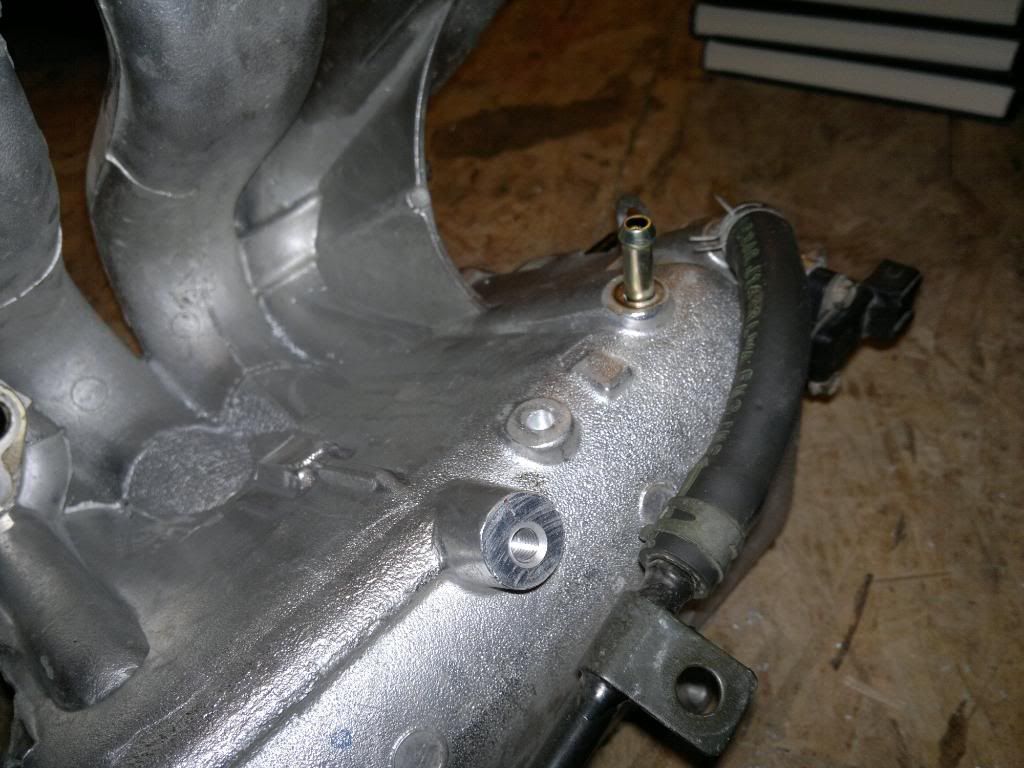
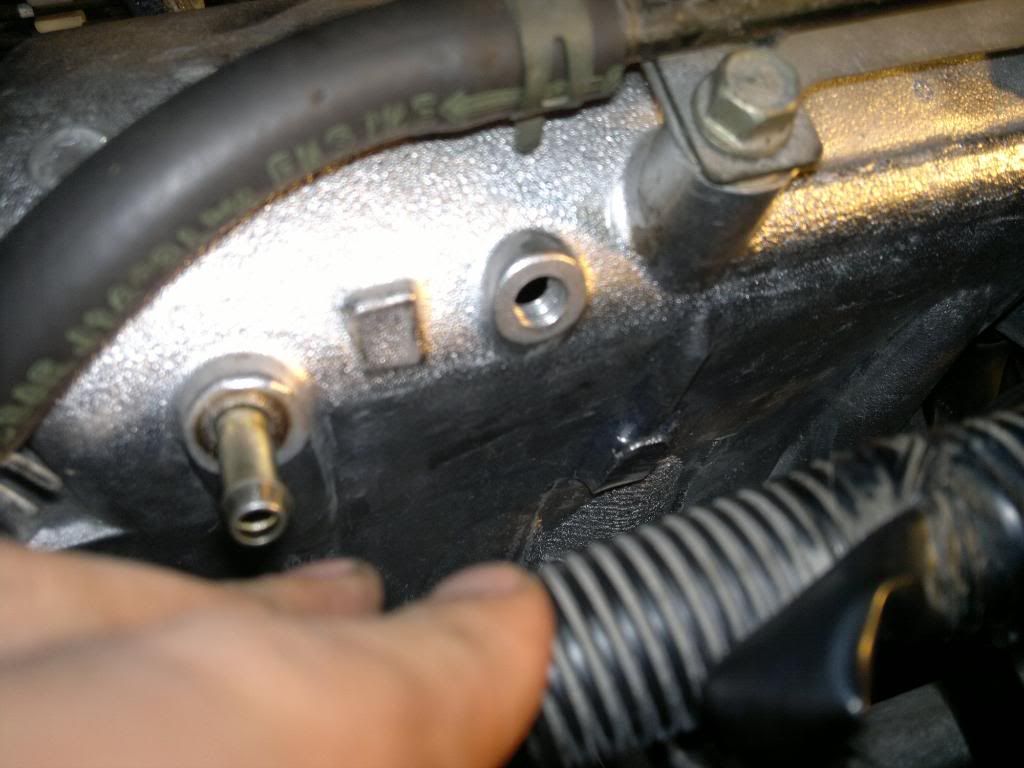
Here's what i did do...it doesn't look like much, but pulling the intake manifold is a bit of a pain in the ***...
I needed to put this on my intake manifold somewhere...its purpose is to feed a mechanical vacuum/boost gauge, as well as actuate the blow-off valve...

Found this nice little flat spot on in the casting, which will later be covered by the plastic engine cover...perfect. You can see in this picture, i have already punched the center and began drilling.
Yeah man! I would totally tap that!
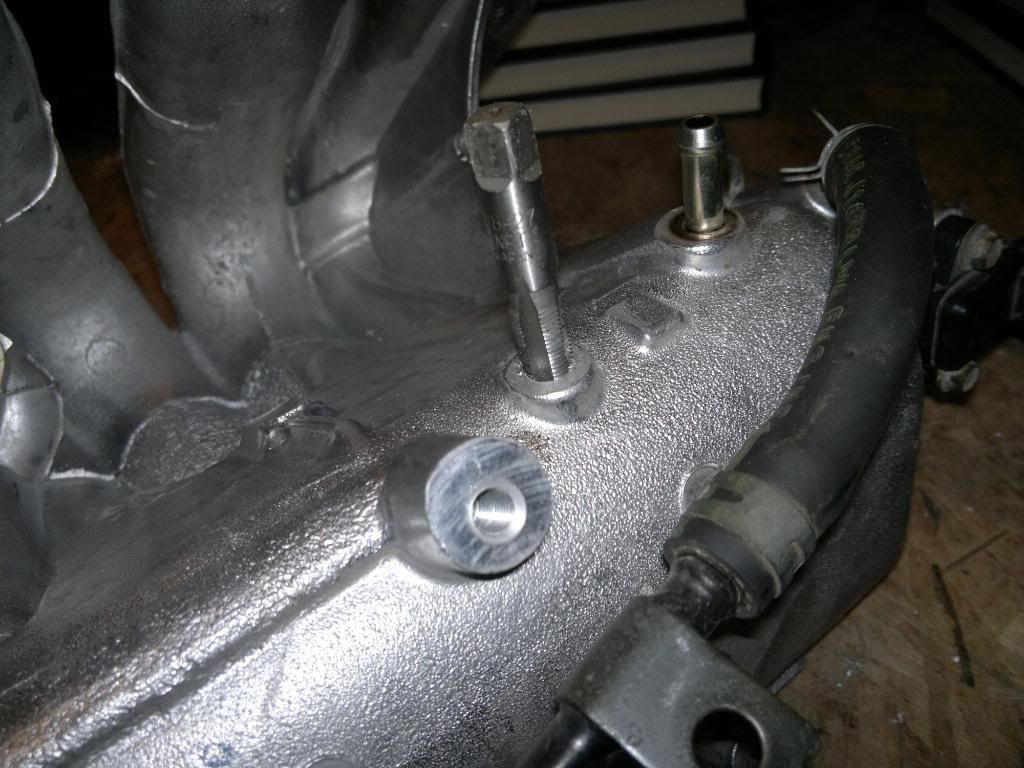
done and done...
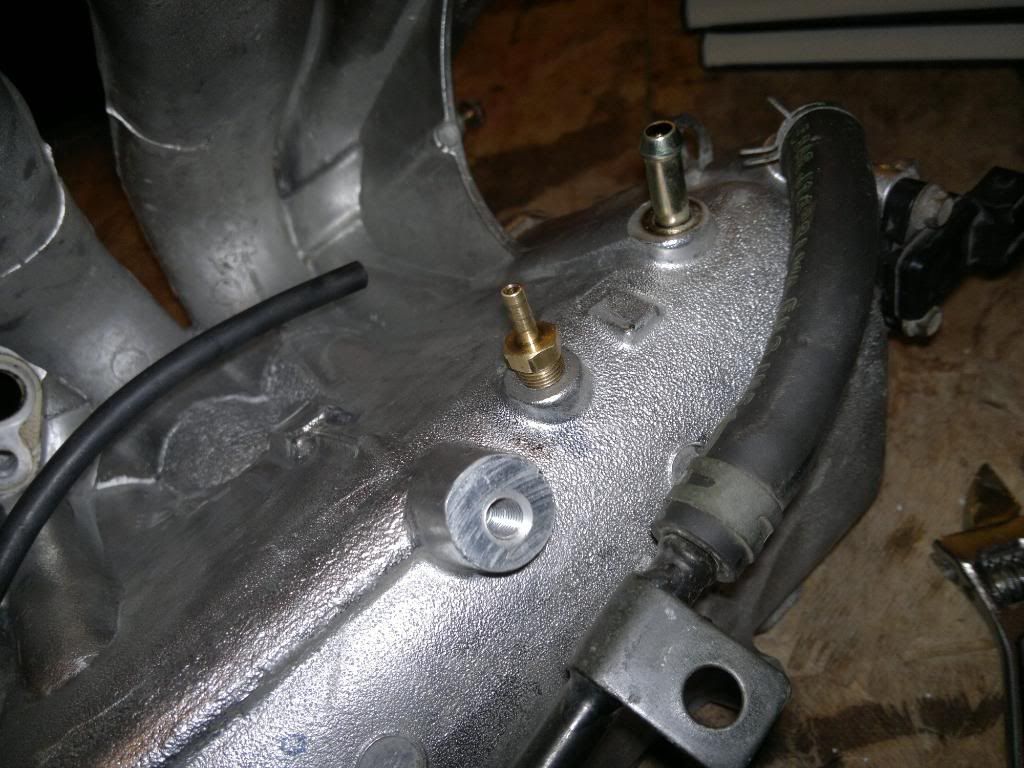
Back on the engine...close-up of threads.
installed...

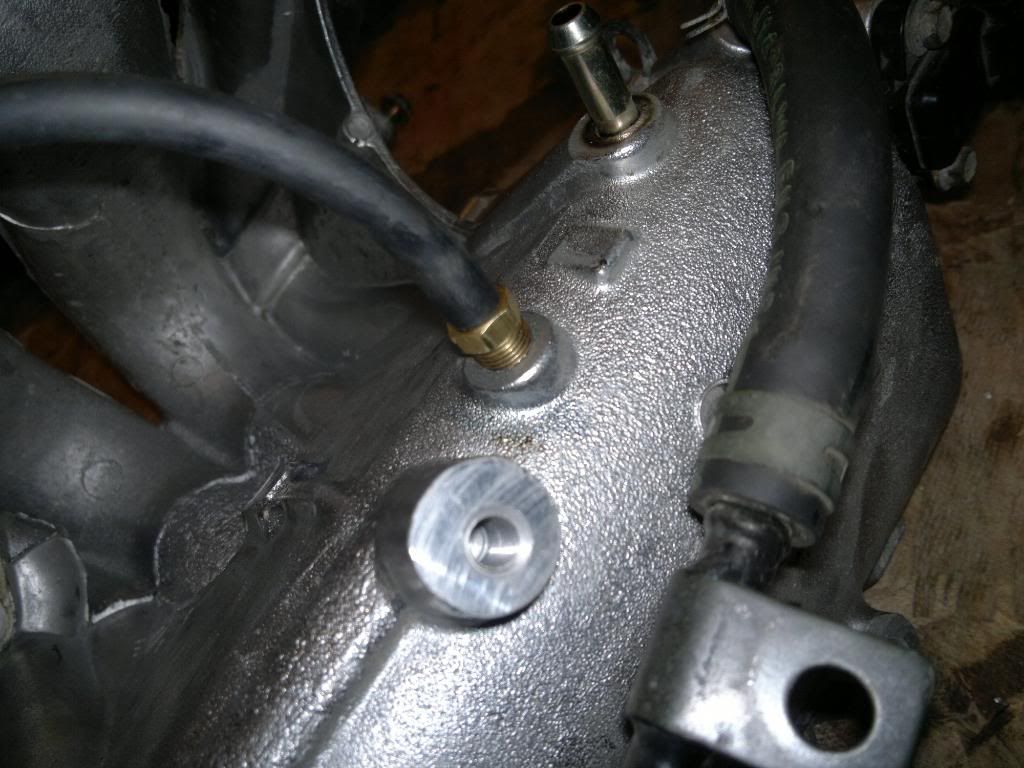
And here is the vacuum tee, one end goes to my boost gauge, which is currently a vacuum only gauge, and the other line is blocked off with a screw, and i tucked it under the engine cover, but it will feed the BOV.

That's all for now folks...that stupid fitting took over 2 hours from cracking the first bolt, to starting the car again...the biggest pain is that the thermostat housing is attached to the intake manifold flange, so when you pull it off, all the coolant in the head spews out all over the transmission, and you have to dry and re-seal all the gaskets and flanges...plus it was cold outside, and i took some breaks to stay warm...a few of my tools had frost on them...
NOTE: removing intake manifold with engine mounted is easier if you remove the valve cover...i didn't, and i got some nasty dings in my no longer nicely painted valve cover..
And on with the next update...
well, i didn't do much this weekend...i was supposed to start working on the downpipe through the week, but because of my work schedule, i was having a hard time meeting up with the shop that's going to bend the pipe for me...i'm having it bent locally to minimize the welding i'll need to do...
Here's what i did do...it doesn't look like much, but pulling the intake manifold is a bit of a pain in the ***...
I needed to put this on my intake manifold somewhere...its purpose is to feed a mechanical vacuum/boost gauge, as well as actuate the blow-off valve...
Found this nice little flat spot on in the casting, which will later be covered by the plastic engine cover...perfect. You can see in this picture, i have already punched the center and began drilling.
Yeah man! I would totally tap that!
done and done...
Back on the engine...close-up of threads.
installed...
And here is the vacuum tee, one end goes to my boost gauge, which is currently a vacuum only gauge, and the other line is blocked off with a screw, and i tucked it under the engine cover, but it will feed the BOV.
That's all for now folks...that stupid fitting took over 2 hours from cracking the first bolt, to starting the car again...the biggest pain is that the thermostat housing is attached to the intake manifold flange, so when you pull it off, all the coolant in the head spews out all over the transmission, and you have to dry and re-seal all the gaskets and flanges...plus it was cold outside, and i took some breaks to stay warm...a few of my tools had frost on them...
NOTE: removing intake manifold with engine mounted is easier if you remove the valve cover...i didn't, and i got some nasty dings in my no longer nicely painted valve cover..
Last edited by CrAnSwIcK; Nov 6, 2011 at 10:28 PM.