
How Screwed Am I? Head Gasket or Rebuild Time or Option 3?


the factory 8 gasket is 3ply and .026 thick.
the factory 9 gasket is 5 ply and .041 thick.
aluminum and cast iron have different expansion rates. 5 ply works better to deal with movement between the two surfaces.
stock 8.8 compression is lowered to 8.67 when using 9 gasket on evo 8.
stock 8.8 comp is raised to 8.99 when using 8 gasket on evo 9.
gaskets are interchangeable without punching holes in them.
Solder it back on. As long as metal touches metal, electricity runs through it.
Take that stud out and put a bolt in it, the ones from the intake side work good, or cut part of that stud off. As long as your have the proper torque rating it doesn't matter how many threads extrude. At a minimum you need 2-3 threads extruding from the nut.
Take that stud out and put a bolt in it, the ones from the intake side work good, or cut part of that stud off. As long as your have the proper torque rating it doesn't matter how many threads extrude. At a minimum you need 2-3 threads extruding from the nut.
Evolved Member
Joined: Aug 2006
Posts: 1,427
Likes: 4
From: Sag-Nasty, MI
the factory 8 gasket is 3ply and .026 thick.
the factory 9 gasket is 5 ply and .041 thick.
aluminum and cast iron have different expansion rates. 5 ply works better to deal with movement between the two surfaces.
stock 8.8 compression is lowered to 8.67 when using 9 gasket on evo 8.
stock 8.8 comp is raised to 8.99 when using 8 gasket on evo 9.
gaskets are interchangeable without punching holes in them.
the factory 9 gasket is 5 ply and .041 thick.
aluminum and cast iron have different expansion rates. 5 ply works better to deal with movement between the two surfaces.
stock 8.8 compression is lowered to 8.67 when using 9 gasket on evo 8.
stock 8.8 comp is raised to 8.99 when using 8 gasket on evo 9.
gaskets are interchangeable without punching holes in them.
The 5 being better than the 3 is self explanatory, my only concern was the coolant passages.
Evolved Member
Joined: Aug 2006
Posts: 1,427
Likes: 4
From: Sag-Nasty, MI
what is that fastener there... did you install an EGT port there too close to the mounting stud? 
you can probably still get that on ok if that's the case just start threading the nut on that stud before the manifold is flush against the head.. but if the end of it is too close to EGT to thread the line to that...


you can probably still get that on ok if that's the case just start threading the nut on that stud before the manifold is flush against the head.. but if the end of it is too close to EGT to thread the line to that...
so out of curiosity, is that what you run on yours? The reason he's talking about punching holes in them is of course the 5 ply closes off some coolant passages between the block and head on the Evo 8, this is another one of those items where there are just as many people saying yea, do that, as there are people saying no use the correct gasket for the yea of the engine.
The 5 being better than the 3 is self explanatory, my only concern was the coolant passages.
The 5 being better than the 3 is self explanatory, my only concern was the coolant passages.
Evolved Member
Joined: Aug 2006
Posts: 1,427
Likes: 4
From: Sag-Nasty, MI
see that's part of what I didn't know and why I was asking your thoughts on that.. good info, I've never had a 9 or had one apart, but after comparing the 8 Head and 8 Block you can see the gasket didn't match that... interesting stuff.
Thread Starter


Joined: Nov 2008
Posts: 1,058
Likes: 16
From: East of the Rockies
what is that fastener there... did you install an EGT port there too close to the mounting stud?
you can probably still get that on ok if that's the case just start threading the nut on that stud before the manifold is flush against the head.. but if the end of it is too close to EGT to thread the line to that...
you can probably still get that on ok if that's the case just start threading the nut on that stud before the manifold is flush against the head.. but if the end of it is too close to EGT to thread the line to that...
The stud hits the bung, so I'll have to relocate it. I am thinking of putting in a 1/8" NPT steel plug or welding the hole and putting the bung on the #2 runner. The #2 runner is more exposed.
Is there a problem with welding it or putting a plug? I was thinking there could be problem down the road with cracking, but I may be justifying getting a new mani (upgrade).
Evolved Member
Joined: Aug 2006
Posts: 1,427
Likes: 4
From: Sag-Nasty, MI
Winner! HAHA! Yes, I did a EGT. So I had the mani off and I put my heat shield on the mani to see where the best place to put the bung. However, I didn't think about the exhaust studs.
The stud hits the bung, so I'll have to relocate it. I am thinking of putting in a 1/8" NPT steel plug or welding the hole and putting the bung on the #2 runner. The #2 runner is more exposed.
Is there a problem with welding it or putting a plug? I was thinking there could be problem down the road with cracking, but I may be justifying getting a new mani (upgrade).
Thread Starter
Joined: Nov 2008
Posts: 1,058
Likes: 16
From: East of the Rockies

Why can't we have more threads like this on EvoM? There are questions, people takings answers, and a bunch of good info from several people with 0 name calling or just random bad info I see so much here.
OP hope it all gos back together well for you, and thanks for sharing all the ups and downs. Im just glad im not the only one who messes up from time to time
OP hope it all gos back together well for you, and thanks for sharing all the ups and downs. Im just glad im not the only one who messes up from time to time
Thread Starter
Joined: Nov 2008
Posts: 1,058
Likes: 16
From: East of the Rockies
Why can't we have more threads like this on EvoM? There are questions, people takings answers, and a bunch of good info from several people with 0 name calling or just random bad info I see so much here.
OP hope it all gos back together well for you, and thanks for sharing all the ups and downs. Im just glad im not the only one who messes up from time to time
OP hope it all gos back together well for you, and thanks for sharing all the ups and downs. Im just glad im not the only one who messes up from time to time
I've done a bunch of name calling to myself offline

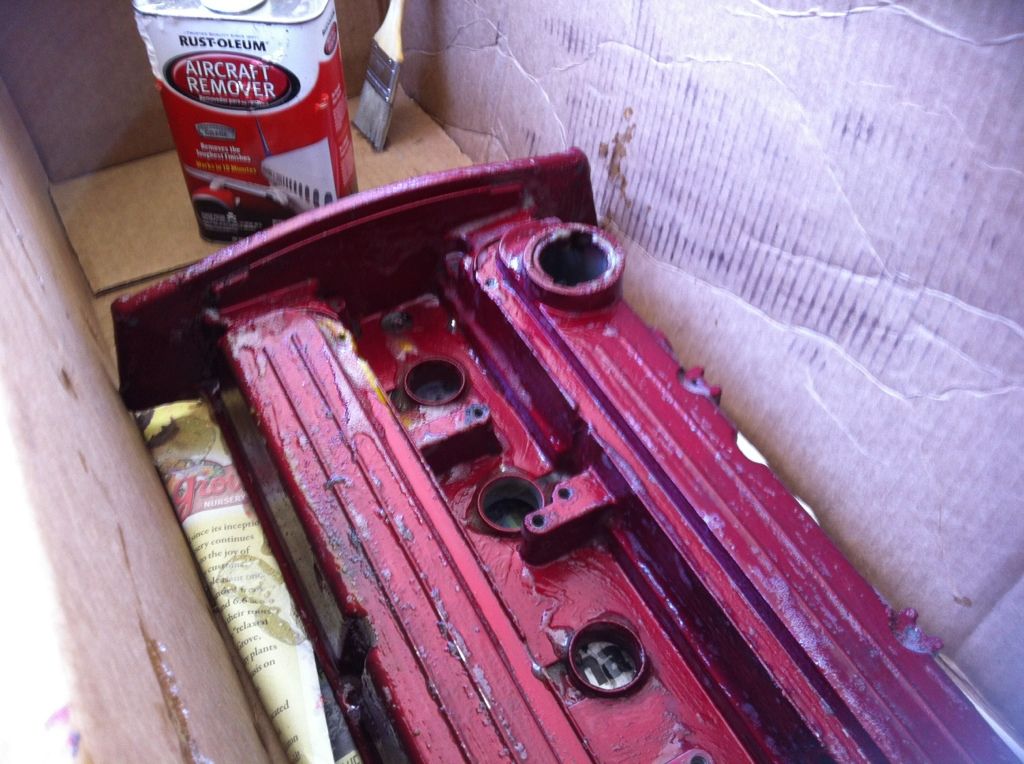
Just finished opening up the VC for catch cans (-10AN). Also removed the baffles and tapped the holes to reinstall after paint.


Newbie
Joined: Mar 2012
Posts: 14
Likes: 0
From: Detroit
^ I am wondering how your valve cover came out.
I did the exact same thing and made the mistake of stripping it. Magnesium is very hard to paint when its raw. Most people recommend using all kinds of converters and catalysts to stop the magnesium from oxidizing before you paint.
I ended up just wet sanding mine, then immediately cleaning it and painted over the raw magnesium with self etching primer, then I used VHT wrinkle black.
I had to bake the whole thing a couple of times in the oven to get it to stick... a 3-4 hour project turned into a weekend..... I wish I would've just painted over the existing red.
Thread Starter
Joined: Nov 2008
Posts: 1,058
Likes: 16
From: East of the Rockies
^ I am wondering how your valve cover came out.
I did the exact same thing and made the mistake of stripping it. Magnesium is very hard to paint when its raw. Most people recommend using all kinds of converters and catalysts to stop the magnesium from oxidizing before you paint.
I ended up just wet sanding mine, then immediately cleaning it and painted over the raw magnesium with self etching primer, then I used VHT wrinkle black.
I had to bake the whole thing a couple of times in the oven to get it to stick... a 3-4 hour project turned into a weekend..... I wish I would've just painted over the existing red.
I did the exact same thing and made the mistake of stripping it. Magnesium is very hard to paint when its raw. Most people recommend using all kinds of converters and catalysts to stop the magnesium from oxidizing before you paint.
I ended up just wet sanding mine, then immediately cleaning it and painted over the raw magnesium with self etching primer, then I used VHT wrinkle black.
I had to bake the whole thing a couple of times in the oven to get it to stick... a 3-4 hour project turned into a weekend..... I wish I would've just painted over the existing red.
I'll post pics later.
Thread Starter
Joined: Nov 2008
Posts: 1,058
Likes: 16
From: East of the Rockies
Update:
It's been driving great for the last 5k miles. I haven't pushed it too much. I'm at 26 psi and 380hp/tq on E85. I'll push it up the boost after this next oil change and see if I can get around 420/420. I'm going to try SD later to see if I can get 450+/450+.
On with the pics:
Test fit:

I had to move notch the alternator bracket because of the MAPerformance Phenolic Intake Manifold Spacer moved the manifold back a little:

Fixed the error on EGT bung placement. I haven't installed it yet, so that's why I have two SS studs in the manifold:

Changed out the eBay Civic Radiator for the Koyo version:

Installed 2 Fairclough Racing -10AN bungs and Earl push on ends:


Installed an ETS Small Battery Kit and Saikou Michi dual catch cans with site glasses:

I need to clean it up. My neighbor said I can use his pressure washer in exchange he can use my TIG welder for his knight armor


It's been driving great for the last 5k miles. I haven't pushed it too much. I'm at 26 psi and 380hp/tq on E85. I'll push it up the boost after this next oil change and see if I can get around 420/420. I'm going to try SD later to see if I can get 450+/450+.
On with the pics:
Test fit:
I had to move notch the alternator bracket because of the MAPerformance Phenolic Intake Manifold Spacer moved the manifold back a little:
Fixed the error on EGT bung placement. I haven't installed it yet, so that's why I have two SS studs in the manifold:
Changed out the eBay Civic Radiator for the Koyo version:
Installed 2 Fairclough Racing -10AN bungs and Earl push on ends:
Installed an ETS Small Battery Kit and Saikou Michi dual catch cans with site glasses:
I need to clean it up. My neighbor said I can use his pressure washer in exchange he can use my TIG welder for his knight armor