for anyone that has crankcase pressure issues

 Sep 10, 2013, 08:58 AM
#722
Well 1/2 NPT is a big hole, I took my time because I did not wanted to crack the valve cover and to minimize on the shavings that could get into the hole. I have a small hand and I was able to stick my finger in the hole and remove lots of the shaving that way, also because Mg is so light it can easily be washed out. I am not worry at all about it, it is just a matter of what you think is better, if you think that removing the baffle is a better option because of the shavings then go for it, if you think that once you remove the baffles a screw is going to fall then don't remove the baffles.
Sep 11, 2013, 08:02 AM
#723
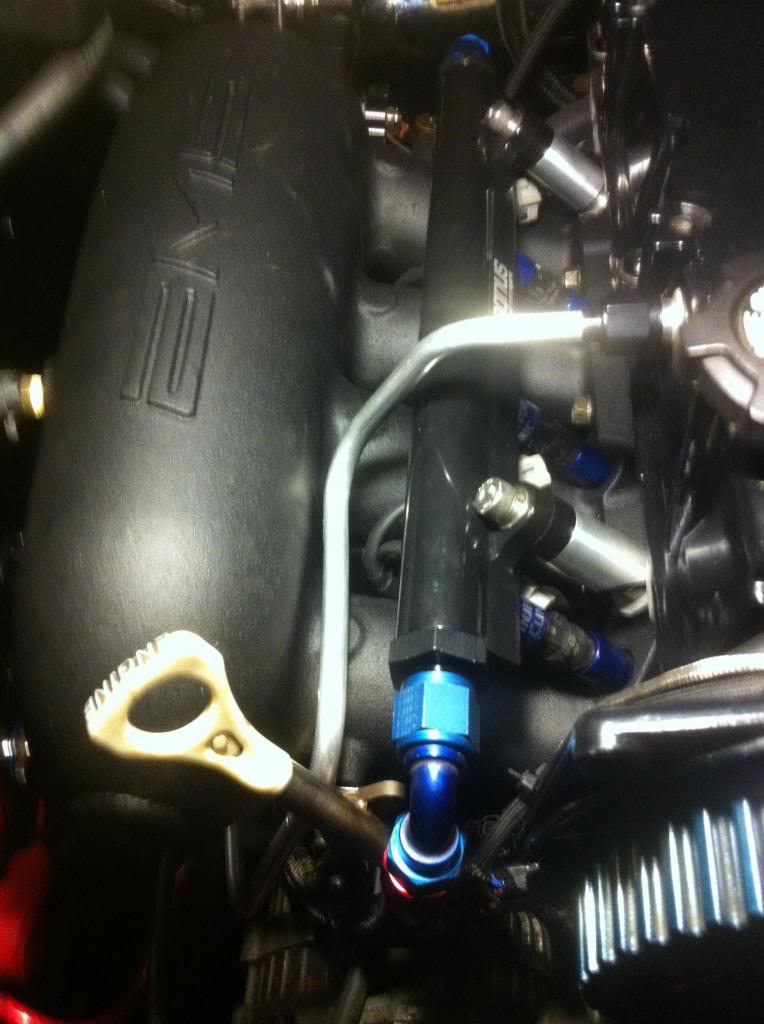
For anyone that does not know what a Fairclough press-in fitting is, here is a picture of one I purchase from him:

Fairclough is a user here on evom that made these fittings for his build and offered them for sale; this is a -10 AN press-in fitting that goes on the side where the PCV valve goes on the valve cover. The good thing is that it is a true -10 AN fitting and you do not have to drill anything, just remove the old press-in fitting with the sleeve and press this one in, making this hole -10 AN. I am surprise that nobody else is offering this as a -10 AN solution.
Here is a thread that he made a while back with more pictures:
https://www.evolutionm.net/forums/we...r-fitting.html
Sep 11, 2013, 08:11 AM
#724
^ I ordered 2 and they are on the way  Also going to try Hal's oil cap. He told me the new baffle and splash guard work very good controlling oil splash. I'm going to try and do what I can before drilling the rocker cover. Next up would be a vented dipstick, but I'll have to make my own because I don't like where the vendors are mounting the AN fitting way too low on the tube.
Also going to try Hal's oil cap. He told me the new baffle and splash guard work very good controlling oil splash. I'm going to try and do what I can before drilling the rocker cover. Next up would be a vented dipstick, but I'll have to make my own because I don't like where the vendors are mounting the AN fitting way too low on the tube.
Sep 11, 2013, 08:45 AM
#725
Is putting like 15 little screws in there to hold it in place after any less of a gamble?
I hooked an air hose up while milling out the side cover so it blew all the chips out while cutting. Seemed to work very well. I used press in fittings on both lines, so no tapping at all. If you were to tap them though, just load the tap up with grease and go a turn at a time, cleaning the tap of grease and shavings with each turn.
I feel a lot better about this method then using screws to secure the baffle back on after removing it. Both methods have risks though.
Sep 11, 2013, 09:02 AM
#726
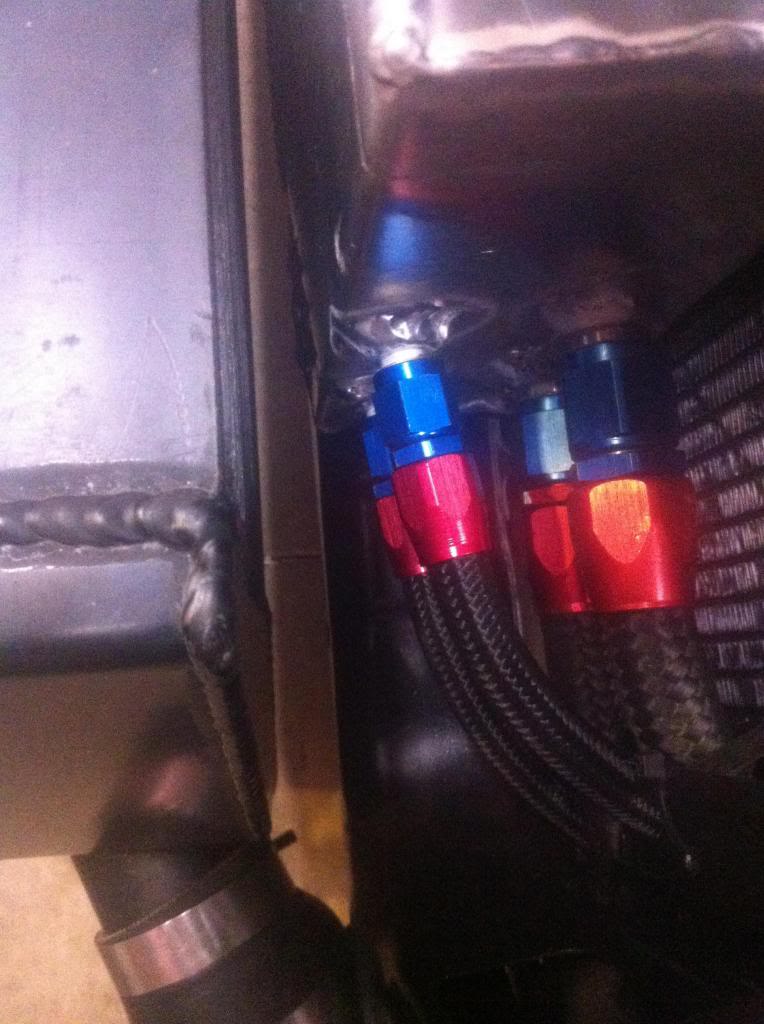
My latest set is as follows... 2 -10 AN from the head, 2 -6 AN from the block
PCV still retained to intake manifold.
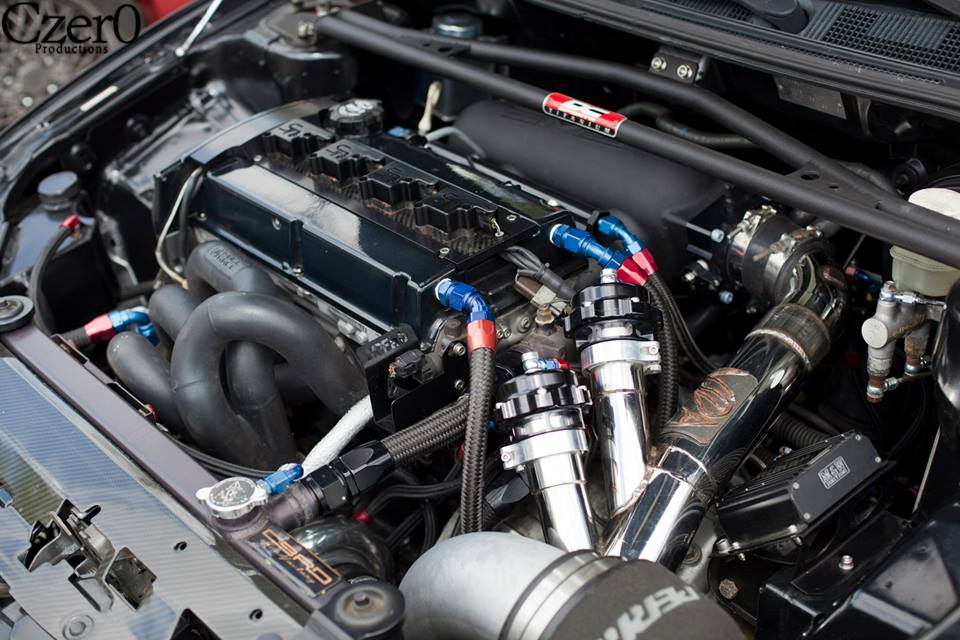
here is a pcv hardline that I did in -6 AN.. I then used a check valve at the intake manifold itself. The fitting that is pressed in is a -6An fitting from STM
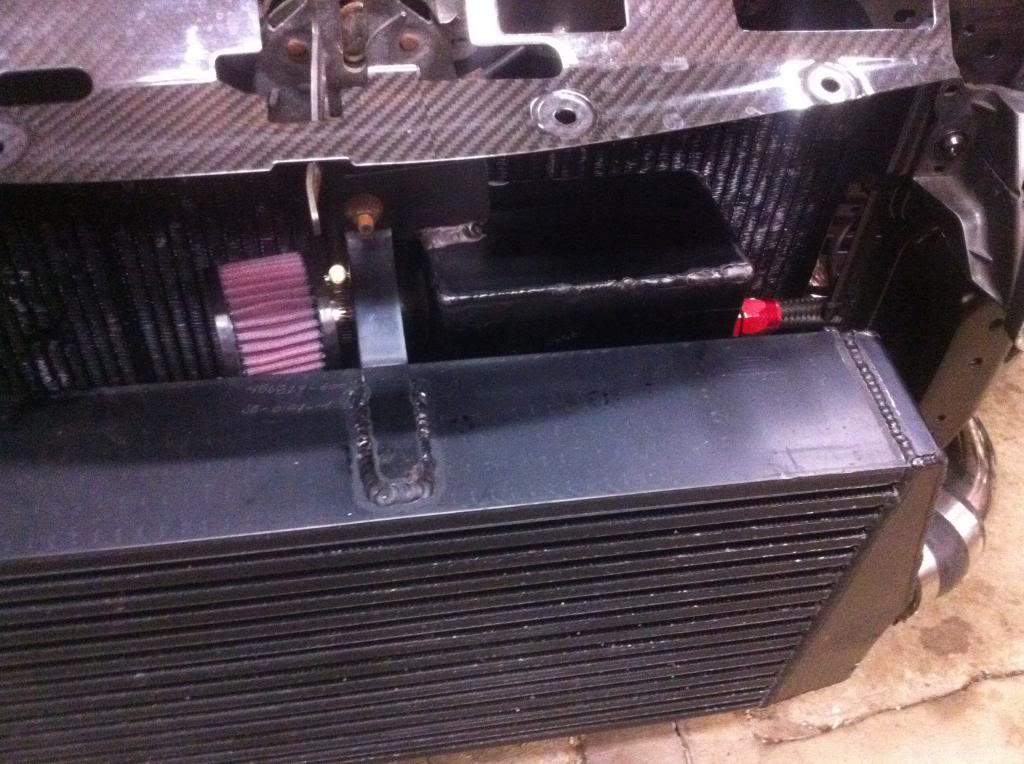
I built a large baffled can that sits inbetween my radiator and fmic
I will say this, that because I do NOT have a reservoir between the pcv valve and the intake manifold, I do see oil in the intake manifold. This system is different when compared to the one that I HAD used previousily in this thread i.e page 8 or 11
PCV still retained to intake manifold.

here is a pcv hardline that I did in -6 AN.. I then used a check valve at the intake manifold itself. The fitting that is pressed in is a -6An fitting from STM

I built a large baffled can that sits inbetween my radiator and fmic


I will say this, that because I do NOT have a reservoir between the pcv valve and the intake manifold, I do see oil in the intake manifold. This system is different when compared to the one that I HAD used previousily in this thread i.e page 8 or 11
Last edited by antilag_200; Sep 11, 2013 at 09:04 AM.
Sep 11, 2013, 09:18 AM
#728
Is putting like 15 little screws in there to hold it in place after any less of a gamble?
I hooked an air hose up while milling out the side cover so it blew all the chips out while cutting. Seemed to work very well. I used press in fittings on both lines, so no tapping at all. If you were to tap them though, just load the tap up with grease and go a turn at a time, cleaning the tap of grease and shavings with each turn.
I feel a lot better about this method then using screws to secure the baffle back on after removing it. Both methods have risks though.
I hooked an air hose up while milling out the side cover so it blew all the chips out while cutting. Seemed to work very well. I used press in fittings on both lines, so no tapping at all. If you were to tap them though, just load the tap up with grease and go a turn at a time, cleaning the tap of grease and shavings with each turn.
I feel a lot better about this method then using screws to secure the baffle back on after removing it. Both methods have risks though.
To mrfred its really easy to remove the baffles if you have the right tools... And at how well you custom make some **** i imagine you have em all...
Sep 11, 2013, 11:07 AM
#730
http://www.summitracing.com/search/p...check%20valves
Sep 11, 2013, 11:27 AM
#731
....
I will get one for you tonight, it is basically a AIR check valve, with a 90 degree fitting of it. they are basically 1/4 NPT male or female fittings, then simply add to choice of AN fittings.
http://www.summitracing.com/search/p...check%20valves
I will get one for you tonight, it is basically a AIR check valve, with a 90 degree fitting of it. they are basically 1/4 NPT male or female fittings, then simply add to choice of AN fittings.
http://www.summitracing.com/search/p...check%20valves
Sep 11, 2013, 11:34 AM
#732
No I don't know the crack pressure of those ones, mcmaster is way better than summit when it comes to specifics on the valve. IMO the crack pressure is poor in comparison to the stock pcv ( uneducated mouth test)
http://www.mcmaster.com/#air-check-valves/=ogpbvd
additionally I had a design estimate on a "custom" check valve, i.e vitton seals, Stainless body, with Male AN fittings built into the body , however it was alittle over 130 bucks for that valve.
http://www.mcmaster.com/#air-check-valves/=ogpbvd
additionally I had a design estimate on a "custom" check valve, i.e vitton seals, Stainless body, with Male AN fittings built into the body , however it was alittle over 130 bucks for that valve.
Sep 11, 2013, 11:44 AM
#733
The cams arent close enough to worry about the bolts and after that is either trapped in the head or the oil pan and still of no concern because it cant make it thru the pickup screen. Shaving will go wherever they want... They may get stopped in the oil filter but some can make it thru and chew bearing or cam journals... Not worth the risk...
Too each their own.
I personally feel it's a bigger risk to take the baffle out. Realize that even if you had shavings in there, they have to get back out through the baffling.
Sep 11, 2013, 12:57 PM
#734
No I don't know the crack pressure of those ones, mcmaster is way better than summit when it comes to specifics on the valve. IMO the crack pressure is poor in comparison to the stock pcv ( uneducated mouth test)
http://www.mcmaster.com/#air-check-valves/=ogpbvd
additionally I had a design estimate on a "custom" check valve, i.e vitton seals, Stainless body, with Male AN fittings built into the body , however it was alittle over 130 bucks for that valve.
http://www.mcmaster.com/#air-check-valves/=ogpbvd
additionally I had a design estimate on a "custom" check valve, i.e vitton seals, Stainless body, with Male AN fittings built into the body , however it was alittle over 130 bucks for that valve.
I'm using one of the "Quick Opening" check valves from McMaster. Its a fine valve with a 0.3 psi crack pressure, but its big, heavy, and relatively expensive. If the VIAIR valve has a decently low crack pressure (less than 0.5 psi), I may have to try one out. I guess I'll call VIAIR.
Sep 11, 2013, 01:11 PM
#735
The check valve company that was dealing with during my design phase, I could specify crack pressures from 0.001 all the way through 99.9
their standard crack pressures were 0.125, 0.5 for values below 1
Here is their website
http://www.checkvalves.com/
their standard crack pressures were 0.125, 0.5 for values below 1
Here is their website
http://www.checkvalves.com/