Project: Saving Katrina 2010 Drag Car
 Dec 15, 2009, 04:49 PM
#1
Project: Saving Katrina 2010 Drag Car
Well I think we have reached the end of the road with regards to circumventing the safety equipment rules at our local dragstrip. Last time out we only got as far as two passes in before they gave us the big boot in the rear and told us not to return until we have a rollbar as we coasted down to a 10.9 at 99mph in testing. Truth be told, we are a hair on an elephant's *** away from running 9's on our STREET CAR complete with A/C, Power Steering, ABS Brakes, factory driveshaft and brakes, with mustache bar and front member, the works. Best to date is 10.1 & 144mph on our heavy setup. We have thought about putting a cage in until it made us sick. In the end I can't bring myself to weld in a 10pt cage for <9.99 into such a clean street car with low mileage. Orlando Speed World is and NHRA friendly track hosting the World Street Nationals here every year. They follow the safety equipment rules fairly closely as there have been plenty of crashes in the past. Many of which I have watched with my own eyes as the life-flight helicopter lands on the end of the strip and takes critically injured racers away.
For quite some time I have been searching for a good project chassis to work on. One I wouldn't cry over someone taking a plasma cutter, sawzall or a tig welder to. Something of a blank canvas to work upon. After a few close deals but no cigar, we came across a good chassis finally to work upon. I sat and watched it for a while, slept on it for a few nights and then when the sleepless nights and visions of drag car plans started to keep me up at night I knew I wasn't going to be able to let it go. We packed up the trailer and headed out of town to pick it up.
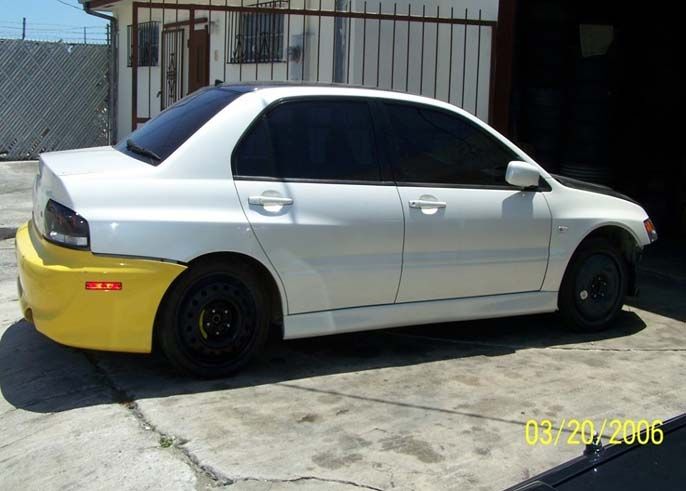
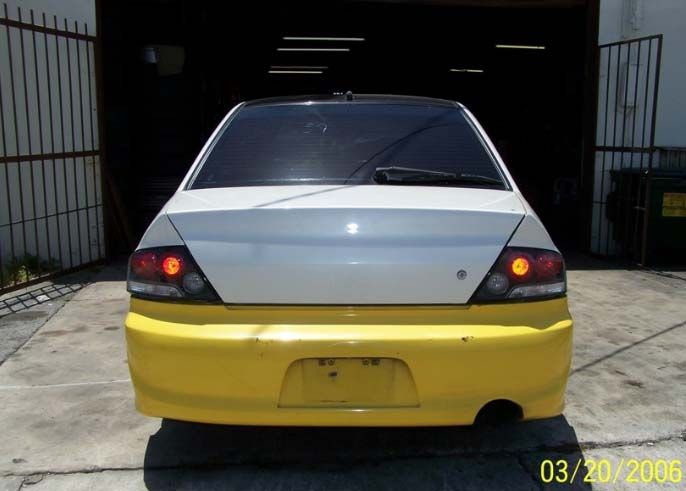
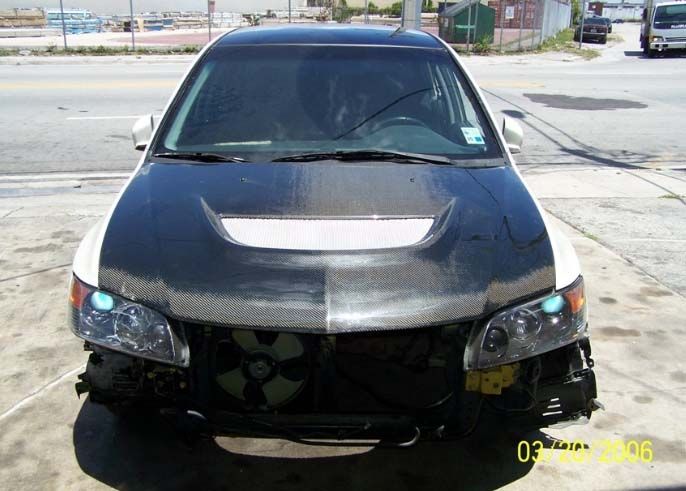
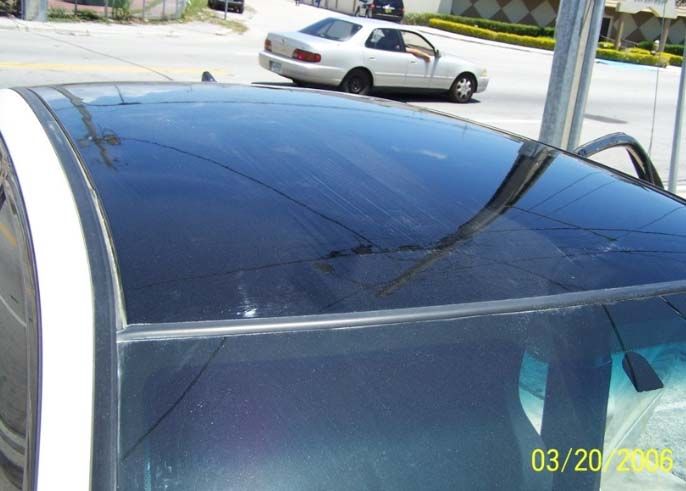
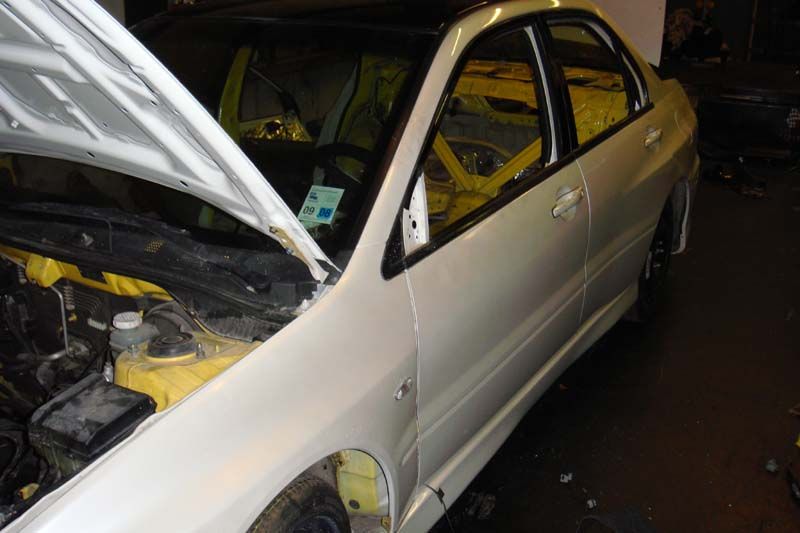
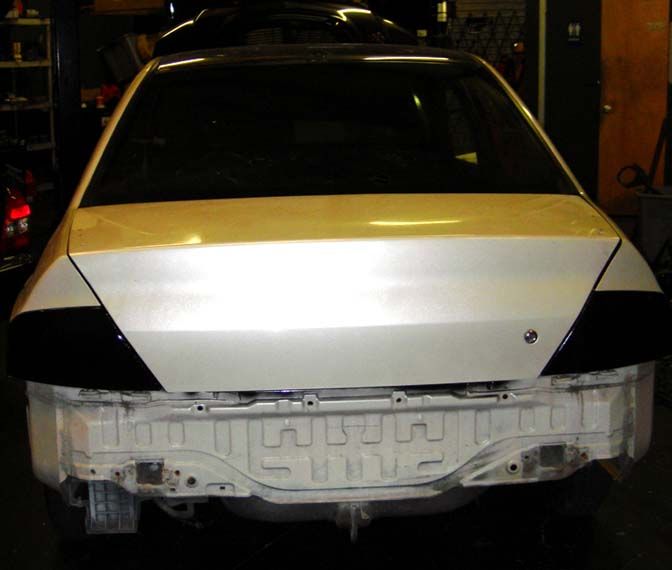
"Project Katrina" is a Hurricane victim violated by none other than most destructive natural disaster of our time, Hurricane Katrina of 2005. Personally I can't tell much is wrong with the car. The car is straight, the body is great, however I am told it dipped the nose in some water. Perfect candidate for a drag car I say...
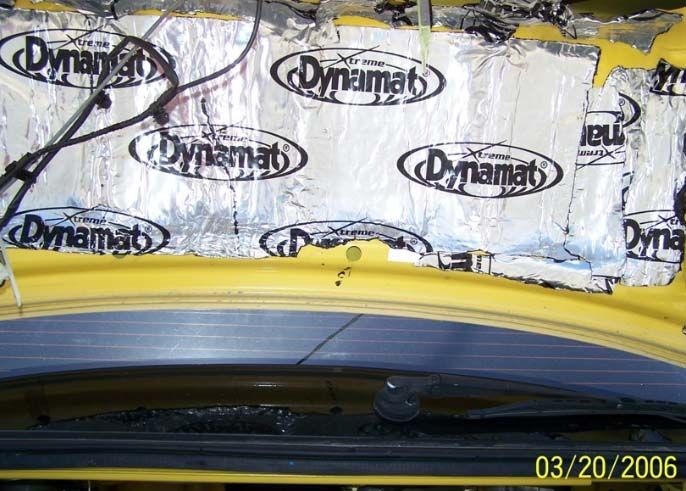
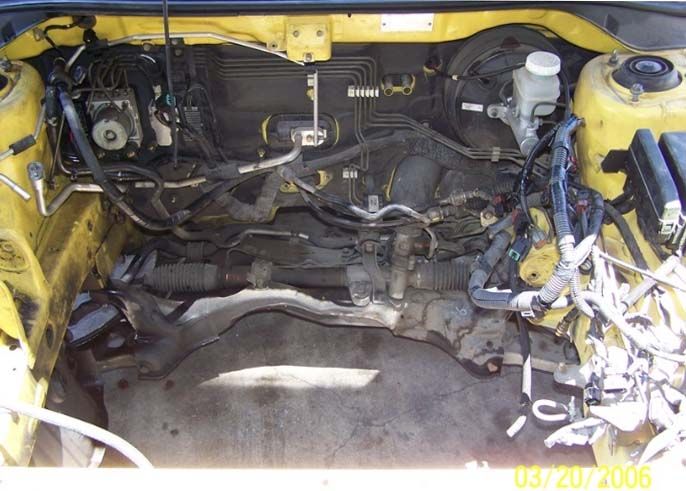
As it stood upon acquiring it, was full interior and dash with A/C controls, no driveline or engine. Two broken windows, yellow engine bay, black front bumper with pearl Acura paint on the exterior. The hood was white underneith but block sanded on top. The whole trunk and lid was and is lined with many pounds worth of Dynamat (the devil) which has proven to be a SOB to remove from the floor of the trunk. The car has rotors, no brakes, ABS unit was there, sway bars, charcoal canister. We picked up the remaining replacement glass while there so that we can put it back together again. The car rolls on 4 x spare tires and an e-brake that it not connected.
The Good: The car has straight lines and paint is decent. The body is in great shape.
The Bad: The Dynamat, the Dynamat, the Dynamat, and the rear and front bumpers don't match. No wheels, brakes, driveline, differentials, transmission or engine.
Here are some of the pics from when we first picked it up:


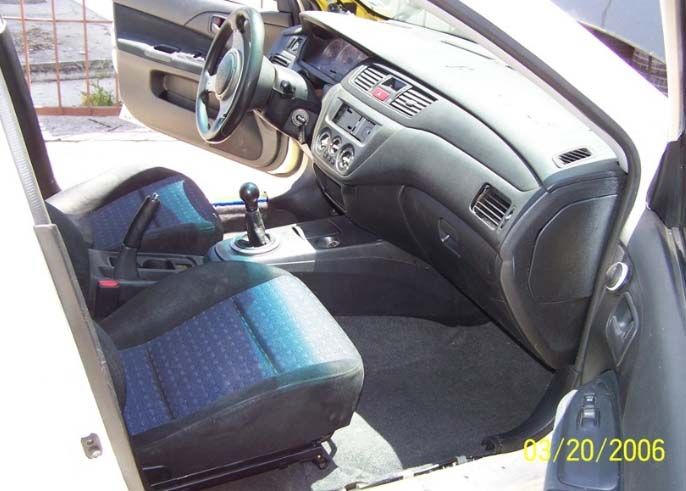
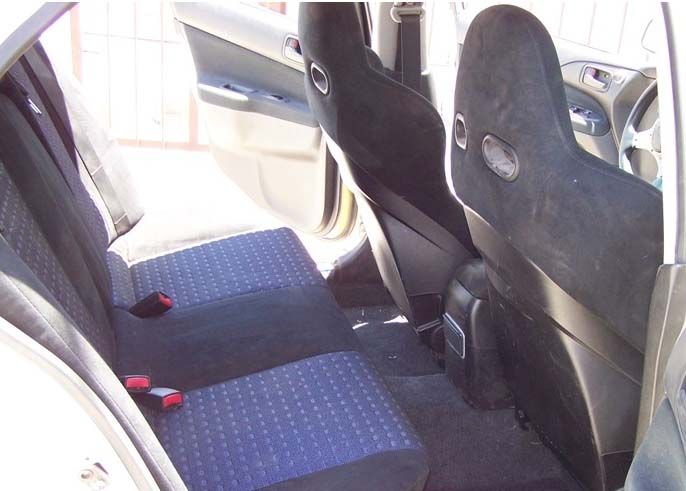
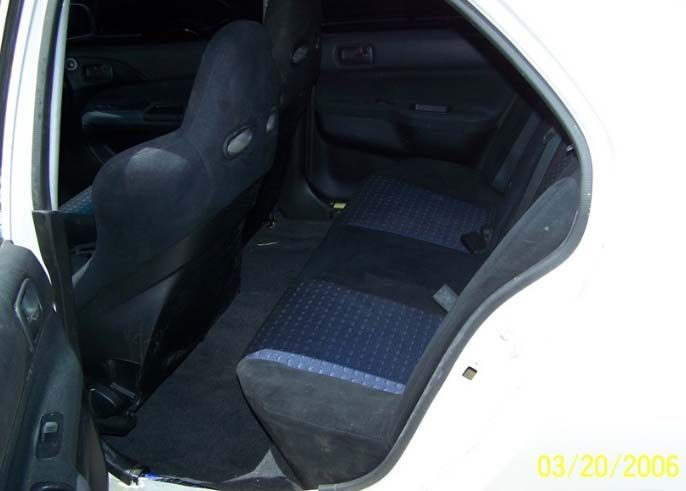
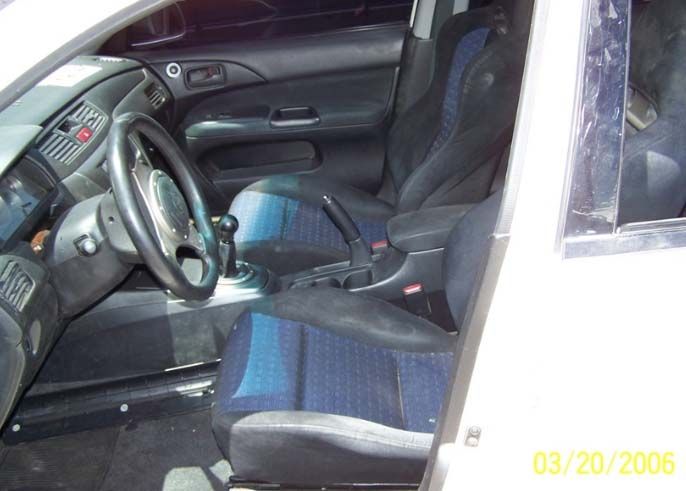
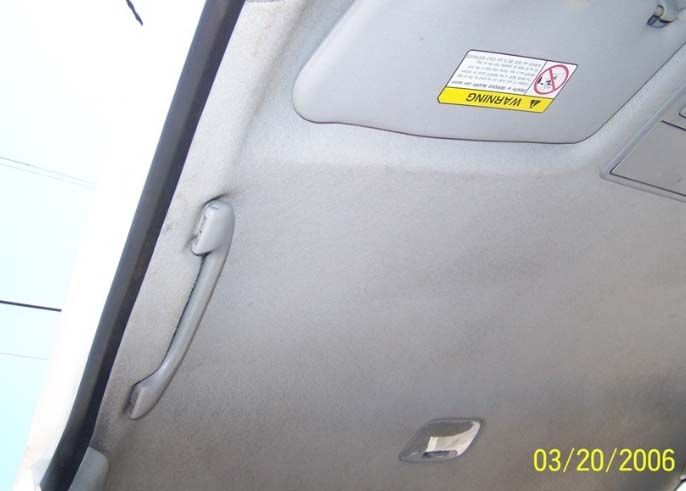


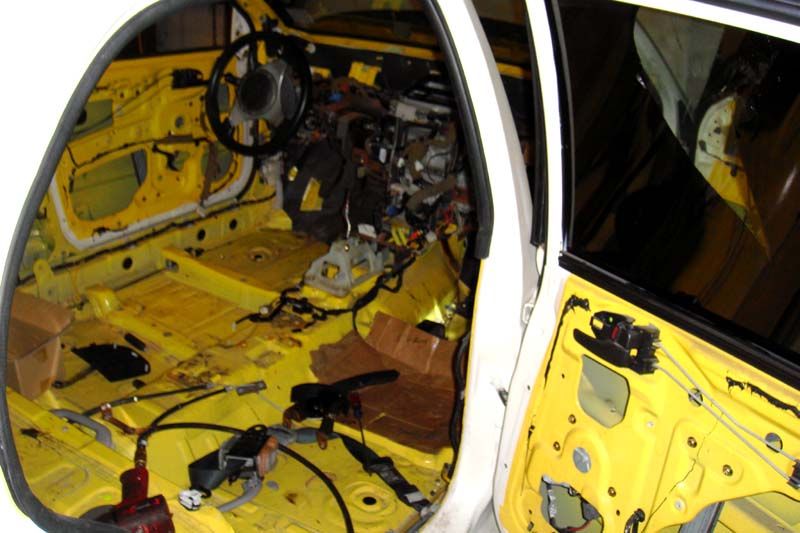
First up was to get the car torn down, removing much of the things we would never do on a street car. Front and rear Recaro seats, carpet, door trim, headliner, dash, headlights and tail lights and begun the tedius process of removing some of the dynamat. Our master plan is to remove all traces of yellow in the car as we had a different color scheme in mind. We wanted to change it to a more discrete black while considering leaving the exterior pearl white.


One of the problems of attacking a project like this with excitement and a little bit of A.D.D. is that you can end up on several tangents, wanting to multi-task many aspects of the car at once. We tried to collect ourselves and try to work on one thing at a time. Each area of the Evo needed to be addressed from engine bay to cabin to trunk and all aspect of the car have to be well thought out ahead of time, despite an otherwise busy schedule working our normal number of several Evo projects, installs and tuning daily.
We concentrated on the engine bay at first coming up with what configuration we would be using for the engine and exhaust/turbo. With "cutting the fat" a large part of the equation on this project, we decided on how we would address those concerns up front. The decision was made to use a custom radiator support beam and fab up the upper support in house to affix the front bumper and headlights along with provisions for hood pins and radiator top support mount. The ABS has been removed in favor of our TTP ABS to non-ABS conversion kit.'
At this point the engine bay is ready for the parts to be fabricated and we will be welding them when we put the cage in.
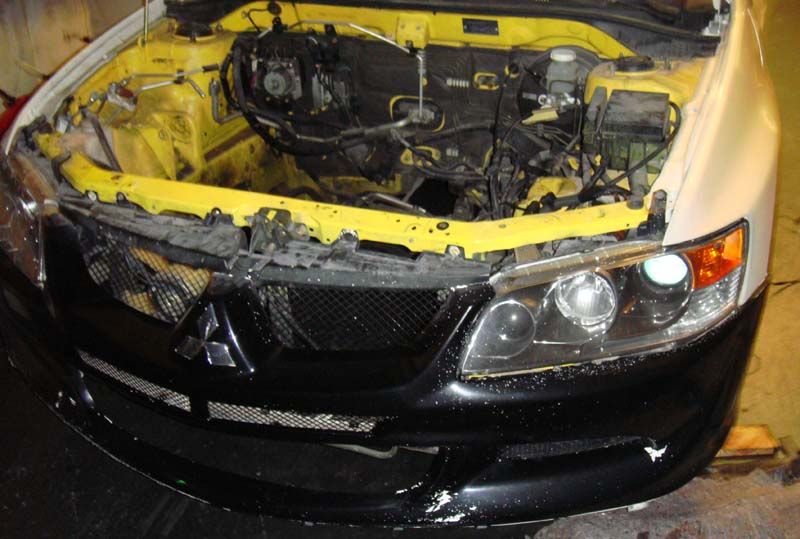
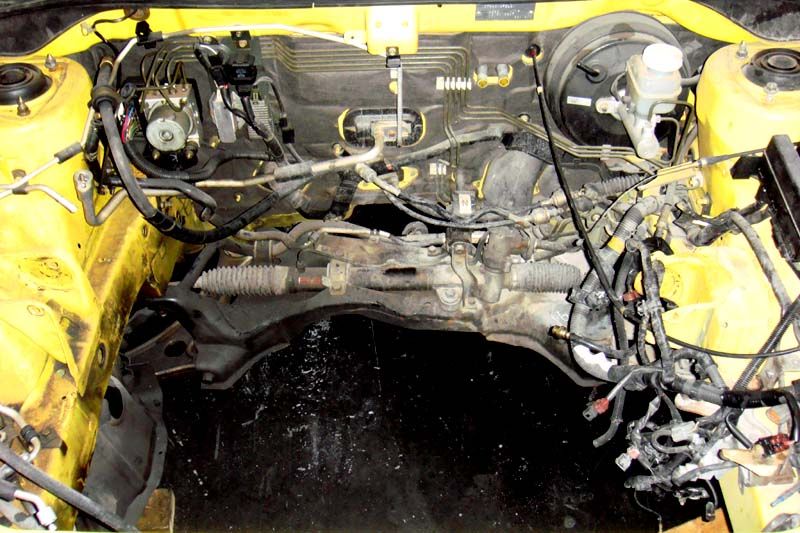
The engine bay BEFORE:
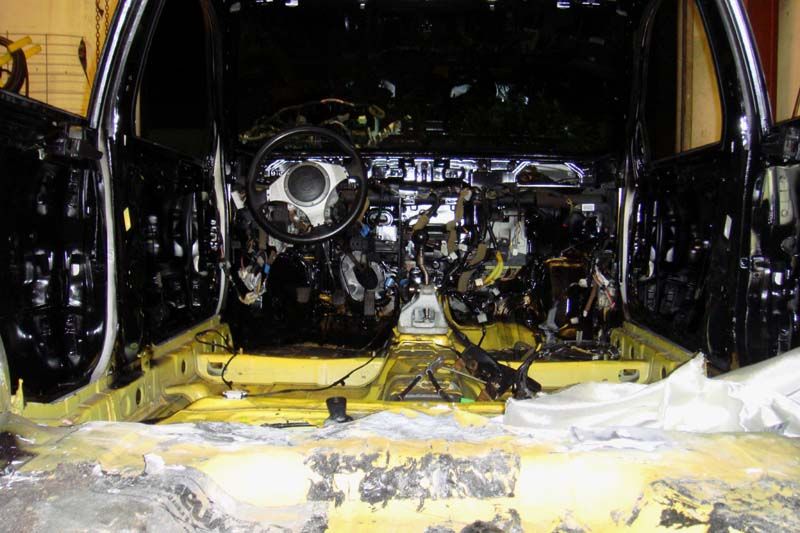
The engine bay AFTER:

The firewall padding on both sides of the wall have been removed to save weight and change the color from yellow to black. ABS brakes changed to non-ABS. The power steering was converted to manual steering and all lines removed. A/C fan, condensor and associated lines were also removed.
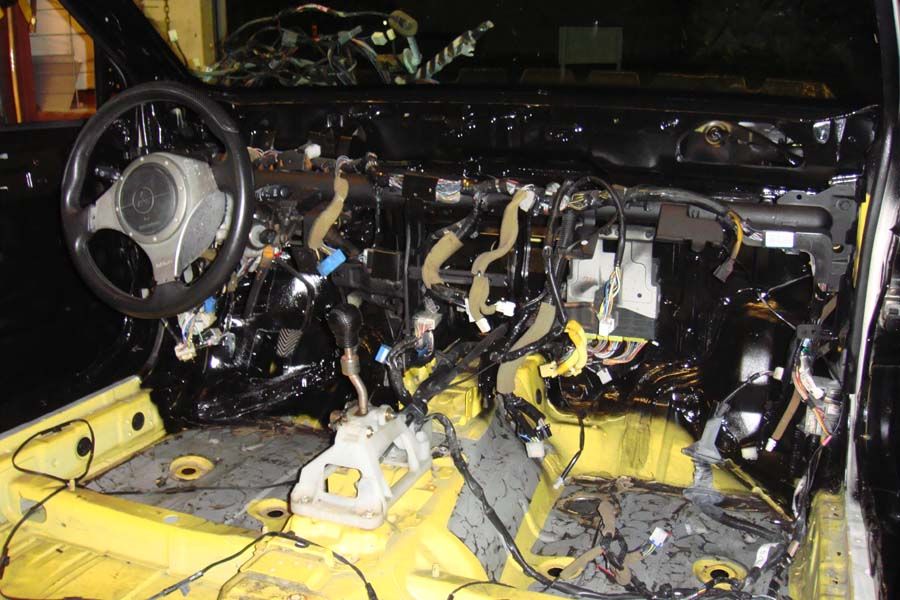
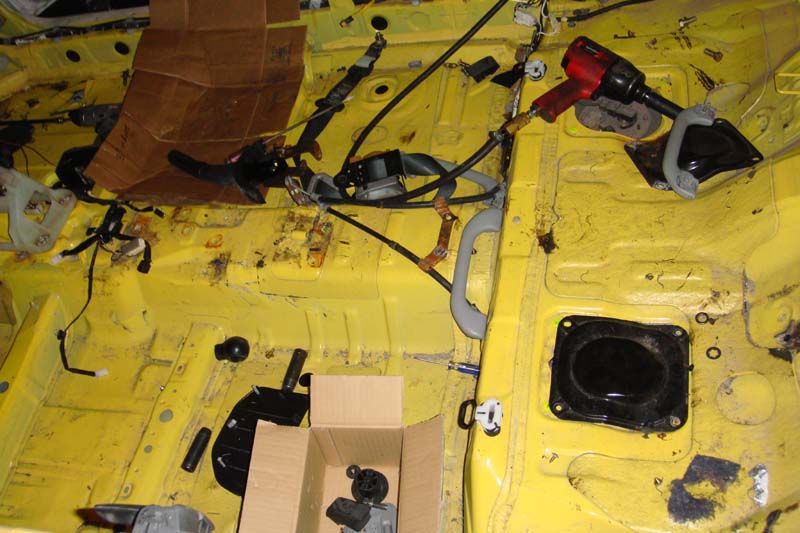
The steering column bar was bare metal and starting to oxidize/rust from the Lousiana oceanic air so we cleaned it up and painted it flat black. The back of the firewall in the cabin, a-pillars and roof was all painted gloss black. We also transformed the interior of the doors to gloss black. All sound deadening material has been removed from the chassis floor, under the rear seat, around the shifter, and up and over the rear fenderwells. This saved 18-22lbs alone but in some areas can be a pain to get it all up.
As we attack the car, at our E.T. goals we will be required to have 5-point harnesses so we removed all 5 sets of seatbelts. While we were at it, the windshield wipers and motors from the front and rear were omitted. If it is not necessary for safety or integrity of the vehicle, it got removed.
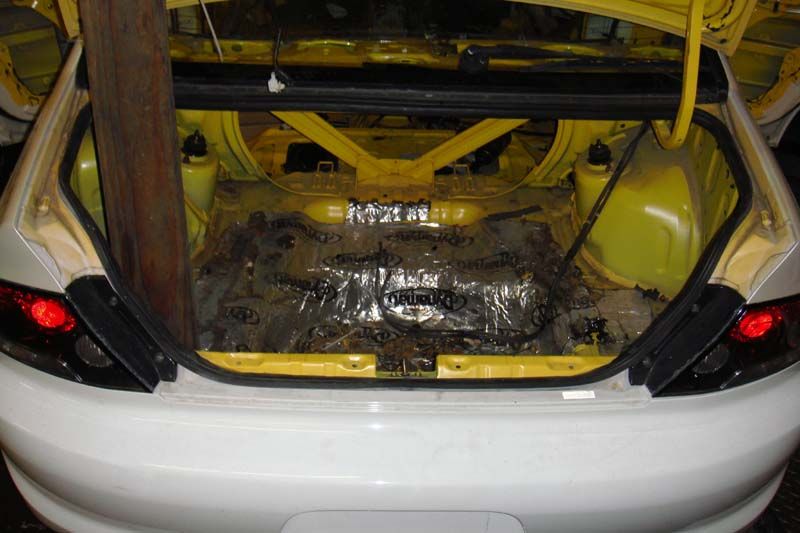
We may decide to put a carbon trunk on the car, but until then we wanted to get rid of the hideous yellow paint so we sprayed the interior of the trunk to black for the time being:
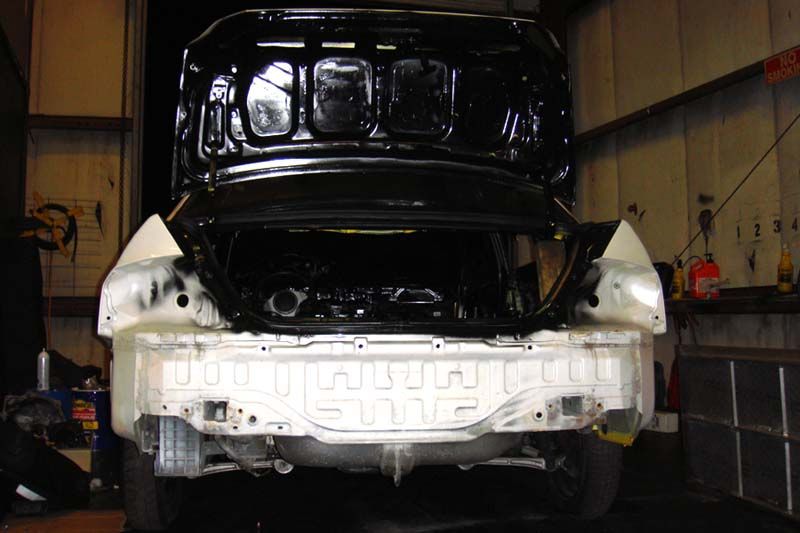
After weighing the rear headlights and deciding that they are very light, we sprayed them also as they had a halfassed JDM tails job done by the previous owner.
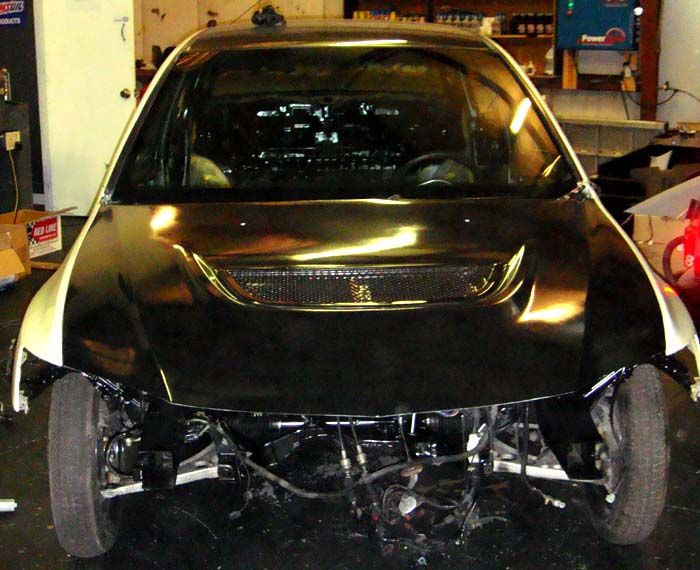
Its hard to get a visual of what the car is going to look like once completed and in order to help us get the impression that we are making progress with the car and invoke motivation, we sprayed the hood gloss black to match the interior and engine bay. As stated the hood was sanded to the bare metal when we got the car. Since the car came with the roof gloss black already it seemed to be the way to go with regards to uniformity.
For quite some time I have been searching for a good project chassis to work on. One I wouldn't cry over someone taking a plasma cutter, sawzall or a tig welder to. Something of a blank canvas to work upon. After a few close deals but no cigar, we came across a good chassis finally to work upon. I sat and watched it for a while, slept on it for a few nights and then when the sleepless nights and visions of drag car plans started to keep me up at night I knew I wasn't going to be able to let it go. We packed up the trailer and headed out of town to pick it up.
"Project Katrina" is a Hurricane victim violated by none other than most destructive natural disaster of our time, Hurricane Katrina of 2005. Personally I can't tell much is wrong with the car. The car is straight, the body is great, however I am told it dipped the nose in some water. Perfect candidate for a drag car I say...
As it stood upon acquiring it, was full interior and dash with A/C controls, no driveline or engine. Two broken windows, yellow engine bay, black front bumper with pearl Acura paint on the exterior. The hood was white underneith but block sanded on top. The whole trunk and lid was and is lined with many pounds worth of Dynamat (the devil) which has proven to be a SOB to remove from the floor of the trunk. The car has rotors, no brakes, ABS unit was there, sway bars, charcoal canister. We picked up the remaining replacement glass while there so that we can put it back together again. The car rolls on 4 x spare tires and an e-brake that it not connected.
The Good: The car has straight lines and paint is decent. The body is in great shape.
The Bad: The Dynamat, the Dynamat, the Dynamat, and the rear and front bumpers don't match. No wheels, brakes, driveline, differentials, transmission or engine.
Here are some of the pics from when we first picked it up:
First up was to get the car torn down, removing much of the things we would never do on a street car. Front and rear Recaro seats, carpet, door trim, headliner, dash, headlights and tail lights and begun the tedius process of removing some of the dynamat. Our master plan is to remove all traces of yellow in the car as we had a different color scheme in mind. We wanted to change it to a more discrete black while considering leaving the exterior pearl white.
One of the problems of attacking a project like this with excitement and a little bit of A.D.D. is that you can end up on several tangents, wanting to multi-task many aspects of the car at once. We tried to collect ourselves and try to work on one thing at a time. Each area of the Evo needed to be addressed from engine bay to cabin to trunk and all aspect of the car have to be well thought out ahead of time, despite an otherwise busy schedule working our normal number of several Evo projects, installs and tuning daily.
We concentrated on the engine bay at first coming up with what configuration we would be using for the engine and exhaust/turbo. With "cutting the fat" a large part of the equation on this project, we decided on how we would address those concerns up front. The decision was made to use a custom radiator support beam and fab up the upper support in house to affix the front bumper and headlights along with provisions for hood pins and radiator top support mount. The ABS has been removed in favor of our TTP ABS to non-ABS conversion kit.'
At this point the engine bay is ready for the parts to be fabricated and we will be welding them when we put the cage in.
The engine bay BEFORE:
The engine bay AFTER:
The firewall padding on both sides of the wall have been removed to save weight and change the color from yellow to black. ABS brakes changed to non-ABS. The power steering was converted to manual steering and all lines removed. A/C fan, condensor and associated lines were also removed.
The steering column bar was bare metal and starting to oxidize/rust from the Lousiana oceanic air so we cleaned it up and painted it flat black. The back of the firewall in the cabin, a-pillars and roof was all painted gloss black. We also transformed the interior of the doors to gloss black. All sound deadening material has been removed from the chassis floor, under the rear seat, around the shifter, and up and over the rear fenderwells. This saved 18-22lbs alone but in some areas can be a pain to get it all up.
As we attack the car, at our E.T. goals we will be required to have 5-point harnesses so we removed all 5 sets of seatbelts. While we were at it, the windshield wipers and motors from the front and rear were omitted. If it is not necessary for safety or integrity of the vehicle, it got removed.
We may decide to put a carbon trunk on the car, but until then we wanted to get rid of the hideous yellow paint so we sprayed the interior of the trunk to black for the time being:
After weighing the rear headlights and deciding that they are very light, we sprayed them also as they had a halfassed JDM tails job done by the previous owner.
Its hard to get a visual of what the car is going to look like once completed and in order to help us get the impression that we are making progress with the car and invoke motivation, we sprayed the hood gloss black to match the interior and engine bay. As stated the hood was sanded to the bare metal when we got the car. Since the car came with the roof gloss black already it seemed to be the way to go with regards to uniformity.
Last edited by TTP Engineering; Dec 15, 2009 at 06:10 PM.


Trending Topics
Dec 16, 2009, 07:22 PM
#8
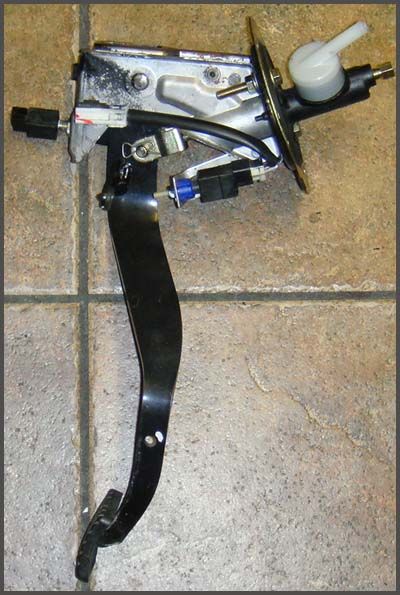
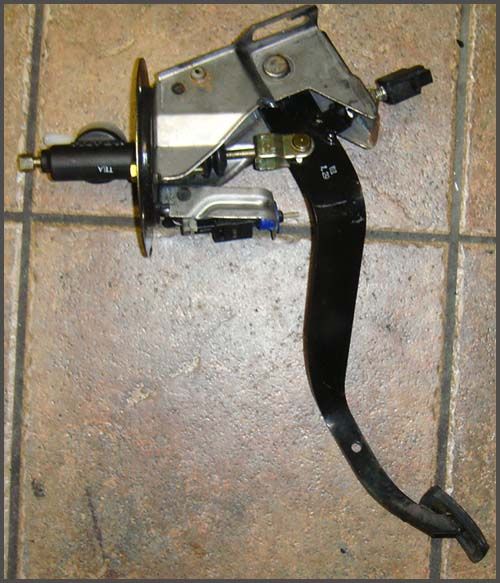
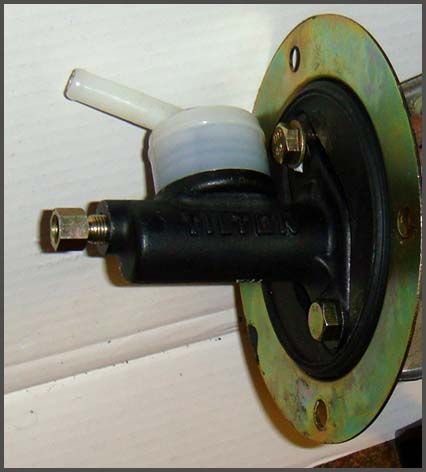
We took the time today to work on the clutch system ahead of the impending engine install. While the dash was out and before the cage goes in we decided to pull the master clutch cylinder and replace the 3/4" unit with a 5/8" Tilton cylinder to transmit the hydraulic fluid faster to the hydraulic release bearing and speed up our shifting ability with the push style twin disc.
We believe this will be a beneficial modification regardless of what clutch is used in the buildup. It will require less pedal travel and transmit more fluid per movement of the pedal. We used a universal Tilton master cylinder for the swap and with little modifications, were able to get it all to work together nicely. The pedal will retain its height adjustment just like stock however it will be best to set the height before install back into the car permanently.
With a -3 AN fitting and a custom -3 ss braided line we will be able to remove the stock line in the car and run the Tilton to the SS braided all the way to the hydraulic release bearing in the push style clutch. We are excited to try it out once we get it all together and hope to improve shifting speed with the mod.

 Dec 16, 2009, 09:11 PM
#13
We have a few areas of the car we will be addressing on top of the chassis alone which will all contribute to the success of the build. Brakes, wheels, tires, engine drag, aero drag, rotating weight etc.
Once the HTA86 is tested out and we take it as far as we can go, we will move on to something slightly larger.