How to: DIY aluminum ball joint and tie rod end heatshields
 May 22, 2010, 04:51 PM
#1
How to: DIY aluminum ball joint and tie rod end heatshields
How to: DIY aluminum ball joint and tie rod end heatshields
I did this a while back, but never got around to posting... I stole the above idea from this post:
https://www.evolutionm.net/forums/ev...t-carnage.html
- and did it my way. Seems to be working great so far.
This is intended to protect the rubber boots on the ball joints supplied with the Whiteline roll correction kit (KCA395) from melting from the intense heat that radiates out of the brake rotors after a track session (for those of us who have removed the OEM shield in the interest of getting more cooling air to the front brakes). The ones for the tie rod ends might not be needed, but as long as I was in there, I figured why not.
If you'd like to see what can happen without these heat shields, check out this thread:
https://www.evolutionm.net/forums/ev...t-carnage.html
I created exact templates for anyone who wants to make these to trace (as long as you print it out without changing the scale on a standard 8 1/2" x 11" sheet of paper), so you won't have to do the time-consuming part of getting the tie rod end shield to fit the hub properly.
Unfortunately, I could not upload the PDF (or even the zipped version) of my templates to this thread because the file size limit is only 100 KB, so you can download it here from mediafire:
http://www.mediafire.com/?dimgliinmz2
If some moderator wants to increase the attachment file size to 137 KB, I can attach the actual PDF, or 101 KB would allow me to attach the zipped file.
EGbeater�s Evo 8/9 front brake heat shield templates
MATERIALS
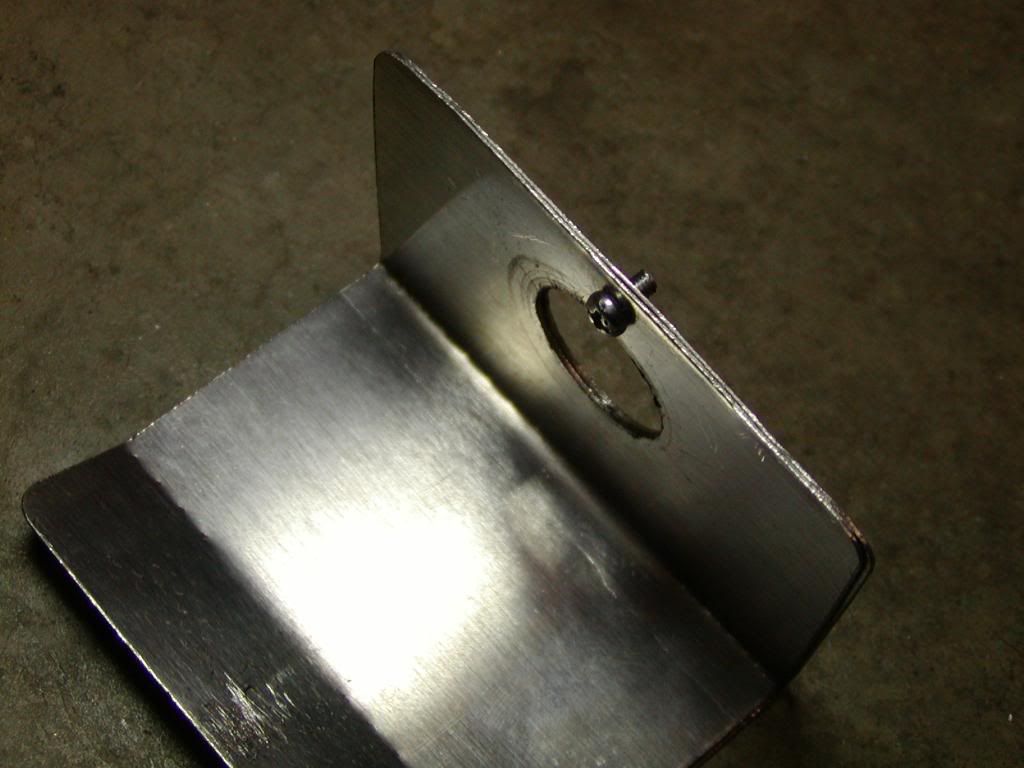
Ball Joint Shield Specifications
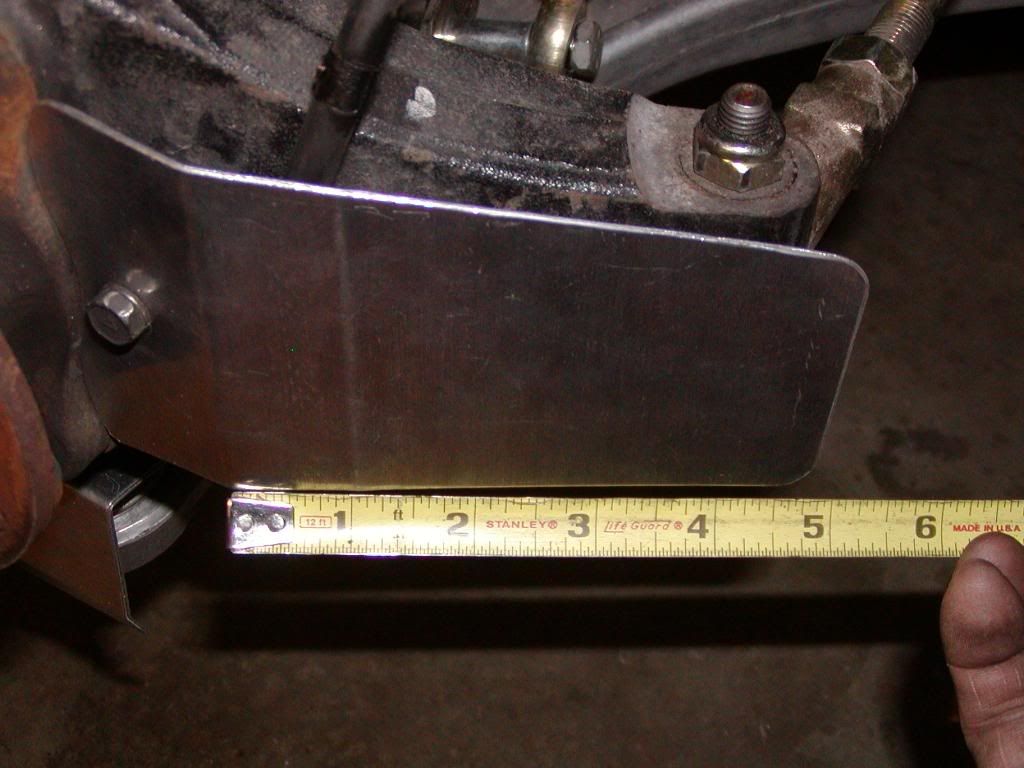
Dimensions: 3" W by 4.5" L Bends: 2 1/8" from end w/holes (100�), 3/4" from other end (20�)
Hole for ball joint: .790" diameter, or 20mm; center point = approx. 11/16" from edge
Hole for locating screw: 3/32" (.094"), or 2.4mm; center point = 7/32" from edge
Weight: 1 oz. each
Tie Rod End / ABS Sensor Shield Specifications
Dimensions: 2.5" W x 3.5" W x 6" L Bend: 4 13/16" from narrow end (30�)
Hole for mounting bolt: 7/32" (.219"), or 6mm; center point = approx. 13/32" from indented edge
Weight: 1.4 oz each
I got the sheet aluminum from Lowes, but it's probably available at Home Depot as well. I used two layers to make it stiffer and theoretically increase the heat shield's effectiveness, but makes it very easy to bend (and I couldn't find any sheet aluminum that was thicker at Lowes).
Keep in mind that screw in the heatshield for the ball joint is NOT optional; it's there to provide a "steering" effect so the shield won't scrape the rotors when you turn the wheels left to right. You could obviously use some other sort of pin that's about the same dimensions, as long as it fits loosely in the slot in the bottom of the knuckle/hub assembly. A screw was the easiest solution for me, and it threads easily into the soft aluminum sheeting (and stays put with threadlocker).
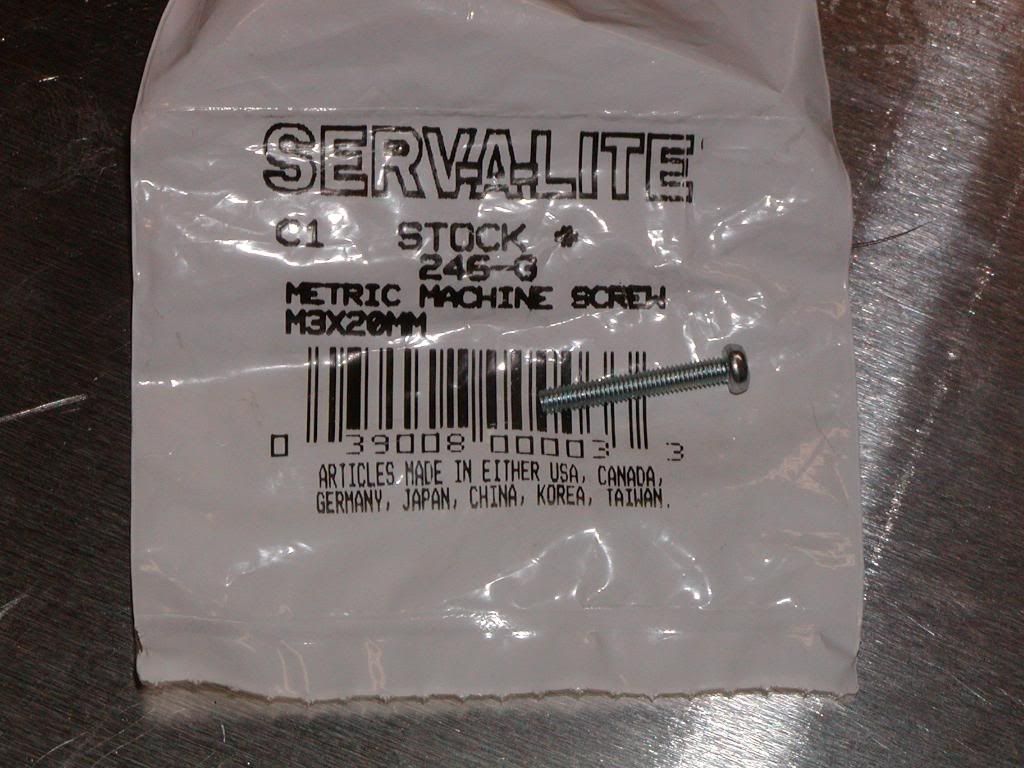
The materials:

(These screws were too long; I had to cut them down):
This is the picture-hanging wire I used to tie back the ABS sensor wire... you could also use a heavy plastic ziptie, although a stainless steel tie would be better, long-term (also available at Lowes).

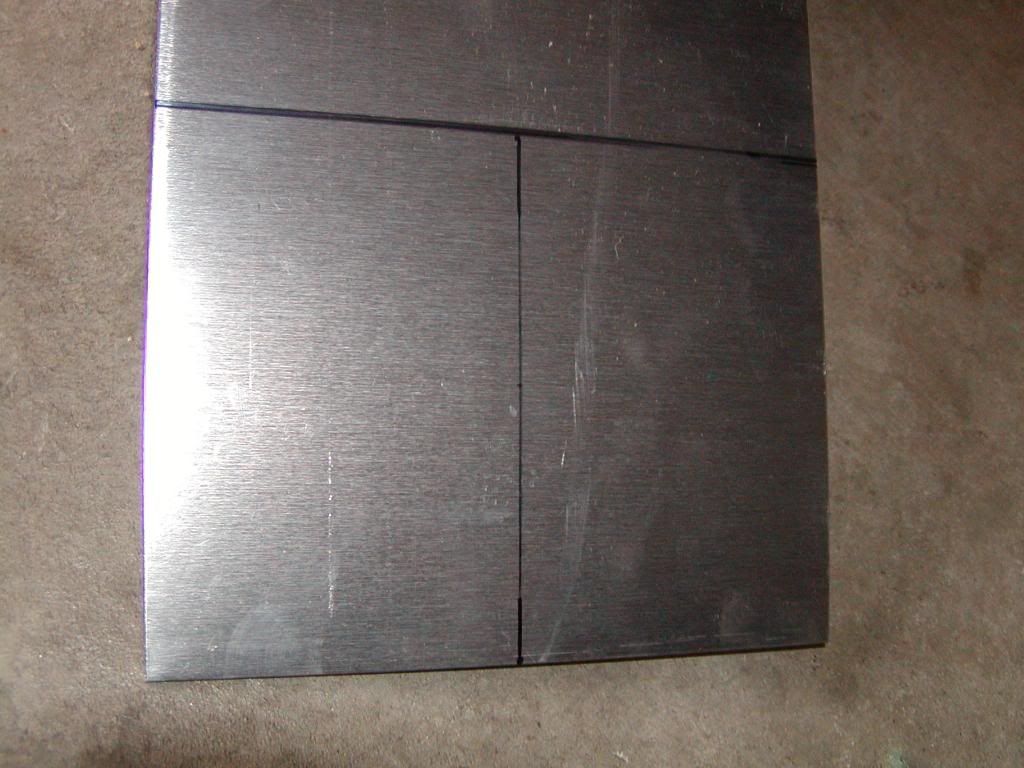
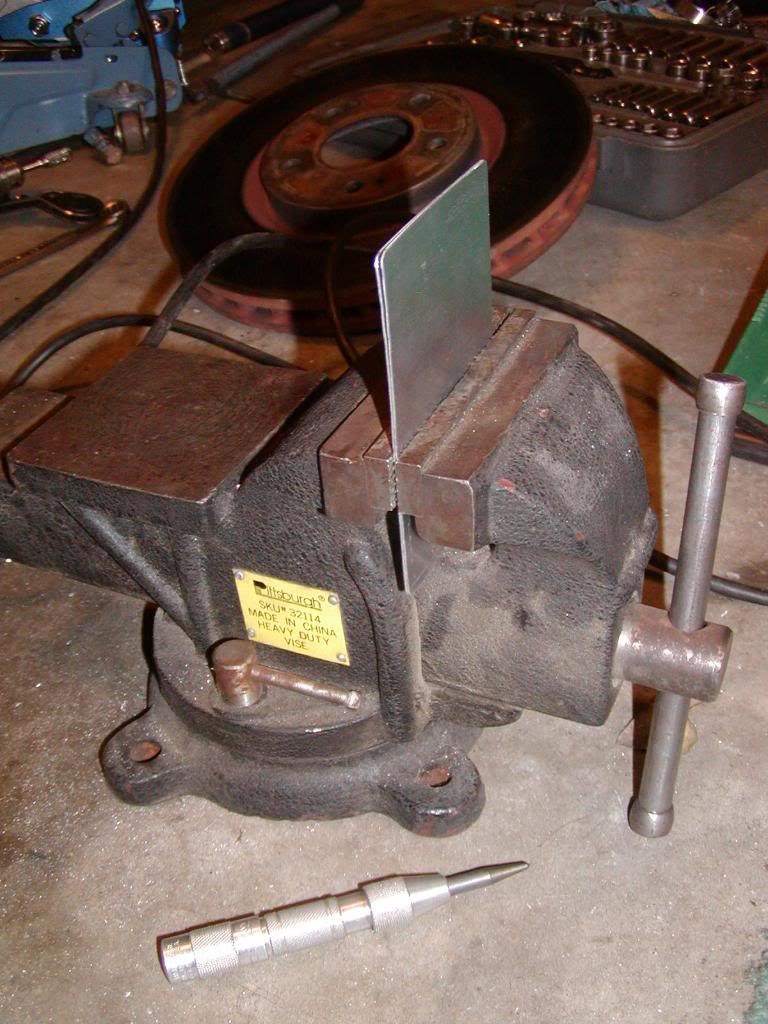
How I cut the sheet material - remember, each shield is double-thick, so you'll need to cut two of each piece if you're going to use two layers of the .025" thick aluminum like I did. A decent pair of tin snips works great.

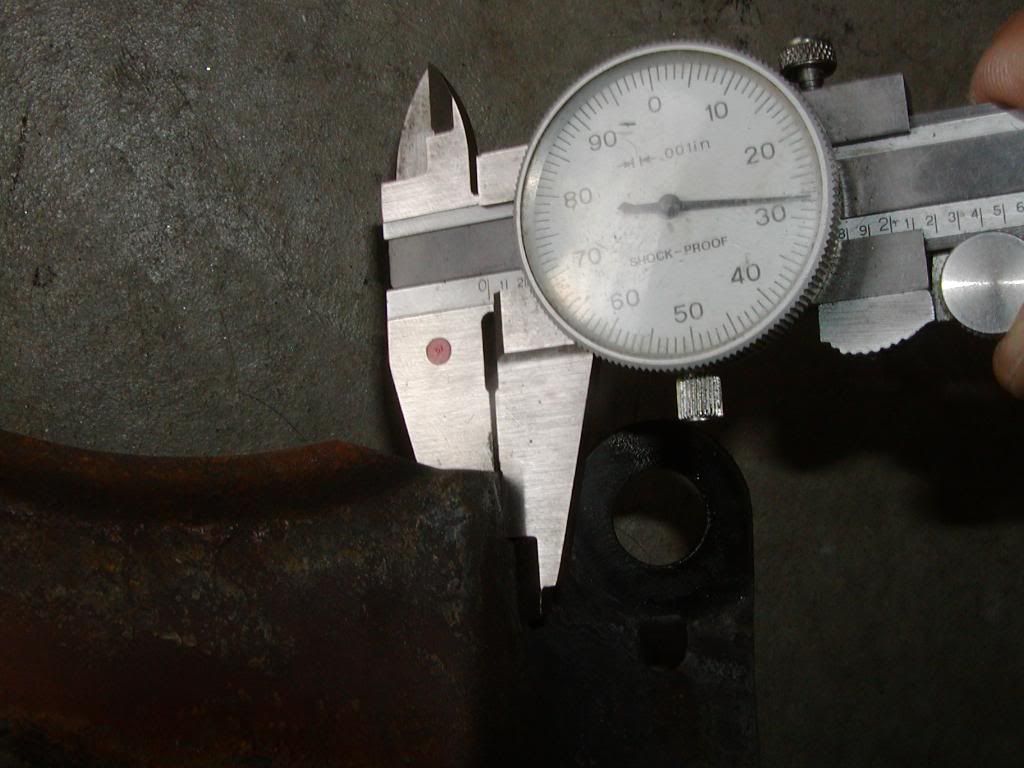
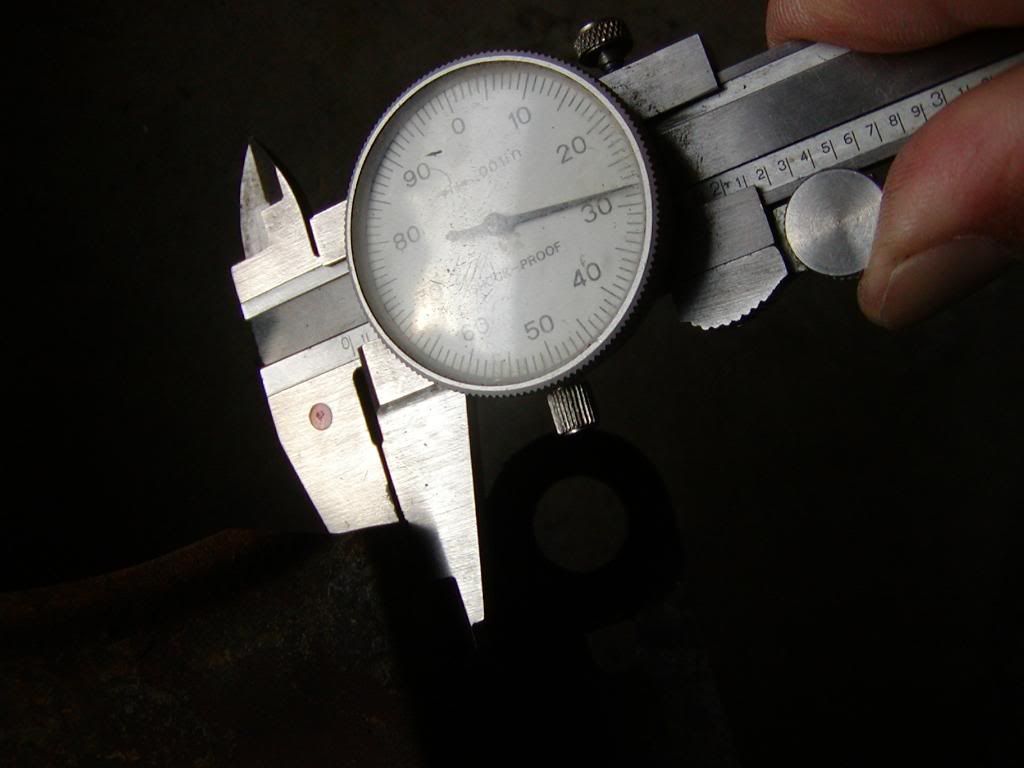
Comparison of the OEM steel heatshield thickness, vs. the aluminum @ .025"... the OEM shield is roughly .028":
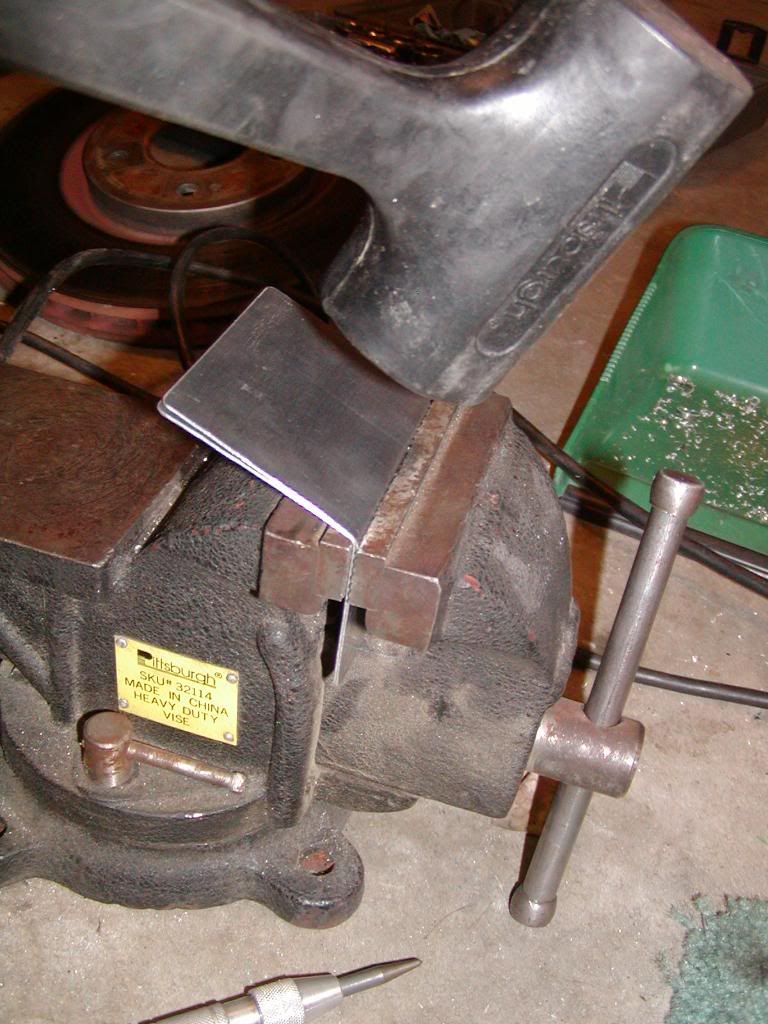
Really easy to bend... I used a vise to make a nice clean line. Note that I bent both pieces together, so they'd dovetail perfectly... if you try to bend them separately, they're almost guaranteed not to match up:
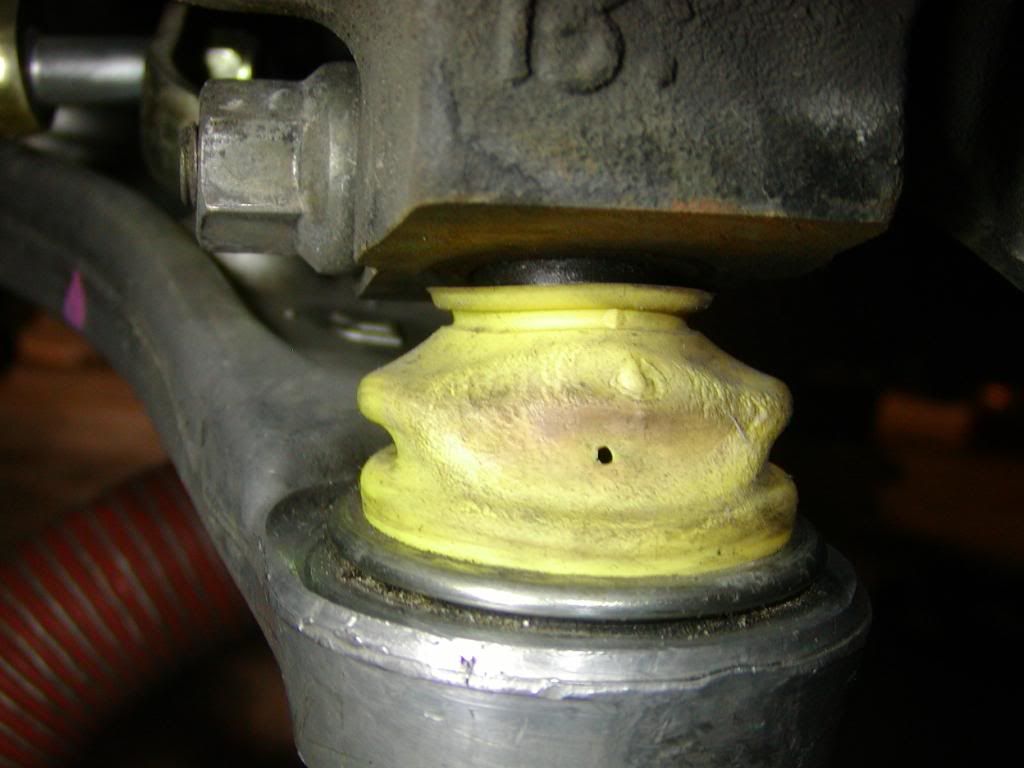
Here is a hole that formed in my Whiteline boot from heat:
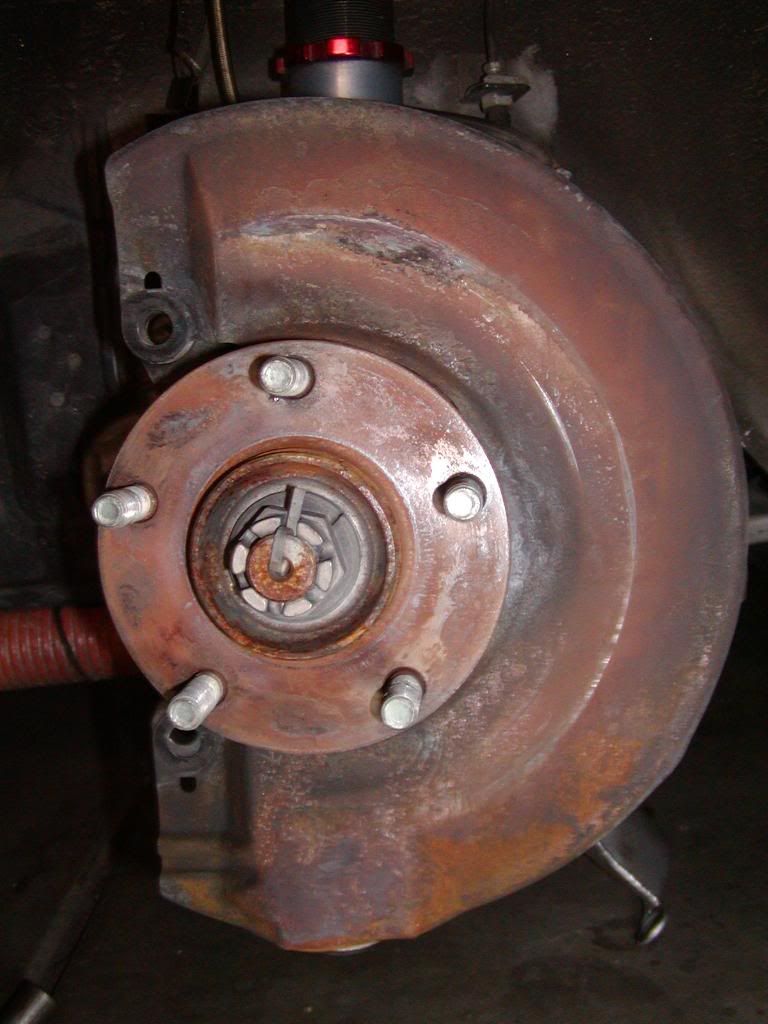
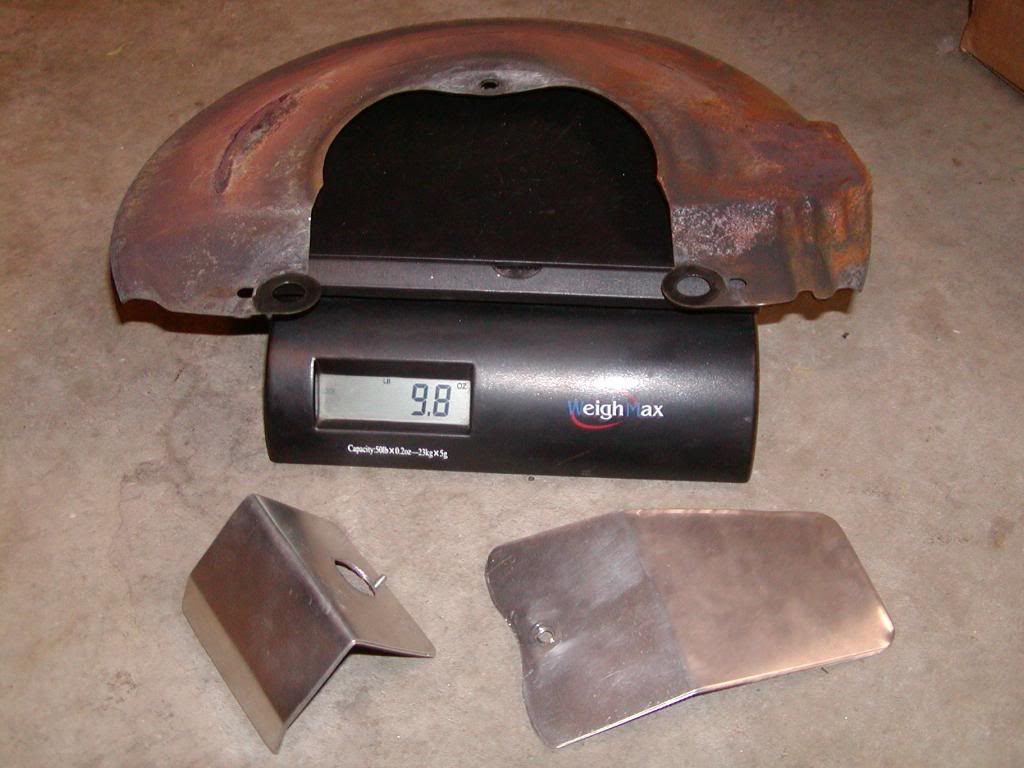
Before removing the OEM heatshield:
A single OEM brake heatshield weighs 9.8 oz, or 19.6 oz for both, or 1.225 lb:
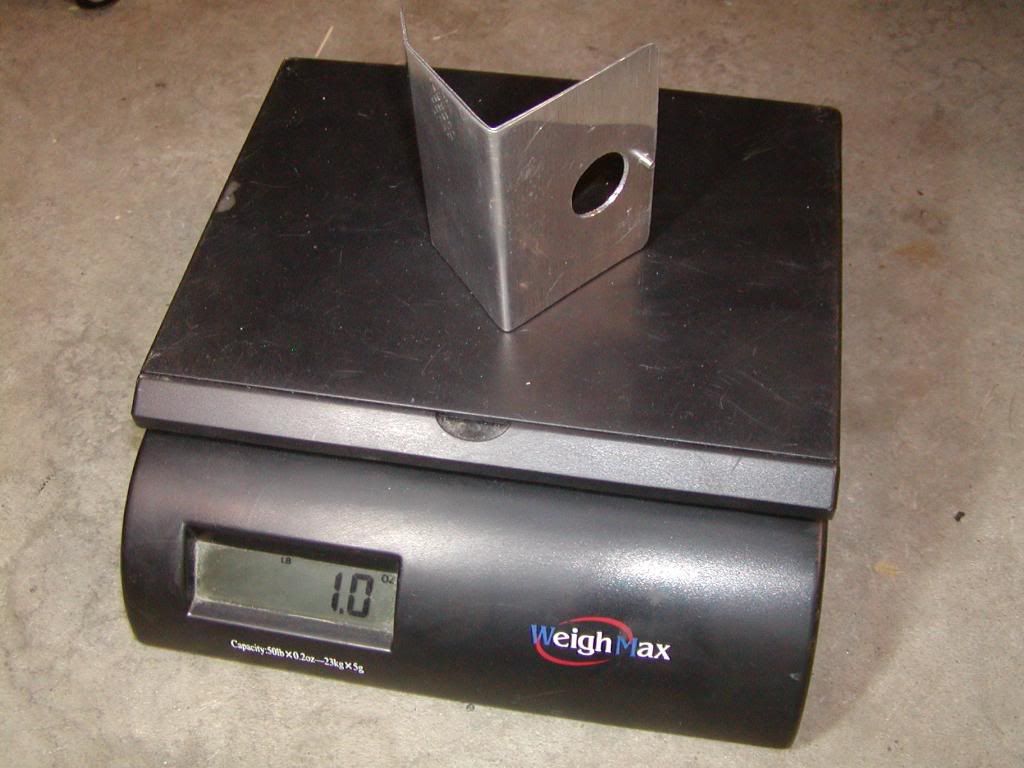
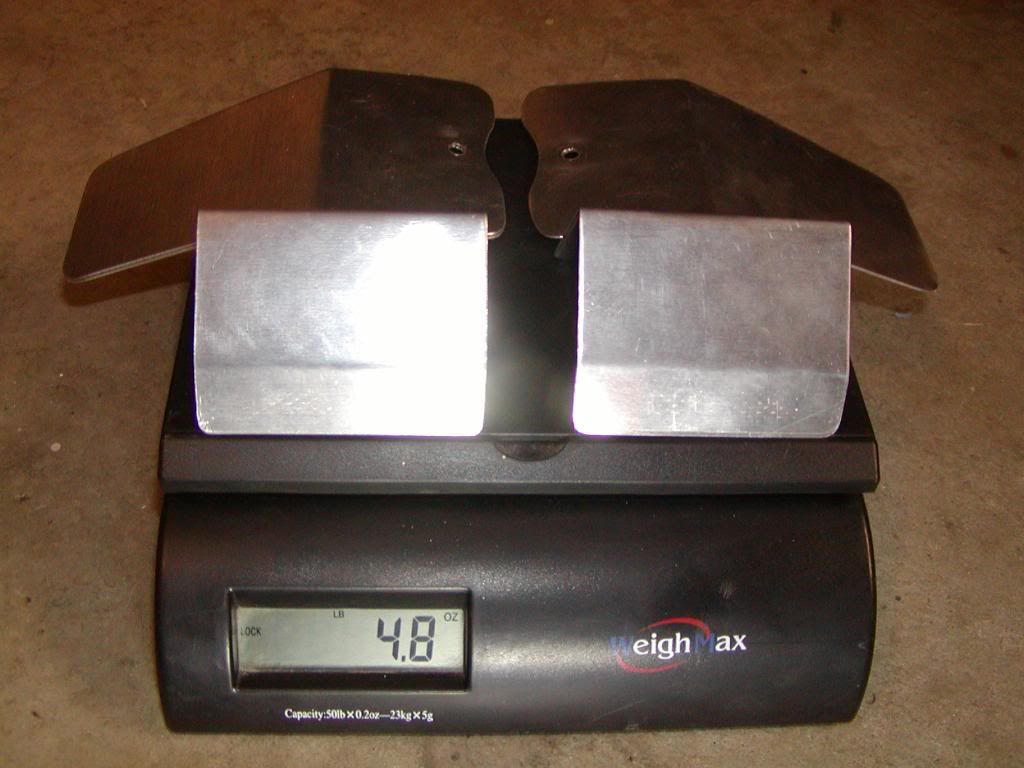
Obviously, these aluminum heatshields weigh a lot less... only 2.4 oz per side, or 4.8 oz (.30 lb) for both sides, which means you'll save almost a pound over having the OEM steel shields installed:

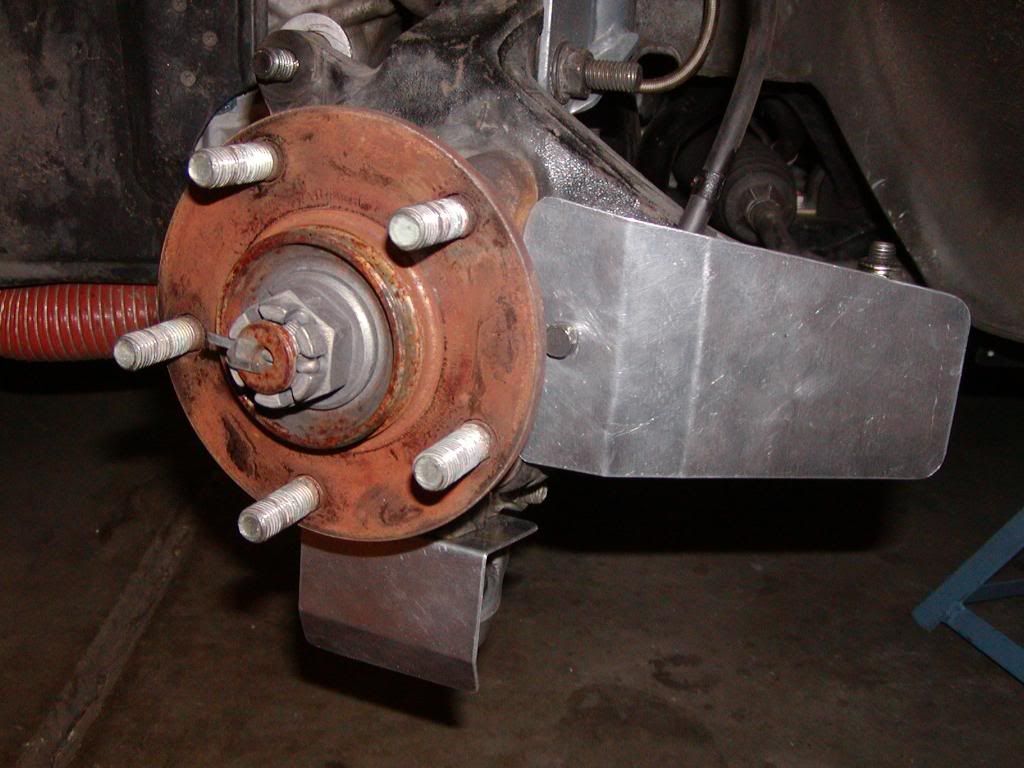
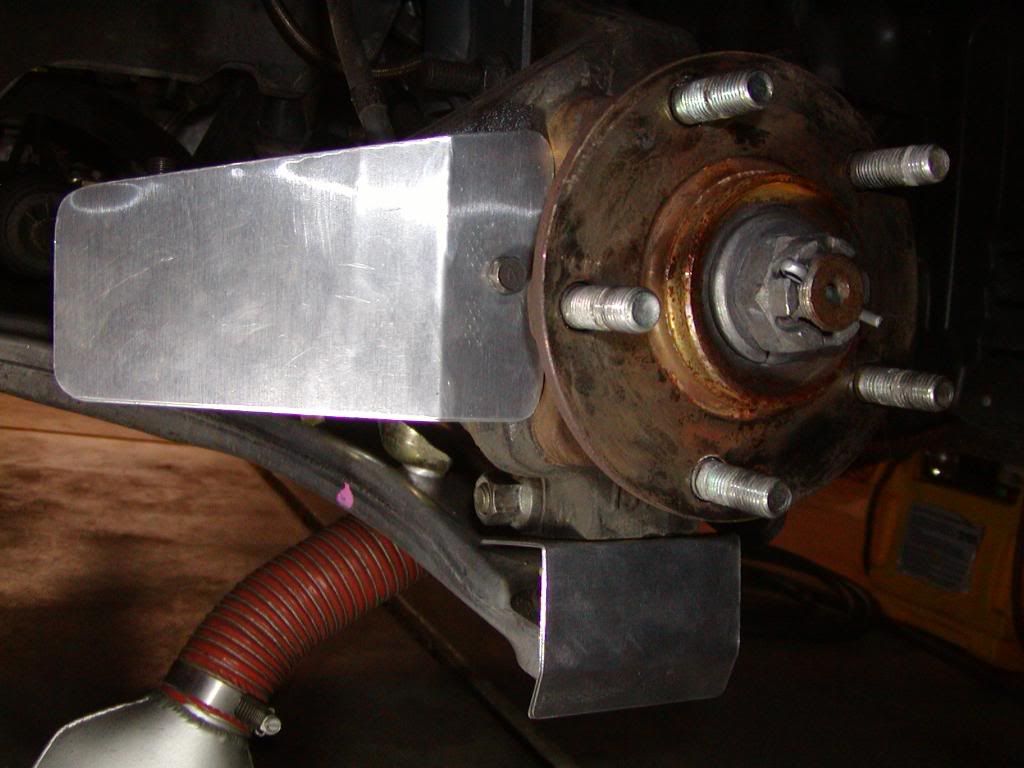
This is what they should look like, after you cut them out and bend them as I've indicated in my template (which you can download here: http://www.mediafire.com/?dimgliinmz2 ).
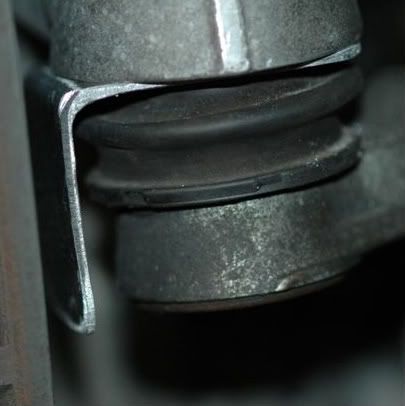
Closeups of the more complicated balljoint heatshield:
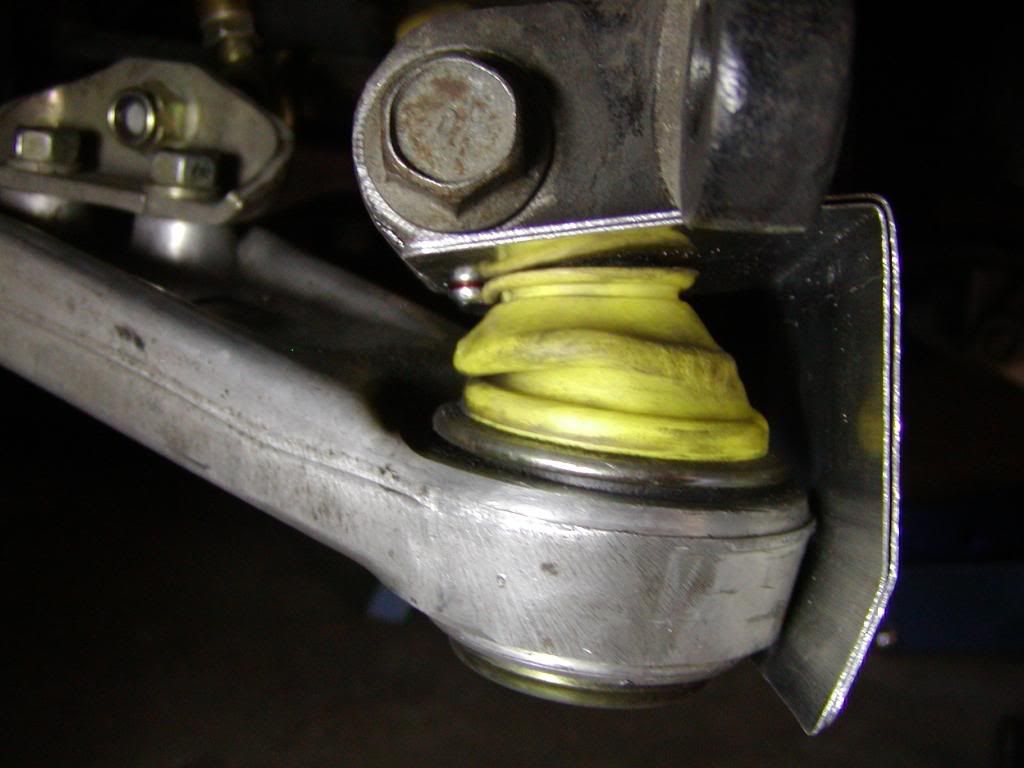
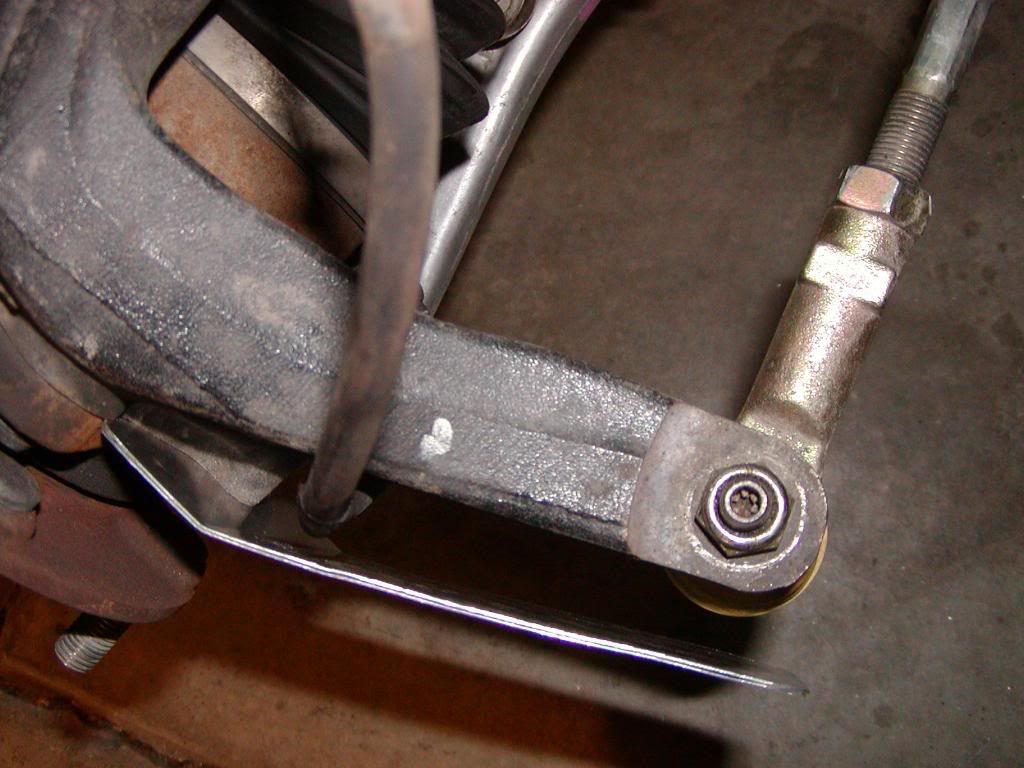
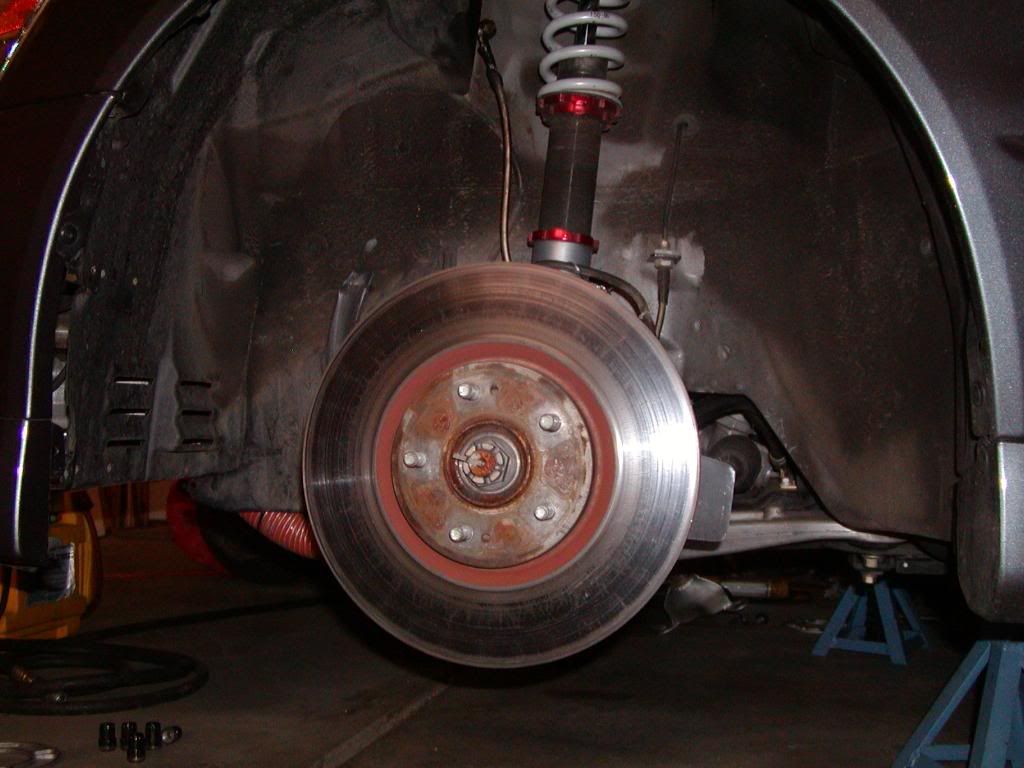
Installed:
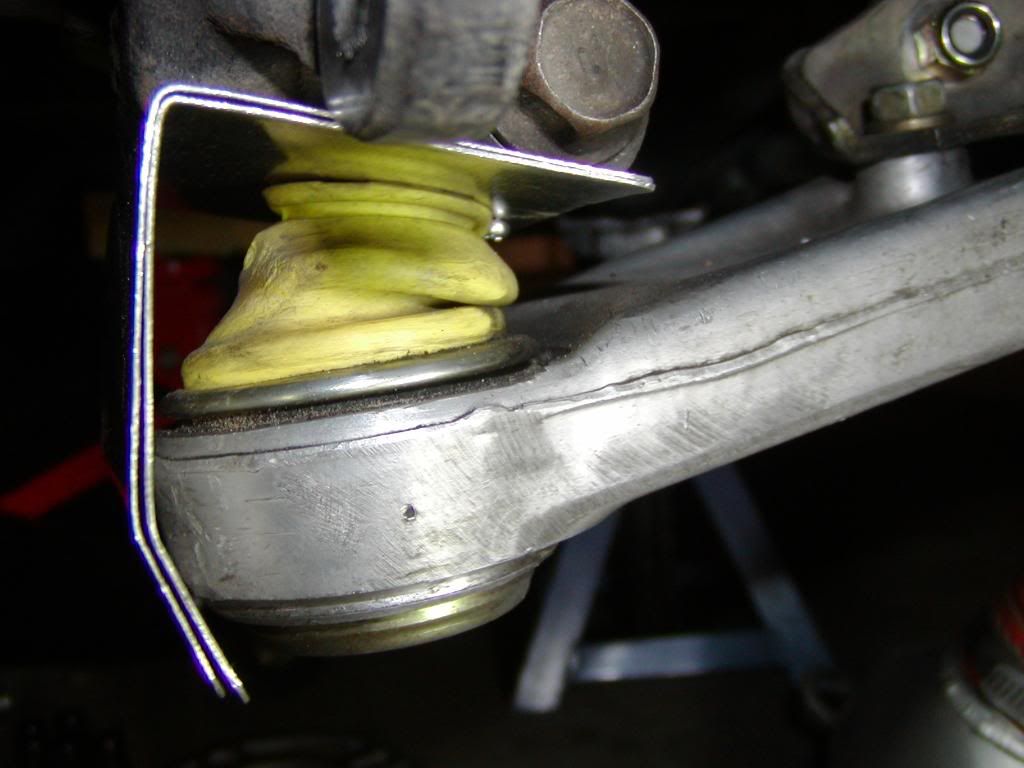
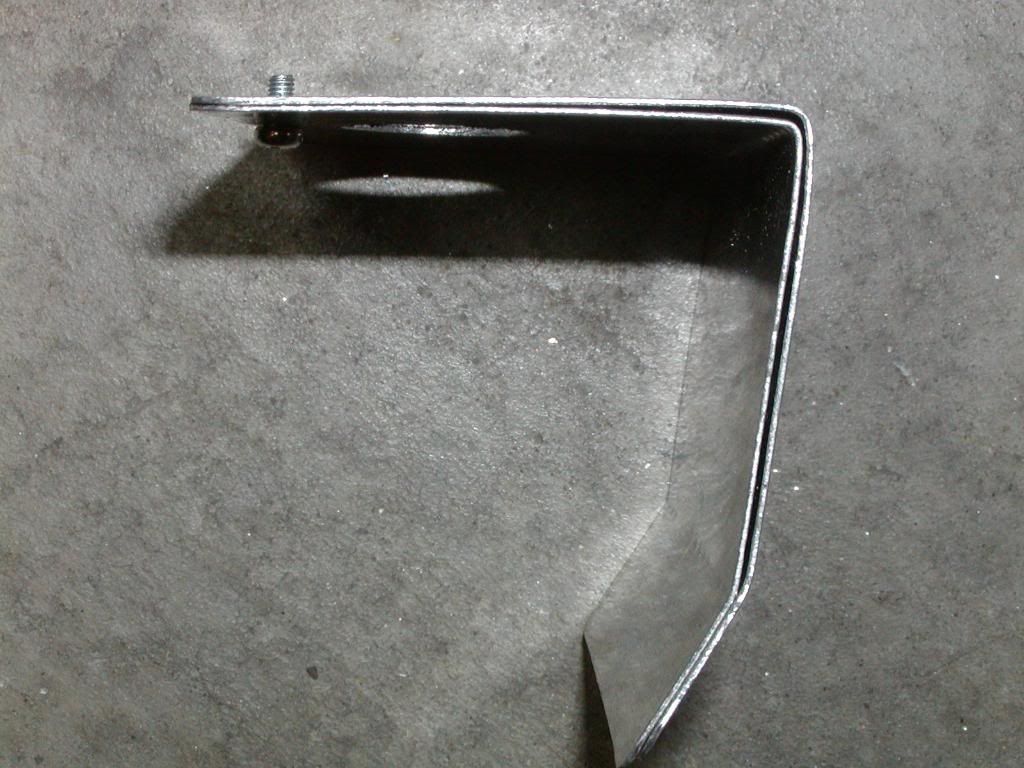
You can see that in my tierod end heatshields, I initially put the bend in the wrong spot, and it rubbed the brake rotors (whoops), so I had to rebend them closer to the mounting bolt. The template I supplied puts the bend in the right spot, don't worry:
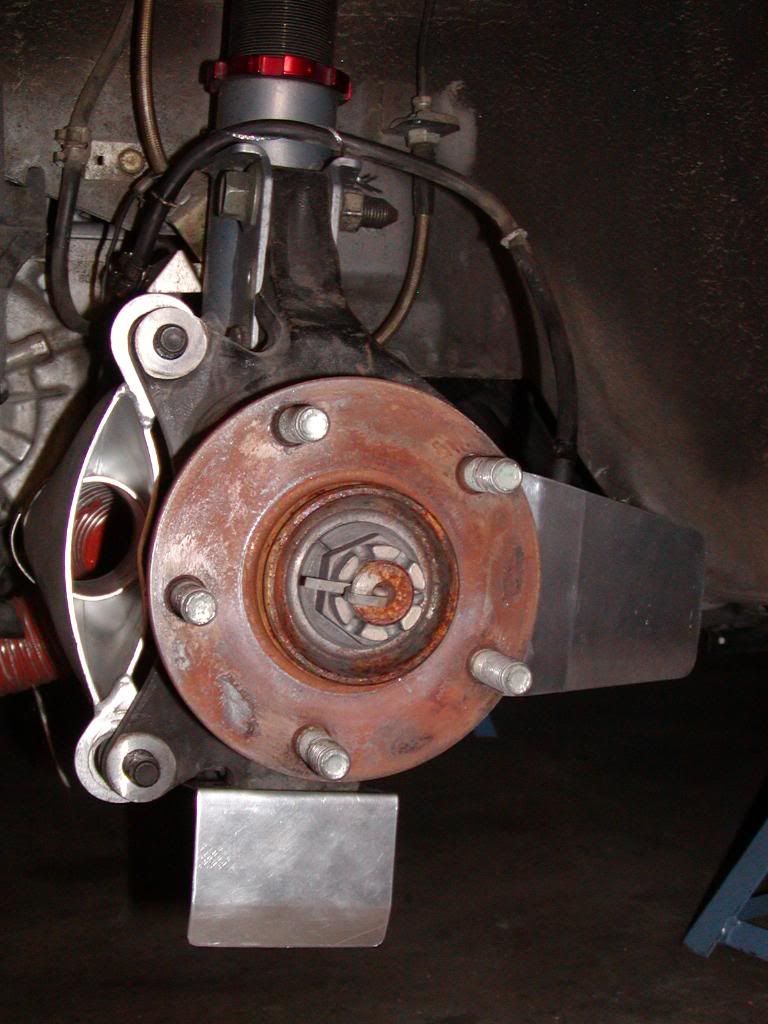
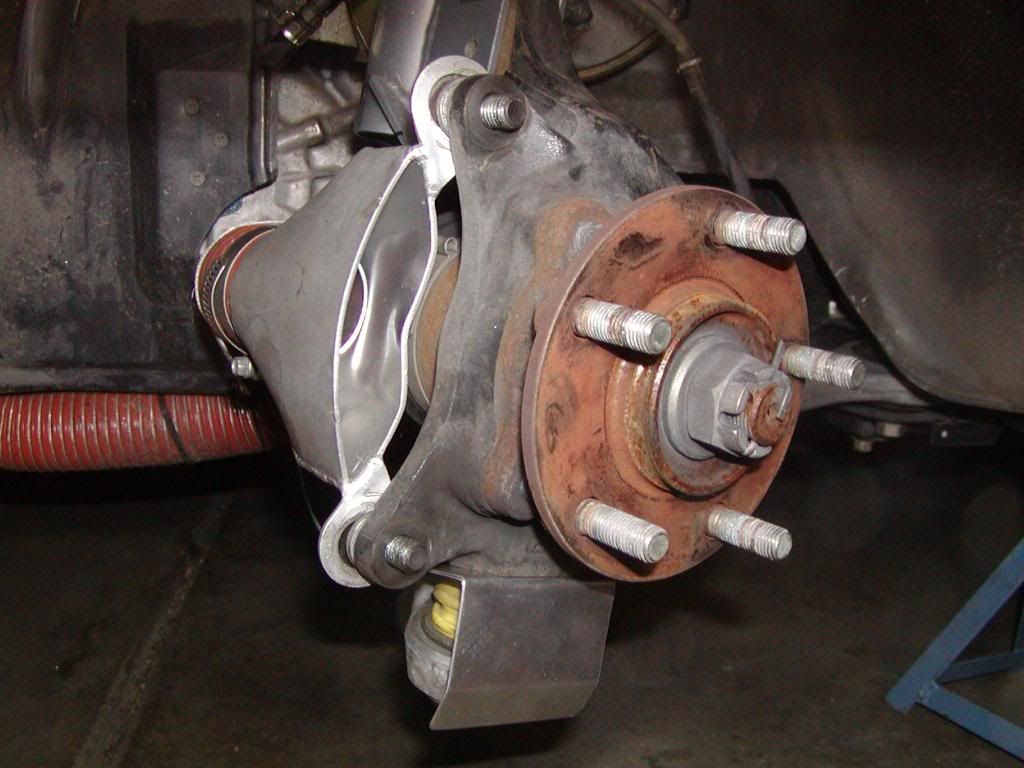
Once the rotors are installed, you can barely see them... might be worth mentioning them to the tech if you take your Evo somewhere to get worked on - anything custom I add on my cars seems to get butchered by careless techs:
https://www.evolutionm.net/forums/ev...t-carnage.html
- and did it my way. Seems to be working great so far.
This is intended to protect the rubber boots on the ball joints supplied with the Whiteline roll correction kit (KCA395) from melting from the intense heat that radiates out of the brake rotors after a track session (for those of us who have removed the OEM shield in the interest of getting more cooling air to the front brakes). The ones for the tie rod ends might not be needed, but as long as I was in there, I figured why not.
If you'd like to see what can happen without these heat shields, check out this thread:
https://www.evolutionm.net/forums/ev...t-carnage.html
I created exact templates for anyone who wants to make these to trace (as long as you print it out without changing the scale on a standard 8 1/2" x 11" sheet of paper), so you won't have to do the time-consuming part of getting the tie rod end shield to fit the hub properly.
Unfortunately, I could not upload the PDF (or even the zipped version) of my templates to this thread because the file size limit is only 100 KB, so you can download it here from mediafire:
http://www.mediafire.com/?dimgliinmz2
If some moderator wants to increase the attachment file size to 137 KB, I can attach the actual PDF, or 101 KB would allow me to attach the zipped file.
EGbeater�s Evo 8/9 front brake heat shield templates
MATERIALS
- Steelworks .025� thick 6� x 18� aluminum sheet x 2, part #11232, ($4.41 each at TrueValue)
- button head M3 x 8mm metric screw x 2, available at hobby stores that sell R/C car parts (e.g., HPI #Z352, about $2.70 for 10-pack of screws)
- liquid thread lock (blue or red)
Ball Joint Shield Specifications
Dimensions: 3" W by 4.5" L Bends: 2 1/8" from end w/holes (100�), 3/4" from other end (20�)
Hole for ball joint: .790" diameter, or 20mm; center point = approx. 11/16" from edge
Hole for locating screw: 3/32" (.094"), or 2.4mm; center point = 7/32" from edge
Weight: 1 oz. each
Tie Rod End / ABS Sensor Shield Specifications
Dimensions: 2.5" W x 3.5" W x 6" L Bend: 4 13/16" from narrow end (30�)
Hole for mounting bolt: 7/32" (.219"), or 6mm; center point = approx. 13/32" from indented edge
Weight: 1.4 oz each
I got the sheet aluminum from Lowes, but it's probably available at Home Depot as well. I used two layers to make it stiffer and theoretically increase the heat shield's effectiveness, but makes it very easy to bend (and I couldn't find any sheet aluminum that was thicker at Lowes).
Keep in mind that screw in the heatshield for the ball joint is NOT optional; it's there to provide a "steering" effect so the shield won't scrape the rotors when you turn the wheels left to right. You could obviously use some other sort of pin that's about the same dimensions, as long as it fits loosely in the slot in the bottom of the knuckle/hub assembly. A screw was the easiest solution for me, and it threads easily into the soft aluminum sheeting (and stays put with threadlocker).
The materials:
(These screws were too long; I had to cut them down):
This is the picture-hanging wire I used to tie back the ABS sensor wire... you could also use a heavy plastic ziptie, although a stainless steel tie would be better, long-term (also available at Lowes).
How I cut the sheet material - remember, each shield is double-thick, so you'll need to cut two of each piece if you're going to use two layers of the .025" thick aluminum like I did. A decent pair of tin snips works great.
Comparison of the OEM steel heatshield thickness, vs. the aluminum @ .025"... the OEM shield is roughly .028":
Really easy to bend... I used a vise to make a nice clean line. Note that I bent both pieces together, so they'd dovetail perfectly... if you try to bend them separately, they're almost guaranteed not to match up:
Here is a hole that formed in my Whiteline boot from heat:
Before removing the OEM heatshield:
A single OEM brake heatshield weighs 9.8 oz, or 19.6 oz for both, or 1.225 lb:
Obviously, these aluminum heatshields weigh a lot less... only 2.4 oz per side, or 4.8 oz (.30 lb) for both sides, which means you'll save almost a pound over having the OEM steel shields installed:
This is what they should look like, after you cut them out and bend them as I've indicated in my template (which you can download here: http://www.mediafire.com/?dimgliinmz2 ).
Closeups of the more complicated balljoint heatshield:
Installed:
You can see that in my tierod end heatshields, I initially put the bend in the wrong spot, and it rubbed the brake rotors (whoops), so I had to rebend them closer to the mounting bolt. The template I supplied puts the bend in the right spot, don't worry:
Once the rotors are installed, you can barely see them... might be worth mentioning them to the tech if you take your Evo somewhere to get worked on - anything custom I add on my cars seems to get butchered by careless techs:

The following users liked this post:
LetsGetThisDone (Apr 7, 2016)


Trending Topics
 Feb 11, 2014, 03:18 PM
#10
http://www.homedepot.com/p/Gardner-B...0245/202528833

 Apr 2, 2016, 10:35 PM
#12
EvoM Guru
iTrader: (1)
Made these today. Used 16g stainless steel though. Less conductive than aluminum, and cutting wasn't an issue with the industrial shear at my buddies fab shop lol. Templates were pretty good. Found that a #6 machine screw fits in the knuckle a little tighter so the ball joint shield doesn't move around as much. Also, once installed, I used a pry bar to make the shield "wrap" around the control arm a bit more, gives a bit more clearance to the rotor.
What did you guys use for shims to replace the OEM dust shield under the caliper mounts? I notice the outside pad is very hard to get in since removing the dust shield pulls the caliper over about .020-.030"...
What did you guys use for shims to replace the OEM dust shield under the caliper mounts? I notice the outside pad is very hard to get in since removing the dust shield pulls the caliper over about .020-.030"...
Apr 2, 2016, 10:36 PM
#13
EvoM Guru
iTrader: (1)
Picture fail.
Apr 2, 2016, 11:13 PM
#14
Does it get too hot to add gold tape or would that even really help?
As for a shim, we could cut up our heat shields? Or if someone knows what gauge it is?
I'm going to Home Depot tomorrow! I just need a way to cut the sheet metal....
As for a shim, we could cut up our heat shields? Or if someone knows what gauge it is?
I'm going to Home Depot tomorrow! I just need a way to cut the sheet metal....
Apr 2, 2016, 11:57 PM
#15
EvoM Guru
iTrader: (1)
My driver side dust shield got effed when the wheel came off, so I can't use it lol. I guess I could measure the passenger and make some with shim stock.

