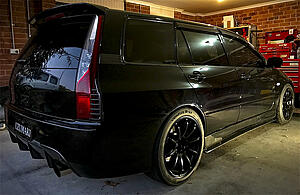
Evo IX GT Wagon. a JDM car in Australia
 Jun 16, 2017, 09:18 AM
#76
Evolved Member
Any update from your tuner about the injectors ?
One thing is for sure, ID injectors are top of the line. The rolls royce of injector world.
I mostly use FIC in the vehicles i tune purely because of the price difference.
One thing is for sure, ID injectors are top of the line. The rolls royce of injector world.
I mostly use FIC in the vehicles i tune purely because of the price difference.
 Jun 16, 2017, 04:53 PM
#77
Evolving Member
Thread Starter
I swapped to the "GT Pumps" silicon inlet as my old hard pipe inlet didn't fit with my new upper intercooler pipe. It's reinforced silicon so at least while it's new I don't think it will suck in because the pod filter doesn't offer much restriction. I could be wrong/ not sure. I was planning to get a custom made aluminium inlet pipe a bit later that will fit perfectly with my airbox.
As for the clamps, from what I've read the t-bolt clamps don't give consistent pressure right around the pipe. I think they look a bit messy too. The Turbosmart clamps I had before were very good too.
@mines5 I emailed your comment to my tuner yesterday, Thanks! I haven't had a reply yet. The car goes back on the dyno in 3 days. A mate of mine with Evo 7, 2.3L, FP Black, cams, ID1700, e85 flex tune runs OEM ECU and his car runs great and over 400kw atw.
Jun 17, 2017, 12:01 AM
#78
Evolved Member
I am sure your tuner will be able to work out. Haltech is top of the line.
On Oem ECU i have tuned FIC 2150 and FIC 1450, both idling at 14.7 afr on pump gas.
Waiting for the dyno results of this beauty.
On Oem ECU i have tuned FIC 2150 and FIC 1450, both idling at 14.7 afr on pump gas.
Waiting for the dyno results of this beauty.
Jun 17, 2017, 07:50 PM
#79
Evolving Member
Thread Starter
Thanks for your imput mines5.
Recently I bought some Carbon Fiber side skirt extensions. They were easy to install as most of the holes were already screw holes in the OEM side skirt. However there are two extra holes in the side skirt extension compared to the OEM side skirts, so I drilled two extra holes in the OEM side skirt so I could use every available mounting points. I replaced all the screws with new zinc plated screw that were slightly longer than the OEM length.
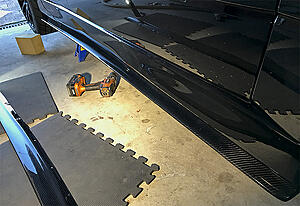
Looks good the the CF spats.

 Jun 17, 2017, 08:08 PM
#80
Evolving Member
Thread Starter
VOLTEX and Beatrush deliveries 
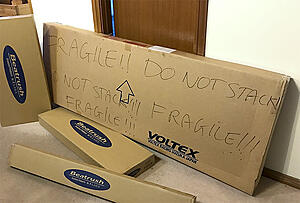
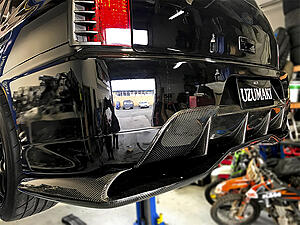
I found a genuine VOLTEX Carbon Fiber rear diffuser "in stock" in Australia from Wei @ VisionR. I believe buying from Japan can take six months as lots of Voltex parts are made to order and they are very busy. Cheaper through VisionR too when you consider shipping, import fees, GST etc.
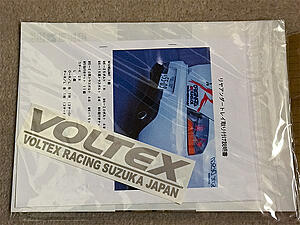
Voltex ER-1 Rear Diffuser
Instructions all in Japanese
To make the trial fitting easier I used a mate's hoist.

The diffuser is actually made for the Evo IX Sedan and as the Evo wagon's rear bar is a squarer shape and about 40mm longer I was a bit worried how the install would go. The first issue was the diffuser touching the muffler as the muffler was a bit crooked. I refused to trim the Voltex diffuser, I've seen people do this before but it weakens it and is not necessary. So I cut the exhaust pipe and repositioned it into a new exhaust flange and Mig welded it up. Great! Now the muffler is straight and has diffuser clearance.
The front of the diffuser was a perfect fit onto the car's chassis. The sides of the diffuser fitted perfectly on the sides of the rear bar too. WIN!
The next issue, which I expected would be a problem, was due to my Carbon Fiber cover that sits on top of the JDM evo 9 rear bar. Its carbon fiber "strakes" which are a similar shape to the oem bar sit down a bit lower than the bare OEM bar so I had to modify 4 of the Voltex attaching brackets.
Pic below shows the diffuser attached but not aligned properly yet. And then I ran out of daytime.
So to continue the install the following day in my garage.
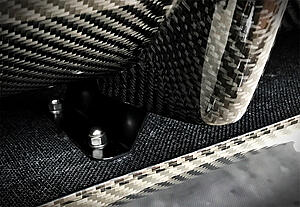
I attached the modified hanger brackets to the Voltex diffuser with bolts and to the car with duct tape. I then removed the bracket bolts from diffuser and lowered the diffuser from the car leaving the brackets attached to the car with duct tape. Now I have room to drill through brackets and into the rear bar & its steel reinforcement. Next I bolted the brackets securely to the car with stainless socket head screws and nyloc nuts.
Then I put the diffuser back on the car using all mounting points. I used stainless fasteners everywhere and domed nuts on the diffuser to hanger brackets bolts here:
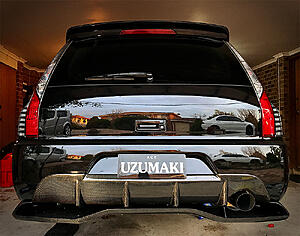
Done. It is a little rock catcher though. I need to address this. Maybe some mesh on the front edge of the diffuser will help to stop the rear tyres filling the diffuser with gravel

I found a genuine VOLTEX Carbon Fiber rear diffuser "in stock" in Australia from Wei @ VisionR. I believe buying from Japan can take six months as lots of Voltex parts are made to order and they are very busy. Cheaper through VisionR too when you consider shipping, import fees, GST etc.
Voltex ER-1 Rear Diffuser
Instructions all in Japanese

To make the trial fitting easier I used a mate's hoist.

The diffuser is actually made for the Evo IX Sedan and as the Evo wagon's rear bar is a squarer shape and about 40mm longer I was a bit worried how the install would go. The first issue was the diffuser touching the muffler as the muffler was a bit crooked. I refused to trim the Voltex diffuser, I've seen people do this before but it weakens it and is not necessary. So I cut the exhaust pipe and repositioned it into a new exhaust flange and Mig welded it up. Great! Now the muffler is straight and has diffuser clearance.
The front of the diffuser was a perfect fit onto the car's chassis. The sides of the diffuser fitted perfectly on the sides of the rear bar too. WIN!
The next issue, which I expected would be a problem, was due to my Carbon Fiber cover that sits on top of the JDM evo 9 rear bar. Its carbon fiber "strakes" which are a similar shape to the oem bar sit down a bit lower than the bare OEM bar so I had to modify 4 of the Voltex attaching brackets.
Pic below shows the diffuser attached but not aligned properly yet. And then I ran out of daytime.

So to continue the install the following day in my garage.
I attached the modified hanger brackets to the Voltex diffuser with bolts and to the car with duct tape. I then removed the bracket bolts from diffuser and lowered the diffuser from the car leaving the brackets attached to the car with duct tape. Now I have room to drill through brackets and into the rear bar & its steel reinforcement. Next I bolted the brackets securely to the car with stainless socket head screws and nyloc nuts.
Then I put the diffuser back on the car using all mounting points. I used stainless fasteners everywhere and domed nuts on the diffuser to hanger brackets bolts here:

Done. It is a little rock catcher though. I need to address this. Maybe some mesh on the front edge of the diffuser will help to stop the rear tyres filling the diffuser with gravel

 Jun 18, 2017, 03:54 AM
#84
Evolving Member
Thread Starter
Voltex developed the aero on the WTAC winning "Tilton Evo". So they're well respected and certainly know what they're doing. The Voltex diffuser stops the rear bar from being a little parachute so it must help airflow but I haven't seen any wind tunnel data on drag reduction or downforce. I've seen cars at World Time Attack in Sydney using this exact diffuser so I hope its not all cosmetic.
Yes I've got to do something about it collecting small rocks. Some mesh at the front should help but in the mean time it does have two large 1.5" drain holes at the front of the diffuser, so I can hose out the gravel
Yes I've got to do something about it collecting small rocks. Some mesh at the front should help but in the mean time it does have two large 1.5" drain holes at the front of the diffuser, so I can hose out the gravel

 Jun 18, 2017, 06:22 AM
#87
Evolving Member
Thread Starter
Dirt? Perhaps it needs more cleaning. But I much prefer the design over the Varis diffuser. I'll happily just clean it every day if it needs it.
Last edited by uzumaki; Jun 18, 2017 at 04:37 PM.
Jun 18, 2017, 04:44 PM
#89
Evolving Member
Thread Starter
Sorry I didn't mean my comment to sound harsh. It's very light too. But the inside is a raw fibreglass finish that has been painted but it's not super smooth. That might be why dust just sits there.