Evo IX GT Wagon. a JDM car in Australia
 Jun 23, 2017, 08:20 PM
#91
Evolving Member
Thread Starter
@Jonno99 I've only used Juice Super C for restoring paint so far. It would work well on restoring my CF parts too when they need it. I need to get a random orbital polisher next and experiment with wax and sealant products.
My tune for the high octane unleaded gas / petrol fuel was done on Tuesday. My tuner lowered the fuel pressure at the rail to get the ECU and injectors to work better together. When driving I see the fuel pressure varying between about 36 to 38 psi now. The engine runs much smoother than before. I will take the car back to the Tuner in a week or two for the e85 flex tune after making note of any tune issues that I notice that need to be corrected.
I also received a new replacement Haltech IQ3 / Racepak dash under warranty too. Plugged it in and it's working. Next I will upload my last saved dash configuration file to it to get all the screens to display what I want to keep an eye on.
 Jul 2, 2017, 02:59 PM
#93

Haha...
What issues are you having with photobucket. Apart from it being ridiculously slow for me, it has always been an ok hosting site for my pics...
What issues are you having with photobucket. Apart from it being ridiculously slow for me, it has always been an ok hosting site for my pics...
Last edited by gotblkr; Jul 2, 2017 at 03:33 PM.
Jul 2, 2017, 05:26 PM
#94
Evolving Member
Thread Starter
Photobucket no longer allows free 3rd party hosting. If you want to use Photobucket to store your photos for displaying on forums it now coast $399 USD per year! So many build threads and DIY thread will now only be text.
Like this one:
https://www.evolutionm.net/forums/ev...nlet-tube.html
Like this one:
https://www.evolutionm.net/forums/ev...nlet-tube.html
Jul 2, 2017, 09:31 PM
#95
NOOOOOO.... That is ridiculous!
My pics are still showing for now. Might just be cached on my PC tho & I can't log onto photobucket at work as they have blacklisted photo sharing sites.
Will take a closer look tonight
My pics are still showing for now. Might just be cached on my PC tho & I can't log onto photobucket at work as they have blacklisted photo sharing sites.
Will take a closer look tonight
Jul 29, 2017, 09:25 PM
#97
Evolving Member
Thread Starter
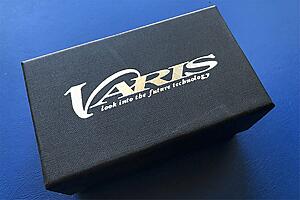
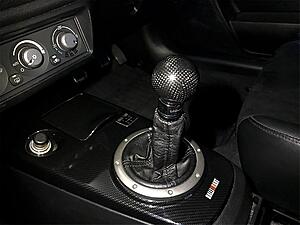
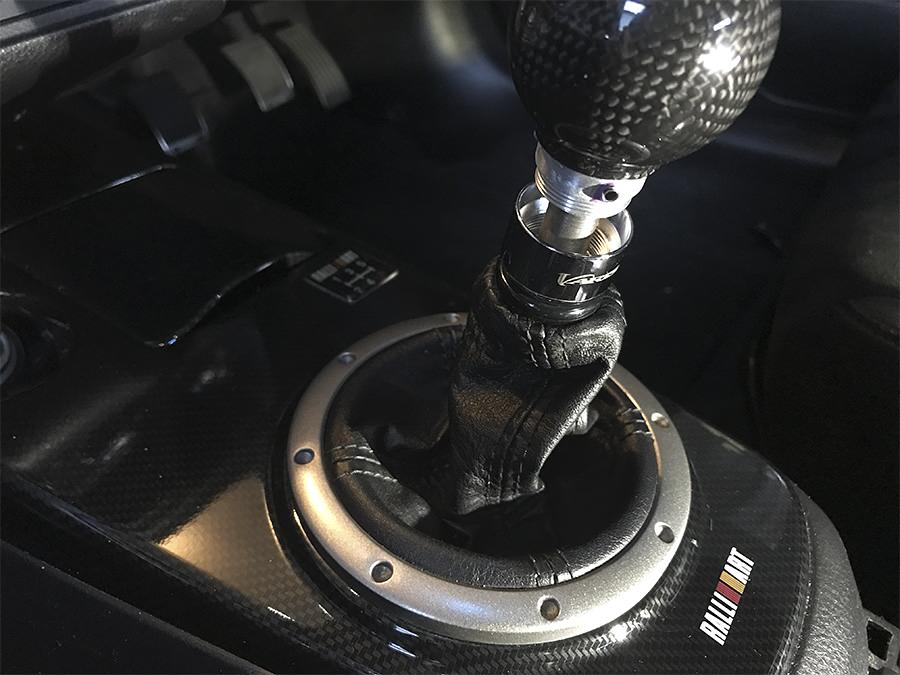
I bought a genuine Varis carbon fiber shift knob from Japan Parts.
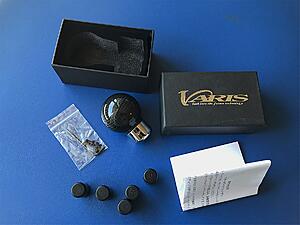
I thought it would be a quick 5 minute install but it was a bit more involved. After removing the old shift knob I soon realised that the Varis chrome ring, that goes on the gear stick shaft first, couldn't slide down far enough to allow access to the set screws.
I needed to trim off the washer that is welded on the shaft to allow the shift boot to slide down further.
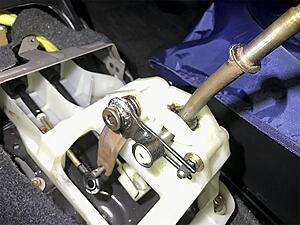
So I removed the shifter from the car and cut the washer off and smoothed up the shaft.
Now the boot can slide down a bit more temporarily for the install
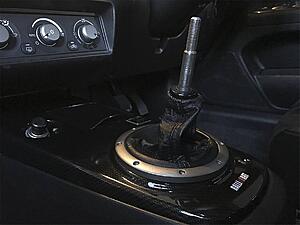
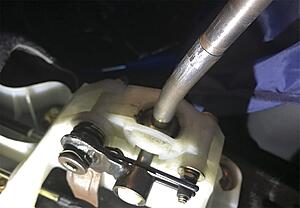
on goes the Varis chrome ring
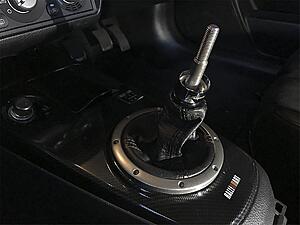
I wrapped some thread tape around the gear stick shaft so it was a snug fit between the new shift knob and to black sleeve which sits inside the knob. I used the longer of the supplied set screws that came with the knob.

a few drops of low strength loctite
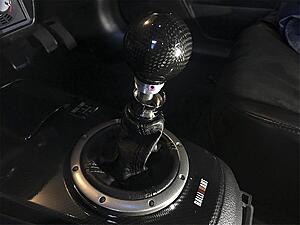
and screwed chrome sleeve up onto the knob.


I thought it would be a quick 5 minute install but it was a bit more involved. After removing the old shift knob I soon realised that the Varis chrome ring, that goes on the gear stick shaft first, couldn't slide down far enough to allow access to the set screws.
I needed to trim off the washer that is welded on the shaft to allow the shift boot to slide down further.

So I removed the shifter from the car and cut the washer off and smoothed up the shaft.

Now the boot can slide down a bit more temporarily for the install

on goes the Varis chrome ring

I wrapped some thread tape around the gear stick shaft so it was a snug fit between the new shift knob and to black sleeve which sits inside the knob. I used the longer of the supplied set screws that came with the knob.
a few drops of low strength loctite

and screwed chrome sleeve up onto the knob.

The following users liked this post:
uzumaki (Jul 29, 2017)
Jul 29, 2017, 10:05 PM
#99
Evolving Member
Thread Starter
Two updates in one day 
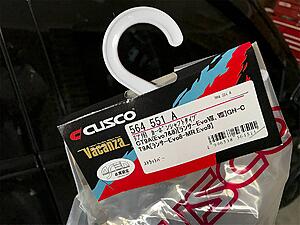
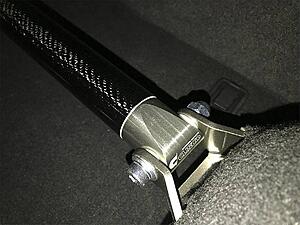
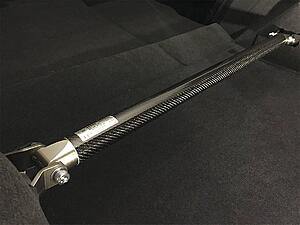
It was only recently when I fitted the new Beatrush rear strut brace and at the time I had completely forgotten about the super cool CUSCO carbon fiber brace. My OCD made me get one asap.
It takes a while to install these as lots of rear trim needs to come out of the wagon.
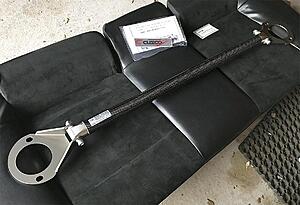
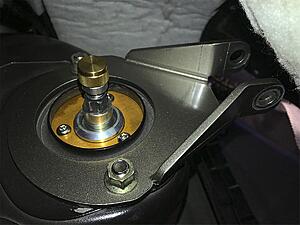
The little details are cool
Rear seats up
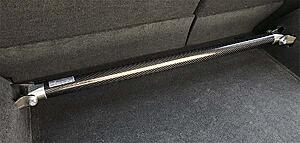
Quick and easy to remove the cross bar for wagon duties
It was only recently when I fitted the new Beatrush rear strut brace and at the time I had completely forgotten about the super cool CUSCO carbon fiber brace. My OCD made me get one asap.

It takes a while to install these as lots of rear trim needs to come out of the wagon.

The little details are cool

Rear seats up

Quick and easy to remove the cross bar for wagon duties

 Aug 12, 2017, 06:34 PM
#101
Evolving Member
Thread Starter
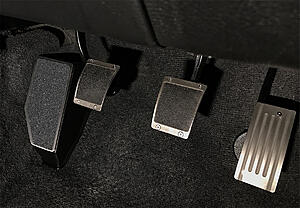
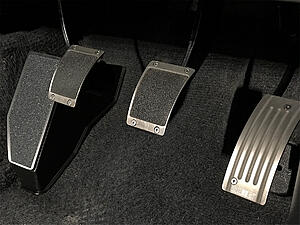
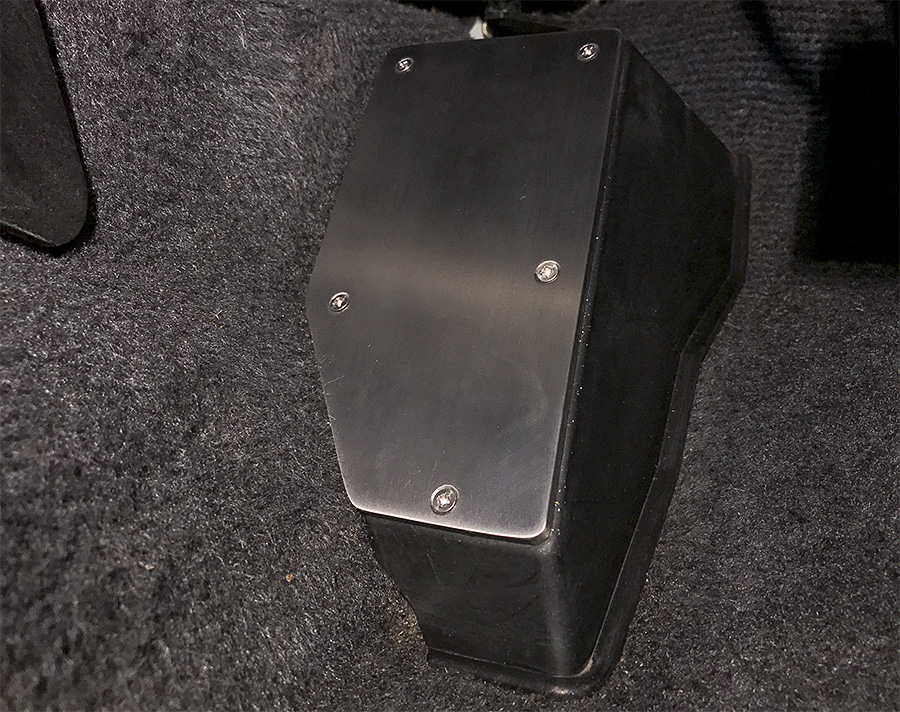
Titanium Dead Pedal
Custom Titanium Footrest aka Dead Pedal "Ralliart Style" and DIY.
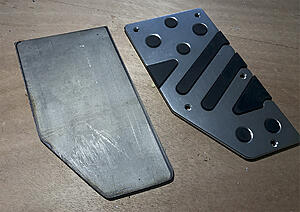
Ralliart didn't include a footrest in their Titanium pedal pad kit. I didn't want to use the Mitsubishi Sports aluminium footrest as they don't match my titanium pedals and I prefer the titanium type as don't slip under your shoe even if your shoes are wet.
I bought a titanium plate 300mm x 100mm.
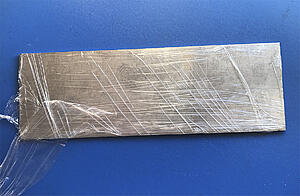
I used the Mitsubishi Sports footrest pad to trace its shape onto the raw titanium. Using a mate's plasma cutter I cut out the basic shape but a bit larger. I wish I photographed or recorded video of this step as the sparks were bright white and it seemed to ignite all the steel dust in the plasma cutting bin. The plasma cutter didn't cut as neat as when I use it to cut mild steel.
This is how it looked after a quick clean up on my Linisher.
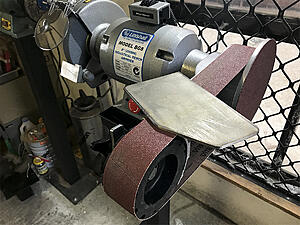
The titanium is hard on sanding belts so I bought a new 40 grit ceramic belt which ripped through the titanium quicker and without generating as much heat.
When the size was perfect I drilled the screw holes and countersunk them
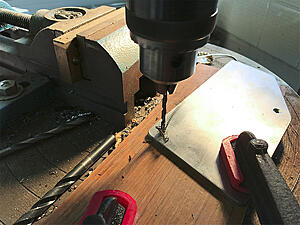
so the screws will sit flush
After a combination of fine grit belt sanding, wet and dry block sanding, bench polishing with compound, I did the final finish with a scotch brite pad to get a brushed metal finish. A fine grit Scotch Belt on the Linisher would have probably been good for this step too.
Cut out some "Dynamite Forever" skateboard grip tape
I used double sided tape and phillips head self tapers to attach it as I couldn't buy allen key countersunk self taping screws.
Add the grip tape
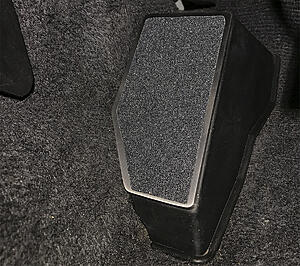
And to finish off the job I replaced the ageing Ralliart black screws on the other pedals with new stainless steel countersunk cap screws.
Ralliart didn't include a footrest in their Titanium pedal pad kit. I didn't want to use the Mitsubishi Sports aluminium footrest as they don't match my titanium pedals and I prefer the titanium type as don't slip under your shoe even if your shoes are wet.
I bought a titanium plate 300mm x 100mm.

I used the Mitsubishi Sports footrest pad to trace its shape onto the raw titanium. Using a mate's plasma cutter I cut out the basic shape but a bit larger. I wish I photographed or recorded video of this step as the sparks were bright white and it seemed to ignite all the steel dust in the plasma cutting bin. The plasma cutter didn't cut as neat as when I use it to cut mild steel.
This is how it looked after a quick clean up on my Linisher.

The titanium is hard on sanding belts so I bought a new 40 grit ceramic belt which ripped through the titanium quicker and without generating as much heat.

When the size was perfect I drilled the screw holes and countersunk them

so the screws will sit flush

After a combination of fine grit belt sanding, wet and dry block sanding, bench polishing with compound, I did the final finish with a scotch brite pad to get a brushed metal finish. A fine grit Scotch Belt on the Linisher would have probably been good for this step too.

Cut out some "Dynamite Forever" skateboard grip tape

I used double sided tape and phillips head self tapers to attach it as I couldn't buy allen key countersunk self taping screws.
Add the grip tape

And to finish off the job I replaced the ageing Ralliart black screws on the other pedals with new stainless steel countersunk cap screws.


 Aug 14, 2017, 01:44 AM
#103
Evolving Member
Thread Starter
On the first page @Nicolas? When the car was in Japan it had a Black Ralliart Bride seat RA652303S1.
I haven't weighed my wagon yet, but I will. From factory the manual transmission wagon was 1499Kg which I think is about 30Kg more than an evo 9 sedan. Its heavier because of the rear fold down seat, steel roof panel, 2 additional small windows and steel anti intrusion bars in the doors.
The GT-A version with auto transmission weighs 1540Kg

The following users liked this post:
uzumaki (Aug 14, 2017)
The following users liked this post:
uzumaki (Aug 14, 2017)