Tire Storage Rack (DIY)
 Feb 10, 2014, 02:33 PM
#1
Evolved Member
Thread Starter
iTrader: (8)
Join Date: Feb 2006
Location: NJ
Posts: 539
Likes: 0
Received 0 Likes
on
0 Posts
Tire Storage Rack (DIY)
Inspired by the thread below, I've decided to build my own tire storage rack. However, Instead of building a rack for 1 set of tires, I've used the entire length of the 2x4x12 to build a rack for all 3 sets. I don't feel like re-writing a step by step, but you can use the pics and the thread below to customize your own... or you can just by one from the tire rack ... http://www.tirerack.com/accessories/...y=Tire+Storage
Thread:
http://www.team-integra.net/forum/bl...rage-rack.html
Thread:
http://www.team-integra.net/forum/bl...rage-rack.html
DIY garage wheel/tire storage rack
Posted 06-15-2013 at 11:26 PM by MorningZ
Did a little project today that I thought I would share with those looking to get some storage in the garage for their extra set of wheels/tires.
It's a pretty straight forward build with minimal cost (I spent ~ $40) and works great ! The tires don't touch the wall and it's solid off-the-floor storage.
First off, here is what we are building:
Final product is 46" wide, so find a spot to mount it in your garage
Parts list:
- (4) 2x4x8 boards (~$3 each at Home Depot)
- (6) 3/8"x3" lag bolts and washers ($8 total at Home Depot)
- 8 feet of chain that can handle 200 lbs (I got it for 99 cents a foot at Ace Hardware)
- (4) Heavy duty eye hooks (i picked up two 2-packs for $1.99 each at Ace, rated at 200lbs capacity) - Pic of chain + eye hooks
- (12) 3" deck screws (paid $9 for a box of them)
- (4) Screw on chain joints (it's C-shaped with a scew-on nut that closes the loop, bottom left of this pic, $1.99 each at Ace)
- (2) "Turnbuckle"-s, this allowed find tuning on the chain length (~$3 each at Home Depot, Ace Hardware by me didn't have these)
Tools list:
- Saw to cut the 2x4's (I used a Miter saw)
- Heavy duty drill with a socket attachment for the lag bolts
- Ratchet
- Dremel tool to cut off extra chain (I suppose bolt cutters or something else could work too)
- Stud finder (DEFINITELY want to mount this thing into studs in the wall)
- Tape measure
- Drill bits for pre-drilling holes in the wood
- Level
Inspiration for this project:
- This post on mr2.com
- this post here on TI by member "dpaton"
I used elements of both of those to make mine
Alright, let's get started !! I scoped out a space on my garage wall for this thing, unfortunately my favorite poster in the world will need to be relocated…

From the post on m2.com I got this diagram and these measurements

Here are the pieces I cut out the 2x4's:
- A: 43" long
- B: *I did not cut these, I used chain instead*
- C: 43" long
- D: 43" long
- E: 26" long (two of these)
- F: 40" long

Here are both "E"-s screwed into the sides of "F" using the deck screws, make sure to pre-drill the holes so you don't split the wood

Following the diagram above, here is piece "C" screwed in over piece "F", piece "D" screwed into the other side of the "E" side pieces, and then loose piece "A" laying across

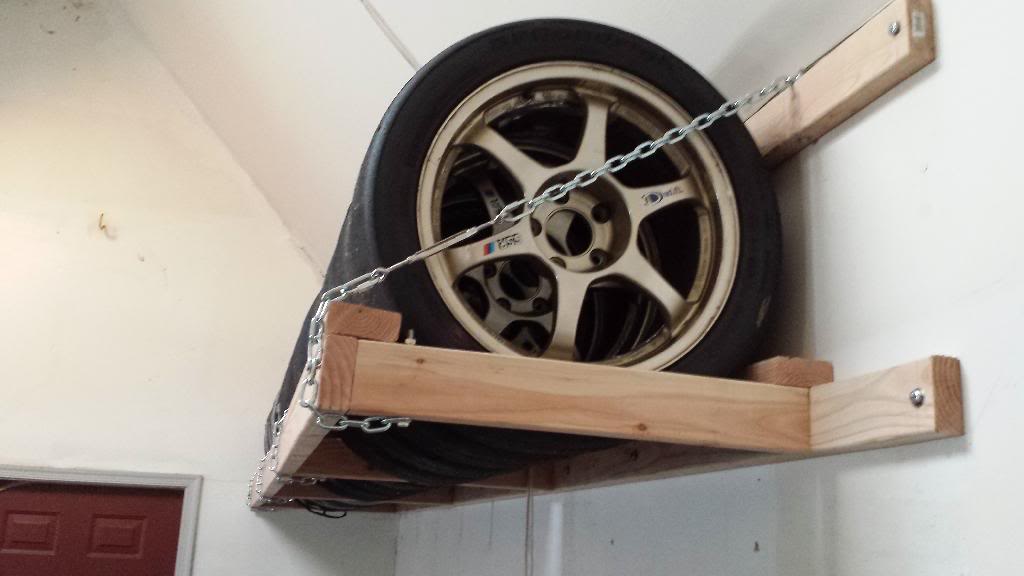
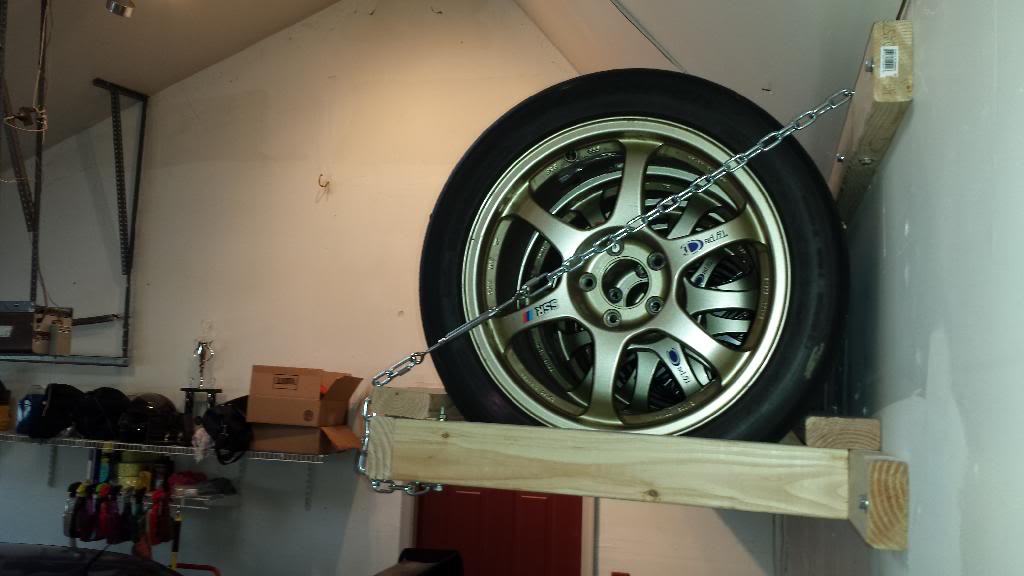
I test fit one of my 17" Motegi rims in in the bottom part of the rack, fits great ! (so this is the bottom part which are all pieces except for "A")

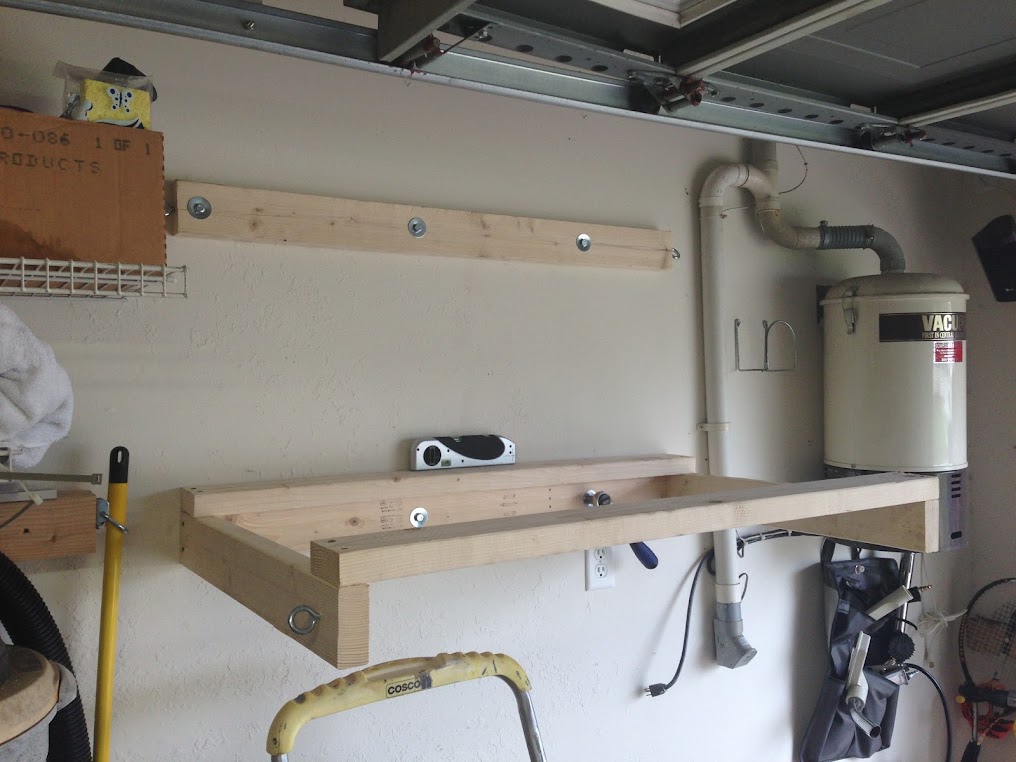
Next up was using the lag bolts to bolt the top piece "A" into studs in the wall. In my garage, the studs are 16" apart and I had pre-drilled holes to protect the wood from splitting. I started the lag bolts by using my heavy duty drill then finished them off using a ratchet. Just want to note that I pre-drilled holes and screwed in eye hooks on each side *before* I mounted this piece of wood, MUCH easier that way.


Then I measured 19" down from the "A" piece and mounted up the bottom part of the rack. Same deal: pre-drilled holes in the 2x4 and used lag bolts fastened to studs in the wall
Now that the two wood parts of the rack are done, I start to get the chain involved, I used the chain connector to hook up the end of the chain to the top "A" piece eye hook, then measured down to the eye hook I put in the front end of the side "E" piece (pre-drilling the wood before screwing in the eye hook of course). I used my Dremel to hack off the excess chain.
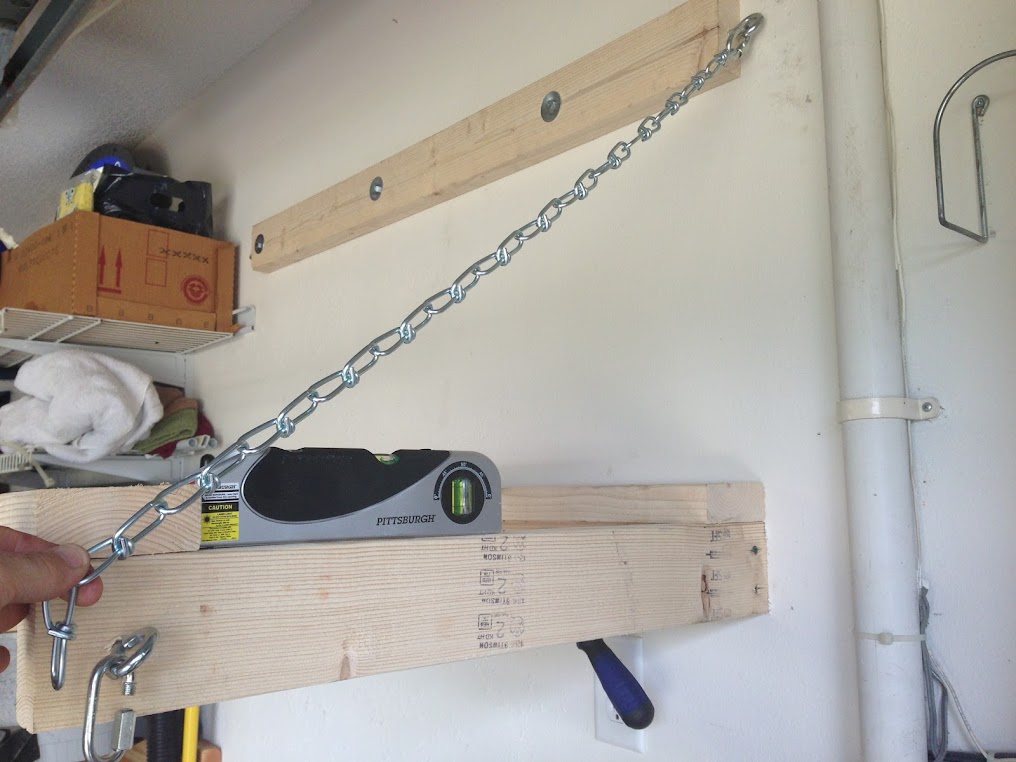
The turnbuckles allow you do fine tune the chain length, tighten or loosen them up to get the rack level

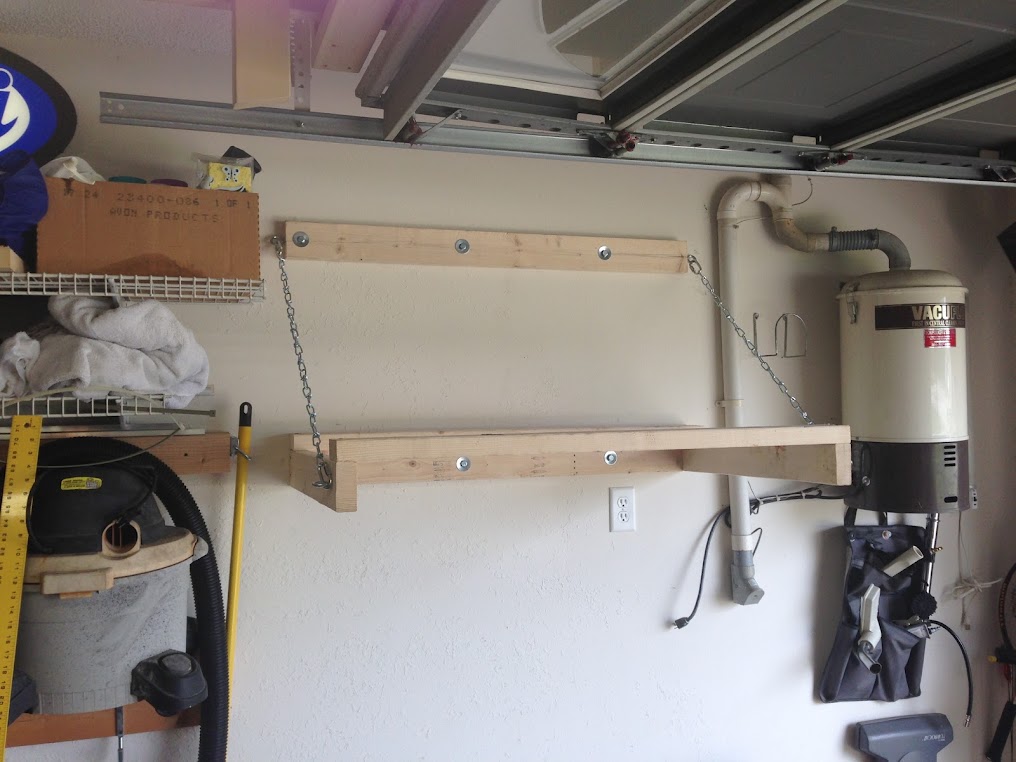
Did the same steps for the other side and

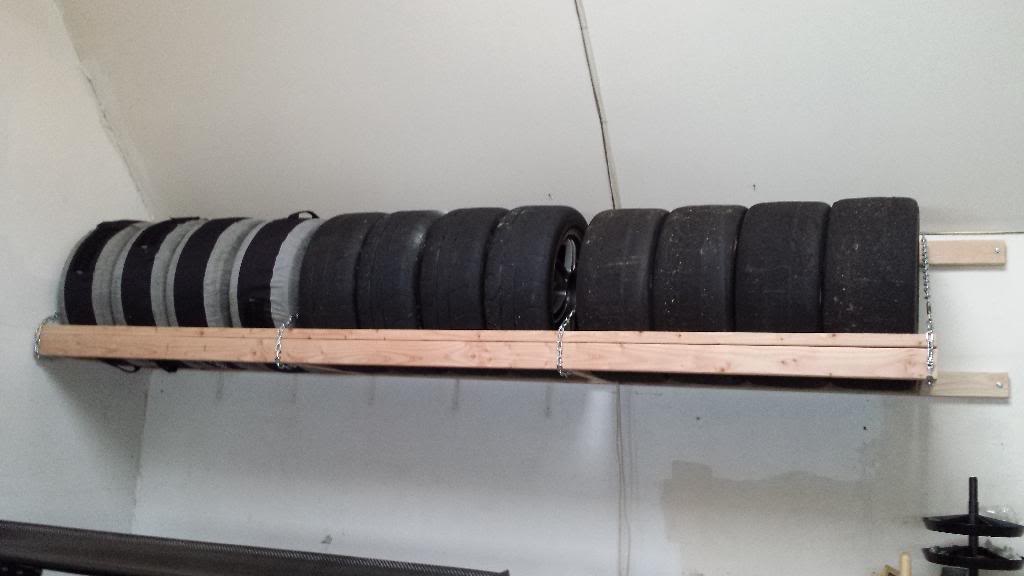
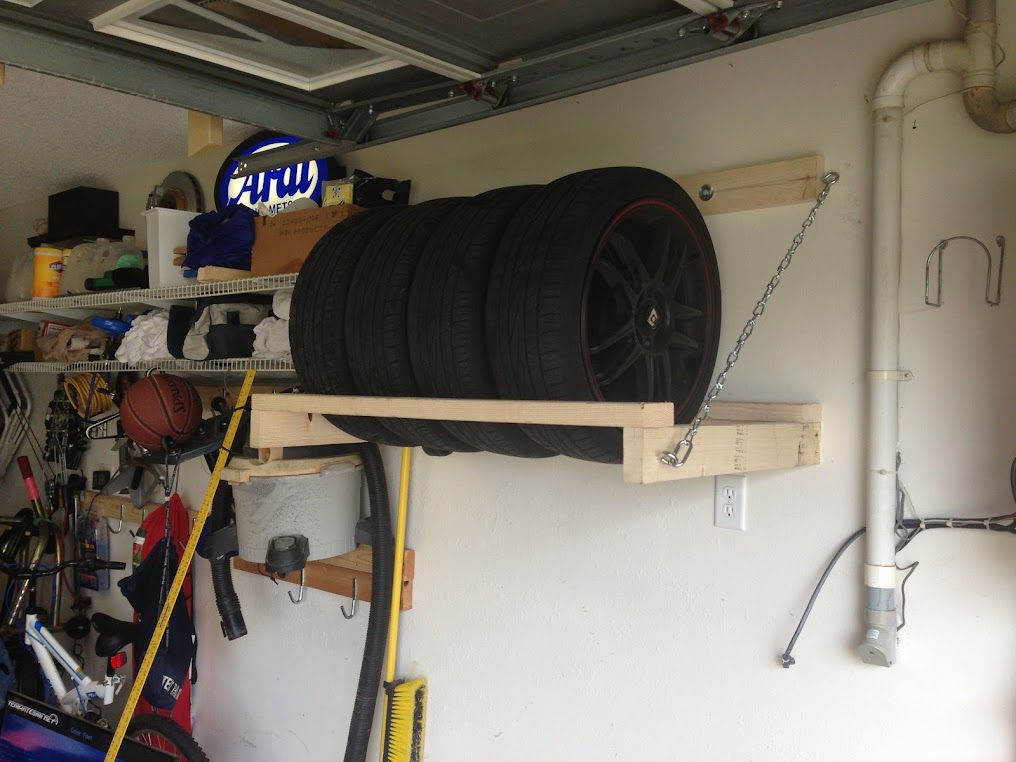
Here is the final result (NOTE: I added the turnbuckles after I completed this article, so these pics don't have them in there)

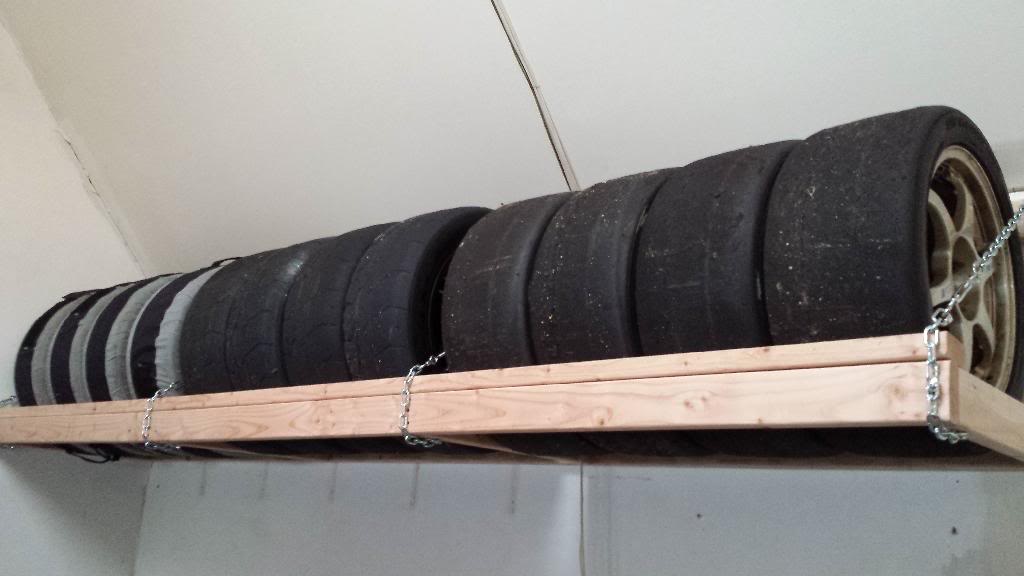
Wheels and tires loaded up !

I'd *HIGHLY* suggest that you leave the area under/in-front-of the rack clear overnight, just to double check that you mounted the rack securely and that the chains will hold the weight (better safe than sorry !)
Enjoy your extra garage floor space !
Posted 06-15-2013 at 11:26 PM by MorningZ
Did a little project today that I thought I would share with those looking to get some storage in the garage for their extra set of wheels/tires.
It's a pretty straight forward build with minimal cost (I spent ~ $40) and works great ! The tires don't touch the wall and it's solid off-the-floor storage.
First off, here is what we are building:
Final product is 46" wide, so find a spot to mount it in your garage
Parts list:
- (4) 2x4x8 boards (~$3 each at Home Depot)
- (6) 3/8"x3" lag bolts and washers ($8 total at Home Depot)
- 8 feet of chain that can handle 200 lbs (I got it for 99 cents a foot at Ace Hardware)
- (4) Heavy duty eye hooks (i picked up two 2-packs for $1.99 each at Ace, rated at 200lbs capacity) - Pic of chain + eye hooks
- (12) 3" deck screws (paid $9 for a box of them)
- (4) Screw on chain joints (it's C-shaped with a scew-on nut that closes the loop, bottom left of this pic, $1.99 each at Ace)
- (2) "Turnbuckle"-s, this allowed find tuning on the chain length (~$3 each at Home Depot, Ace Hardware by me didn't have these)
Tools list:
- Saw to cut the 2x4's (I used a Miter saw)
- Heavy duty drill with a socket attachment for the lag bolts
- Ratchet
- Dremel tool to cut off extra chain (I suppose bolt cutters or something else could work too)
- Stud finder (DEFINITELY want to mount this thing into studs in the wall)
- Tape measure
- Drill bits for pre-drilling holes in the wood
- Level
Inspiration for this project:
- This post on mr2.com
- this post here on TI by member "dpaton"
I used elements of both of those to make mine
Alright, let's get started !! I scoped out a space on my garage wall for this thing, unfortunately my favorite poster in the world will need to be relocated…
From the post on m2.com I got this diagram and these measurements
Here are the pieces I cut out the 2x4's:
- A: 43" long
- B: *I did not cut these, I used chain instead*
- C: 43" long
- D: 43" long
- E: 26" long (two of these)
- F: 40" long
Here are both "E"-s screwed into the sides of "F" using the deck screws, make sure to pre-drill the holes so you don't split the wood
Following the diagram above, here is piece "C" screwed in over piece "F", piece "D" screwed into the other side of the "E" side pieces, and then loose piece "A" laying across
I test fit one of my 17" Motegi rims in in the bottom part of the rack, fits great ! (so this is the bottom part which are all pieces except for "A")
Next up was using the lag bolts to bolt the top piece "A" into studs in the wall. In my garage, the studs are 16" apart and I had pre-drilled holes to protect the wood from splitting. I started the lag bolts by using my heavy duty drill then finished them off using a ratchet. Just want to note that I pre-drilled holes and screwed in eye hooks on each side *before* I mounted this piece of wood, MUCH easier that way.
Then I measured 19" down from the "A" piece and mounted up the bottom part of the rack. Same deal: pre-drilled holes in the 2x4 and used lag bolts fastened to studs in the wall
Now that the two wood parts of the rack are done, I start to get the chain involved, I used the chain connector to hook up the end of the chain to the top "A" piece eye hook, then measured down to the eye hook I put in the front end of the side "E" piece (pre-drilling the wood before screwing in the eye hook of course). I used my Dremel to hack off the excess chain.
The turnbuckles allow you do fine tune the chain length, tighten or loosen them up to get the rack level
Did the same steps for the other side and
Here is the final result (NOTE: I added the turnbuckles after I completed this article, so these pics don't have them in there)
Wheels and tires loaded up !
I'd *HIGHLY* suggest that you leave the area under/in-front-of the rack clear overnight, just to double check that you mounted the rack securely and that the chains will hold the weight (better safe than sorry !)
Enjoy your extra garage floor space !


Trending Topics
 May 14, 2014, 03:01 PM
#11
Evolved Member
Thread Starter
iTrader: (8)
Join Date: Feb 2006
Location: NJ
Posts: 539
Likes: 0
Received 0 Likes
on
0 Posts
http://www.mcmaster.com/#piano-hinges/=rysvdc

Thread
Thread Starter
Forum
Replies
Last Post
mRVRsport
Outlander Sport
9
Oct 9, 2016 05:31 AM
mRVRsport
Outlander Sport
16
Nov 18, 2015 12:14 PM