Energy Suspension bushing replacement!

 Dec 10, 2012, 10:24 PM
#33

I installed a full bushings kit on my evo 8. i have white line and energy bushings. the only time they make noise is when i jack up the evo to change the oil or work on it. i can see that if your putting them in a longer travel suspension vehicle they may make a bit of noise. these bushings took the handling to a all new level, i would say my evo handled like a Honda and now it handles like a sports car(like it should).
I installed these with an hf 20 ton press and it only took a after noon. the only thing i would worn you about is the bolts on the lower a arms they are really on there. if you don�t have a impact that�s able to to more than 1200 flb. i had to take the car to my mechanic (the guy that dose the work that i cant). the lift was all i really needed but all went well and my mechanic didn�t charge me much. the tires ware way more even. all and all this is the best add on to my evo 8 sense my fp red.
to lube the bushings is pretty easy i just got a Grease Injector Needle, Fits Standard Grease Gun Couplers lube, its for lubing my air gun, but the lube is difference. all i have to do is just poke the bushing from one side and lube it up. works great.
link for the injector needle http://www.truevalue.com/product/Gre...keyword=grease
Mar 19, 2013, 08:03 PM
#34
I did this to my GSX, it was intensive as far as labor. but not really hard. a good tip is to lube the bushing and inner race of the part to have the bushing pressed in. and then lube the sleeve bushing and press it in and then anti-seize the inside of the bushing sleeve along with the bolt so no corrosion happens.
another tip is that i sprayed the bolt with dry lubricant and allowed them to dry. they will never rust!!!
another tip is that i sprayed the bolt with dry lubricant and allowed them to dry. they will never rust!!!


 Feb 11, 2014, 07:49 AM
#39
I also couldn't find any setup at my work that I could effectively get to that bushing with a press. I ended up using a piece of all thread, nuts, washers, and two tube pieces to pull it out. Small tube (1.345" OD) that passes through the control arm on the rear side, larger tube (1.5" ID) on the front side. Put the front nut in a bench vise and rotate the whole arm to get the most leverage. It sucked. Mitsubishi sure used a small thickness of metal on the outer diameter of that bushing.
Last edited by Terror Rising; Feb 11, 2014 at 07:55 AM.
Feb 11, 2014, 07:58 AM
#40
I know what you mean. I had to carefully position it with the arbor plates in such a manor that the hole on the bottom was large enough to press out the old bushing but also hold the actual LCA. It took a lot of re positioning but I was able to finally pop it out. This was on the control arm that I had to cut out due to a seized LCA bolt so I still have to push out the ones on my car currently.
What are you using for a dye? I rented the ball joint master service kit and actually used a little too large of a dye top push it out and it got stuck in my LCA. I had fun getting that out. Luckily it was already scrap metal so it wasnt a big deal but when I do it for real I need to make sure I use a proper dye.
What are you using for a dye? I rented the ball joint master service kit and actually used a little too large of a dye top push it out and it got stuck in my LCA. I had fun getting that out. Luckily it was already scrap metal so it wasnt a big deal but when I do it for real I need to make sure I use a proper dye.
Feb 11, 2014, 09:41 AM
#41
I also couldn't find any setup at my work that I could effectively get to that bushing with a press. I ended up using a piece of all thread, nuts, washers, and two tube pieces to pull it out. Small tube (1.345" OD) that passes through the control arm on the rear side, larger tube (1.5" ID) on the front side. Put the front nut in a bench vise and rotate the whole arm to get the most leverage. It sucked. Mitsubishi sure used a small thickness of metal on the outer diameter of that bushing.

What are you using for a dye? I rented the ball joint master service kit and actually used a little too large of a dye top push it out and it got stuck in my LCA. I had fun getting that out. Luckily it was already scrap metal so it wasnt a big deal but when I do it for real I need to make sure I use a proper dye.

I had that EXACT same issue last night. The largest cylinder was a perfect size for the pillow ball bushing, but then it was fused in the LCA.
 I ended up pushing it back out far enough to then use the PSRS to push it completely out the other side.
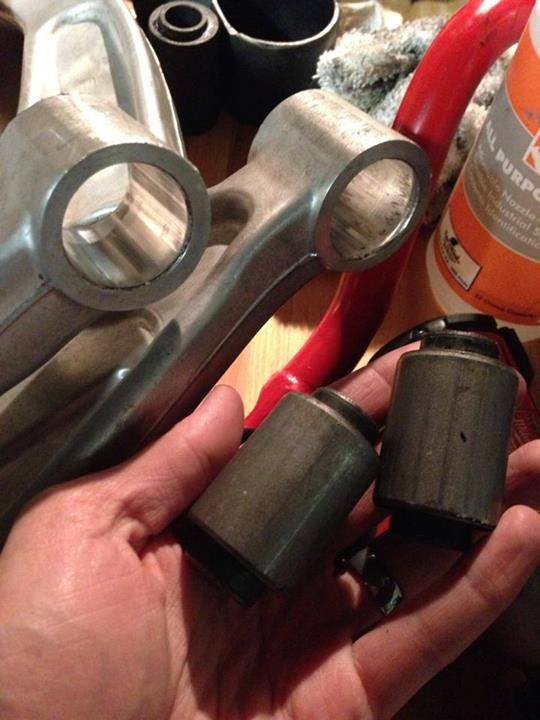
Last edited by golgo13; Feb 11, 2014 at 09:53 AM. Reason: I R DUMB
Feb 11, 2014, 11:40 AM
#43
Glad you got it all sorted out. I wasn't reading carefully enough as I thought you were originally talking about the big donut gasket but obviously by stating the horizontal one you mean the one that is horizontal or parallel to the ground
I suppose I could do exactly as you did and use the new bushing to pop it out however I then may not have the proper dye to push it back in as itll still be stock in the LCA. I guess since the Perrin bushing is solid I could use a smaller socket to pop it back in; I just assumed I'd use the same size dye.
Ideally the proper dye would have ~1/16" smaller diameter than the diameter of the LCA such that it wont get stuck in there but the next size down in the kit was too small. I may just go to home depot with the spare LCA that I have and find a steel pipe or something to use instead.
Feb 11, 2014, 11:50 AM
#44
Ideally the proper dye would have ~1/16" smaller diameter than the diameter of the LCA such that it wont get stuck in there but the next size down in the kit was too small. I may just go to home depot with the spare LCA that I have and find a steel pipe or something to use instead.
My Vorshlag plates add caster and camber.
 Feb 11, 2014, 01:56 PM
#45

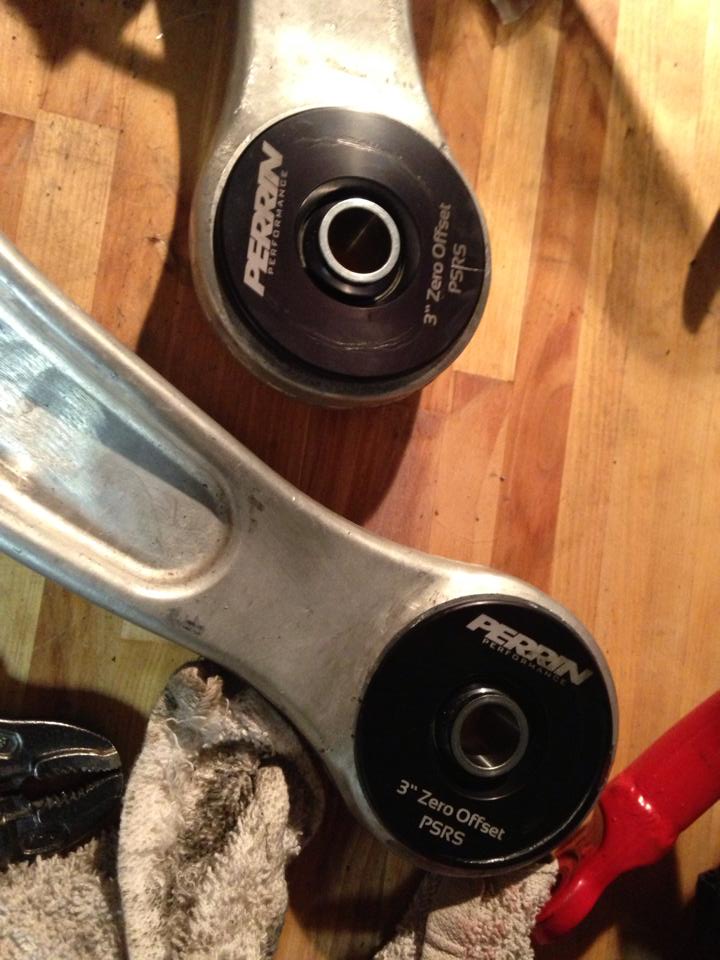
The positive offset spherical bushing rotates the LCA towards the front of the car moving the tire forward in the wheel well. This creates more clearance for wider/taller tires.
Doing one and not doing the other, does not make much sense. The only downside to the positive offset rear bushing is that it creates a "less happy" angle on the front bushing making it hard to install/remove and also creating a bit of additional unintended suspension stiffness and stress on the LCA.
My top plates are caster adjustable and I set them for as much caster as possible without rubbing on the back of the wheel well. As in, I keep adding caster until I only slightly rub at full lock on both wheels.