Evo X Boost Gauge Install ,No splicing, No firewall drilling,Pics+Vid= Clean As Hell
 Nov 23, 2008, 10:28 PM
#46
Evolving Member
Join Date: Aug 2008
Location: Dirty South
Posts: 281
Likes: 0
Received 0 Likes
on
0 Posts
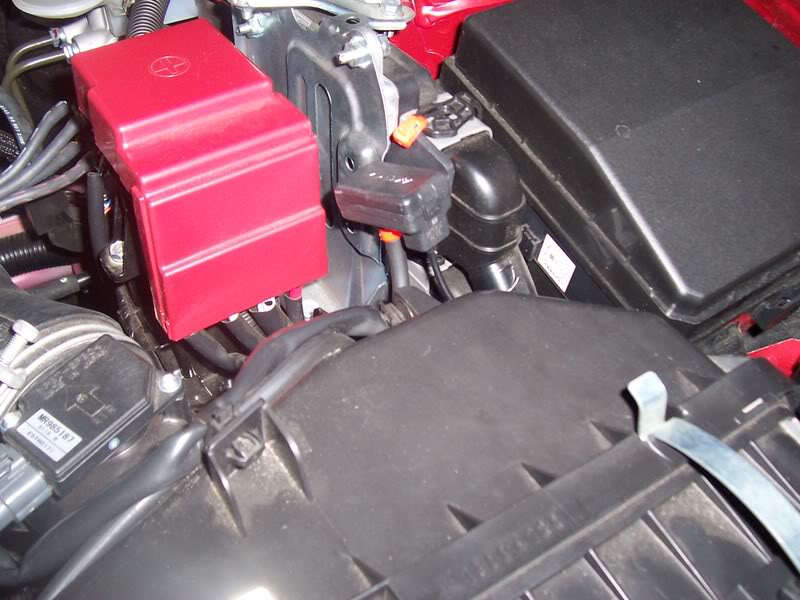
^Should have just stuck with the original directions, this took me maybe 2 hours to complete with 30 minutes of that staring at my engine bay figuring out where to mount the Defi Boost Sensor. I have never installed any gauge up till that point.

 Nov 25, 2008, 02:48 PM
#48
Evolving Member
Thread Starter
iTrader: (5)
Join Date: Mar 2007
Location: Minnesota
Posts: 283
Likes: 0
Received 0 Likes
on
0 Posts
") Theres no hole behind the stearing wheel well, just a solid metal sheet with the stearing pole pointing downward into the bottom of the drivetrain. I had to buy extra long tubeing and wire to run this boost guage. I remeber on my VIII it was so easy just tap into the headlight wire and run the boost hose behind the glove box and wallah a little hole behind the intake mani. 30 mins tops, this install is takeing me weeks to do.
Theres no hole behind the stearing wheel well, just a solid metal sheet with the stearing pole pointing downward into the bottom of the drivetrain. I had to buy extra long tubeing and wire to run this boost guage. I remeber on my VIII it was so easy just tap into the headlight wire and run the boost hose behind the glove box and wallah a little hole behind the intake mani. 30 mins tops, this install is takeing me weeks to do. 
 Nov 25, 2008, 09:39 PM
#51
Evolving Member
Thread Starter
iTrader: (5)
Join Date: Mar 2007
Location: Minnesota
Posts: 283
Likes: 0
Received 0 Likes
on
0 Posts
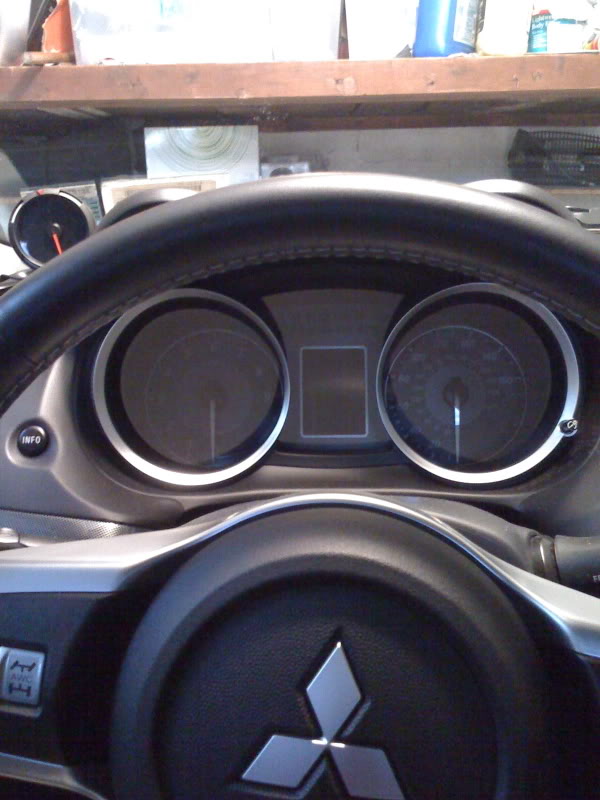
So far its been right side or left side steering wheel  which is good for hiding wires behind steering wheel. Your spot might be a little harder to hide the wires. My other spot i might try for my next gauges is the hubby under the climate controls as the ceiling of it is flat. Just flip the mount and stick it to the ceiling of the hubby for that.
Something like this but a little cleaner looking for my next gauges. But can be used for boost gauge also.
which is good for hiding wires behind steering wheel. Your spot might be a little harder to hide the wires. My other spot i might try for my next gauges is the hubby under the climate controls as the ceiling of it is flat. Just flip the mount and stick it to the ceiling of the hubby for that.Something like this but a little cleaner looking for my next gauges. But can be used for boost gauge also.
Last edited by ZWingerRyRy; Nov 25, 2008 at 09:46 PM.
Nov 25, 2008, 10:32 PM
#53
Evolving Member
Thread Starter
iTrader: (5)
Join Date: Mar 2007
Location: Minnesota
Posts: 283
Likes: 0
Received 0 Likes
on
0 Posts
The gauge to be visible? Well your spot works for that, but steering wheel also does just not to the point of visible in the windshield. Im just picky and visible wires would bug me I think i saw someone route the wires through the vent up there, never tried it but just a idea.
I think i saw someone route the wires through the vent up there, never tried it but just a idea.
 Jan 12, 2009, 11:34 AM
#55
Newbie
iTrader: (2)
Join Date: Apr 2008
Location: Virginia
Posts: 87
Likes: 0
Received 0 Likes
on
0 Posts
ZWingerRyRy,
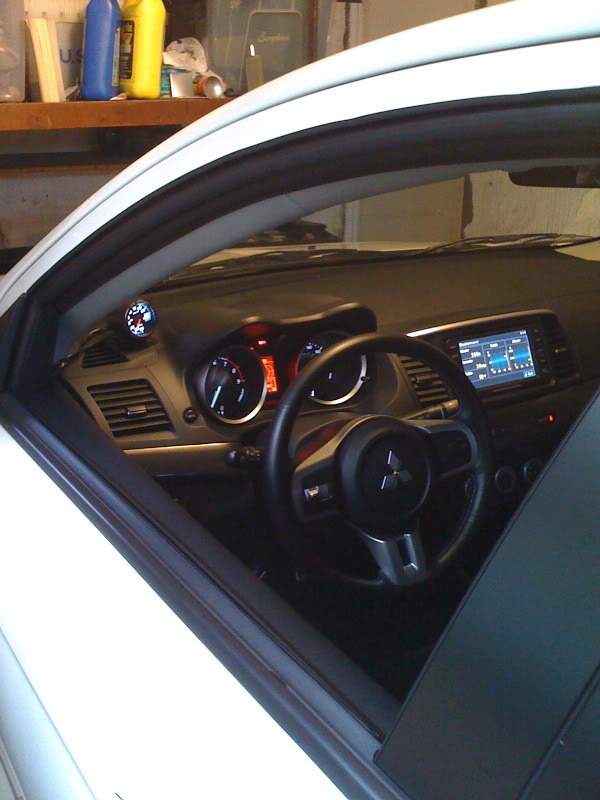
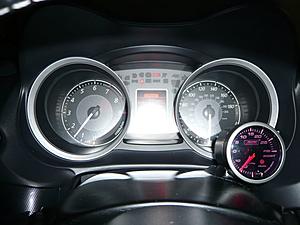
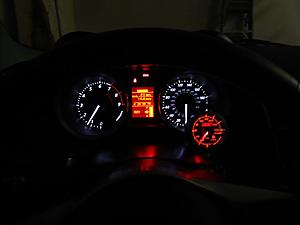
Thanks for the great write-up. I followed your step-by-step instructions and everything worked out great. Thanks for taking the time to share your findings with everyone in the Evo X community.
here is my Defi Boost Gauge installed:

Thanks for the great write-up. I followed your step-by-step instructions and everything worked out great. Thanks for taking the time to share your findings with everyone in the Evo X community.
here is my Defi Boost Gauge installed:
Jan 16, 2009, 04:43 PM
#57
Newbie
iTrader: (1)

Join Date: Oct 2008
Location: Southeast
Posts: 30
Likes: 0
Received 0 Likes
on
0 Posts
Another satisfied customer here  I thought about making another thread and just referencing this one, but I thought everyone would be better served with additional information in this one...hope you don't mind.
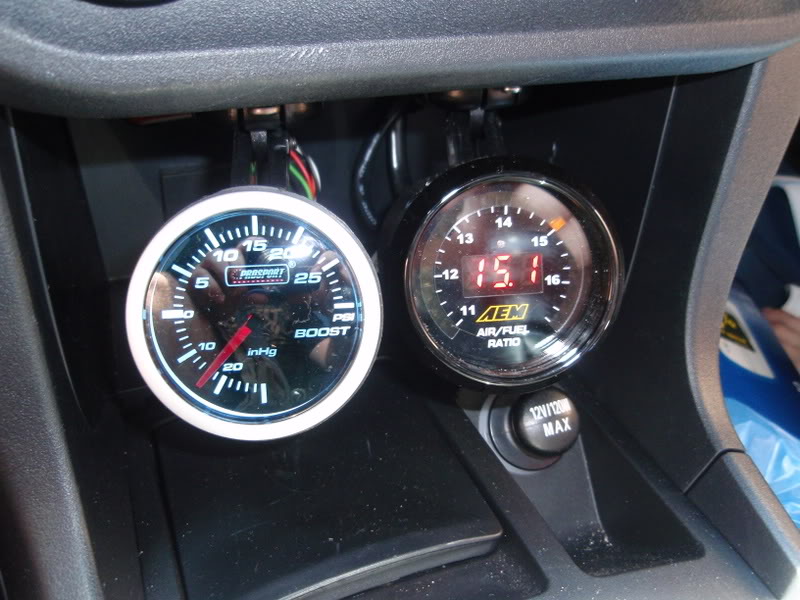
I used this install for my prosport boost gauge and it worked out well. A little "heads up" for anyone installing a prosport gauge using this guide...you will have to splice some wire into the harness for it to be long enough. No big deal though. I soldered the power connections and covered them with heat shrink tube, but I just twisted the sensor connectors together then covered with heat shrink.
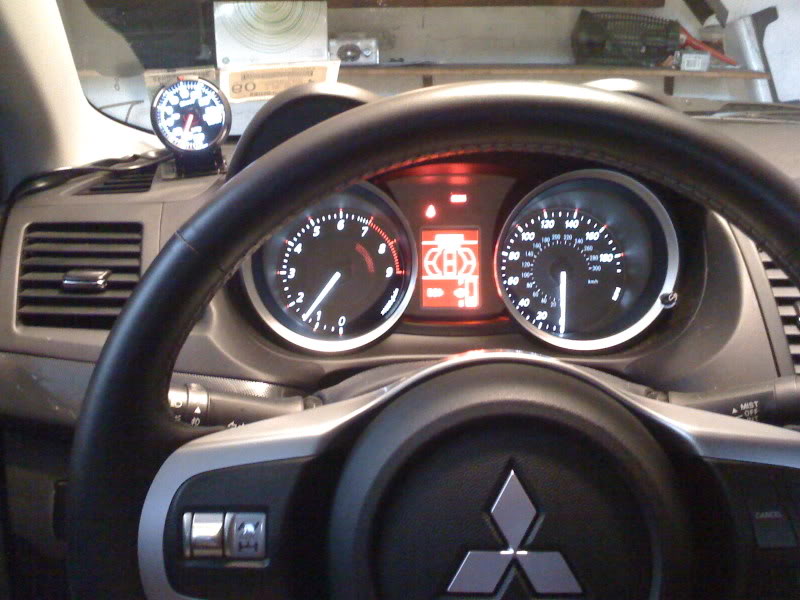
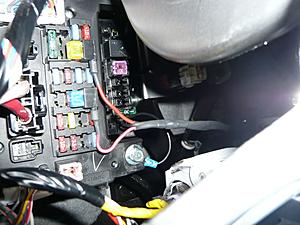
For prosport gauges the orange wire hooked into an ignition only fuse (I used the cig lighter) will make the gauge light up red. The white wire will make it white. If you want it white during the day and red at night, tap the white wire to the cig lighter and the orange wire to the headlight wire in the steering wheel column harness. I didn't do this myself...the "white" has too much of a blue tint to it so I went with constant red. Tap the red wire into the door lock fuse and the black to the bolt by the interior fuse box. I used bussman add-a-fuse links.
Also, since I haven't been able to find an upper column cover with a built-in gauge pod for the Evo X, I decided to make one myself. I used a dremmel, some epoxie sculpt (two part epoxy), sandpaper and some Duplicolor bumper paint. Pics below.
Once again, thanks for the great install write up. This is definitely the cleanest way to install your gauges.
I thought about making another thread and just referencing this one, but I thought everyone would be better served with additional information in this one...hope you don't mind. I used this install for my prosport boost gauge and it worked out well. A little "heads up" for anyone installing a prosport gauge using this guide...you will have to splice some wire into the harness for it to be long enough. No big deal though. I soldered the power connections and covered them with heat shrink tube, but I just twisted the sensor connectors together then covered with heat shrink.
For prosport gauges the orange wire hooked into an ignition only fuse (I used the cig lighter) will make the gauge light up red. The white wire will make it white. If you want it white during the day and red at night, tap the white wire to the cig lighter and the orange wire to the headlight wire in the steering wheel column harness. I didn't do this myself...the "white" has too much of a blue tint to it so I went with constant red. Tap the red wire into the door lock fuse and the black to the bolt by the interior fuse box. I used bussman add-a-fuse links.
Also, since I haven't been able to find an upper column cover with a built-in gauge pod for the Evo X, I decided to make one myself. I used a dremmel, some epoxie sculpt (two part epoxy), sandpaper and some Duplicolor bumper paint. Pics below.
Once again, thanks for the great install write up. This is definitely the cleanest way to install your gauges.


 Jan 17, 2009, 04:47 PM
#59
Newbie
iTrader: (1)
Join Date: Oct 2008
Location: Southeast
Posts: 30
Likes: 0
Received 0 Likes
on
0 Posts
I put the tee in the same spot as the original poster. I would make a run to the parts store and get some better hose though, the hose that comes with the prosport gauge is kind of crappy.
Jan 17, 2009, 05:14 PM
#60
Evolved Member
Join Date: Dec 2008
Location: MD
Posts: 685
Likes: 0
Received 0 Likes
on
0 Posts
Yeah, I don't like that clear hose either. I was a little confused before because from the pic it looked like the original poster was saying to attach it at the coolant plug on the head. I opened the hood and decided I am teeing into the bov hose.