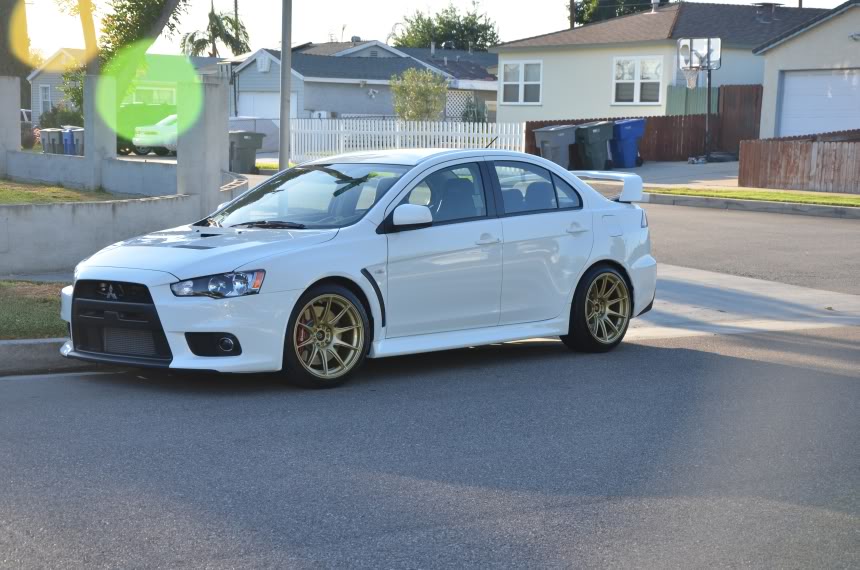
EZ PEEZY SSS Wing Install on 2010 GSR (from Lancer wing to SSS wing)
 Aug 23, 2011, 09:52 PM
#1
Evolving Member
Thread Starter
iTrader: (7)

Join Date: Feb 2010
Location: Brea, CA - Orange County
Posts: 325
Likes: 0
Received 0 Likes
on
0 Posts
EZ PEEZY SSS Wing Install on 2010 GSR (from Lancer wing to SSS wing)
EDIT - I know this is pretty easy to do but you never know who just might need it. I was under the impression that the SSS wing would bolt on no problems (which is sorta does) but not completely since 2 bolts aren't able to get into the thread housing until you drill the trunk. If I helped just one person than hey it was worth it 
NOTE - you don't need to do this to to fit the SSS wing on a base GSR, however, I would go as far and say its recommended and sits much better.
REASON FOR DOING THIS? - I did this because I swapped my low wing on the gsr to the BIG BOI off a SSS package. You notice during install that only 1 of 2 bolts will screw in on each side of the wing. The installation of the wing can still be done with only 1 bolt on each side however, I prefer the piece of mind of "installing it right / better".
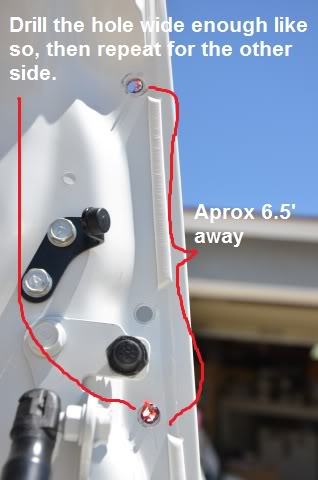
The distance between each bolt and thread housing is 5 inches on the low wing and 6.5 on the SSS.
TOOLS
INSTALL DIFFICULTY 1-10 & TIME = 2 // 30 minutes to 1 hour. (Most of the time is spent cutting adhesive tape and drilling the holes). I only gave it a 2 because using the drill can be a bit scary but it's pretty straight forward - push firmly and squeeze the button First timers take your time and do things right. Its better to do it right the first time, than to have to go back and fix your choppy work.
-------------------------------------------------------------------------------------------------------------------------
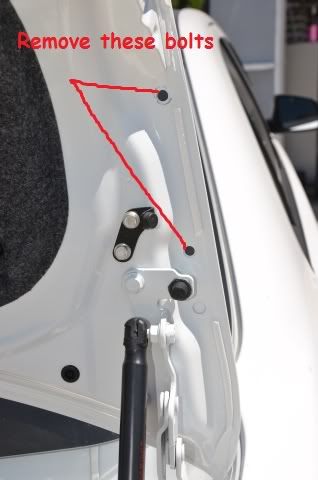
First unscrew these 2 bolts on each side (refer to picture for location) & pull the wing off.
(It will take some force since it's also being held down by double sided adhesive tape)
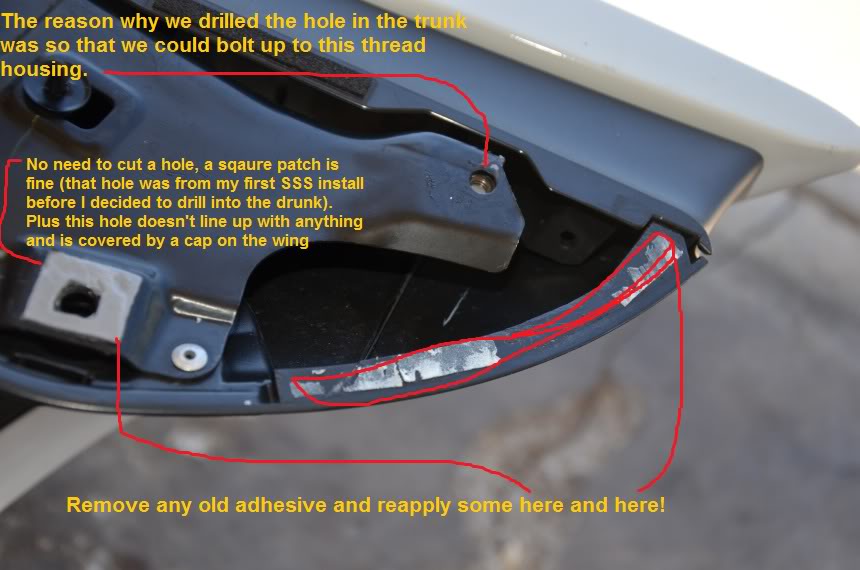
Next find this covered hole on the trunk, this is where you want to drill into. You can either drill from under the trunk or above it. I choose to drill beneath it which makes the aluminum open upwards but can easily be cleaned up by using the bit to shave off the upward scales. Also I didn't care if shavings or marks showed up on the trunk cause it would be covered by the wing and if I ever go wingless I'll be going CF replica do-luck style. Take your time here if you're drilling from above.
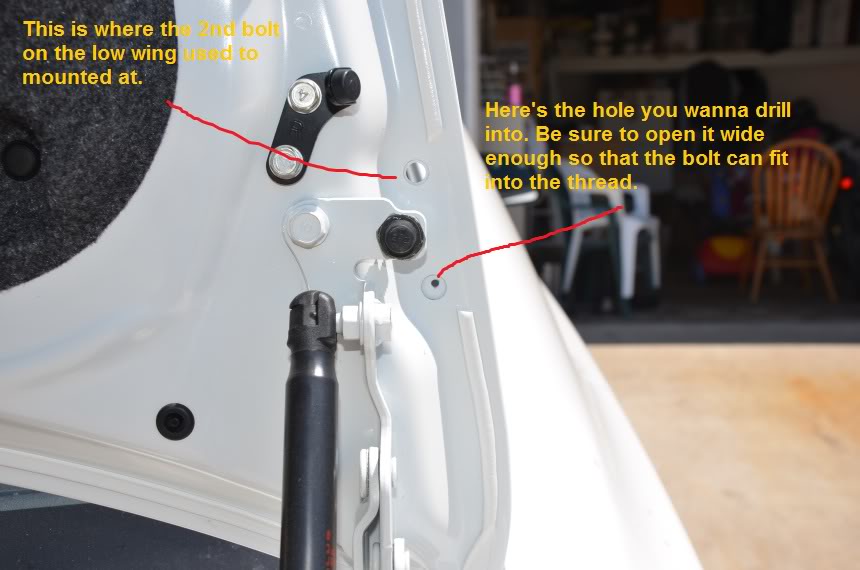
Make sure the hole is wide enough so that the bolt can meet the thread on the wing.

Next cut a square of 3M tape and cover the 2 holes furthest from each other. Firmly press down on them and then cut an opening up for the bolt by drilling through the tape. (You can cut it but why not make it quick and easy )
)
DO NOT REMOVE THE TAPE MASK YET. You want to wait until right before the wing goes on so that you don't get debris on it.
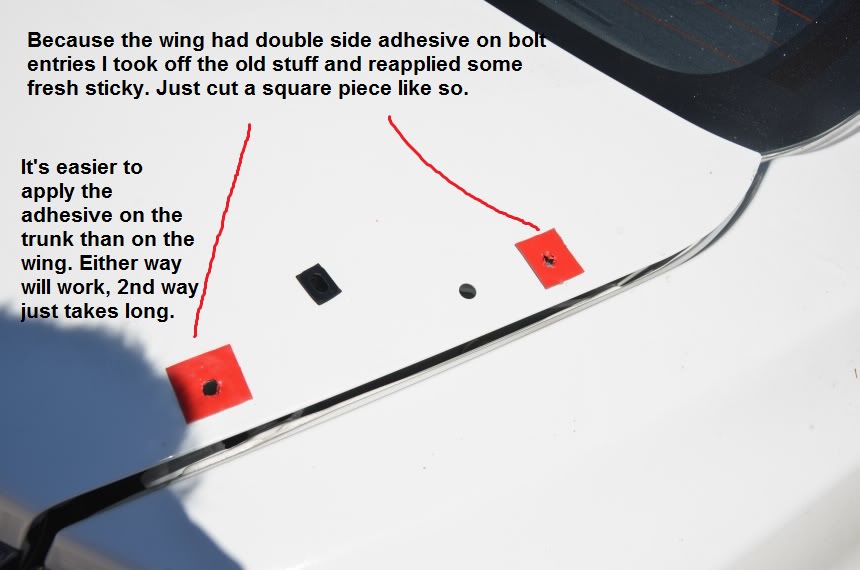
Now remove the old adhesive that was on the wing and reply it in the areas below.
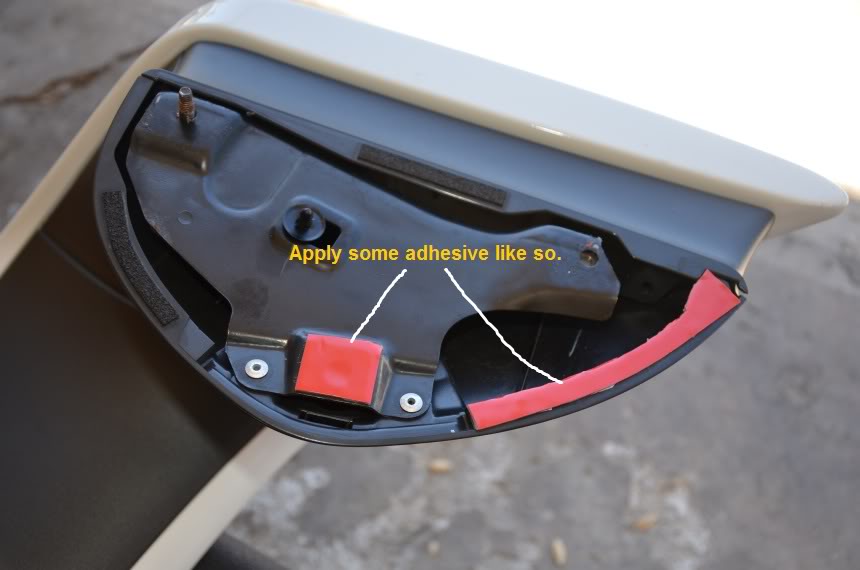
Do the same to the other side. When you're done remove the masking strip from both sides and do the same to the trunk. Its just about time do apply the wing to the trunk!
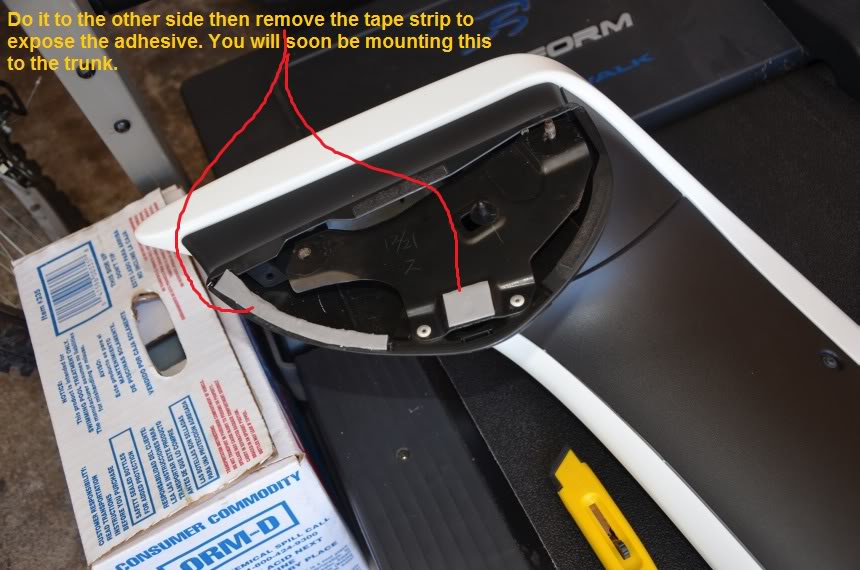
Now that the adhesive is exposed on both the trunk and wing we can mount it.
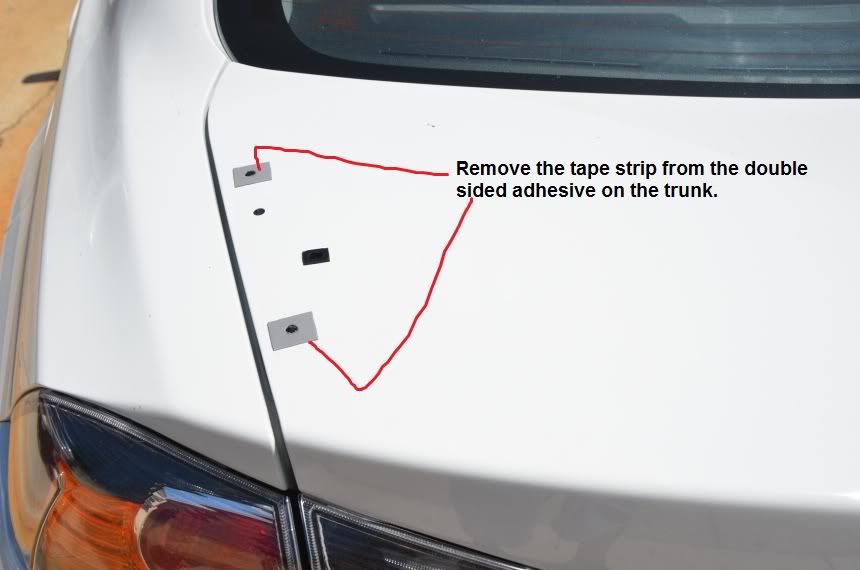
*QUICK TIP* as soon as one slides into the hole, line up the other side. If you sink the wing in to low you won't have enough wiggle / play room to get the other side in and you may ruin the adhesive having to reapply it. So just barely fit one side and then work on the other. Once both sides are set in their homes firmly press down on the wing. Go to each side of the wing and apply your body weight onto it for 20 secs to get the adhesive to stick to the trunk / wing.
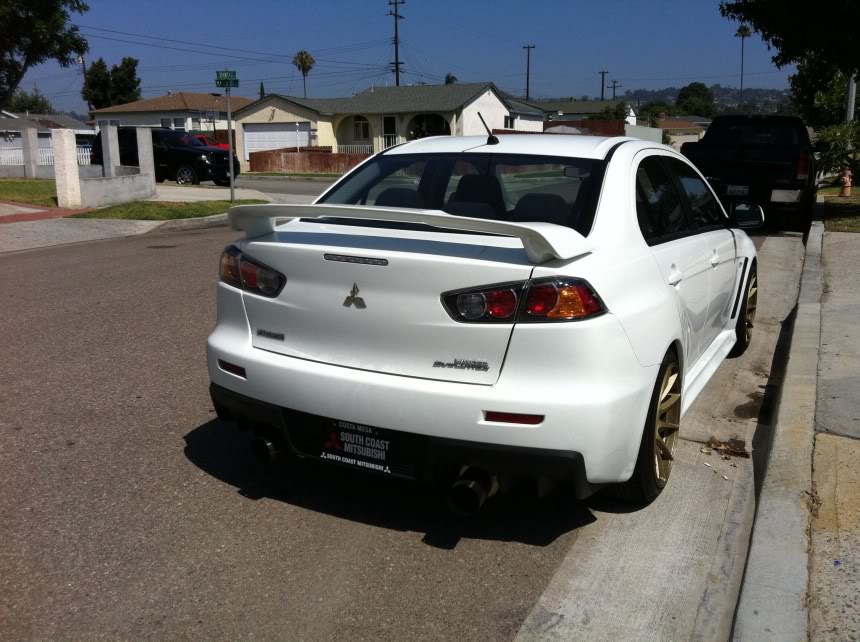
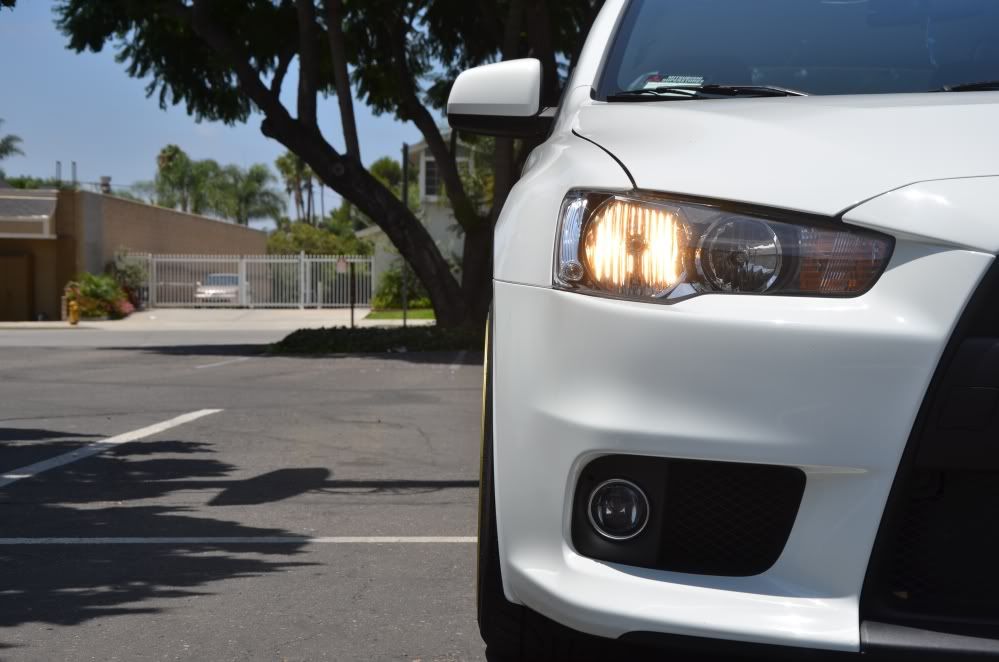
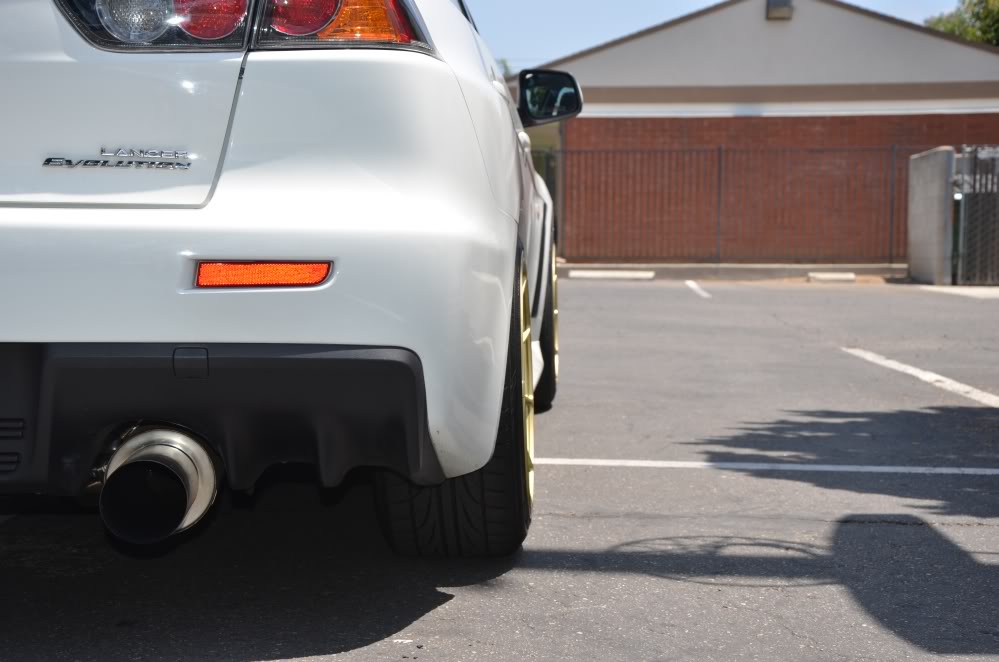
TADAAY! DONE!
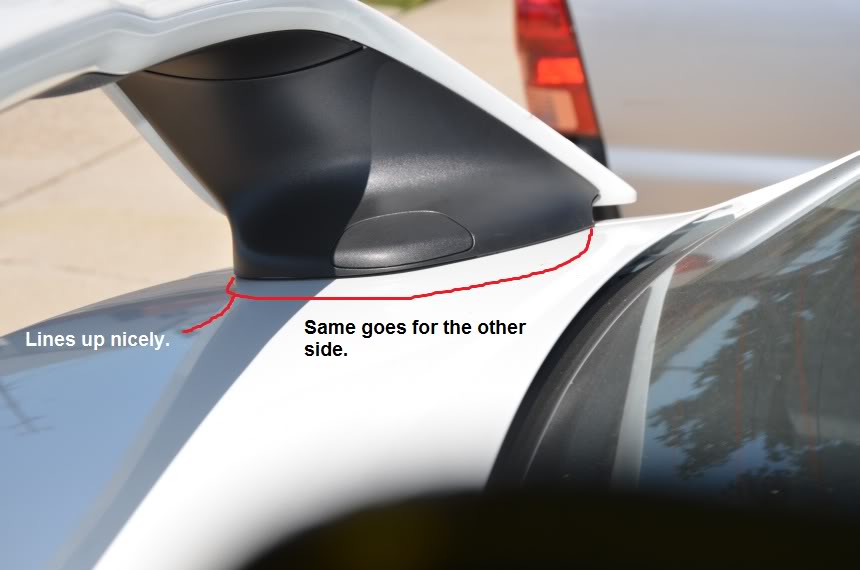
Before
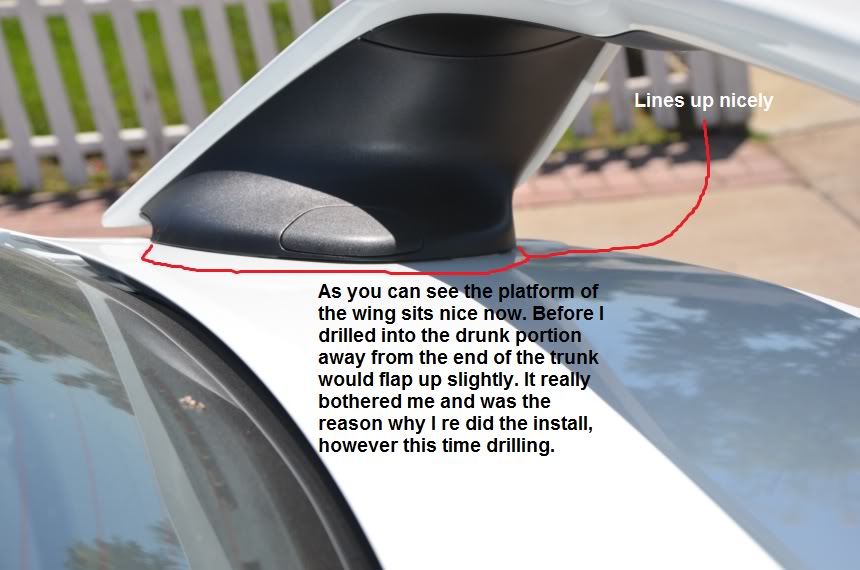
After
Sorry for some errors like DRUNK instead of TRUNK lol
NOTE - you don't need to do this to to fit the SSS wing on a base GSR, however, I would go as far and say its recommended and sits much better.
REASON FOR DOING THIS? - I did this because I swapped my low wing on the gsr to the BIG BOI off a SSS package. You notice during install that only 1 of 2 bolts will screw in on each side of the wing. The installation of the wing can still be done with only 1 bolt on each side however, I prefer the piece of mind of "installing it right / better".
The distance between each bolt and thread housing is 5 inches on the low wing and 6.5 on the SSS.
TOOLS
- Drill with 1/4 drill bit (most sets will come with a good range of drill bits)
- Ratchet with 10 and 11mm sockets
- 3M OUTDOOR double sided adhesive tape (5 pound)
- Razor
- Scissors
INSTALL DIFFICULTY 1-10 & TIME = 2 // 30 minutes to 1 hour. (Most of the time is spent cutting adhesive tape and drilling the holes). I only gave it a 2 because using the drill can be a bit scary but it's pretty straight forward - push firmly and squeeze the button
First timers take your time and do things right. Its better to do it right the first time, than to have to go back and fix your choppy work.-------------------------------------------------------------------------------------------------------------------------
First unscrew these 2 bolts on each side (refer to picture for location) & pull the wing off.
(It will take some force since it's also being held down by double sided adhesive tape)
Next find this covered hole on the trunk, this is where you want to drill into. You can either drill from under the trunk or above it. I choose to drill beneath it which makes the aluminum open upwards but can easily be cleaned up by using the bit to shave off the upward scales. Also I didn't care if shavings or marks showed up on the trunk cause it would be covered by the wing and if I ever go wingless I'll be going CF replica do-luck style. Take your time here if you're drilling from above.
Make sure the hole is wide enough so that the bolt can meet the thread on the wing.
Next cut a square of 3M tape and cover the 2 holes furthest from each other. Firmly press down on them and then cut an opening up for the bolt by drilling through the tape. (You can cut it but why not make it quick and easy
)DO NOT REMOVE THE TAPE MASK YET. You want to wait until right before the wing goes on so that you don't get debris on it.
Now remove the old adhesive that was on the wing and reply it in the areas below.
Do the same to the other side. When you're done remove the masking strip from both sides and do the same to the trunk. Its just about time do apply the wing to the trunk!
Now that the adhesive is exposed on both the trunk and wing we can mount it.
*QUICK TIP* as soon as one slides into the hole, line up the other side. If you sink the wing in to low you won't have enough wiggle / play room to get the other side in and you may ruin the adhesive having to reapply it. So just barely fit one side and then work on the other. Once both sides are set in their homes firmly press down on the wing. Go to each side of the wing and apply your body weight onto it for 20 secs to get the adhesive to stick to the trunk / wing.
TADAAY! DONE!
Before
After
Sorry for some errors like DRUNK instead of TRUNK lol
Last edited by phishy; Aug 23, 2011 at 11:23 PM.
 Aug 25, 2011, 01:13 AM
#3
Useful information. Thanks for the write up.
Only advice I can give is to drill slowly that way you dont accidently dent the trunk. One of the previous owners of my Evo drilled through the holes from the back and whenever I take off the wing I can see slight raises in the trunk.
Only advice I can give is to drill slowly that way you dont accidently dent the trunk. One of the previous owners of my Evo drilled through the holes from the back and whenever I take off the wing I can see slight raises in the trunk.
Aug 27, 2011, 08:01 PM
#5
Evolving Member
Thread Starter
iTrader: (7)
Join Date: Feb 2010
Location: Brea, CA - Orange County
Posts: 325
Likes: 0
Received 0 Likes
on
0 Posts
@1768 - Thank you.
Trending Topics


 Sep 24, 2011, 01:50 PM
#11
Evolving Member
Thread Starter
iTrader: (7)
Join Date: Feb 2010
Location: Brea, CA - Orange County
Posts: 325
Likes: 0
Received 0 Likes
on
0 Posts
Even if it does it will run off by the trunk run off, like when you wash your car the water runs down the trunk run off, so I'm not worried about it. The adhesive will apply a strong enough hold the repel any water from making it into the actual trunk. Make sure you use outdoor 3M adhesive (5 pound) - you can get this @ home depot.

 Oct 30, 2012, 06:58 PM
#15
Evolving Member
Thread Starter
iTrader: (7)
Join Date: Feb 2010
Location: Brea, CA - Orange County
Posts: 325
Likes: 0
Received 0 Likes
on
0 Posts
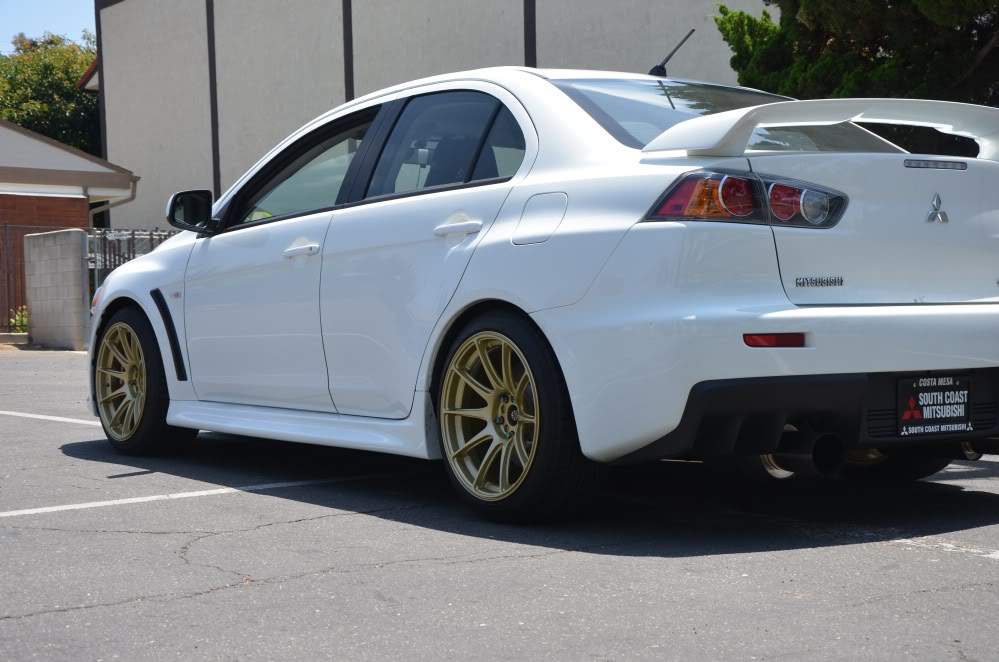
That was my old setup. I was on Gold XXR 527 with Falken 452 245/40 tire &Tein springs. Now I'm on BC Coilovers with Enkei RPF1's 18x10.5 SBC finish on Michelin Pilots 265/35. I may change to Gold RPF1's if I can find a vendor but am really considering Rotifom TMB with a GOLD or Silver center finish (not sbc).


Last edited by phishy; Oct 30, 2012 at 07:25 PM.