mrwickd123 WW Evo X Progress Journal
 Mar 2, 2014, 06:36 PM
#1
Evolving Member
Thread Starter
mrwickd123 WW Evo X Progress Journal
Link to the previous build thread: http://www.evoxforums.com/forums/sho...d.php?t=148874
It's filled with some great advice from many great folks on the forum and more pics that didn't make it to this thread.
Lap times:
Big Willow- Coming in Dec
Buttonwillow Race #13 CW- [strike]2:11.473[/strike]
2:10.57 (with a 180 lb passenger and a 50 lb seat in the car)
List of Mods:
*means has yet to be installed
Power:
AEM 320lph Fuel Pump + MAP Install Kit
BakaUnchi 91 tune (Getting re-tuned for 91/100 this September)
Depo 3" LICP
ETS UICP
ETS 3.5" FMIC
ETS Intake
ETS Downpipe
GrimmSpeed 3 port
Kozmic K27 Catch Can
Morse Muffler 3" Dual Catback
Weapon R Racing Test Pipe
Tial QR DV
Handling:
AMS Stainless Steel Brake Lines
Bilstein Shocks (revalved for Swift Spec R springs)
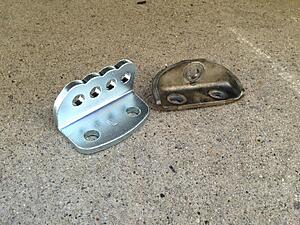
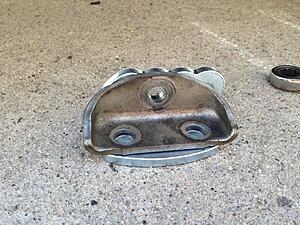
Cusco Endlink Adjustment Bracket (Front)
Hotchkis Rear Sway Bar
Hotchkis Front Sway Bar
H&R Camber bolts Front
Ichiba V2 20mm spacers
Performance Friction Metallic Z Front Pads
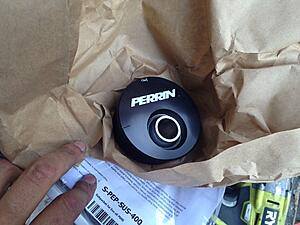
Perrin P.S.R.S. w/ Caster
Swift Spec R Springs
West End Alignment
Whiteline Front Control Arm Bushings
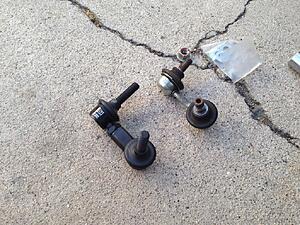
Whiteline Front Endlinks
Whiteline RCK
Whiteline Rear Adjustable Lower Control Arms
Whiteline Rear Endlinks
Yokohama Advan AD08R
Misc.:
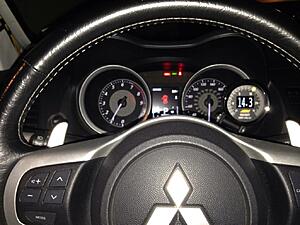
AEM Failsafe Gauge
AEM Oil Pressure Gauge
AEM Trans Temp Gauge
AEM Voltage Gauge
AEM Water Temp Gauge
AMS AC Delete
AMS Oil Pressure Sending Unit Line
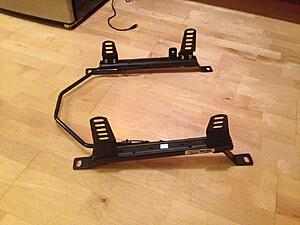
Buddyclub Driver's Seat Rail
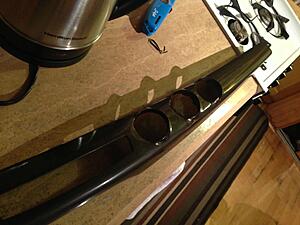
GSR Wing
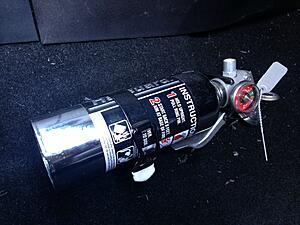
Halguard Fire Extinguisher
Kozmic left side beam bracket
Kozmic SST Filter
Mishimoto X-Line Radiator
Mitsubishi Fog Delete
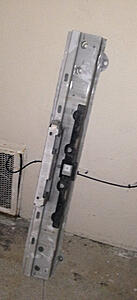
Mitsubishi X RS Rear Bumper Beam
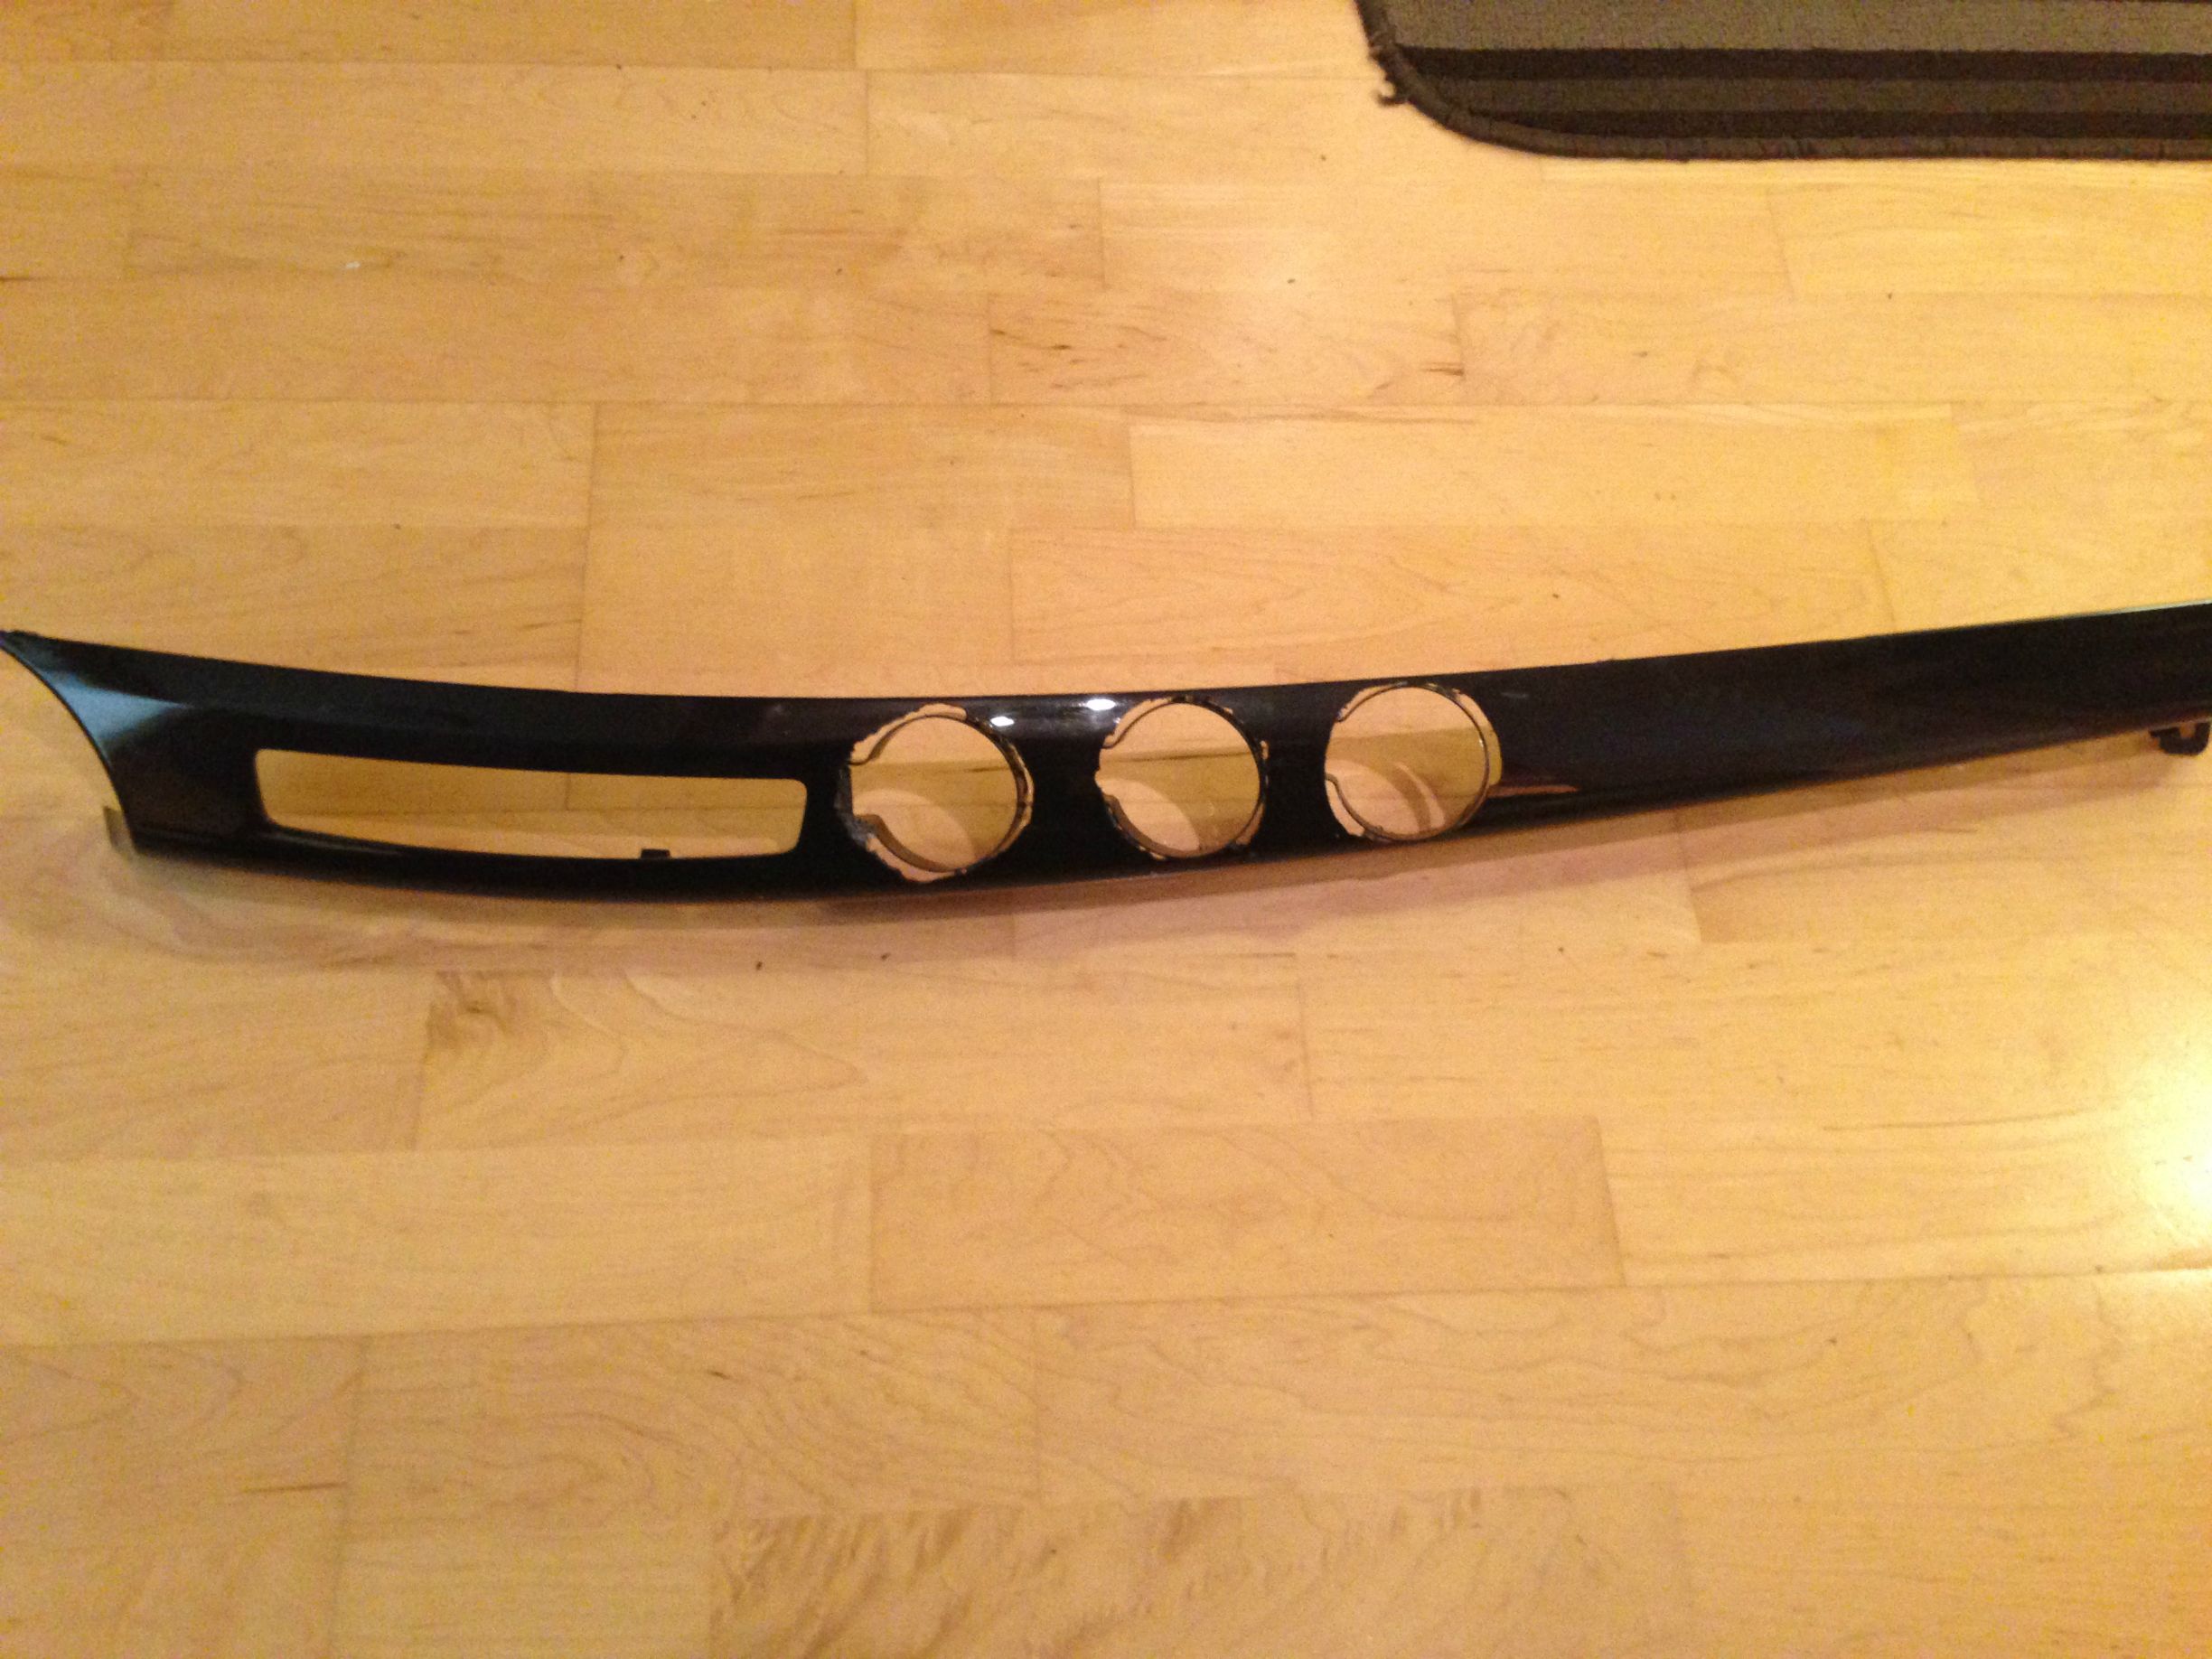
OEM Replica Front Lip
PWJDM Bumper Quick Release Kit
PWJDM Upper Canards
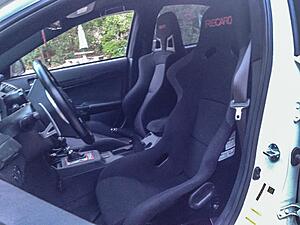
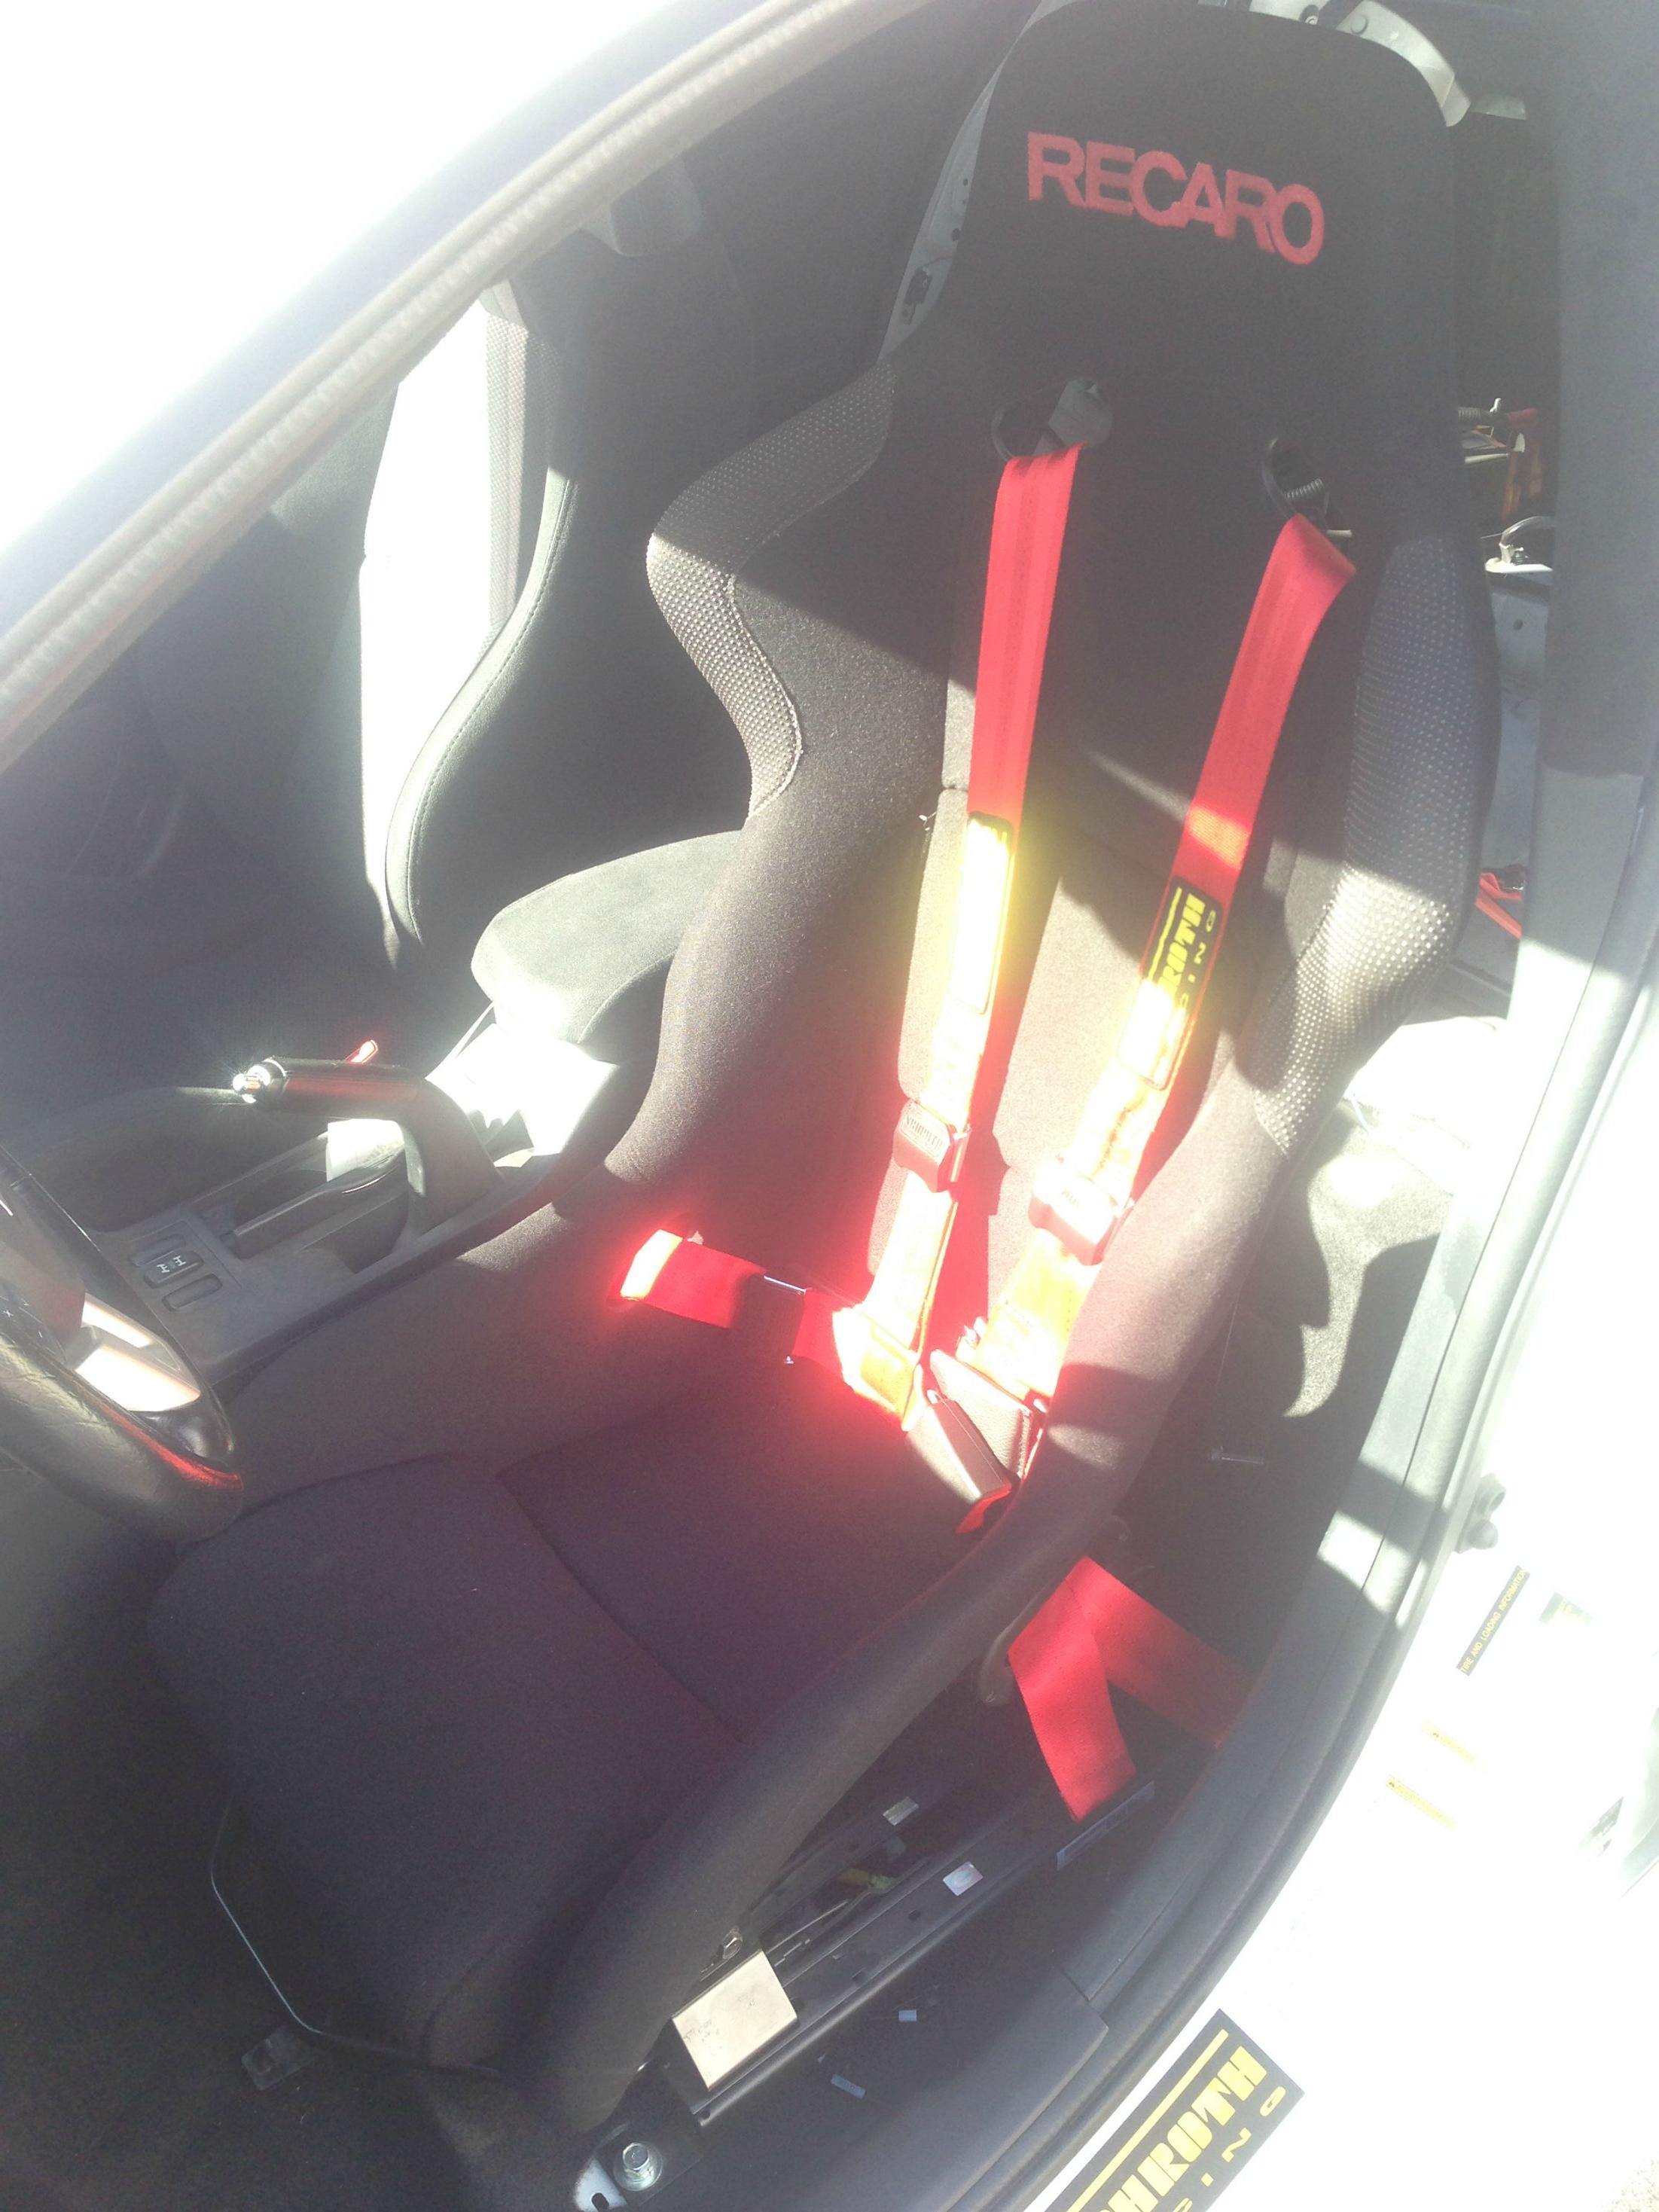
Recaro Profi SPG Seat
Schroth Rallye 4 Red
Spal 5.2" Fan for the SST cooler
STM Small Battery Kit
Tactrix OP2
Weathertech Window Visors - Present from my awesome girlfriend
Weight Reduction
Removed
V-Bracket behind seats (~5 lbs)
Driver side rear passenger belt (~2 lbs)
Fog Deletes (~4 lbs)
Trunk carpet and panels (~10 lbs)
Rear seat headrests (~3 lbs)
Floor mats (~8 lbs)
Spare, Jack and Tools (~45 lbs)
Replaced/Modified
AMS AC Delete (~20lbs)
Buddyclub Driver's Seat Rail (~2 lbs)
Full TBE dual exhaust (~30 lbs)
Kozmic Beam Bracket + Catch Can (~4 lbs)
Mitsubishi X RS Rear Beam (~25 lbs)
Recaro SPG Racing Seat (~35lbs)
Schroth Rallye 4 replaced OEM belt (~2-3 lbs)
STM Battery Kit (~20 lbs)
On the track
Passenger Seat (~50 lbs)
Rear Seats (~40 lbs)
Rear safety accessories (~8 lbs)
Future Plans:
Handling:
Cusco Rear Strut Bar
Enkei RPF1
Hankook RS3 v2 275-35-18
Weight Reduction
Cusco Front Strut Bar
JDM Crash Beam - Front
Misc.
AMS motor mounts
Dodson transmission sump
Move Over Motorsports Quick Release
Planted Seat Brackets
Tow Hook- Front
Old Stuff (that has been sold or is sitting waiting to be sold):
Perrin Inlet Pipe
K&N Drop In Filter
Cobb SF Intake
Ultimate Racing short downpipe
TopSpeed test pipe
Mishimoto Dual Catch Can set up
Hotchkis Rear Endlinks
Rally Armor Mud Flaps
Ralliart Mud Flaps (red)
Prosport EVO Boost Gauge
AEM Wideband
AEM Boost Gauge
Dual Steering Column Pod
Rexpeed Dual Pod
Custom a pillar triple gauge pod
Custom single exit exhaust
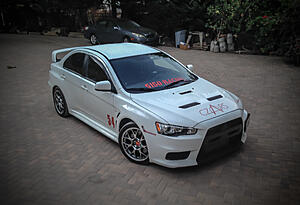
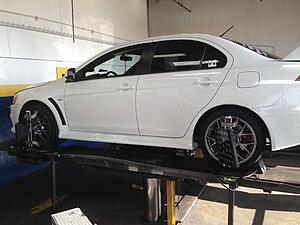
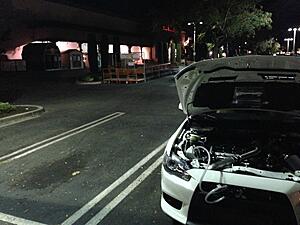
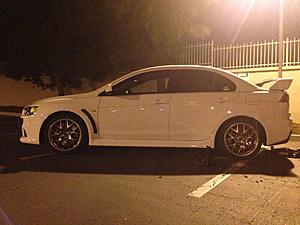
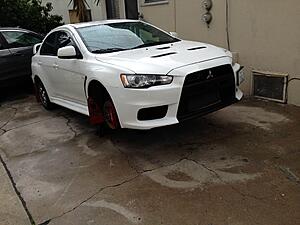
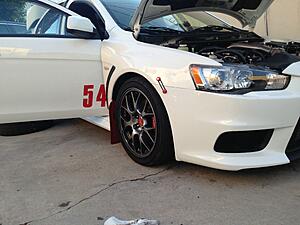
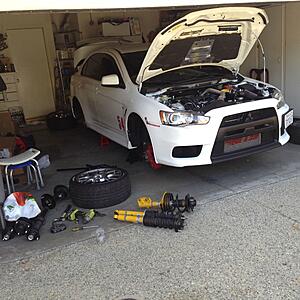
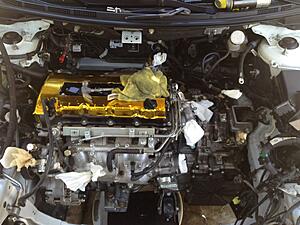
How it sits as of 08/15/2014
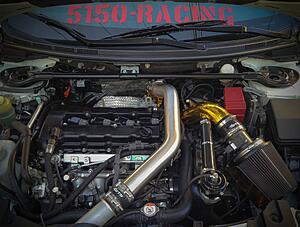
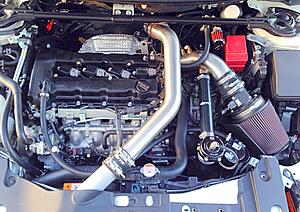
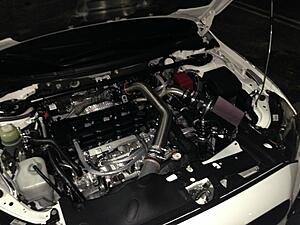
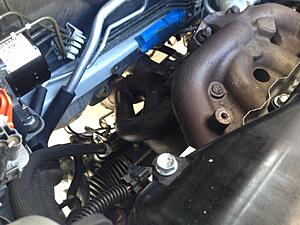
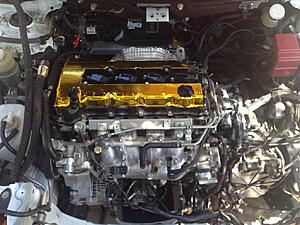
Engine bay as of 07/27/2014
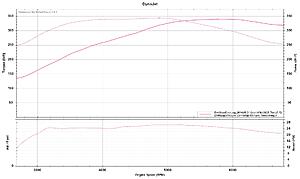
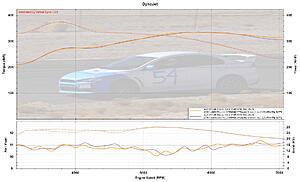
Power as of 06/01/2014 (on an old tune that doesn't account for the catch can, PCV delete, fuel pump, 3.5" intercooler or the downpipe)
Weight as of 08/15/14
3460 with about ~ 4 gal
Well, ImageShack deleted all of my photos so I've lost quite a bit of stuff. Here's what was retained:
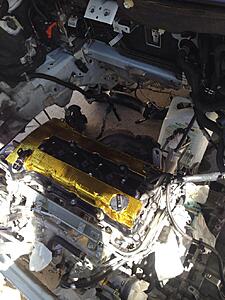
Engine bay as of 3/3/2014
Power as of 02/13/2014
Picking her up from South Coast

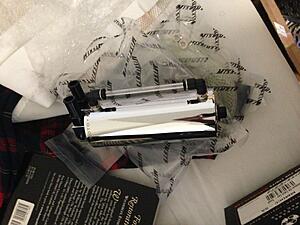
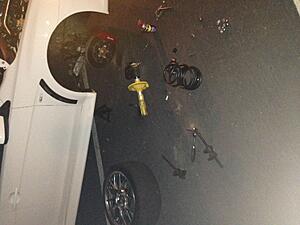
First set of goodies:


Late night plasti-dippin in the school parking lot:

Next morning: (getting ready to install the test pipe and the short DP)
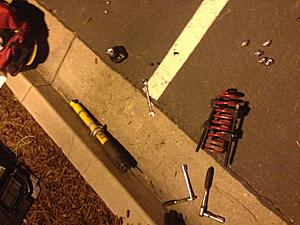
Here's a full list of tools I was using to install all of this crap:
http://www.officialgearheadcentral.c...s-for-you.html


Later at night. Worked til' 2am installing the DP and the TP. Was hard mainly because it was done on the floor with two jack stands and a lack of tools.


Got the pod by rexpeed two days after. Went and used 3M tape to stick it to the stock pillar. Made holes in the stock pillar using a knife. So far it's been holding up fine to G-Force and usual wear and tear. After sticking it to the pillar, I plasti dipped that black as well. Ended up looking pretty good.

Update 12/4/2013
New V-Band clamp to get rid of that leak between DP and TP

Also got a COBB SF intake. Now I'm ready for the first track day.

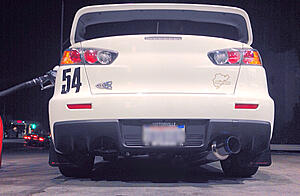
Track photo:
Picked up a TiAL QR from Baka. Fitment is ****ty for the stock snorkel.
The BOV was knocking against the strut bar so I had to relocate it. Hopefully this helps someone who's looking forward to moving their BOV without getting rid of their intake snorkel.
Fog light delete (DIY here)

1/4/2014
Picked up Hotchkis FSB, RSB and Endlinks for an awesome price from Baka. Installed the rear one immediately.
1/10
Alignment done. Slowly getting ready for the next track day. Left some room for lowering springs
1/13/14
Time to get that exhaust installed. Hit the muffler shop and asked for a custom straight-pipe catback. Here's how it all went
2/6-14/14
Got the Mishimoto catch can today.
Also removed mud flaps.
2/10
Got the ets intake today and put it on. Fitment was bad and the heatshield was black, not brushed. But since ETS is so awesome they're sending me a new pipe!
 \
\
Started installing the catch cans, only to realize I need longer hoses and more clamps. Instead of biking to Home Depot every time I needed something, I drove there and preformed the install on the spot.
2/12/2014
Installed springs. Started yestarday, finished today (5 hours, lack of an impact wrench made a huge difference, plus messed up with the front left first time around).
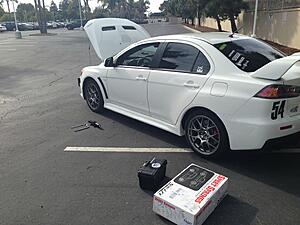
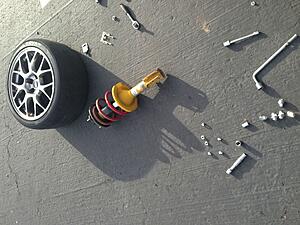
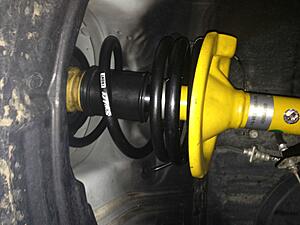
took off the wwf reservoir because my hands are fat
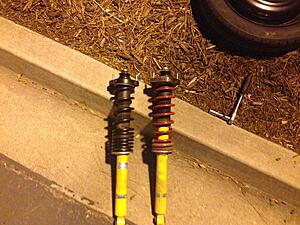
Final result:
02/28
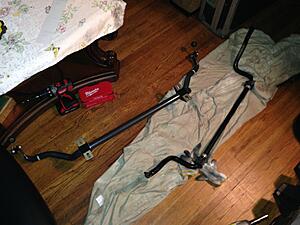
Removed the stock front sway bar, took me a day and a half but it's raining here so give me a break. At one point I just said "screw it" and kept working under some light drizzle (but once it started pouring I sprinted back inside). The weather was not on my side these past few days.
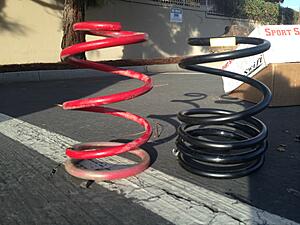
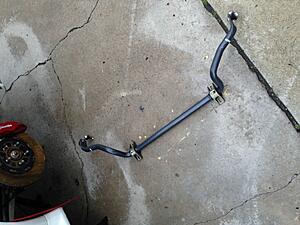
Stock compared to the Hotchkis sway bar
Also:
Installed OEM fog deletes (as opposed to my ghetto Home Depot ones)
Also:
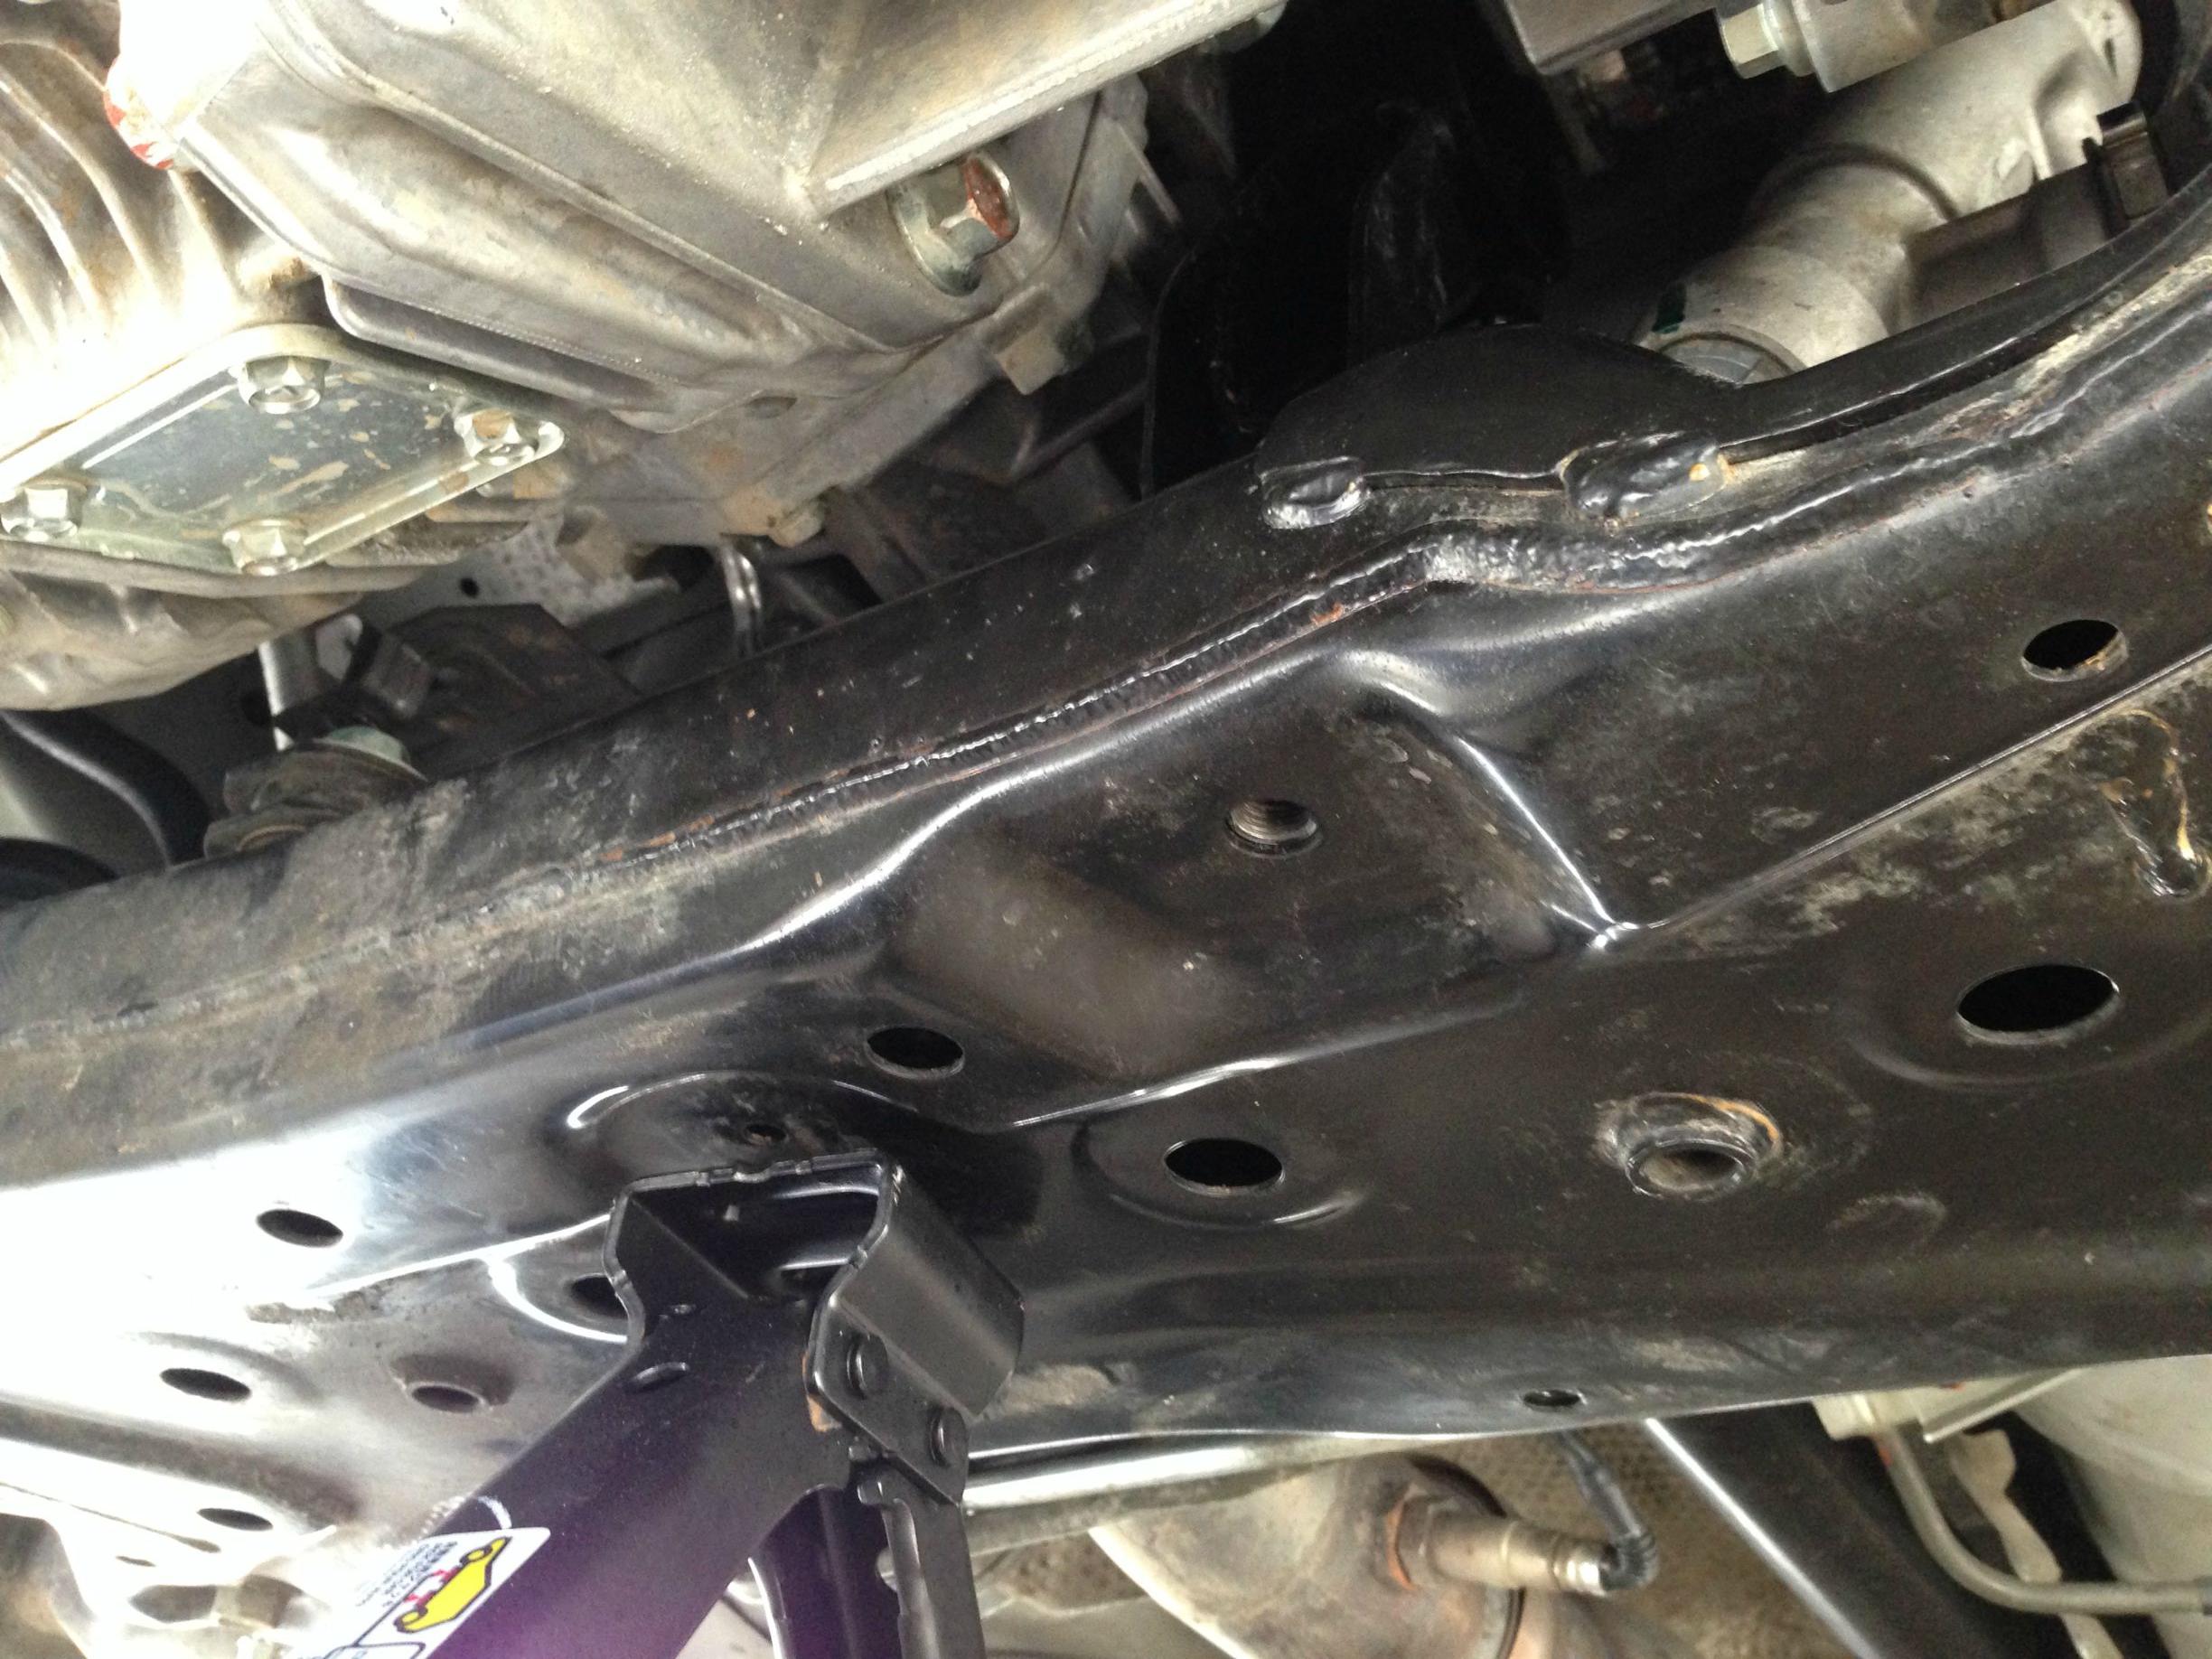
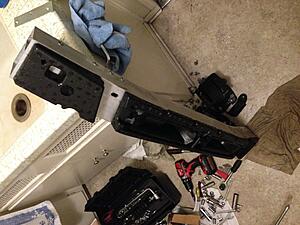
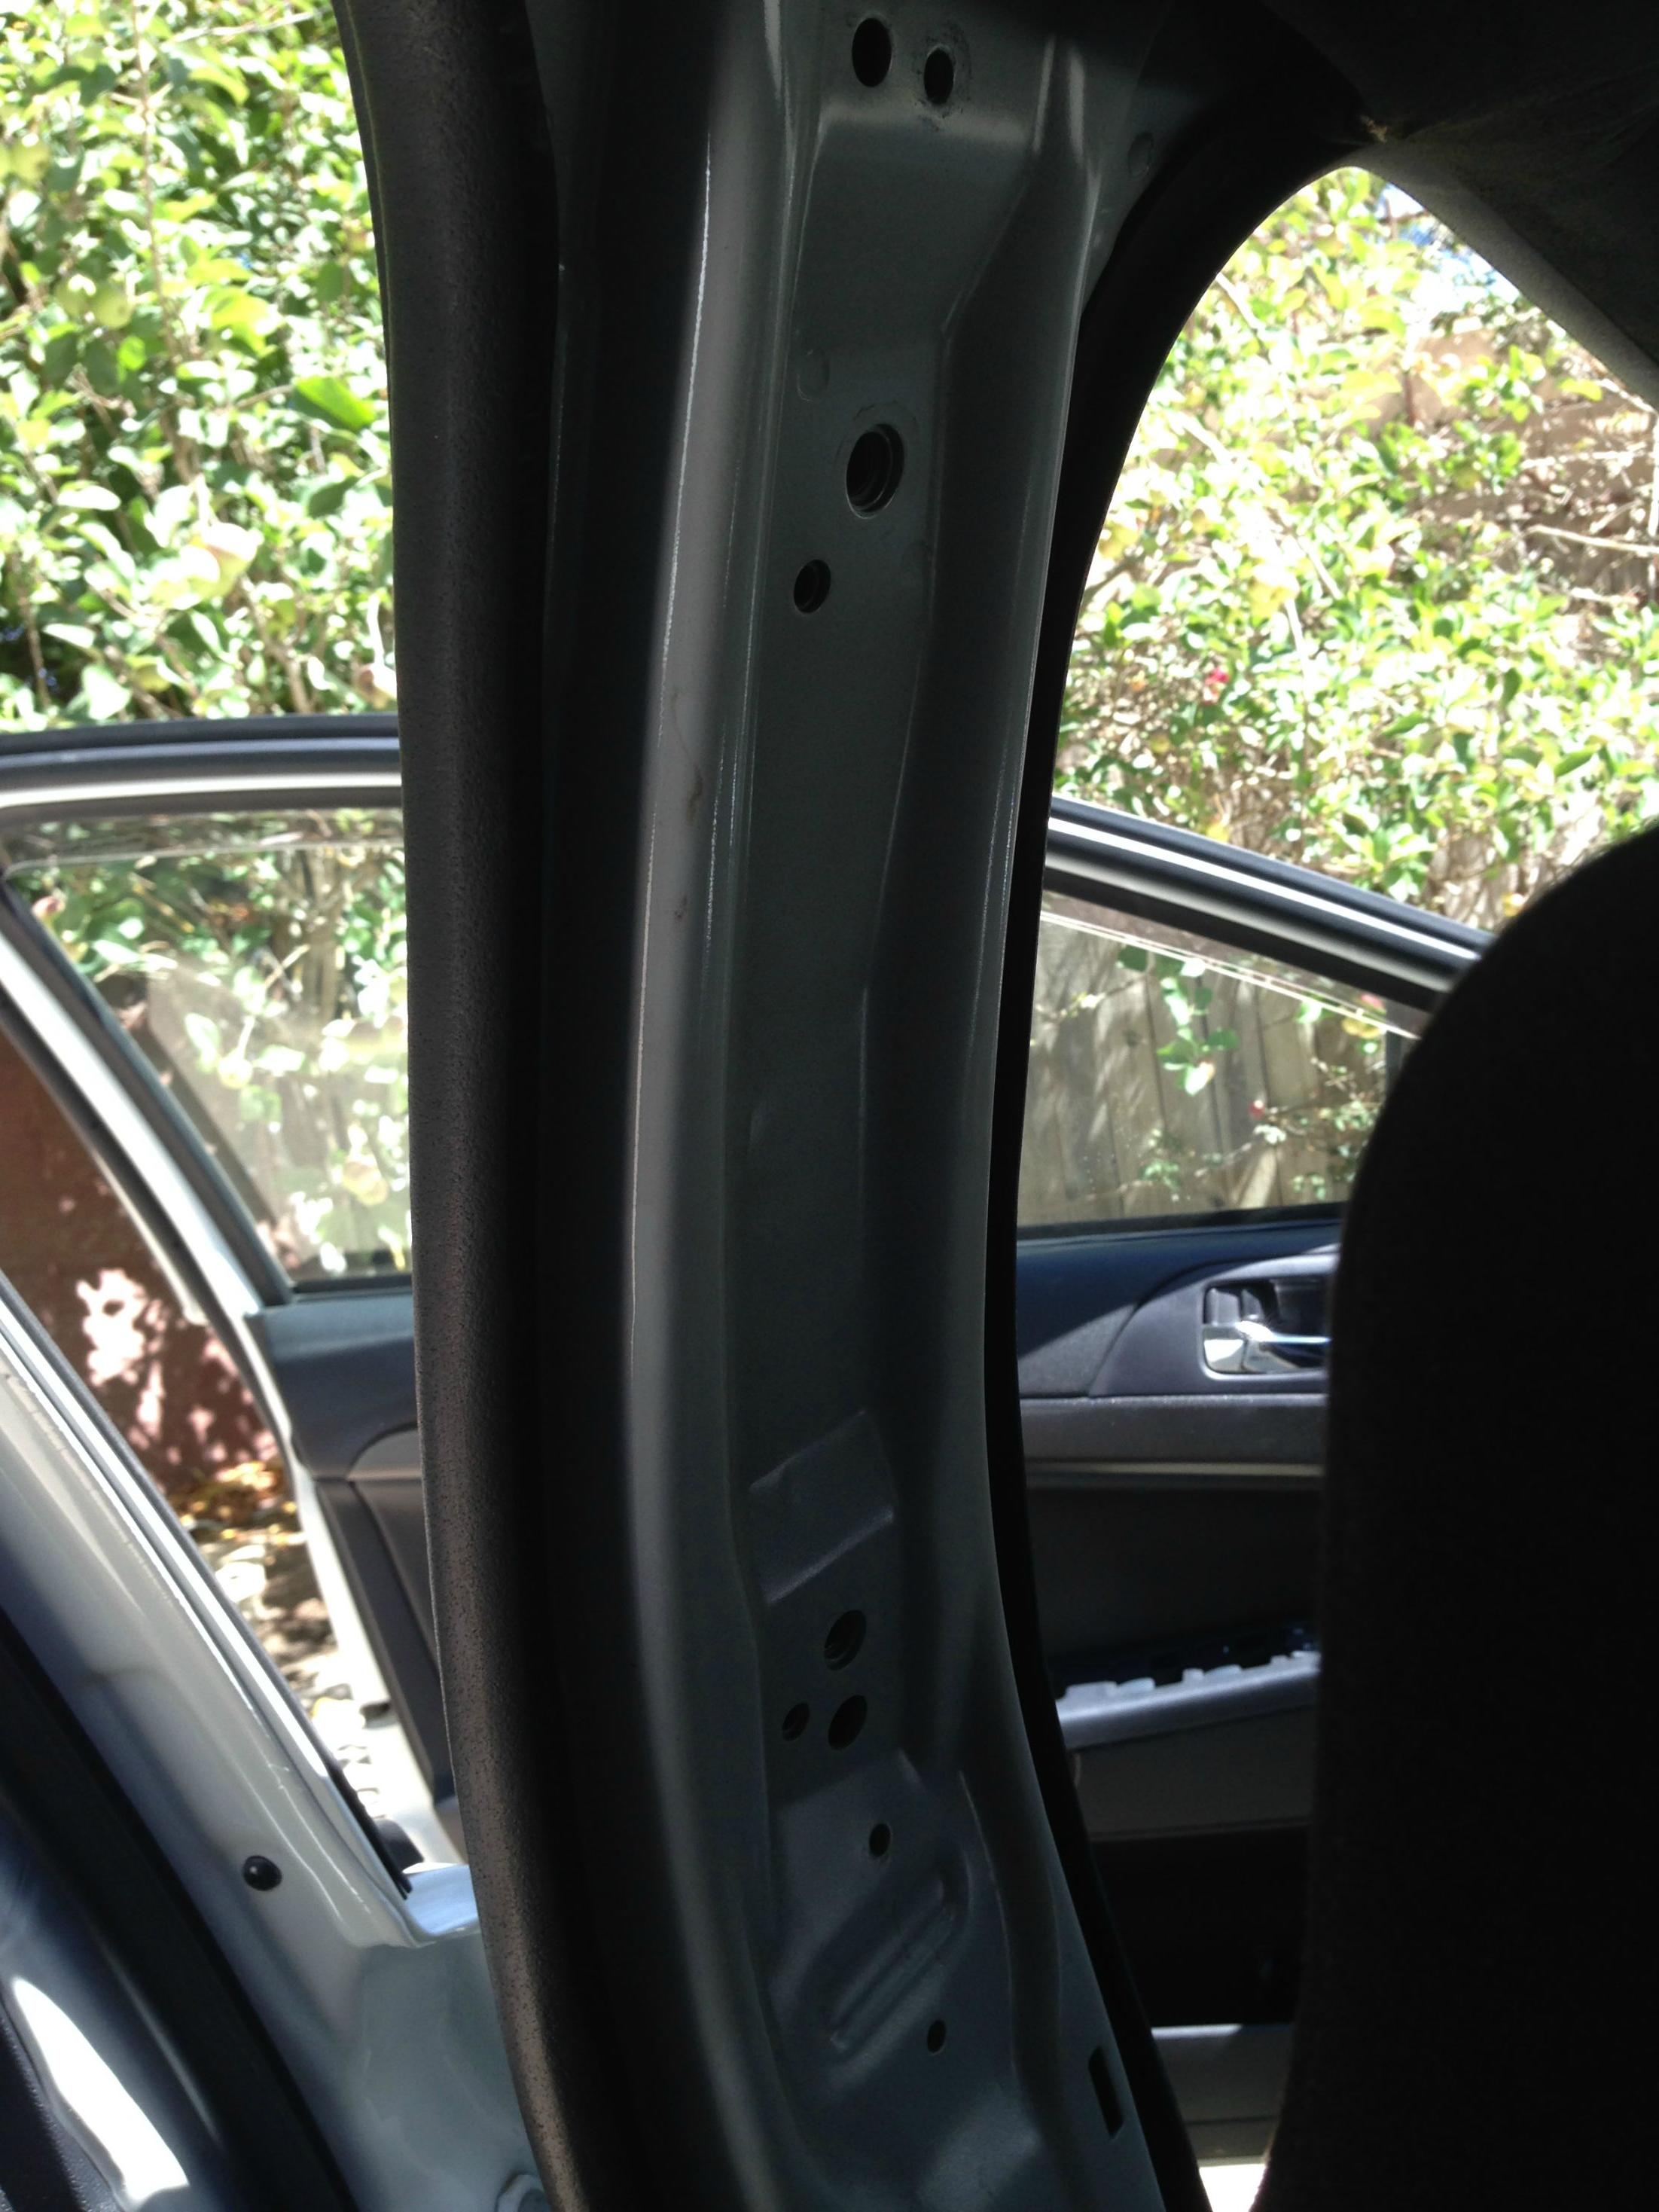
Removed front crash beam. Thanks to ddawg for the awesome write up (click here to read)
3/1
Front Sway bar installed, car back together. Took 2.5 days, mostly due to the rain. Some pics and videos:
3/3
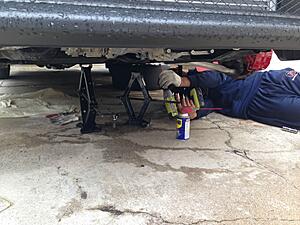
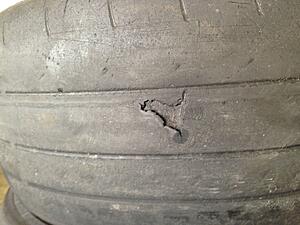
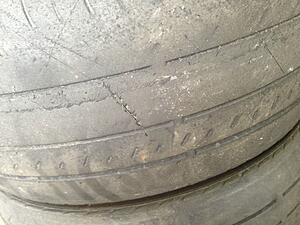
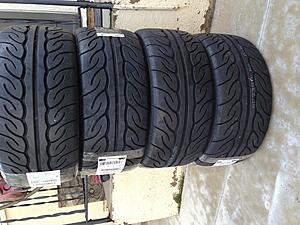
Got the tires installed.
Old:

New:
Also got re-aligned.
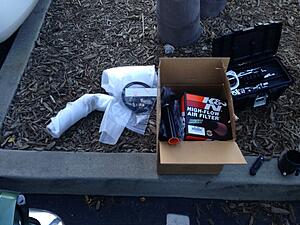
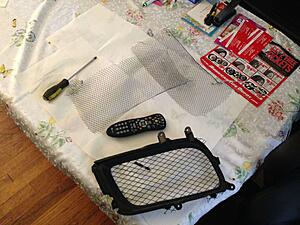
Finally, got new breather filters to VTA the catch cans.
3/6/14
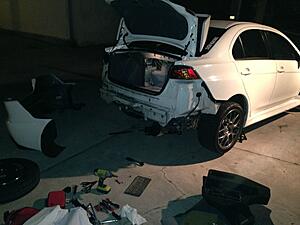
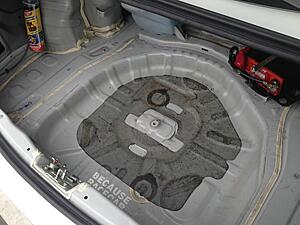
Removed the rear crash beam, v-bracket behind the rear seat, spare, jack and tools. Also got rid of the mud flaps, tired of them. Now to get her checked up.
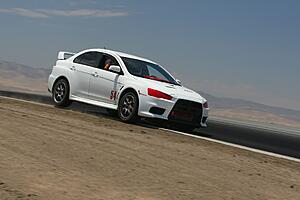
Raceday - 3/9/14
Did pretty well, but could've done much better if I had more track time. Clocked 2:11.4 in the Race #13 CW configuration at Buttonwillow.
3/20-22/14
Installed the whiteline RCK and re-aligned the car


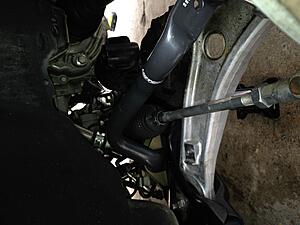
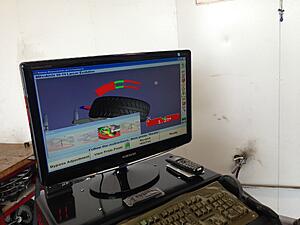
Why you should get an alignment after working on your suspension:
4/18-19
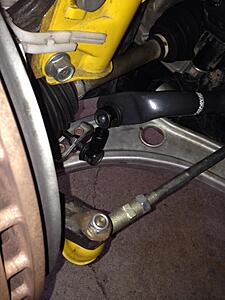
Installed front endlinks and the new failsafe gauge
5/9
Installed the ETS Downpipe as well as the weapon R test pipe

5/16
Started around 12 am at night, did the Kozmic catch can and then fell asleep:
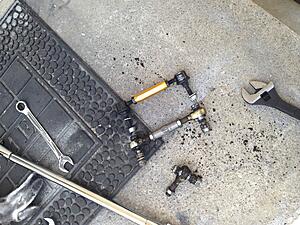
Later in the morning, went and picked up the whiteline links from a lurker who has been supplying me with parts since the day I got the car.
Installed those ASAP.
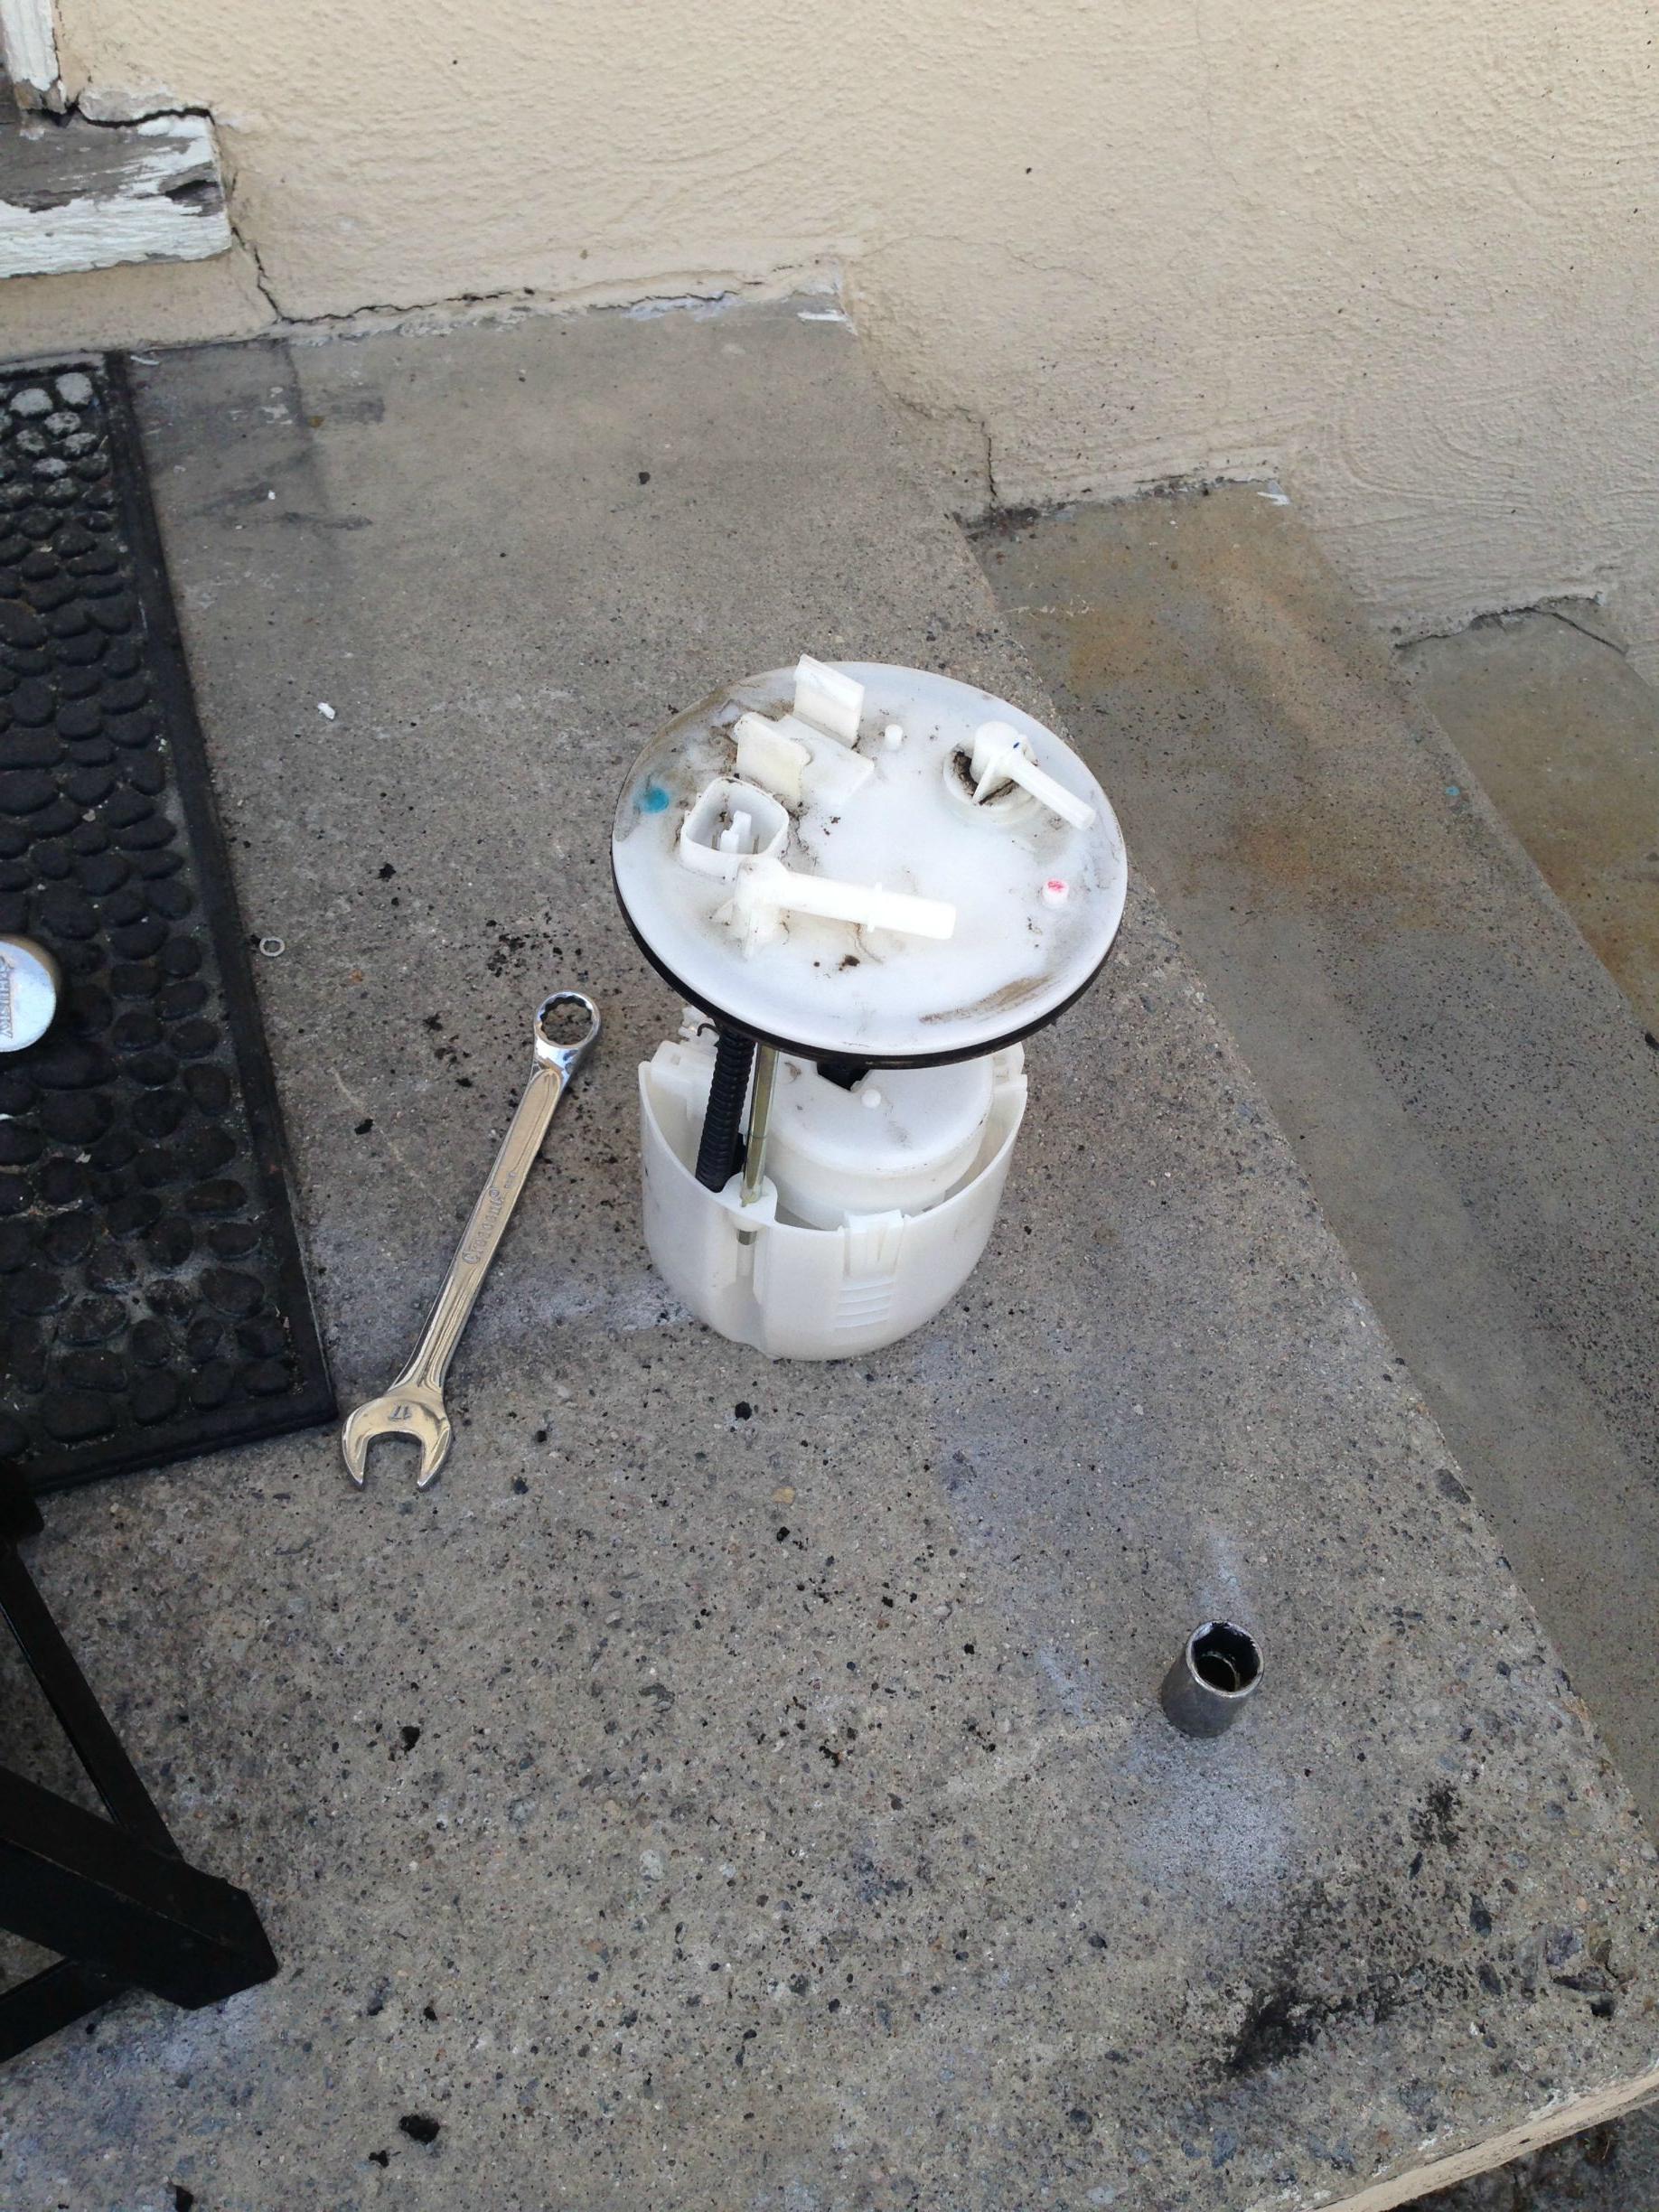
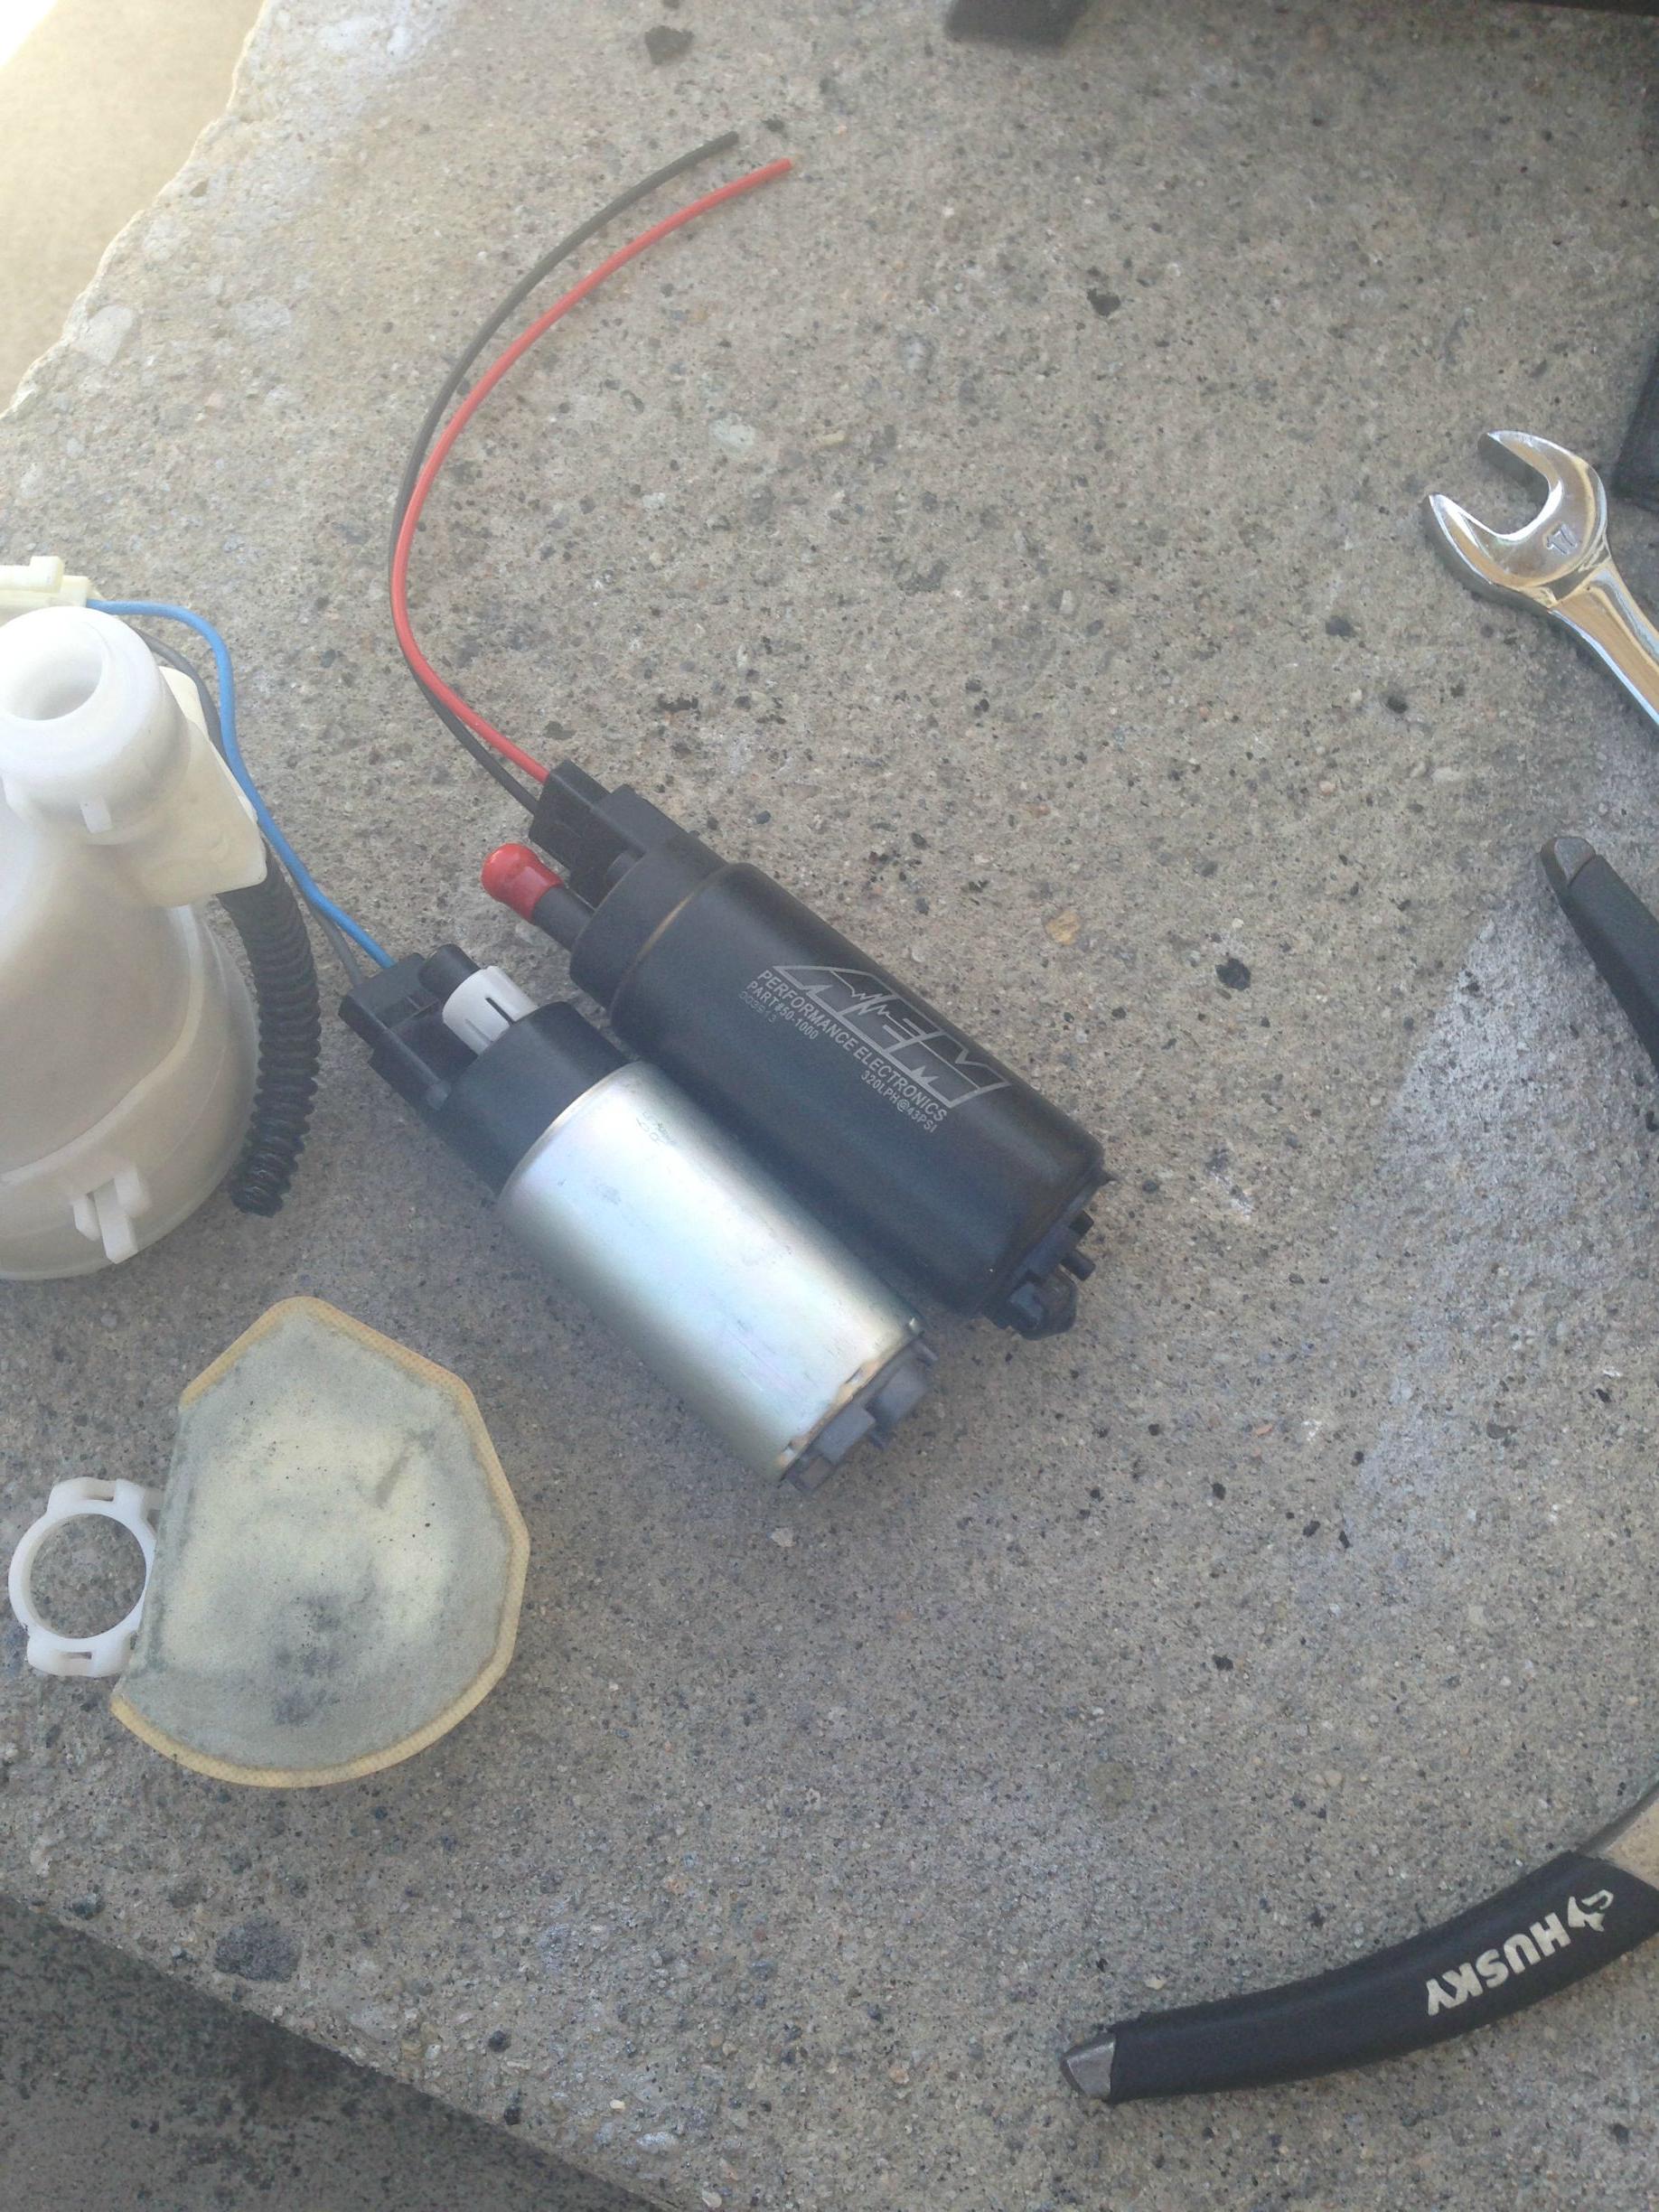
Then went on to the pump:

Note: When removing the pump there's going to be a hose held by a green clip (can be barely seen in the pic above). Some instructions may say that you'll spew a "little" or "some fuel". No, you'll spill out a **** ton of fuel, that's not including the **** ton that's inside the fuel pump assembly. I ended up hosing down my interior with pissgas, much like so:

Anyways, pump is out of the car
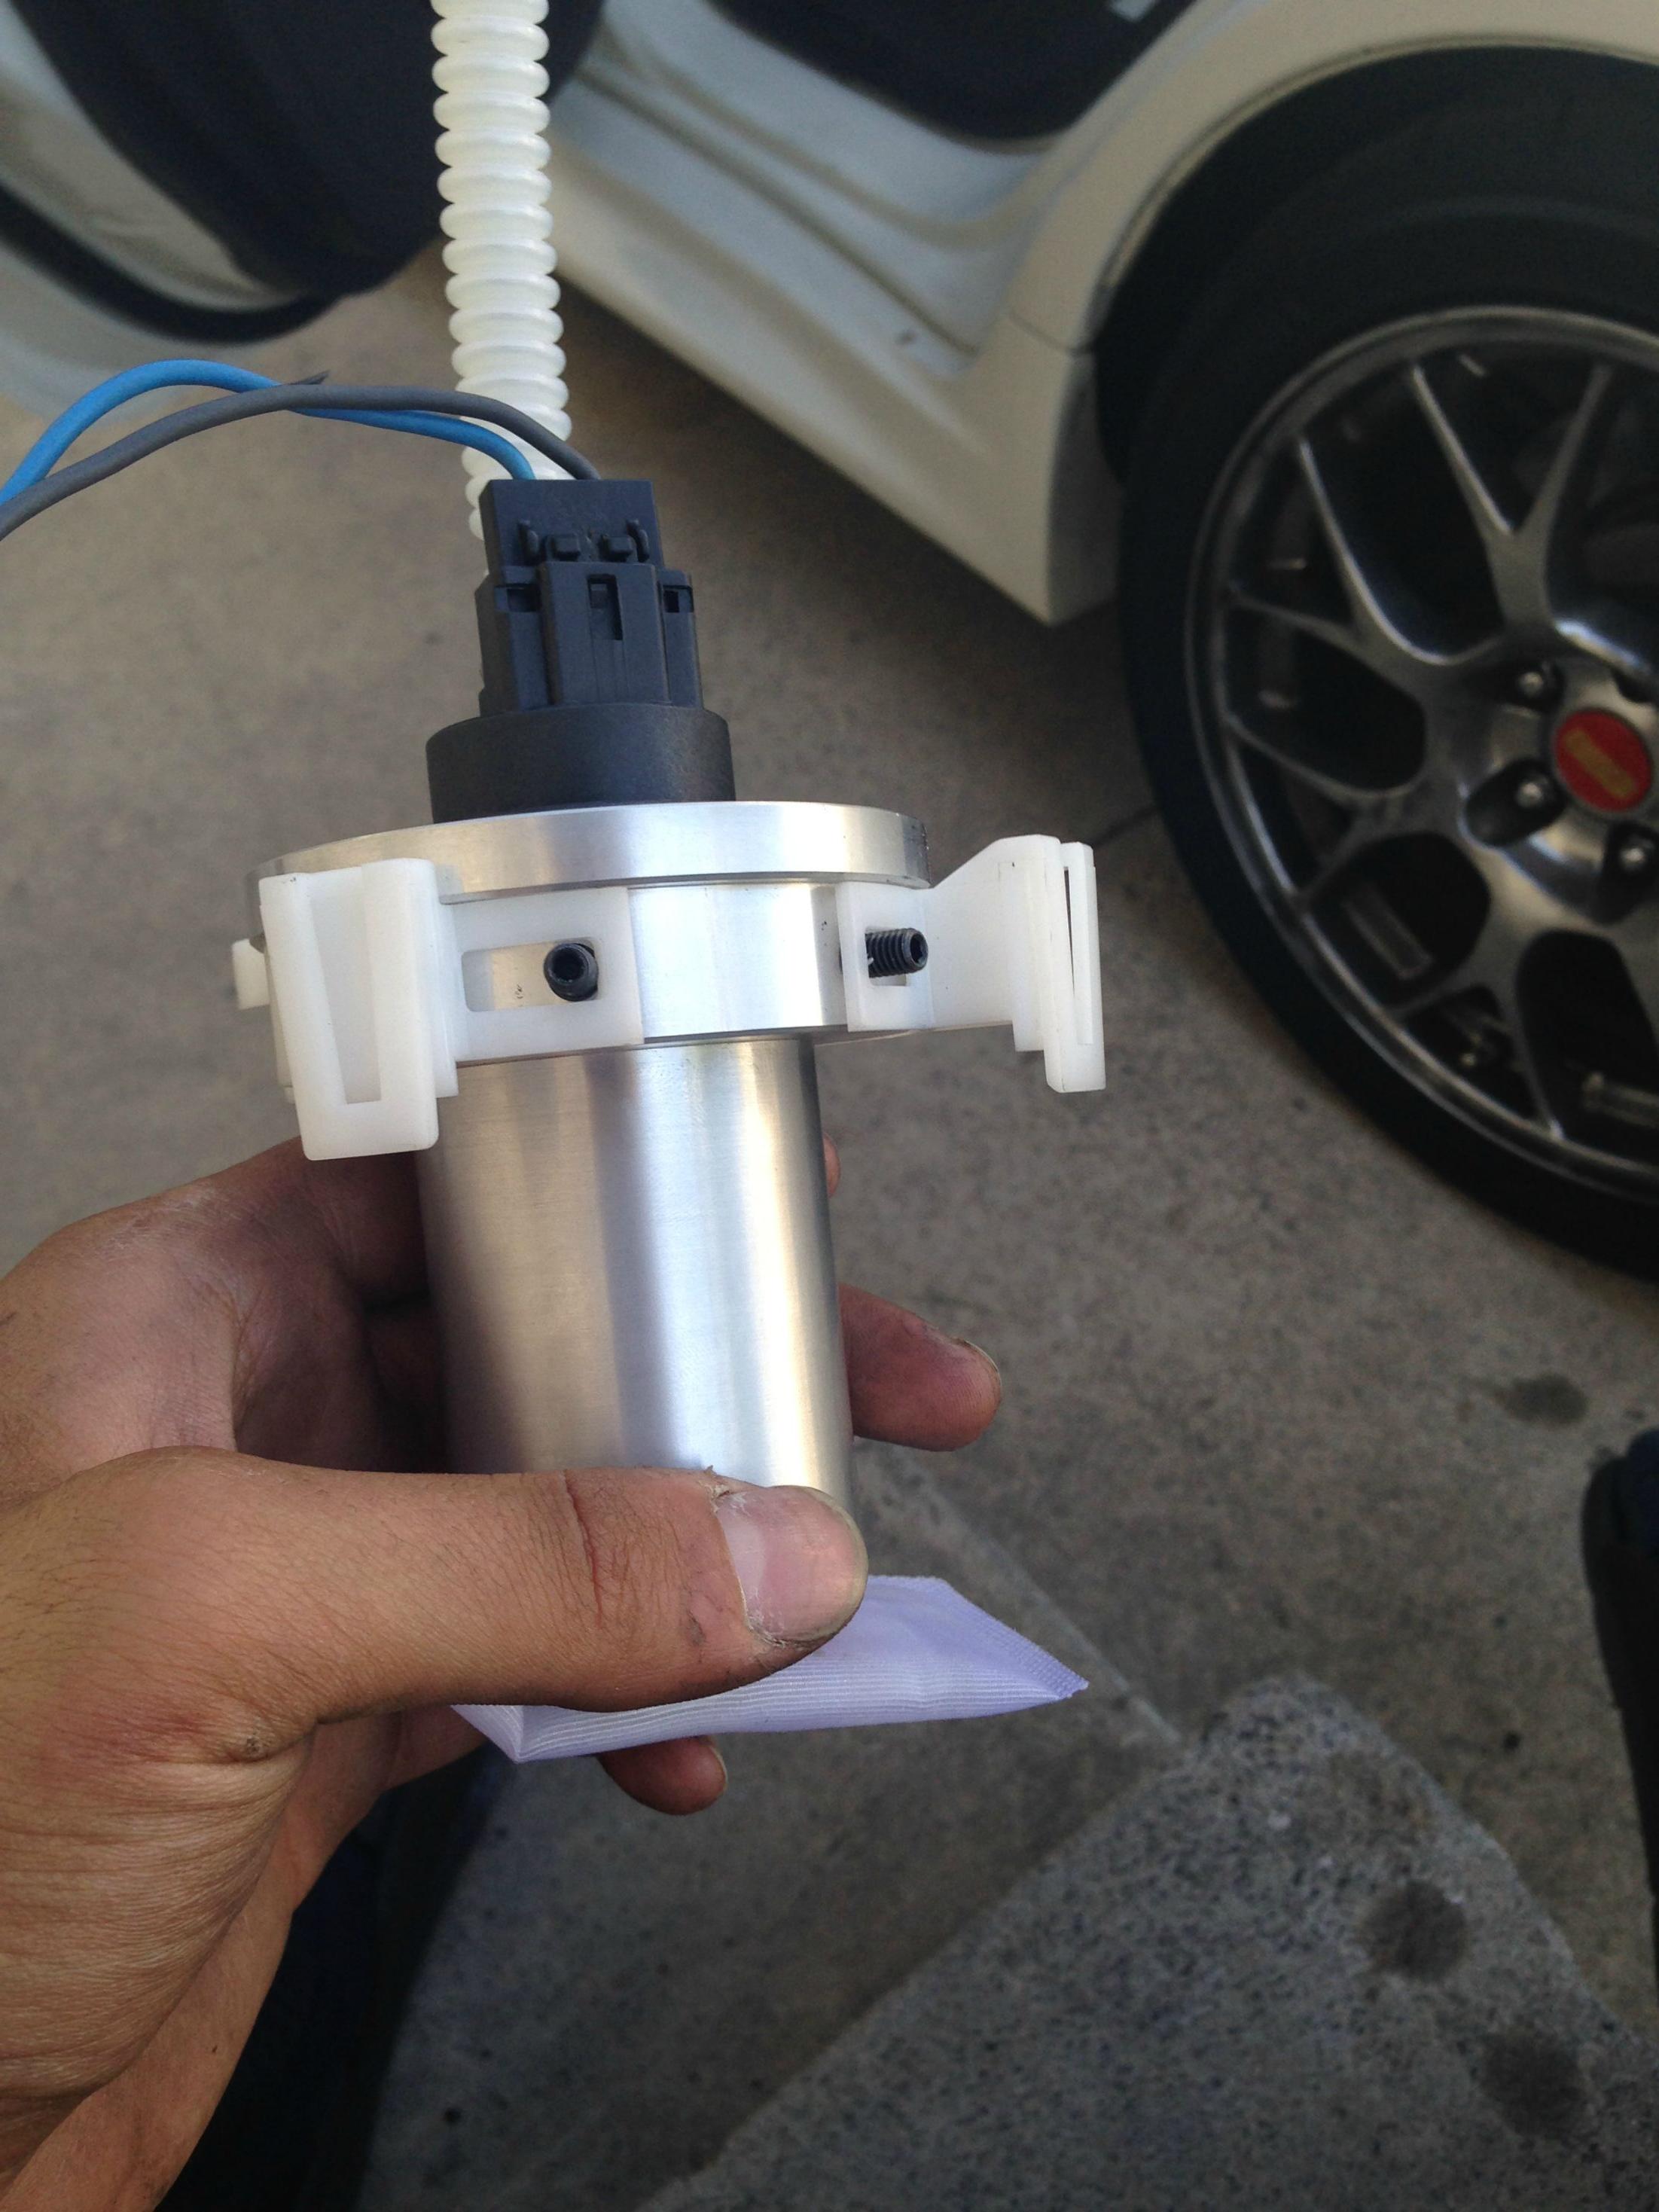
Fuel level sensor:
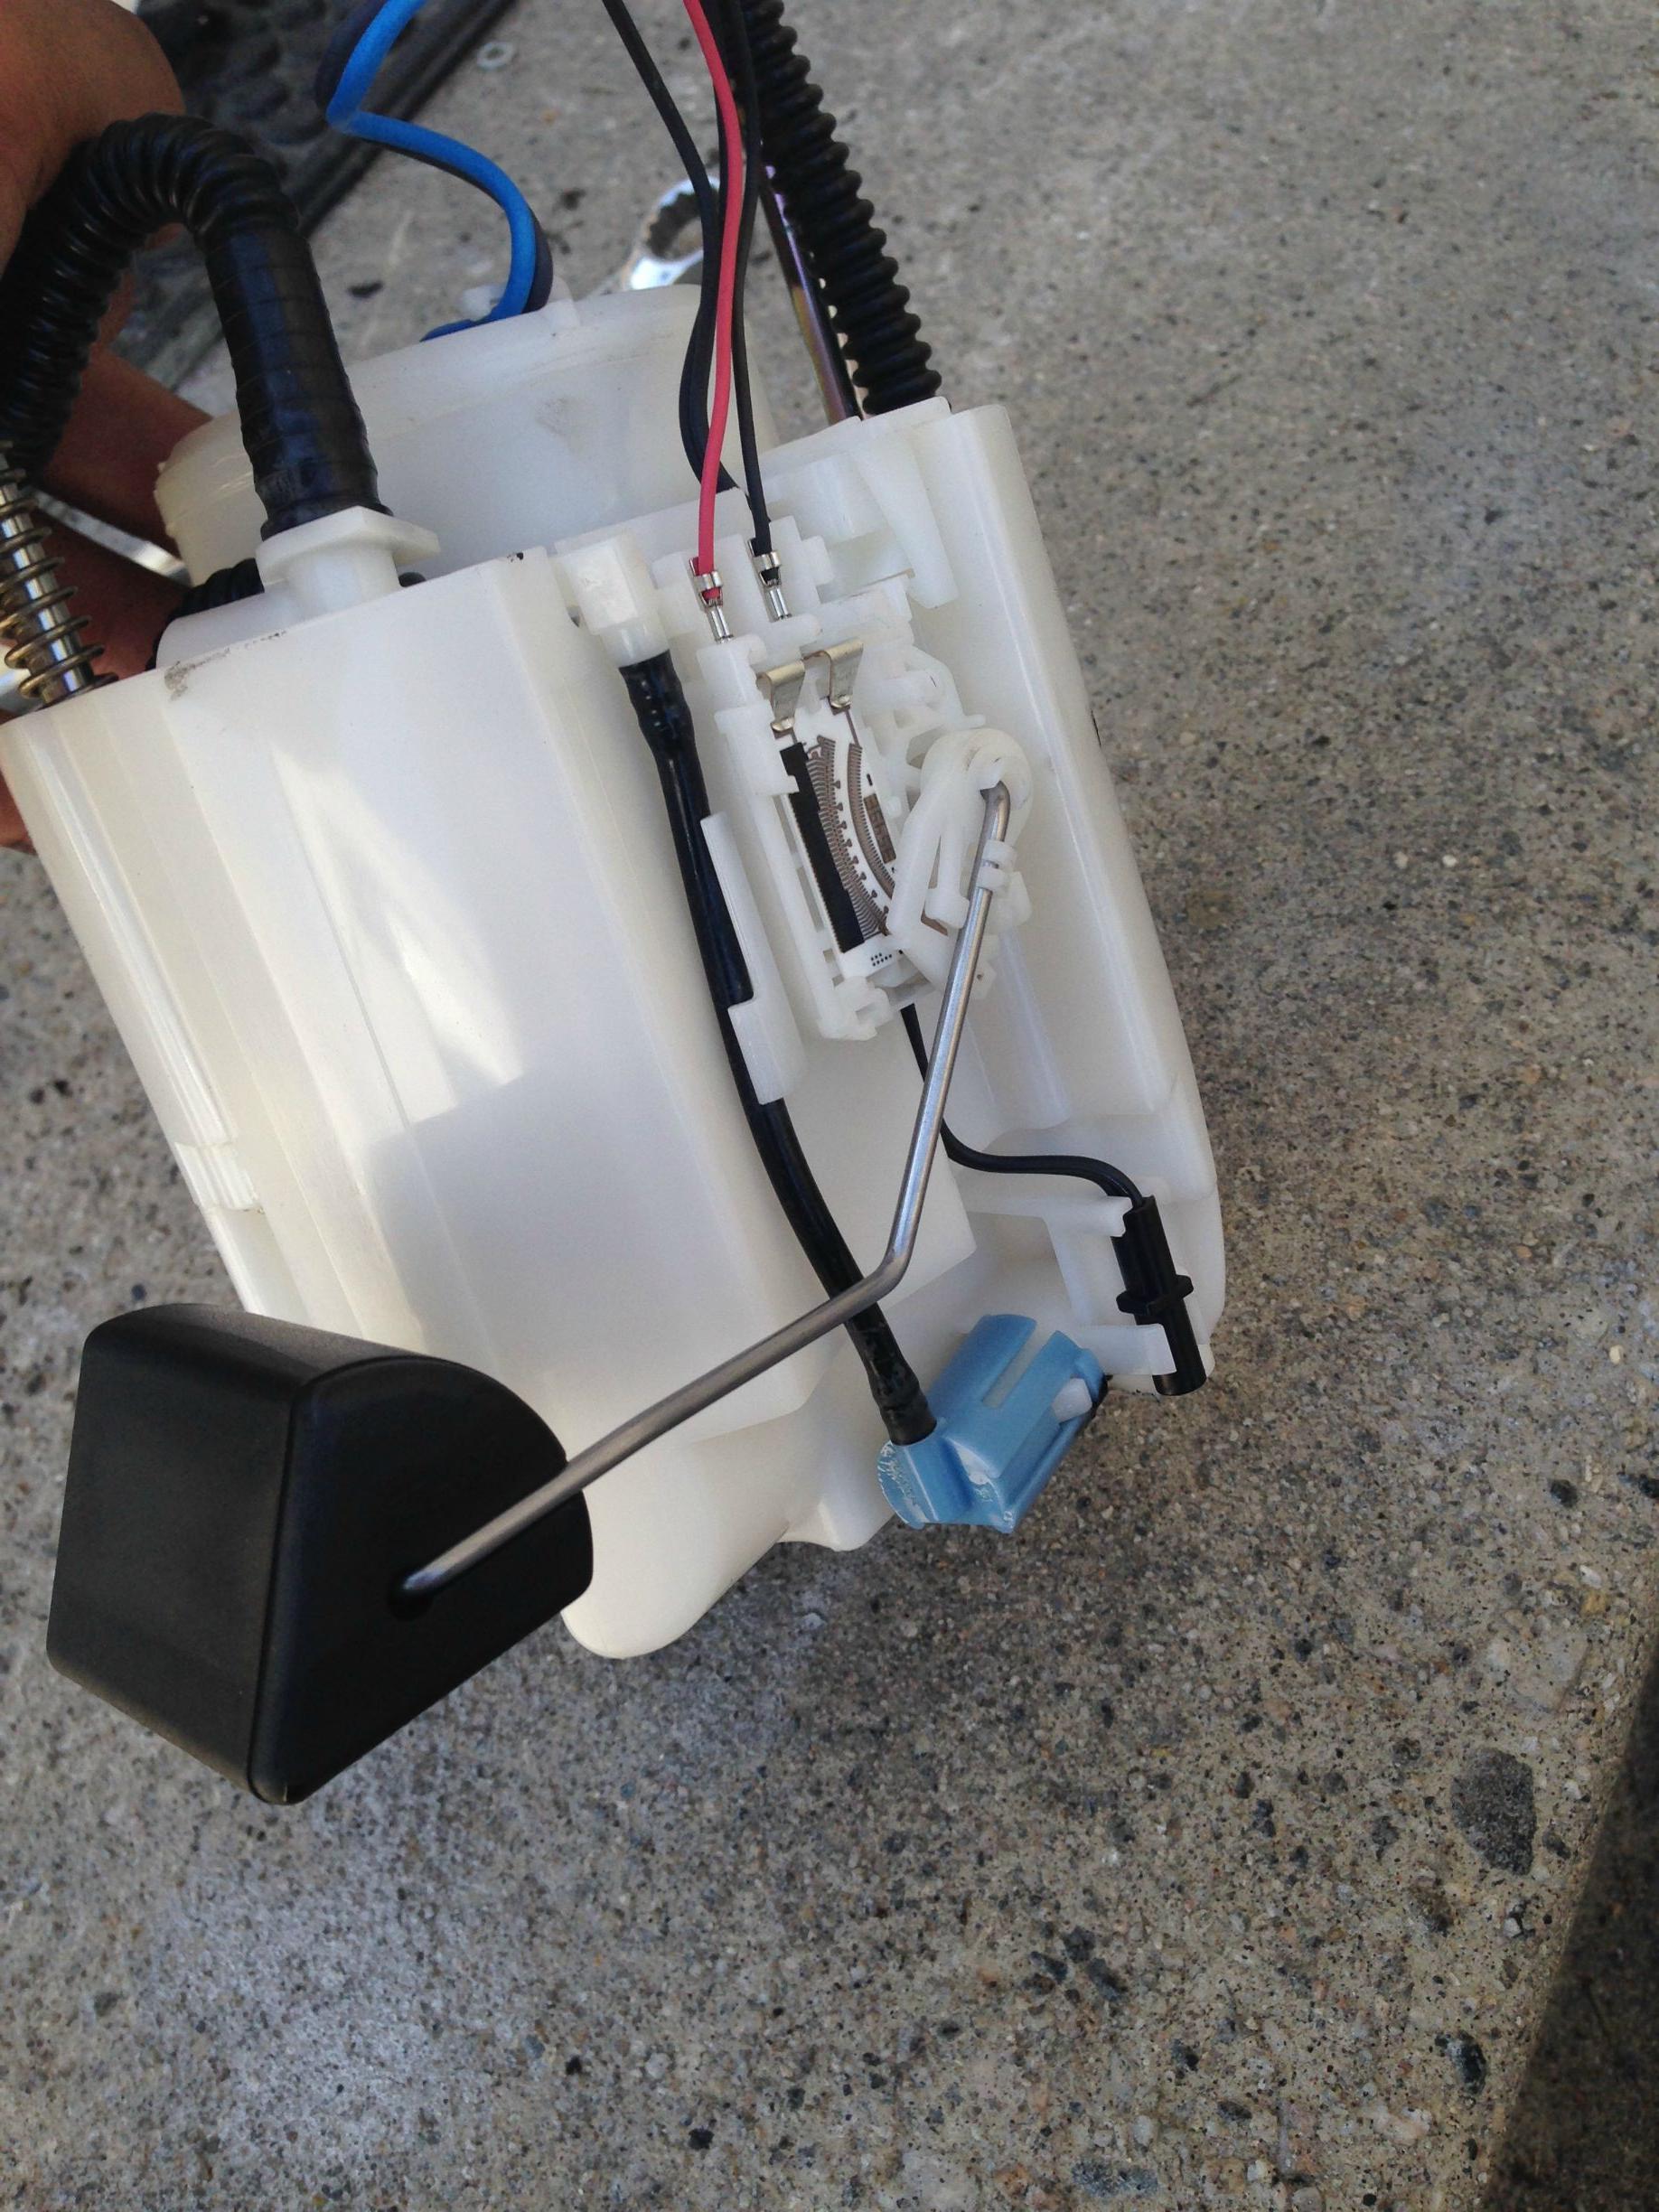
Stock vs AEM
MAP fuel install kit- great asset
Setback: For some reason the ground wire was slightly exposed. I didn't have a car and I needed to get mine running by the end of the day. To do this I needed to use heat shrink, and the nearest auto parts store was not within a skateboarding distance. Sev to the rescue:
Sev drives 30 min from his home and brings me heat shrink to cover this up:
Everything back together (I later ziptied some hoses and moved them around)

5/23
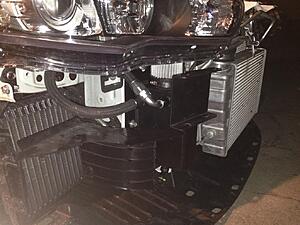
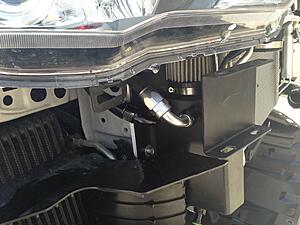
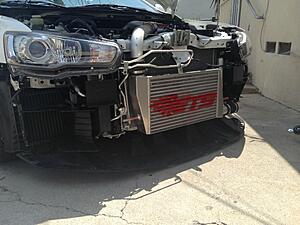
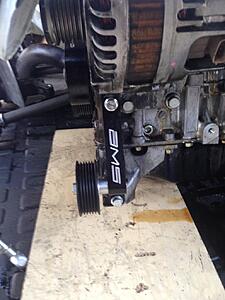
Installed the FMIC today along with the 90* fitting for the catch can and the Kozmic left side bracket
Thanks to Kyle for the pump, InProgress for the catch can, Vegeta for the downpipe, P Turner for the FMIC, pistolpete for the 90* fitting and Ian @MAP for some awesome deals!
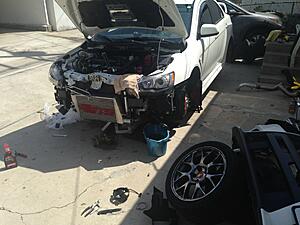
6/8-9
Car is apart, on stands yet again
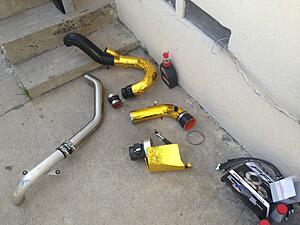
Got everything except for the JDM rear beam, set it out on the desk and enjoyed the view (STM battery kit not pictured):
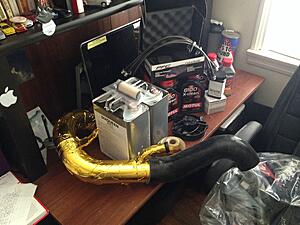
Then proceeded to wrap the pipes
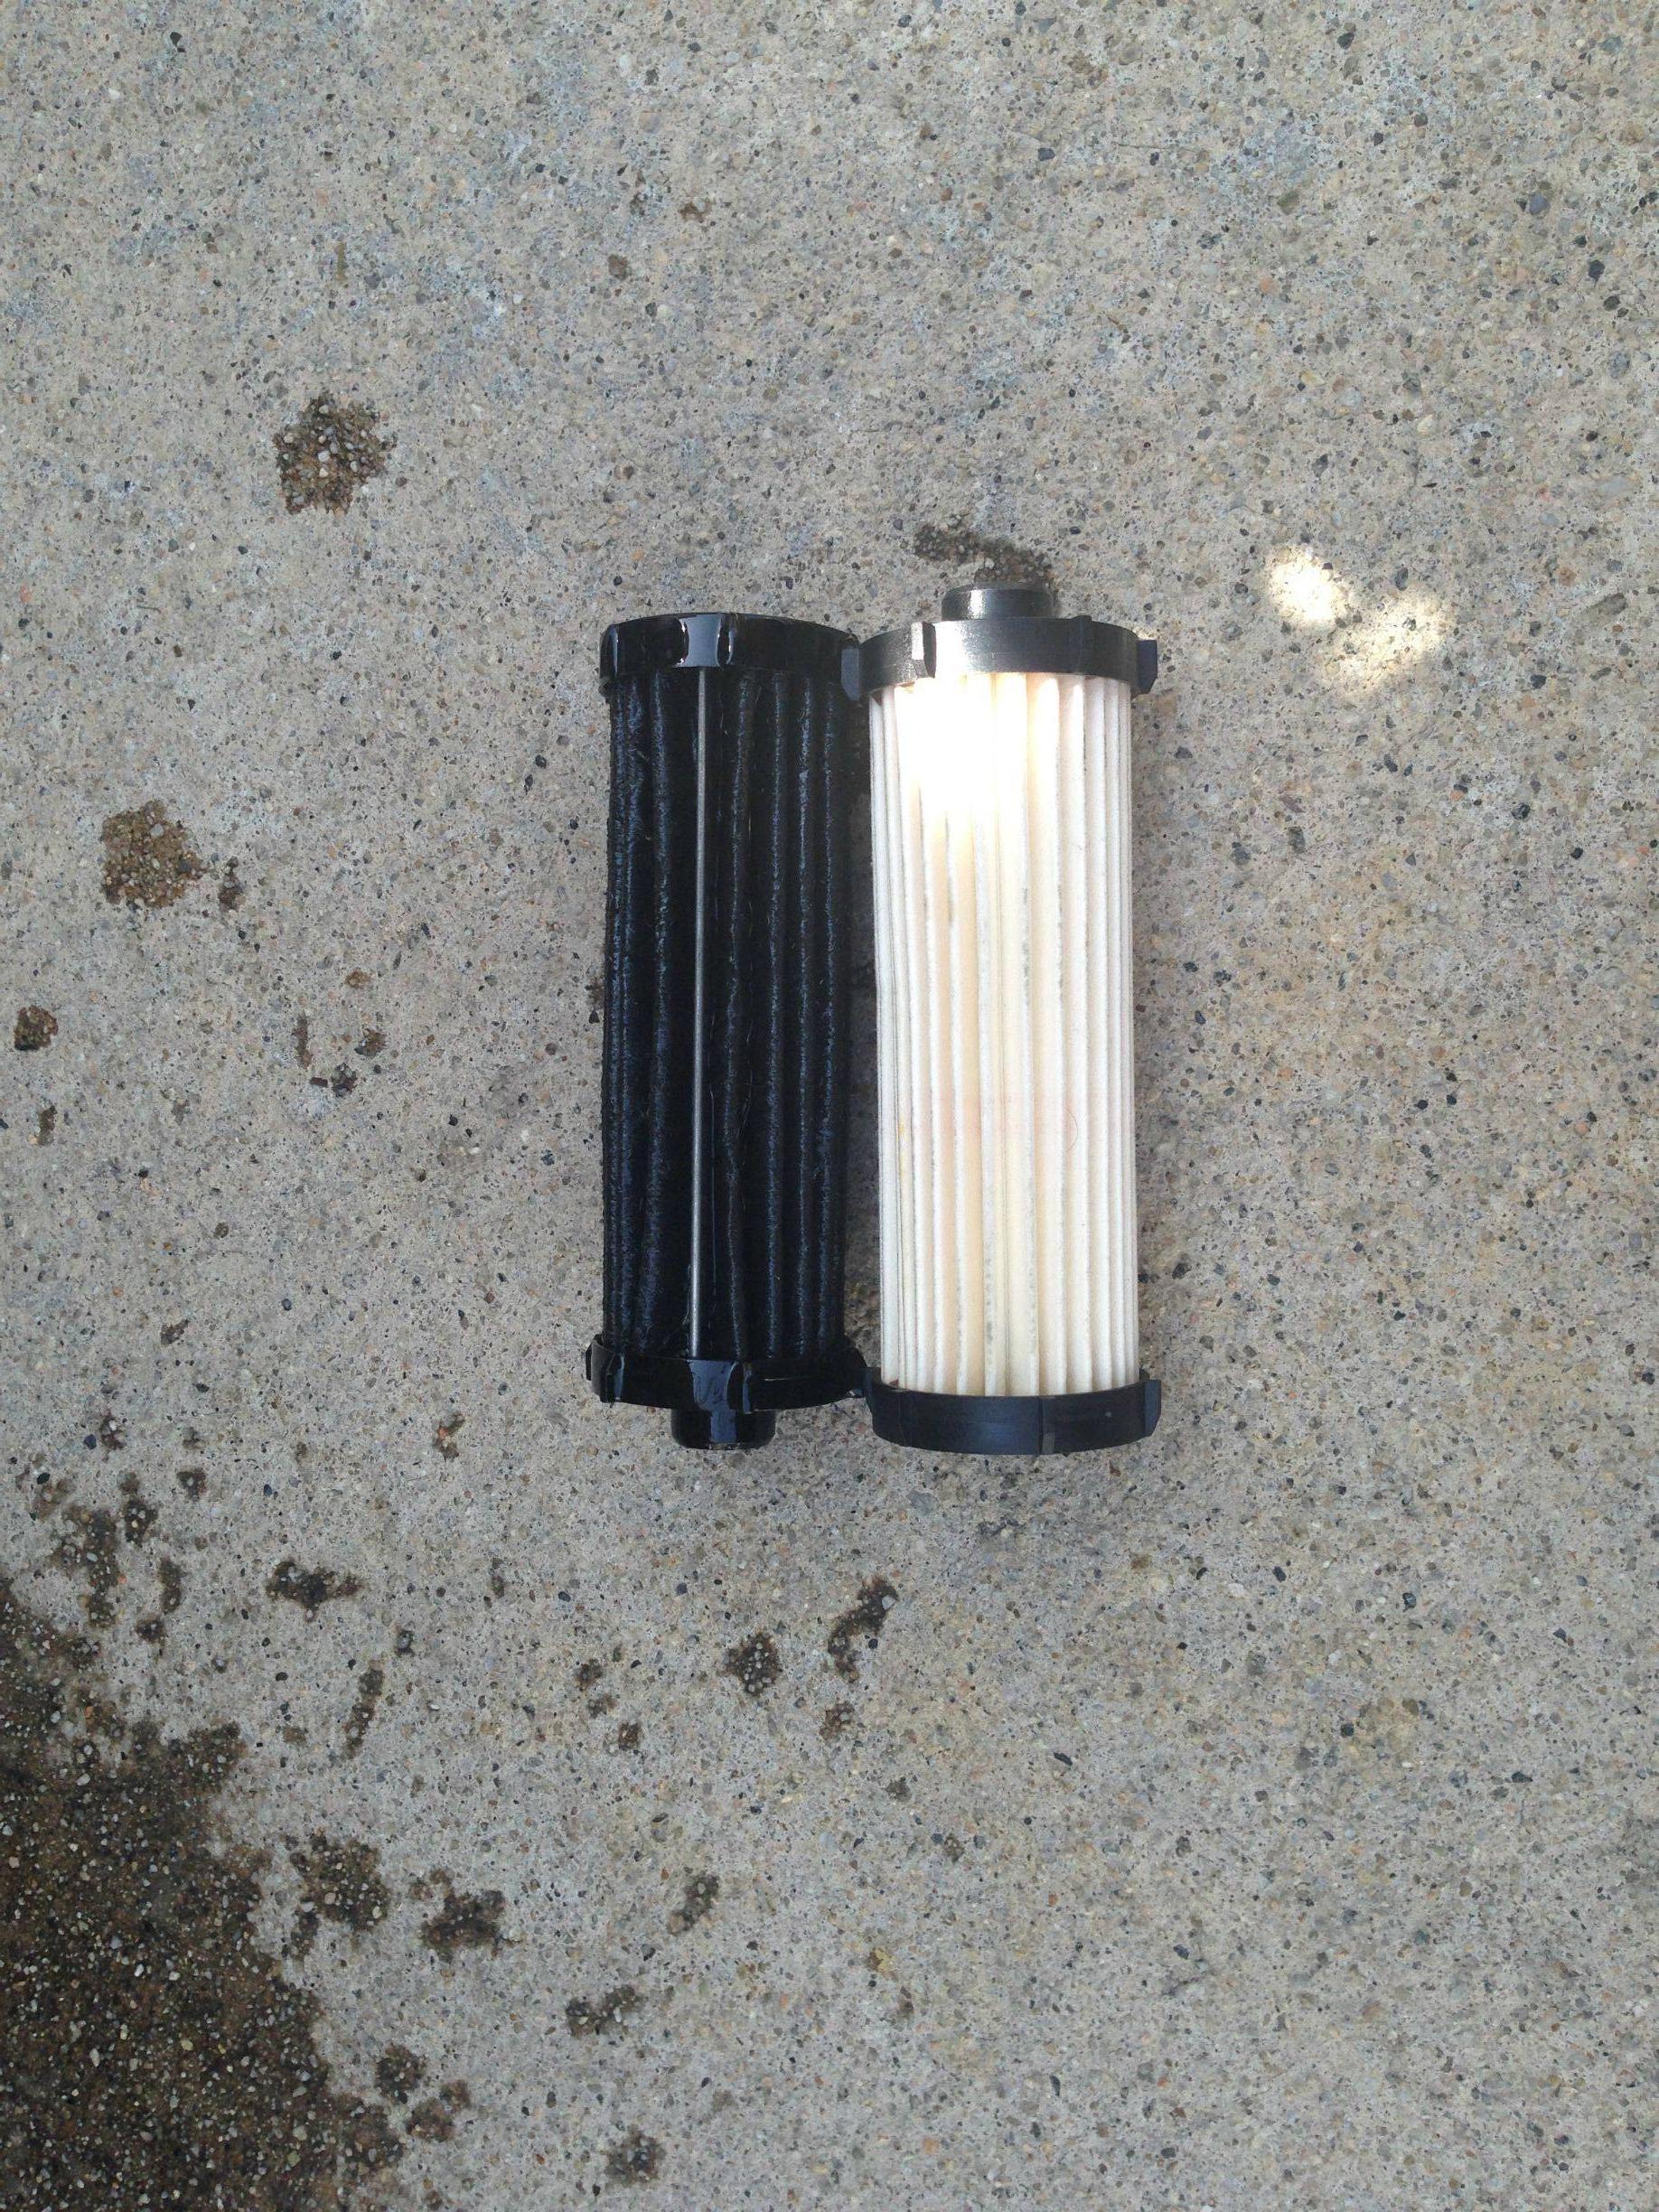
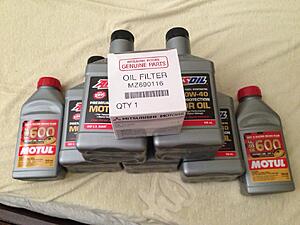
Changed engine oil+ filter, then went for the SST fluid + filter. Here's a before-after comparison. The old filter had around 15k on it, 2 track days, lots of launches and canyon runs.
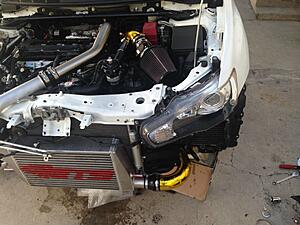
Intake and intercooler piping back on
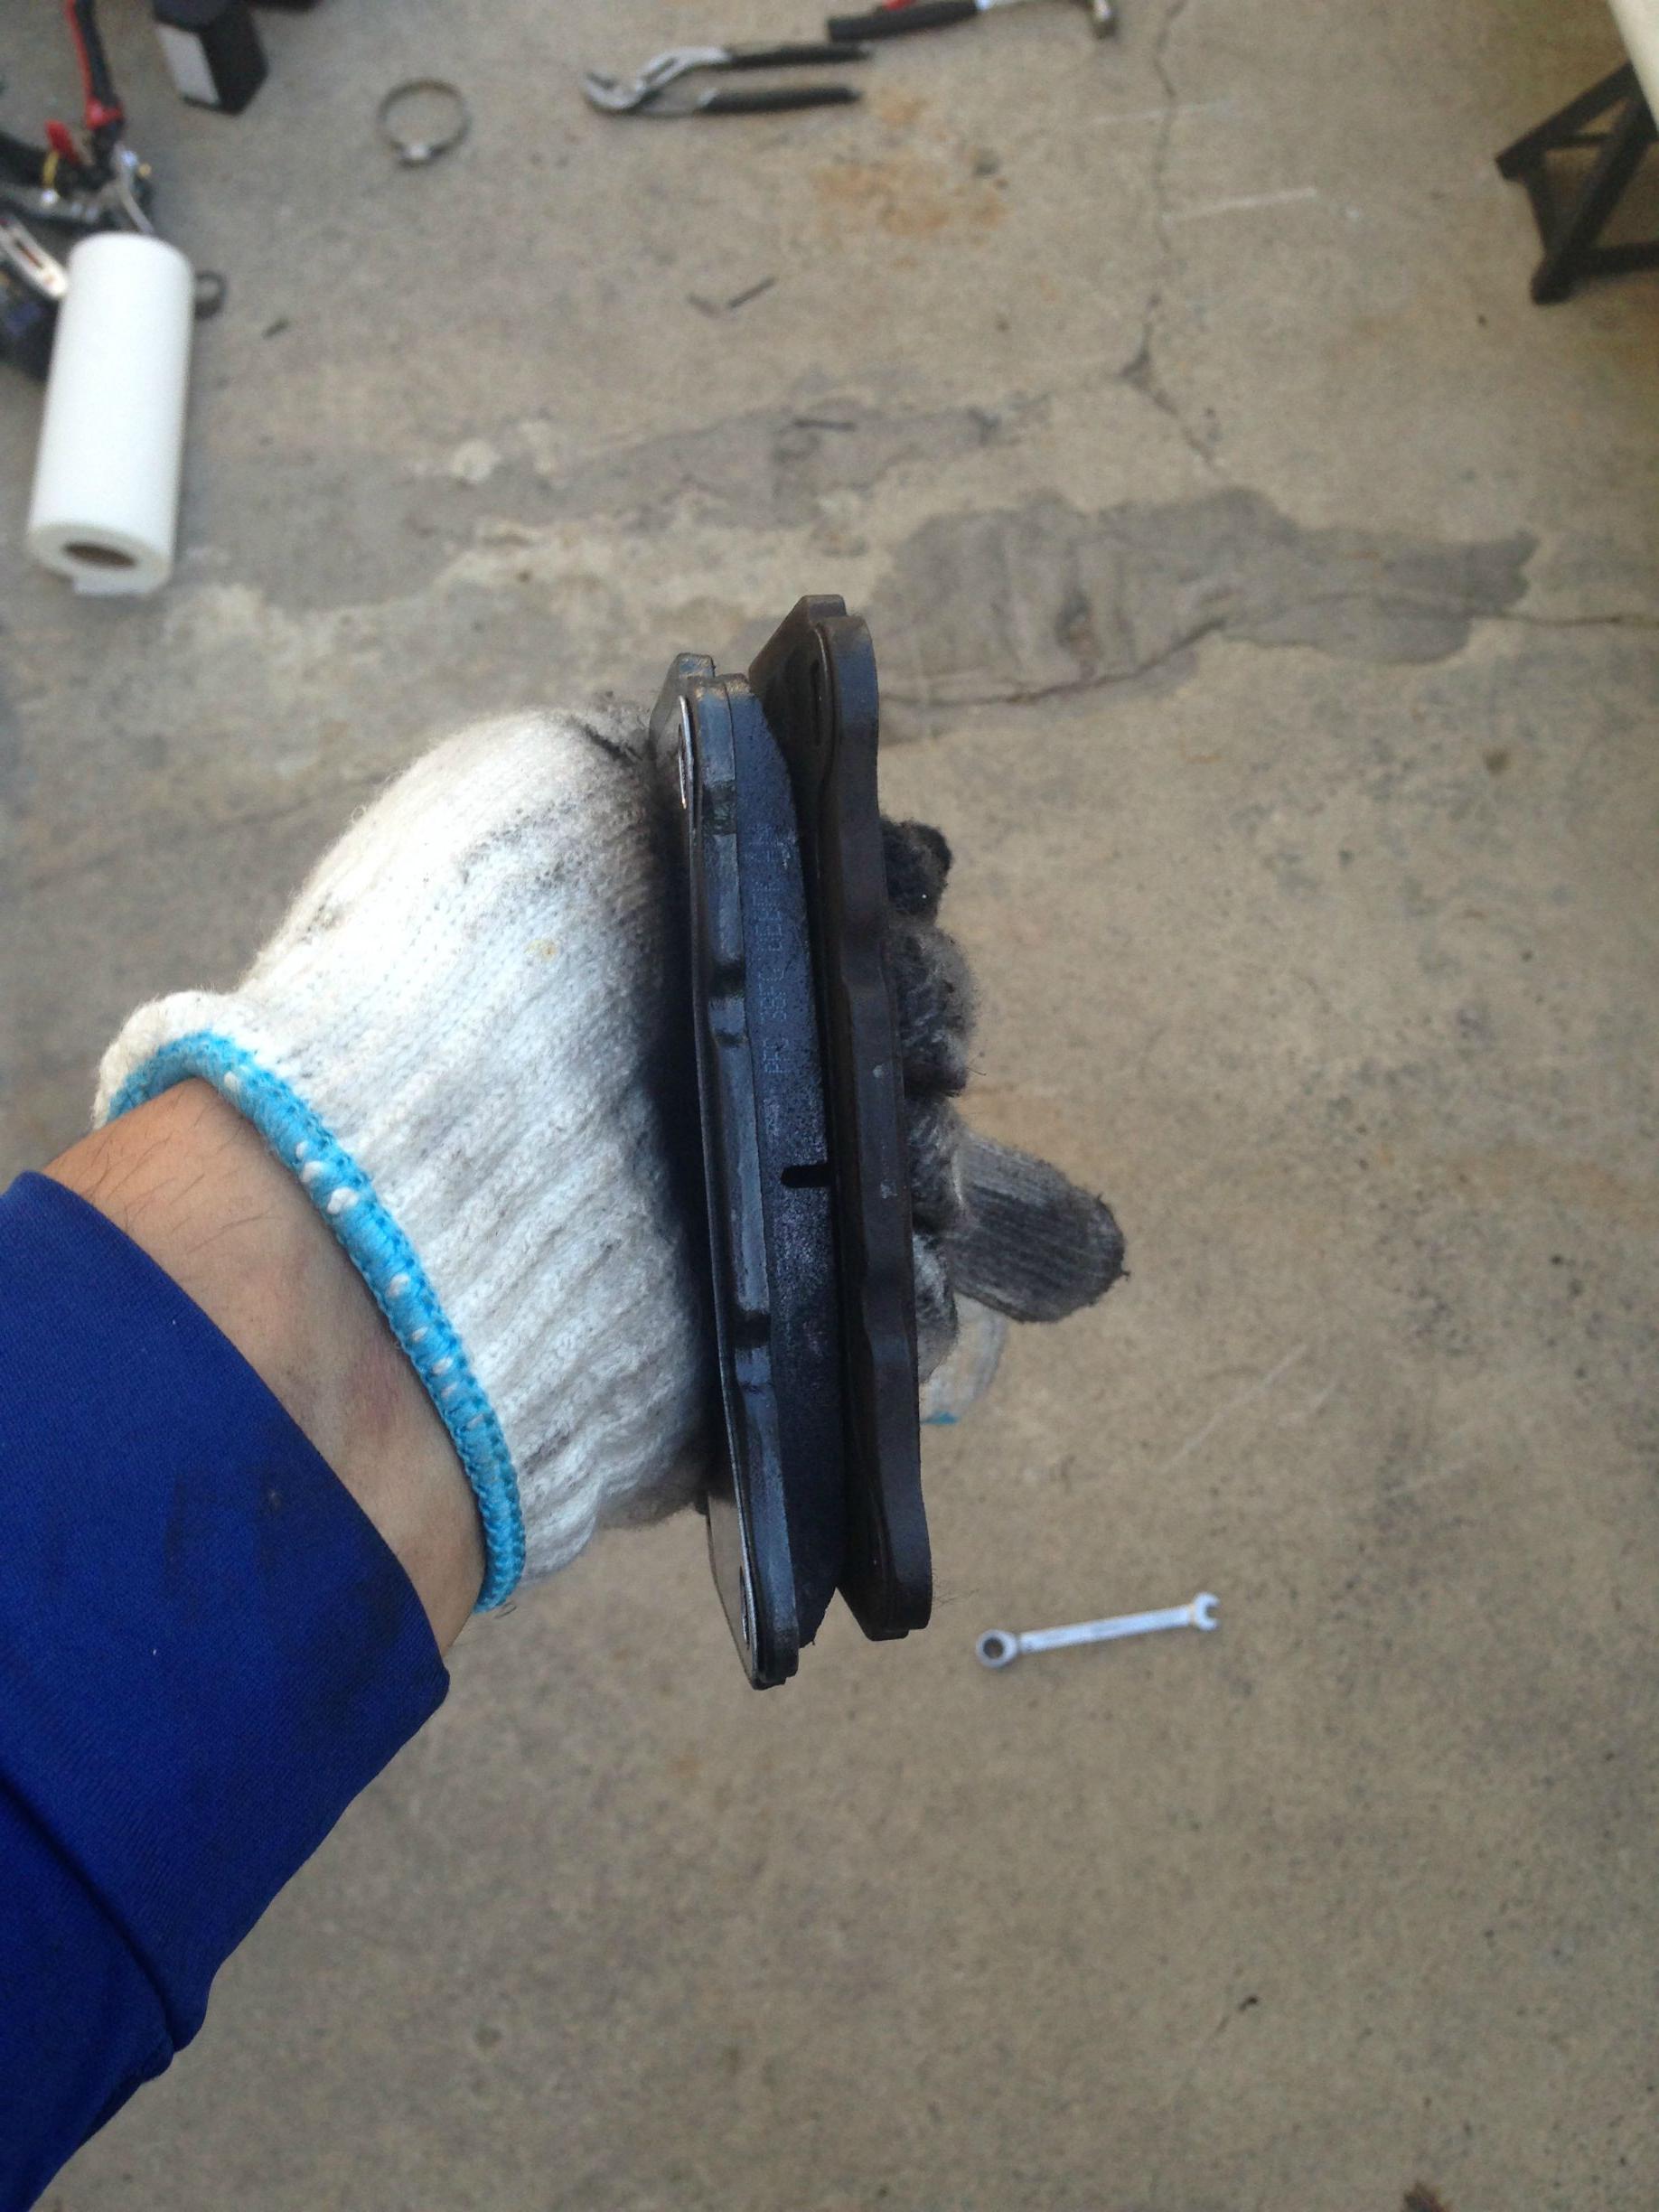
Changed out the brake pads, another old vs new comparison.
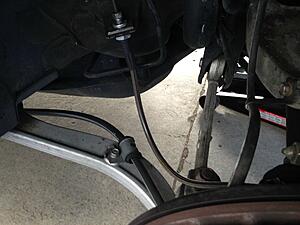
AMS Brake lines installed by the dealer
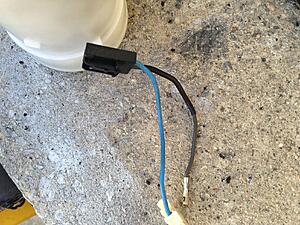
Also installed the SST fan, thanks to qwertymess for clarifying which wires to tap into, which were the fog light wires
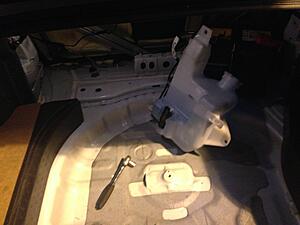
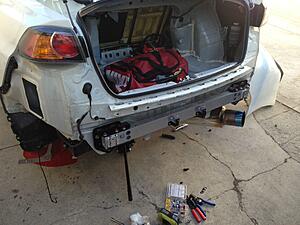
Finally, installed the STM small battery kit. Here's what my trunk looks like now
6/13-16
Rear beam installed
PWJDM quick release
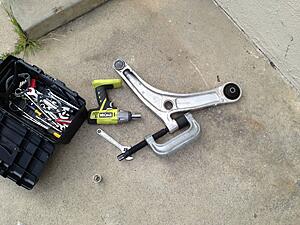
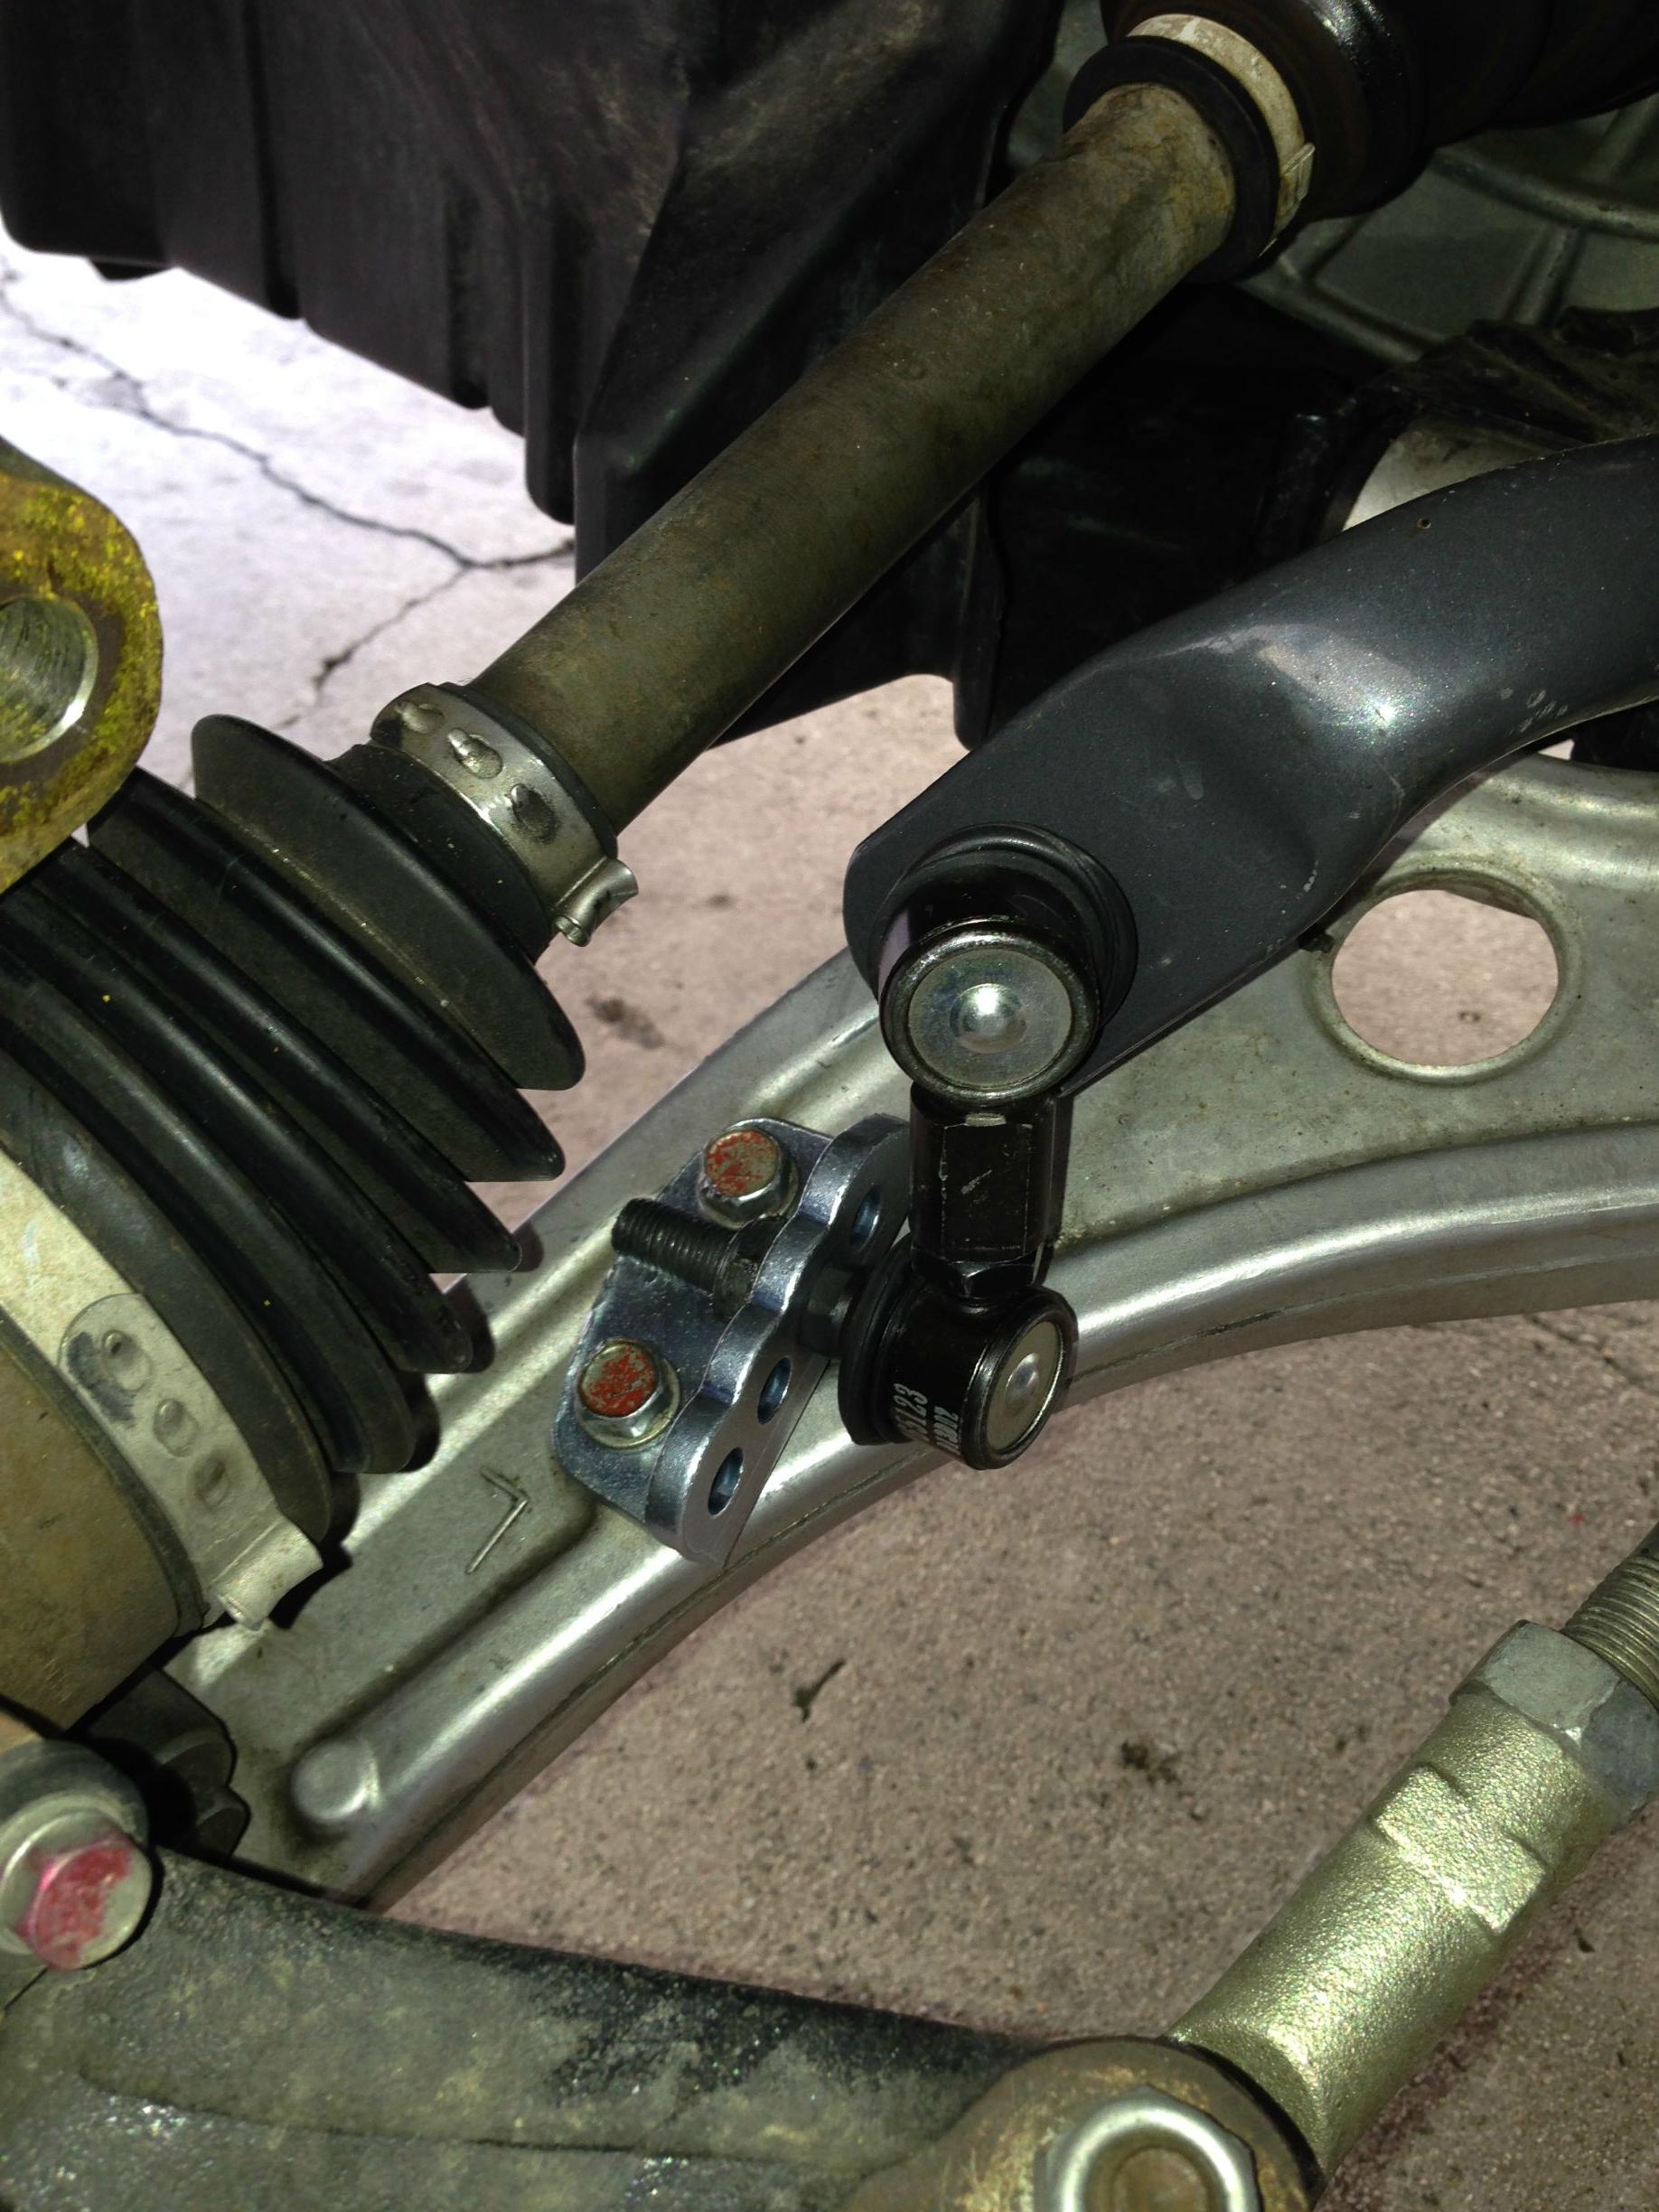
Also installed the Cusco front link brackets.
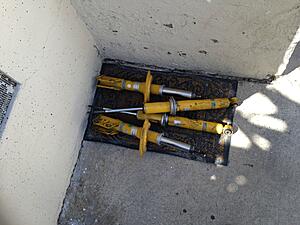
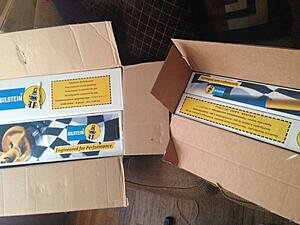
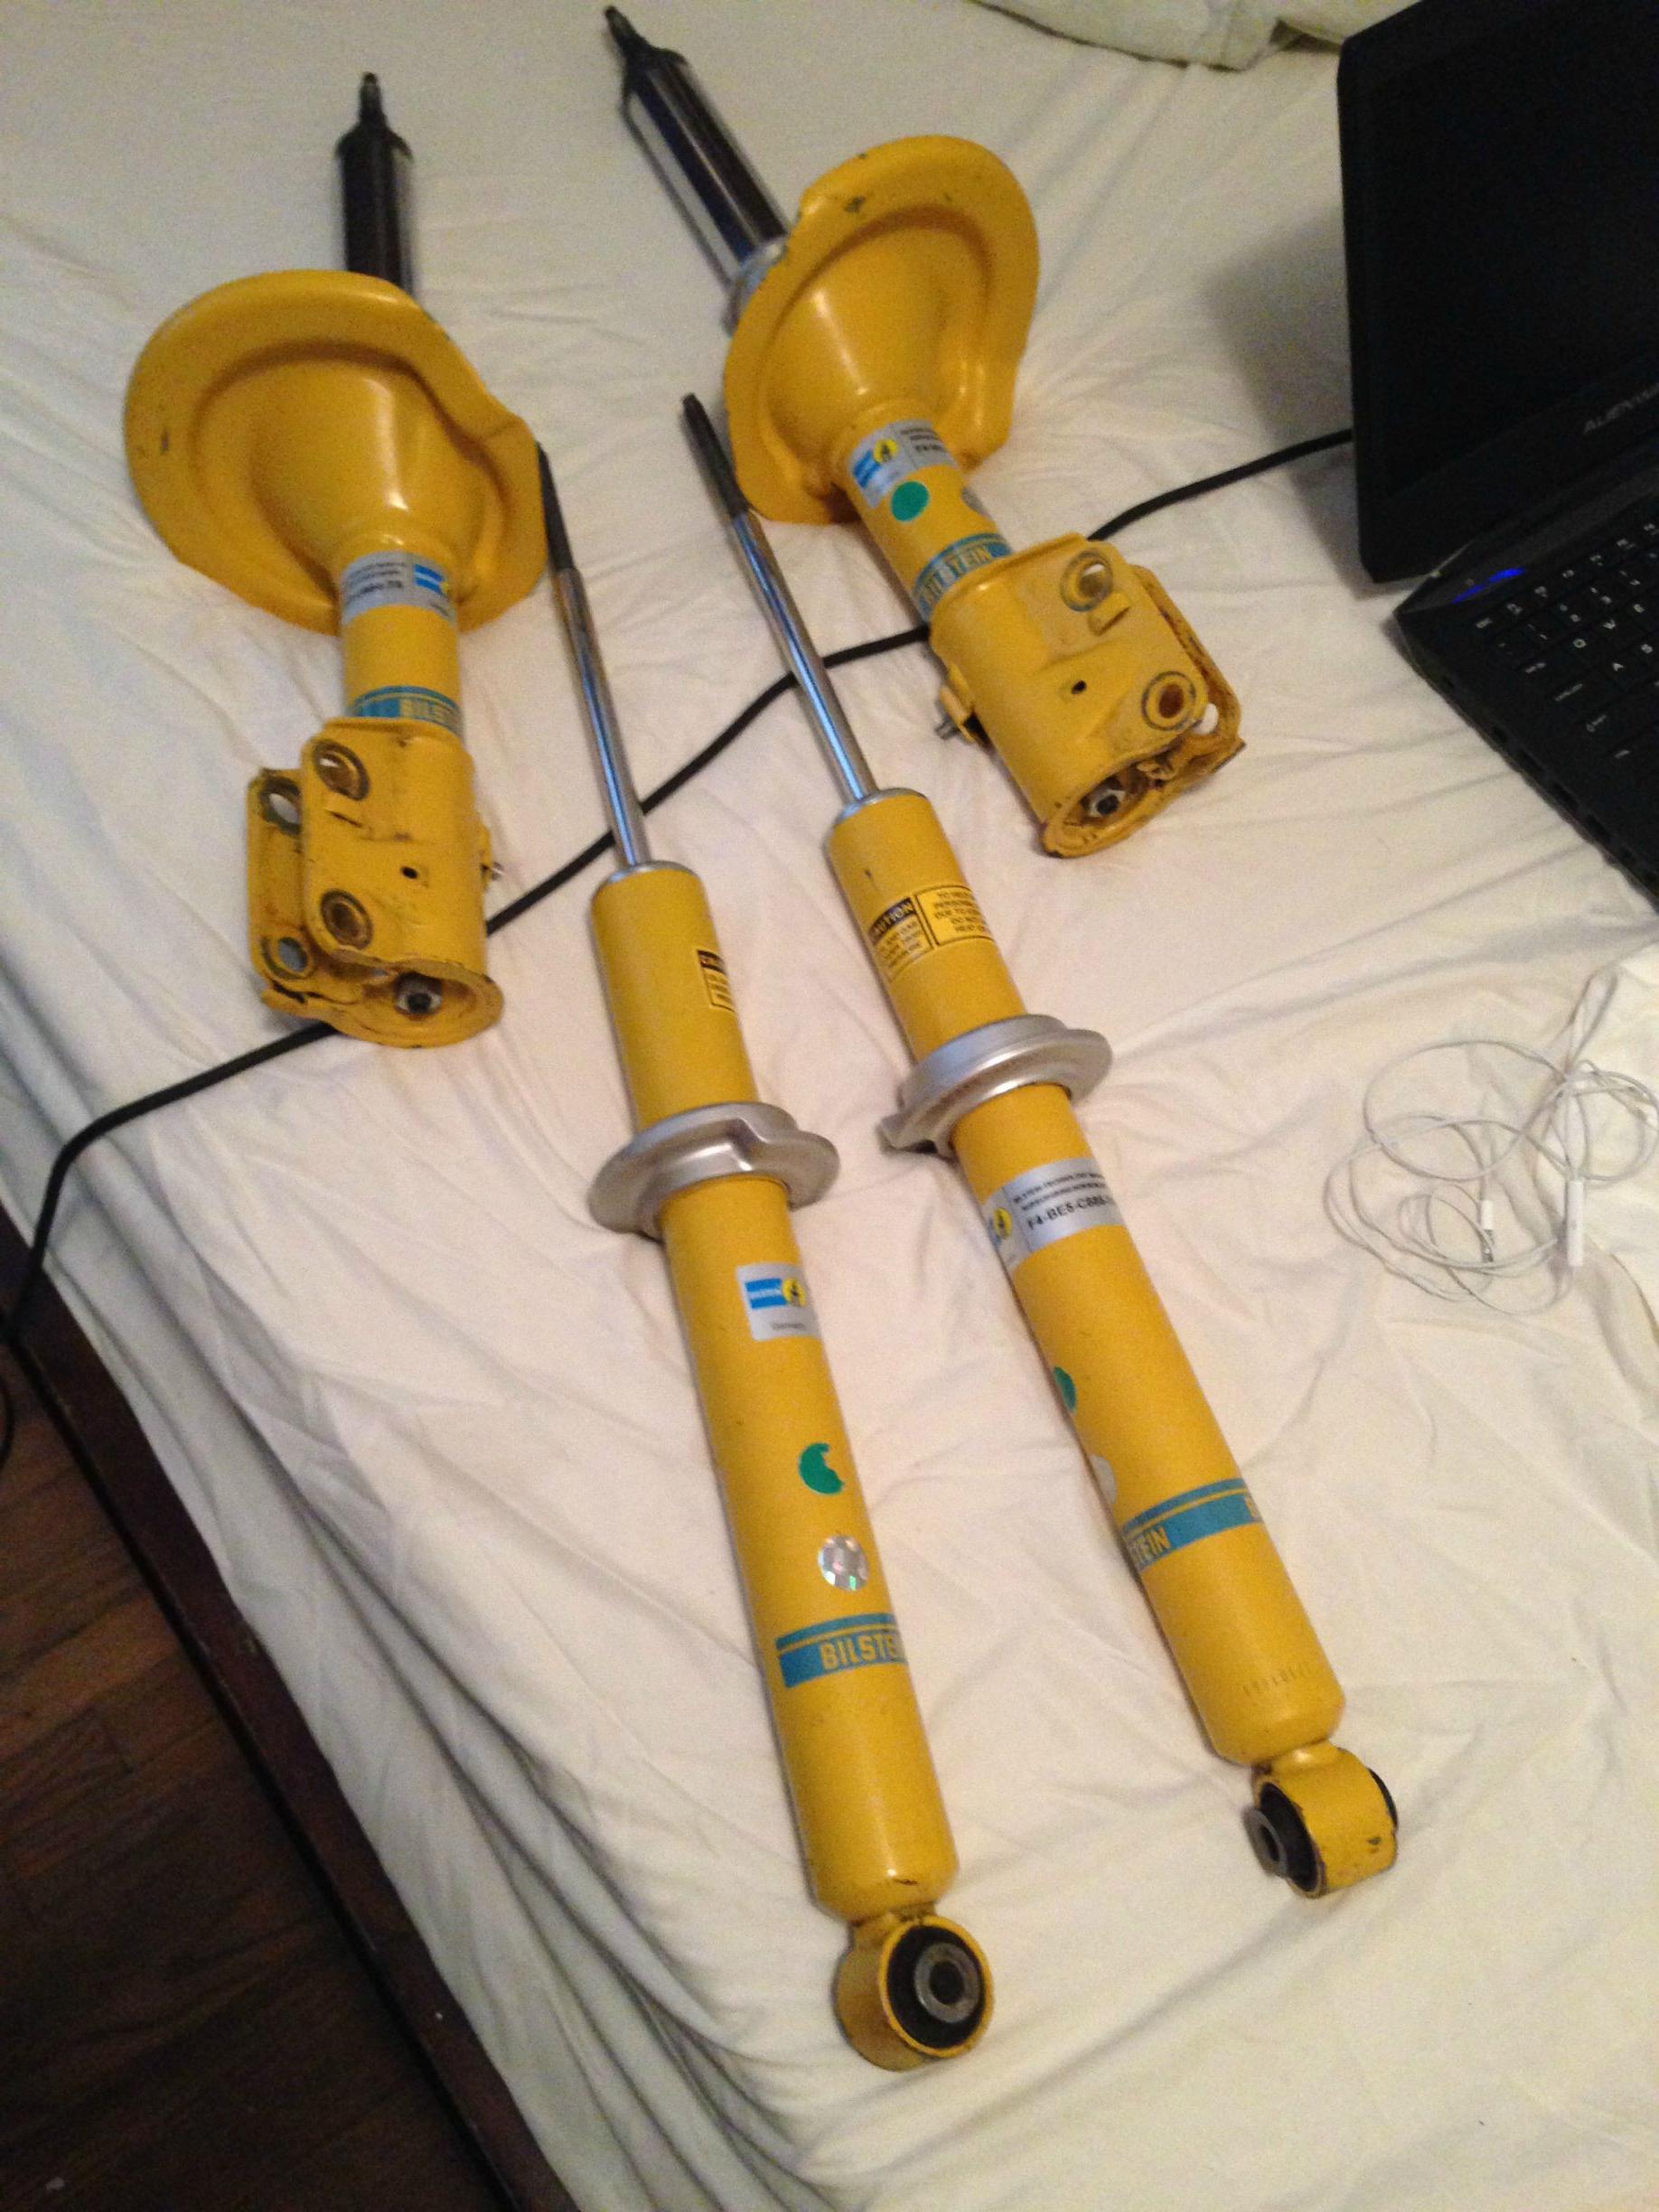
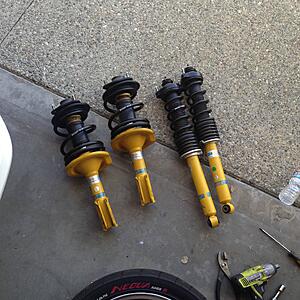
Sent the Bilsteins for a revalve.
7/10
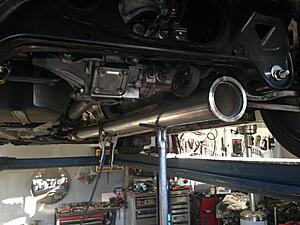
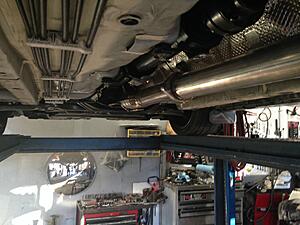
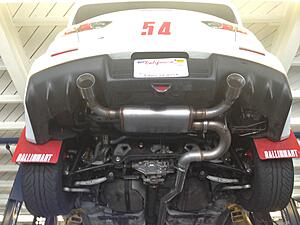
New exhaust by Morse Muffler

7/17
These came in
My good friend let me use his garage
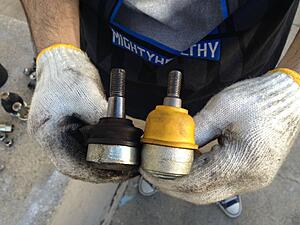
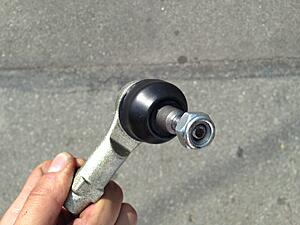
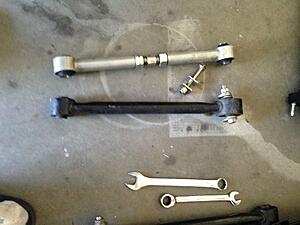
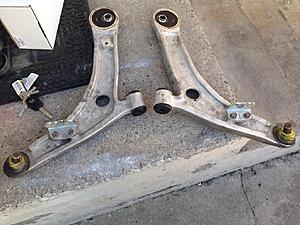
Also, got the camber arms from qwertymess
7/21
GF got me one of these for my birthday.
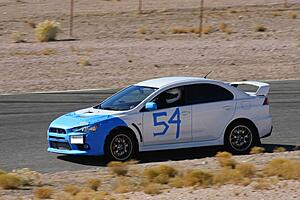
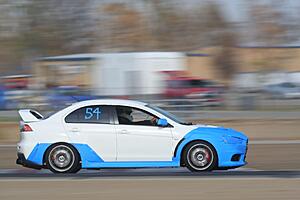
Track day #3
For moar photos: http://www.evoxforums.com/forums/sho....php?p=4735186
Footage (sorry for sound quality):
Le me going off track because went in too hot. Brakes locked up so I released them and just went in the dirt, did a 4 wheel drift and came right out. Video Outside:
[ttp://www.youtube.com/watch?v=7CadYoxFcDs&list=UU5coTXISbL63ejwhQLFNR2A
Inside (omw out)
After this occurence, my mom (a passenger at the time) passed out. Yes- I made my mom pass out.
A few clean laps
Overheated
8/8-8/10
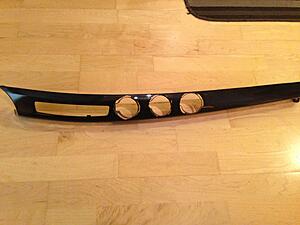
Finished up a gauge pod

Also, installed the new SPG seat with the BuddyClub Rail
8/21
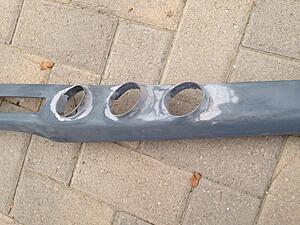
Test fitting the new gauges. Didn't like the angle so I essentially re did the whole pod, messing up the clear coat in process. At least the gauges are pointed how I want them to be
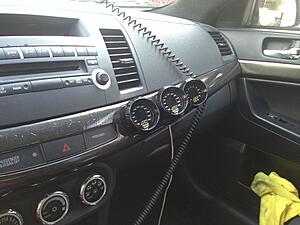
Also got PSRS in the mail
8/28
Installed the Schroth Harness (Rallye 4). Also removed the OEM driver side seat belt.
9/1-8: The hell week.
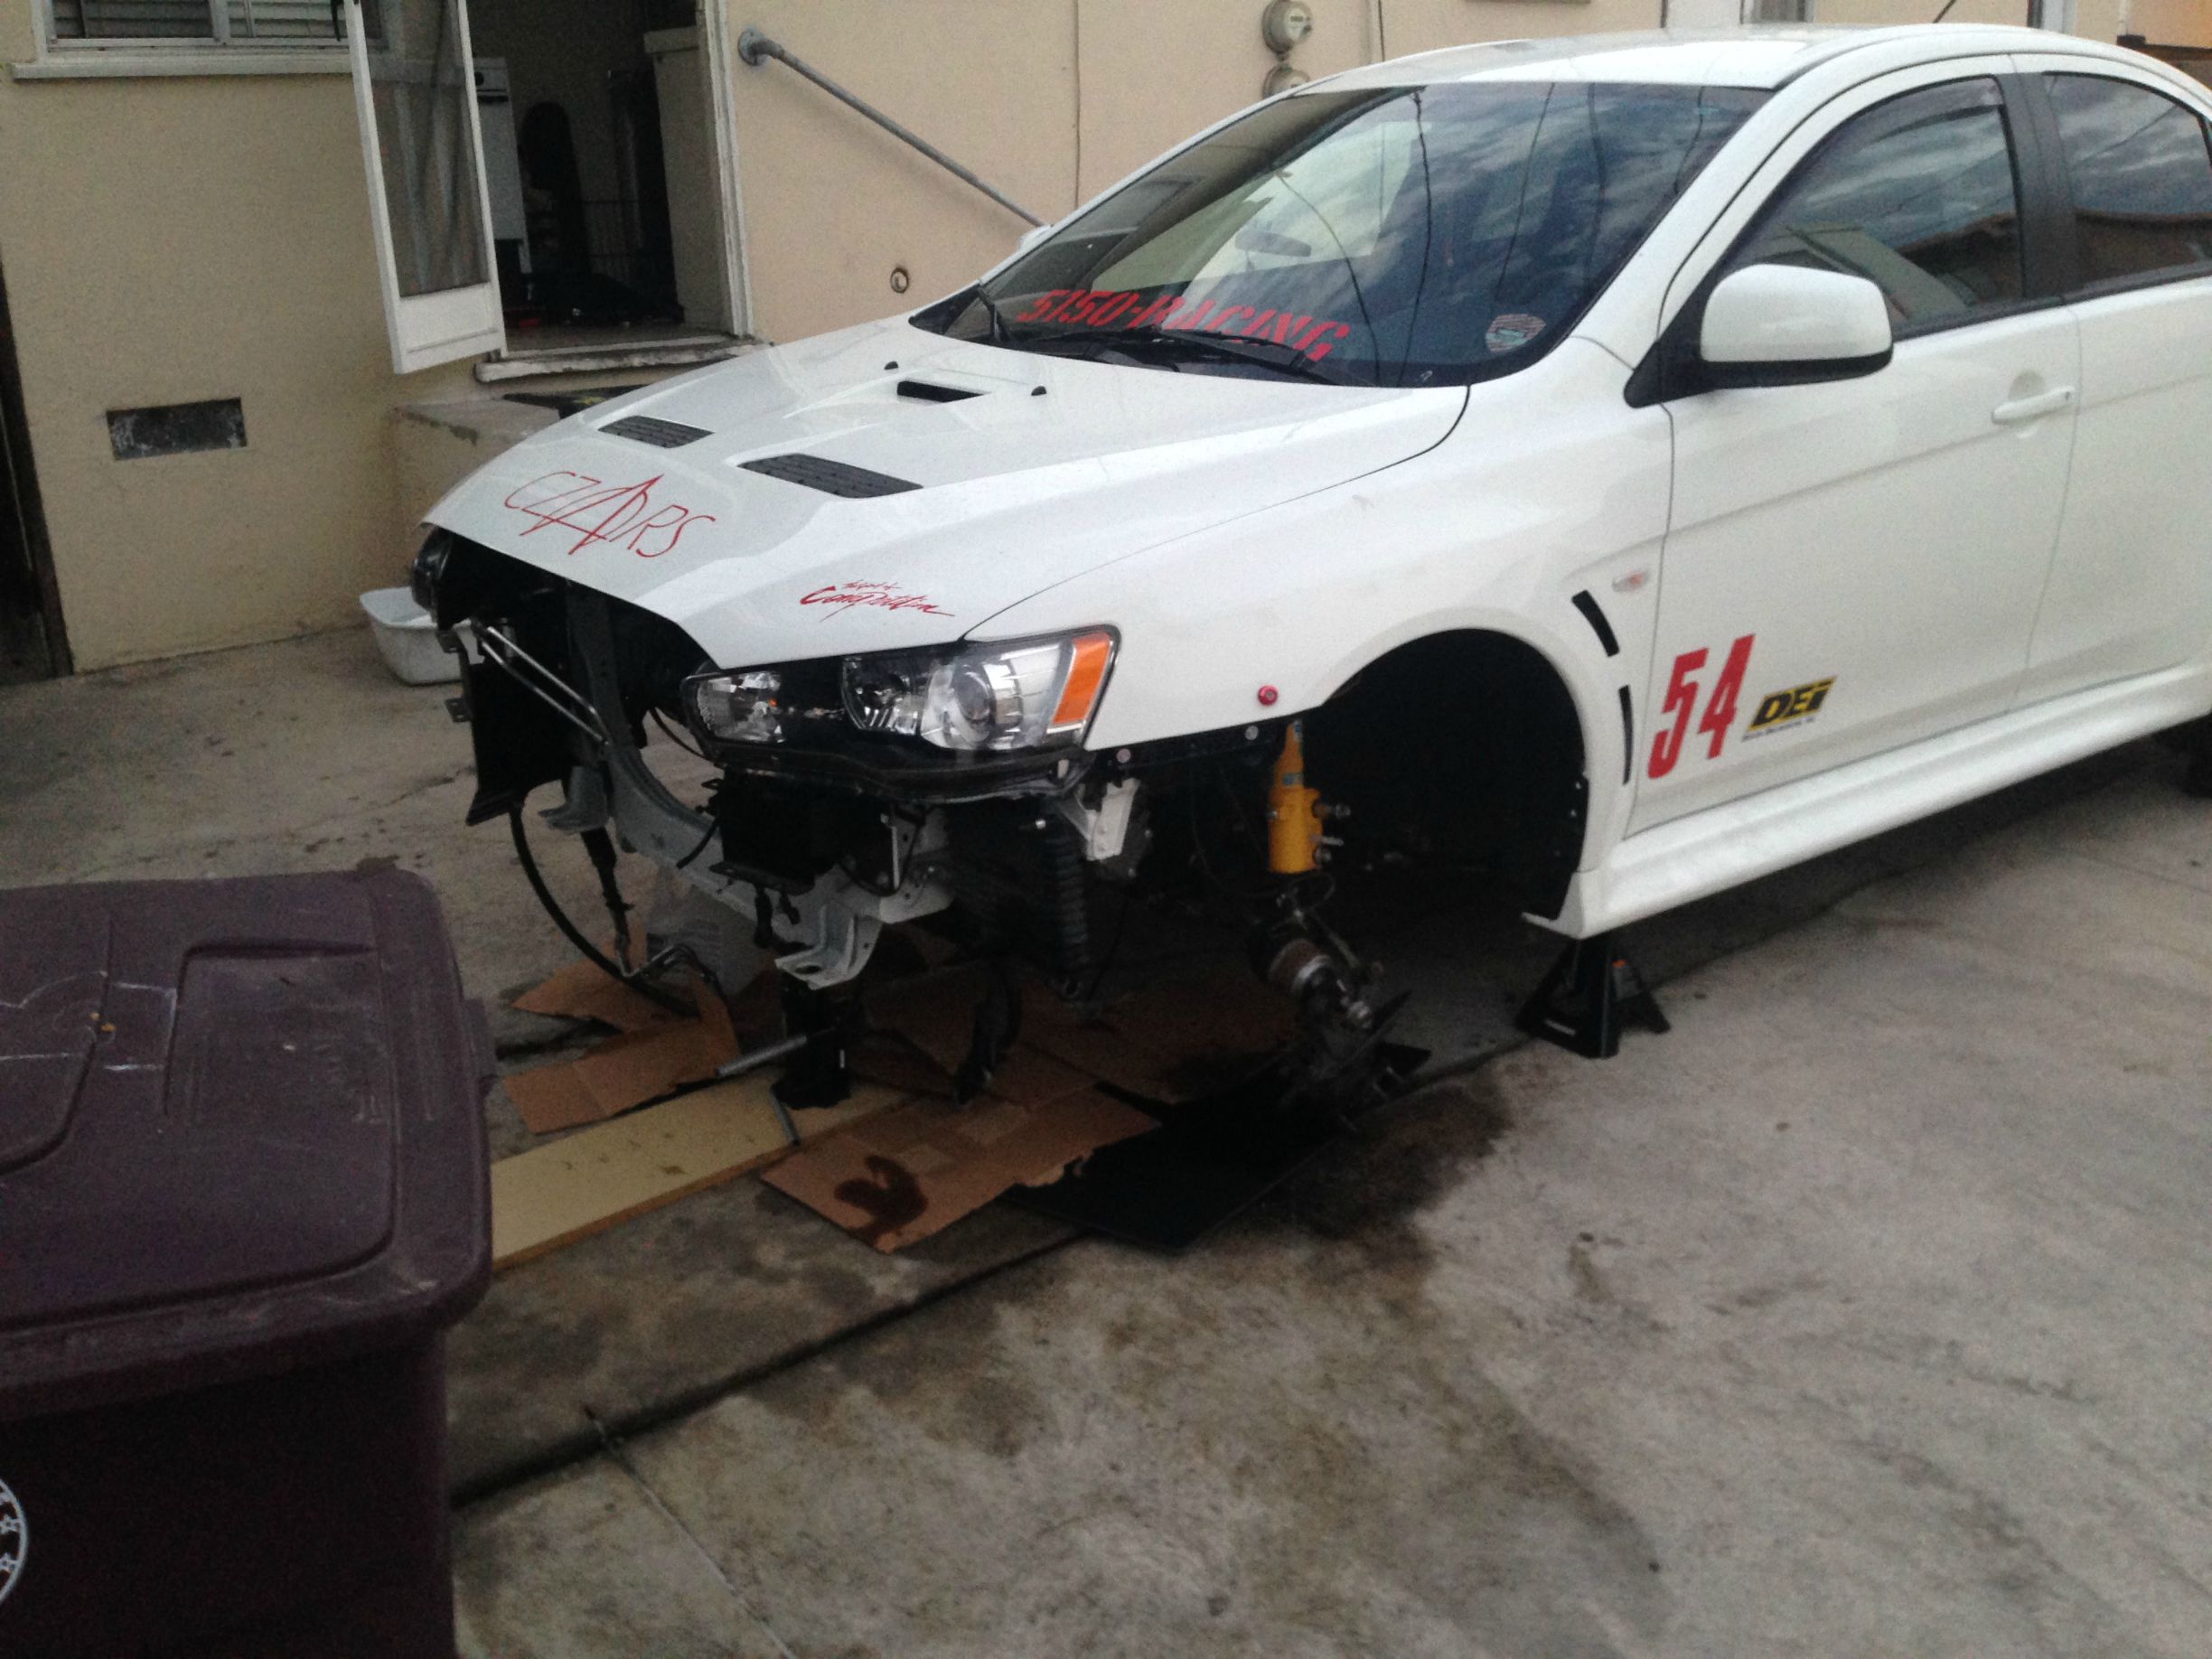
Installed all the sensors on the car, everything was going fine, the car was supposed to be ready for a tune due the fifth of September, which meant it had to have new oil and had to be back together by the fourth. I had to wait for about 3 days for the machine shop to make a fitting to fit the transmission drain plug, in order to fit the 1/8 npt temp sensor provided with the AEM temp gauge. The WORKS temp sensor was a pita as well, since the 1/8 fitting was BPT and not NPT, so I had to get that re-threaded. That too, was solved. Then came the oil pressure sensor, and I used the AMS fitting in order to move it away from the engine. This seemed like it was the easiest of the three gauges (not including voltage, which just had to be hooked up to 12v power). Well, little did I know, the fitting AMS provided was cone shaped, resulting in the oil filter housing being cracked.
I was hoping to have this fixed before the tune (and then the track day), but after much thought, I cancelled both and got on with taking the car apart. I bought a windage tray, which has yet to be shipped as of 9/8/14. I used this as an opportunity to get a new, larger radiator- Mishimoto X line, and remove AC as I rarely use it. This being the first time I've ever pulled an engine, I've been asking for assistance. Morricus, Englando, bellacotim, UT_EvoX, Kozmic, DrivenFab and many more have been guiding me through the process and giving me various ideas.
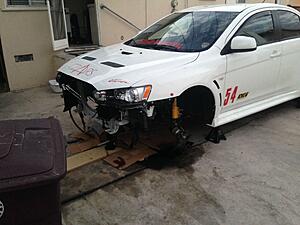
Let the tear apart commence:
Windage tray that's on the way
Slowly moving it all out of the way
AC Removed
Wiring removed, working on the CV shafts
Stored the brembos in the car
New hoist ordered, on le way

9/10-9/12
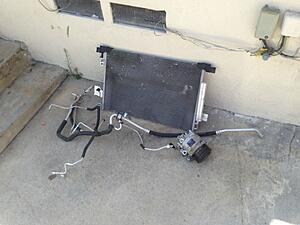
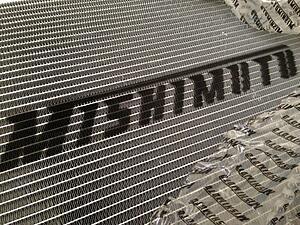
Got the Mishimoto X-Line Radiator in the mail:
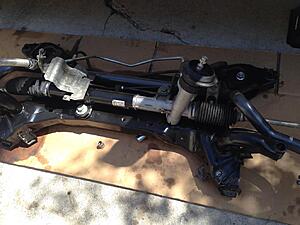
Removed the subframe, cleaned it up
Lowered the engine to the floor (more like dropped it)
Gathered fluids, realized I'll need ACD fluid, T case fluid and PS fluid.
Had the PSRS pressed into the control arms
Old crappy bushings

Installed the AMS AC delete
It's filled with some great advice from many great folks on the forum and more pics that didn't make it to this thread.
Lap times:
Big Willow- Coming in Dec
Buttonwillow Race #13 CW- [strike]2:11.473[/strike]
2:10.57 (with a 180 lb passenger and a 50 lb seat in the car)
List of Mods:
*means has yet to be installed
Power:
AEM 320lph Fuel Pump + MAP Install Kit
BakaUnchi 91 tune (Getting re-tuned for 91/100 this September)
Depo 3" LICP
ETS UICP
ETS 3.5" FMIC
ETS Intake
ETS Downpipe
GrimmSpeed 3 port
Kozmic K27 Catch Can
Morse Muffler 3" Dual Catback
Weapon R Racing Test Pipe
Tial QR DV
Handling:
AMS Stainless Steel Brake Lines
Bilstein Shocks (revalved for Swift Spec R springs)
Cusco Endlink Adjustment Bracket (Front)
Hotchkis Rear Sway Bar
Hotchkis Front Sway Bar
H&R Camber bolts Front
Ichiba V2 20mm spacers
Performance Friction Metallic Z Front Pads
Perrin P.S.R.S. w/ Caster
Swift Spec R Springs
West End Alignment
Whiteline Front Control Arm Bushings
Whiteline Front Endlinks
Whiteline RCK
Whiteline Rear Adjustable Lower Control Arms
Whiteline Rear Endlinks
Yokohama Advan AD08R
Misc.:
AEM Failsafe Gauge
AEM Oil Pressure Gauge
AEM Trans Temp Gauge
AEM Voltage Gauge
AEM Water Temp Gauge
AMS AC Delete
AMS Oil Pressure Sending Unit Line
Buddyclub Driver's Seat Rail
GSR Wing
Halguard Fire Extinguisher
Kozmic left side beam bracket
Kozmic SST Filter
Mishimoto X-Line Radiator
Mitsubishi Fog Delete
Mitsubishi X RS Rear Bumper Beam
OEM Replica Front Lip
PWJDM Bumper Quick Release Kit
PWJDM Upper Canards
Recaro Profi SPG Seat
Schroth Rallye 4 Red
Spal 5.2" Fan for the SST cooler
STM Small Battery Kit
Tactrix OP2
Weathertech Window Visors - Present from my awesome girlfriend
Weight Reduction
Removed
V-Bracket behind seats (~5 lbs)
Driver side rear passenger belt (~2 lbs)
Fog Deletes (~4 lbs)
Trunk carpet and panels (~10 lbs)
Rear seat headrests (~3 lbs)
Floor mats (~8 lbs)
Spare, Jack and Tools (~45 lbs)
Replaced/Modified
AMS AC Delete (~20lbs)
Buddyclub Driver's Seat Rail (~2 lbs)
Full TBE dual exhaust (~30 lbs)
Kozmic Beam Bracket + Catch Can (~4 lbs)
Mitsubishi X RS Rear Beam (~25 lbs)
Recaro SPG Racing Seat (~35lbs)
Schroth Rallye 4 replaced OEM belt (~2-3 lbs)
STM Battery Kit (~20 lbs)
On the track
Passenger Seat (~50 lbs)
Rear Seats (~40 lbs)
Rear safety accessories (~8 lbs)
Future Plans:

Handling:
Cusco Rear Strut Bar
Enkei RPF1
Hankook RS3 v2 275-35-18
Weight Reduction
Cusco Front Strut Bar
JDM Crash Beam - Front
Misc.
AMS motor mounts
Dodson transmission sump
Move Over Motorsports Quick Release
Planted Seat Brackets
Tow Hook- Front
Old Stuff (that has been sold or is sitting waiting to be sold):
Perrin Inlet Pipe
K&N Drop In Filter
Cobb SF Intake
Ultimate Racing short downpipe
TopSpeed test pipe
Mishimoto Dual Catch Can set up
Hotchkis Rear Endlinks
Rally Armor Mud Flaps
Ralliart Mud Flaps (red)
Prosport EVO Boost Gauge
AEM Wideband
AEM Boost Gauge
Dual Steering Column Pod
Rexpeed Dual Pod
Custom a pillar triple gauge pod
Custom single exit exhaust
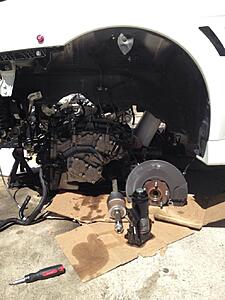
How it sits as of 08/15/2014

Engine bay as of 07/27/2014

Power as of 06/01/2014 (on an old tune that doesn't account for the catch can, PCV delete, fuel pump, 3.5" intercooler or the downpipe)

Weight as of 08/15/14
3460 with about ~ 4 gal

Well, ImageShack deleted all of my photos so I've lost quite a bit of stuff. Here's what was retained:
Engine bay as of 3/3/2014

Power as of 02/13/2014

Picking her up from South Coast
First set of goodies:
Late night plasti-dippin in the school parking lot:
Next morning: (getting ready to install the test pipe and the short DP)
Here's a full list of tools I was using to install all of this crap:
http://www.officialgearheadcentral.c...s-for-you.html
Later at night. Worked til' 2am installing the DP and the TP. Was hard mainly because it was done on the floor with two jack stands and a lack of tools.
Got the pod by rexpeed two days after. Went and used 3M tape to stick it to the stock pillar. Made holes in the stock pillar using a knife. So far it's been holding up fine to G-Force and usual wear and tear. After sticking it to the pillar, I plasti dipped that black as well. Ended up looking pretty good.
Update 12/4/2013
New V-Band clamp to get rid of that leak between DP and TP
Also got a COBB SF intake. Now I'm ready for the first track day.
Track photo:

Picked up a TiAL QR from Baka. Fitment is ****ty for the stock snorkel.

The BOV was knocking against the strut bar so I had to relocate it. Hopefully this helps someone who's looking forward to moving their BOV without getting rid of their intake snorkel.

Fog light delete (DIY here)
1/4/2014
Picked up Hotchkis FSB, RSB and Endlinks for an awesome price from Baka. Installed the rear one immediately.


1/10
Alignment done. Slowly getting ready for the next track day. Left some room for lowering springs


1/13/14
Time to get that exhaust installed. Hit the muffler shop and asked for a custom straight-pipe catback. Here's how it all went


2/6-14/14
Got the Mishimoto catch can today.

Also removed mud flaps.
2/10
Got the ets intake today and put it on. Fitment was bad and the heatshield was black, not brushed. But since ETS is so awesome they're sending me a new pipe!
 \
\Started installing the catch cans, only to realize I need longer hoses and more clamps. Instead of biking to Home Depot every time I needed something, I drove there and preformed the install on the spot.


2/12/2014
Installed springs. Started yestarday, finished today (5 hours, lack of an impact wrench made a huge difference, plus messed up with the front left first time around).


took off the wwf reservoir because my hands are fat


Final result:

02/28
Removed the stock front sway bar, took me a day and a half but it's raining here so give me a break. At one point I just said "screw it" and kept working under some light drizzle (but once it started pouring I sprinted back inside). The weather was not on my side these past few days.
Stock compared to the Hotchkis sway bar

Also:
Installed OEM fog deletes (as opposed to my ghetto Home Depot ones)

Also:
Removed front crash beam. Thanks to ddawg for the awesome write up (click here to read)

3/1
Front Sway bar installed, car back together. Took 2.5 days, mostly due to the rain. Some pics and videos:


3/3
Got the tires installed.
Old:


New:

Also got re-aligned.

Finally, got new breather filters to VTA the catch cans.


3/6/14
Removed the rear crash beam, v-bracket behind the rear seat, spare, jack and tools. Also got rid of the mud flaps, tired of them. Now to get her checked up.


Raceday - 3/9/14
Did pretty well, but could've done much better if I had more track time. Clocked 2:11.4 in the Race #13 CW configuration at Buttonwillow.


3/20-22/14
Installed the whiteline RCK and re-aligned the car


Why you should get an alignment after working on your suspension:

4/18-19
Installed front endlinks and the new failsafe gauge


5/9
Installed the ETS Downpipe as well as the weapon R test pipe


5/16
Started around 12 am at night, did the Kozmic catch can and then fell asleep:

Later in the morning, went and picked up the whiteline links from a lurker who has been supplying me with parts since the day I got the car.
Installed those ASAP.

Then went on to the pump:

Note: When removing the pump there's going to be a hose held by a green clip (can be barely seen in the pic above). Some instructions may say that you'll spew a "little" or "some fuel". No, you'll spill out a **** ton of fuel, that's not including the **** ton that's inside the fuel pump assembly. I ended up hosing down my interior with pissgas, much like so:
Anyways, pump is out of the car
Fuel level sensor:
Stock vs AEM
MAP fuel install kit- great asset
Setback: For some reason the ground wire was slightly exposed. I didn't have a car and I needed to get mine running by the end of the day. To do this I needed to use heat shrink, and the nearest auto parts store was not within a skateboarding distance. Sev to the rescue:

Sev drives 30 min from his home and brings me heat shrink to cover this up:


Everything back together (I later ziptied some hoses and moved them around)
5/23
Installed the FMIC today along with the 90* fitting for the catch can and the Kozmic left side bracket


Thanks to Kyle for the pump, InProgress for the catch can, Vegeta for the downpipe, P Turner for the FMIC, pistolpete for the 90* fitting and Ian @MAP for some awesome deals!
6/8-9
Car is apart, on stands yet again

Got everything except for the JDM rear beam, set it out on the desk and enjoyed the view (STM battery kit not pictured):

Then proceeded to wrap the pipes

Changed engine oil+ filter, then went for the SST fluid + filter. Here's a before-after comparison. The old filter had around 15k on it, 2 track days, lots of launches and canyon runs.
Intake and intercooler piping back on

Changed out the brake pads, another old vs new comparison.
AMS Brake lines installed by the dealer

Also installed the SST fan, thanks to qwertymess for clarifying which wires to tap into, which were the fog light wires
Finally, installed the STM small battery kit. Here's what my trunk looks like now

6/13-16
Rear beam installed

PWJDM quick release

Also installed the Cusco front link brackets.


Sent the Bilsteins for a revalve.


7/10
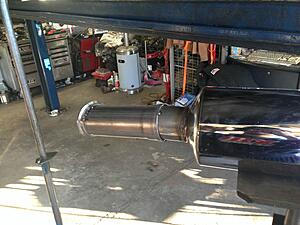
New exhaust by Morse Muffler


7/17
These came in

My good friend let me use his garage

Also, got the camber arms from qwertymess


7/21
GF got me one of these for my birthday.

Track day #3

For moar photos: http://www.evoxforums.com/forums/sho....php?p=4735186
Footage (sorry for sound quality):
Le me going off track because went in too hot. Brakes locked up so I released them and just went in the dirt, did a 4 wheel drift and came right out. Video Outside:
[ttp://www.youtube.com/watch?v=7CadYoxFcDs&list=UU5coTXISbL63ejwhQLFNR2A
Inside (omw out)
A few clean laps
Overheated
8/8-8/10
Finished up a gauge pod


Also, installed the new SPG seat with the BuddyClub Rail


8/21
Test fitting the new gauges. Didn't like the angle so I essentially re did the whole pod, messing up the clear coat in process. At least the gauges are pointed how I want them to be

Also got PSRS in the mail

8/28
Installed the Schroth Harness (Rallye 4). Also removed the OEM driver side seat belt.
9/1-8: The hell week.

Installed all the sensors on the car, everything was going fine, the car was supposed to be ready for a tune due the fifth of September, which meant it had to have new oil and had to be back together by the fourth. I had to wait for about 3 days for the machine shop to make a fitting to fit the transmission drain plug, in order to fit the 1/8 npt temp sensor provided with the AEM temp gauge. The WORKS temp sensor was a pita as well, since the 1/8 fitting was BPT and not NPT, so I had to get that re-threaded. That too, was solved. Then came the oil pressure sensor, and I used the AMS fitting in order to move it away from the engine. This seemed like it was the easiest of the three gauges (not including voltage, which just had to be hooked up to 12v power). Well, little did I know, the fitting AMS provided was cone shaped, resulting in the oil filter housing being cracked.
I was hoping to have this fixed before the tune (and then the track day), but after much thought, I cancelled both and got on with taking the car apart. I bought a windage tray, which has yet to be shipped as of 9/8/14. I used this as an opportunity to get a new, larger radiator- Mishimoto X line, and remove AC as I rarely use it. This being the first time I've ever pulled an engine, I've been asking for assistance. Morricus, Englando, bellacotim, UT_EvoX, Kozmic, DrivenFab and many more have been guiding me through the process and giving me various ideas.
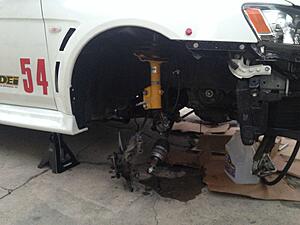
Let the tear apart commence:

Windage tray that's on the way

Slowly moving it all out of the way

AC Removed

Wiring removed, working on the CV shafts


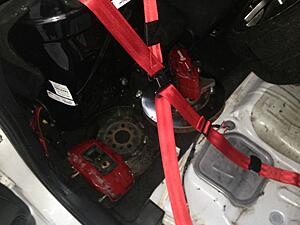
Stored the brembos in the car

New hoist ordered, on le way
9/10-9/12
Got the Mishimoto X-Line Radiator in the mail:

Removed the subframe, cleaned it up

Lowered the engine to the floor (more like dropped it)


Gathered fluids, realized I'll need ACD fluid, T case fluid and PS fluid.

Had the PSRS pressed into the control arms

Old crappy bushings

Installed the AMS AC delete

Last edited by mrwickd123; Sep 13, 2014 at 11:41 AM.
 Sep 13, 2014, 11:43 AM
#5
Evolving Member
Thread Starter
NOTE: All of this will be progressively updated
How to's and useful threads:
How to: Get accurate numbers in Virtual Dyno
How to: Install Prosport Evo Boost Gauge, Pics+Video guide
How to: Make yourself an affordable dual gauge pod in 15-20 minutes! Pics+Videos!
How to: Post pictures with your thread: Photo Guide
How To: AEM Failsafe Wideband and Boost
How To: Install Racing Buckets
Fog delete kit for under 10 bucks.
Whiteline RCK Install Notes
Catch Can Informational
EcuFlash Informational
Various resources used for this build:
Alignment DIY Videos:
Links:
Alignment Specs Informational
Rear O2 Logging How To and Informational
Tech Specs Informational
Bondo Glass Repair Informational and How To
Images:
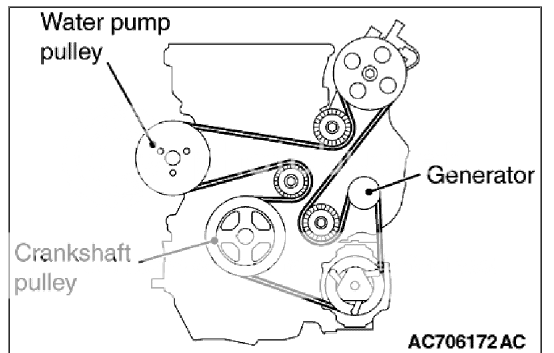
Belt positioning
Mini-reviews (Click if underlined for full review) :
AEM Boost and AFR Gauge- Solid gauges that have performed very well and are certainly worth the money. Both gauges are easy to install (assuming you know what you're doing) and will keep you informed on your car's condition. 8/10
AEM Failsafe- great gauge for the money. Not only is this a wideband + boost gauge, this is also a failsafe gauge which can prevent engine damage. One minor issue with this gauge is that at first you can't quite tell what boost levels you are at, that is until you configure the gauge so the LED colors correspond with desired boost levels. It was reasonably easy to install, yet AEM has their priorities backwards. They included an *** ton of wires and nowhere near enough of a vacuum line (and their fitting was absolute crap). While it's worth the price tag, it does require a visit to pepboys to get the install done. 8/10
AEM Temp Gauge
AEM Oil Pressure Gauge
AEM 320lph Fuel Pump- I got this pump with hopes of preventing anymore knock past 6k rpm. Well, what do you know, even without the tune being adjusted the car no longer knocks up top. More so, it knocks less than ever. It seems like the stock fuel pump leans out after being overheated. This is not the story with the AEM pump. It keeps pumping fuel into the injectors and its flow rate of 320lph is more than enough for the stock turbo set-up. 9/10
AMS Oil Pressure gauge line
Bilstein Revalve Service Review
Buddyclub Seat Rail Review
Cobb SF Intake - VD did not catch much of a difference, however the car did feel faster mostly due to amplified induction noise and bov noise. The lack of a heat shield caused an annoying idle issue with the AC on. 6/10
ETS UICP - neither VD nor the butt dyno noticed a difference after bolting this thing on, however it did provide a peace of mind, knowing that it will not expand under high pressure like the stock UICP and will not pop off. 7/10
ETS Intake Review
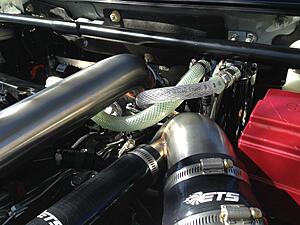
ETS Downpipe - The quality of the pipe and welds is top notch, although it is a bit heavier then what I would like it to be. It's easy to install once you get the hang of the dp install. It actually made the car sound smoother, less rough, more refined. As for performance, the car did overboost after the install by around 2-3 psi to 30 psi, meaning the restriction has in fact been removed. I have yet to get a re-tune for full numbers, but I don't doubt its effectiveness. 8.5/10
Grimmspeed 3 Port - very easy to install and configure, even for an amateur like myself. Has been on for almost a year and two track days and so far it held up real well. No complaints here, 10/10
H&R Camber bolts Review
Hotchkis sway bars + links- Absolutely love them, huge difference over stock. The car feels way more planted and stable and inspires tons of confidence. Bolt on install, comes with everything needed + great customer support. The price of the links is a bit high, but no biggie as they live up to the tag. Overall I'm absolutely satisfied. 9.5/10
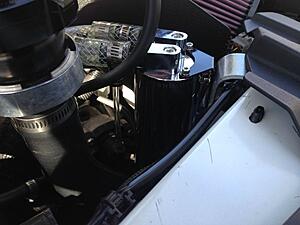
Kozmic K27 Catch Can Review
MAP Fuel Pump Install Kit- pretty much required if you're installing any pump that isn't labeled "drop in". The kit makes the install a breeze, but instructions could definitely help- even though it is mostly self explanatory. The billet pump housing feels solid in the hand, the quality speaks for itself. In my opinion this kit is definitely worth the money, considering the fact that the pump is like 90 bucks. If you purchase this kit WITH the pump, it will cost you even less. The hose could be shorter, as it is a bit too long, and as mentioned previously instructions would be nice. Last tick off was the sock, as it was too large to fit the AEM pump. I ended up using the sock that came with the pump. All in all, the kit gets a solid 8.5/10
Mishimoto Catch Can Review
Recaro Profi SPG Seat Review
Rexpeed dual pod- pretty good piece for the price, made of ABS plastic so no cracks ever occured. Rexpeed did not provide any mounting hardware on instructions but there's not much need considering it's mostly common sense and lots of 3M dual sided tape. Very functional piece, but with a bit of a high price tag. 7.5/10
Spal fan for the SST cooler - While a great addition, the fan will not do anything that's not already being done at high speeds. It is at idle or in traffic will it actually suck air into the cooler. It isn't an expensive piece, and it isn't difficult to install. Because of this, I think a 7.5/10 is a well deserved rating.
Swift Spec - R Review
Tactrix cable (OP2.0)- while the price tag may leave some in awe, we must remember that similar cables + software cost twice the price. Thanks to this cable I've been able to diagnose lots of issues and have some VD fun. It also played a key role in getting my car tuned by Jon. Is it worth the price? Every penny. 10/10
TiAL QR - Beautiful piece, made in the USA. This thing holds boost real well and looks and sounds fantastic. My stock BOV was giving out so this was the rational choice. I'm still running it with no problems and it's not giving me any trouble. 8/10
TopSpeed test pipe- This does not come separately from the entire exhaust however if you manage to scoop one up, keep it. Top Speed currently has a different version, which is like 130 bucks on eBay. Beautiful pipe, cost effective, comes with two bungs and mounts right up to the OEM hanger location. Only problem was fitment as it was a bit short for the OEM exhaust, however this may or may not apply to the current version. 7.5/10
UR Short Downpipe - Good piece for anyone with a stock downpipe and an aftermarket test pipe/hfc who is looking to eliminate a leak, or simply have your exhaust be 3" in diameter down from the O2 housing. You can opt in for an optional wideband bung as well, and the reason you want your wideband in your downpipe is to prevent false readings in case a leak occurs. I personally suggest buying these used, as 150 dollars (170 if you want that bung) for a brand new one is a tad bit excessive, considering the gains (or lack thereof) you get from this mod. 6.5/10
V-Band did a great job of eliminating the leak between the DP and test pipe, and separating the two that much easier. It's around 20 bucks on eBay. The clamp itself, however, is pretty crappy and can take damage pretty easily, even when installing it. 7/10
Whiteline Rear Endlinks- They do come a bit loose if you don't tighten them using an impact gun, however this is virtually impossible on the chassis side. The adjustability is nice, but having worked with hotchkis endlinks, I can say it can be better. The price is fair, bringing the overall rating to a 7/10
Whiteline Rear Camber Arms- Very easy to adjust, bolt right up to factory mounts. These control arms are a tad heavier than stock, and do cost in the mid to high 300 range. Overall rating: 7.5/10
Weapon R Racing Cat - Fitment was not bad at all, although the fake cat was not cut out convincingly. It's got a few rough edges but overall you won't be able to tell from under the car, especially if its been lowered. For the money I reckon there's nothing better on the market. 7/10
Whiteline RCK Review
Whiteline Front Links- Adjustability of these links leaves much desired, although they can definitely take a beating. If the car is DD, they're not worth the trouble. 6.5/10
Yokohama Advan A13C Review
Yokohama Advan AD08R- absolutely love these tires. It takes some time to warm up, but once warm they grip the road really nice. They also perform a tad bit better in the wet when compared to the OEM A13Cs. Compared to the OEM tires the price is way lower and in my opinion it is definitely worth the price. 8.5/10
How to's and useful threads:
How to: Get accurate numbers in Virtual Dyno
How to: Install Prosport Evo Boost Gauge, Pics+Video guide
How to: Make yourself an affordable dual gauge pod in 15-20 minutes! Pics+Videos!
How to: Post pictures with your thread: Photo Guide
How To: AEM Failsafe Wideband and Boost
How To: Install Racing Buckets
Fog delete kit for under 10 bucks.
Whiteline RCK Install Notes
Catch Can Informational
EcuFlash Informational
Various resources used for this build:
Alignment DIY Videos:
Links:
Alignment Specs Informational
Rear O2 Logging How To and Informational
Tech Specs Informational
Bondo Glass Repair Informational and How To
Images:
Belt positioning
Mini-reviews (Click if underlined for full review) :
AEM Boost and AFR Gauge- Solid gauges that have performed very well and are certainly worth the money. Both gauges are easy to install (assuming you know what you're doing) and will keep you informed on your car's condition. 8/10
AEM Failsafe- great gauge for the money. Not only is this a wideband + boost gauge, this is also a failsafe gauge which can prevent engine damage. One minor issue with this gauge is that at first you can't quite tell what boost levels you are at, that is until you configure the gauge so the LED colors correspond with desired boost levels. It was reasonably easy to install, yet AEM has their priorities backwards. They included an *** ton of wires and nowhere near enough of a vacuum line (and their fitting was absolute crap). While it's worth the price tag, it does require a visit to pepboys to get the install done. 8/10
AEM Temp Gauge
AEM Oil Pressure Gauge
AEM 320lph Fuel Pump- I got this pump with hopes of preventing anymore knock past 6k rpm. Well, what do you know, even without the tune being adjusted the car no longer knocks up top. More so, it knocks less than ever. It seems like the stock fuel pump leans out after being overheated. This is not the story with the AEM pump. It keeps pumping fuel into the injectors and its flow rate of 320lph is more than enough for the stock turbo set-up. 9/10
AMS Oil Pressure gauge line
Bilstein Revalve Service Review
Buddyclub Seat Rail Review
Cobb SF Intake - VD did not catch much of a difference, however the car did feel faster mostly due to amplified induction noise and bov noise. The lack of a heat shield caused an annoying idle issue with the AC on. 6/10
ETS UICP - neither VD nor the butt dyno noticed a difference after bolting this thing on, however it did provide a peace of mind, knowing that it will not expand under high pressure like the stock UICP and will not pop off. 7/10
ETS Intake Review
ETS Downpipe - The quality of the pipe and welds is top notch, although it is a bit heavier then what I would like it to be. It's easy to install once you get the hang of the dp install. It actually made the car sound smoother, less rough, more refined. As for performance, the car did overboost after the install by around 2-3 psi to 30 psi, meaning the restriction has in fact been removed. I have yet to get a re-tune for full numbers, but I don't doubt its effectiveness. 8.5/10
Grimmspeed 3 Port - very easy to install and configure, even for an amateur like myself. Has been on for almost a year and two track days and so far it held up real well. No complaints here, 10/10
H&R Camber bolts Review
Hotchkis sway bars + links- Absolutely love them, huge difference over stock. The car feels way more planted and stable and inspires tons of confidence. Bolt on install, comes with everything needed + great customer support. The price of the links is a bit high, but no biggie as they live up to the tag. Overall I'm absolutely satisfied. 9.5/10
Kozmic K27 Catch Can Review
MAP Fuel Pump Install Kit- pretty much required if you're installing any pump that isn't labeled "drop in". The kit makes the install a breeze, but instructions could definitely help- even though it is mostly self explanatory. The billet pump housing feels solid in the hand, the quality speaks for itself. In my opinion this kit is definitely worth the money, considering the fact that the pump is like 90 bucks. If you purchase this kit WITH the pump, it will cost you even less. The hose could be shorter, as it is a bit too long, and as mentioned previously instructions would be nice. Last tick off was the sock, as it was too large to fit the AEM pump. I ended up using the sock that came with the pump. All in all, the kit gets a solid 8.5/10
Mishimoto Catch Can Review
Recaro Profi SPG Seat Review
Rexpeed dual pod- pretty good piece for the price, made of ABS plastic so no cracks ever occured. Rexpeed did not provide any mounting hardware on instructions but there's not much need considering it's mostly common sense and lots of 3M dual sided tape. Very functional piece, but with a bit of a high price tag. 7.5/10
Spal fan for the SST cooler - While a great addition, the fan will not do anything that's not already being done at high speeds. It is at idle or in traffic will it actually suck air into the cooler. It isn't an expensive piece, and it isn't difficult to install. Because of this, I think a 7.5/10 is a well deserved rating.
Swift Spec - R Review
Tactrix cable (OP2.0)- while the price tag may leave some in awe, we must remember that similar cables + software cost twice the price. Thanks to this cable I've been able to diagnose lots of issues and have some VD fun. It also played a key role in getting my car tuned by Jon. Is it worth the price? Every penny. 10/10
TiAL QR - Beautiful piece, made in the USA. This thing holds boost real well and looks and sounds fantastic. My stock BOV was giving out so this was the rational choice. I'm still running it with no problems and it's not giving me any trouble. 8/10
TopSpeed test pipe- This does not come separately from the entire exhaust however if you manage to scoop one up, keep it. Top Speed currently has a different version, which is like 130 bucks on eBay. Beautiful pipe, cost effective, comes with two bungs and mounts right up to the OEM hanger location. Only problem was fitment as it was a bit short for the OEM exhaust, however this may or may not apply to the current version. 7.5/10
UR Short Downpipe - Good piece for anyone with a stock downpipe and an aftermarket test pipe/hfc who is looking to eliminate a leak, or simply have your exhaust be 3" in diameter down from the O2 housing. You can opt in for an optional wideband bung as well, and the reason you want your wideband in your downpipe is to prevent false readings in case a leak occurs. I personally suggest buying these used, as 150 dollars (170 if you want that bung) for a brand new one is a tad bit excessive, considering the gains (or lack thereof) you get from this mod. 6.5/10
V-Band did a great job of eliminating the leak between the DP and test pipe, and separating the two that much easier. It's around 20 bucks on eBay. The clamp itself, however, is pretty crappy and can take damage pretty easily, even when installing it. 7/10
Whiteline Rear Endlinks- They do come a bit loose if you don't tighten them using an impact gun, however this is virtually impossible on the chassis side. The adjustability is nice, but having worked with hotchkis endlinks, I can say it can be better. The price is fair, bringing the overall rating to a 7/10
Whiteline Rear Camber Arms- Very easy to adjust, bolt right up to factory mounts. These control arms are a tad heavier than stock, and do cost in the mid to high 300 range. Overall rating: 7.5/10
Weapon R Racing Cat - Fitment was not bad at all, although the fake cat was not cut out convincingly. It's got a few rough edges but overall you won't be able to tell from under the car, especially if its been lowered. For the money I reckon there's nothing better on the market. 7/10
Whiteline RCK Review
Whiteline Front Links- Adjustability of these links leaves much desired, although they can definitely take a beating. If the car is DD, they're not worth the trouble. 6.5/10
Yokohama Advan A13C Review
Yokohama Advan AD08R- absolutely love these tires. It takes some time to warm up, but once warm they grip the road really nice. They also perform a tad bit better in the wet when compared to the OEM A13Cs. Compared to the OEM tires the price is way lower and in my opinion it is definitely worth the price. 8.5/10
Last edited by mrwickd123; Sep 13, 2014 at 12:00 PM.

Thread
Thread Starter
Forum
Replies
Last Post
doncarbone
Project Cars / Build Threads
120
Apr 21, 2020 01:15 PM
kpt6
For Sale - Part Outs
5
Jul 28, 2017 12:25 PM
FS[Mid-Atlantic]: VA/DC 2004 WW EVO RS 79k miles $14k
drakedeming
For Sale - Cars For Sale
7
May 9, 2017 03:10 PM