MCS 2-Way Remote reservoir Dampers Review
 Jun 6, 2017, 09:33 PM
#1
MCS 2-Way Remote reservoir Dampers Review
Back in March, I ordered a set of MCS ( http://www.motioncontrolsuspension.com ) (https://vorshlag-store.com) 2-way remote reservoir dampers for my 2011 Evo X. They arrived in late April, with only a few hiccups  and I've finally got them on the car. I ordered them for use in time attack and in NASA Club racing, autocross competition. Ive had the JRZ RS1 on my car since 2013 and was looking for something to take me to that next level. After reading some reviews I decided to order the MCS setup through Vorshlag Motorsports in the Plano area, which was a great experience. Top-notch customer service and good pricing.
First of all, I can't say enough about how responsive and helpful Wyatt at MCS has been in working through this and getting them on the car. I was a bit worried about where and how to mount the 2 ways but Wyatt supplied me all the mounting bracket�s and hard wear to mount them up properly and free of charge, now that's good customer service, that means the external reservoirs aren't going anywhere. Service after the sale is one of the most important parts of buying one of these shock setups and MCS delivers.
I've had the shocks on the car for a few days but just got the struts on the car of yesterday morning, and I will have a HPDE in a few days at Thunderhill to really try them out. Having already had the JRZ on the car since 2013 I exited to play with the two ways and see how much it�s really make a difference.
The other really neat part of these things is the nitrogen pressure adjustability, which is a feature of most remote reservoir dampers. I've got them set at 175psig right now. I was informed by the people who did all the chassis set up the can be set up to add extra "spring rate" from the nitrogen lift.
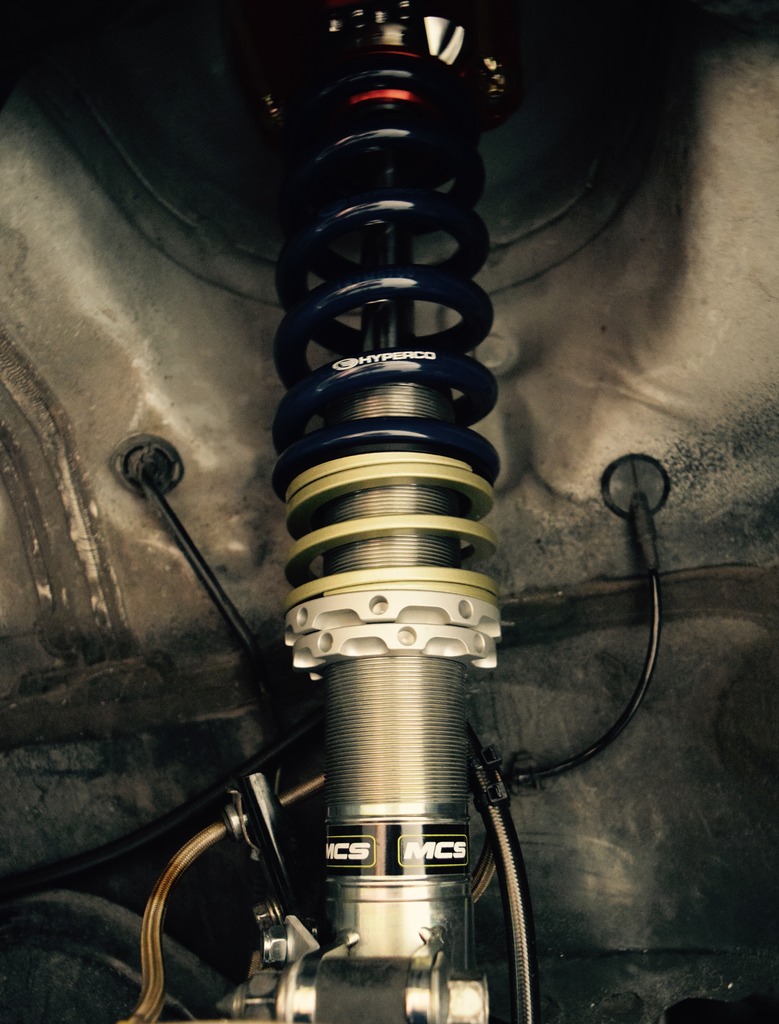
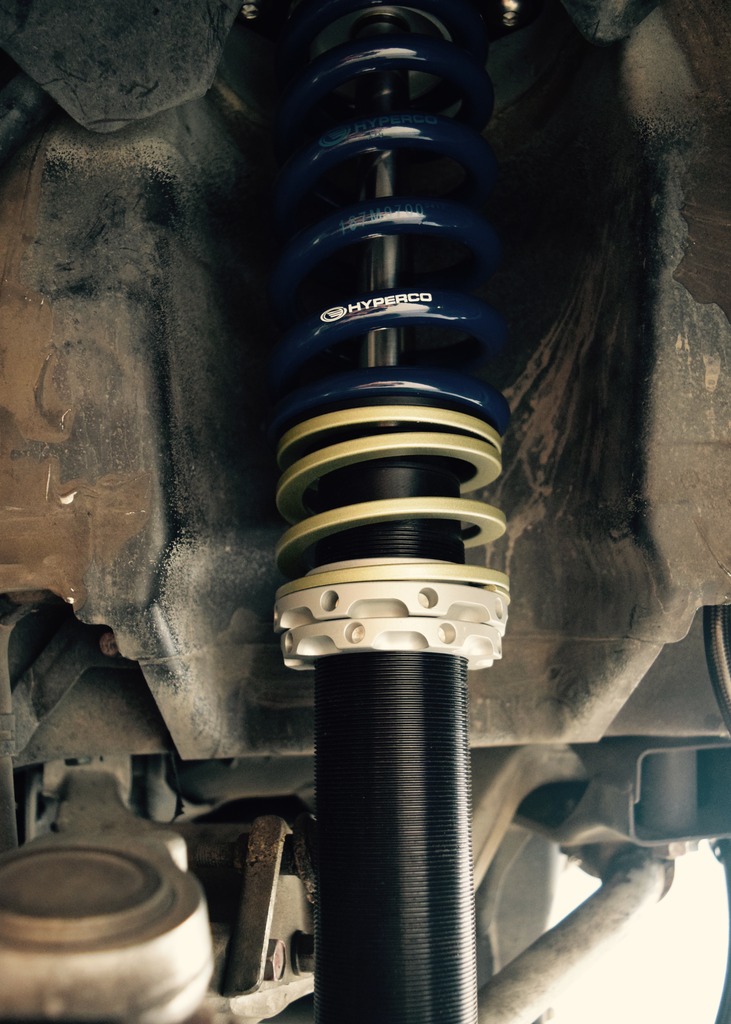
I'm running 265/35-18 RE71R and preventing rollover is key when you're stuck with a pig of a car so camber is set -3.0 in front and 2.6 in rear with 700lbs hypercoil spring square, running street tires, so the added roll resistance should be a big help, where I might be able to soften the rear bar while maintaining roll stiffness, which will help with mid-corner balance. Lots of fun stuff to play with. The tire wear will tell the tale at the next event.
For the street, I've just had the stock nitrogen psi about 175psi in the canisters and 8 clicks from soft on the rebound all around, with 4 clicks of compression in front and in the rear. This seems to keep the control over big hits effective without inducing any head toss over rough concrete. The car feels a little bit stiffer than my JRZ with 550lbs spring, but it rides pretty damn nice with them at the beginning settings, with the only harshness coming from the relatively stiff 700lbs spring. There's a noticeable difference between each adjustment point, which I'm very surprised by as I was expecting to need 3-4 clicks to notice a difference with heavy car that I have.
The MCS setup in total weighs about 5 lbs more than the JRZ�s. This is partly because of the remote reservoirs and hoses and partly because the struts use a steel body instead of aluminum. Most of extra weight is in the struts themselves.
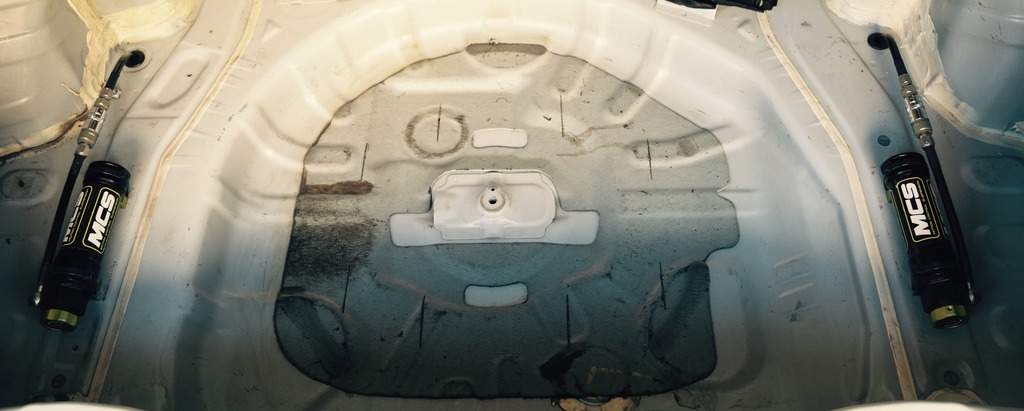
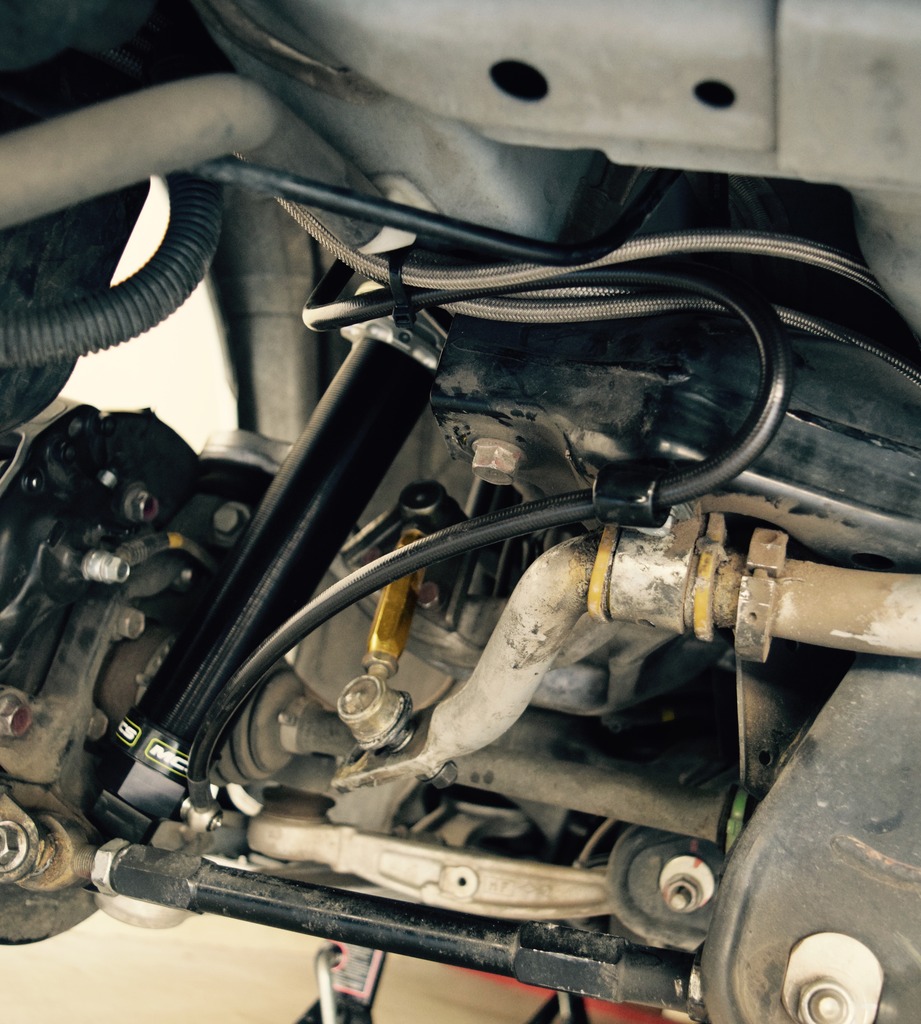
Mounting the canisters was probably the most difficult part of the install. I ended up routing the rears through one of the notch cut in the trunk on each side, used the supplied mount for both canisters to the bottom of the trunk area. It was my best solution for ease of adjustability for both compression and nitrogen pressure and keeping them out of the way of cargo with the length I had available. The fronts are routed up along the inner body to the inner fender liner with some zip ties protecting them from abrasion against the tire and rim, and the canisters were placed by the back of the headlight down away from most of the engine heat. This is really more of a friction fit, using some foam and zip ties to hold it in place. I didn't want to have to cut and re-zip tie the canisters every time I want to adjust pressure so this still allows easy access to the compression adjuster if needed.
Will report back with impressions after I've competed on them a few times and have a better idea what I like for track day settings. I have a feeling I won't be far off my street settings.
Highly recommend MCS for your Evo X Awesome Damper needs. See below for in-focus photos: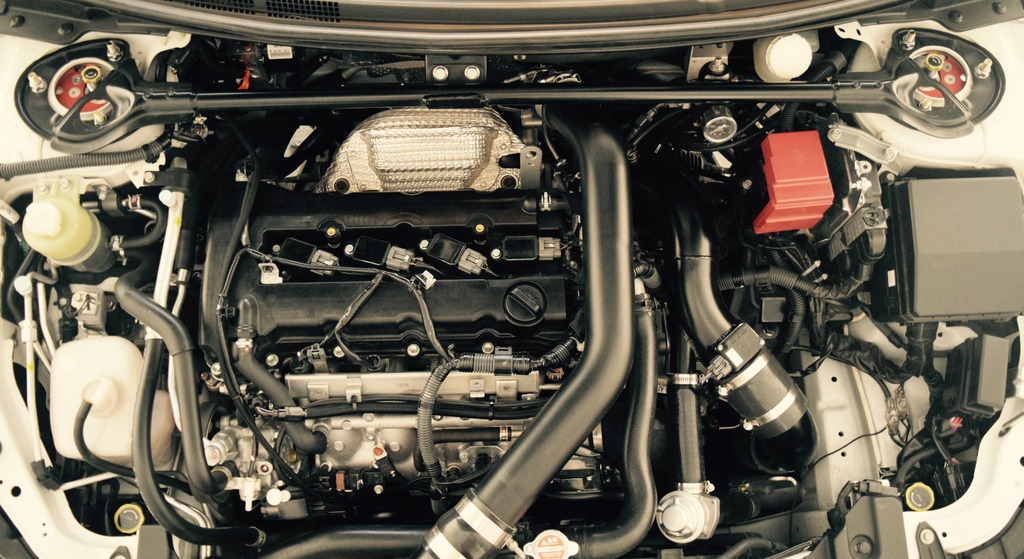
and I've finally got them on the car. I ordered them for use in time attack and in NASA Club racing, autocross competition. Ive had the JRZ RS1 on my car since 2013 and was looking for something to take me to that next level. After reading some reviews I decided to order the MCS setup through Vorshlag Motorsports in the Plano area, which was a great experience. Top-notch customer service and good pricing. First of all, I can't say enough about how responsive and helpful Wyatt at MCS has been in working through this and getting them on the car. I was a bit worried about where and how to mount the 2 ways but Wyatt supplied me all the mounting bracket�s and hard wear to mount them up properly and free of charge, now that's good customer service, that means the external reservoirs aren't going anywhere. Service after the sale is one of the most important parts of buying one of these shock setups and MCS delivers.
I've had the shocks on the car for a few days but just got the struts on the car of yesterday morning, and I will have a HPDE in a few days at Thunderhill to really try them out. Having already had the JRZ on the car since 2013 I exited to play with the two ways and see how much it�s really make a difference.
The other really neat part of these things is the nitrogen pressure adjustability, which is a feature of most remote reservoir dampers. I've got them set at 175psig right now. I was informed by the people who did all the chassis set up the can be set up to add extra "spring rate" from the nitrogen lift.
I'm running 265/35-18 RE71R and preventing rollover is key when you're stuck with a pig of a car so camber is set -3.0 in front and 2.6 in rear with 700lbs hypercoil spring square, running street tires, so the added roll resistance should be a big help, where I might be able to soften the rear bar while maintaining roll stiffness, which will help with mid-corner balance. Lots of fun stuff to play with. The tire wear will tell the tale at the next event.
For the street, I've just had the stock nitrogen psi about 175psi in the canisters and 8 clicks from soft on the rebound all around, with 4 clicks of compression in front and in the rear. This seems to keep the control over big hits effective without inducing any head toss over rough concrete. The car feels a little bit stiffer than my JRZ with 550lbs spring, but it rides pretty damn nice with them at the beginning settings, with the only harshness coming from the relatively stiff 700lbs spring. There's a noticeable difference between each adjustment point, which I'm very surprised by as I was expecting to need 3-4 clicks to notice a difference with heavy car that I have.
The MCS setup in total weighs about 5 lbs more than the JRZ�s. This is partly because of the remote reservoirs and hoses and partly because the struts use a steel body instead of aluminum. Most of extra weight is in the struts themselves.
Mounting the canisters was probably the most difficult part of the install. I ended up routing the rears through one of the notch cut in the trunk on each side, used the supplied mount for both canisters to the bottom of the trunk area. It was my best solution for ease of adjustability for both compression and nitrogen pressure and keeping them out of the way of cargo with the length I had available. The fronts are routed up along the inner body to the inner fender liner with some zip ties protecting them from abrasion against the tire and rim, and the canisters were placed by the back of the headlight down away from most of the engine heat. This is really more of a friction fit, using some foam and zip ties to hold it in place. I didn't want to have to cut and re-zip tie the canisters every time I want to adjust pressure so this still allows easy access to the compression adjuster if needed.
Will report back with impressions after I've competed on them a few times and have a better idea what I like for track day settings. I have a feeling I won't be far off my street settings.
Highly recommend MCS for your Evo X Awesome Damper needs. See below for in-focus photos:


 Jun 18, 2017, 06:51 PM
#2
Update:
Went to Thunderhill last Monday. Was excited to try the coilovers out on the track. First session with settings at recommend settings to begin with 8 bump and 4 rebound. first time out. car seemed well planted, front end had some porpoising but all in all good. Car had less dive and lift most likely do to the stiffer spring. Second session tried to balance the porpoising, adjusted to 6 bump and 8 rebound. Winging it since i have never had to deal with adjusting 2 way coilovers. porpoising was gone, seemed like things were going in the right direction. I'm amazed by the way each setting had noticeable difference. third session adjusted setting to 10 bump and 11 rebound, this is were things got to wild . I went in total opposite direction car became very bouncy at the limits and in corner entry and exit, posted my PB that session though.
All in all very capable coilover, seems like i have a lot of learning to do about how to adjusted correctly. shame on me for not learning before hand... so if anyone has any tuning tips and settings please let me know. Im really a newb when it comes to this stuff .
Video for reference:
Thanks!
 Jun 22, 2017, 01:38 PM
#4
EvoM Guru
iTrader: (1)
Nice setup man. Car looks very composed.

Trending Topics
Jan 29, 2019, 06:15 PM
#8
Newbie

Join Date: Nov 2007
Location: Texas
Posts: 57
Likes: 0
Received 0 Likes
on
0 Posts
GoodTimes,
I PM'ed you this question a couple of days ago, so sorry for posting it too, just figured you may not check your PMs often. I just picked up MCS 2WNR coilovers from Vorshlag Friday for my 2011 MR. I'm not ready to install them just yet, but I did notice the struts lack a mounting point for the stock brake line brackets. Do you have any pictures that show your solution for this? Or can you describe what you did? Just trying to figure things out before I jump into the install in a month or two. I would rather not use zip ties. Looking for a more solid / permanent install.
Thanks for any help you can provide!
Roger
Jan 30, 2019, 05:16 AM
#9
Evolved Member
GoodTimes,
I PM'ed you this question a couple of days ago, so sorry for posting it too, just figured you may not check your PMs often. I just picked up MCS 2WNR coilovers from Vorshlag Friday for my 2011 MR. I'm not ready to install them just yet, but I did notice the struts lack a mounting point for the stock brake line brackets. Do you have any pictures that show your solution for this? Or can you describe what you did? Just trying to figure things out before I jump into the install in a month or two. I would rather not use zip ties. Looking for a more solid / permanent install.
Thanks for any help you can provide!
Roger
I PM'ed you this question a couple of days ago, so sorry for posting it too, just figured you may not check your PMs often. I just picked up MCS 2WNR coilovers from Vorshlag Friday for my 2011 MR. I'm not ready to install them just yet, but I did notice the struts lack a mounting point for the stock brake line brackets. Do you have any pictures that show your solution for this? Or can you describe what you did? Just trying to figure things out before I jump into the install in a month or two. I would rather not use zip ties. Looking for a more solid / permanent install.
Thanks for any help you can provide!
Roger
Jan 30, 2019, 05:22 PM
#10
Newbie
Join Date: Nov 2007
Location: Texas
Posts: 57
Likes: 0
Received 0 Likes
on
0 Posts
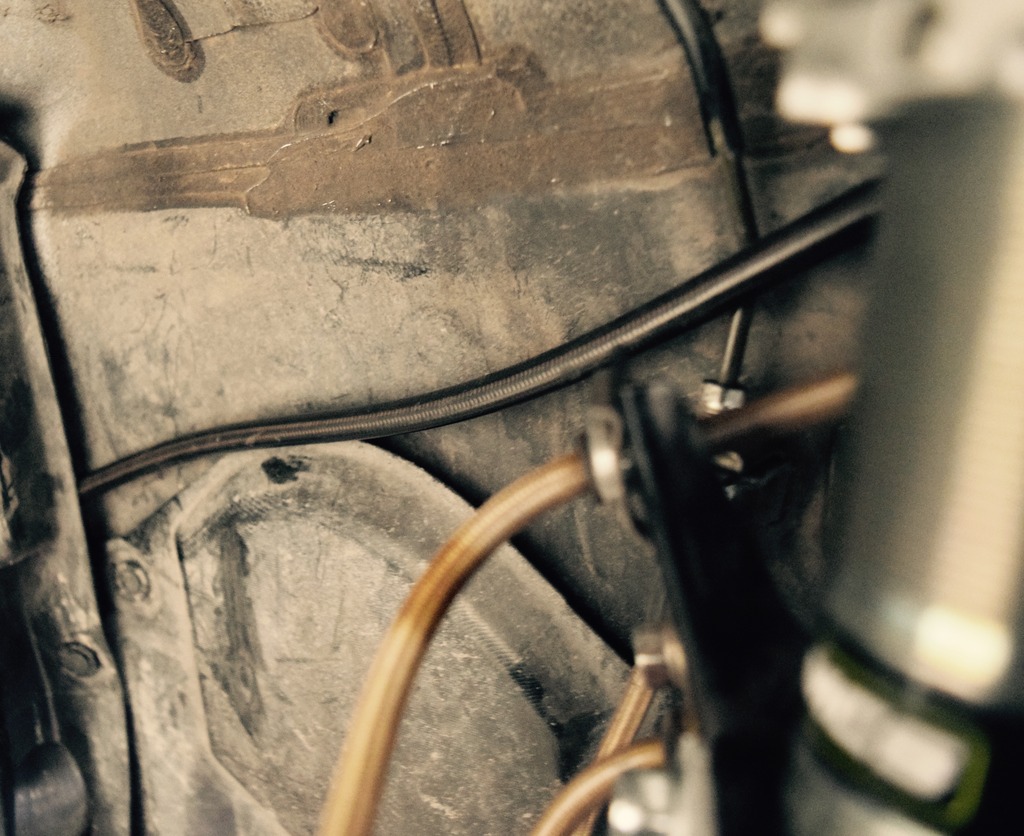
Thanks for the reply, but I'm not sure we're talking about the same bracket? I apologize for not giving a better description of the bracket I'm concerned about. Your description sounds like you're talking about the little white plastic "U-shaped" channel that the wheel speed sensor runs in that fits around the knuckle. I'm concerned about the metal bracket that holds the brake fluid lines, where they transition from a flex line back to a solid line, etc. It is actually 2 metal clips that join together I believe. On the stock struts there is a stud welded on the INBD side, and this bracket assembly slides over the stud and is retained by a 12mm nut. I want to know what others did to mount this bracket assembly since there is no stud on the INBD side of the MCS struts.
Thanks for any help you can provide!
Roger
Jan 30, 2019, 05:28 PM
#11
Evolved Member
MrAWD,
Thanks for the reply, but I'm not sure we're talking about the same bracket? I apologize for not giving a better description of the bracket I'm concerned about. Your description sounds like you're talking about the little white plastic "U-shaped" channel that the wheel speed sensor runs in that fits around the knuckle. I'm concerned about the metal bracket that holds the brake fluid lines, where they transition from a flex line back to a solid line, etc. It is actually 2 metal clips that join together I believe. On the stock struts there is a stud welded on the INBD side, and this bracket assembly slides over the stud and is retained by a 12mm nut. I want to know what others did to mount this bracket assembly since there is no stud on the INBD side of the MCS struts.
Thanks for any help you can provide!
Roger

To make things a bit more clear, are you talking about the front strut or rear shock?
Either way, I did not have to do anything about the brake lines for either front nor rear. If you could add a picture here, it would be of great help!
Jan 30, 2019, 06:18 PM
#12
Newbie
Join Date: Nov 2007
Location: Texas
Posts: 57
Likes: 0
Received 0 Likes
on
0 Posts
I guess we were not talking about the same bracket!
To make things a bit more clear, are you talking about the front strut or rear shock?
Either way, I did not have to do anything about the brake lines for either front nor rear. If you could add a picture here, it would be of great help!
To make things a bit more clear, are you talking about the front strut or rear shock?
Either way, I did not have to do anything about the brake lines for either front nor rear. If you could add a picture here, it would be of great help!
Thanks,
Roger
Jan 30, 2019, 06:34 PM
#13
Newbie
Join Date: Nov 2007
Location: Texas
Posts: 57
Likes: 0
Received 0 Likes
on
0 Posts
Jan 30, 2019, 06:39 PM
#14
Newbie
Join Date: Nov 2007
Location: Texas
Posts: 57
Likes: 0
Received 0 Likes
on
0 Posts
Here's a link that shows the bracket and how it's holding a bunch of lines in place. Sorry it's from another forum. https://www.evoxforums.com/forums/sh...d.php?t=398190
Jan 31, 2019, 05:13 AM
#15
Evolved Member
Here's a link that shows the bracket and how it's holding a bunch of lines in place. Sorry it's from another forum. https://www.evoxforums.com/forums/sh...d.php?t=398190