4g94 Forged internals rebuild steps by step guide


The following users liked this post:
03_OZRally (Nov 21, 2020)
The following users liked this post:
03_OZRally (Nov 21, 2020)
 Feb 2, 2015, 06:16 PM
#18
Evolved Member
Thread Starter
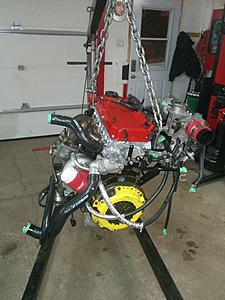
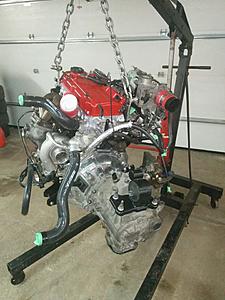
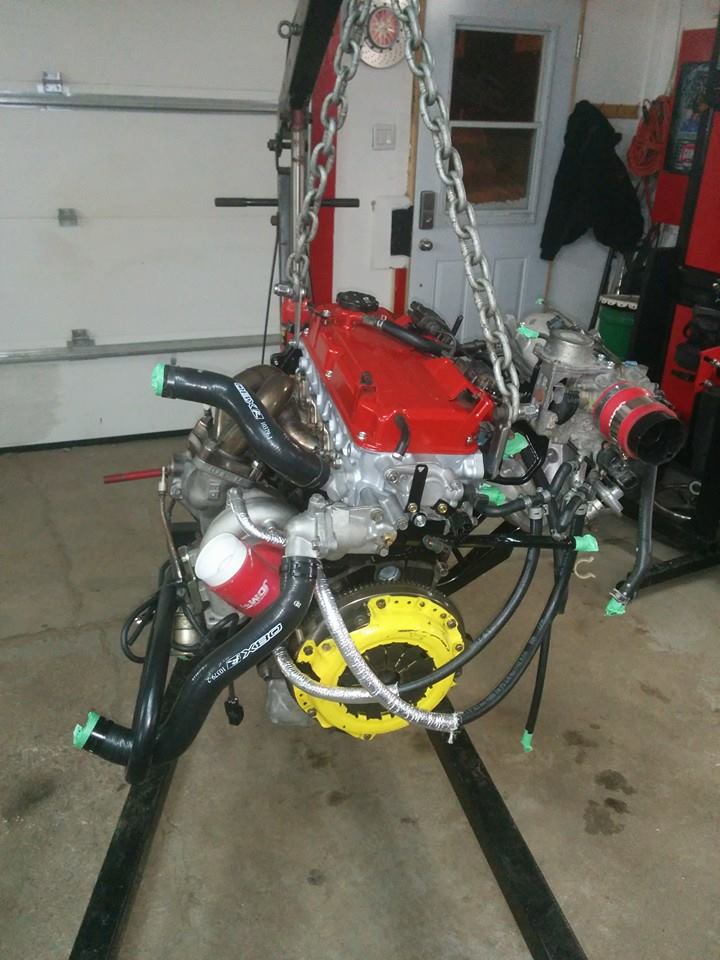
If you guys are turboed and are looking for ideas on where and how to safely mount your turbo oil feed line here's a few pictures of the turbo and various brackets i have made for the oil feed and O2 housing to support the turbo!
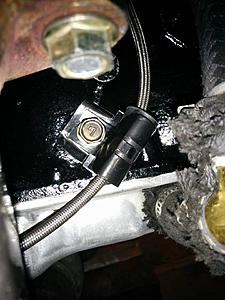
Here's the 1st bracket for the oil feed line to keep it in distance with the engine block and away from the exhaust downpipe:
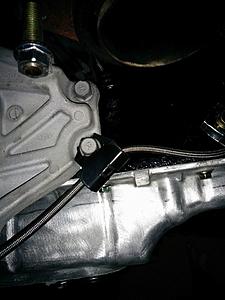
Here's the 2nd bracket for the oil feed line:
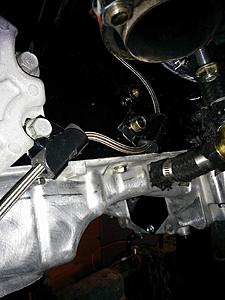
Now the 2 brackets together:
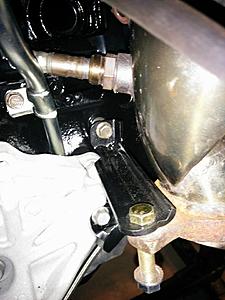
This is my bracket to support the exhaust manifold and turbo assembly on the O2 housing:
Those oil feed line brackets are really easy to make all you need it a thin sheet metal piece and a rubber hose with a larger ID than your oil feed line OD. Cut a small piece of rubber hose and slice it open to be able to slide it onto your oil feed line. Bend the metal sheet over the rubber hose and drill 2 equal size holes to fit the correct size bolt you're going to use to mount it in place. Paint the part if you want and then you're ready to go! Easy custom made bracket that is going to let your oil feed line move freely without rubbing metal on metal.
As for the O2 housing bracket i highly recommend making one if you don't have one already because the turbo assembly is extremely heavy and if not supported will cause your manifold to crack after a while. This time you want to use a really thick piece of metal to avoid the piece to bend and eventually break in 2. I used the old bracket that kept the power steering pump tied to the engine mount bracket bolt, cut it, bent it and then welded the corner of the piece in place to increase the bracket's strength.
Here's the 1st bracket for the oil feed line to keep it in distance with the engine block and away from the exhaust downpipe:

Here's the 2nd bracket for the oil feed line:

Now the 2 brackets together:

This is my bracket to support the exhaust manifold and turbo assembly on the O2 housing:

Those oil feed line brackets are really easy to make all you need it a thin sheet metal piece and a rubber hose with a larger ID than your oil feed line OD. Cut a small piece of rubber hose and slice it open to be able to slide it onto your oil feed line. Bend the metal sheet over the rubber hose and drill 2 equal size holes to fit the correct size bolt you're going to use to mount it in place. Paint the part if you want and then you're ready to go! Easy custom made bracket that is going to let your oil feed line move freely without rubbing metal on metal.
As for the O2 housing bracket i highly recommend making one if you don't have one already because the turbo assembly is extremely heavy and if not supported will cause your manifold to crack after a while. This time you want to use a really thick piece of metal to avoid the piece to bend and eventually break in 2. I used the old bracket that kept the power steering pump tied to the engine mount bracket bolt, cut it, bent it and then welded the corner of the piece in place to increase the bracket's strength.
The following users liked this post:
03_OZRally (Nov 21, 2020)
Feb 21, 2015, 09:54 AM
#19
Evolved Member
Thread Starter
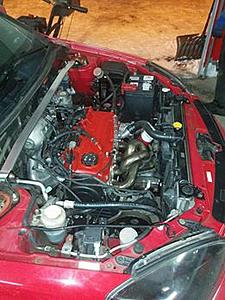
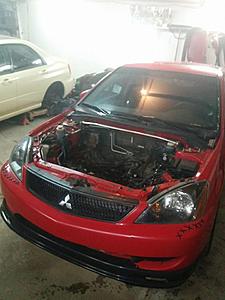
Got the engine and transmission back in the car yesturday night worked from 6pm to 3am. Primed the oil pump and turbo oil feed line and now all that is left to do is install the intake piping, transmission oil and coolant! Here's a few pictures from yesturday.


The following users liked this post:
03_OZRally (Nov 21, 2020)

 Feb 22, 2015, 06:49 AM
#23
Evolved Member
Thread Starter
The following users liked this post:
03_OZRally (Nov 21, 2020)
Feb 22, 2015, 06:51 AM
#24
Evolved Member
Thread Starter
The following users liked this post:
03_OZRally (Nov 21, 2020)
Feb 22, 2015, 05:49 PM
#26
Evolved Member
Thread Starter
Here's a video of the start up! There was background music and it was inside a garage so it sounds like **** but it's actually running awsome!
An here is when it was at idle outside.
An here is when it was at idle outside.
Last edited by marcouxa1; Feb 22, 2015 at 06:47 PM.
The following users liked this post:
03_OZRally (Nov 21, 2020)