Rebuilding my VIII
 Sep 26, 2012, 12:44 PM
#1
Rebuilding my VIII
Hey All,
This past weekend I became the proud owner of a 2003 TB VIII. The car has about 81k on it. Unforunately, something went amiss and the previous owner ended up with a hole in the block where the #2 rod used to be. I stuck a deal with the owner (here on the forum). He sold off all his go-fast parts and left me with mainly a stock shell in need of some love. He included a good block and a head that was supposed to be good. Upon further inspection, it looks like 2 of the intake valves high-fived #2 on it's last journey through the block.
The car is stock except for JDM tails, OEM window visors, Walbro 255lph, and Tein springs.
Plans for the car are to get it 99% back to stock so I can start fresh. So far I've picked up a ton of stock stuff off the forum.
The block and head are being freshened up. ACL bearings and ARP hardware for the block. I'll also be using a GSC race BSE kit. Supertech valves and stock hardware for the head. The only thing I might do while I'm in there is put in the Kiggly Racing regulator.
So, not a crazy build, but it'll be great to get it back to stock. I've never driven an EVO. I've had 2 DSMs in my past, but I've been in an NA car for the past 5 years. Really ready to get back into AWD + turbo.
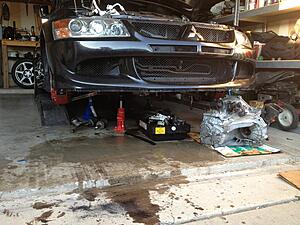
As she stands right now:
Attachment 335379
I'll make updates as I have them. Thanks for looking!
This past weekend I became the proud owner of a 2003 TB VIII. The car has about 81k on it. Unforunately, something went amiss and the previous owner ended up with a hole in the block where the #2 rod used to be. I stuck a deal with the owner (here on the forum). He sold off all his go-fast parts and left me with mainly a stock shell in need of some love. He included a good block and a head that was supposed to be good. Upon further inspection, it looks like 2 of the intake valves high-fived #2 on it's last journey through the block.
The car is stock except for JDM tails, OEM window visors, Walbro 255lph, and Tein springs.
Plans for the car are to get it 99% back to stock so I can start fresh. So far I've picked up a ton of stock stuff off the forum.
The block and head are being freshened up. ACL bearings and ARP hardware for the block. I'll also be using a GSC race BSE kit. Supertech valves and stock hardware for the head. The only thing I might do while I'm in there is put in the Kiggly Racing regulator.
So, not a crazy build, but it'll be great to get it back to stock. I've never driven an EVO. I've had 2 DSMs in my past, but I've been in an NA car for the past 5 years. Really ready to get back into AWD + turbo.
As she stands right now:
Attachment 335379
I'll make updates as I have them. Thanks for looking!
 Sep 26, 2012, 02:38 PM
#2
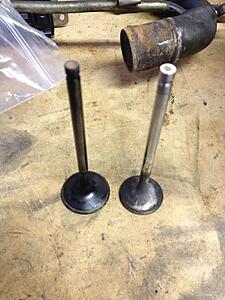
One of the bent valves:
Attachment 336096
Culprit for the hole in the block:
Attachment 336097
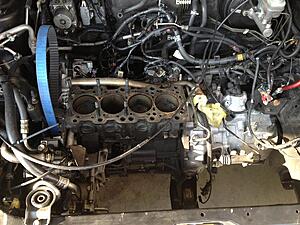
Current engine bay:
Attachment 336096
Culprit for the hole in the block:
Attachment 336097
Current engine bay:


 Oct 5, 2012, 12:53 PM
#7
Finally got my daily driver up and running again. (As in, back to stock). Now I can focus on the Evo as money permits. I got in new Supertech valve guides and seals and picked up a set of gently loved Supertech valves and keepers. Head will be going to the shop soon.
Hoping to get the front of the Evo up on stands this weekend to start pulling the axles and unbuttoning the transfer case from the tranny. Should be fun.
Hoping to get the front of the Evo up on stands this weekend to start pulling the axles and unbuttoning the transfer case from the tranny. Should be fun.
Trending Topics
Oct 7, 2012, 03:39 PM
#9
A few updates for today. Got my valves in this week. They will, of course, be cleaned up before being installed with the new guides and seals.
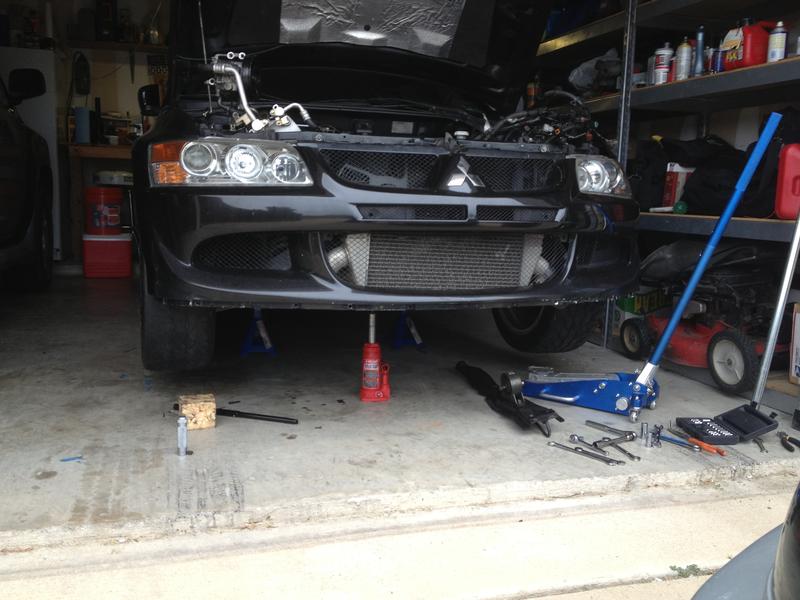
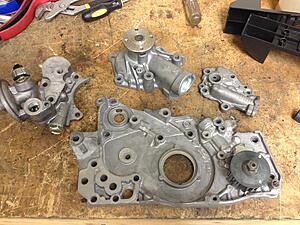
Got the car in the air to remove the cross member and front motor mount. Stuck a bottle jack under the (blown) motor to keep it from hanging too much on the remaining 2 mounts.
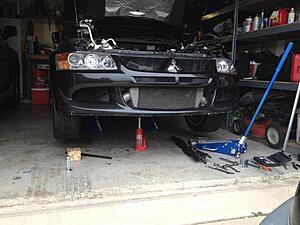
Had a run of good luck this afternoon while my son took his nap. I pulled the wheels and popped the axle nuts off. Removed the passenger's side axle, easy. Went to remove the driver's side and had a little trouble. The axle was away from the tranny, but didn't want to come out. After some persuasion, it came out, along with the input shaft! Woot. didn't have to rent the slide-hammer. At this point, all I had holding the motor in was the rear motor mount and driver's side mount. Went ahead and supported the tranny with a jack and removed the mounts.

It wasn't pretty coming down, but it's out. Spent a little time after that removing some of the timing components.
And there I am for the day. Not bad for a couple hours of work today.
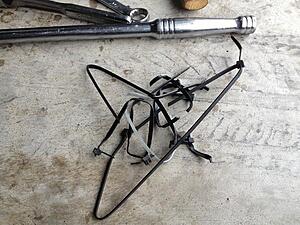
Oh, and this was the oil cooler mounting solution:

Got the car in the air to remove the cross member and front motor mount. Stuck a bottle jack under the (blown) motor to keep it from hanging too much on the remaining 2 mounts.
Had a run of good luck this afternoon while my son took his nap. I pulled the wheels and popped the axle nuts off. Removed the passenger's side axle, easy. Went to remove the driver's side and had a little trouble. The axle was away from the tranny, but didn't want to come out. After some persuasion, it came out, along with the input shaft! Woot. didn't have to rent the slide-hammer. At this point, all I had holding the motor in was the rear motor mount and driver's side mount. Went ahead and supported the tranny with a jack and removed the mounts.

It wasn't pretty coming down, but it's out. Spent a little time after that removing some of the timing components.

And there I am for the day. Not bad for a couple hours of work today.
Oh, and this was the oil cooler mounting solution:

Last edited by aggieEVO; Oct 8, 2012 at 08:06 AM.
Oct 8, 2012, 06:42 PM
#10
Made more progress tonight. Separated the engine from tranny. Glad that went okay. I was disappointed to find that the car had a stock pressure plate with what I think is an ACT 6-puck street disc. I was told it was an ACT HDSS. Kinda bummed about that.
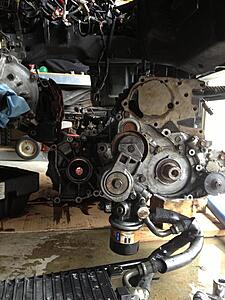
One of my biggest pet peeves is when things don't get bolted back up correctly. Thank God this motor isn't going back in. There were 4 different bolts holding the crank damper onto the crank. Used (and mismatched) pressure plate bolts. Only 2 bolts holding the lower timing cover on. And this made me chuckle:
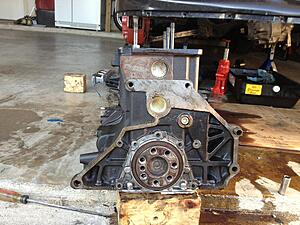
ZERO bolts holding the rear main seal housing in place. Only RTV.
Here is the pile of crap left over:
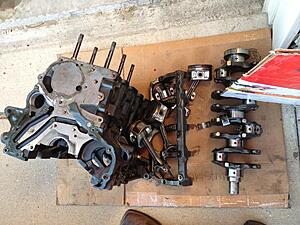
I was hoping that the crank would be good. Bearing surfaces were all in great shape, but the rod that went was stuck to the crank. Not about to put that in another motor or pawn it off on someone.
My mess. Gotta pick up some kitty litter. There's always more fluid than you think:
Might be my last update for a while. Now I'm saving money to get the head and block to the shop. I'll post before and after pictures as I clean parts and get them ready to go back in.
One of my biggest pet peeves is when things don't get bolted back up correctly. Thank God this motor isn't going back in. There were 4 different bolts holding the crank damper onto the crank. Used (and mismatched) pressure plate bolts. Only 2 bolts holding the lower timing cover on. And this made me chuckle:

ZERO bolts holding the rear main seal housing in place. Only RTV.
Here is the pile of crap left over:

I was hoping that the crank would be good. Bearing surfaces were all in great shape, but the rod that went was stuck to the crank. Not about to put that in another motor or pawn it off on someone.
My mess. Gotta pick up some kitty litter. There's always more fluid than you think:

Might be my last update for a while. Now I'm saving money to get the head and block to the shop. I'll post before and after pictures as I clean parts and get them ready to go back in.
 Oct 23, 2012, 09:39 AM
#14
A few more parts cleaned up. I pulled all the plugs out of the filter housing before I cleaned them up. Put a little teflon tape and a little blue loctite in there when I put them back in. I'm going to have to get a new oil cooler, so I'll probably plug the lines for that temporarily. I don't mind running without one until the weather warms back up, if she's even running by then.

Last edited by aggieEVO; Oct 23, 2012 at 09:41 AM.
Oct 26, 2012, 09:57 AM
#15
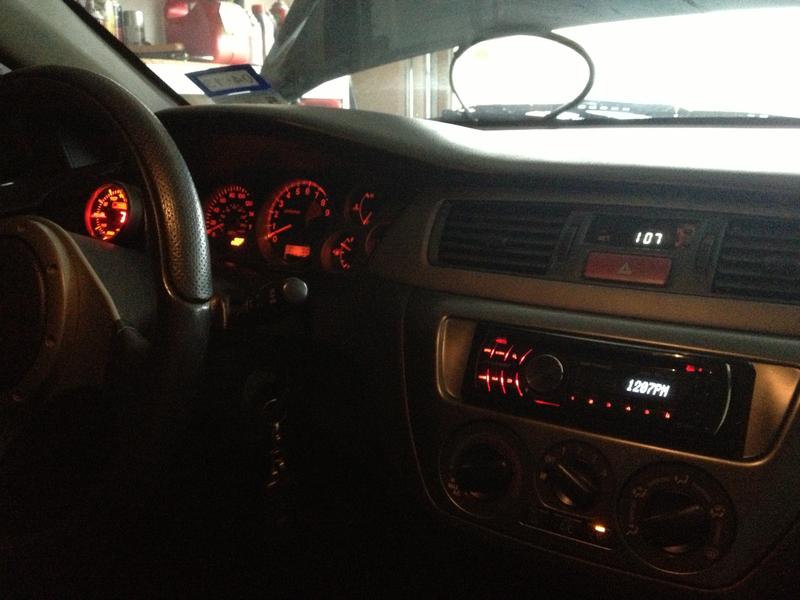
Brought a spare battery home last night to hook up and check out the interior situation. The car has an aftermarket amp and head unit with stock speakers. Hooked up the RCAs and battery. Sounded pretty decent. The alarm is driving me nuts, though. Might have to go. The HVAC is a bit hard to move. I'll be studying up on the mega-thread and adding a cabin filter.
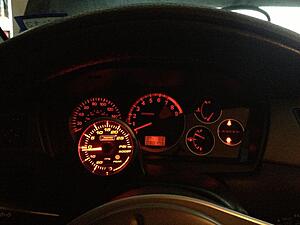
Boost gauge:
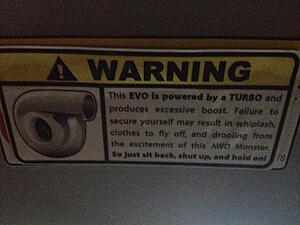
Also found this on the passenger's visor (to be removed):
Boost gauge:

Also found this on the passenger's visor (to be removed):
