Andy's JDM TME
 Feb 10, 2018, 11:33 PM
#1
Evolving Member
Thread Starter
Andy's JDM TME
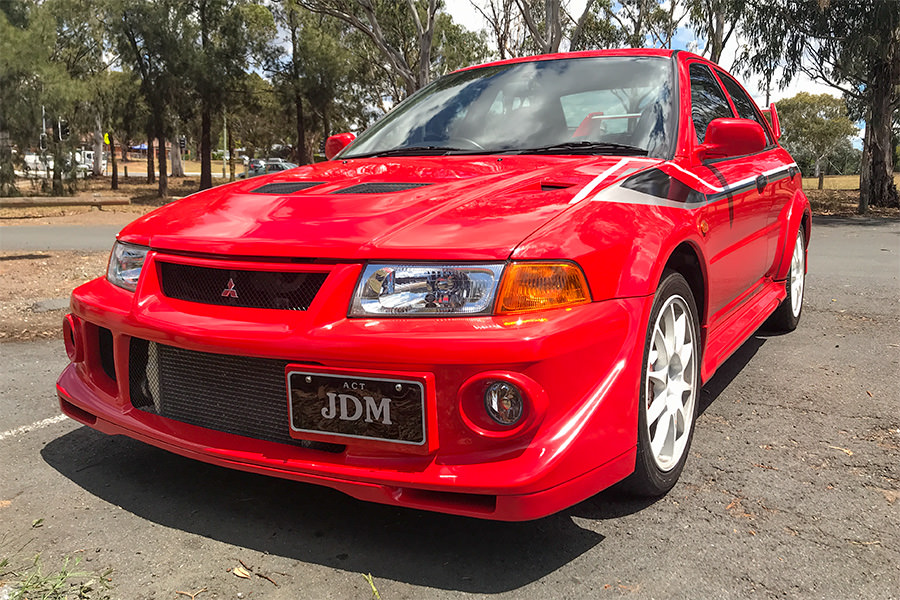
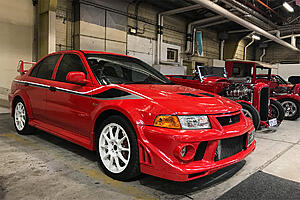
Introducing another one of my dream cars.
After trying to purchase this JDM Tommi Making Edition Evo VI from the previous owner for over 1 year, he finally sold it to me last Sunday, February 4th, 2018. I was very excited to finally drive it home.
I took it to have a roadworthy inspection the following day as I only had a 1 week registration permit. It passed inspection fine and it was soon registered in my name. I transferred the “JDM” plates from my daily to this new project.
Here is a photo after I screwed on the new plates, outside the DMV.

The car is completely stock apart from a 3” turbo back stainless exhaust, a boost gauge and a dash mounted “LED Shift Light”. The car does need some tidying up, detailing and servicing but it is very clean and rust free. “Tommi” was complied in Australia 04/2008 so its been on salt free roads in Australia for the past 10 years where it was always garaged and has only travelled 33,000kms or 20,500 miles. The car dealership decal on the rear bar shows it was originally sold by Mitsubishi only 27km from the centre of downtown Tokyo at this dealer http://www.urawa-higashi-mitsubishi-motor-sales.com which is probably why there is no rust under the car, as it was not near the snow. From the clutch pedal feel it tells me the clutch has been replaced with a firmer aftermarket clutch and there are spanner marks on the bell housing bolts which reinforces my thoughts.
I have purchased a set of Timing Belt assistance tools from STM Tuned Inc and I’ve ordered all the timing belt pulleys, bolts, belts, seals, water pump etc from Japan. The engine sounds very good and has done approx 92,000Kms or 57,000 miles verified through the “Japan ODO Check” service. The car was complied in Australia in 04/2008 almost 10 years ago and garaged in Canberra the past 5 years.
If anyone reading this thread has access to the "Lancer Evolution 6 TME Workshop Manual Supplement" Part number (i think) : S9806CNCP9-B Please message me
After trying to purchase this JDM Tommi Making Edition Evo VI from the previous owner for over 1 year, he finally sold it to me last Sunday, February 4th, 2018. I was very excited to finally drive it home.
I took it to have a roadworthy inspection the following day as I only had a 1 week registration permit. It passed inspection fine and it was soon registered in my name. I transferred the “JDM” plates from my daily to this new project.
Here is a photo after I screwed on the new plates, outside the DMV.
The car is completely stock apart from a 3” turbo back stainless exhaust, a boost gauge and a dash mounted “LED Shift Light”. The car does need some tidying up, detailing and servicing but it is very clean and rust free. “Tommi” was complied in Australia 04/2008 so its been on salt free roads in Australia for the past 10 years where it was always garaged and has only travelled 33,000kms or 20,500 miles. The car dealership decal on the rear bar shows it was originally sold by Mitsubishi only 27km from the centre of downtown Tokyo at this dealer http://www.urawa-higashi-mitsubishi-motor-sales.com which is probably why there is no rust under the car, as it was not near the snow. From the clutch pedal feel it tells me the clutch has been replaced with a firmer aftermarket clutch and there are spanner marks on the bell housing bolts which reinforces my thoughts.
I have purchased a set of Timing Belt assistance tools from STM Tuned Inc and I’ve ordered all the timing belt pulleys, bolts, belts, seals, water pump etc from Japan. The engine sounds very good and has done approx 92,000Kms or 57,000 miles verified through the “Japan ODO Check” service. The car was complied in Australia in 04/2008 almost 10 years ago and garaged in Canberra the past 5 years.
If anyone reading this thread has access to the "Lancer Evolution 6 TME Workshop Manual Supplement" Part number (i think) : S9806CNCP9-B Please message me
Last edited by uzumaki; Feb 11, 2018 at 12:08 AM. Reason: to add request for help finding a Lancer Evolution 6 TME Workshop Manual Supplement

The following 2 users liked this post by uzumaki:
codgi (Mar 21, 2021),
MinusPrevious (Feb 21, 2018)
 Feb 10, 2018, 11:34 PM
#3
Evolving Member
Thread Starter
Mod List.
3� XForce stainless steel turbo back exhaust with 3� Magnaflow muffler
Defi Boost Gauge
Factory option front bar with fog lights
Factory TME Decal kit
Black Tinted windows
HD Clutch
Re-installed JDM Safety Flare
3� XForce stainless steel turbo back exhaust with 3� Magnaflow muffler
Defi Boost Gauge
Factory option front bar with fog lights
Factory TME Decal kit
Black Tinted windows
HD Clutch
Re-installed JDM Safety Flare
Feb 10, 2018, 11:35 PM
#6
Evolving Member
Thread Starter
But while waiting for that important stuff to arrive I have collected a few parts to install on the car and I�ll continue on another few jobs that need to be done.
All vehicles in Japan are require to carry a safety flare but it is removed before transporting the cars to Australia or when going thru the compliance process in Australia. I�m not sure which. So I had to replace it with the deluxe model safety flare which also has a window smashing spike on its base.
Flare with cover:
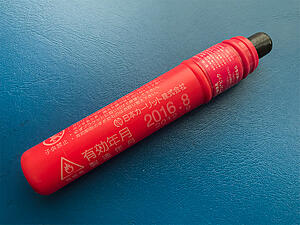
Open and ready for action!
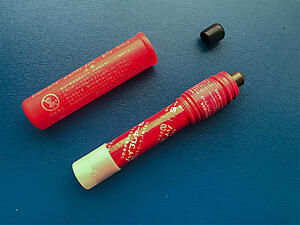
Back in position after 10 years absence:
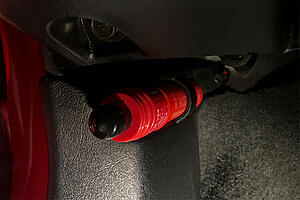


The following users liked this post:
uzumaki (Feb 12, 2018)
Feb 11, 2018, 11:33 PM
#9
Evolving Member
Thread Starter
Thanks Jimmy and Thrilla. Much appreciated guys
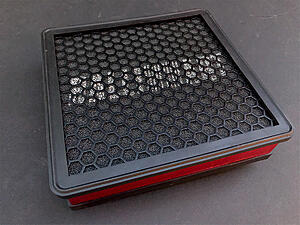
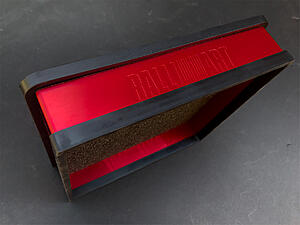
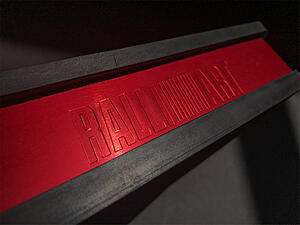
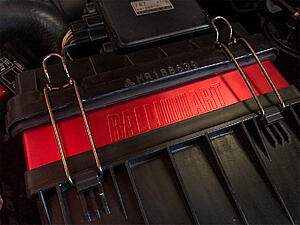
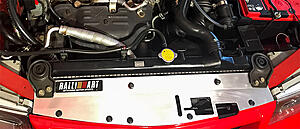
I had this Ralliart panel filter sitting on my shelf which I had used briefly in my Evo IX and thought I would try it out in the TME. It fits and blings up the engine bay with a little Ralliart goodness. Not sure if it's filtration ability is as good as a K&N or paper filter though.
More updates soon.
I had this Ralliart panel filter sitting on my shelf which I had used briefly in my Evo IX and thought I would try it out in the TME. It fits and blings up the engine bay with a little Ralliart goodness. Not sure if it's filtration ability is as good as a K&N or paper filter though.


More updates soon.
The following users liked this post:
uzumaki (Feb 12, 2018)
Feb 12, 2018, 02:54 PM
#11
Evolved Member
That's the type of car I would swap my 9 for. Its a beautiful looking car going up in price every year. Stock ones are hard to find now. You definitely need that flare when you get stuck out in a snow drift in the middle of Norway
The following users liked this post:
uzumaki (Feb 12, 2018)

The following users liked this post:
uzumaki (Feb 16, 2018)
Feb 16, 2018, 01:16 PM
#13
Evolving Member
Thread Starter
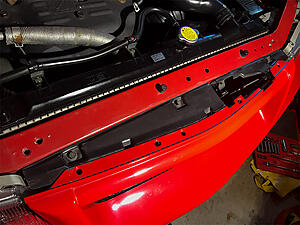
This radiator cooling panel was on the car when I bought it and it was a good fit but I didn�t like the raw aluminium finish or the buckled Ralliart decal so I took it off for a freshen up.
With the panel removed I see it�s very clean underneath, no corrosion found here either. Excellent!
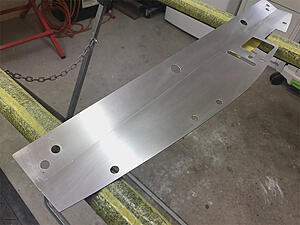
I gave it a rub down with grey scotch bite, wax & grease remover, tack rag and compressed air.
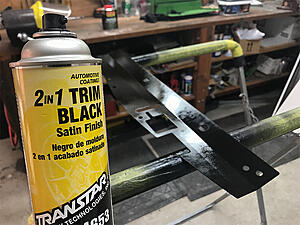
Using "Transtar 2 in 1 Trim Black" paint in a can I started spraying very light coats. After I had decent coverage I increased to a couple of medium wet coats. Its called 2 in 1 as you don�t need to use primer beforehand. Using this paint you need to use an appropriate respirator so you don�t die of cancer.
After it had dried enough for dust not to stick to it I waited another half an hour and then put it out in the sun to fully dry.
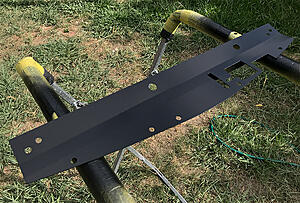
2 days later I put it back on the car after cleaning up the radiator brackets & bolts and the OEM attaching clips.
Big improvement IMO.

I probably should�ve had it powder coated but I was impatient and wanted to DIY

With the panel removed I see it�s very clean underneath, no corrosion found here either. Excellent!

I gave it a rub down with grey scotch bite, wax & grease remover, tack rag and compressed air.

Using "Transtar 2 in 1 Trim Black" paint in a can I started spraying very light coats. After I had decent coverage I increased to a couple of medium wet coats. Its called 2 in 1 as you don�t need to use primer beforehand. Using this paint you need to use an appropriate respirator so you don�t die of cancer.

After it had dried enough for dust not to stick to it I waited another half an hour and then put it out in the sun to fully dry.

2 days later I put it back on the car after cleaning up the radiator brackets & bolts and the OEM attaching clips.
Big improvement IMO.

I probably should�ve had it powder coated but I was impatient and wanted to DIY
The following users liked this post:
EVO196 (Mar 17, 2021)
Feb 17, 2018, 08:00 PM
#14
Evolving Member
Thread Starter
Yesterday I had a car meet to attend (Shannons Coffee & Cars) so I thought I better remove the wheels and give them a clean so I started with the rears.
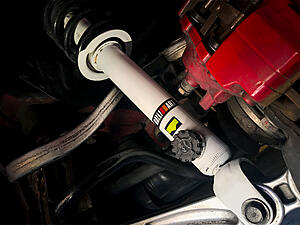
My struts were dirty too so I gave them a wipe down with a rag and kerosine. It took a fair bit of rubbing. They must've been a dealer option I'm guessing.
The rotors needed a scrub with steel wool to remove rust from them.
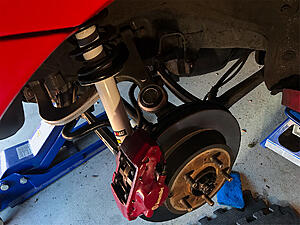
For a quick clean they came up pretty good but I need to re-visit all the suspension arms and bolts with a bit more time.
Organiser Marshalls parked me beside this Lotus. My car looked high compared to it
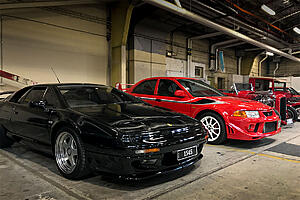
Quite a few people liked it and photographed it. I can�t wait to do more work on the car and document my progress
My struts were dirty too so I gave them a wipe down with a rag and kerosine. It took a fair bit of rubbing. They must've been a dealer option I'm guessing.
The rotors needed a scrub with steel wool to remove rust from them.

For a quick clean they came up pretty good but I need to re-visit all the suspension arms and bolts with a bit more time.

Organiser Marshalls parked me beside this Lotus. My car looked high compared to it

Quite a few people liked it and photographed it. I can�t wait to do more work on the car and document my progress

The following 2 users liked this post by uzumaki:
EVO196 (Mar 17, 2021),
MinusPrevious (Feb 18, 2018)


