When you click on links to various merchants on this site and make a purchase, this can result in this site earning a commission. Affiliate programs and affiliations include, but are not limited to, the eBay Partner Network.
TSComptuned New Service - Total Crankcase eliminator modification
After testing a lot of different catch can systems, hose routings & plumbings over the years,
we have came to the conclusion the best way to lower/eliminate crankcase pressure
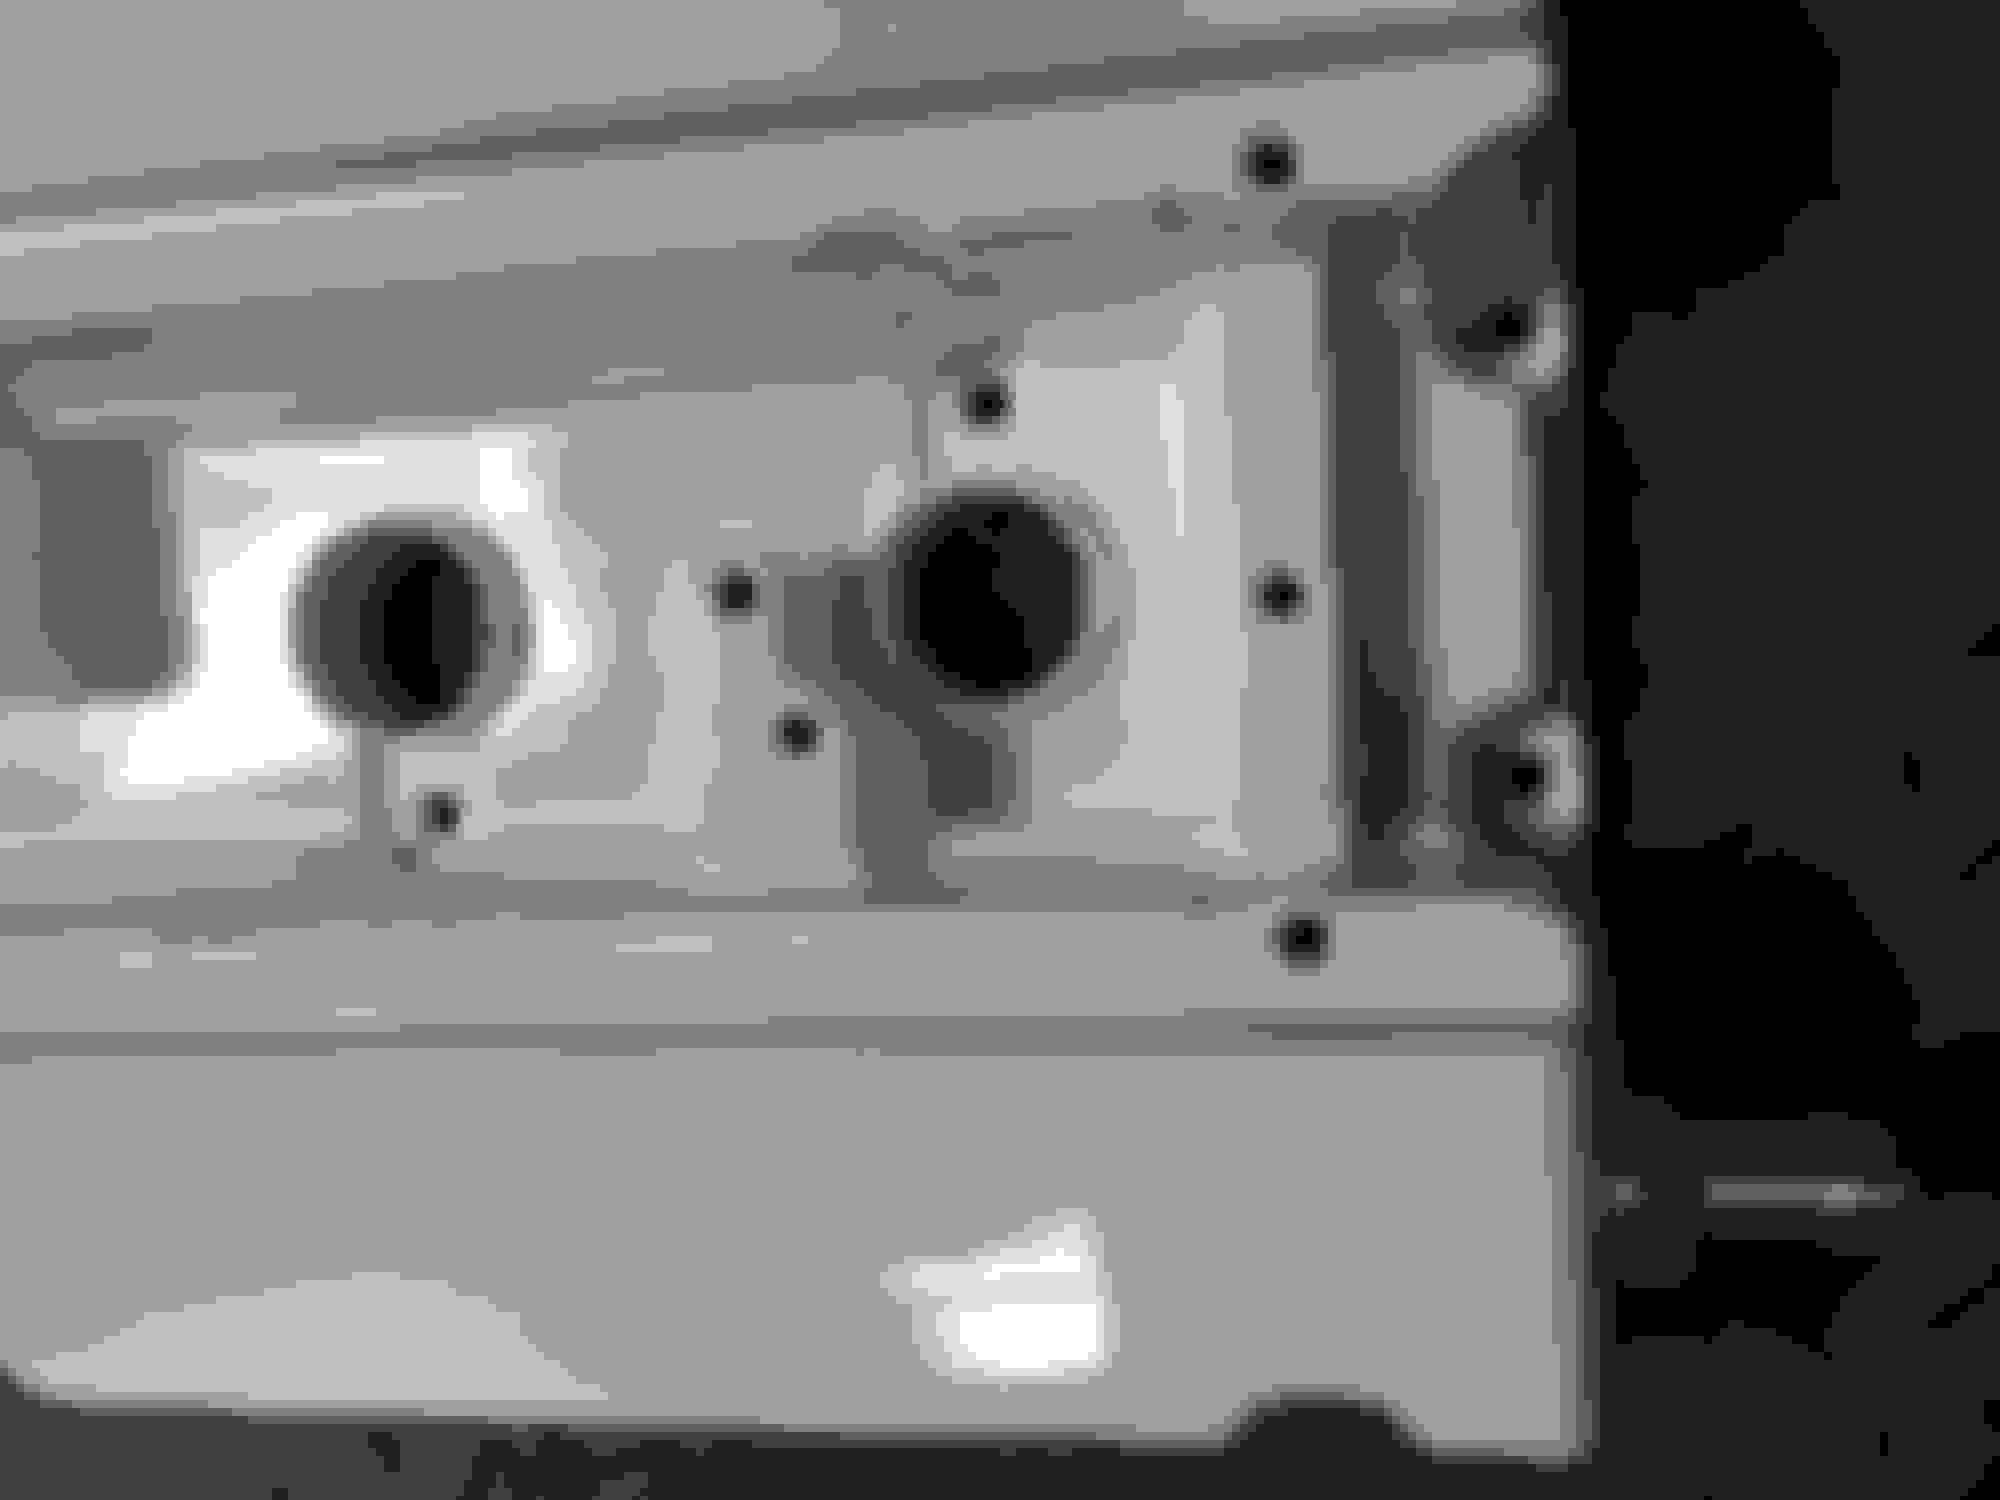
in your Evo is to simply drill out the existing side port (driver side) hole and enlarge
it to approximitely 5/8 inches. This drops crankcase pressure dramatically, and eliminates
the need for any type of dipstick retention device to keep the dipstick down.
By enlarging the side existing port hole via drill and tapping, we are still keeping a fully functional
baffle system intact. Even though you now have enlarged the OEM hole up to 3x more in size, you will
not experience any kind of excessive oil blowby through this larger port created. The reason for this is,
Because the OEM baffling in your OEM Evo valvecover is extremely well designed in this area, due to the
fact it is where the manufacturer relied on relieving the most pressure with the help of the intake turbo suction.
If you were to drill this same 5/8 inch hole on the opposite side of the valve cover on the same driver side,
you would find yourself dumping most, if not all (not really) your engine oil out of your valve cover due to inefficient
baffling. This same scenario takes place when you attempt to vent at the oil cap as well, again due to inefficient baffling.
So, in order to not lose any oil or cause other problems, you must work with whats already inside your valve cover from
Mitsubishi. Doing so will completely eliminate all 'excessive' crankcase pressure and at the same time you will not dump
or lose any excessive oil in the process.
On higher HP applications, this also will free up power due to allowing the engine to breathe
better and release excessive pressure. There has been up to or higher than 10WHP gains with doing
this modification depending on how bad your situation is. The vehicle will also operate more efficient
and smoother in general in all aspects of its operation.
This modification can be benefited from every Evo, but is not necessarily needed for
Evo's under 500WHP typically. This is mostly for those 600whp+ high HP builds.
If you try to make a lot of power on the stock crankcase system from the Evo, you will find
yourself burning oil on decelleration due to the oil traveling back up the turbo return line
into the CHRA, making the turbo burn your oil from your oil pan in the hotside. Not only is
this extremely inefficient, but its also dangerous to not just your car, but to the people behind you that
cannot see from a cloud of thick smoke left behind.
This service cost $200 which includes the fitting. Shipping is not included.
For anyone interested just PM me or email me at @ tom@tscomptuned.net or send a text to 717 478 8519
Thanks for reading.
Feel free to post questions if you have any to the public.
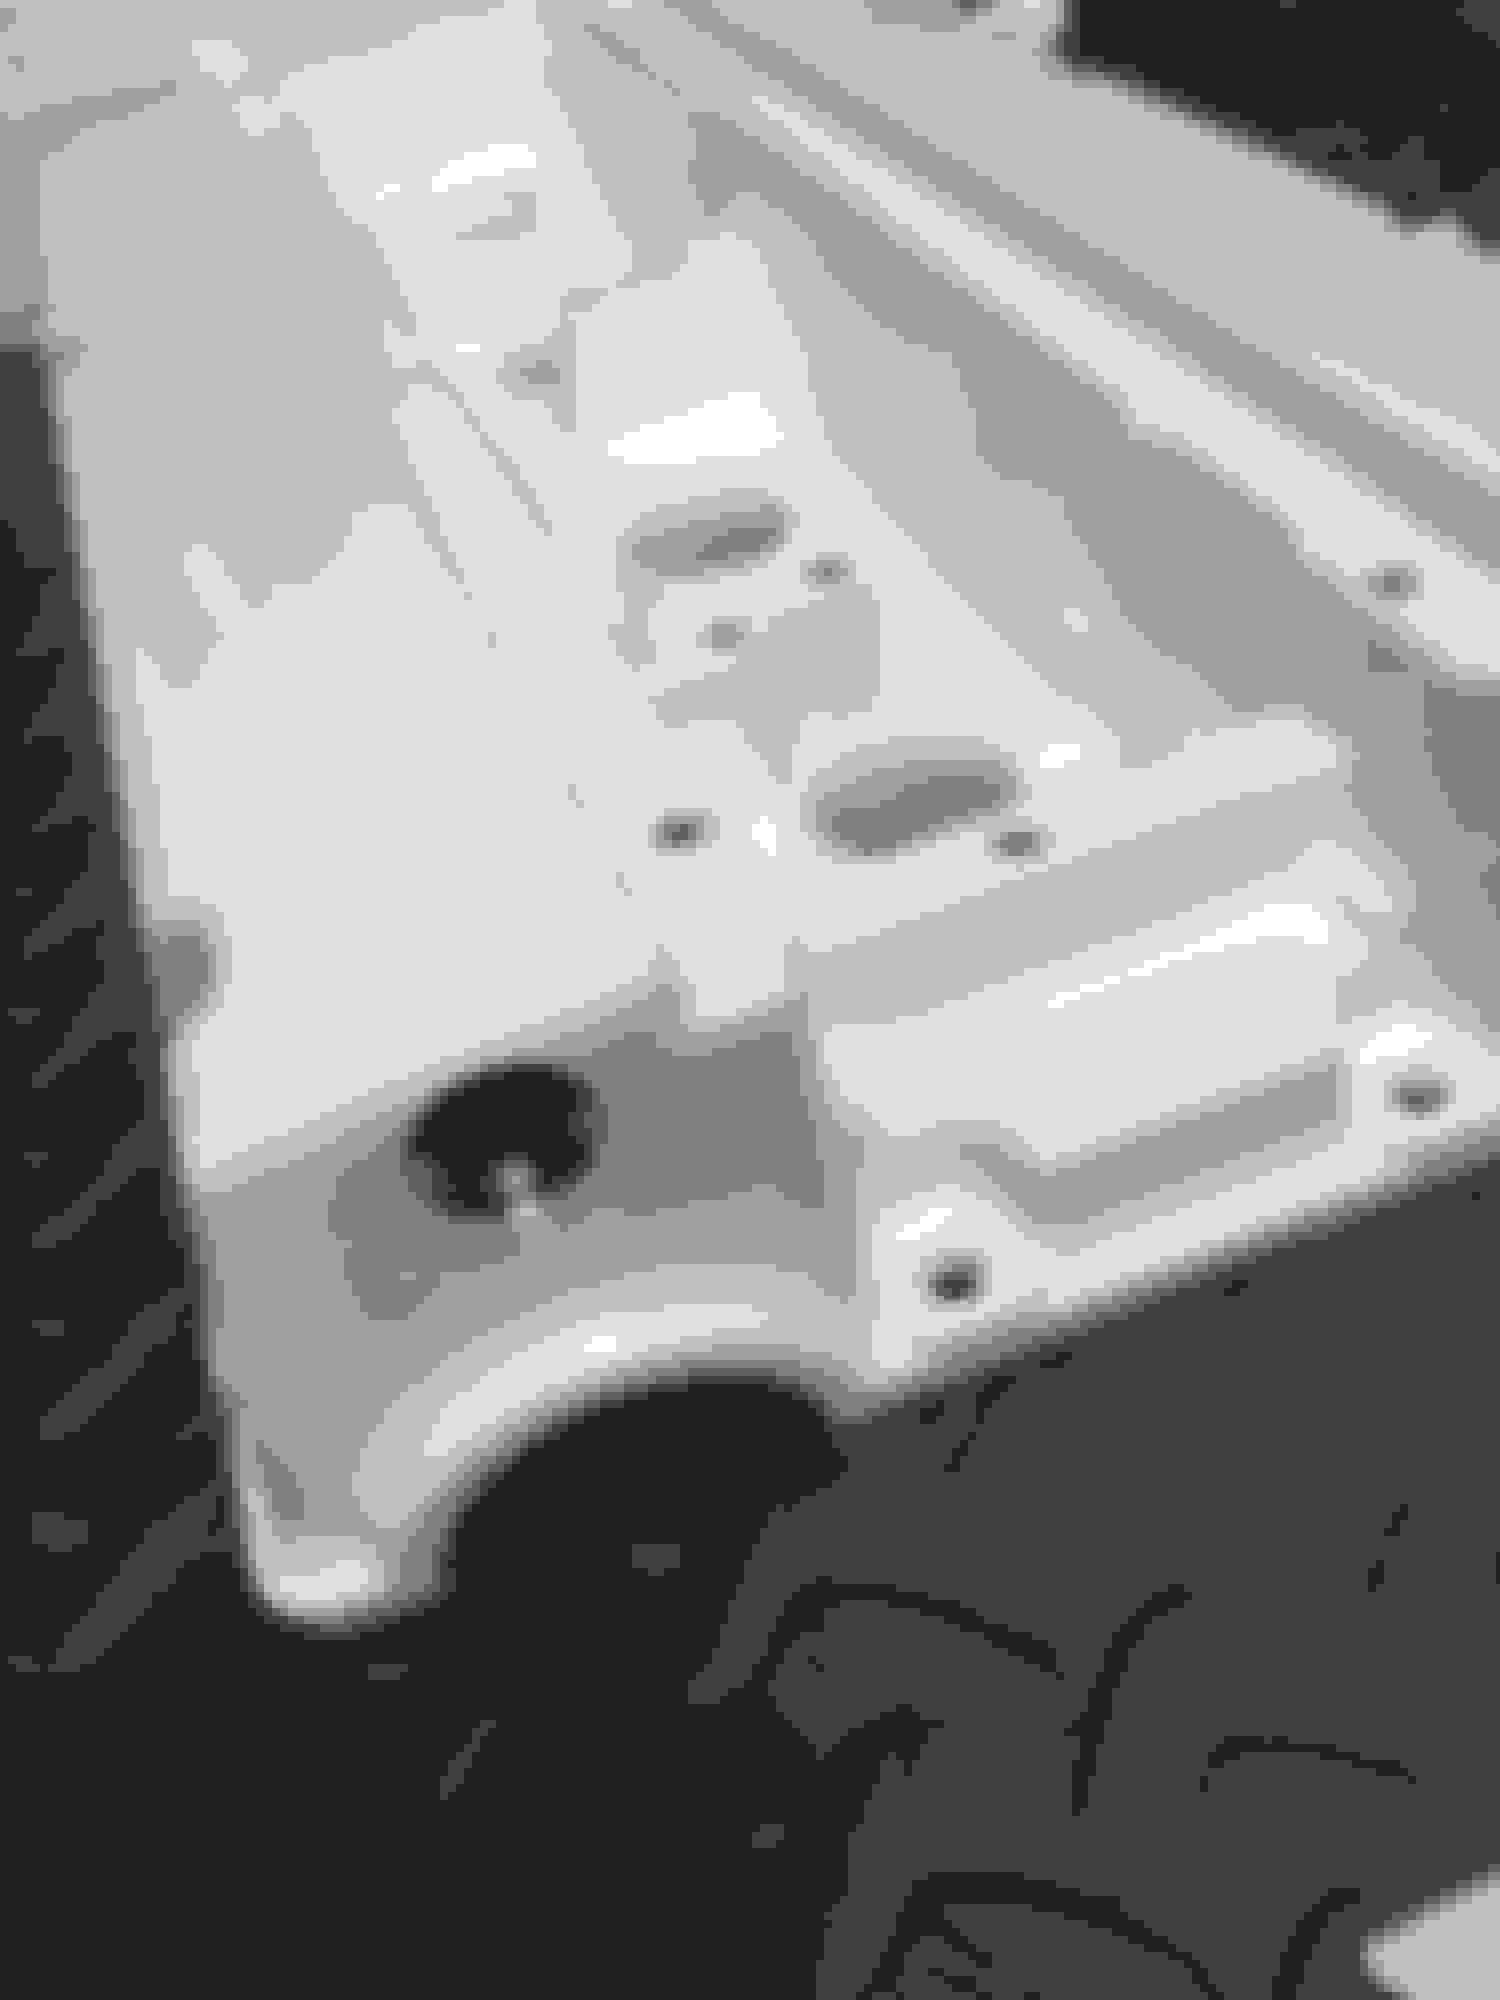
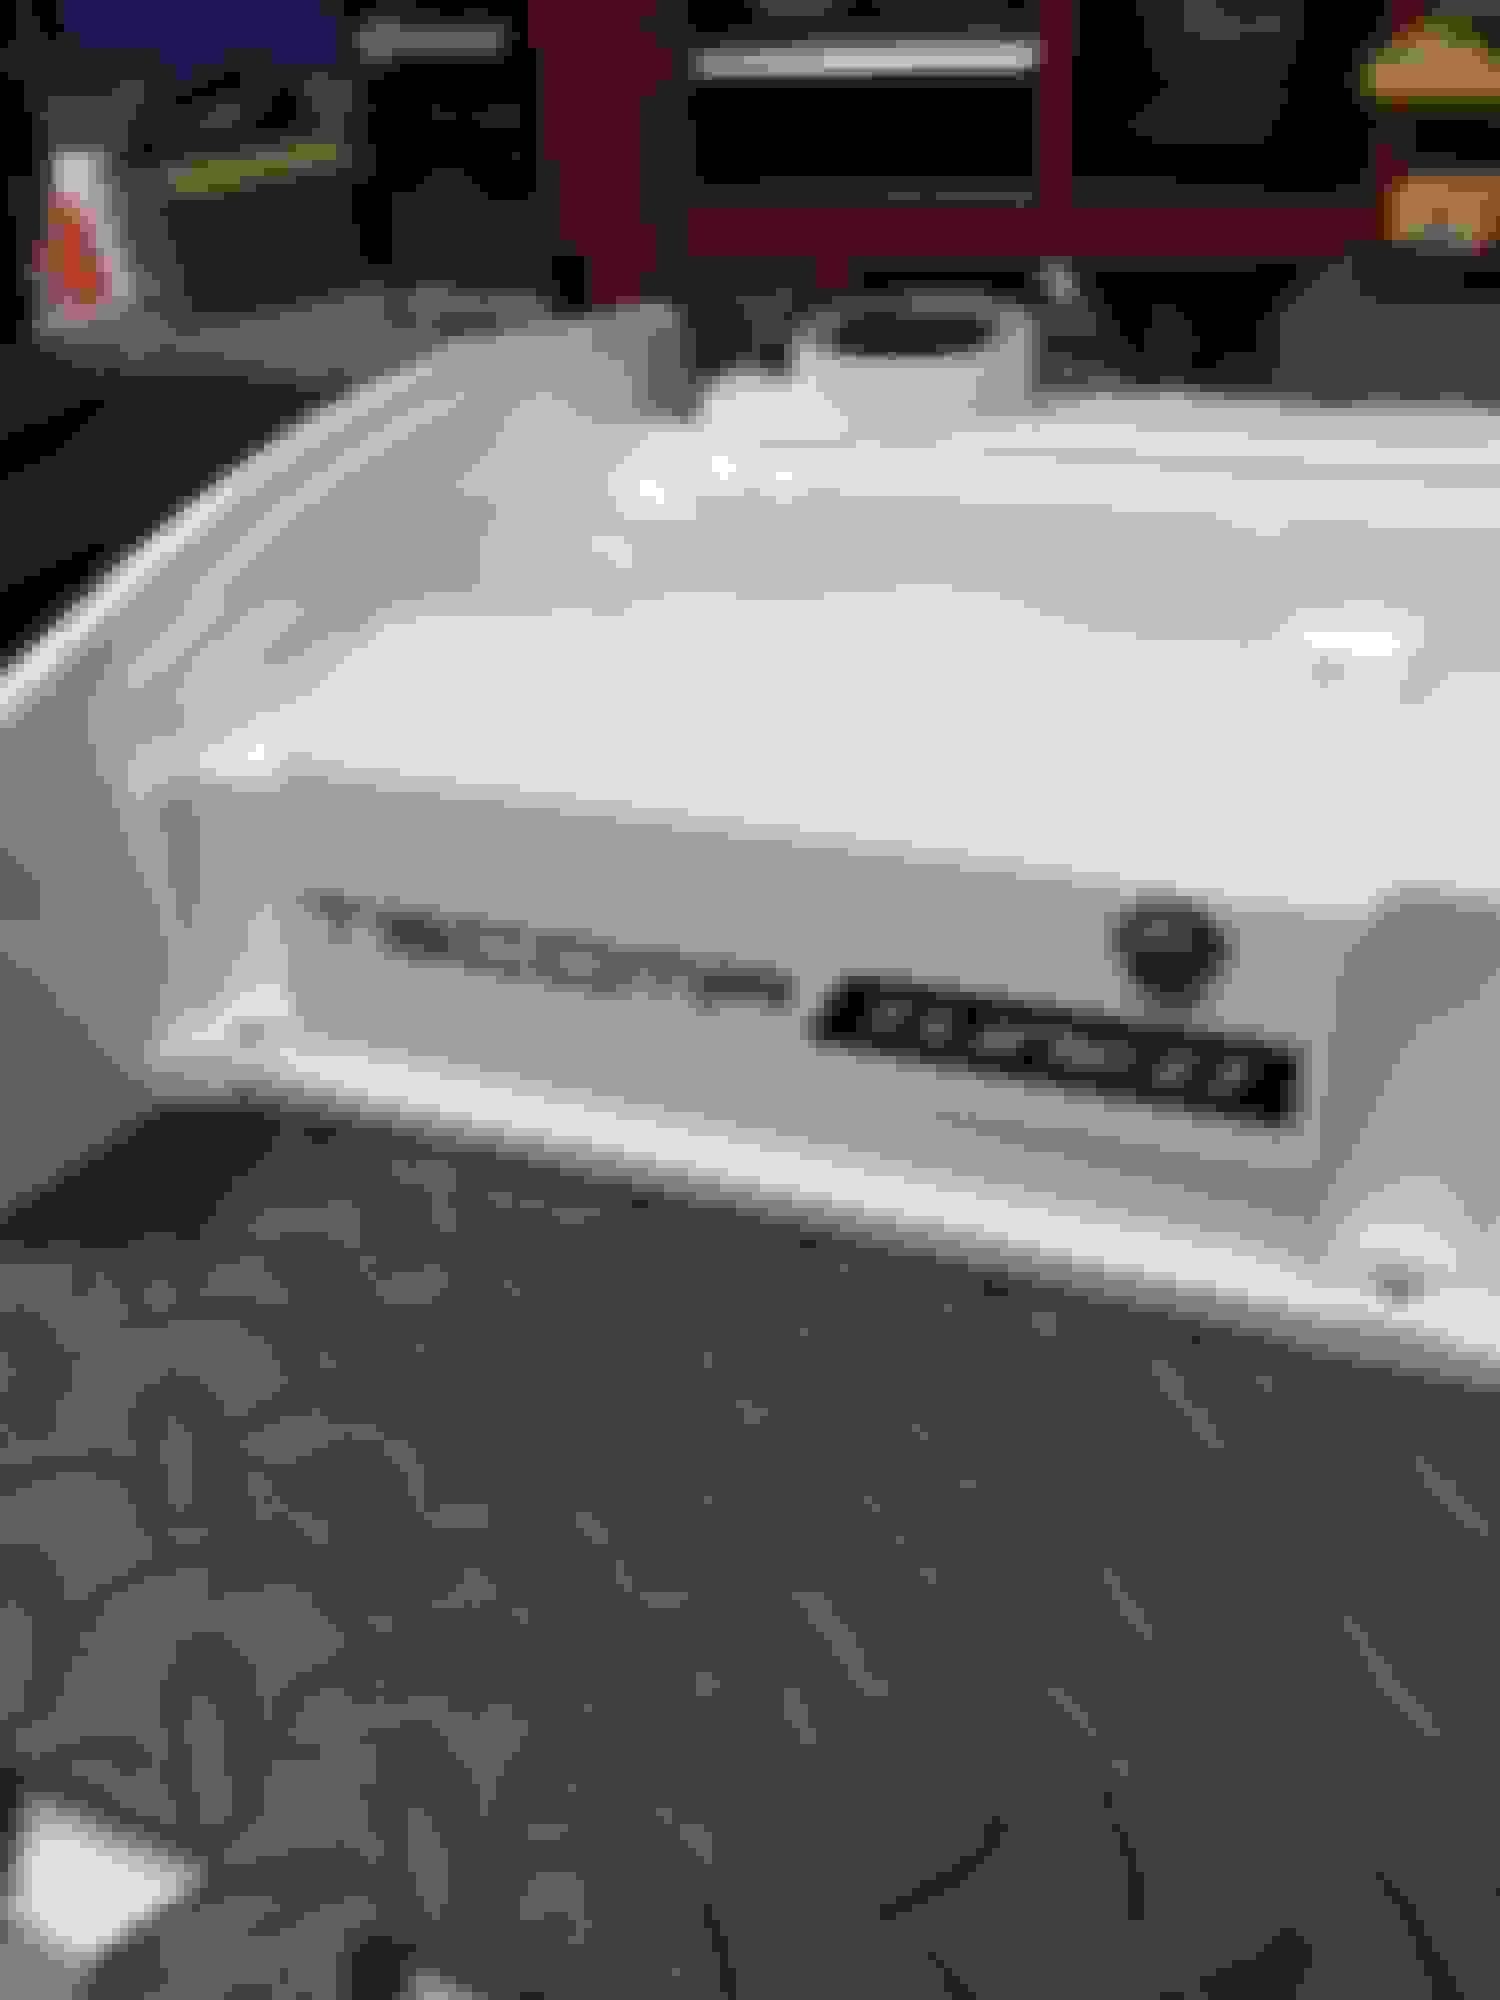
The valve cover pictured is simply a demo version provided to us by one of our customers. We do not put stickers on your valve cover
unless you request it. We only install the fitting.
Turn around time for this modification is roughly 48 hours.
Last edited by tscompusa; May 26, 2016 at 04:30 PM.
Where do all the shavings go when you drill out the valve cover since you do not seem to remove the stock baffling?
"Slowly, carefully, with lots of oil and vacuuming," wait for it. I need to take care of this issue myself but having a hard time taking care of it since driving the car is rare.
Where do all the shavings go when you drill out the valve cover since you do not seem to remove the stock baffling?
Originally Posted by evo8426
"Slowly, carefully, with lots of oil and vacuuming," wait for it. I need to take care of this issue myself but having a hard time taking care of it since driving the car is rare.
Originally Posted by fantrman
Tom, I'd like to DIY this, but how can you be sure to keep all the drill and tap shavings out of the baffle area?
1. Industrial sized deep sink with very hot/warm water.
2. Lots of brake cleaner (low 3m strength so it doesn't strip paint)
3. Lots of compressed air
4. Shop Vac for initial first cleaning
Takes about 1hr to thoroughly clean each one. Expect to use at least 2-3 full cans of brake cleaner, and rinse and repeat step 1 through 3 about 10 times.
Anyone who removes baffles for this is silly or never really ran water through the valve cover to really see how it flows out. Its impossible to leave shavings in it, unless you are super careless and don't pay attention.
We also have a very high powered 1000 lumen led light so we can see inside to make sure everything is gone and clear.
You would be surprised at how much stuff is trapped and hidden in your valve cover once you actually remove the baffle... Ask me how I know...
Yes because you didn't properly flush it out. We took them out as well after we were done our method and nothing is left behind.
In fact, taking the baffle out before the mods even done there's more debri we found vs after we cleaned it and then removed the baffle after the mod.
We have done 20+ of these to date, its not something I'm just randomly offering without knowing what I'm doing.
Go run liquid through the valve cover, and see how it only has two major flow points and tell me you cant safely extract everything from it after theres a 5/8" hole.
Every major car that comes out of our shop has this mod done, and they all perform flawless. Some have 45K+ on their builds.
I don't just offer a service out of nowhere unless I do my home work first. That's why every car we build holds up.
 Jan 21, 2016, 08:19 AM