Brake caliper refinishing SPARK TECH style
 May 6, 2009, 10:25 AM
#1

Brake caliper refinishing SPARK TECH style
Well I guess we felt like most evo owners...disgusted by looking at our faded/peeling calipers.
Even after purchasing Volk CE28N's we were not happy because our calipers were faded and clear coat was peeling. We would have liked to have them powder coated but the powder coaters we contacted were 1 1/2 weeks back logged (eventually we'll have them powder coated for durability). Because this is our daily driver we looked into painting...I must say I was very reluctant to go this route. Since this is our daily driver we were off to the local parts store (advanced auto..across the street ) They have a product made by Dupli-color made specifically for calipers. They say it has ceramic and with stands 500deg (intermittent).
The only right way to prep these are to remove them completely from the car (down side..you will have to bleed the brakes properly after install, but a good time to flush and replace old brake fluid with a higher DOT fluid) Start by removing brake pads with the calipers still attached to the car...makes it easier
After you have removed the calipers you will need to find a bolt that threads into the opening where the brake lines go. This will prevent water from entering the calipers in the clean up phase.
You will need to sand the calipers by hand or use a small dual action sander to knock it down quickly... I used 220 grit paper, you don't want to sand off all the paint. Just get the clear coat and irregularities out of the surface. I used a green scuff pad (like ones used for household cleaning) and good old dish cleaning liquid. This step removes the brake dust/grease that has been baked on over time and preps the surface so the paint will adhere with out fish eyes or bubbles. You will want to do each caliper a few times as this is a critical step to having a smooth finish. Finish by rinsing the caliper thoroughly.
Next step is to hang the caliper from one of the mounting holes so it is completely suspended. Let drip dry...30mins in the sun will do the trick. The sun will also bring the caliper up to temp which makes the paint lay down and shine even better. Once properly dried...make sure there is no water sitting in the crevices of the caliper. Now you will need to tape over the dust boots you don't want paint anywhere near the pistons or seals or it will cause sticking and added headaches...you won't be painting the inner area where the pads go. If you did a good job cleaning with the scuff pad it will be pretty clean and won't be seen anyway.
Unfortunately we don't have any before pics but that shouldn't be a problem they looked like most calipers on the average evo
The first coat should be very light...this helps promote adhesion since it's the first coat. Let that coat dry atleast 10mins....go have a . Follow with another light coat followed by another We put 4 coats on our calipers and well drank 6's
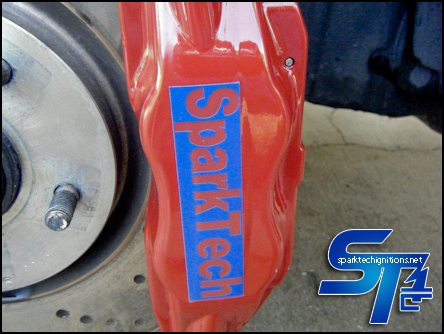
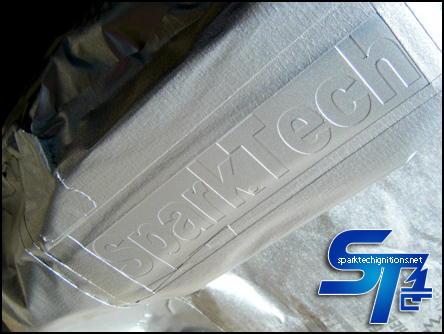
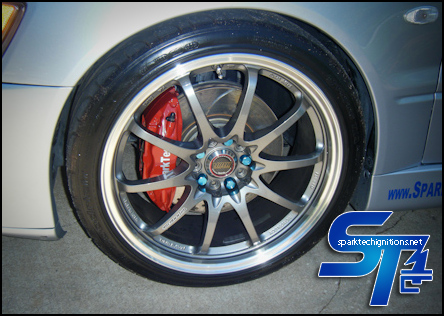
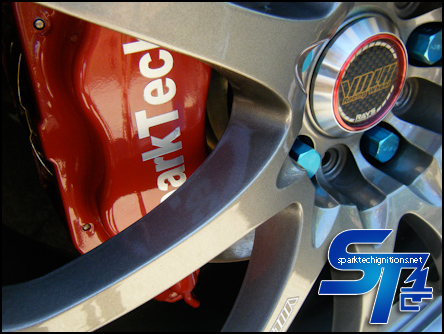
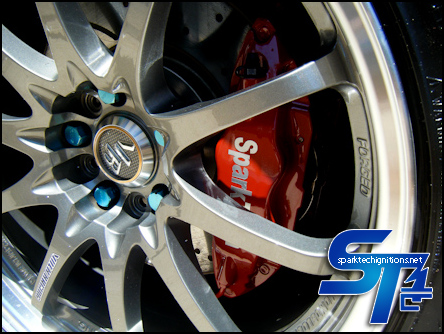
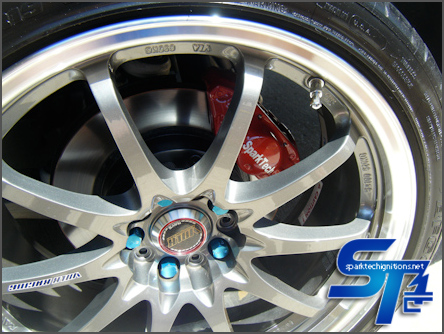
 After coat #4 we let the calipers hang overnight to cure. The following morning we installed the calipers and then used a vinyl Spark Tech sticker for our stencil for the next step.

Again we used the Dupli-color caliper paint...originally we were trying to find white but they only had silver (since our car is silver we though we'd give it a go) Just like the caliper...first coat very light...followed by another(kidding it was early so coffee was the drink of choice") ) Be patient light coats are better than running the paint with a heavy coat. We did 4 light coats again for good coverage.
) Be patient light coats are better than running the paint with a heavy coat. We did 4 light coats again for good coverage.


In the beginning we didn't think we'd do a how to on refinishing calipers so we are missing photos of all the steps. It just came out so well we thought we'd share. It's been almost 2 weeks now and they look like day 1 so far. Obviously this won't last as long as powder coating but if we get 6 months out of it were happy. One advantage to going this route is unlike powder coating you don't have to disassemble the entire caliper and purchase new seals (if your seals are not leaking this saves over $100 in seals)


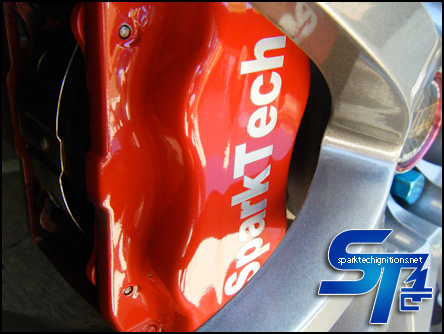
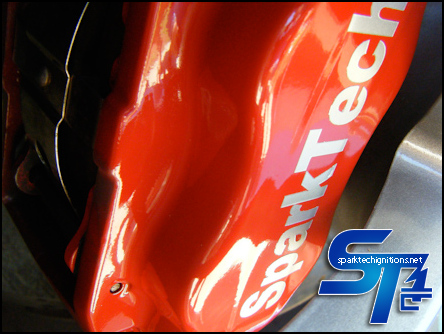
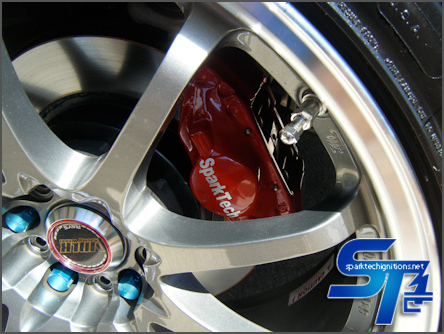
Here are the pics of the rear calipers

If you have any questions feel free to ask...if I didn't explain a particular step clear enough i'd be glad to do so...Thanks for reading
Even after purchasing Volk CE28N's we were not happy because our calipers were faded and clear coat was peeling. We would have liked to have them powder coated but the powder coaters we contacted were 1 1/2 weeks back logged (eventually we'll have them powder coated for durability). Because this is our daily driver we looked into painting...I must say I was very reluctant to go this route. Since this is our daily driver we were off to the local parts store (advanced auto..across the street
) They have a product made by Dupli-color made specifically for calipers. They say it has ceramic and with stands 500deg (intermittent).The only right way to prep these are to remove them completely from the car (down side..you will have to bleed the brakes properly after install, but a good time to flush and replace old brake fluid with a higher DOT fluid) Start by removing brake pads with the calipers still attached to the car...makes it easier
After you have removed the calipers you will need to find a bolt that threads into the opening where the brake lines go. This will prevent water from entering the calipers in the clean up phase.
You will need to sand the calipers by hand or use a small dual action sander to knock it down quickly... I used 220 grit paper, you don't want to sand off all the paint. Just get the clear coat and irregularities out of the surface. I used a green scuff pad (like ones used for household cleaning) and good old dish cleaning liquid. This step removes the brake dust/grease that has been baked on over time and preps the surface so the paint will adhere with out fish eyes or bubbles. You will want to do each caliper a few times as this is a critical step to having a smooth finish. Finish by rinsing the caliper thoroughly.
Next step is to hang the caliper from one of the mounting holes so it is completely suspended. Let drip dry...30mins in the sun will do the trick. The sun will also bring the caliper up to temp which makes the paint lay down and shine even better. Once properly dried...make sure there is no water sitting in the crevices of the caliper. Now you will need to tape over the dust boots you don't want paint anywhere near the pistons or seals or it will cause sticking and added headaches...you won't be painting the inner area where the pads go. If you did a good job cleaning with the scuff pad it will be pretty clean and won't be seen anyway.
Unfortunately we don't have any before pics
but that shouldn't be a problem they looked like most calipers on the average evoThe first coat should be very light...this helps promote adhesion since it's the first coat. Let that coat dry atleast 10mins....go have a
. Follow with another light coat followed by another We put 4 coats on our calipers and well drank 6's After coat #4 we let the calipers hang overnight to cure. The following morning we installed the calipers and then used a vinyl Spark Tech sticker for our stencil for the next step. Again we used the Dupli-color caliper paint...originally we were trying to find white but they only had silver (since our car is silver we though we'd give it a go) Just like the caliper...first coat very light...followed by another
(kidding it was early so coffee was the drink of choice) Be patient light coats are better than running the paint with a heavy coat. We did 4 light coats again for good coverage.In the beginning we didn't think we'd do a how to on refinishing calipers so we are missing photos of all the steps. It just came out so well we thought we'd share. It's been almost 2 weeks now and they look like day 1 so far. Obviously this won't last as long as powder coating but if we get 6 months out of it were happy. One advantage to going this route is unlike powder coating you don't have to disassemble the entire caliper and purchase new seals (if your seals are not leaking this saves over $100 in seals)
Here are the pics of the rear calipers
If you have any questions feel free to ask...if I didn't explain a particular step clear enough i'd be glad to do so...Thanks for reading
Last edited by SparkTech; May 7, 2009 at 08:48 AM.
 May 6, 2009, 06:31 PM
#2
daaaamn dude they came out AWESOME. i like the custom spark tech work. nice job.
whats the plains for the back??? i know i know. you should put the little logo of the tip of the spark plug on it like in your decals.
wow man. i need to do mine. i hate how they fade, peal, and look. your look brand new again.
whats the plains for the back??? i know i know. you should put the little logo of the tip of the spark plug on it like in your decals.
wow man. i need to do mine. i hate how they fade, peal, and look. your look brand new again.
May 6, 2009, 10:03 PM
#5
Looks great!
Many years ago I did something similar with some Skyline calipers for my 240sx.
I prepped just like you did and used brake cleaner all over when finished. Since there were raised letters I used masking tape on them and did about 10 coats, and it was almost hard to get it off but it did and sanded the tops of the letters with rough grit, and they looked awesome!
I didn't bother with any of the dupli-color automotive-speciality paints though. Instead I used even cheaper general high-temp Rust-Oleum flat black. Any Rust-Oleum is very thick heavy and heavy duty and makes a lot of other paint even automotive high-temp seem thin and watery in comparison.
The point of the story is you don't necessarily have to use the expensive and often thin and runny auto high temp paint, and it held up to very hard use for years.
I imagine these will also hold up very well for a long time actually.

 .
. on your job.


