
Ground Control Sleeved Coil Installation!

Thread Starter
Evolving Member
iTrader: (1)
Joined: Feb 2011
Posts: 163
Likes: 0
From: Newfoundland, Canada
Ground Control Sleeved Coil Installation!
This has been a long time coming but it is finally happened. My original plans were to do the whole install starting Friday morning but I ended up getting insanely drunk Thursday night and well I was useless until about 2:00 PM Friday so I never got the car started till 3:00 PM. Other then that, Friday went pretty smooth.
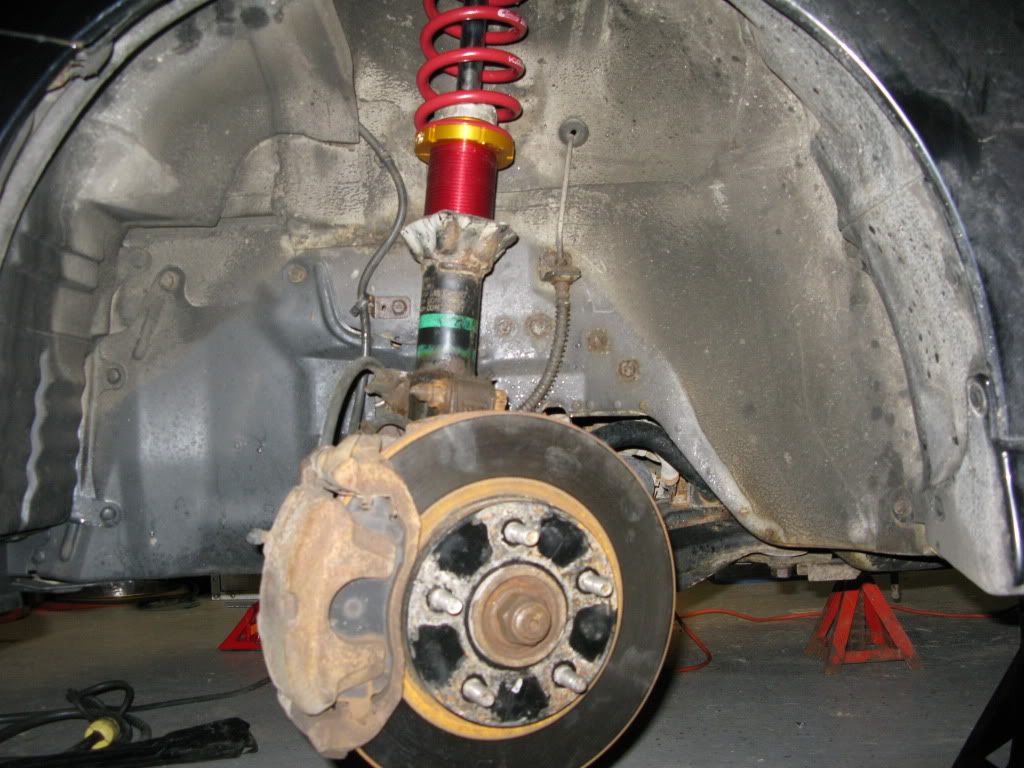
So first I put the car on up on all 4 jack stands. The original intentions were to do front and back but I wasn't feeling to good after supper so I had to stop after the front.
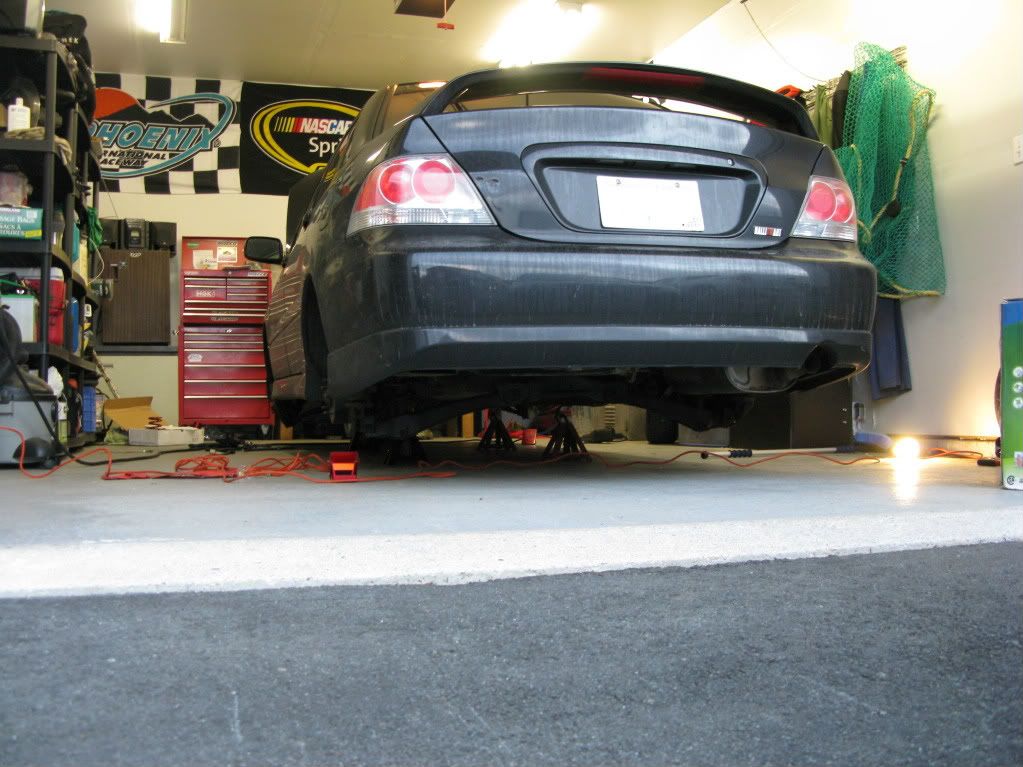
Yea the garage is a bit of a mess but in the state I was in, I didn't care too much lol.
Removal of the front struts is pretty easy on these cars. It's not a McPherson setup where everything connects to the strut; ours are independent from basically everything else other then the knuckle.
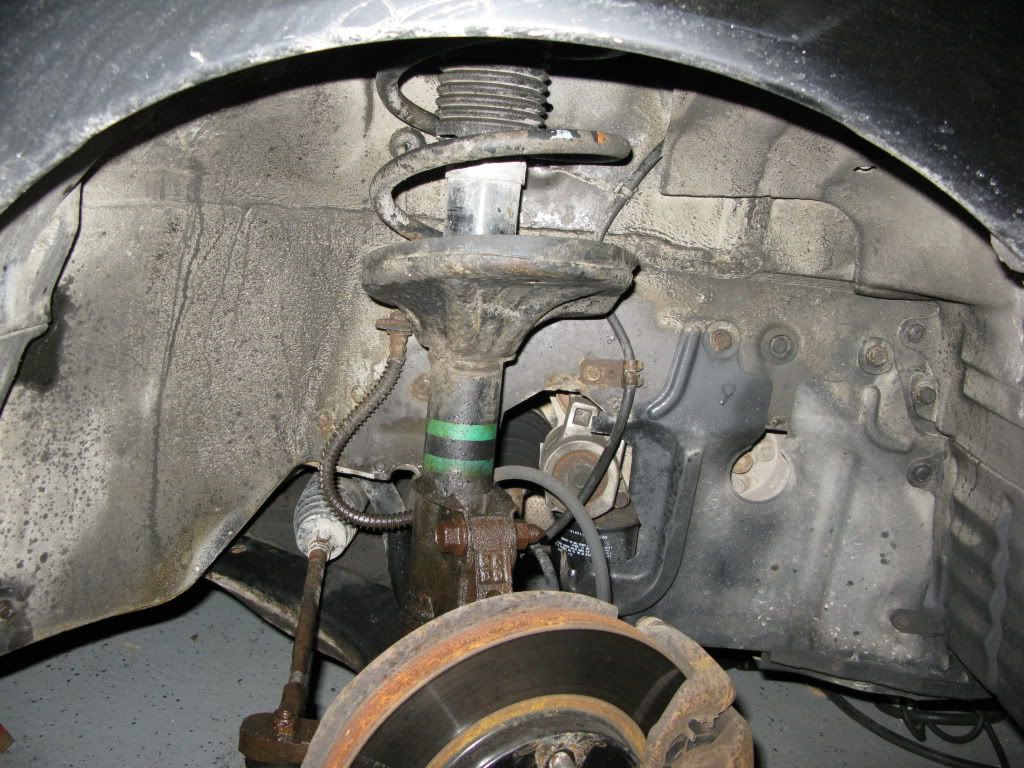
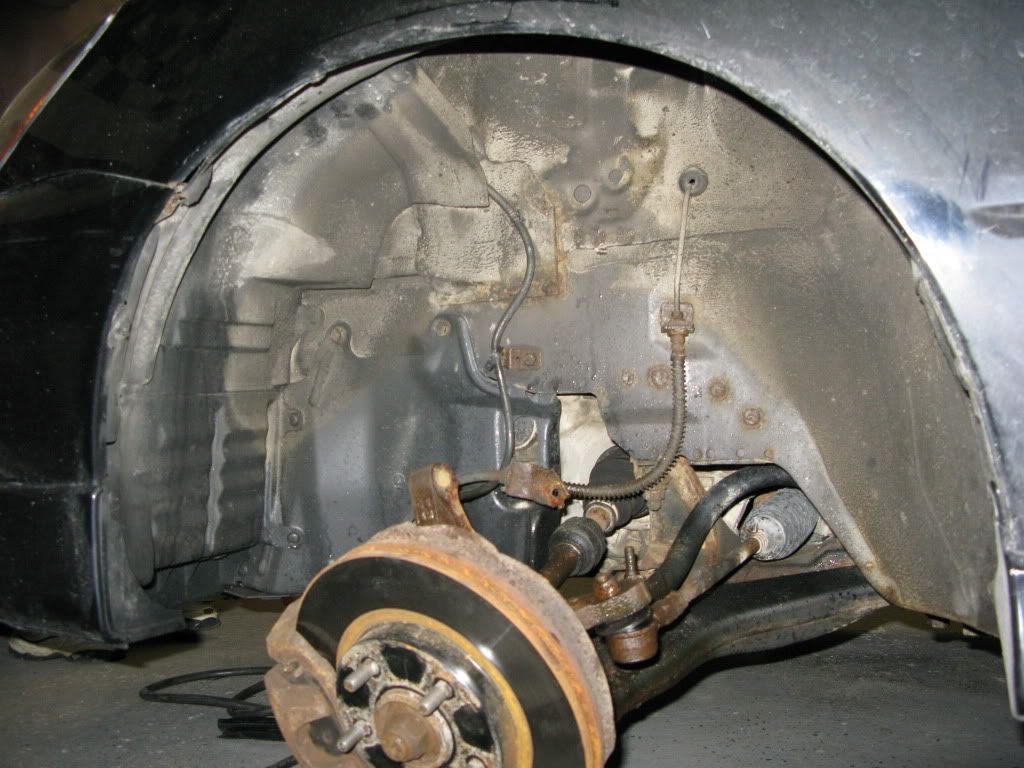
There is a total of 6 nuts/bolts to remove. First you remove a 12mm nut on the back of the strut. This one holds on the two brackets for a brake line and I think a power steering line. The nut is directly on the back and therefore you can not see it without turning your wheel. It is accessible but for might as well turn your wheel and make it a little easier on your self.
Next remove the two 19mm nuts & bolts from the knuckle directly in the front of the strut. It is the two main ones that you will see as soon as you remove the wheel.
Next remove the three 14mm bolts from the strut tower. What I did was take off two, loosen the third and remove it by hand while I was holding the strut below, that way it won�t fall onto the boot below and rip it.
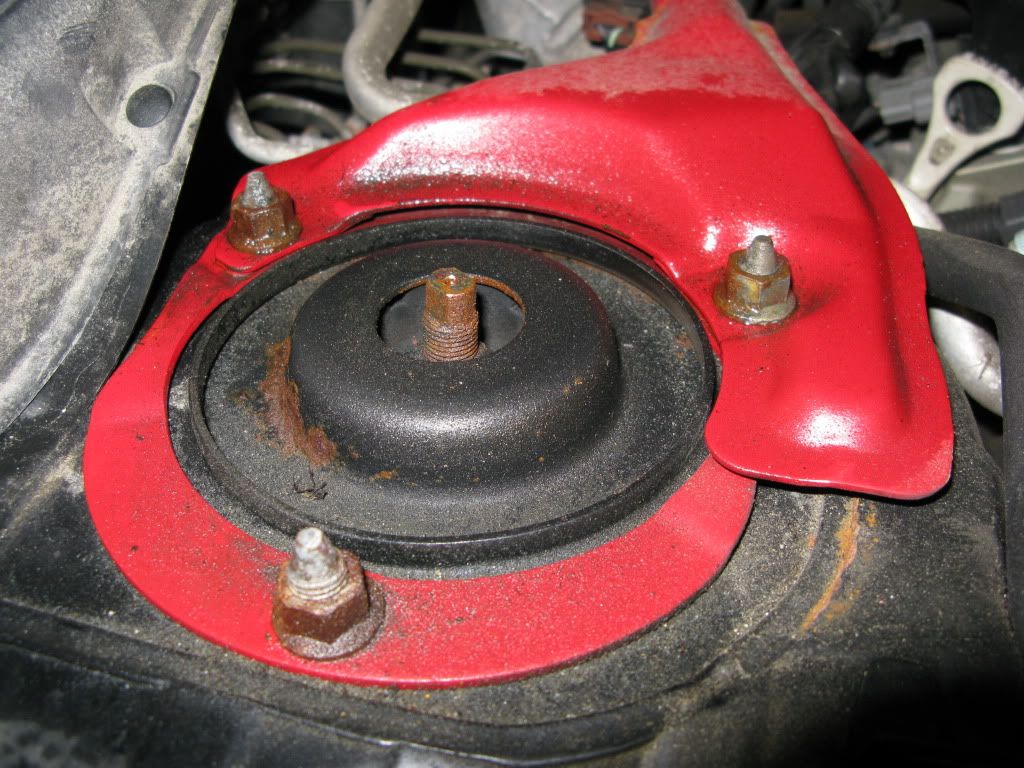
From here the strut basically falls out, just takes a little tweaking here and there to get it away from the well.
In order to remove the coil from the strut your going to need to compress the coil so it don't fly across through the air when you undo the top bolt. There is no need to hurt yourself doing a simple job. To properly do this, get some compression tools from any local automotive supply shop; they are not too expensive for the basic tools. Unfortunately I was not informed about mine being lent out and not returned so I had to do it another way...
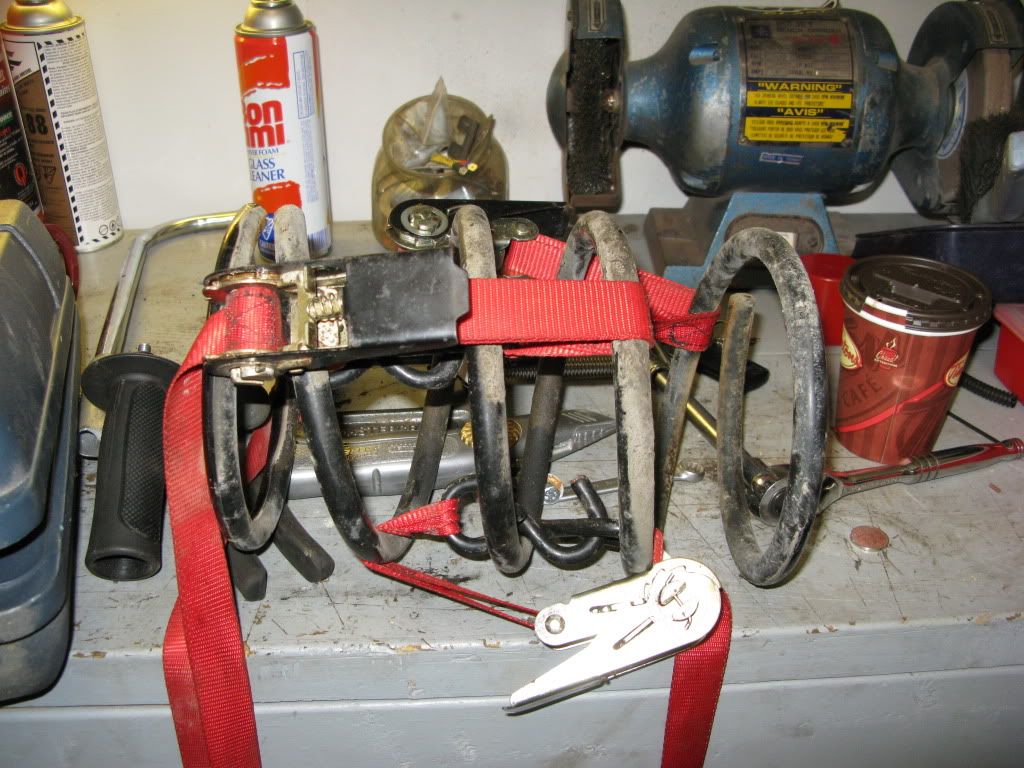
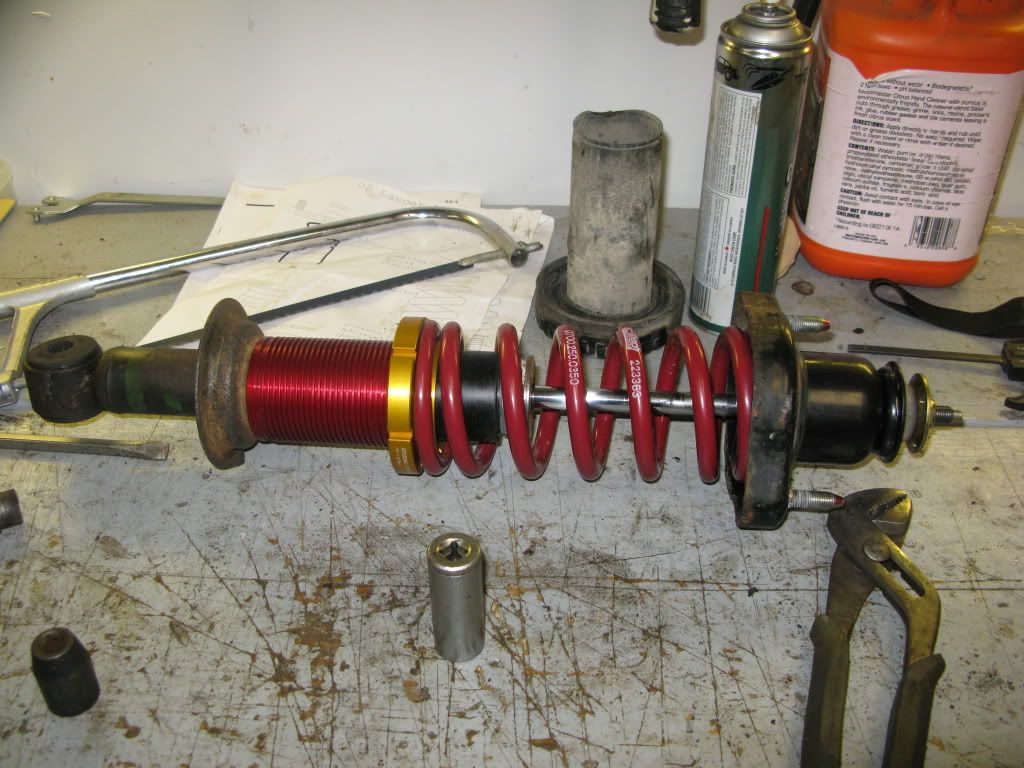
...ratchet straps worked perfectly.
Here is the strut without the coil. The little silver cap on top of the chamber has to be knocked off for installation of the sleeve. A chisel/screwdriver and hammer, working your way around will get it off.
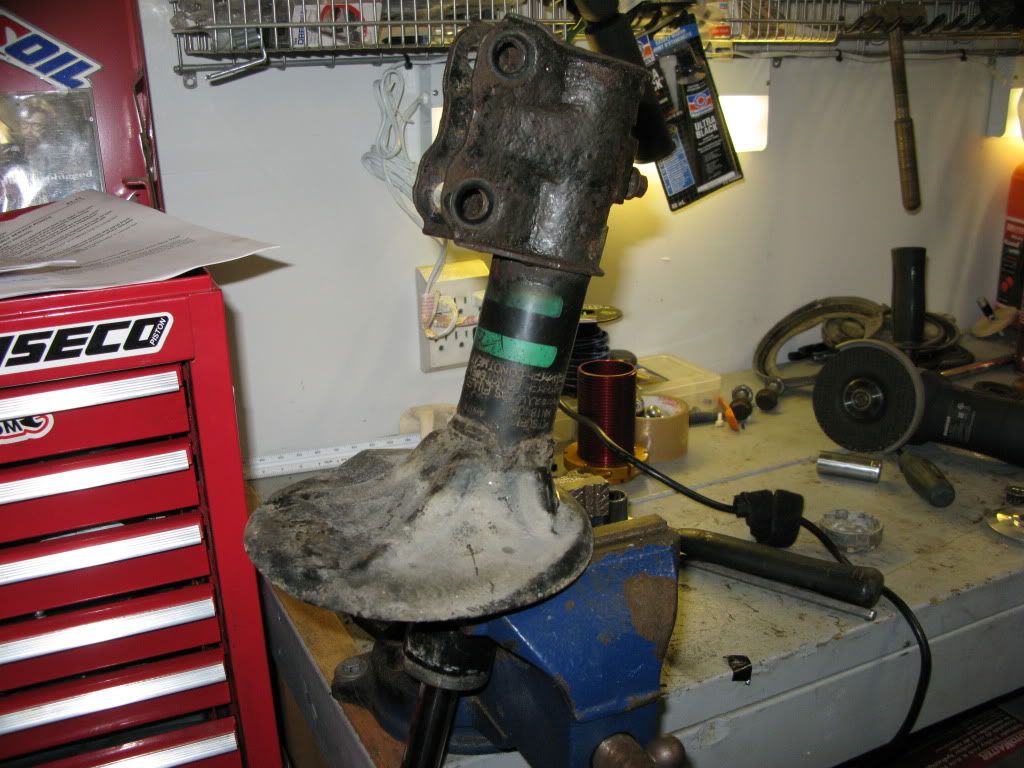
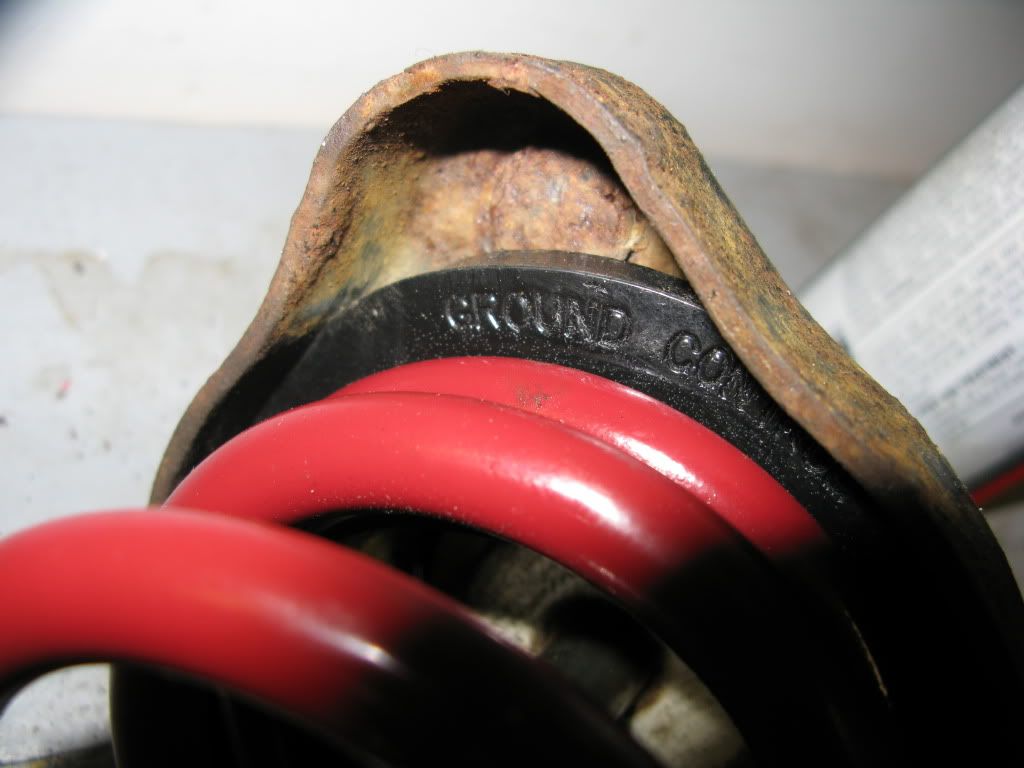
Here is a better view of the cap. As you can see here, this is when the strut is reassembled and the cap keeps the sleeve from sliding/spinning. Once the car is down it don�t matter anyways because the coil will keep more then enough pressure to keep the sleeve from moving.
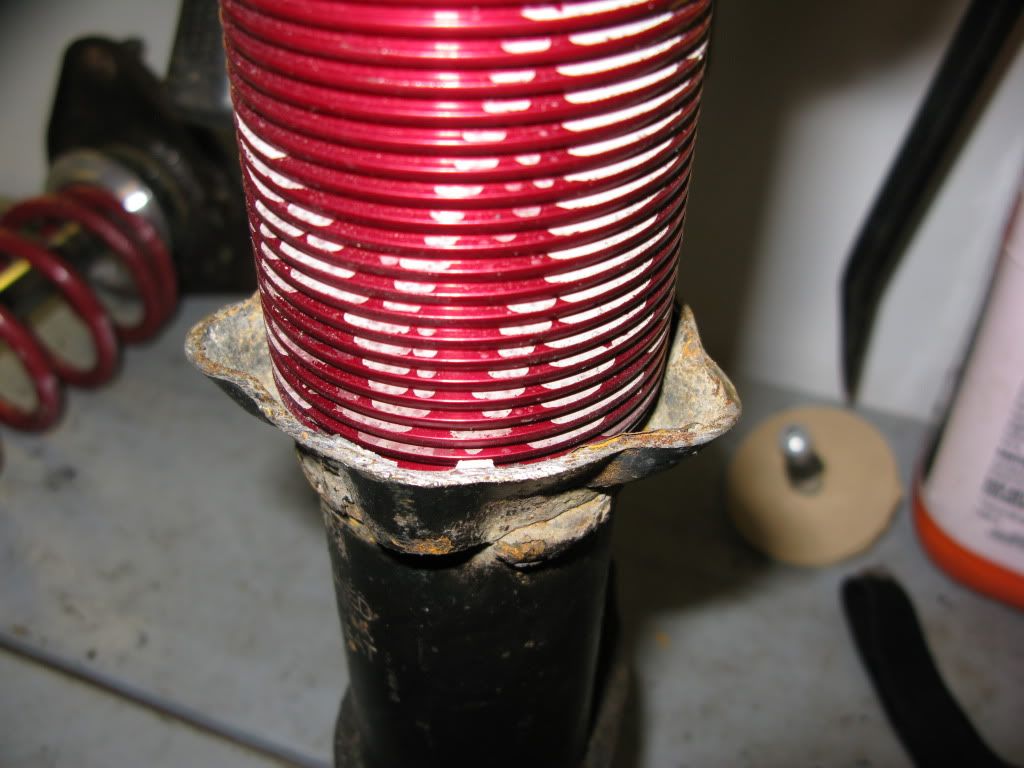
The next step is to cut the lower stock coil perch. It is not outlined to do so by Ground Control but it is an obvious and important step. This is done so you can adjust the sleeve with out having to drop the full strut assembly from the car because the stock strut perch will get in the way and hide the sleeve. The more you cut off, the more accessible the sleeve will be and you will also have more range in the sleeve.
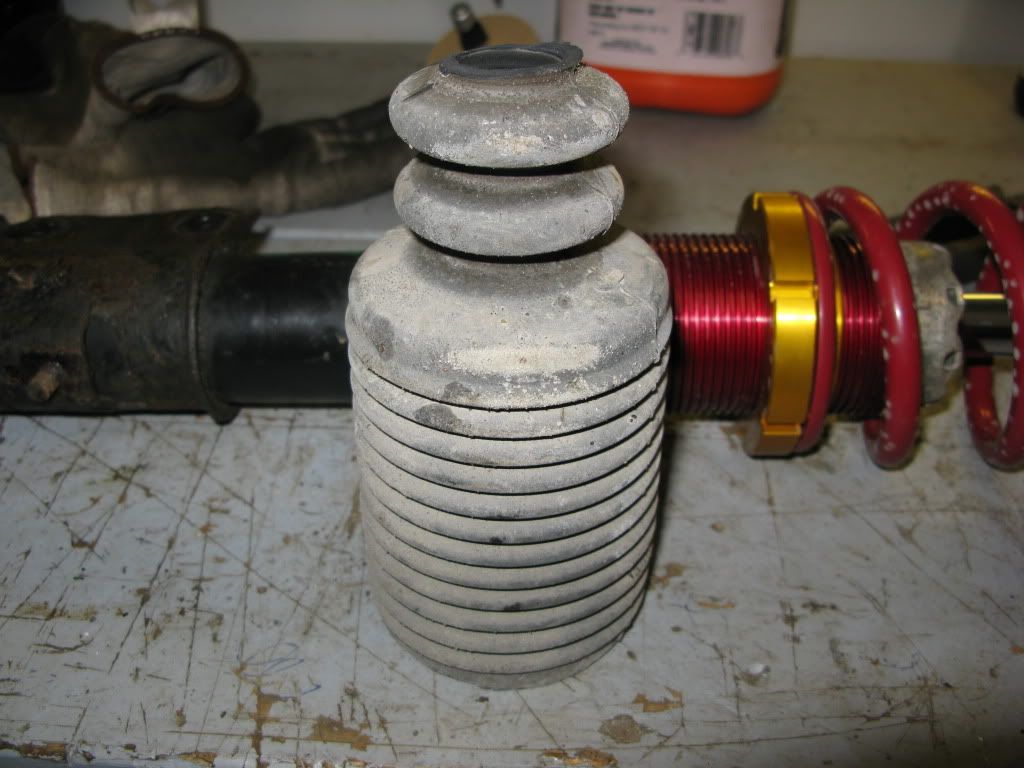
Next you will need to cut the bump stop down a good bit. Here you can see how much was cut off compared to what is actually used.
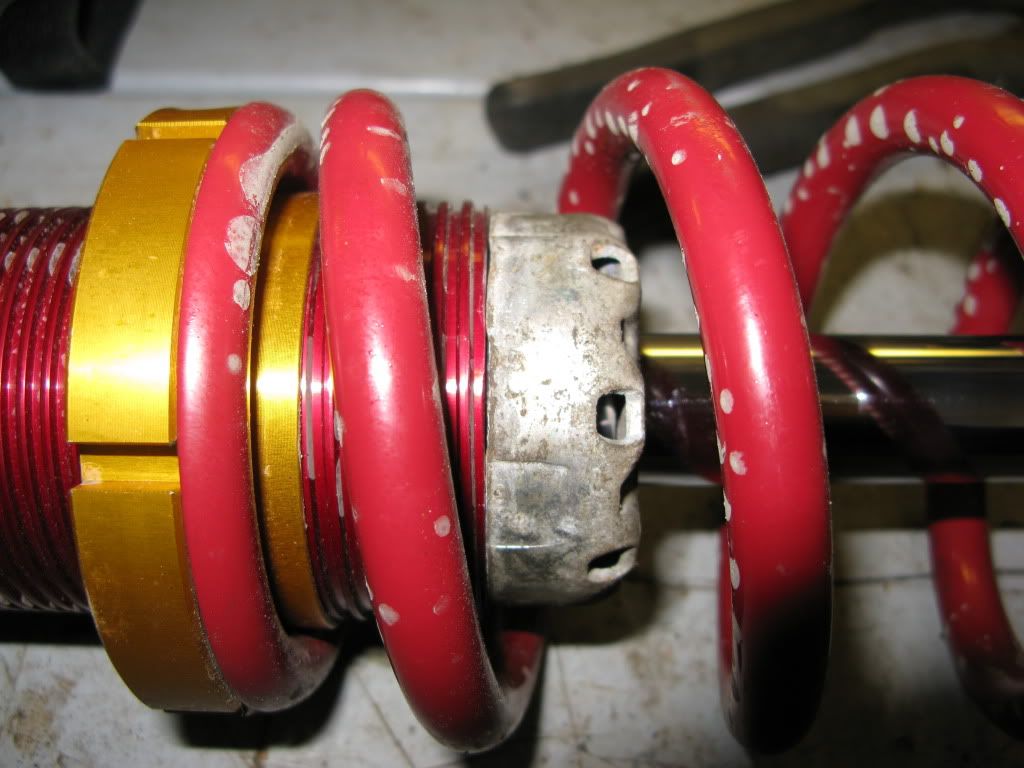
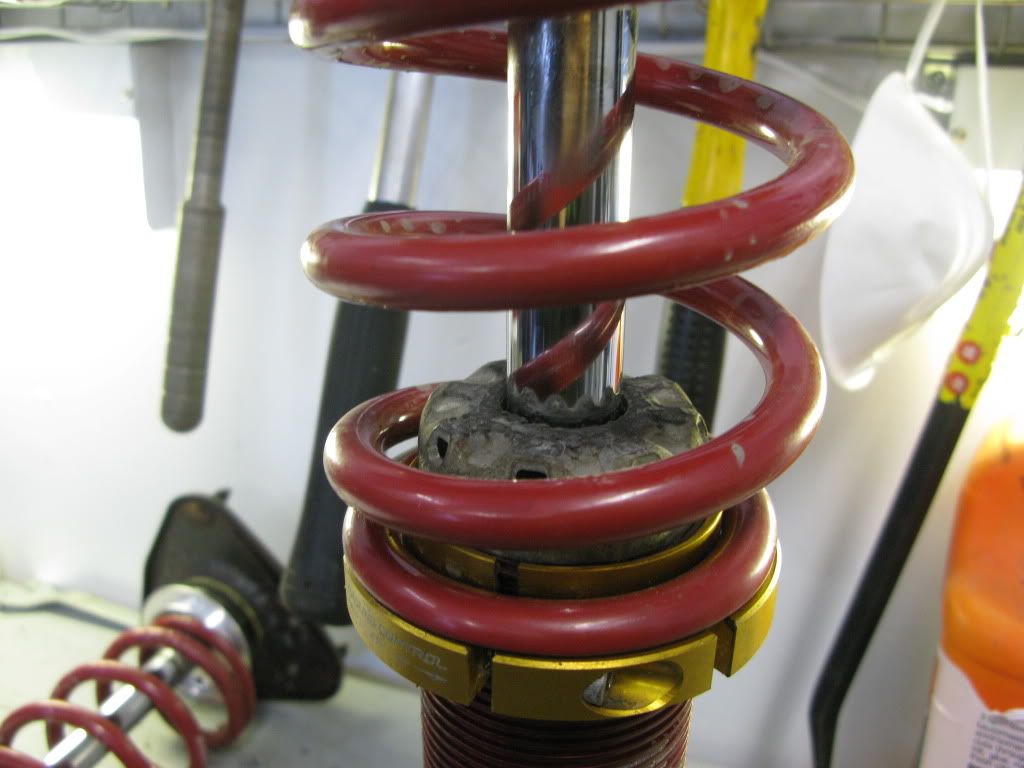
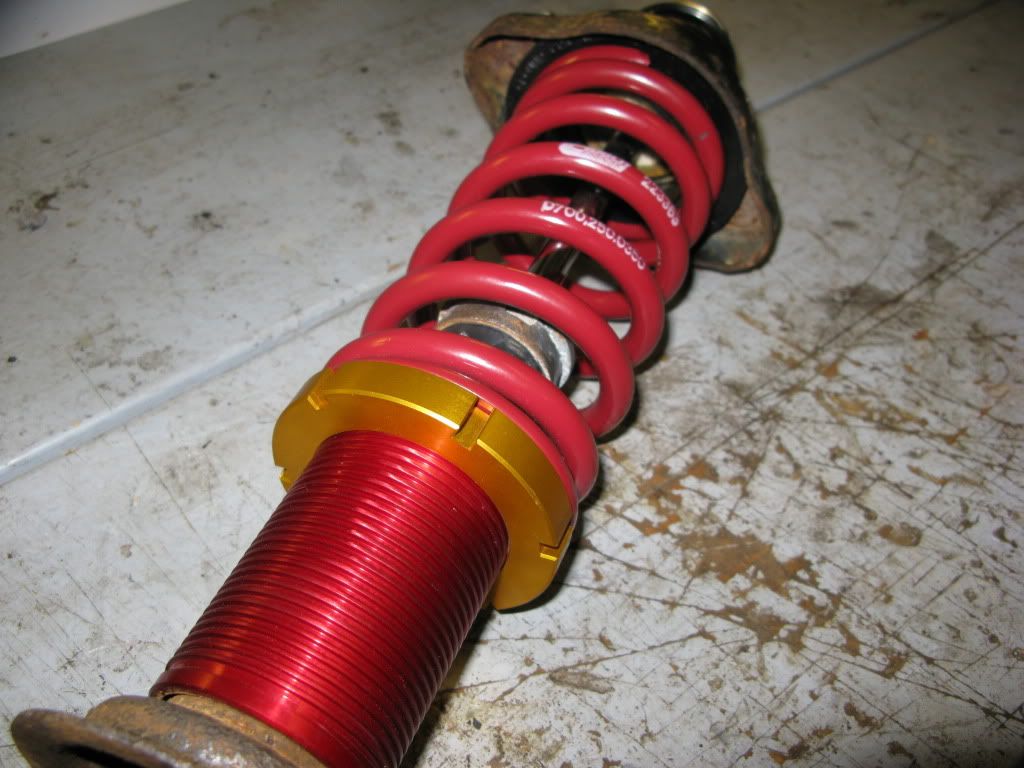
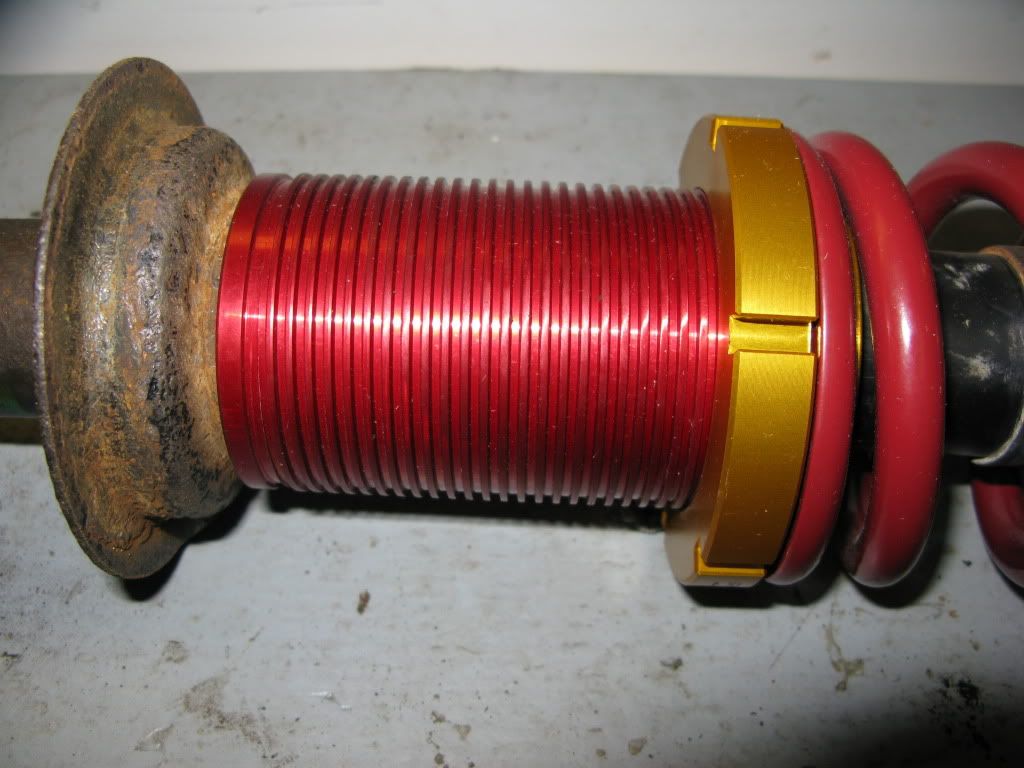
The order in which the strut is assembled goes: sleeve, the cap that you had to knock off, coil, bump stop, aluminum hat/coil perch, and finally the stock strut cap/tower/.
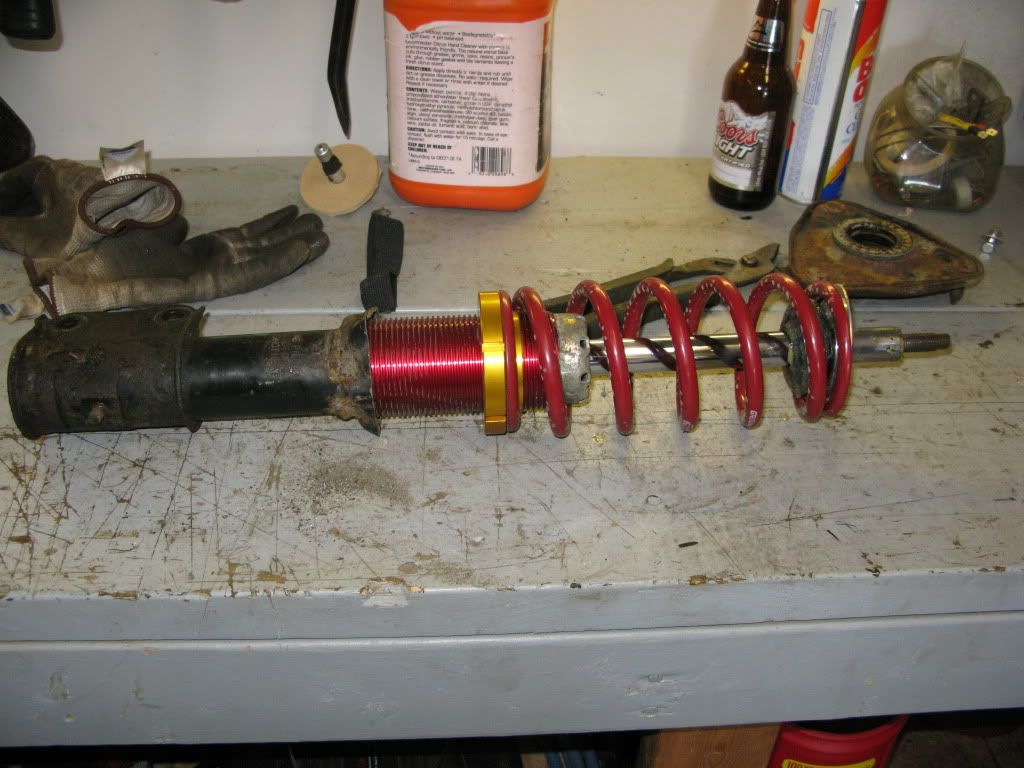
Next is to pretty much do the reverse of how you took the strut out. Do the 14mm tower nuts first then the two 19mm in front and then the back 12mm nut. When all said and done, it should look similar to this.
It was an overall a quick process for the front but I did have minor problems with the 19mm bolts being a little seized. Nothing a whole lot of leverage couldn�t take care of though.
Making my way to the back, I was expecting the worst. From seized bolts to broken sway bar links, I had already accepted the fact that if it something happened then I wouldn�t be surprised. The side that gave me all the trouble was the driver side. My passenger side basically fell out as if it was brand new so the following description is of what happened on the driver side. Expect the same for the passenger side, just with out the carnage.
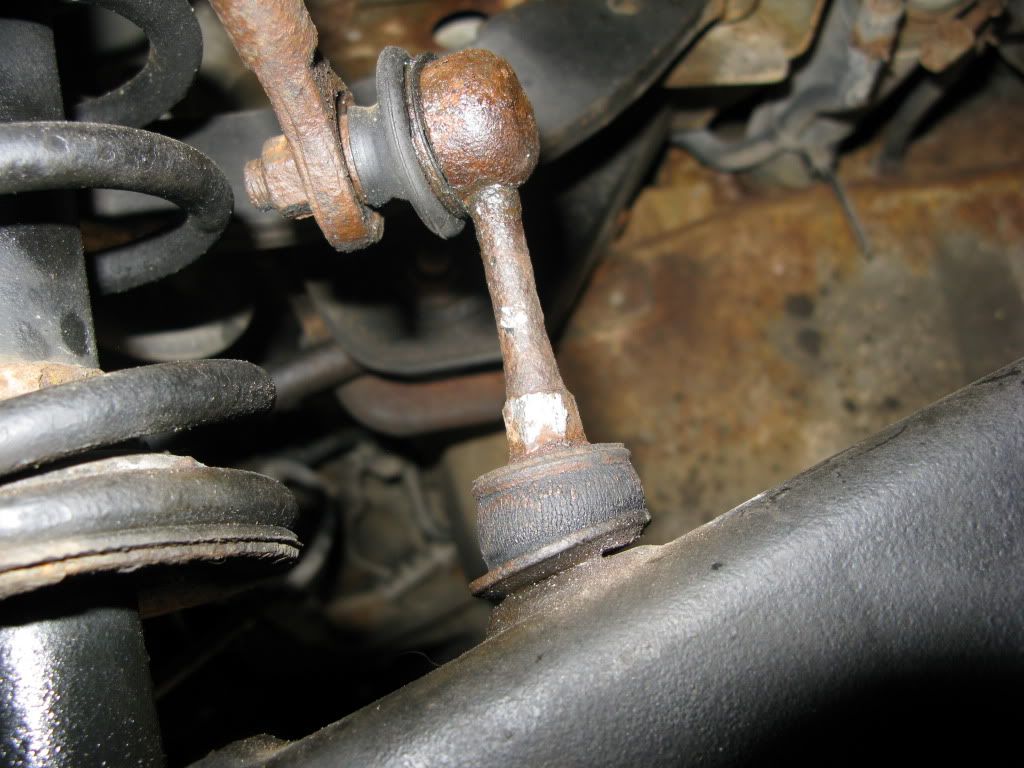
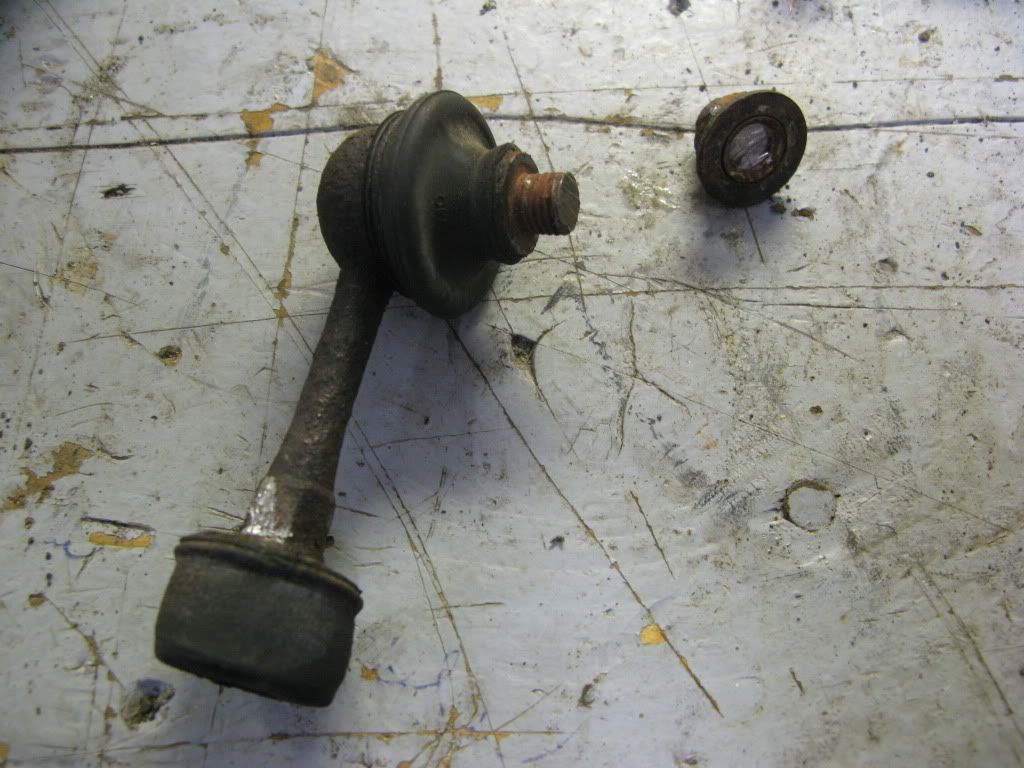
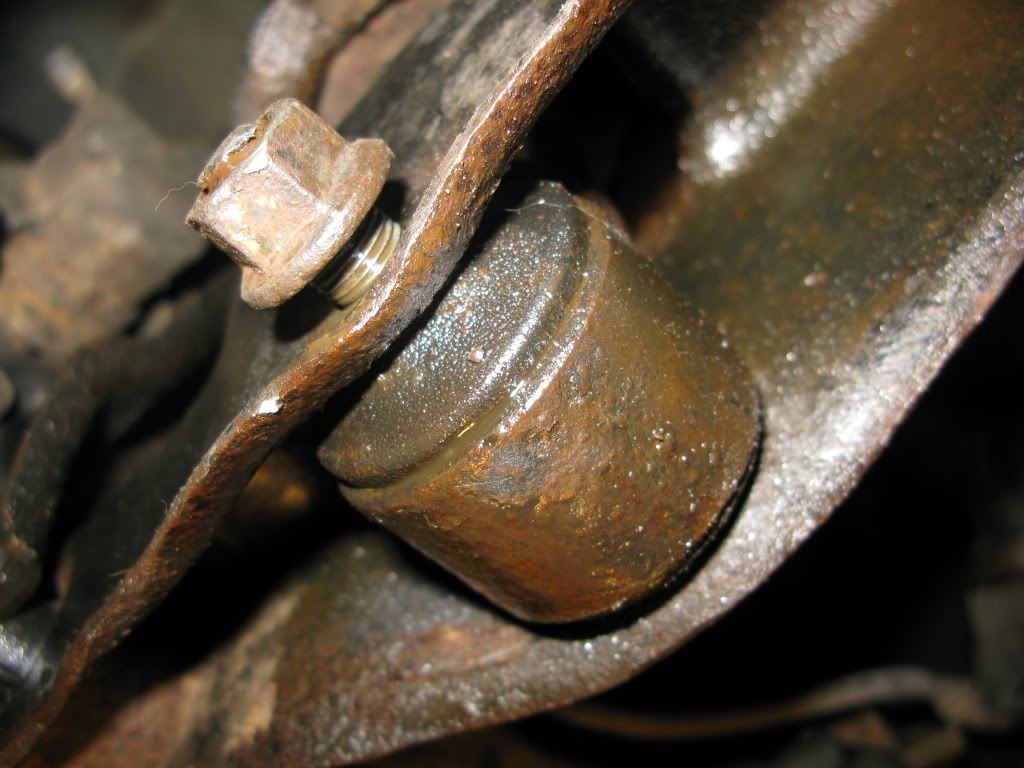
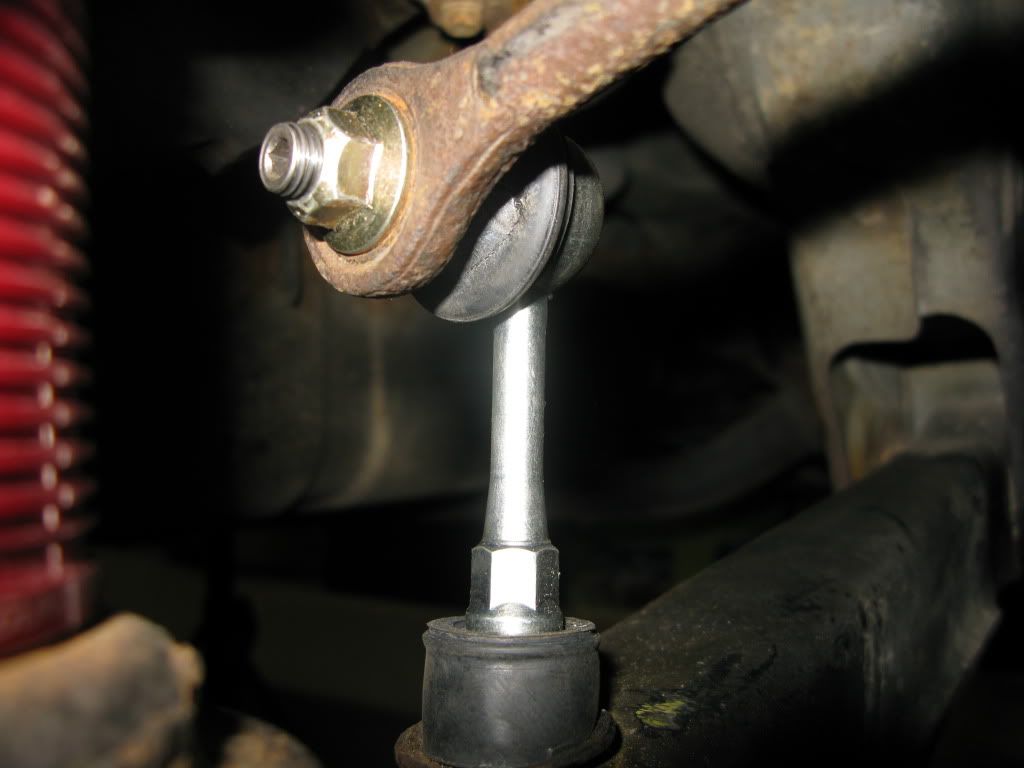
The first thing that should be done is the end link for the sway bar. The nut is located underneath the control arm and if you live anywhere where cars rust, you can be sure that it will make your experience hell. The nut is a 14mm iirc but it didn�t matter for me because I had to cut the link in order to drop the arm.

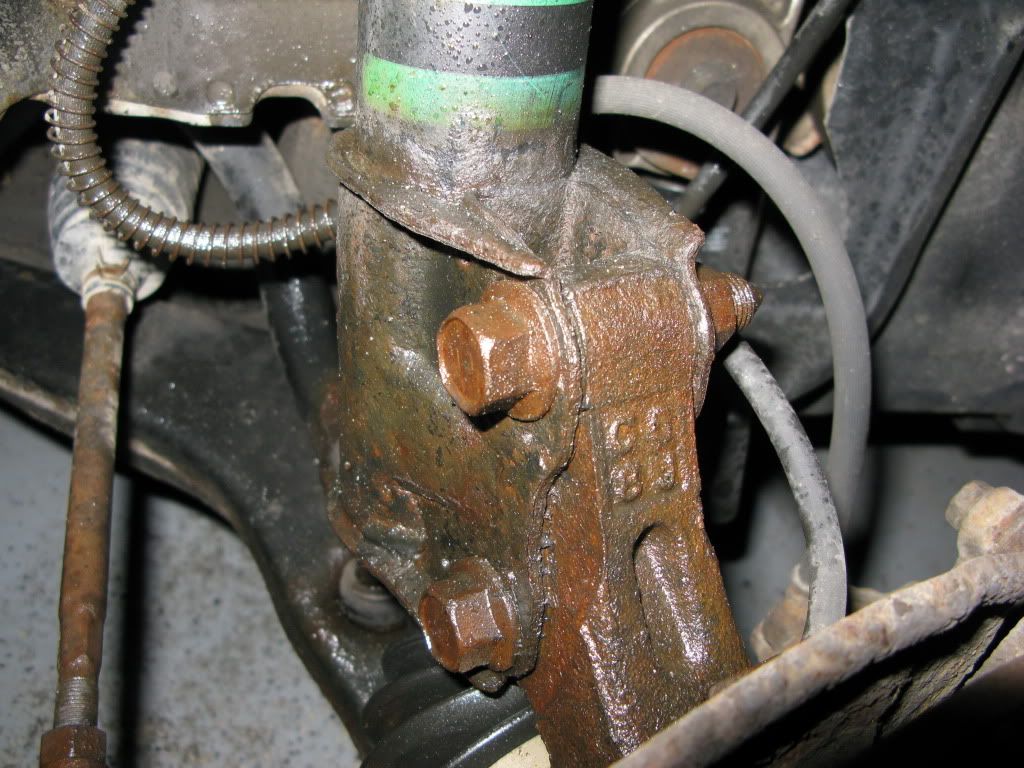
Next I tackled the lower arm and trailing arm connecting 17mm bolt and nut. This was actually not bad; with a bit of leverage I managed to get that initial crack and zipped it off with impact gun.
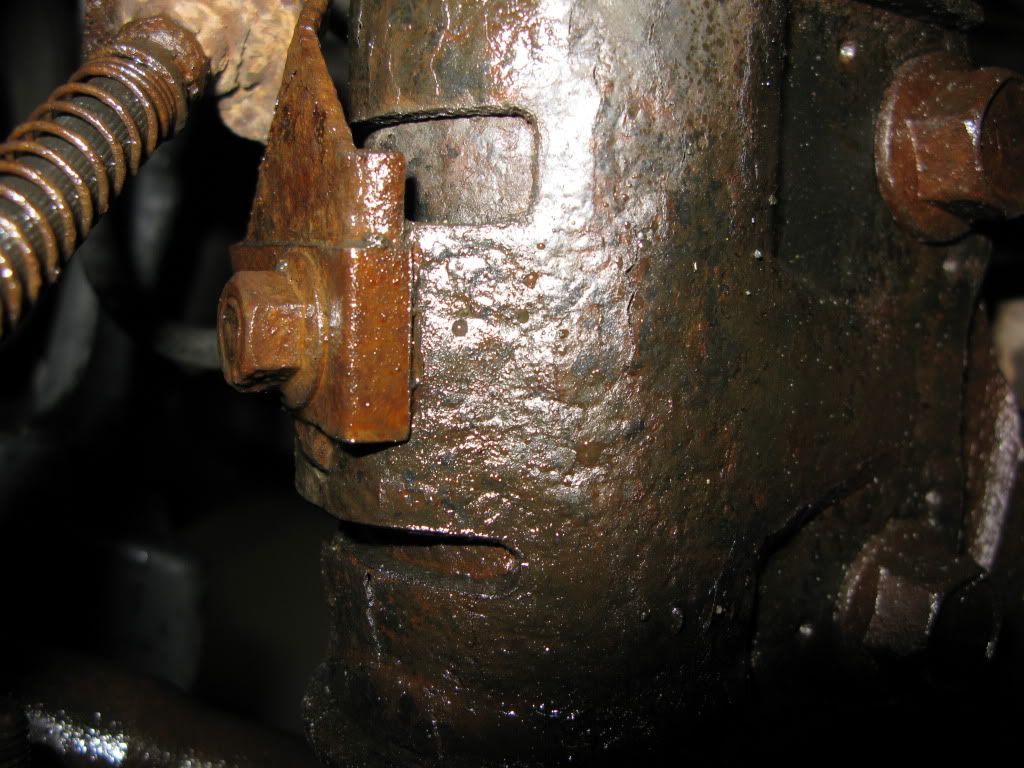
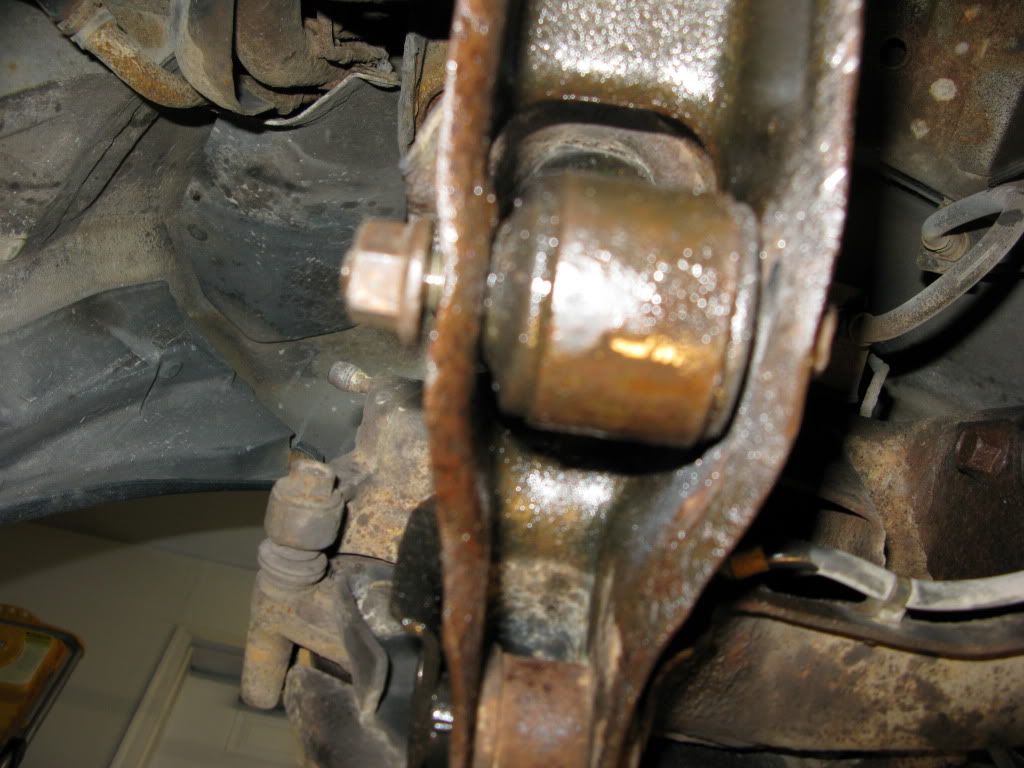
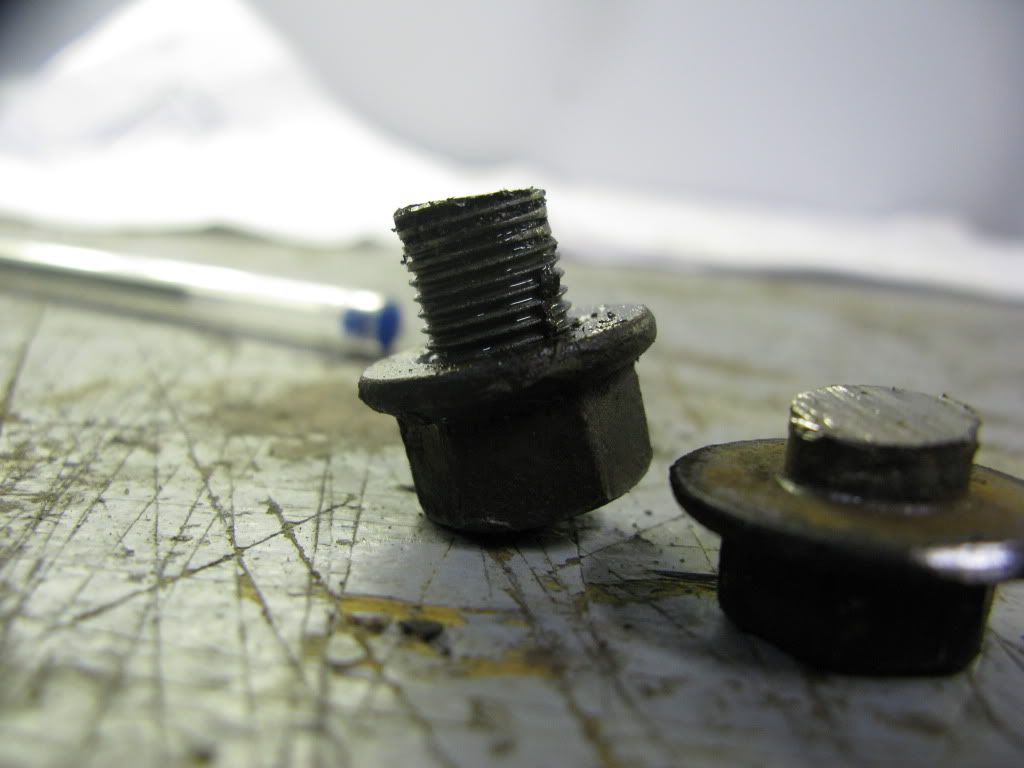
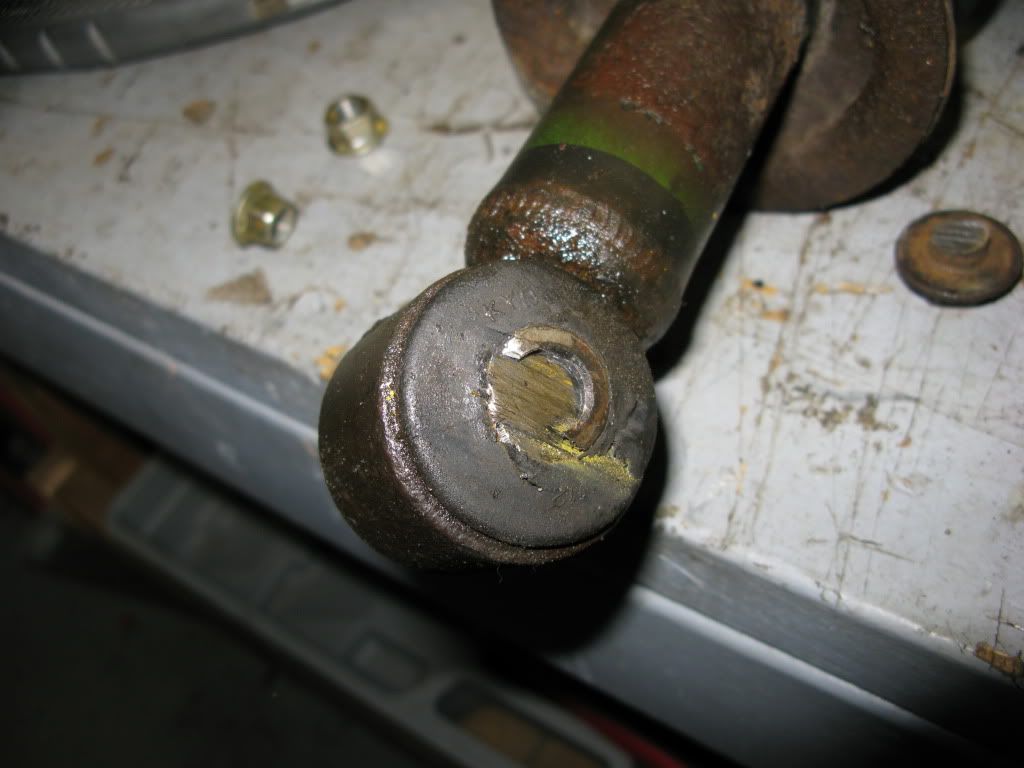
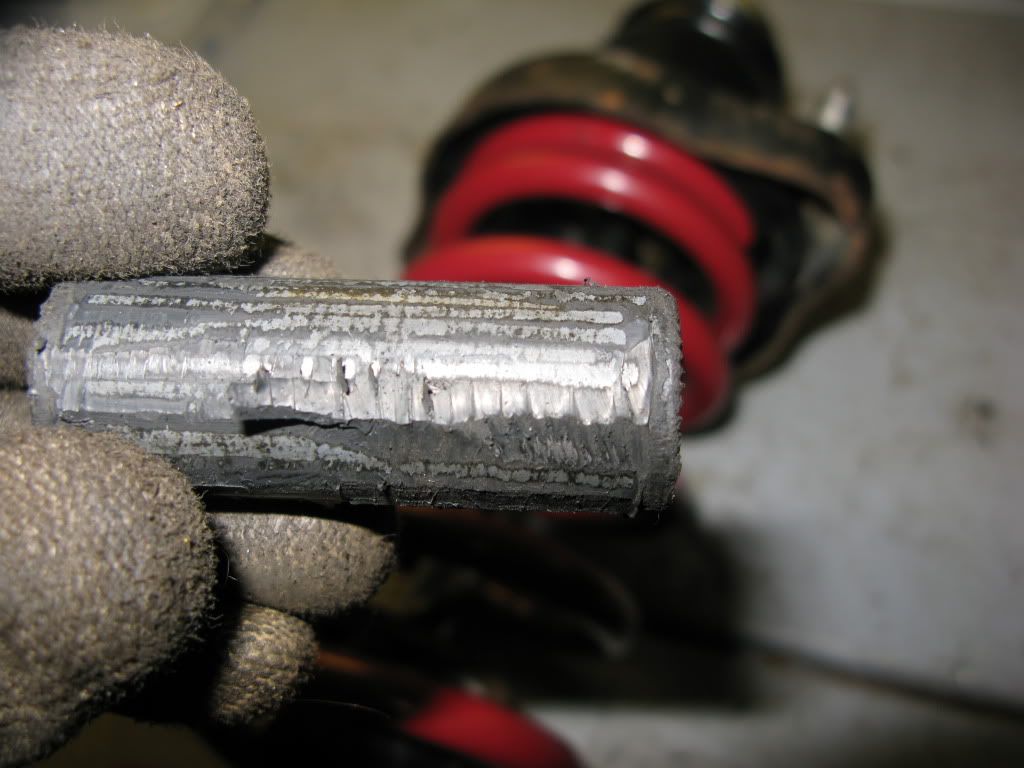
Unfortunately that was the only bolt I got out. When I got to the lower strut 17mm bolt I had hell. Getting the nut off was fairly easy work, but I was quick to realize that the bolt itself was seized into the bare metal sleeve of the bushing. I spent ~45 mins just hammering and beating the sh*t out of the bolt trying to get it out but everything I did was useless. Eventually I had to cut the bolt out using a reciprocating saw and a metal blade which left me with the only option of having to replace the bolt, obviously. Not really what I wanted to do but it is what it is I guess.
The only thing left to do was to remove the inner lining of the trunk to get to the strut towers of and remove the 14mm nuts. Once off, the assembly basically falls out. You will have no problem getting them out because they are inside the trunk and will not be open to the elements.

Once you get the strut out and to your workstation it is a fairly simple process of breaking down the strut assembly and reassembling it with the Ground Control setup. Again first you will need to compress the stock coil, it should be fairly easy because over time they sag and get loose (the reason why I am doing this install). I did it the same way as the front so I didn�t get any pictures of that. Remove the top nut and bowl shape washer. Once removed, the strut tower will slide right off exposing the factory bump stop, coil perch and shaft boot.
The factory perch and boot can be removed and thrown out because it will not be used again. The bump stop will be cut down to the first layer and the rest thrown out. The instructions that Ground Control gives shows the ES bump stops, not the one like in RA�s but it is the same process for cutting them down. The RA bump stop is yellow and almost like a hard foam or some sort of poly blend whereas the ES ones are, I think, a rubber like the front bump stops.
The silver, rusted in my case, cap does not need to be knocked off like in the front setup. Instead, the sleeve slides over and it comes with a rubber spacer that goes in between the sleeve and shock chamber. This will keep it from rattling and moving around.
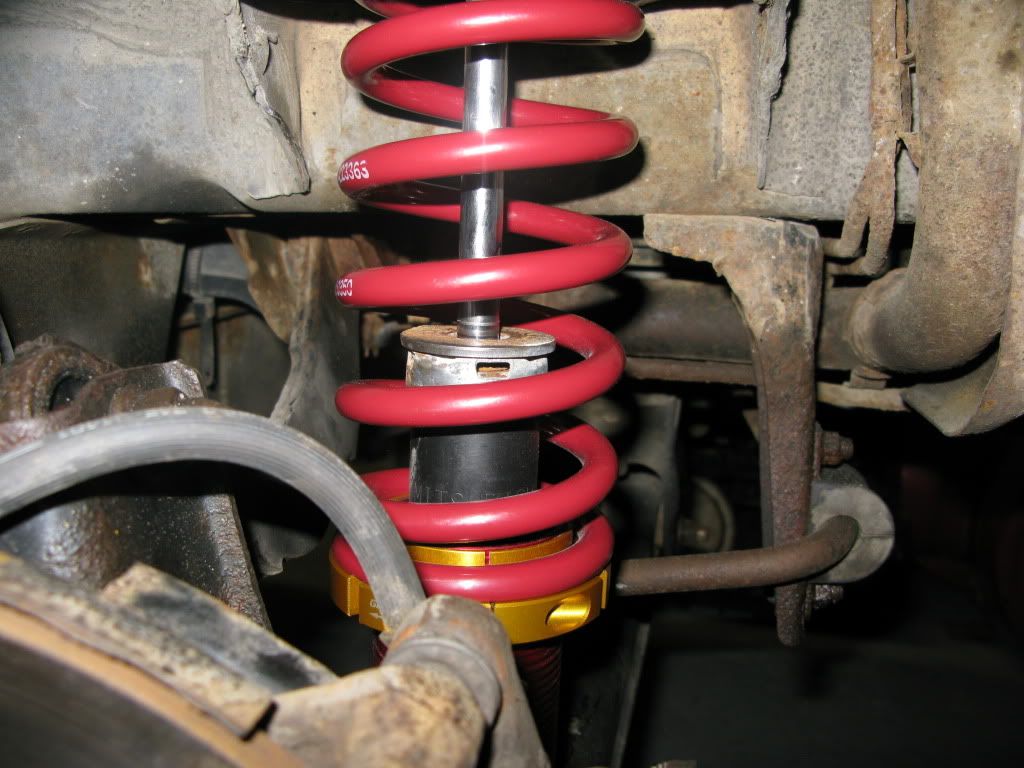
The coil goes on next but unlike the front setup, the rear does not come with an aluminum hat, but with a rubber �insulator� which fits into the top of the strut tower. Before installing the insulator, remember to install the bump stop.
Next put the strut tower on and tighten down the top nut. Voila, the rear strut is assembled.
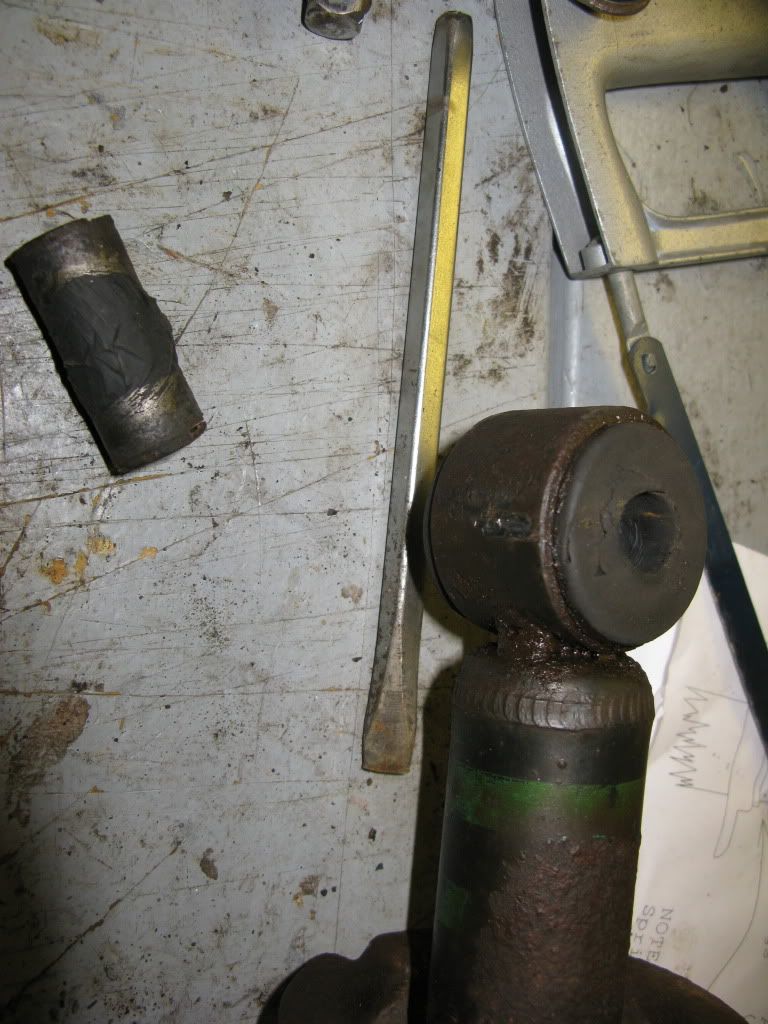
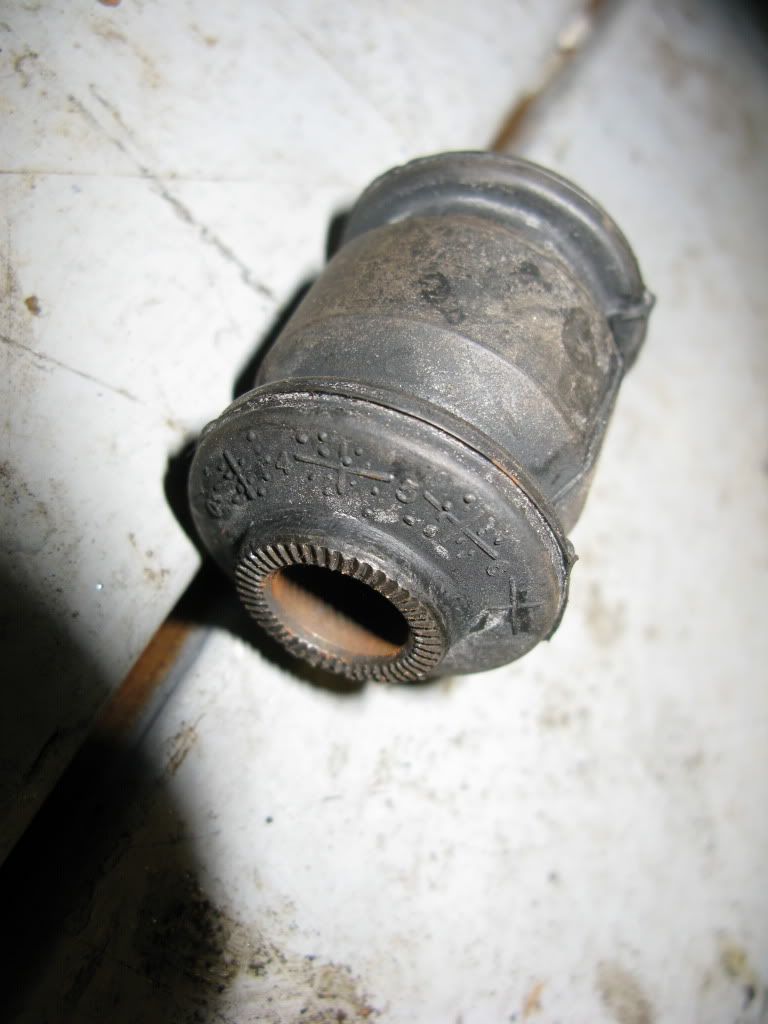
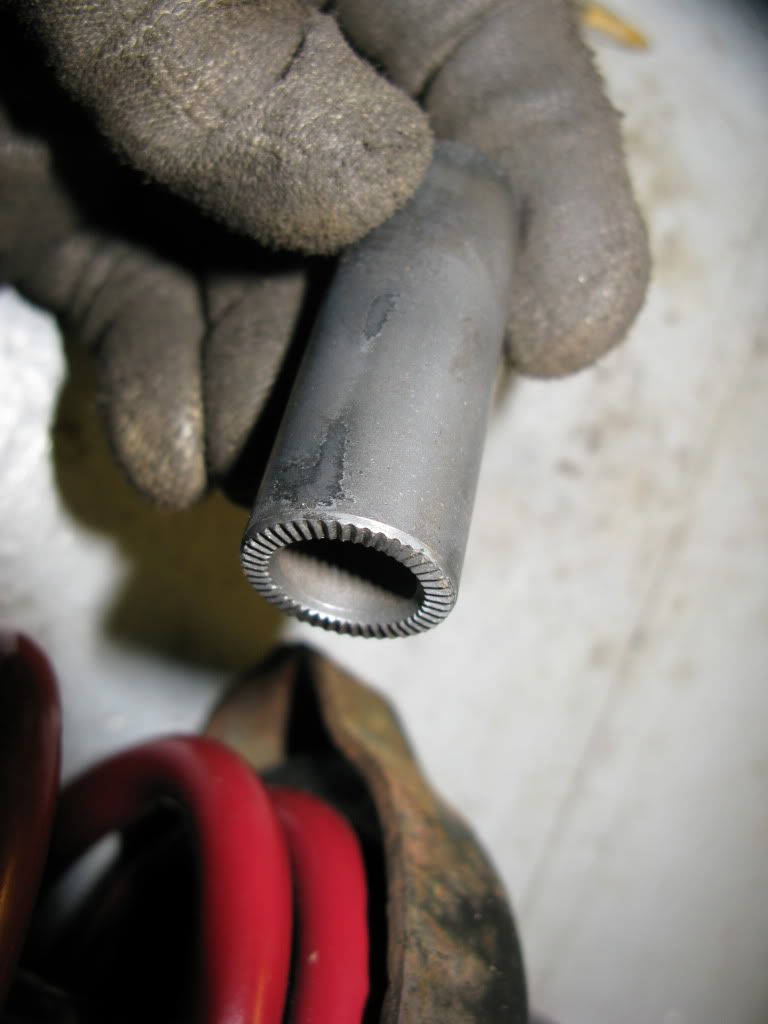
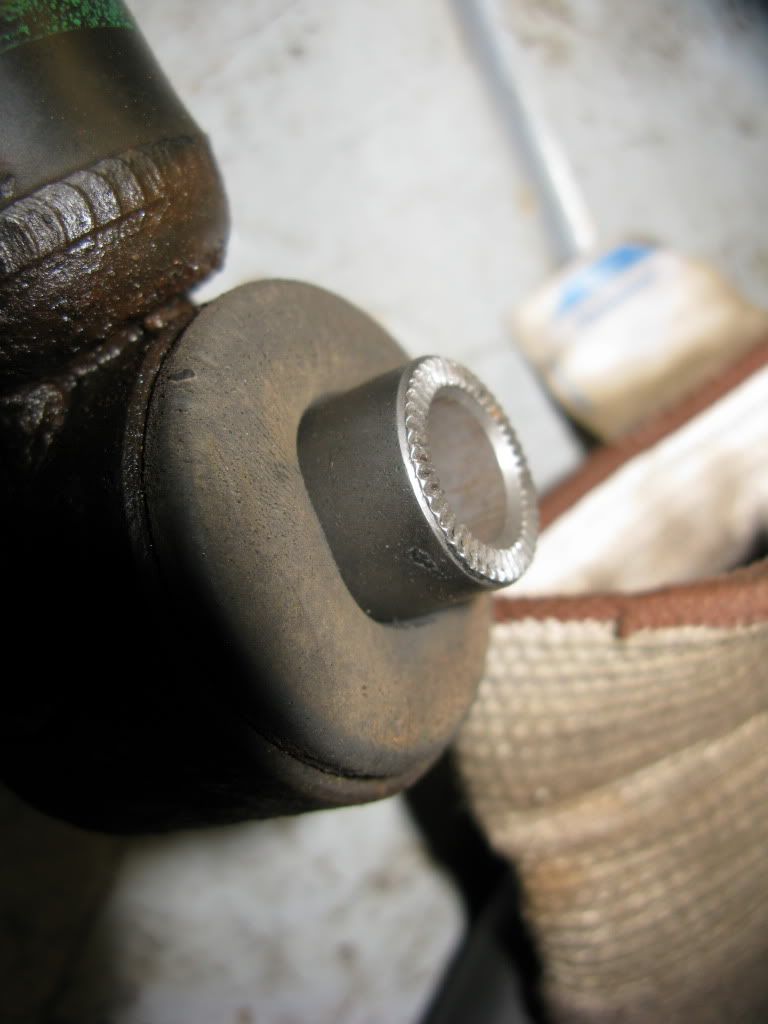
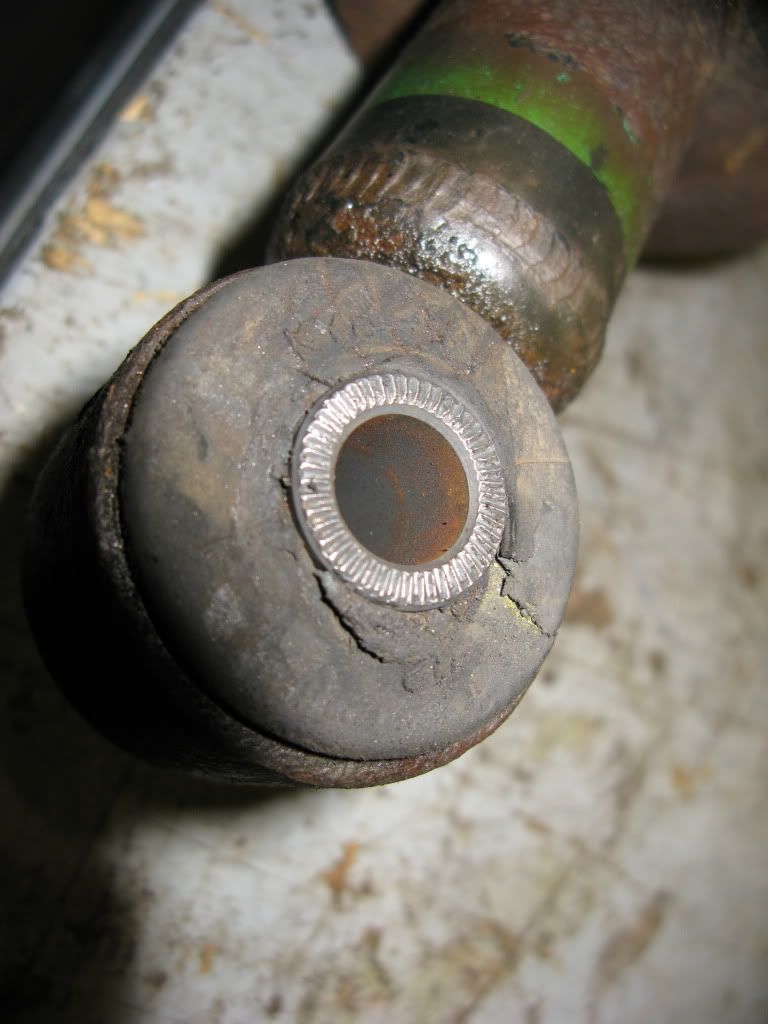
Now if you were like me and ended up having to cut the bottom bolt from the assembly, a few options come your way. For starters, the bushing is not sold separately from the strut, it comes pressed in from Mitsubishi. Thus resulting in the purchase of a new assembly, but no one wants to spend money on a new strut if it is not needed. Your second option is buying a used strut, not matter the working condition, get the bushing out and press it into your own strut. What I did was find a bushing sleeve that had the same inside and outside diameter and pressed it into my bushing. A slightly larger outside dimension is not to much of a big deal but it can become an inconvenience when trying to press it into the bushing, but, it will be much more snug compared to getting one that is the same size.
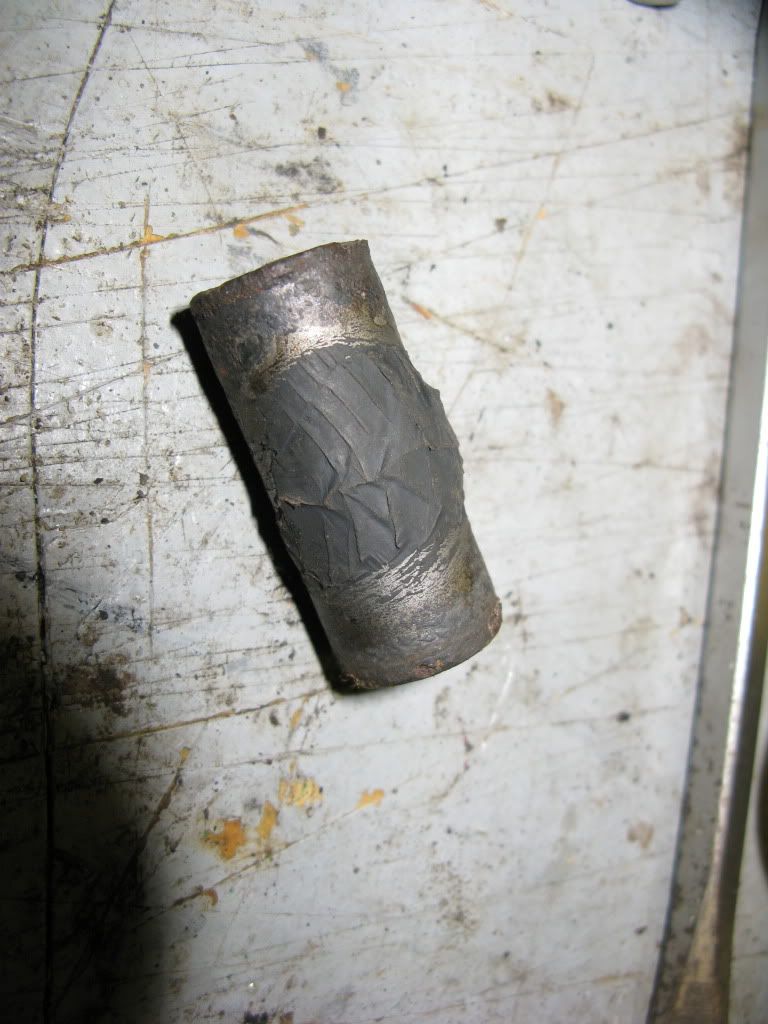
The sleeve I got come from a Hyundai Elantra control arm bushing. It has the same inside and outside diameter and plus it was free. It is a bit longer then the Mitsubishi one so I grinded it down to the correct length. The reciprocating saw barely made a mark on it.
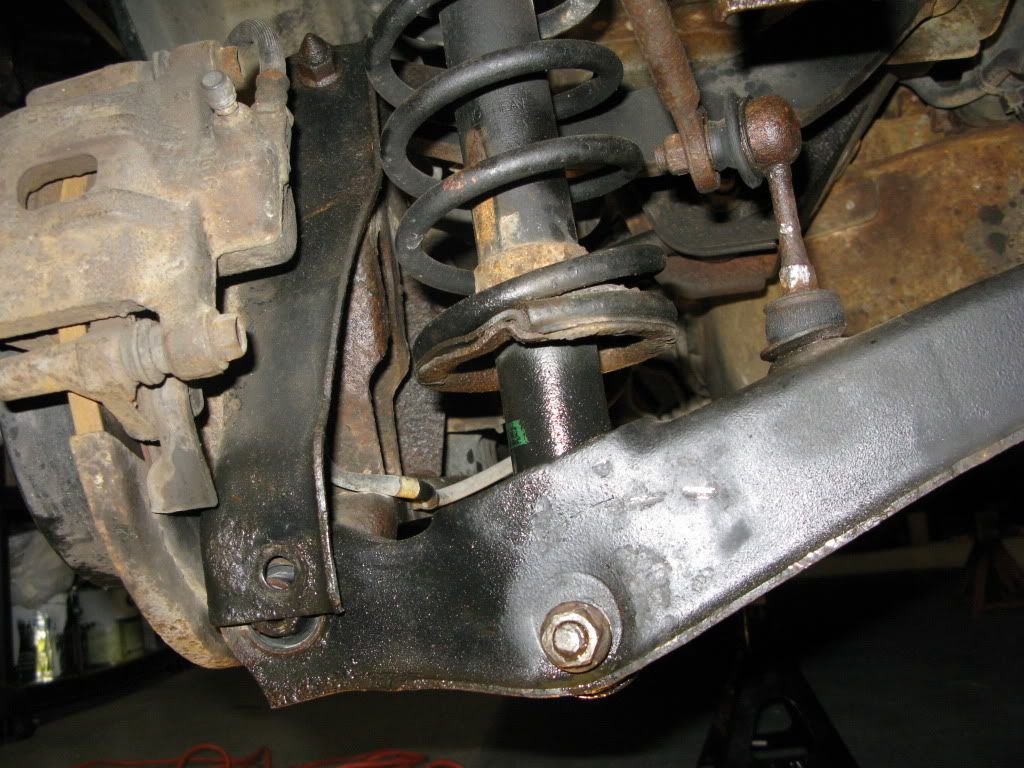
Next came the end link for the sway bar; fairly simple task.
After replacing the sway bar end link, the strut assembly was ready to be installed. I basically did the reverse of how I got it out by starting with the tower nuts in the trunk, followed by the strut bolt on the bottom, then the lower arm and trailing arm connection bolt, and finally the sway bar end link bottom nut.
I got the sleeves all the way up right now because well it is winter and there is no reason to have them down so I don�t have any stance pictures. I figure if it is have nice out one day I will drop it a bit and get some pics. I did a quick drive around my subdivision and over a set of speed bumps by a school I live near and everything is riding nice. It is a little rougher ride but yet still comforatable. One thing I definitly did notice right away is the improvement in handling. The car stays very flat in turns and even under heavy braking, the front does not dip anywhere near what it used to. The real test will be autocross next spring with a set of good tires on my factory 16� rims. The plans in the spring will be to lower roughly 1.5� in the front and whatever it takes to make the back level with the subwoofers in.
I got to run out to the airport in about an hour to pick up the misses so by then I should have a decent �daily driver review�.
Sorry if I am a little incoherent, got a lot of school stuff on my mind. Anyways I hope you found this a little helpful and I will post up some reviews as I go but right now, the intial ride seems to be just what I was looking for.
Hopefully I got enough pics to properly show what I did. Any questions feel free to ask, no matter how dumb/technical/general you thing they are.
stockley1234
So first I put the car on up on all 4 jack stands. The original intentions were to do front and back but I wasn't feeling to good after supper so I had to stop after the front.
Yea the garage is a bit of a mess but in the state I was in, I didn't care too much lol.
Removal of the front struts is pretty easy on these cars. It's not a McPherson setup where everything connects to the strut; ours are independent from basically everything else other then the knuckle.
There is a total of 6 nuts/bolts to remove. First you remove a 12mm nut on the back of the strut. This one holds on the two brackets for a brake line and I think a power steering line. The nut is directly on the back and therefore you can not see it without turning your wheel. It is accessible but for might as well turn your wheel and make it a little easier on your self.
Next remove the two 19mm nuts & bolts from the knuckle directly in the front of the strut. It is the two main ones that you will see as soon as you remove the wheel.
Next remove the three 14mm bolts from the strut tower. What I did was take off two, loosen the third and remove it by hand while I was holding the strut below, that way it won�t fall onto the boot below and rip it.
From here the strut basically falls out, just takes a little tweaking here and there to get it away from the well.
In order to remove the coil from the strut your going to need to compress the coil so it don't fly across through the air when you undo the top bolt. There is no need to hurt yourself doing a simple job. To properly do this, get some compression tools from any local automotive supply shop; they are not too expensive for the basic tools. Unfortunately I was not informed about mine being lent out and not returned so I had to do it another way...
...ratchet straps worked perfectly.
Here is the strut without the coil. The little silver cap on top of the chamber has to be knocked off for installation of the sleeve. A chisel/screwdriver and hammer, working your way around will get it off.
Here is a better view of the cap. As you can see here, this is when the strut is reassembled and the cap keeps the sleeve from sliding/spinning. Once the car is down it don�t matter anyways because the coil will keep more then enough pressure to keep the sleeve from moving.
The next step is to cut the lower stock coil perch. It is not outlined to do so by Ground Control but it is an obvious and important step. This is done so you can adjust the sleeve with out having to drop the full strut assembly from the car because the stock strut perch will get in the way and hide the sleeve. The more you cut off, the more accessible the sleeve will be and you will also have more range in the sleeve.
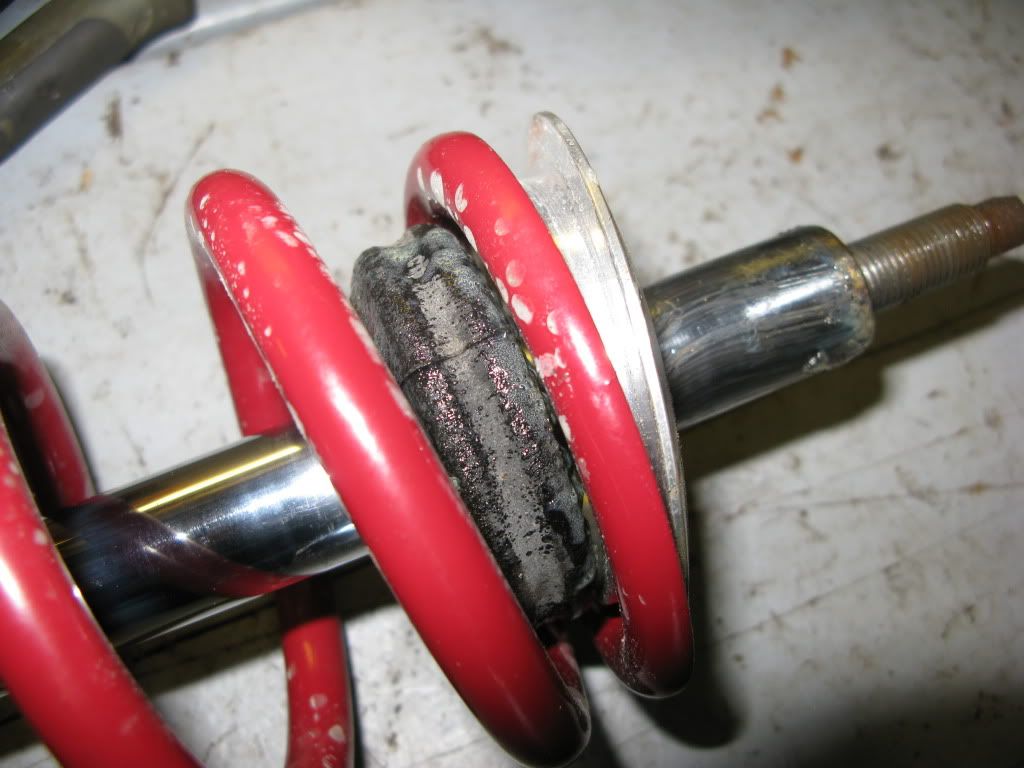
Next you will need to cut the bump stop down a good bit. Here you can see how much was cut off compared to what is actually used.
The order in which the strut is assembled goes: sleeve, the cap that you had to knock off, coil, bump stop, aluminum hat/coil perch, and finally the stock strut cap/tower/.
Next is to pretty much do the reverse of how you took the strut out. Do the 14mm tower nuts first then the two 19mm in front and then the back 12mm nut. When all said and done, it should look similar to this.
It was an overall a quick process for the front but I did have minor problems with the 19mm bolts being a little seized. Nothing a whole lot of leverage couldn�t take care of though.
Making my way to the back, I was expecting the worst. From seized bolts to broken sway bar links, I had already accepted the fact that if it something happened then I wouldn�t be surprised. The side that gave me all the trouble was the driver side. My passenger side basically fell out as if it was brand new so the following description is of what happened on the driver side. Expect the same for the passenger side, just with out the carnage.
The first thing that should be done is the end link for the sway bar. The nut is located underneath the control arm and if you live anywhere where cars rust, you can be sure that it will make your experience hell. The nut is a 14mm iirc but it didn�t matter for me because I had to cut the link in order to drop the arm.
Next I tackled the lower arm and trailing arm connecting 17mm bolt and nut. This was actually not bad; with a bit of leverage I managed to get that initial crack and zipped it off with impact gun.
Unfortunately that was the only bolt I got out. When I got to the lower strut 17mm bolt I had hell. Getting the nut off was fairly easy work, but I was quick to realize that the bolt itself was seized into the bare metal sleeve of the bushing. I spent ~45 mins just hammering and beating the sh*t out of the bolt trying to get it out but everything I did was useless. Eventually I had to cut the bolt out using a reciprocating saw and a metal blade which left me with the only option of having to replace the bolt, obviously. Not really what I wanted to do but it is what it is I guess.
The only thing left to do was to remove the inner lining of the trunk to get to the strut towers of and remove the 14mm nuts. Once off, the assembly basically falls out. You will have no problem getting them out because they are inside the trunk and will not be open to the elements.
Once you get the strut out and to your workstation it is a fairly simple process of breaking down the strut assembly and reassembling it with the Ground Control setup. Again first you will need to compress the stock coil, it should be fairly easy because over time they sag and get loose (the reason why I am doing this install). I did it the same way as the front so I didn�t get any pictures of that. Remove the top nut and bowl shape washer. Once removed, the strut tower will slide right off exposing the factory bump stop, coil perch and shaft boot.
The factory perch and boot can be removed and thrown out because it will not be used again. The bump stop will be cut down to the first layer and the rest thrown out. The instructions that Ground Control gives shows the ES bump stops, not the one like in RA�s but it is the same process for cutting them down. The RA bump stop is yellow and almost like a hard foam or some sort of poly blend whereas the ES ones are, I think, a rubber like the front bump stops.
The silver, rusted in my case, cap does not need to be knocked off like in the front setup. Instead, the sleeve slides over and it comes with a rubber spacer that goes in between the sleeve and shock chamber. This will keep it from rattling and moving around.
The coil goes on next but unlike the front setup, the rear does not come with an aluminum hat, but with a rubber �insulator� which fits into the top of the strut tower. Before installing the insulator, remember to install the bump stop.
Next put the strut tower on and tighten down the top nut. Voila, the rear strut is assembled.
Now if you were like me and ended up having to cut the bottom bolt from the assembly, a few options come your way. For starters, the bushing is not sold separately from the strut, it comes pressed in from Mitsubishi. Thus resulting in the purchase of a new assembly, but no one wants to spend money on a new strut if it is not needed. Your second option is buying a used strut, not matter the working condition, get the bushing out and press it into your own strut. What I did was find a bushing sleeve that had the same inside and outside diameter and pressed it into my bushing. A slightly larger outside dimension is not to much of a big deal but it can become an inconvenience when trying to press it into the bushing, but, it will be much more snug compared to getting one that is the same size.
The sleeve I got come from a Hyundai Elantra control arm bushing. It has the same inside and outside diameter and plus it was free. It is a bit longer then the Mitsubishi one so I grinded it down to the correct length. The reciprocating saw barely made a mark on it.
Next came the end link for the sway bar; fairly simple task.
After replacing the sway bar end link, the strut assembly was ready to be installed. I basically did the reverse of how I got it out by starting with the tower nuts in the trunk, followed by the strut bolt on the bottom, then the lower arm and trailing arm connection bolt, and finally the sway bar end link bottom nut.
I got the sleeves all the way up right now because well it is winter and there is no reason to have them down so I don�t have any stance pictures. I figure if it is have nice out one day I will drop it a bit and get some pics. I did a quick drive around my subdivision and over a set of speed bumps by a school I live near and everything is riding nice. It is a little rougher ride but yet still comforatable. One thing I definitly did notice right away is the improvement in handling. The car stays very flat in turns and even under heavy braking, the front does not dip anywhere near what it used to. The real test will be autocross next spring with a set of good tires on my factory 16� rims. The plans in the spring will be to lower roughly 1.5� in the front and whatever it takes to make the back level with the subwoofers in.
I got to run out to the airport in about an hour to pick up the misses so by then I should have a decent �daily driver review�.
Sorry if I am a little incoherent, got a lot of school stuff on my mind. Anyways I hope you found this a little helpful and I will post up some reviews as I go but right now, the intial ride seems to be just what I was looking for.
Hopefully I got enough pics to properly show what I did. Any questions feel free to ask, no matter how dumb/technical/general you thing they are.
stockley1234
good write-up. but how does it look?
Oh, and for the record, you don't need to compress the springs...if you compress them any more than where they're at already you're making it more dangerous...
i should have made a how-to video when i did mine...basically, you don't need to compress anything, it's overkill, because if you noticed, the fully decompressed spring, is about as tall from the seat of the strut, to the top of the strut. basically what you do is take the spring and strut assembly, wrap it in a blanket if you're still worried about it, so only the top nut is exposed then step on it, and put an impact to it...that's it!
*edit*
Lol! those rear sway bar end-links were a ***** weren't they? ( forgot to throw that into my comment...) When i did mine i was totally unprepared, and didn't have a sway bar for a week, car handled like ****...lol, i had to take the whole bar off and grind the old links off, and drill my perches cause they broke too...
Last edited by CrAnSwIcK; Nov 14, 2011 at 05:42 PM.
Thread Starter
Evolving Member
iTrader: (1)
Joined: Feb 2011
Posts: 163
Likes: 0
From: Newfoundland, Canada
good write-up. but how does it look?
Oh, and for the record, you don't need to compress the springs...if you compress them any more than where they're at already you're making it more dangerous...
i should have made a how-to video when i did mine...basically, you don't need to compress anything, it's overkill, because if you noticed, the fully decompressed spring, is about as tall from the seat of the strut, to the top of the strut. basically what you do is take the spring and strut assembly, wrap it in a blanket if you're still worried about it, so only the top nut is exposed then step on it, and put an impact to it...that's it!
As for how it looks, it is PISSING rain out, cold, and dark so I never got to really get a good look at it. Maybe this weekend coming I will play around with the heights and post some pics of the range of adjustability. For the front, I never cut the stock perches all the way down so it won't go as low as the sleeves allow but I am expecting it will still get fairly low. No worries, there will be pics of the car coming!
*edit for your edit lol*
The driver side one was a massive SL*T but surprisingly enough the passenger side one was best kind. That whole side was awesome to work with unlike the driver side.
Last edited by stockley1234; Nov 14, 2011 at 05:43 PM.
Thread Starter
Evolving Member
iTrader: (1)
Joined: Feb 2011
Posts: 163
Likes: 0
From: Newfoundland, Canada
Out to the airport now and everything seems to be very nice so far. It hits bumps a bit harder but that was expected. Handling has dramatically improved due to the less body roll. I must say, I am quite satisfied so far.
Thread Starter
Evolving Member
iTrader: (1)
Joined: Feb 2011
Posts: 163
Likes: 0
From: Newfoundland, Canada
I got mine as kind of a favor. Still online but special ordered. The best place to get them would be from GC themselves. No messing around with a middle man distributer.
Ground Control
Anymore questions please feel free to ask, I love helping out people to the best of my abilites, therefore, no question is dumb

Trending Topics
Thread Starter
Evolving Member
iTrader: (1)
Joined: Feb 2011
Posts: 163
Likes: 0
From: Newfoundland, Canada
From what I know, not a whole lot has changed with the strut setup on our cars other then dampers (bump stops).
I can't remember off hand. Probably best to check yourself, rather then me guessing and possibly giving you false information. Just jack up your car and measure. If you got precision calibers then it would be best to use those, but you can rough it with a tape I would imagine.
I can't remember off hand. Probably best to check yourself, rather then me guessing and possibly giving you false information. Just jack up your car and measure. If you got precision calibers then it would be best to use those, but you can rough it with a tape I would imagine.
Thread Starter
Evolving Member
iTrader: (1)
Joined: Feb 2011
Posts: 163
Likes: 0
From: Newfoundland, Canada
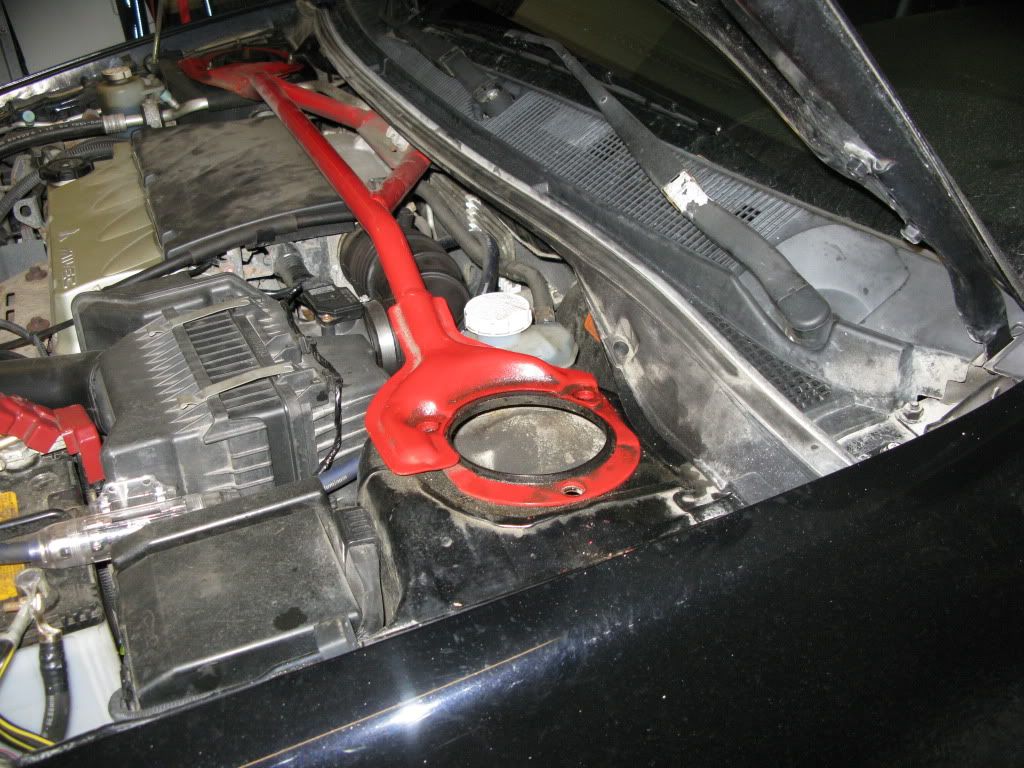
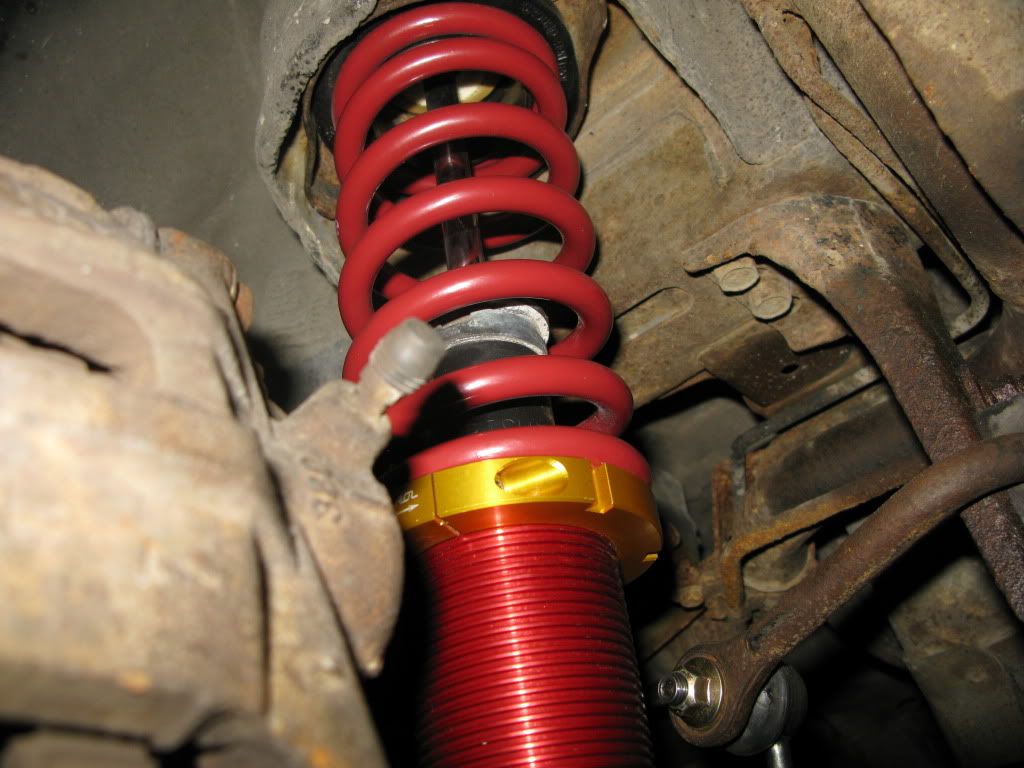
All in due time . I did play around with it for a quick min. Only dropped the driver side front to see how low it got. You can see from the pics that I did not cut the stock coil perch all the way down, I left about an inch there so I can really only go down 2 inches, which is more then enough (actually it is two much) for stock struts. The reason for leaving that extra bit of metal there was because I knew that I will be dropping it come spring, so I left it there to prevent me from doing the full 3 inches. I did get a picture but it SUCKS because it was taken with my HTC Wildfire S which has a horrible camera.
Maybe what I will do once I am done exams is lower it all the way down and get a few pictures. Hopefully I will have a bit more time then. It won't be this weekend but I am done my exams tuesday coming so maybe the weekend following, that is depending on how exhausted I will be after driving across province Friday, back on Saturday and having a Xmas party Saturday night lol.
I have not driven a RA with a set of coilovers so I don't think I can truly answer your question but from the vehicles (04 STI Targa/Rally car, 03 tiburon tuscani, 96 Talon TSI to name a few) that I have driven with coilovers, there is no comparison. If I had the money, I would have went with the coilovers because you have so much more range and freedom with your setup. All I have is ride height, which is fine for cruising but when I autocross in the summer, I know I will be kicking my *** for cheaping out.
Don't get me wrong, the Ground Controls are still a great product but when it comes to ultimate performance, do coilovers. Plus if your looking to slam, they are the minimum u want for suspension.
. I did play around with it for a quick min. Only dropped the driver side front to see how low it got. You can see from the pics that I did not cut the stock coil perch all the way down, I left about an inch there so I can really only go down 2 inches, which is more then enough (actually it is two much) for stock struts. The reason for leaving that extra bit of metal there was because I knew that I will be dropping it come spring, so I left it there to prevent me from doing the full 3 inches. I did get a picture but it SUCKS because it was taken with my HTC Wildfire S which has a horrible camera.Maybe what I will do once I am done exams is lower it all the way down and get a few pictures. Hopefully I will have a bit more time then. It won't be this weekend but I am done my exams tuesday coming so maybe the weekend following, that is depending on how exhausted I will be after driving across province Friday, back on Saturday and having a Xmas party Saturday night lol.
I have not driven a RA with a set of coilovers so I don't think I can truly answer your question but from the vehicles (04 STI Targa/Rally car, 03 tiburon tuscani, 96 Talon TSI to name a few) that I have driven with coilovers, there is no comparison. If I had the money, I would have went with the coilovers because you have so much more range and freedom with your setup. All I have is ride height, which is fine for cruising but when I autocross in the summer, I know I will be kicking my *** for cheaping out.
Don't get me wrong, the Ground Controls are still a great product but when it comes to ultimate performance, do coilovers. Plus if your looking to slam, they are the minimum u want for suspension.
Thread Starter
Evolving Member
iTrader: (1)
Joined: Feb 2011
Posts: 163
Likes: 0
From: Newfoundland, Canada

This is one I took about a week ago, I had to lighten the contrast and stuff so you could really see it.

It can go another inch or so in the front and inch and a half in the back yet, but because I just got new tires I will not be going lower until I get an alignment. In fact, I will be raising it till that time.

