
I was going to put some pics of my instal up a week ago, but I had to wait for a ban to lift on my account. Ban lifted. 10 points accumulated. Good thing those points are not proportional to drivers license points!!
So I ripped out my old headunit which was a Kenwood Excelon where I ran music off my thumbdrive. I bought the new DVD playet thinking I would be able to run videos, pictures, and music off my thumbdrive. To my suprise, you can only run music off of it. ****ty. But the good thing is the DVD player will sort music and videos according to whatever you choose. You have the option to sort by Song, Artist, Album, Genere, Podcasts, etc.
Well like I said, you can't run videos form the thumbdrive, so I went and bought a 32Gig iPod touch so I can get on the internet too. Also had to buy the kenwood cable which interfaces with Ipod and allows me to controll it from the DVD player. Cool! After uploading videos and music and pics to the Ipod, I have to say, it is pretty much everything I wanted. I just thought I was going to be able to do it from my thumbdrive like my old chines crap DVD player that I got on Ebay.
So here are some pics of the install.
Old Deck:
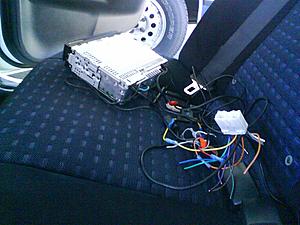
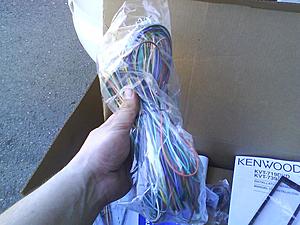
Wow. Lots of cable!
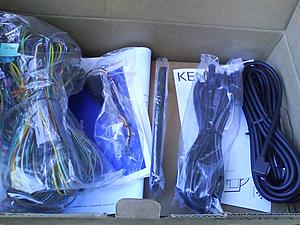
Had to run this from the deck to the hideaway unit that I mounted in the trunk. Yey.
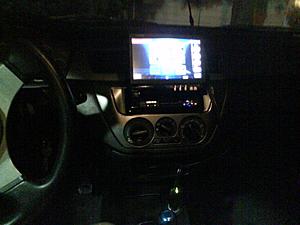
Here is a pic of the final product. I will get some better pics up later.
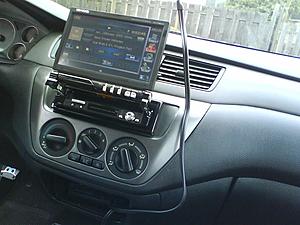
At night:
So I ripped out my old headunit which was a Kenwood Excelon where I ran music off my thumbdrive. I bought the new DVD playet thinking I would be able to run videos, pictures, and music off my thumbdrive. To my suprise, you can only run music off of it. ****ty. But the good thing is the DVD player will sort music and videos according to whatever you choose. You have the option to sort by Song, Artist, Album, Genere, Podcasts, etc.
Well like I said, you can't run videos form the thumbdrive, so I went and bought a 32Gig iPod touch so I can get on the internet too. Also had to buy the kenwood cable which interfaces with Ipod and allows me to controll it from the DVD player. Cool! After uploading videos and music and pics to the Ipod, I have to say, it is pretty much everything I wanted. I just thought I was going to be able to do it from my thumbdrive like my old chines crap DVD player that I got on Ebay.
So here are some pics of the install.
Old Deck:

Wow. Lots of cable!

Had to run this from the deck to the hideaway unit that I mounted in the trunk. Yey.

Here is a pic of the final product. I will get some better pics up later.

At night:

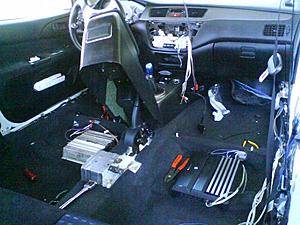
So in order to fit 2 amps and the hideaway unit in a simple way, I put one amp under each seat, and the hideway unit in the trunk with the sub woofer and box.
I honestly think the Lancer Evolution is the easiest car to perform installs in. I have taken the interior out a dozen times, and not once have I broken a single plastic christmastree clip. I am famous for breaking those litle plastic clips. Not one broken! Thank you Mitsu engineers. I actually thought this one through!! The ISO mounting makes things much for reliable and solid. I never like how in hondas you have to use that supid aluminum cage to mount headunits. Thats stupid. Mitsu is allright!
Here are some pics I took during the install.
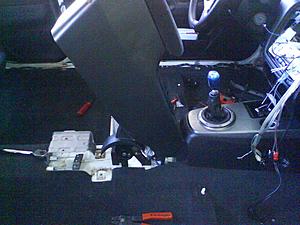
Center console removed. EZ!! Only 2 screws in the storage part. Remove those and it pulls right up. There are two clips in front and those click in and out easily. I ran cables from one amp to the other by going under the center console.
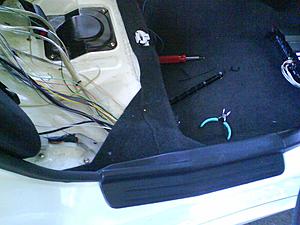
Just a few of the cables running along the passenger side dor sill. I popped out the trim panels that cover the sill in the front and back, and the kick panels, and the seatbelt cover (B Pillar cover) and that all only took me about 45 seconds for each side (driver and passenger.) Very simple process. Almost as easy to put them back on also.
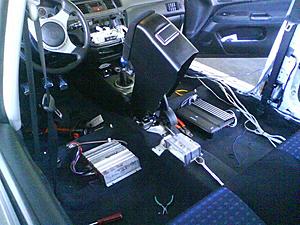
Here is a general overview shot. You can see on the pasenger side where I store the excess length of RCA cables in the B pillar. I ziptied the bundles to zip tie pads that are adhesive backed. Lots of room in there to store excess length cables.
Here is a shot from the other side. Keep in mind, no DVD player cables had been run yet at all!!
I honestly think the Lancer Evolution is the easiest car to perform installs in. I have taken the interior out a dozen times, and not once have I broken a single plastic christmastree clip. I am famous for breaking those litle plastic clips. Not one broken! Thank you Mitsu engineers. I actually thought this one through!! The ISO mounting makes things much for reliable and solid. I never like how in hondas you have to use that supid aluminum cage to mount headunits. Thats stupid. Mitsu is allright!
Here are some pics I took during the install.
Center console removed. EZ!! Only 2 screws in the storage part. Remove those and it pulls right up. There are two clips in front and those click in and out easily. I ran cables from one amp to the other by going under the center console.

Just a few of the cables running along the passenger side dor sill. I popped out the trim panels that cover the sill in the front and back, and the kick panels, and the seatbelt cover (B Pillar cover) and that all only took me about 45 seconds for each side (driver and passenger.) Very simple process. Almost as easy to put them back on also.


Here is a general overview shot. You can see on the pasenger side where I store the excess length of RCA cables in the B pillar. I ziptied the bundles to zip tie pads that are adhesive backed. Lots of room in there to store excess length cables.

Here is a shot from the other side. Keep in mind, no DVD player cables had been run yet at all!!

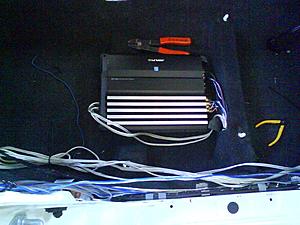
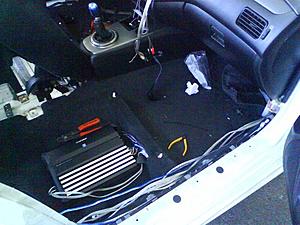
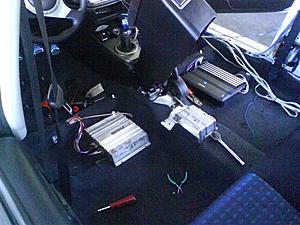
Here is an overview shot with all the cables running to the amps sort of tucked away. When the seats are reinstalled, no cables are visible. So I eneded up putting tw strips of velcroe on each amp. It works great. They probably wouldnt move even in a rollover accident. Probably a good thing. Yet when I pull them out, the velcroe is still farely easy to unlatch form the carpet. PRetty much a perfect balance.
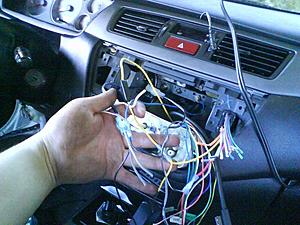
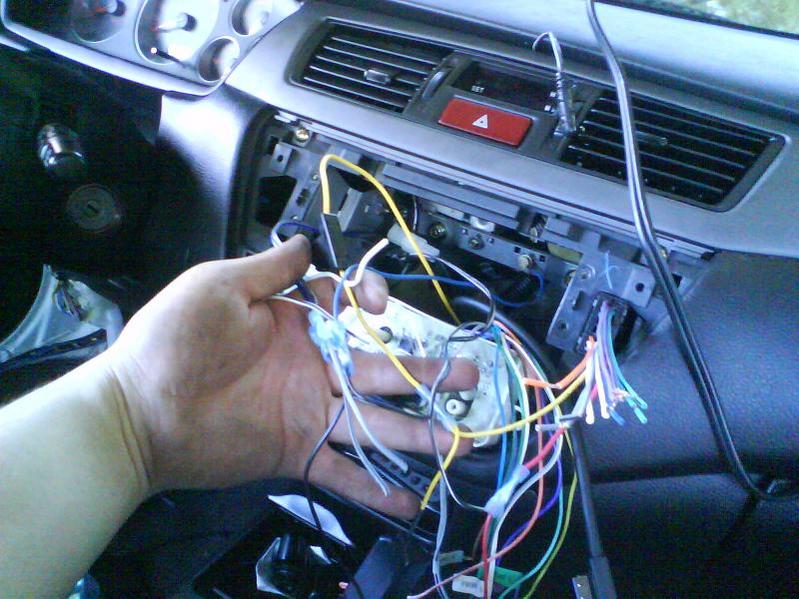
Cluster ****. That was fun to organize.
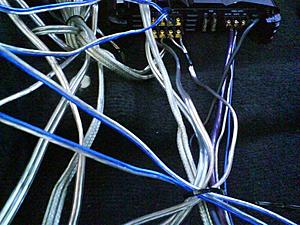
Here is all the DVD player cables being run to the hideaway unit mounted in the trunk. Later on, I had to re route the RCAs that normall run to the headunit in the front, to the hideaway unit in the back. I may remount the hideaway unit somewhere in the dash at somepoint, but I dont know if there are a whole lot of options up front.
Theses are the wires which run from the hideaway unit in the back to the headunit in the front. Didnt have to plug in any of the speaker wires since all my speakers are amplified. That made things a little less time consuming.
I will add additional pics later. Untill then I need to go get my self a .
.

Cluster ****. That was fun to organize.

Here is all the DVD player cables being run to the hideaway unit mounted in the trunk. Later on, I had to re route the RCAs that normall run to the headunit in the front, to the hideaway unit in the back. I may remount the hideaway unit somewhere in the dash at somepoint, but I dont know if there are a whole lot of options up front.

Theses are the wires which run from the hideaway unit in the back to the headunit in the front. Didnt have to plug in any of the speaker wires since all my speakers are amplified. That made things a little less time consuming.
I will add additional pics later. Untill then I need to go get my self a
.This is a place holder for the last section of the install.
PS: Anyone know how i can make those thumbs larger? I used the uploader to upload the pics rather than something like photo bucket. Dunno if theres anything I can do about their sizes.
PS: Anyone know how i can make those thumbs larger? I used the uploader to upload the pics rather than something like photo bucket. Dunno if theres anything I can do about their sizes.
Evolving Member
Where did you ground everything to? I'm trying to find a spot that I can ground mine to. 
hah i had a whole thread just about that!!
The deck: There is a cross support behind it for the center console. There was a small screw that didnt hold anything on. I assumed it was a for a ground, so I just ran a grount wire to it. Works well.
Amps: Each amp is mounted beneat the seat. The little cutouts in the carpet where the cables come out of, I just drilled a pilot hole, scraped of the paint and put a washer over a wood screw. Just kid of carefully drill in the woood screw with the ground wire wrapped around it. Did it for both amps. Works well.
Hideaway unit. The cross member behind the rear seat, same thing. Drilled a pilt hole, scraped all the paint off around it (used a dremel) and same thing wrapped the ocnductor of the ground ccable around the screw and carefully screwed it in. Again with a washer to helppush the coinductor against the now bare metal for good conduction.