
Doing a stereo installation for a friend


Thread Starter
Evolving Member
Joined: May 2006
Posts: 103
Likes: 0
From: OC
Doing a stereo installation for a friend
I registered because I thought I might need help taking the evo apart, but so far, everything's been really simple. I thought I'd post pics of my progress since everyone always loves pictures  I think my friend browses this forum, but I'm not sure what his username is.
Oh, and the installation is going really slowly because between work, hanging out w/ my gf, and whatever else I feel like doing, I only work on the car maybe 12 hours a week or so.
Ok, onto the pics.
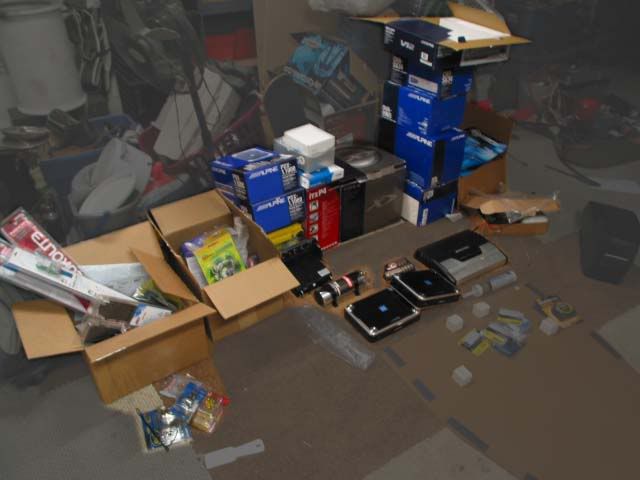
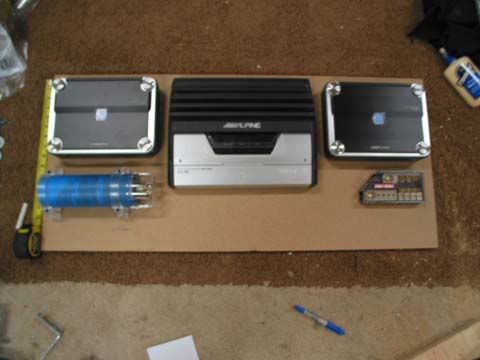
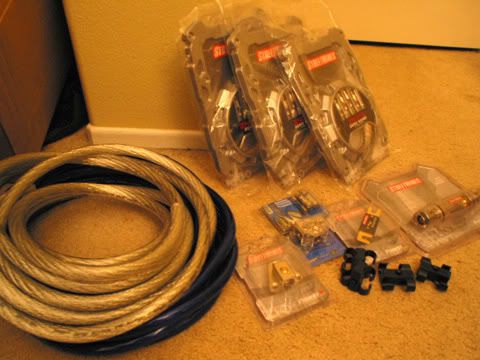
Here's what I'm putting in.
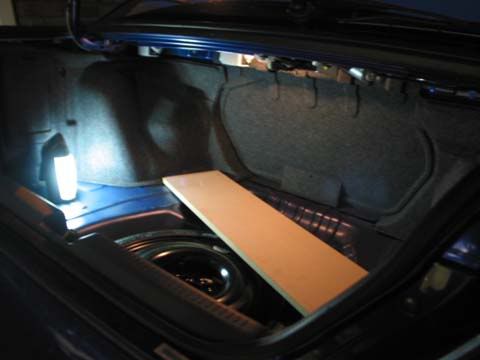
And your guy's tiny *** trunk.
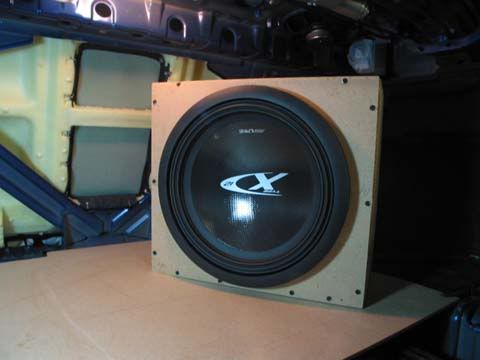
The sub box. 1.1 cu ft for a Alpine 12" Type-X. 8 awg speaker wire (it was cheap and I'm going to put an amp on each voicecoil)

Installed upside down because it was easier to install it this way. No one's ever going to see it anyway.
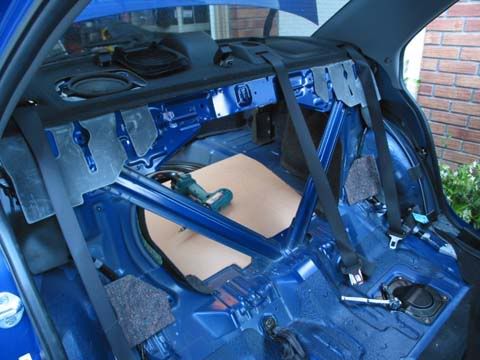
'Cause it's going in like this
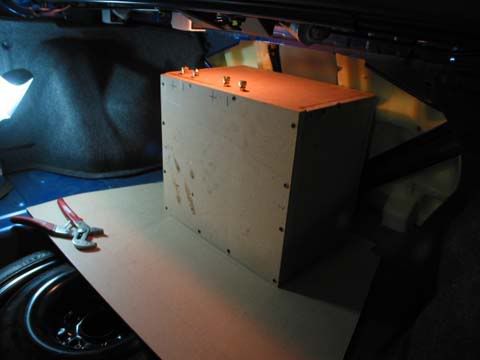
With this board behind it

The board is the base of the amprack
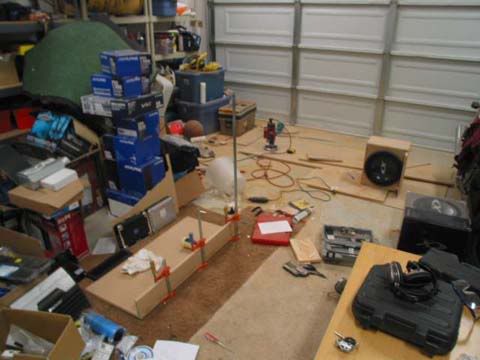
My messy workarea
I think my friend browses this forum, but I'm not sure what his username is.Oh, and the installation is going really slowly because between work, hanging out w/ my gf, and whatever else I feel like doing, I only work on the car maybe 12 hours a week or so.
Ok, onto the pics.
Here's what I'm putting in.
And your guy's tiny *** trunk.
The sub box. 1.1 cu ft for a Alpine 12" Type-X. 8 awg speaker wire (it was cheap and I'm going to put an amp on each voicecoil)
Installed upside down because it was easier to install it this way. No one's ever going to see it anyway.
'Cause it's going in like this
With this board behind it
The board is the base of the amprack
My messy workarea
Thread Starter
Evolving Member
Joined: May 2006
Posts: 103
Likes: 0
From: OC
Took the rear seats out to make things easier.
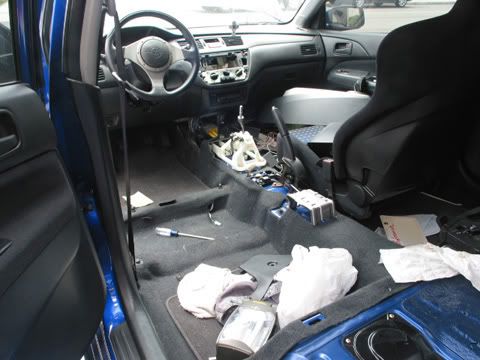
Took the driver's seat out too so I could plan out where to run the power wire and where to mount the computer.
0 awg power wire. Some other stuff that came in a package.
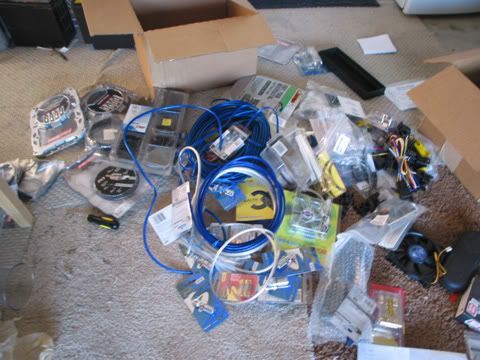
Wonder what was in those three brown boxes? lol, here it is. I took everything out, and then organized them into the boxes to make things easier to find cause it was taking forever to find anything.
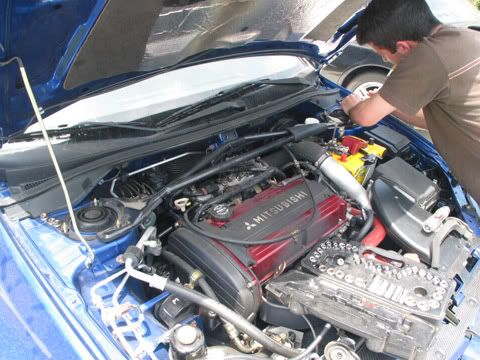
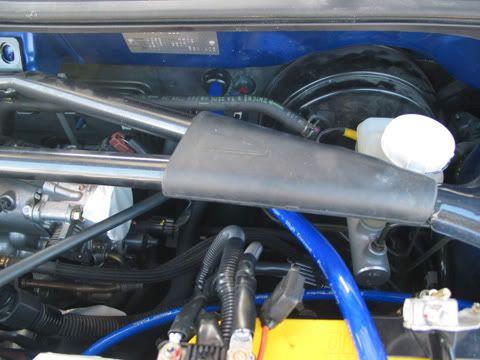
I needed to put a hole in the firewall, but a buncha stuff was in my way so I had to take them off before I could really get in there. My roommate helping me take the strut tower brace off.
The strut tower brace and part of the intake removed.
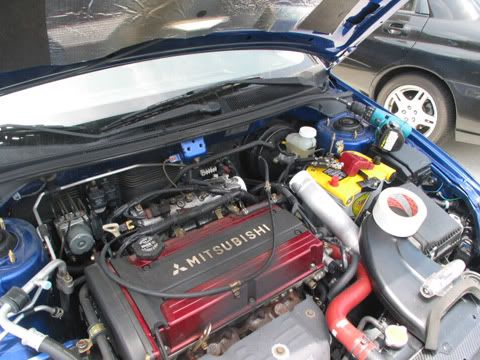
The battery terminals were a little far up on the battery, so I flattened out all the wire terminals and turned them so they went out the back. I had to extend one of the heavier wires with a length of 4 awg power wire and a splice, and I routed the 8 awg wire that goes to the underhood fuse box around the front of the battery.
The hole I drilled. If you're going to do the same, drill it about a 1/4" to the left in this view. There's some deadening or something around the throttle cable that made things difficult.
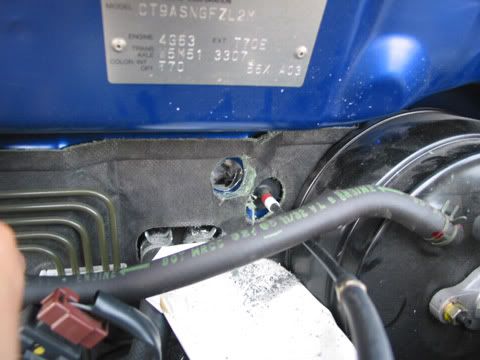
I had to take this picture because it was so weird to see sunlight coming into the footwell.

The wire installed w/ a grommet.
I upgraded and added some grounds w/ some extra 4 awg wire while everything was taken out.
Took the driver's seat out too so I could plan out where to run the power wire and where to mount the computer.
0 awg power wire. Some other stuff that came in a package.
Wonder what was in those three brown boxes? lol, here it is. I took everything out, and then organized them into the boxes to make things easier to find cause it was taking forever to find anything.
I needed to put a hole in the firewall, but a buncha stuff was in my way so I had to take them off before I could really get in there. My roommate helping me take the strut tower brace off.
The strut tower brace and part of the intake removed.
The battery terminals were a little far up on the battery, so I flattened out all the wire terminals and turned them so they went out the back. I had to extend one of the heavier wires with a length of 4 awg power wire and a splice, and I routed the 8 awg wire that goes to the underhood fuse box around the front of the battery.
The hole I drilled. If you're going to do the same, drill it about a 1/4" to the left in this view. There's some deadening or something around the throttle cable that made things difficult.
I had to take this picture because it was so weird to see sunlight coming into the footwell.
The wire installed w/ a grommet.
I upgraded and added some grounds w/ some extra 4 awg wire while everything was taken out.
Last edited by jdub765; May 16, 2006 at 01:26 AM.
Thread Starter
Evolving Member
Joined: May 2006
Posts: 103
Likes: 0
From: OC
The evo on the left is the car I'm doing the installation into. It looks like the evos have the WRX cornered and are going to kick its *** or something. I was helping rewire some some stuff in the other evo.

I ran the Ai-Net, optical, remote, front left and right, and center channel speaker wires in a fabric sheath to make it easier to install, and to protect the optical cable. And I labelled the speaker wires so I don't mix them up later. The front right and left pop out of the sheath to the side because I'm going to mount the crossovers under the passenger seat because they're HUGE.
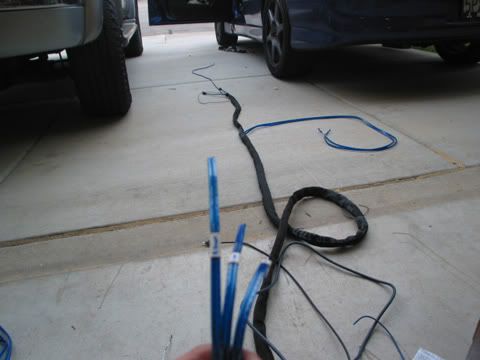
I took the other seat out as well, to make everything easier.
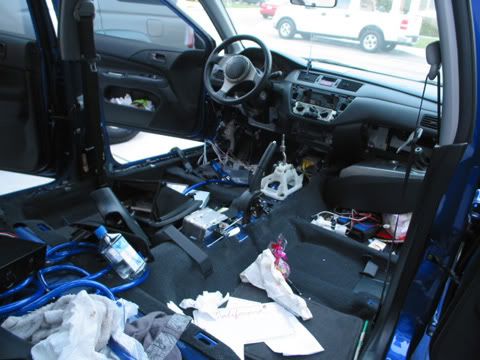
A little while later, the bundle of wires, and part of the power wire is run. I lightened this pic so you could see the convenient tabs you guys have there that I zip tied the power wire to. That totally simplified everything for me.
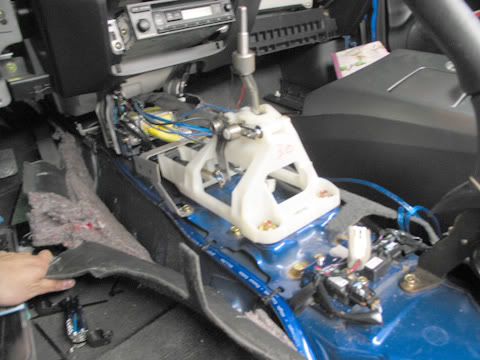
The bundle of wires is run up the right side of the hump, while the power wire is run up the left side. You can see the bundle of wires come out under the carpet in the middle of the picture. There's a T distribution block under the driver's seat so that I can tap some power out of it for the computer.
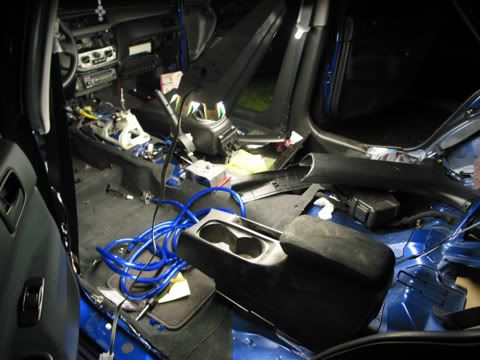
Anyone notice my worklight? It's a 4' dual flourescent tube fixture hung from the interior oh-$hit handles I love these way more than flashlights 
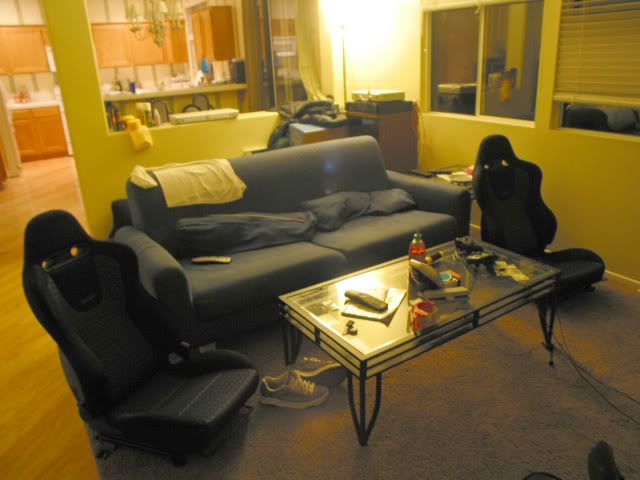
And we're using the seats right now to supplement our couch
I ran the Ai-Net, optical, remote, front left and right, and center channel speaker wires in a fabric sheath to make it easier to install, and to protect the optical cable. And I labelled the speaker wires so I don't mix them up later. The front right and left pop out of the sheath to the side because I'm going to mount the crossovers under the passenger seat because they're HUGE.
I took the other seat out as well, to make everything easier.
A little while later, the bundle of wires, and part of the power wire is run. I lightened this pic so you could see the convenient tabs you guys have there that I zip tied the power wire to. That totally simplified everything for me.
The bundle of wires is run up the right side of the hump, while the power wire is run up the left side. You can see the bundle of wires come out under the carpet in the middle of the picture. There's a T distribution block under the driver's seat so that I can tap some power out of it for the computer.
Anyone notice my worklight? It's a 4' dual flourescent tube fixture hung from the interior oh-$hit handles
I love these way more than flashlights And we're using the seats right now to supplement our couch
Last edited by jdub765; May 16, 2006 at 01:08 AM.
Evolving Member
Joined: Dec 2005
Posts: 386
Likes: 0
From: Connecticut
i thought this was gonna be about putting in a headunit....cuz taking our dash apart is so friggen easy i was gonna right you a 1 sentence how to.....
but dayem....what types of amps, speakers, and headunit are you using?
but dayem....what types of amps, speakers, and headunit are you using?

Evolving Member
Joined: Jan 2006
Posts: 174
Likes: 0
From: Yonkers
Dude...it doesnt look like u know what u are doing.... i mean, where is the Crazy Glue and Duct tape? these are must haves for this type of project.... lol JK man... post pics of the finished product...

Trending Topics

Thread Starter
Evolving Member
Joined: May 2006
Posts: 103
Likes: 0
From: OC
Nah, I didn't weigh it. I'm guessing the finished product is going to weigh around 150-200 lbs or so. My friends said that the evo has weight bias towards the front so maybe this will help make the distribution closer to 50/50
For the headunit, he got a DVA-9965, and an in-dash touchscreen for the computer.
For amps, he has a MRA-D550 for the center, front L/R, rear L/R, and two PDX-1.1000s for the subwoofer.
The sub is a 12" Type-X, but I forgot what he's using for the component speakers. I'm guessing their either older Type-Rs or Type-Xs and they use some of the biggest crossovers I've ever seen. I haven't found a center speaker for him yet.
I'll keep you guys updated...
Last edited by jdub765; May 16, 2006 at 10:21 AM.
definitely keep us updated, oh and can you come do mine next! lol
I have a questions for you, I keep popping one of my fuses on my + distribution block. I am running to amps and a capacitor.
I checked all my connections and every thing looks good.
What would cause one fuse to keep burning out, its starting to **** me off?
Figured I would ask because you seem to know what you are doing,
Which is funny because when I was 18 I use to install systems for best-buy.
Just can't figure it out!!
Thanks
Thread Starter
Evolving Member
Joined: May 2006
Posts: 103
Likes: 0
From: OC
How do you have everything wired? What are you running? What size fuse? When is it blowing? What amp is blowing the fuse? Maybe the amp is messed up?
On the dist blocks, I've always run fuses that are about 30% higher than the device it's protecting. Those fuses are to protect against shorts. The amp fuses are to protect the amp.
On the dist blocks, I've always run fuses that are about 30% higher than the device it's protecting. Those fuses are to protect against shorts. The amp fuses are to protect the amp.
