
Installing Beatrush Propeller Shaft Bushings In your Garage


Hate to be a jerk.
First posting that you are referring to:
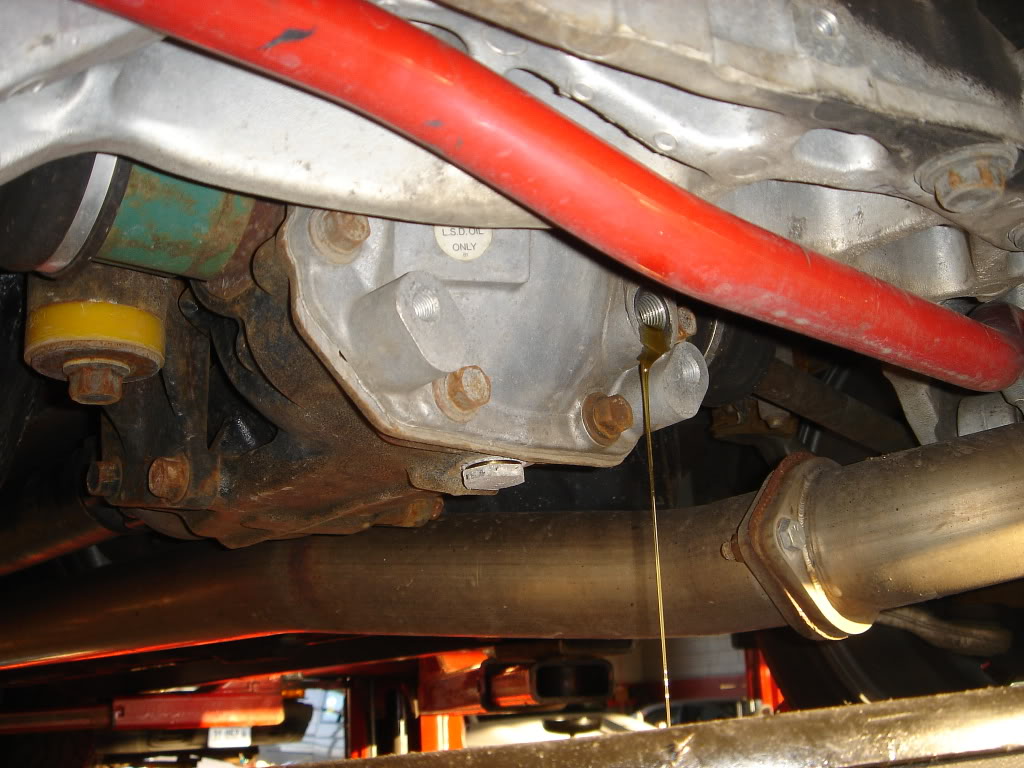
Bushing support installed backwards. Smaller bushing support goes on the top of the differential support between the chassis and the support. What you are seeing is the smaller bushing support installed incorrectly on the bottom of the differential support, and obviously the larger one incorrectly on the top of the differential support.
Second picture:
Lower bushing support installed properly
Would rather not point it out, but you wanted to know.
Shawn
First posting that you are referring to:
Bushing support installed backwards. Smaller bushing support goes on the top of the differential support between the chassis and the support. What you are seeing is the smaller bushing support installed incorrectly on the bottom of the differential support, and obviously the larger one incorrectly on the top of the differential support.
Second picture:
Lower bushing support installed properly
Would rather not point it out, but you wanted to know.
Shawn

Hate to be a jerk.
First posting that you are referring to:
Bushing support installed backwards. Smaller bushing support goes on the top of the differential support between the chassis and the support. What you are seeing is the smaller bushing support installed incorrectly on the bottom of the differential support, and obviously the larger one incorrectly on the top of the differential support.
Second picture:
Lower bushing support installed properly
Would rather not point it out, but you wanted to know.
Shawn
Actually they were the incorrect ones sent to me. There are two versions available, one for the JDM Evos, and one for the US spec ones. I know because Kami Speed contacted me and sent me the correct ones later.

 Have no one to blame but myself for trying to hurry to do it before work started.

Just for future reference to anyone reading this thread, you can do this job yourself by doing only one side at a time. For instance, loosen the left side just enough to change the bushings on the right and get the bolt threaded back in, and then do the left side and tighten everything back up. Takes like 20 minutes depending on your exhaust.

Just for future reference to anyone reading this thread, you can do this job yourself by doing only one side at a time. For instance, loosen the left side just enough to change the bushings on the right and get the bolt threaded back in, and then do the left side and tighten everything back up. Takes like 20 minutes depending on your exhaust.
Not a problem. I highly recommend it, $63 well spent. Let me know if you have any questions, I might be able to provide pics or further assistance, I know there aren't really any "how-tos" for the rear-diff bushings and the Japanese instructions are next to useless for anyone who can't read Japanese.
Not a problem. I highly recommend it, $63 well spent. Let me know if you have any questions, I might be able to provide pics or further assistance, I know there aren't really any "how-tos" for the rear-diff bushings and the Japanese instructions are next to useless for anyone who can't read Japanese.
These two bushing sets are a cheap and good mod. The rear diff bushings should be pretty straight forward. Just take your time.

Kami Speed wound up sending me the correct ones at no charge.
I had no real reason to change em, I just did. lol
I noticed no difference in the change of the rear diff bushings.

Just for future reference to anyone reading this thread, you can do this job yourself by doing only one side at a time. For instance, loosen the left side just enough to change the bushings on the right and get the bolt threaded back in, and then do the left side and tighten everything back up. Takes like 20 minutes depending on your exhaust.

I'm trying to understand a few other things in the thread as well:
So are you (or others in this thread) saying that new poly rear diff bushings and the poly mustache bar bushing set (bushings only, not a new bar) will probably get the job done?
I'm getting ready to order everything for this procedure and I want to get what I need the first try.
Thanks!
Last edited by nirvevo; Aug 5, 2009 at 01:00 PM.