
perrin o2 simulator install

perrin o2 simulator install
OK, I didn't fancy removing the passenger seat, so I thought this might be a better solution. I followed the instructions for the Perrin install and the Buschur unit has the same connections. So, this is really the Perrin install with a Buschur unit, with pictures  . I think it's probably a little more involved but the location has a good crounding source and the module can be zip tied out of the way.
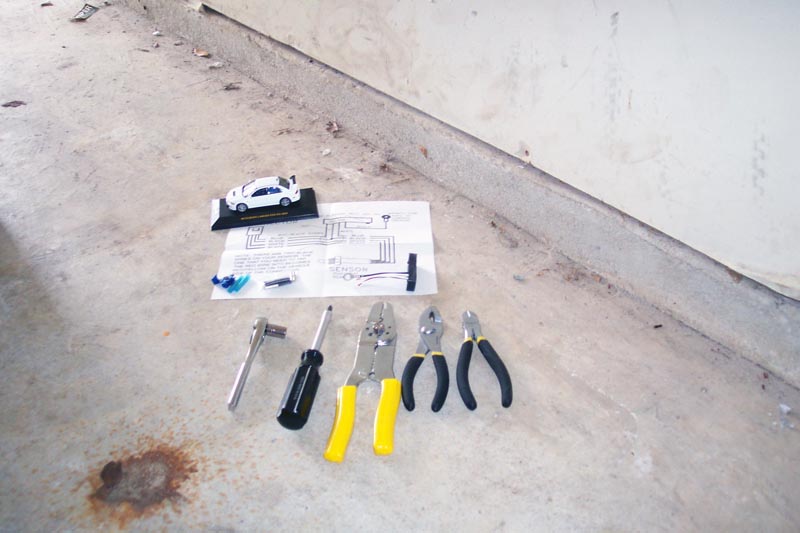
First off we need some tools. Good ole faithful 10mm socket, wire stripper, wire cutter, crimping tool, cross head screwdriver, pliers (not really needed), hair dryer (not pictured), kinfe (not pictured), and an Evo. Be warned, I don't think the install will work to well on the Evo pictured.
Next up, open up the arm rest and remove the 2 screws pictured below. Pull the whole thing up from the back and disconnect the switch underneath for the intercooler sprayer, then remove.
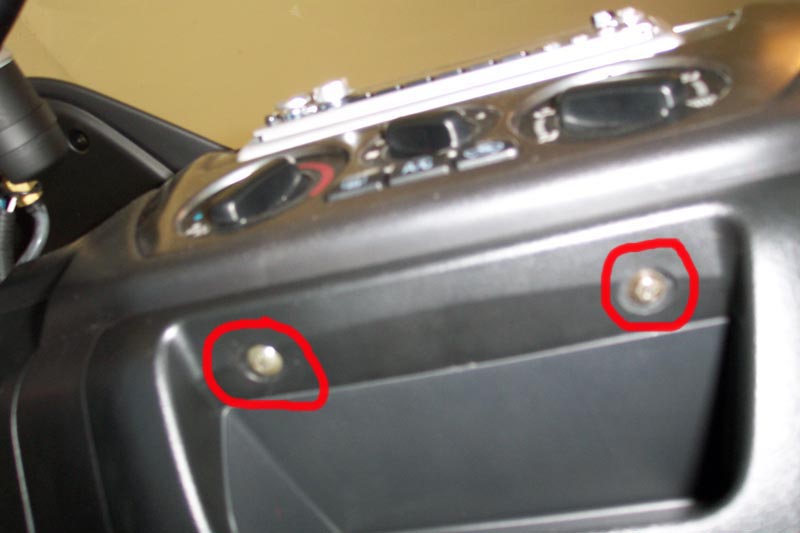
There are 2 screws at the base of the shifter console that need to be removed, as well as the electrical plug.

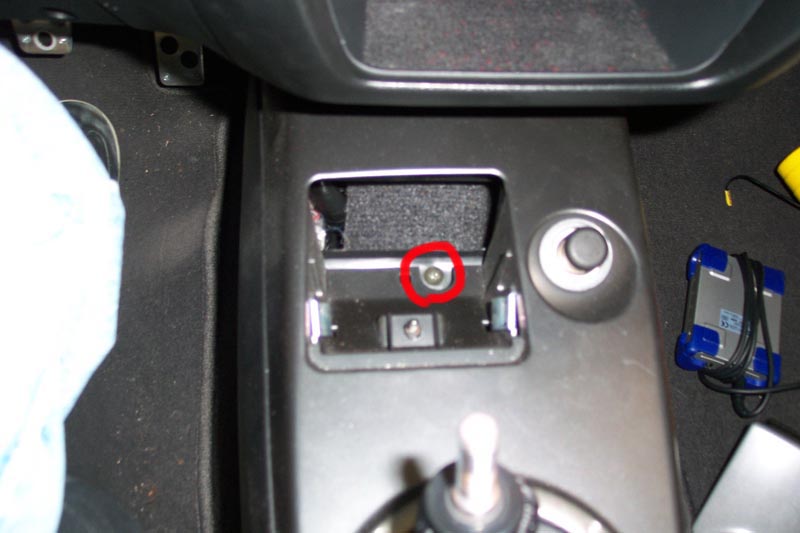
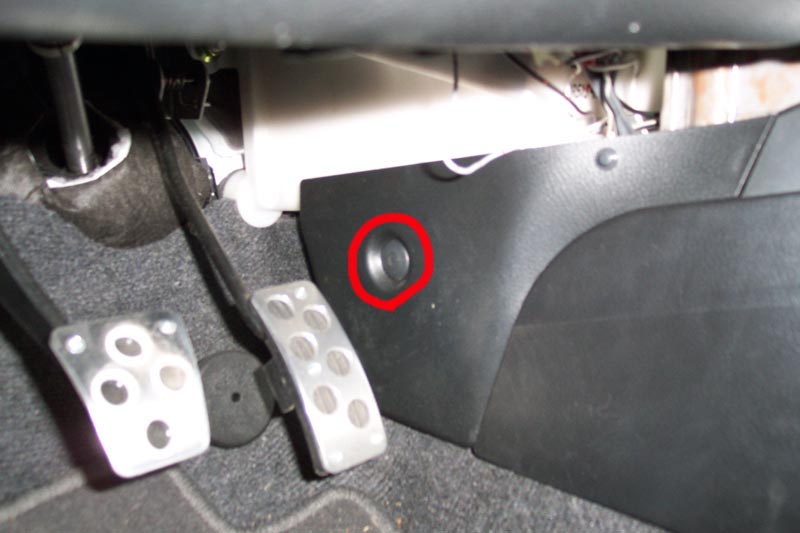
Remove ashtray and remove screw.
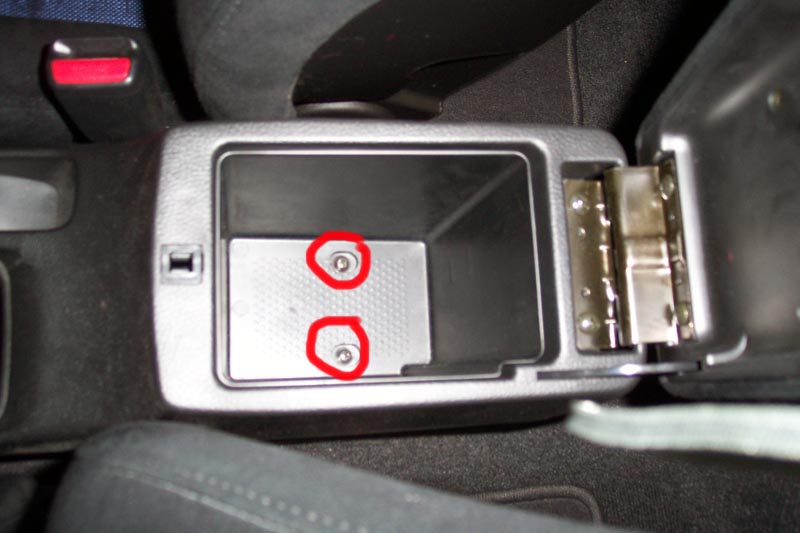
Remove 2 screws from cubby hole & pull out.
. I think it's probably a little more involved but the location has a good crounding source and the module can be zip tied out of the way.First off we need some tools. Good ole faithful 10mm socket, wire stripper, wire cutter, crimping tool, cross head screwdriver, pliers (not really needed), hair dryer (not pictured), kinfe (not pictured), and an Evo. Be warned, I don't think the install will work to well on the Evo pictured.
Next up, open up the arm rest and remove the 2 screws pictured below. Pull the whole thing up from the back and disconnect the switch underneath for the intercooler sprayer, then remove.
There are 2 screws at the base of the shifter console that need to be removed, as well as the electrical plug.
Remove ashtray and remove screw.
Remove 2 screws from cubby hole & pull out.
Last edited by chaotichoax; Jan 30, 2010 at 08:43 PM.
Next we need to remove the push screw from the driver side of the shifter console and remove that panel by sliding it towards the firewall.
Now, there's another push pin there that needs to be removed.

Over on the passenger side of the shifter console remove the rear piece and the push pin that is hiding beneath it.

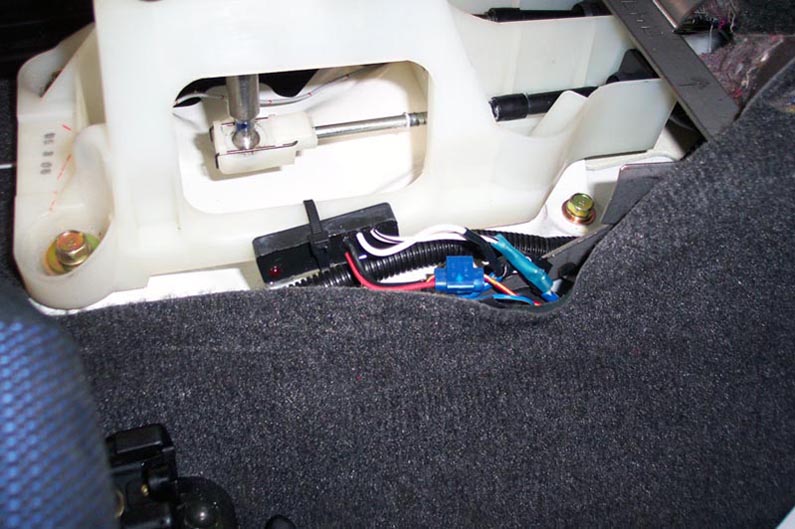
Gently wrestle the sifter console free from its location. It's best to move both seats back as fat as possible and pull the handbrake as high as it goes. Angle the shifter console towards the driver and try to bend the plastic round the handbrake. We are then looking at the plastic shifter housing and, on the right hand side, is the wiring we need access to. It's the big black wire that isn't the wiring loom. You'll also notice the big piece of metal there which is held on by 2 10mm bolts. It's easier to remove that while you work, but the right hand bolt is where we will get ground.
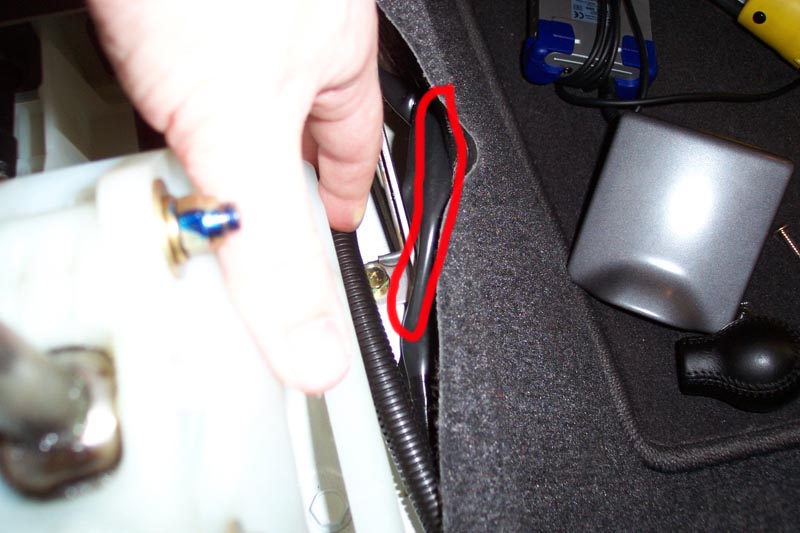
Carefully cut the outside black housing to expose the 3 wires beneath. The wires are blue, blue/yellow, and red/yellow. The blue wire is actually a shielded housing for 2 more wires, so you need to caregully cut into that shielding to expose those wires as well.
Now, there's another push pin there that needs to be removed.
Over on the passenger side of the shifter console remove the rear piece and the push pin that is hiding beneath it.
Gently wrestle the sifter console free from its location. It's best to move both seats back as fat as possible and pull the handbrake as high as it goes. Angle the shifter console towards the driver and try to bend the plastic round the handbrake. We are then looking at the plastic shifter housing and, on the right hand side, is the wiring we need access to. It's the big black wire that isn't the wiring loom. You'll also notice the big piece of metal there which is held on by 2 10mm bolts. It's easier to remove that while you work, but the right hand bolt is where we will get ground.
Carefully cut the outside black housing to expose the 3 wires beneath. The wires are blue, blue/yellow, and red/yellow. The blue wire is actually a shielded housing for 2 more wires, so you need to caregully cut into that shielding to expose those wires as well.
Last edited by UFO; Jan 29, 2005 at 02:22 PM.
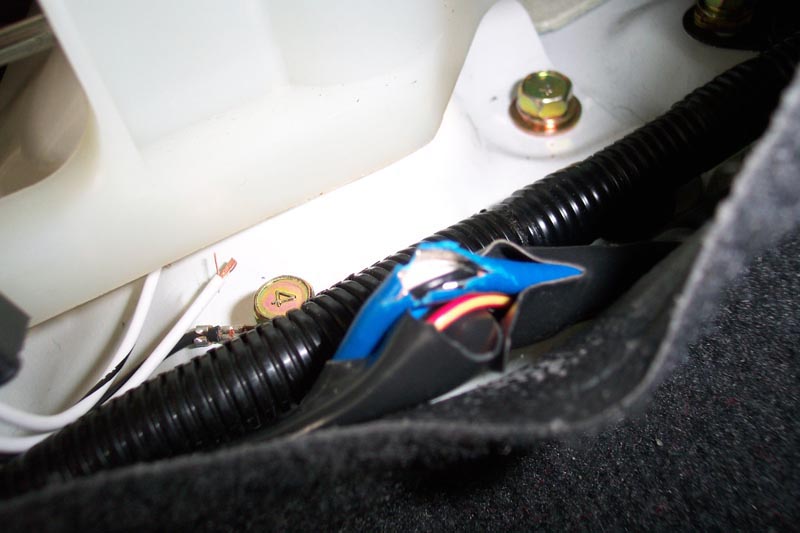
Next we need to cut the white wire that we just removed from the blue shielding and attach two of the supplied connectores to it.

Slide the black heat-shrink housings onto the white & white/black wires on the O2 sim and crimp the white wire on the O2 sim to the white wire leading to the back of the vehicle. Crimp the white/black wire on the O2 sim to the white wire leading to the ECU. Use the hairdryer to shrink the cover and protect the wire. You might notice I have a blue connector in the picture. Remember a few steps back where I mentioned sliding over the cover? Yeah, well I forgot to on one of the wires and didn't realise until I'd crimped it...
Splice the red wire on the O2 sim to the red/yellow wire. I used on of those plastic splice thingies you can buy from any auto-parts store. Now, ground the black wire to the bolt discussed earlier. Put the key in the ignition and turn it to check whether the red light flashes.
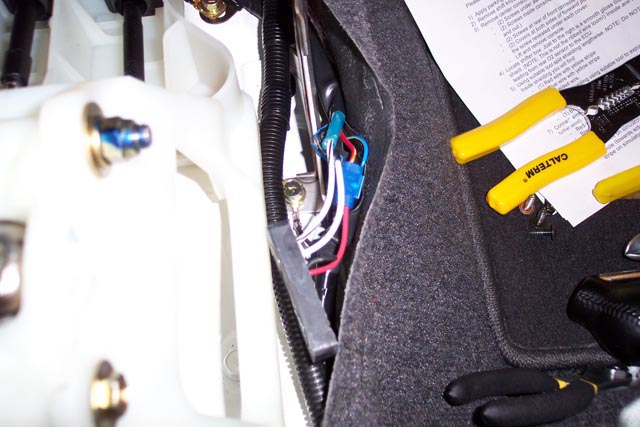
If it does, then zip tie the O2 sim to the shifter base and reinstall everything. Cross your fingers and hope for no SES light!
Slide the black heat-shrink housings onto the white & white/black wires on the O2 sim and crimp the white wire on the O2 sim to the white wire leading to the back of the vehicle. Crimp the white/black wire on the O2 sim to the white wire leading to the ECU. Use the hairdryer to shrink the cover and protect the wire. You might notice I have a blue connector in the picture. Remember a few steps back where I mentioned sliding over the cover? Yeah, well I forgot to on one of the wires and didn't realise until I'd crimped it...
Splice the red wire on the O2 sim to the red/yellow wire. I used on of those plastic splice thingies you can buy from any auto-parts store. Now, ground the black wire to the bolt discussed earlier. Put the key in the ignition and turn it to check whether the red light flashes.
If it does, then zip tie the O2 sim to the shifter base and reinstall everything. Cross your fingers and hope for no SES light!
Last edited by UFO; Jan 29, 2005 at 02:33 PM.

Thread
Thread Starter
Forum
Replies
Last Post
Blacksheepdj
Lancer How Tos / Installations
2
Jun 28, 2007 06:52 PM
UFO
Evo How To Requests / Questions / Tips
13
May 25, 2005 10:57 AM