
How to: Windshield Spray Mist


Thread Starter
Evolving Member
iTrader: (15)
Joined: Oct 2005
Posts: 286
Likes: 0
From: Livingston NJ
How to: Windshield Spray Mist
Sick of the squirt-gun like jets the stock windshield sprayers make? Time to swap in ones that distribute the fluid evenly over the windshield.
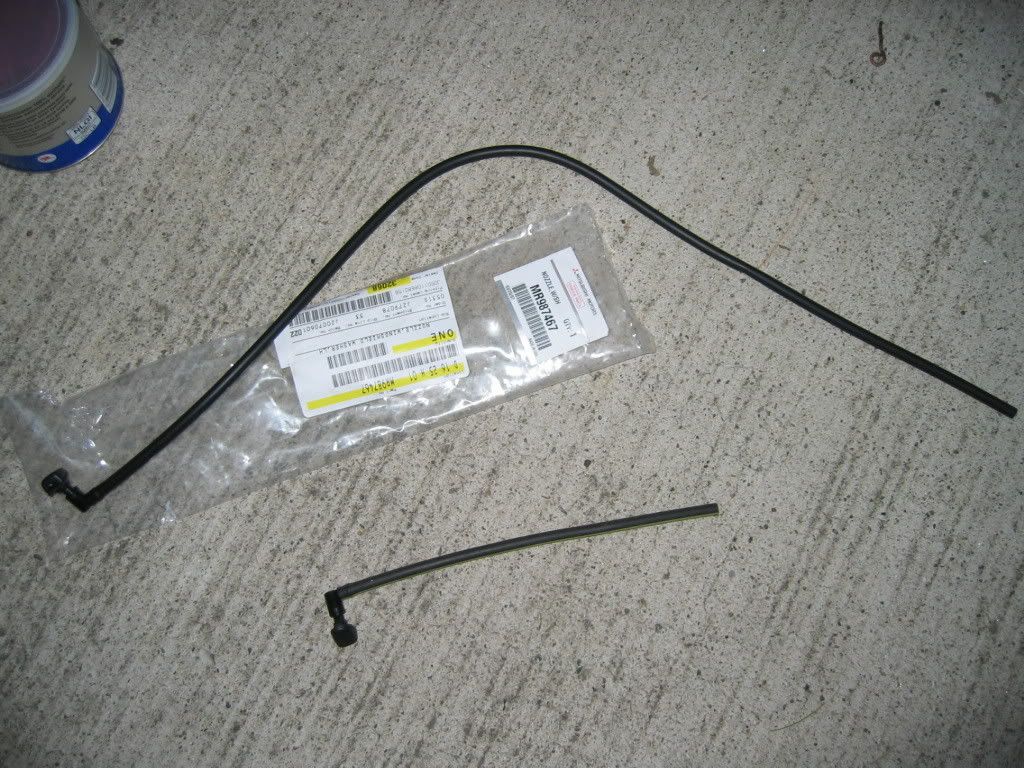
I used the 2004 Galant nozzles as a replacement. Can't remember what I paid for them... should be round $12. Just call up the dealership and ask them for the parts.
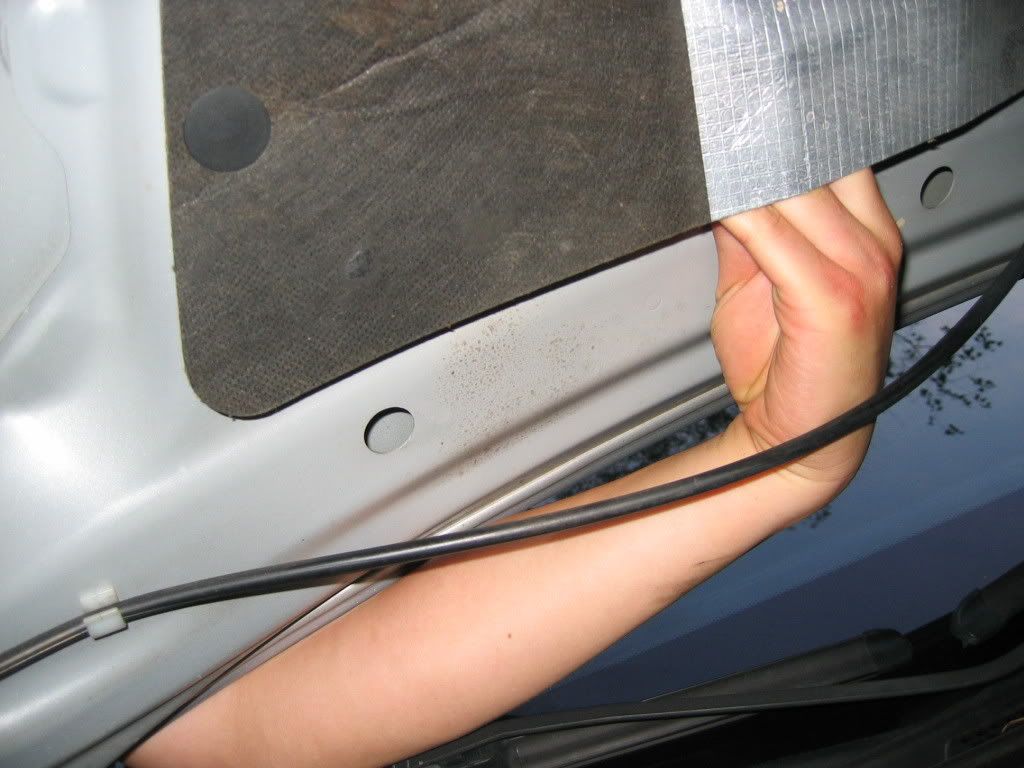
So I started by reaching under the heat shielding like so
You'll want to remove the rubber lines from the clips holding them in place. Then disconnect the hose from the Y- connector in the middle:
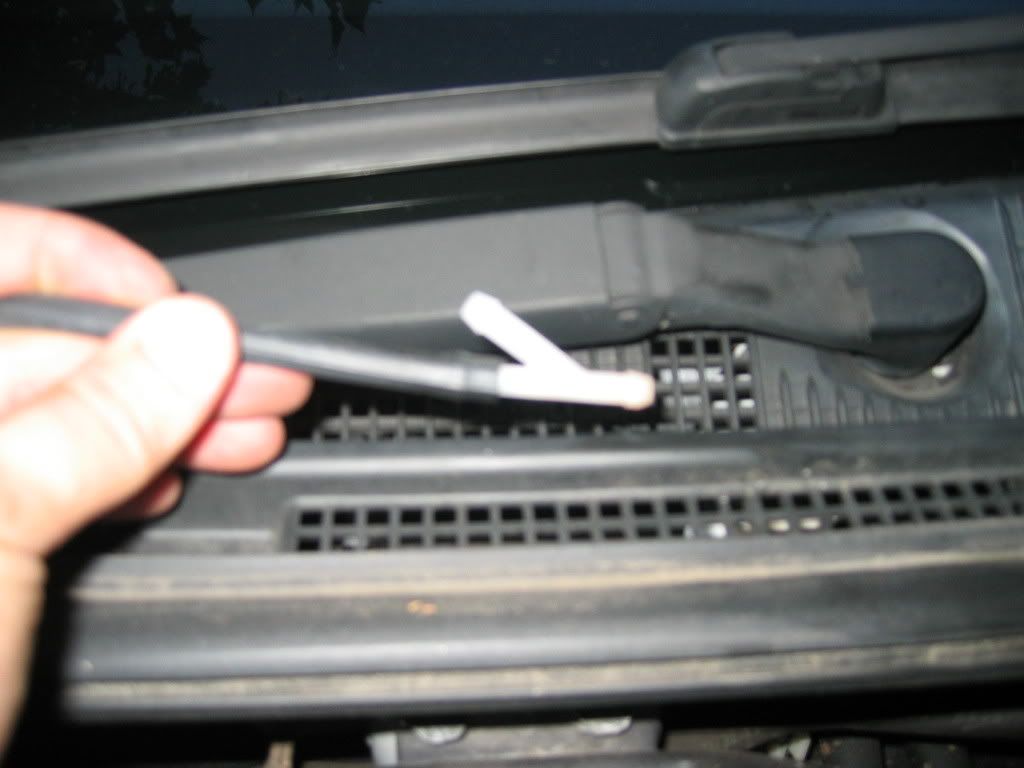
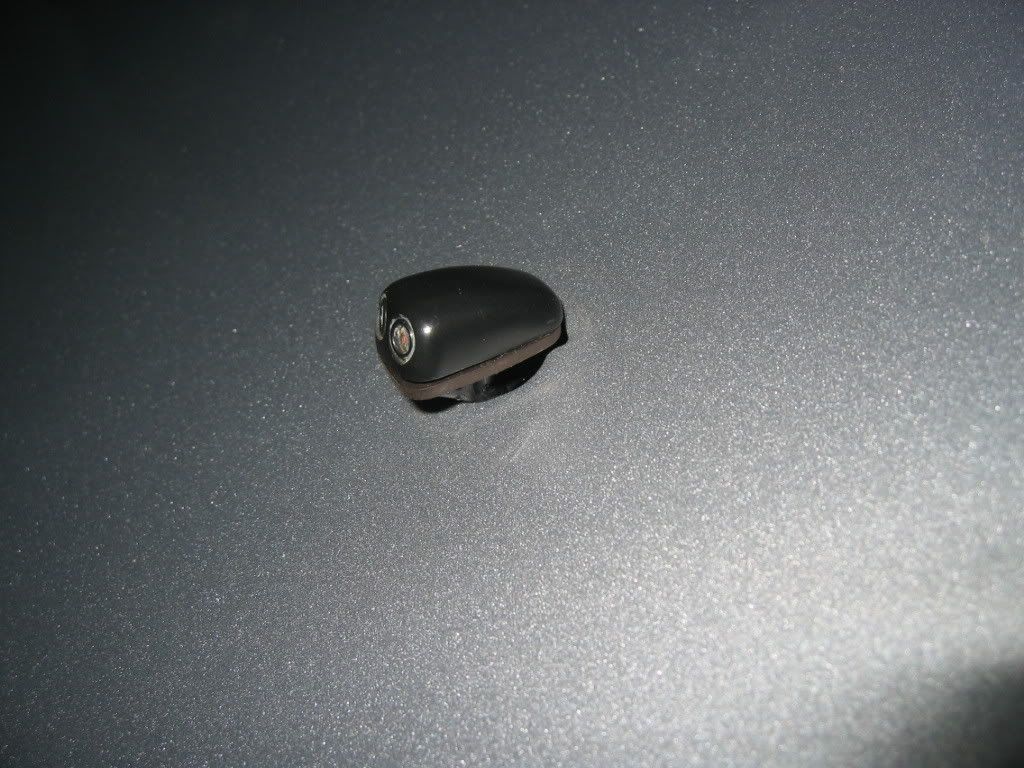
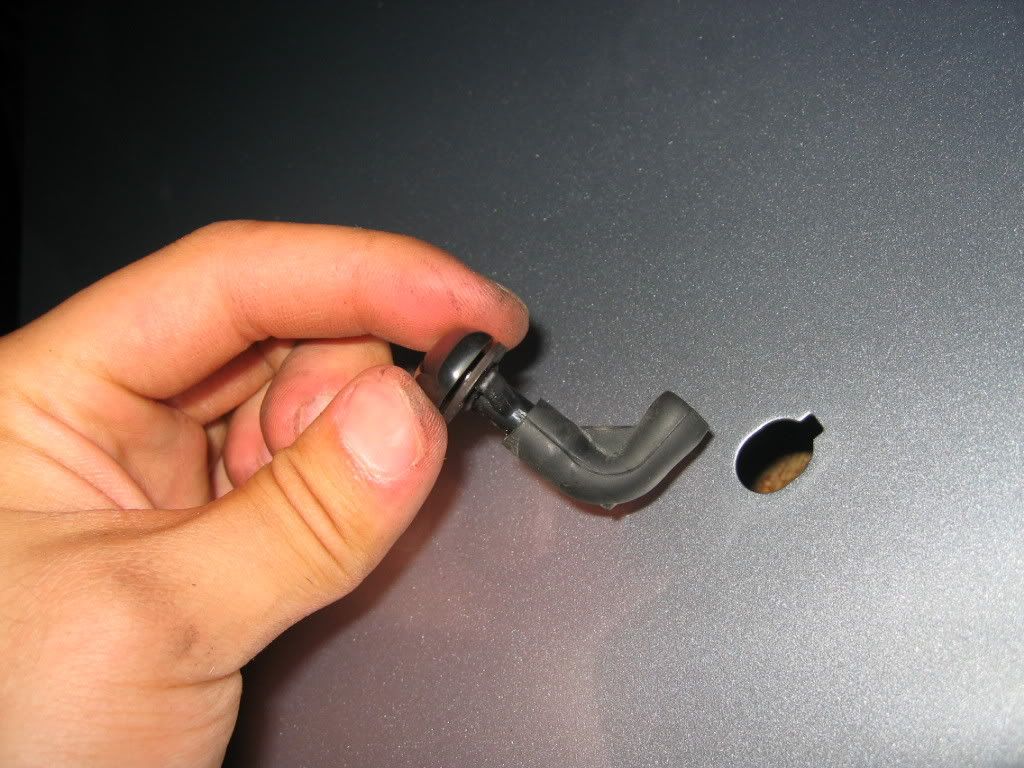
Now move on to the nozzles. Just reach under, grab the sprayers with either a kung fu grip or needle nose pliers (i used pliers), and start wiggling them side to side to unclip the nozzle from the underside. (the clips are on the left and right side of the nozzles) Then you'll be able to pull the sucker out from the top.
Once you get both of them out, route the new ones in through the top and connect them to the Y connector. The passenger's side nozzle pointed away from the middle, so the line will need to be looped around to avoid pinching. Also, I found I didn't have enough of the rubber line provided with the new nozzles, so I just connected it to one of the old lines (which had a plastic connector), and cut the hoses to fit.
Many thanks to bruce988jl for the info. I just posted his findings with pix.
I used the 2004 Galant nozzles as a replacement. Can't remember what I paid for them... should be round $12. Just call up the dealership and ask them for the parts.
So I started by reaching under the heat shielding like so
You'll want to remove the rubber lines from the clips holding them in place. Then disconnect the hose from the Y- connector in the middle:
Now move on to the nozzles. Just reach under, grab the sprayers with either a kung fu grip or needle nose pliers (i used pliers), and start wiggling them side to side to unclip the nozzle from the underside. (the clips are on the left and right side of the nozzles) Then you'll be able to pull the sucker out from the top.
Once you get both of them out, route the new ones in through the top and connect them to the Y connector. The passenger's side nozzle pointed away from the middle, so the line will need to be looped around to avoid pinching. Also, I found I didn't have enough of the rubber line provided with the new nozzles, so I just connected it to one of the old lines (which had a plastic connector), and cut the hoses to fit.
Many thanks to bruce988jl for the info. I just posted his findings with pix.


Thread
Thread Starter
Forum
Replies
Last Post
EvoDan2004
For Sale/WTB - Engine / Drivetrain / Power
51
Oct 7, 2016 04:24 AM
FS[West]: JDM Evo 9 MR headlights
takeshi999
For Sale - Interior / Exterior / Sound / Styling
16
Feb 13, 2015 02:58 PM
takeshi999
For Sale - Interior / Exterior / Sound / Styling
4
Apr 20, 2014 12:11 PM
Jameson_IXMR
Evo How Tos / Installations
1
Feb 7, 2010 10:30 PM