
Braille Lightweight Battery(B2015) and Aluminum Braille Mount Install

Thread Starter

Joined: Jul 2007
Posts: 559
Likes: 1
From: Tampa/Riverview
Greetings EVO Family,
Here is my quick down and dirty on how to install a Braille Light Weight Battery Kit in your car� or at least how I installed it in my EVO VIII.
For starters you are going to need a few hand tools:
TOOLS:
- 12 mm socket and ratchet
- 4 mm allen key
- Phillips head screw driver
- Electric Dremmel, hand saw or if you�re really low budget like moi, a hand held razor blade
carpet cutter will work.
1) First thing you wanna do as with any DIY job is make sure you have everything you're supposed to; so inventory your stuff first.
2) Next figure out what you need and what you don�t. If you follow the instructions they should highlight which bolts and which spacers to use for your particular battery. For the B2015 I bought the directions tell you to �Use 50mm spacers below the threaded rods and use 60mm screws to bolt the uprights to the base of the mount�. I went ahead and circled the stuff you will need for this particular set up as my instructions did nothing to specify which spacers were the 50mm spacers and which screws were the 60mm screws etc.
[IMG] [/IMG]
3) Now you'll need to assemble your mount to make sure you have the right fit for your particular battery. So first put the 50mm screws through the side of the base plate that has the rounded holes that marry up with the rounded part of the screw heads.
[IMG] [/IMG]
4) Then slide the 50mm spacers over the screws and screw down the threaded rods. You should be able to do this with just your hands but if not grab that 14mm allen key and get it dun.

NOTE: One side of the mount's pillar's is going to be taller than the other. The shorter side should sit against the terminal side of the battery.
[IMG] [/IMG]
5) Place your battery in the mount with the shorter side against the terminal side of the battery.

6) Place the larger of the two black aluminum plate inserts into the slot on the top of the battery. The + and � signs on the plate should correspond with the + and -terminals on the battery. After this place the �BRAILLE� labeled plate (strap) across the top of the battery where the holes line up with the holes in the pillar rods�BUT DON�T PUT THE DOMED SCREWS IN YET!

7) If you have done everything up to this point correctly you will notice that there is some space between the top of your threaded rods and your Braille Tie down plate. Don�t just say the hell with it and attempt to ratchet down the domed screws to compensate for this as all you will do is damage the battery or other parts of your mount. This is where your washers come into play.

8) Now you can either add the washers at the top of the pillars as I did to fill in the space OR you can take everything apart and add the washers between the mount and the spacers, or between the spacers and the threaded rods. Either way just be sure to add the same number of washers to both sides of the mount or you will not be able to adequately secure the battery and it WILL slide around when you drive. NOW put your domed screws in and verify the fit. It should be tight.
[IMG]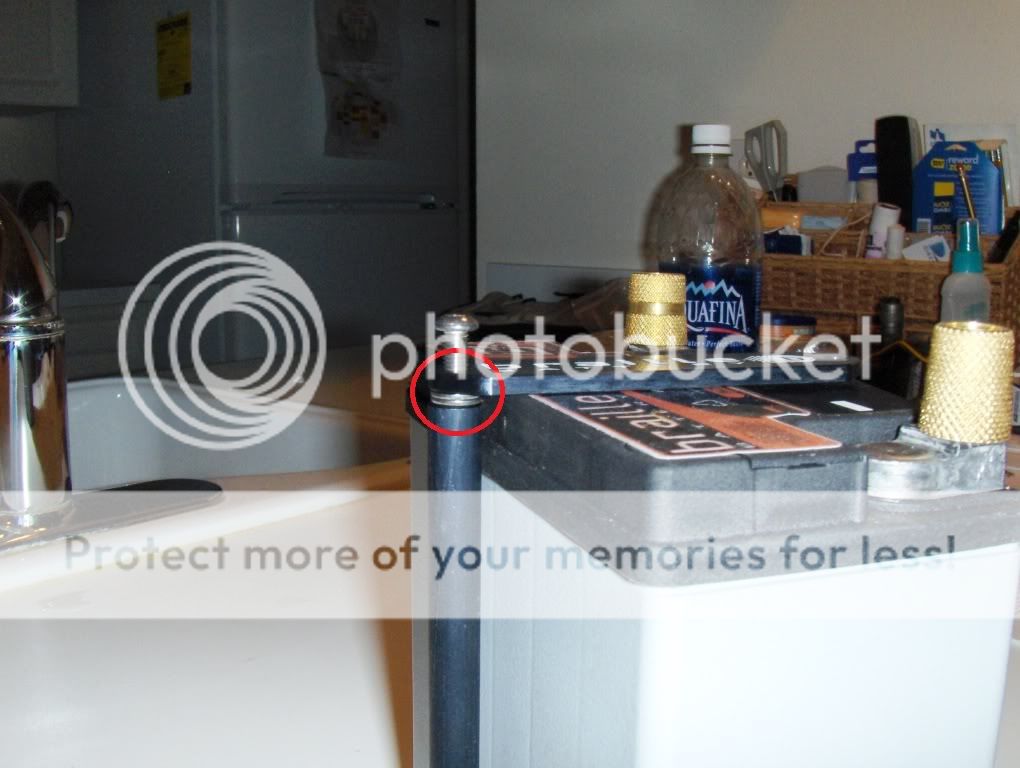 [/IMG]
Now once you have your mount built and your battery fitted it�s time to install them both in the car. So for starters if you have not already done so remove your stock battery and tray.
9) You will need a myriad of other tools to remove the shock battery from the car but that is another thread� the only parts you need to really be focused on are the two 12mm nuts that are ultimately holding the tray in the car. Remove those and take out the tray. Place the tray somewhere where you can align your mount with the tray and decide where to insert the mount screws.
[IMG] [/IMG]
10) Now here you have some options once you size up your mount to tray configuration and figure out where you are going to insert your screws. You can either modify the stock tray to only accommodate what you will need for the aluminum mount or you are free to leave it as one whole piece. For me, going from a Buschur Mini Kit to this kit I have grown used to having that extra room in the engine bay so I used my carpet blade to modify the fiberglass tray. Obviously a dremel, or a real hand saw with some sort of vice to hold the tray would have been more ideal but I have what I have
[IMG] [/IMG]
11) Now take your modified tray and use your ratchet and 12mm socket to put those two nuts that held it in place back in the car and lock those down. Then place your mount in the spot that you determined 1) would best hold your mount in place once you inserted the screws and 2) would best facilitate placement of your battery, and screw your mount down to the tray using your phillips head screwdriver with 4 or 6 screws.
[IMG] [/IMG]
12) Once your mount is adequately placed, drop in the battery tie it down and reattach the positive and negative cables and go for a ride to make sure nothing shifts around on ya and call it a Braille Battery Kit Install!!!


[IMG] [/IMG]
Here is my quick down and dirty on how to install a Braille Light Weight Battery Kit in your car� or at least how I installed it in my EVO VIII.
For starters you are going to need a few hand tools:
TOOLS:
- 12 mm socket and ratchet
- 4 mm allen key
- Phillips head screw driver
- Electric Dremmel, hand saw or if you�re really low budget like moi, a hand held razor blade
carpet cutter will work.
1) First thing you wanna do as with any DIY job is make sure you have everything you're supposed to; so inventory your stuff first.
2) Next figure out what you need and what you don�t. If you follow the instructions they should highlight which bolts and which spacers to use for your particular battery. For the B2015 I bought the directions tell you to �Use 50mm spacers below the threaded rods and use 60mm screws to bolt the uprights to the base of the mount�. I went ahead and circled the stuff you will need for this particular set up as my instructions did nothing to specify which spacers were the 50mm spacers and which screws were the 60mm screws etc.
[IMG]
[/IMG]3) Now you'll need to assemble your mount to make sure you have the right fit for your particular battery. So first put the 50mm screws through the side of the base plate that has the rounded holes that marry up with the rounded part of the screw heads.
[IMG]
[/IMG]4) Then slide the 50mm spacers over the screws and screw down the threaded rods. You should be able to do this with just your hands but if not grab that 14mm allen key and get it dun.
NOTE: One side of the mount's pillar's is going to be taller than the other. The shorter side should sit against the terminal side of the battery.
[IMG]
[/IMG]5) Place your battery in the mount with the shorter side against the terminal side of the battery.
6) Place the larger of the two black aluminum plate inserts into the slot on the top of the battery. The + and � signs on the plate should correspond with the + and -terminals on the battery. After this place the �BRAILLE� labeled plate (strap) across the top of the battery where the holes line up with the holes in the pillar rods�BUT DON�T PUT THE DOMED SCREWS IN YET!
7) If you have done everything up to this point correctly you will notice that there is some space between the top of your threaded rods and your Braille Tie down plate. Don�t just say the hell with it and attempt to ratchet down the domed screws to compensate for this as all you will do is damage the battery or other parts of your mount. This is where your washers come into play.
8) Now you can either add the washers at the top of the pillars as I did to fill in the space OR you can take everything apart and add the washers between the mount and the spacers, or between the spacers and the threaded rods. Either way just be sure to add the same number of washers to both sides of the mount or you will not be able to adequately secure the battery and it WILL slide around when you drive. NOW put your domed screws in and verify the fit. It should be tight.
[IMG]
[/IMG]Now once you have your mount built and your battery fitted it�s time to install them both in the car. So for starters if you have not already done so remove your stock battery and tray.
9) You will need a myriad of other tools to remove the shock battery from the car but that is another thread� the only parts you need to really be focused on are the two 12mm nuts that are ultimately holding the tray in the car. Remove those and take out the tray. Place the tray somewhere where you can align your mount with the tray and decide where to insert the mount screws.
[IMG]
[/IMG]10) Now here you have some options once you size up your mount to tray configuration and figure out where you are going to insert your screws. You can either modify the stock tray to only accommodate what you will need for the aluminum mount or you are free to leave it as one whole piece. For me, going from a Buschur Mini Kit to this kit I have grown used to having that extra room in the engine bay so I used my carpet blade to modify the fiberglass tray. Obviously a dremel, or a real hand saw with some sort of vice to hold the tray would have been more ideal but I have what I have
[IMG]
[/IMG]11) Now take your modified tray and use your ratchet and 12mm socket to put those two nuts that held it in place back in the car and lock those down. Then place your mount in the spot that you determined 1) would best hold your mount in place once you inserted the screws and 2) would best facilitate placement of your battery, and screw your mount down to the tray using your phillips head screwdriver with 4 or 6 screws.
[IMG]
[/IMG]12) Once your mount is adequately placed, drop in the battery tie it down and reattach the positive and negative cables and go for a ride to make sure nothing shifts around on ya and call it a Braille Battery Kit Install!!!
[IMG]
[/IMG]


search is your friend...
http://www.tirerack.com/accessories/detail.jsp?ID=36
on the left side you can look for the battery.
http://www.tirerack.com/accessories/detail.jsp?ID=36
on the left side you can look for the battery.
search is your friend...
http://www.tirerack.com/accessories/detail.jsp?ID=36
on the left side you can look for the battery.
http://www.tirerack.com/accessories/detail.jsp?ID=36
on the left side you can look for the battery.
 thanks, I think. I really hate the "search is your friend" comments on here, but at least you gave a link. So +1 for you. Since I think these forums are more like talking to friends I thought I'd lead in with my real question to the OP with where he got his from and the real question is "how's it holding up?" Again, since I feel like I'm talking to friends on here please don't be offended when I say RTFQ
  BTW, the how do you think I found a 10 month old thread? Always nice to talk to another Coloradian
Thread Starter
Joined: Jul 2007
Posts: 559
Likes: 1
From: Tampa/Riverview
My Bad Boss... nobody said anything on here for so long soooooooooooooo after a while I stopped checking on it. To answer your question the battery is doing really well. And to answer your other question I believe I got it from JEGS, but you can get them straight from Braille also. The biggest thing to remember with any mini battery is that if you garage your car more than you drive it YOU GOTTA keep some sort of trickle charge on em. At least once a week to be safe... especially during warmer months.
Trending Topics

Thread
Thread Starter
Forum
Replies
Last Post
tiggeryellow1
For Sale - Part Outs
30
Jun 4, 2013 07:07 AM
tiggeryellow1
For Sale - Part Outs
39
May 1, 2013 04:40 PM
johnnnyjeans
Evo Show / Shine
13
Oct 18, 2012 03:50 PM
itrsport.com
Evo How Tos / Installations
1
Nov 27, 2005 01:23 PM