
Evo IX MR Radio Relocate


Thread Starter
Newbie
Joined: Nov 2012
Posts: 18
Likes: 1
From: Michigan
Evo IX MR Radio Relocate
There is a DIY on the site, but it lacks any pics. Thought you guys would appreciate this. I'd give this a 2 out of 5 on the difficulty scale. If you can change your own diff fluids, understand basic wiring, and know how not to break plastic trim pieces, you're good.
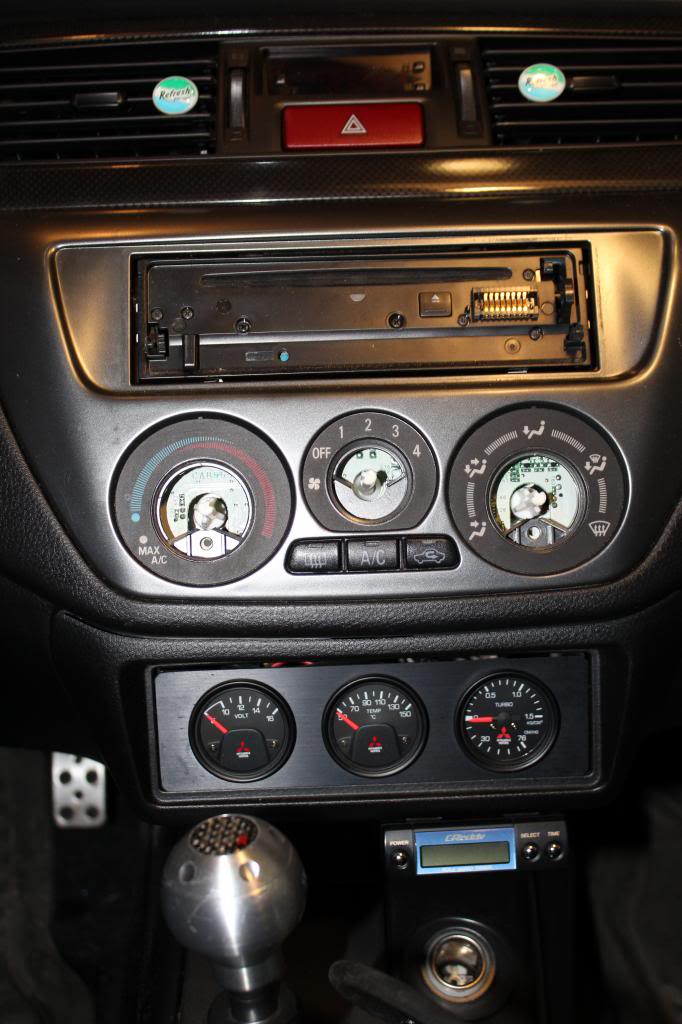
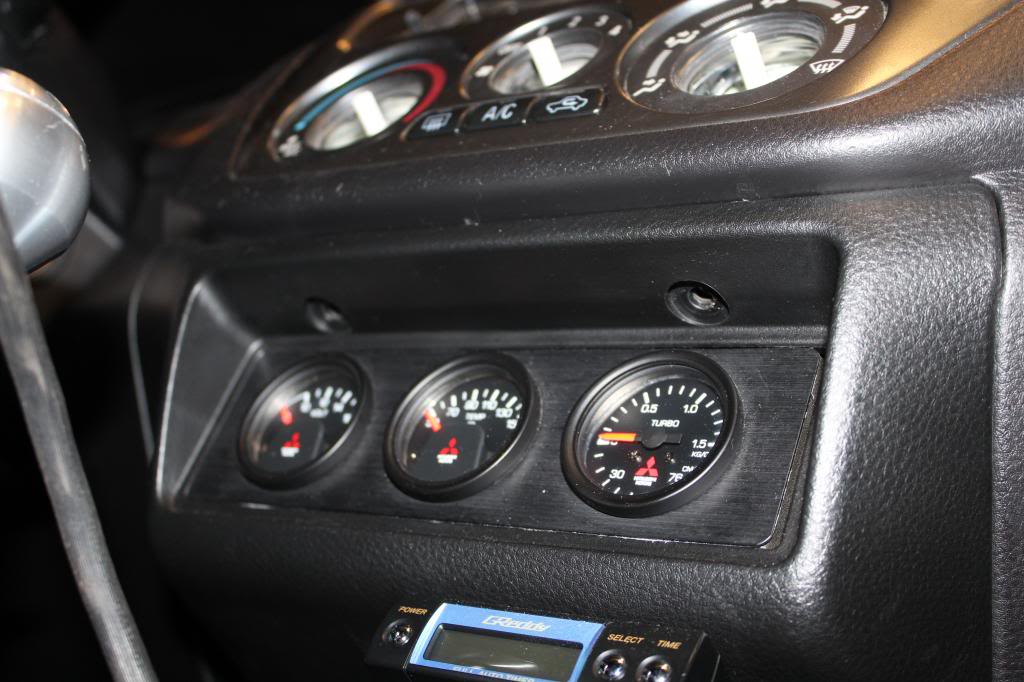
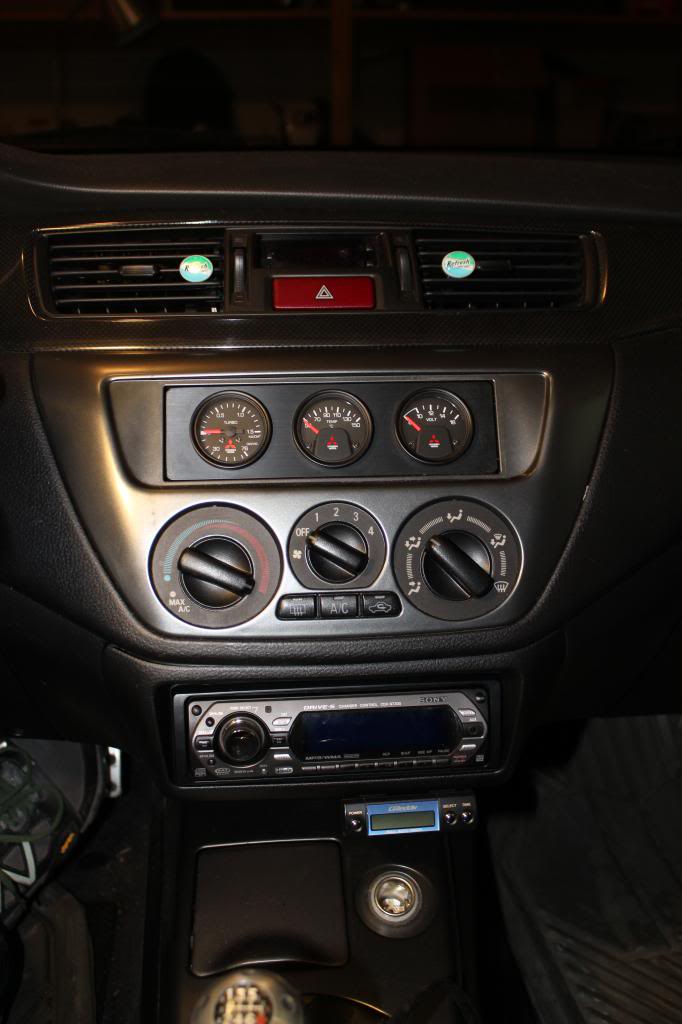
IX MR/MR SE/RS package cars come with the triple set of gauges. They are mounted way too low and are nearly impossible to see. Furthermore, the boost gauge on my car was on the far end (passenger side), making it too far away to really keep an eye on.
You will need:
Screwdrivers - longer flat, normal phillips, stubby phillips head
Needlenose pliers or wire cutters
A couple shop rags
A good drop light or flashlight
Space heater if you live in the tundra like me

Took me 40 minutes as a first timer, plus an hour preheating the garage.
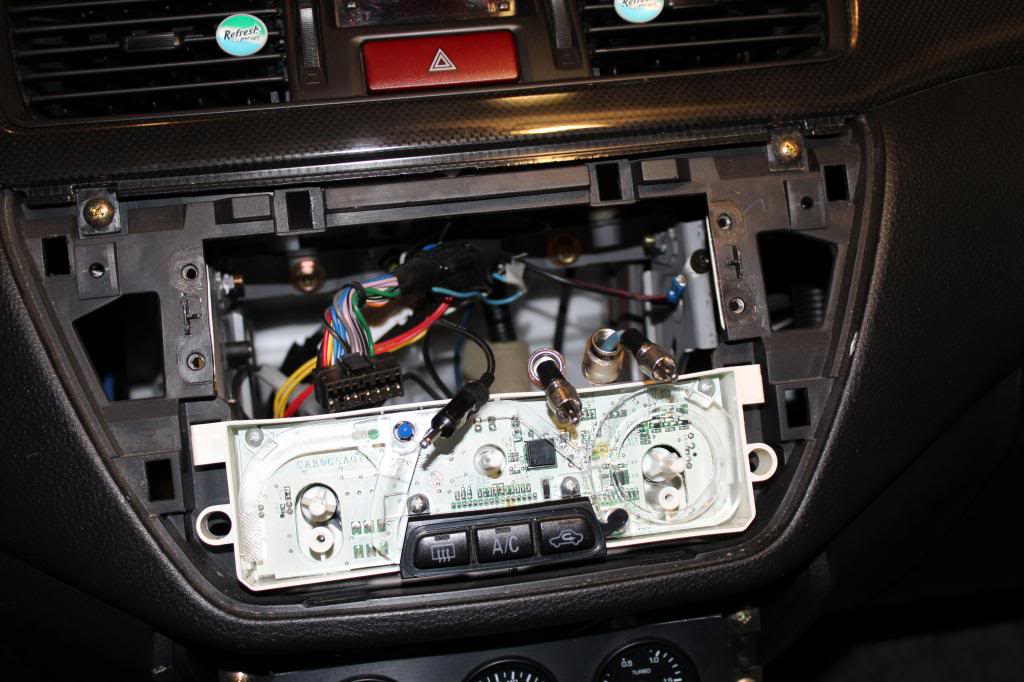
First, pull the three knobs straight off the HVAC controls. There are two screws on the outer knobs, undo them. GO EASY on these they don't need a lot of torque.
Also, undo the two screws underneath the HVAC controls that go vertical from in front of the gauge set.
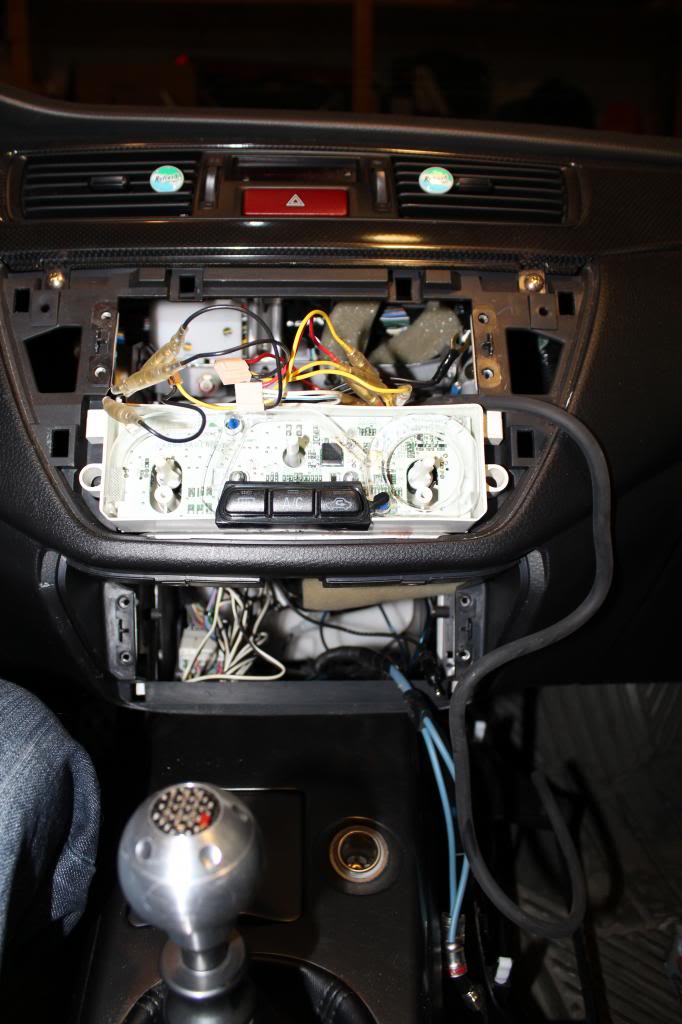
Now you can pull off the HVAC/Radio bezel and the gauge bezel. You'll need to tug pretty hard on the HVAC one, I used two fingers and yanked it one corner at a time.
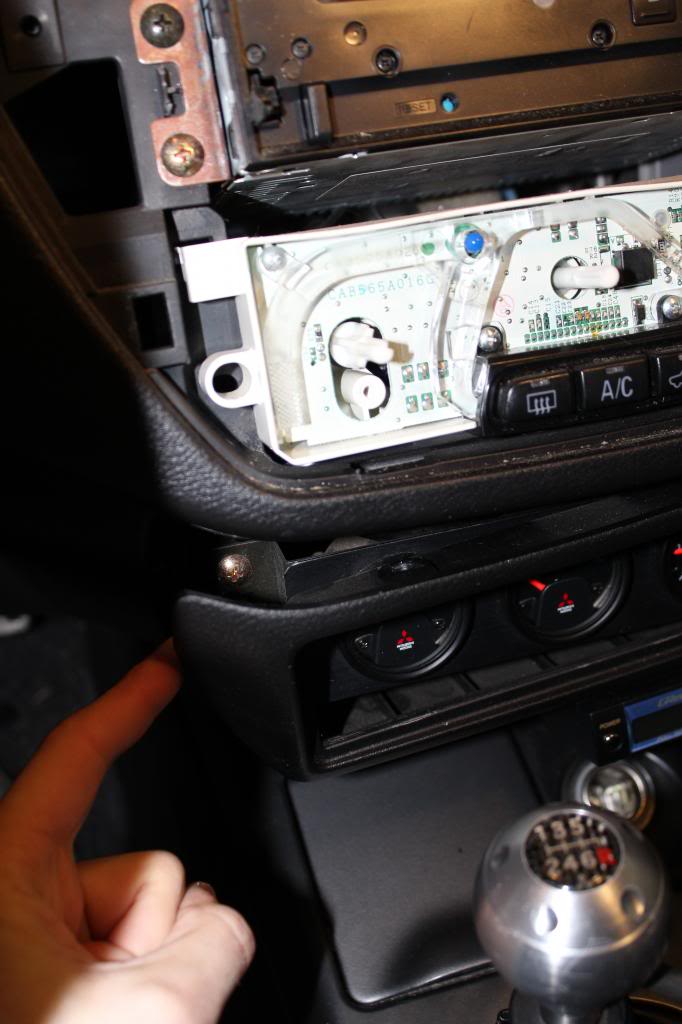
Undo the four screws around the radio and pull it straight out. You will need to remove the cables at the back, do so carefully. Take your time here, ripping a connection out like a gorilla is going to make this a 3 hour project real fast.
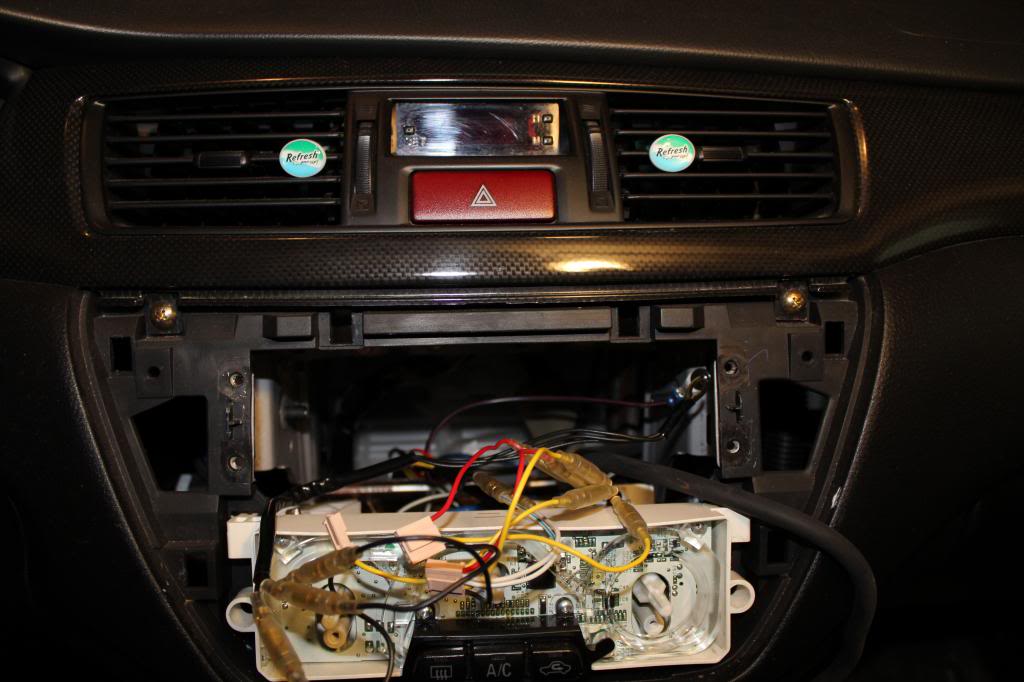
You'll be left with this hole in your dash.
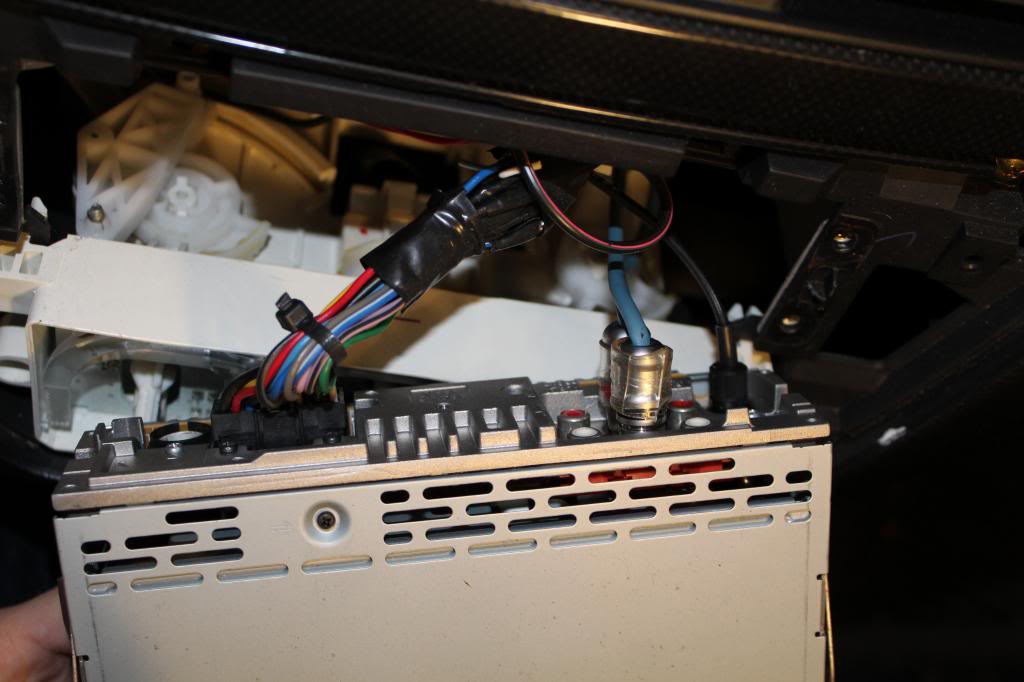
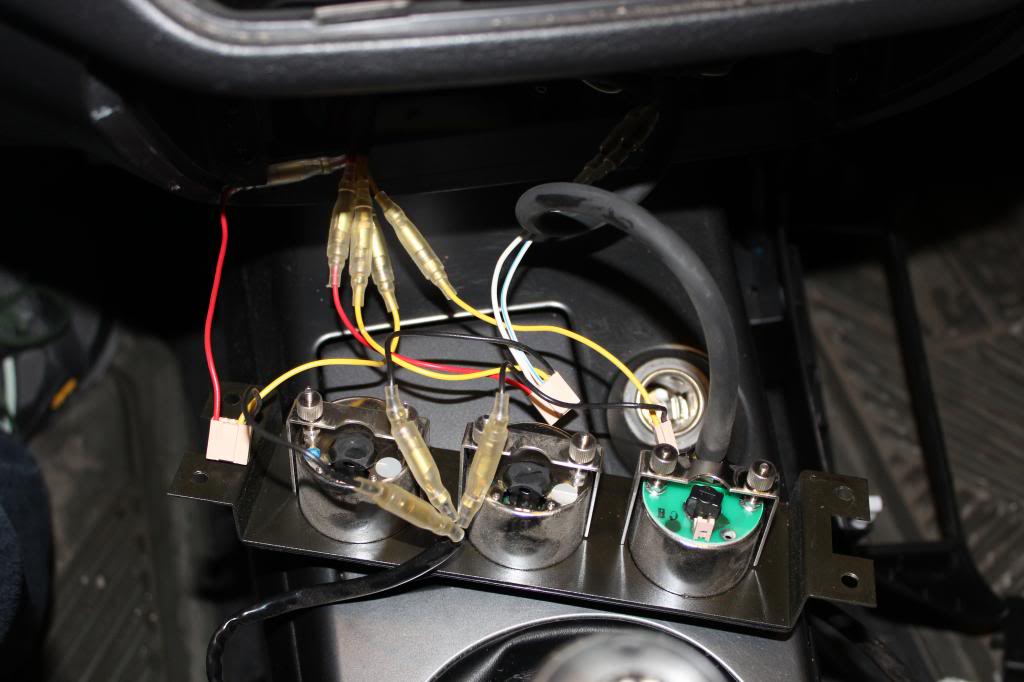
Repeat the same process with the four screws on the gauge pack. Be aware these are very long screws. There is a black plastic spacer behind each of the sets of screws, you'll need to reuse it for the radio. Disconnect hook-ups, here is a pick of the wiring to each. AGAIN go slow and take it easy. White/Blue is Oil Temp, vac line is boost - wiggle to disconnect.
OPTIONAL: If you want to move any of the gauges from one side to the other, now is the time. Get a rag, go to your work bench, and undo the little brackets (don't lose the tiny lock washers). Move as you see fit.
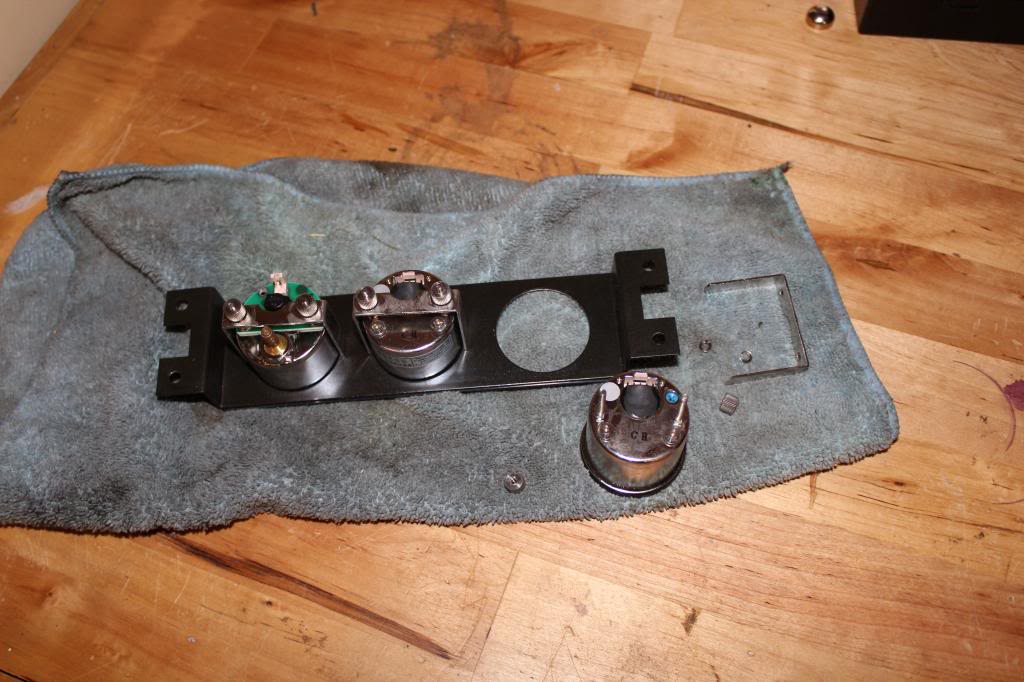
Check they are square/level and tighten brackets.

Now you've got this mess to deal with.
The wiring is pretty easy to move behind the HVAC unit. Some cars, mine included, had the boost vac line and oil sender line zip tied. Clip it and move the gauge wiring to the top/speaker and radio to the bottom.
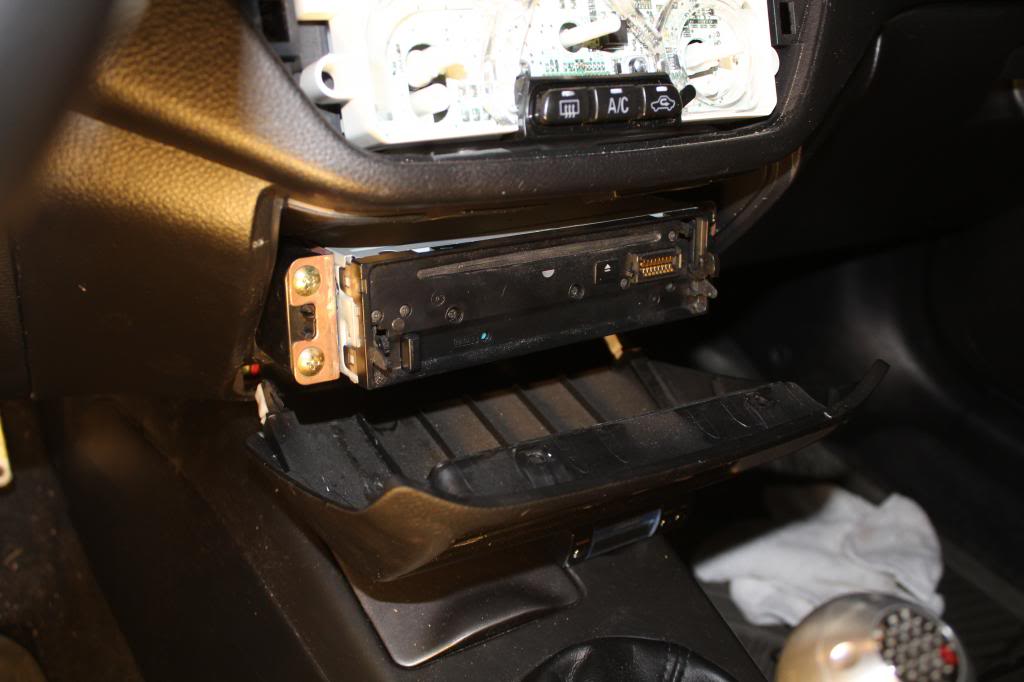
At this point. Reconnect the radio to the wires (now in the bottom din). Pre-fit the black spacers with the four screws already in, and slide the radio down the channel into place. This was the trickiest part, you have to jimmy a non-factory radio a bit, make sure the area behind is clear before shoving it in.
Same deal up top. Reconnect all lines/wires. You may have to relocate a grounding wire. On my car the radio ground was long enough, but the OE gauge ground was too short. Unbolt/screw it and move it to a new spot.

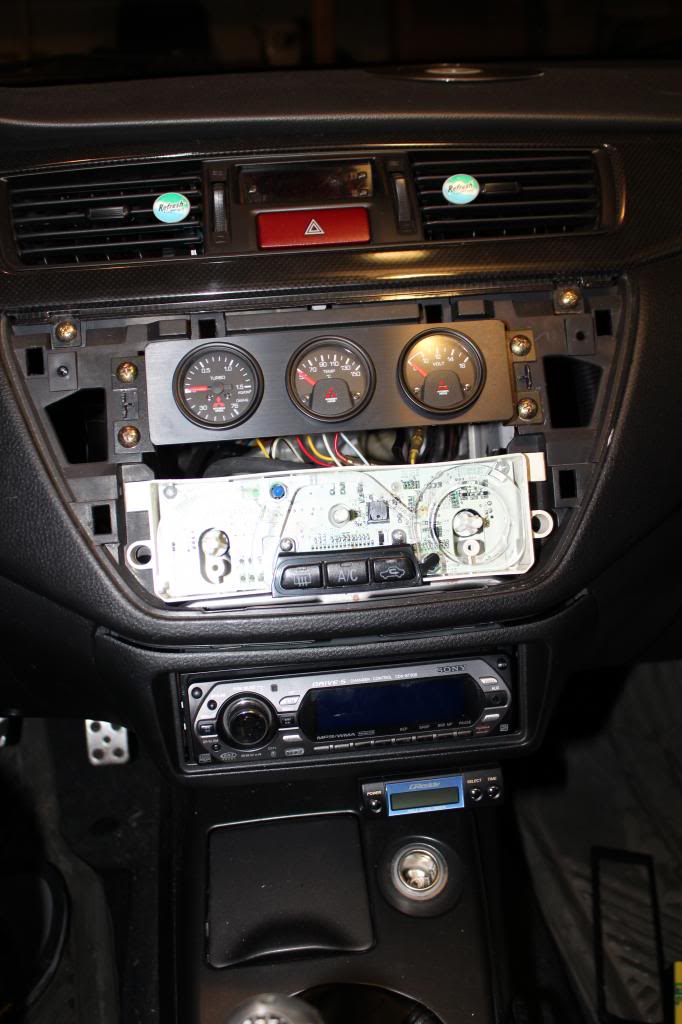
Tighten all the screws down and flip your ignition on...you should get this. Note - I sandwiched the top gauges ground between the plastic and one of the dash bracket screw holes, it provides a solid ground, you can just see it above and to the right of the voltmeter.

Reattach the lower bezel. Push it back on, then secure with the two vertical screws.
Put the top bezel back on, it clicks right back in, then add the two little screws from the HVAC unit (again, go easy on these). Add knobs.
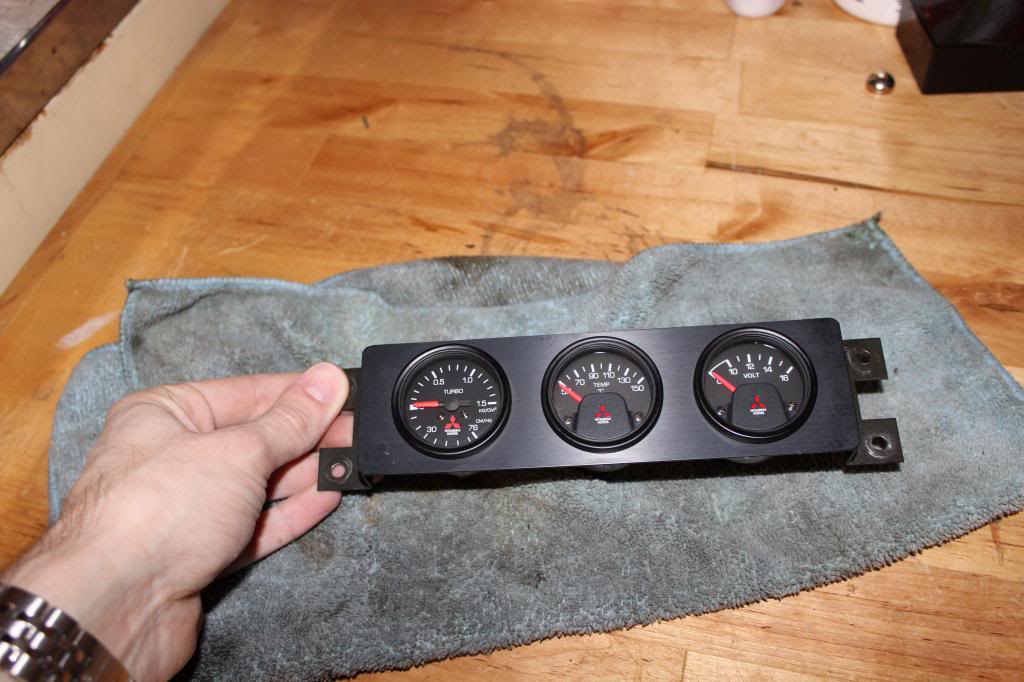
Boom. You're done. Readable gauges that are so OE it hurts.
Link to all the pics with a bonus set of pics of my trashed rear brake pads - http://s596.beta.photobucket.com/use...dio%20Relocate

IX MR/MR SE/RS package cars come with the triple set of gauges. They are mounted way too low and are nearly impossible to see. Furthermore, the boost gauge on my car was on the far end (passenger side), making it too far away to really keep an eye on.
You will need:
Screwdrivers - longer flat, normal phillips, stubby phillips head
Needlenose pliers or wire cutters
A couple shop rags
A good drop light or flashlight
Space heater if you live in the tundra like me
Took me 40 minutes as a first timer, plus an hour preheating the garage.
First, pull the three knobs straight off the HVAC controls. There are two screws on the outer knobs, undo them. GO EASY on these they don't need a lot of torque.
Also, undo the two screws underneath the HVAC controls that go vertical from in front of the gauge set.
Now you can pull off the HVAC/Radio bezel and the gauge bezel. You'll need to tug pretty hard on the HVAC one, I used two fingers and yanked it one corner at a time.
Undo the four screws around the radio and pull it straight out. You will need to remove the cables at the back, do so carefully. Take your time here, ripping a connection out like a gorilla is going to make this a 3 hour project real fast.
You'll be left with this hole in your dash.
Repeat the same process with the four screws on the gauge pack. Be aware these are very long screws. There is a black plastic spacer behind each of the sets of screws, you'll need to reuse it for the radio. Disconnect hook-ups, here is a pick of the wiring to each. AGAIN go slow and take it easy. White/Blue is Oil Temp, vac line is boost - wiggle to disconnect.
OPTIONAL: If you want to move any of the gauges from one side to the other, now is the time. Get a rag, go to your work bench, and undo the little brackets (don't lose the tiny lock washers). Move as you see fit.
Check they are square/level and tighten brackets.
Now you've got this mess to deal with.
The wiring is pretty easy to move behind the HVAC unit. Some cars, mine included, had the boost vac line and oil sender line zip tied. Clip it and move the gauge wiring to the top/speaker and radio to the bottom.
At this point. Reconnect the radio to the wires (now in the bottom din). Pre-fit the black spacers with the four screws already in, and slide the radio down the channel into place. This was the trickiest part, you have to jimmy a non-factory radio a bit, make sure the area behind is clear before shoving it in.
Same deal up top. Reconnect all lines/wires. You may have to relocate a grounding wire. On my car the radio ground was long enough, but the OE gauge ground was too short. Unbolt/screw it and move it to a new spot.
Tighten all the screws down and flip your ignition on...you should get this. Note - I sandwiched the top gauges ground between the plastic and one of the dash bracket screw holes, it provides a solid ground, you can just see it above and to the right of the voltmeter.
Reattach the lower bezel. Push it back on, then secure with the two vertical screws.
Put the top bezel back on, it clicks right back in, then add the two little screws from the HVAC unit (again, go easy on these). Add knobs.
Boom. You're done. Readable gauges that are so OE it hurts.
Link to all the pics with a bonus set of pics of my trashed rear brake pads - http://s596.beta.photobucket.com/use...dio%20Relocate


Trending Topics

I did my radio relocation last spring... and shortly after, my radio head unit stopped working. The radio turns on, but there's no sound coming from any of the speakers. I was VERY careful with installing, but I can't figure out what's worn. I also went so far as to replace the head unit with an Infiniti SSL head unit and the issue still exists: radio on, with no volume coming from the speakers... what could be the issue?
Thread Starter
Newbie
Joined: Nov 2012
Posts: 18
Likes: 1
From: Michigan
I did my radio relocation last spring... and shortly after, my radio head unit stopped working. The radio turns on, but there's no sound coming from any of the speakers. I was VERY careful with installing, but I can't figure out what's worn. I also went so far as to replace the head unit with an Infiniti SSL head unit and the issue still exists: radio on, with no volume coming from the speakers... what could be the issue?
Also, you could have blown a fuse, which would in some cases allow power to the radio, but not to the amp/speakers.
best of luck.

Thanks... My Evo doesn't have the amplifier under the seat... but I'll check the fuses and the maybe test the wires... I appreciate the help!
