
post pics of CUSTOM gauge setups

Originally Posted by EnJaNir
Can you get a closer pic of where you ran that main wire, if you drilled a hole..etc etc
That is exactly what I was planning on doing and I think it looks great
That is exactly what I was planning on doing and I think it looks great
I didn't have to drill a hole, i just removed the dash cluster bezel, and ran the wire behind it, i think there's like 1mm of open space in the corner, enough for you to run the main wire through without having to drill or anything.


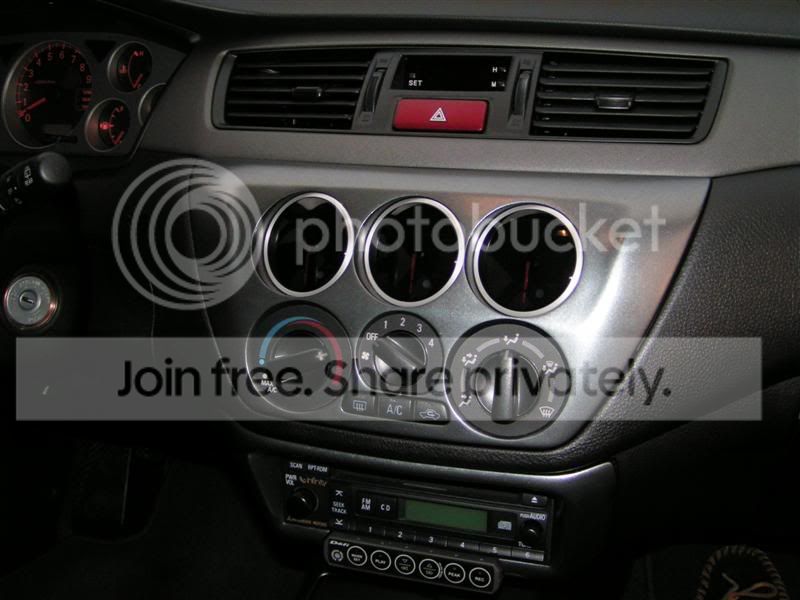
Here's a few of the ones a friend of mine an I have done.
I'll try and remember to get pics of the newer prototype that has the gauges angled toward the driver, but still flush.
I'll try and remember to get pics of the newer prototype that has the gauges angled toward the driver, but still flush.
Last edited by Joey B; Feb 3, 2006 at 12:26 PM.

Originally Posted by SilverNine
what kind of guages are those ^^^^^^
http://www.autometer.com/demos/nexus/
Originally Posted by jhanksevo
i like that how much?
The only problem is we have been on hold for a few months. My friend broke his hand and then moved to Florida. I'm waiting for him to settle in and then we'll start making them again.

Originally Posted by Jo & Joey
Here's a few of the ones a friend of mine an I have done.
I'll try and remember to get pics of the newer prototype that has the gauges angled toward the driver, but still flush.
I'll try and remember to get pics of the newer prototype that has the gauges angled toward the driver, but still flush.

Newbie
Joined: Dec 2005
Posts: 32
Likes: 0
Originally Posted by NocturnalEVO
I didn't have to drill a hole, i just removed the dash cluster bezel, and ran the wire behind it, i think there's like 1mm of open space in the corner, enough for you to run the main wire through without having to drill or anything.
Sorry it's taken me so long to respond. I thought I subscribed and when I relized I didn't, it took me forever just to find this thing again.
Ok so here we go with answering questions -
The gauges are kinda tight, but because these panels are made by hand occasionally one might not be as tight (i.e. the gauge can spin in the hole slightly but will not bounce out) so we just use a little tape. As you push the gauge into the hole there is a area that is smaller so that the gauge doesn't go through the panel into your dash. (refer to Pic 1 and pic 2)
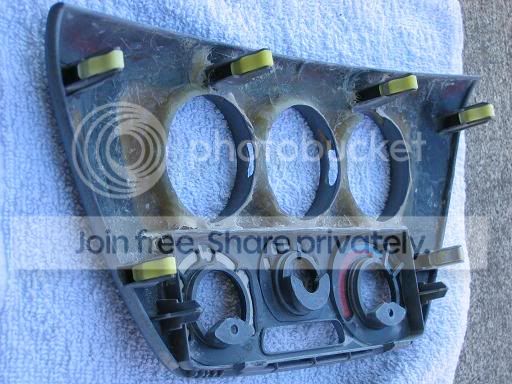
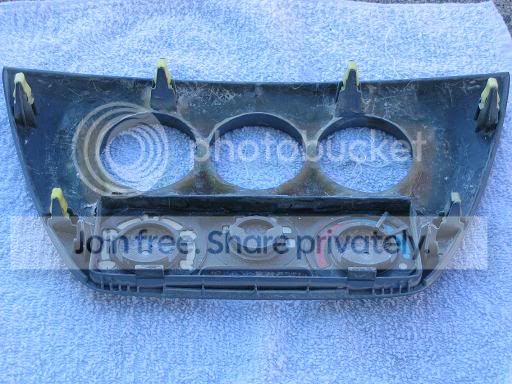
We took a brand new panel and used fiberglass to help the new mold. Sanded a whole bunch to smooth it out, cut holes, sand, prime, sand, etc, etc. Then got some paint match to spray a couple of coats over it...finished product.
Now this other one I'm showing is a prototype (pic 3, 4, 5, and 6). The gauges are slightly angled toward the driver. It would cost a bit more too because it's a lot harder to get the angles just right so they look; good plus it requires a lot more time than the other one to put together. It may be $240-250....we haven't really settled on a price for this one just yet.

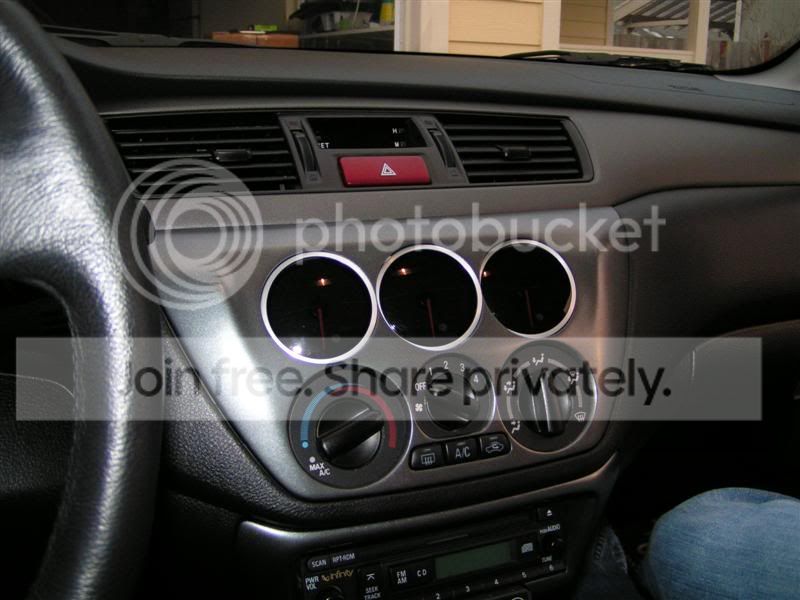
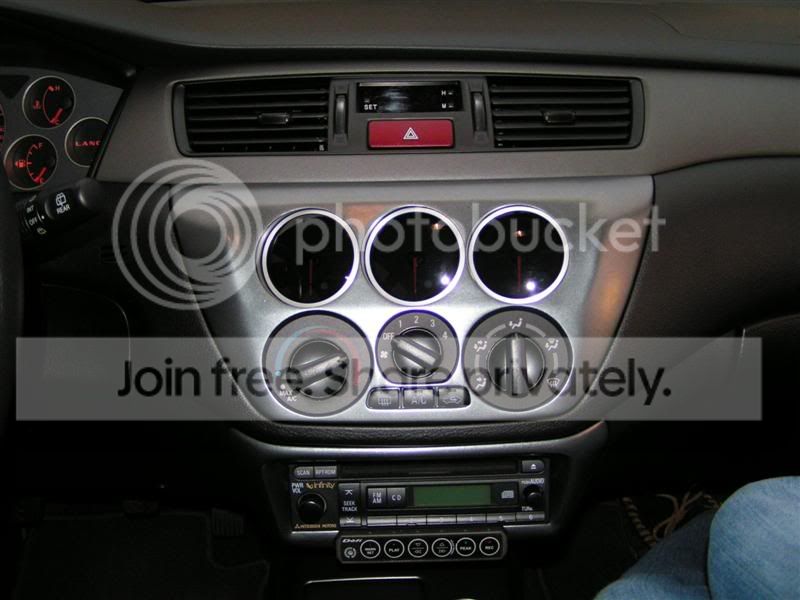
The only difference between the first type and the angled one is that with the angled one your radio won't be able to be put back because you have to trim the radio mount on the pasengers side to the point where it can't be used again (if you've taken your radio out before, you will notice it is held in with four screws. where the two screws on the passenger side hold the radio, that portion has to be cut out a bit so that the last gauge can angle back).
Well I hope this all make some sort of sense.
Ok so here we go with answering questions -
Originally Posted by Jixxer
How do you mount the gauges to the dash? Do they bounce around while you are driving?
Originally Posted by trinydex
did you fab the cubby panel or did you mod the stock one? cuz i notice it's painted and it's suppose to be that textured interior material....
Now this other one I'm showing is a prototype (pic 3, 4, 5, and 6). The gauges are slightly angled toward the driver. It would cost a bit more too because it's a lot harder to get the angles just right so they look; good plus it requires a lot more time than the other one to put together. It may be $240-250....we haven't really settled on a price for this one just yet.
The only difference between the first type and the angled one is that with the angled one your radio won't be able to be put back because you have to trim the radio mount on the pasengers side to the point where it can't be used again (if you've taken your radio out before, you will notice it is held in with four screws. where the two screws on the passenger side hold the radio, that portion has to be cut out a bit so that the last gauge can angle back).
Well I hope this all make some sort of sense.
Last edited by Joey B; Feb 16, 2006 at 10:47 PM.


