
Intro To Colorsanding and Buffing 101

Thread Starter
Evolving Member
Joined: Apr 2006
Posts: 155
Likes: 0
From: Tulsa, Ok
Intro To Colorsanding and Buffing 101
I had posted this in a different thread and I thought this info might be useful to others so I made a new thread. This thread is a simple outline on how to buff your ride. Colorsanding and buffing will remove things like Oxidation(that yellow hue) on CF parts and/or your cars existing paint, as well as, bring back your shine to a near new gloss. So here goes:
Step 1: Get a fine grit sandpaper, 1500 to 2500, then sand any imperfections out of your job while using water(IE a squirt bottle) and sand it down flat. You can start with 1500 and end with 2500 or just use either one start to finish but 2500 is easier to buff out. There will be no imperfections what so ever and your finish will be DULL and SANDED. BE VERY CAREFUL when doing this to not put finger grooves in your finish, because when you buff it back you will see them.
Step 2: Using a buffer and WHITE foam pad(3M pad and 3M compound) and compound, buff out the sand scratches until you can no longer see them. If you are a beginner use a slow speed. It takes longer but you run a lower risk of "burning" your paint. Burning occurs when you leave the buffer in one spot to long and it heats up your paint and scars it.
Step 3: Using a buffer and a BLACK foam pad(once again 3m pads and 3m polish) and polish, polish comes in 2 types Light and Dark, so depending on the color of your car get the right one. Polish the car back to a nice shine, if you have a dark car use a slower speed and a fine touch to remove any swirls and get that nice deep gloss. You should use a slower speed when you polish anyhoo.
Step 4: To remove any swirls use the same polish and a very fine CLEAN towel, and hand polish. Then reapply your favorite wax and call it a day.
Also keep in mind you can only colorsand and buff your car's finish a few times. Every time you colorsand you are removing a lil bit of clear. So I think 2 -3 times MAX is all you can do with this process.
Some foot notes, the difference between a white and black foam pad is simple, the white is a lil more coarse for using with compound and the black is finer and used for polishing. I hope this helps any of you who want to do this on their own, but please be careful when using the buffer and start out with a slower speed and NEVER LEAVE that buffer in one spot for too long. Take it easy on your edges because they will burn easily too. Also the very fine CLEAN towel is what we call a T shirt towel in the paint shop. If you have any questions do not be afraid to PM and I will help you out as much as I can. Enjoy all and good luck
Josh


Be very careful color sanding stock paint. There is only a total of .005-.006" of paint on an Evo from the factory- or at least on my IX. This includes primer, base coat, and clear coat. So, you are looking at a max of .003" of clear which is just over a human hair in thickness. I wouldn't sand on it even once unless it really needs it.
Originally Posted by Steve_P
Be very careful color sanding stock paint. There is only a total of .005-.006" of paint on an Evo from the factory- or at least on my IX. This includes primer, base coat, and clear coat. So, you are looking at a max of .003" of clear which is just over a human hair in thickness. I wouldn't sand on it even once unless it really needs it.
THe paint on the evo sucks, i got my 2 passenger doors repainted for a scratch, and the car was only 6 months old, now over a year later, the repaint is still nice, while the stock paint is pitted(lower rear doors), form rock chips. considering the closeness in age, i am amazed.

Trending Topics
being a professional detailer, i would say your write-up is RIGHT ON! Yet i think your gonna need a disclaimer! lol Cause beginners plus wet sanding + buffer, usually equals no good first time results...
PEOPLE BE WARNED! This is a greeaat write up but i was able to perfect this type of technique through YEARS of practice on old junk yard hoods and trunks...Done right however and you'll never let your evo/car get dirty again! lol
OVERALL, good writeup! The more clean cars in this world the better it is to look at! lol
Thread Starter
Evolving Member
Joined: Apr 2006
Posts: 155
Likes: 0
From: Tulsa, Ok
Originally Posted by LI Pinky
being a professional detailer, i would say your write-up is RIGHT ON! Yet i think your gonna need a disclaimer! lol Cause beginners plus wet sanding + buffer, usually equals no good first time results...
PEOPLE BE WARNED! This is a greeaat write up but i was able to perfect this type of technique through YEARS of practice on old junk yard hoods and trunks...Done right however and you'll never let your evo/car get dirty again! lol
OVERALL, good writeup! The more clean cars in this world the better it is to look at! lol
PEOPLE BE WARNED! This is a greeaat write up but i was able to perfect this type of technique through YEARS of practice on old junk yard hoods and trunks...Done right however and you'll never let your evo/car get dirty again! lol
OVERALL, good writeup! The more clean cars in this world the better it is to look at! lol
Thanks Pinky, and being a professional painter for the last 11 years, I have logged my time behind a buffer and have done my fair share of colorsanding.
 But you are right, BEGINNERS need to take their time if they want to do this. In my painting thread I stress that so much, and I cant stress it enough to just TAKE YOUR TIME, do it RIGHT, NOT TWICE. But with patience and a little commen sense, I think the average DIY'er could get it done with lil to no problems. The colorsanding is not what I worry about, its the buffing. But old paint is less likely to "burn" then a new finish, because its fully cured. Also for the "thickness of your stock finish, how are you measuring it???(to that one guy that said .003 on inch or whatever. The only sure fire way to measure your stock finish is to get a Micro Fiche and find out for sure. You should see a range of 3-4 mils, or even 5-6 mils. Go to a paint store and ask them to measure it, or even a good body shop. Its a very simple lil measuring device and you will know for sure what you have to work with. Thanks guys for the kind words, and I hope this helps a few of you out there. Good luck
Josh
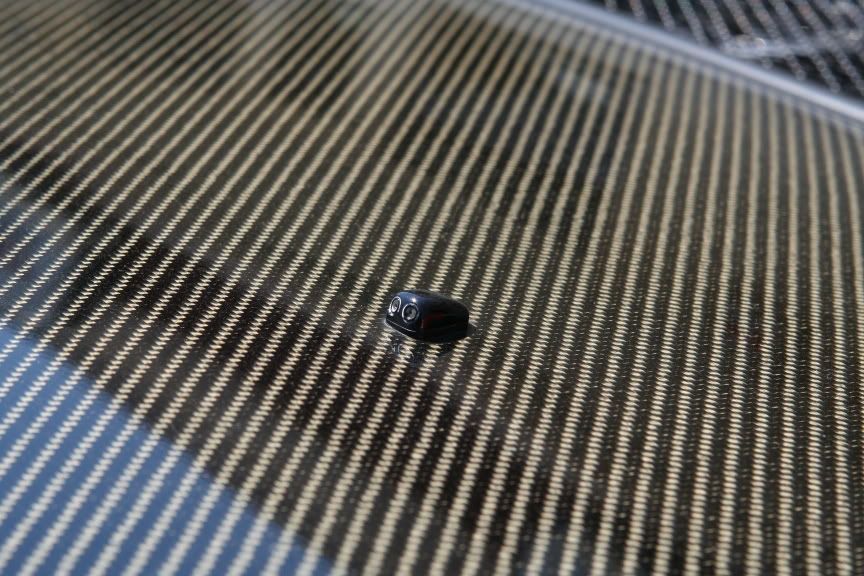
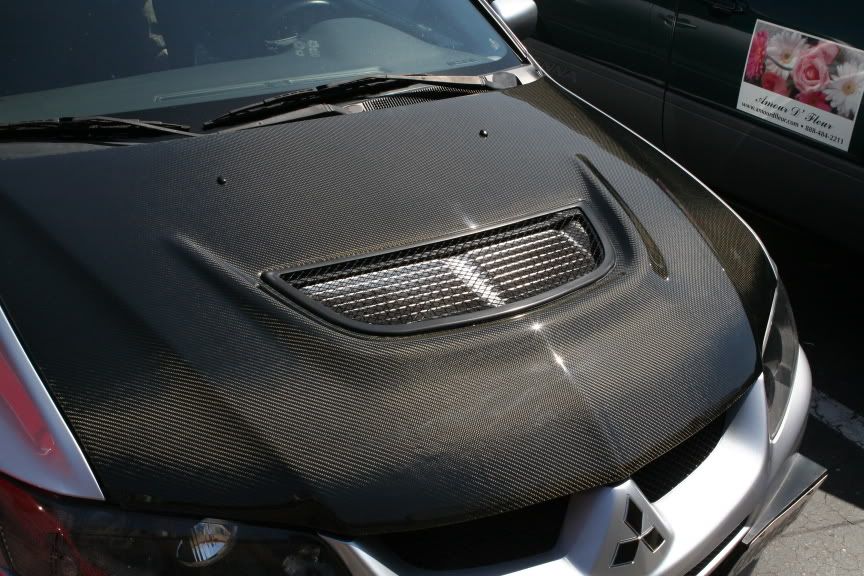
I had an excellent experience with color sanding then buffing my CF Hood I purchased just over a year ago. I DID NOT DO THIS WORK MYSELF. THIS WAS FROM A PROFESSIONAL DEATAIL SHOP. I kept good care of the hood washing the car frequently and waxing it about once a month. The innevitable happened thanks to the lack of a garage and shading at work. Oxidation was taking over my CF hood.
My 1st option was reclear coating the hood. Most expensive (aside from purchasing a new/used cf hood or oem hood and then paint to match)
My 2nd was to color sand then buff the hood.....cheapest ($100 at the shop I went to for doing the hood only, including full car wash afterwards)
If you guys look at your CF hoods closely, you will notice a serious amount of clear coat on them! This provides ample room for you or your detailer to work with while color sanding (compared to our stock paint).
I do not have before shots but you can imaging my not so pretty CF hood with more oxidation on it, then I felt comfortable driving around with.
Please consider color sanding then buffing as an option for your CF products when oxidation has taken over.
The end result was AMAZING! Looks like a BRAND NEW CF HOOD!!
Great "How-To" Josh!!
Mike
These are after shots (obviously).
Thread Starter
Evolving Member
Joined: Apr 2006
Posts: 155
Likes: 0
From: Tulsa, Ok
Thanks mike for posting the pics, and I wanted to add something real quick. If you are buffing your hood or around anything plastic(ie hood squirters, moldings anything like that) BE SURE to either remove them first, or to tape them off. A buffer with ANYKIND of pad on it(white or black or wool) WILL seriously scar them up and burn the crap out of them. IMO removing them is just as easy as taping them off, plus you will not have compound dust or polish residue left over in those hard to get to cracks, or underneath them. Just wanted to add that and once again thanks Mike for the pics and sharing your experience with this.
Later Josh
Later Josh
instead of using your plam or hand for sanding you might want to let them kno to get a sanding block so it stays even. 3m makes litlle rubber ones that we use in our shop.!! also they make good squeegies while ur sanding.
Thread Starter
Evolving Member
Joined: Apr 2006
Posts: 155
Likes: 0
From: Tulsa, Ok
Originally Posted by DSM GSR04
instead of using your plam or hand for sanding you might want to let them kno to get a sanding block so it stays even. 3m makes litlle rubber ones that we use in our shop.!! also they make good squeegies while ur sanding.
Later Josh
