
evo 8 Rag to Riches


evo 8 Rag to Riches
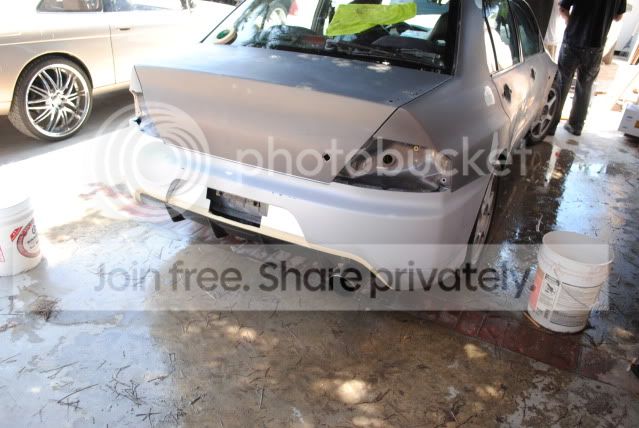
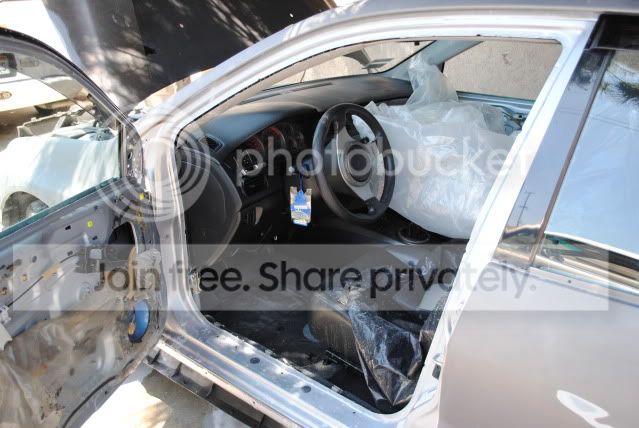
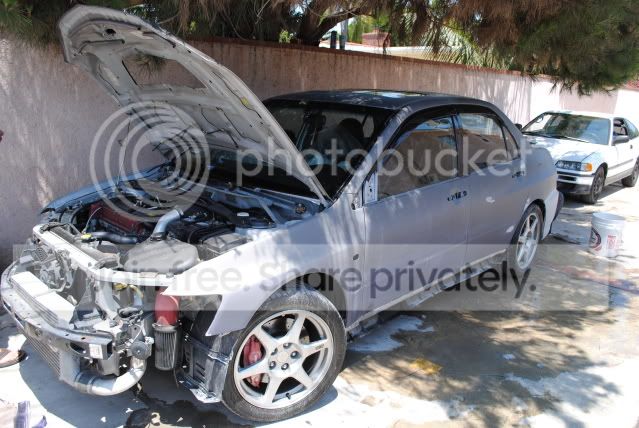
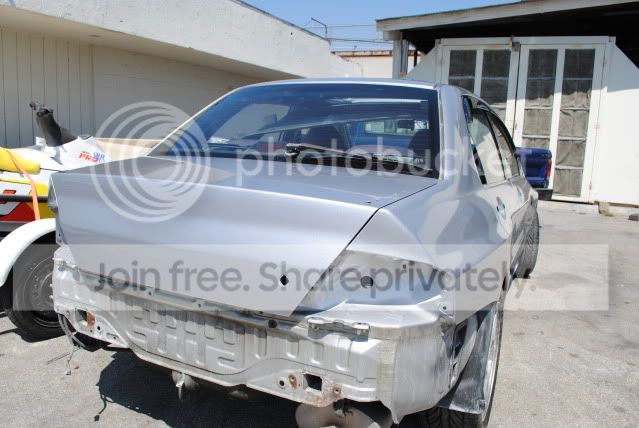
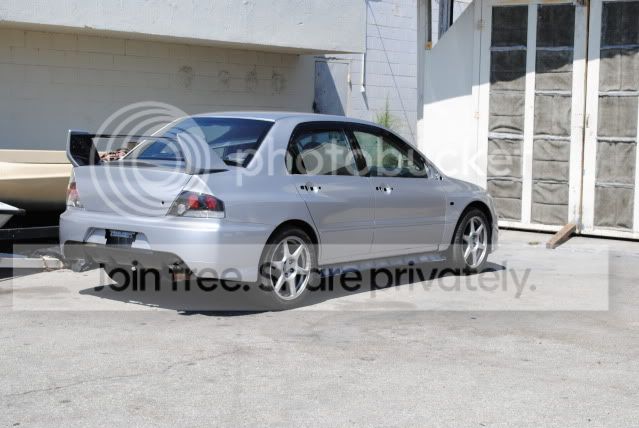
from this ugly looking monster
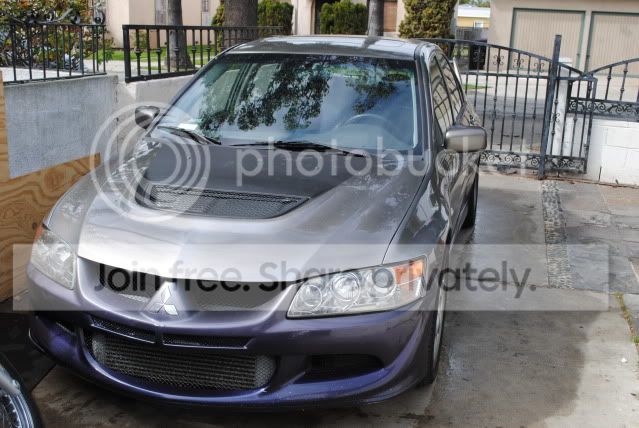
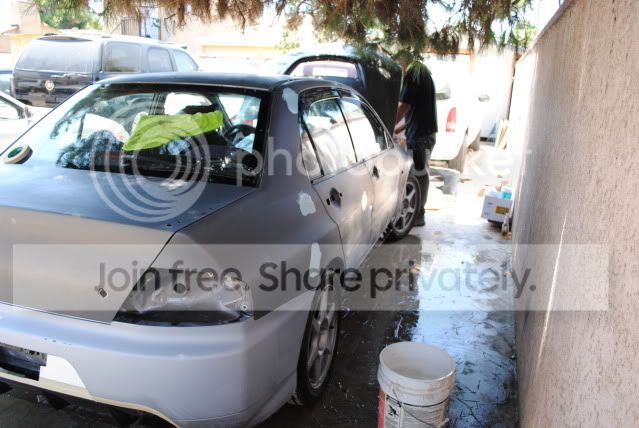
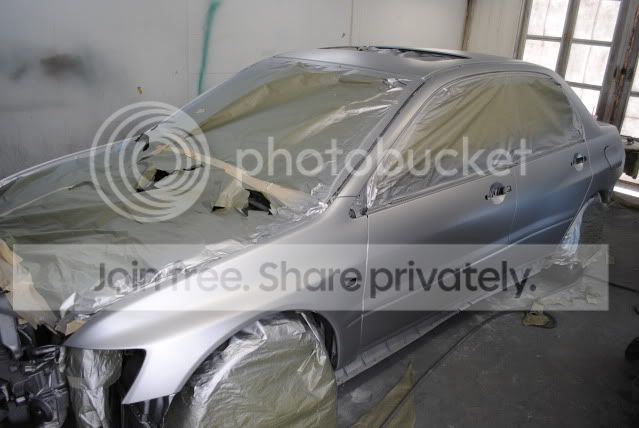
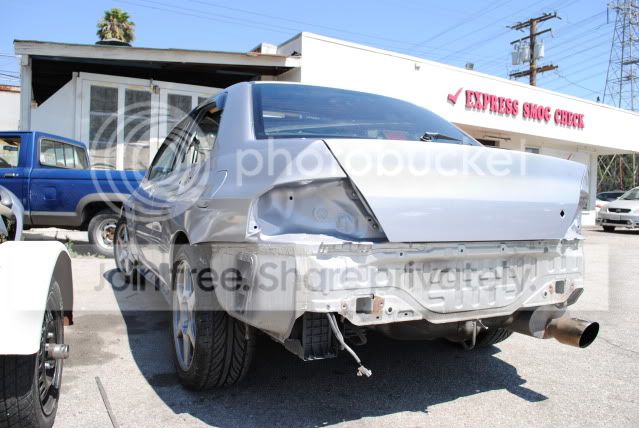
to this work in progress
update 7/19/11
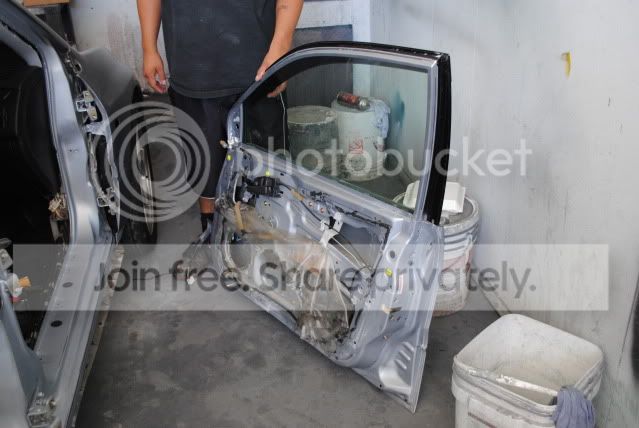
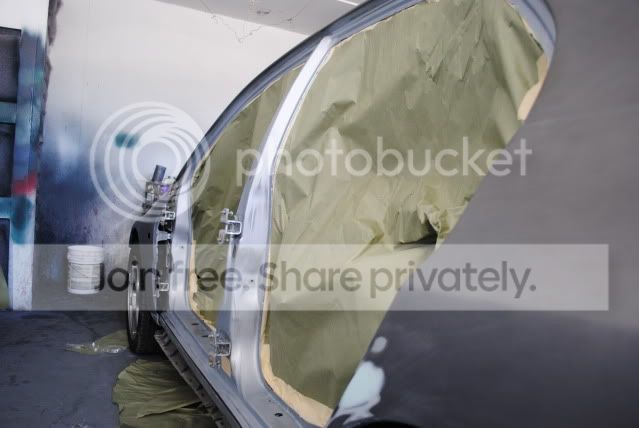
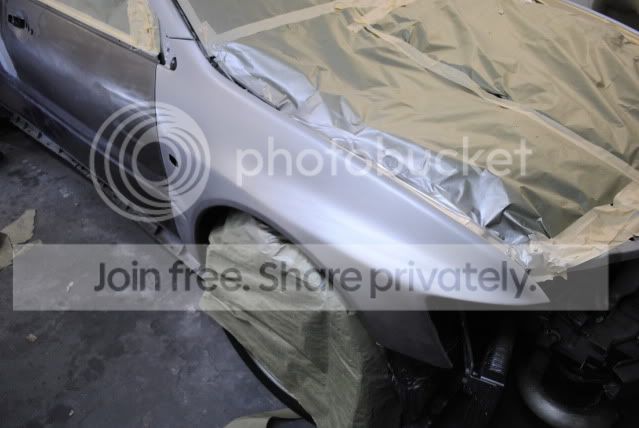
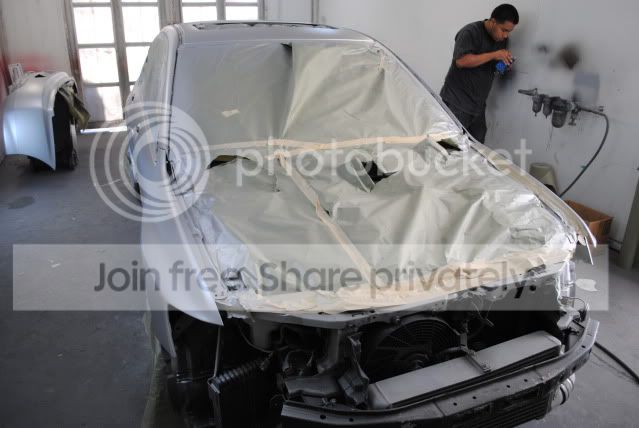
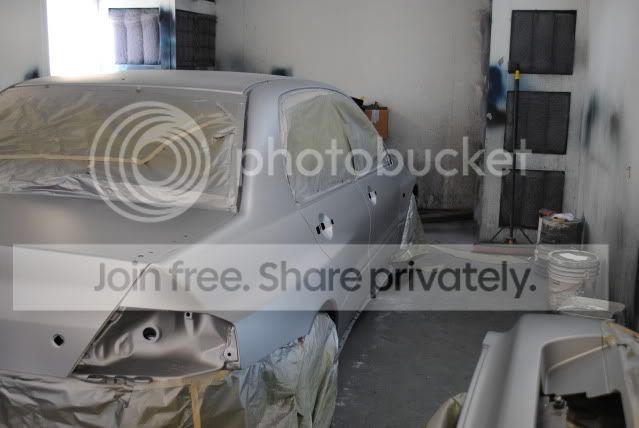
today doors where removed along with the hood and masked, to paint all the jams and small crevices. tomorrow the whole car chea
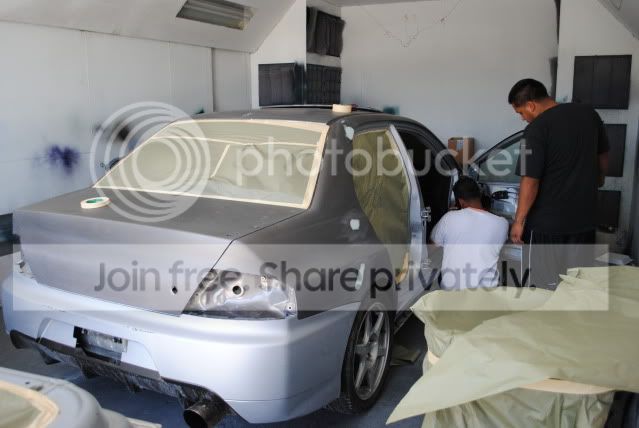
UPDATE 7/20/11 3 PM
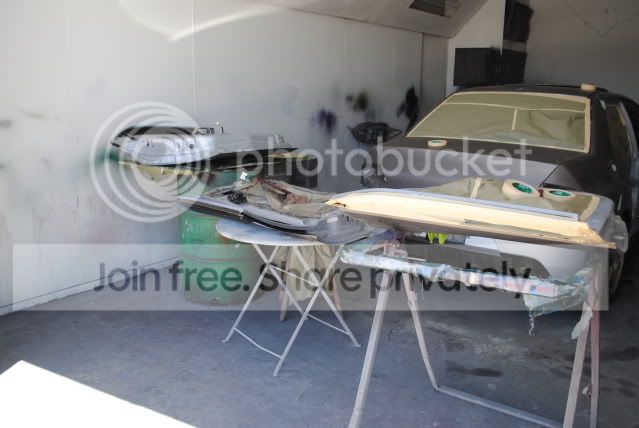
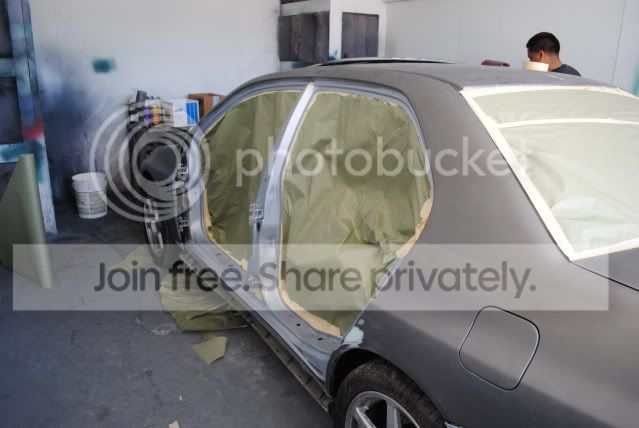
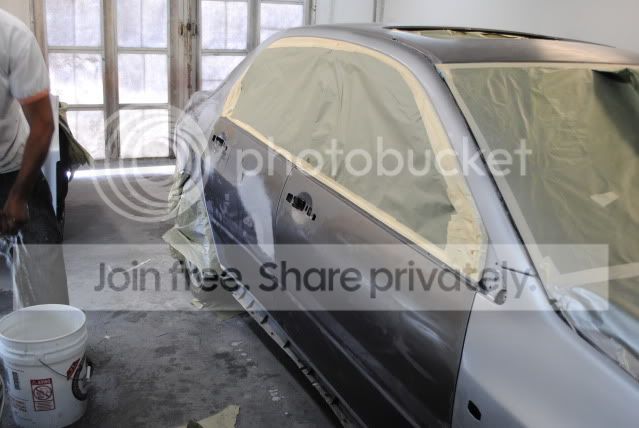
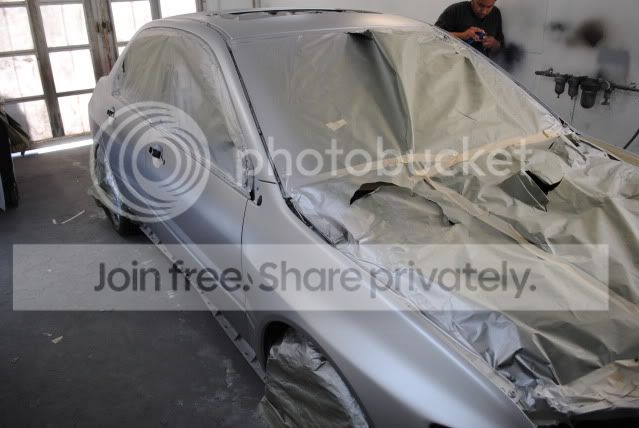
door jams and seems are painted and cleared doors are back on and the exterior is going to be painted later on this afternoon
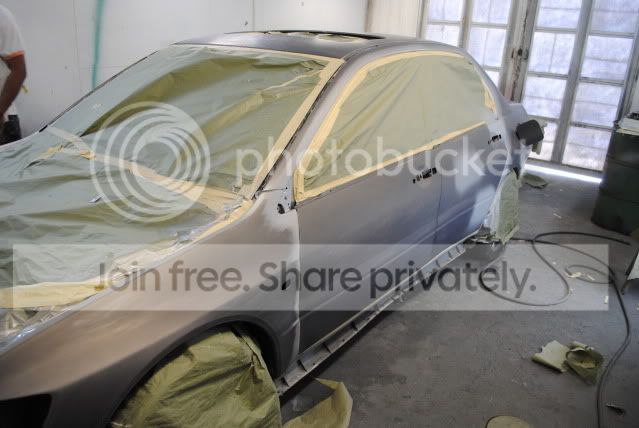
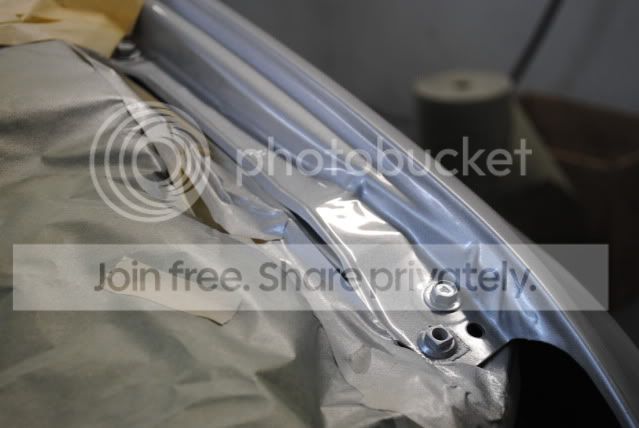

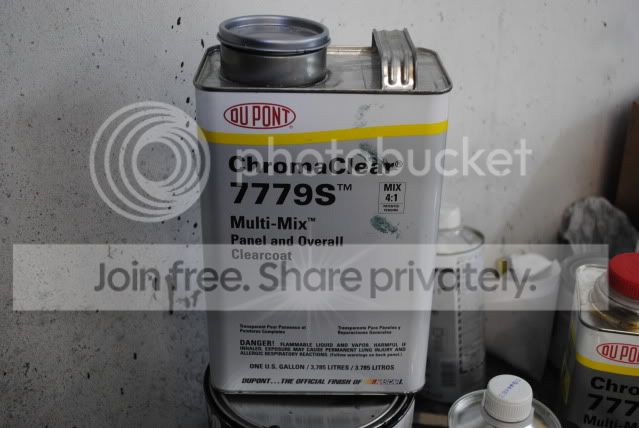
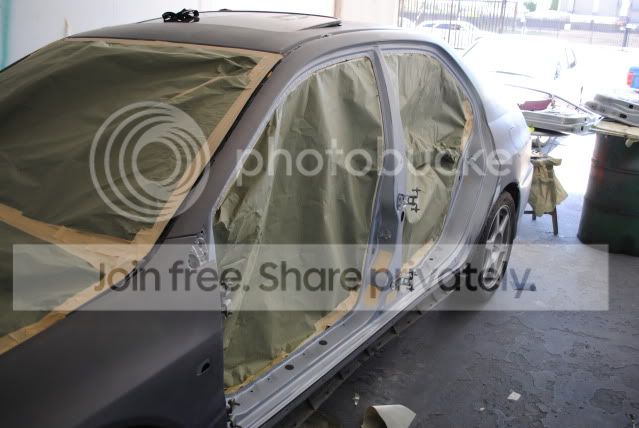
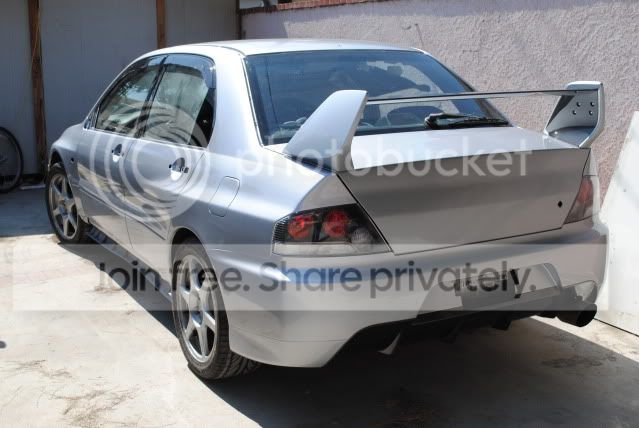
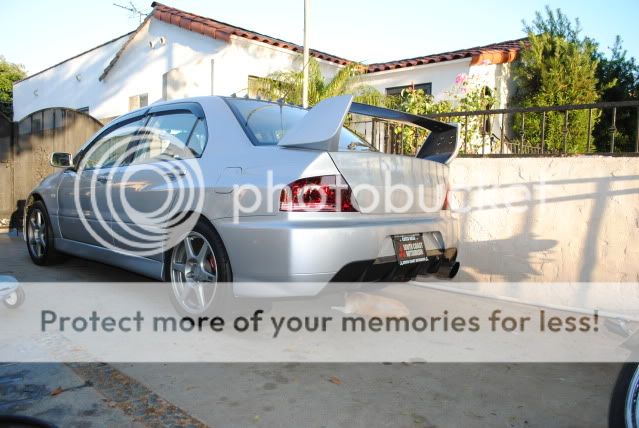
update 7/20/11 5:30ish pm 1st coat of apex silver
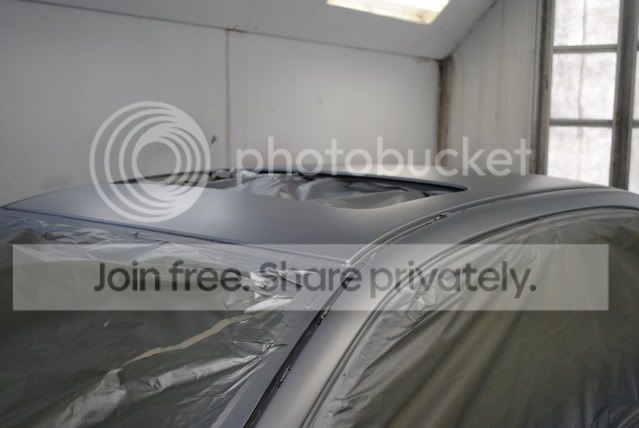
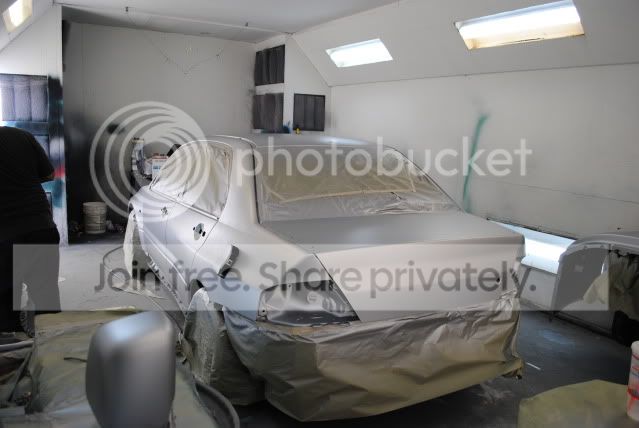
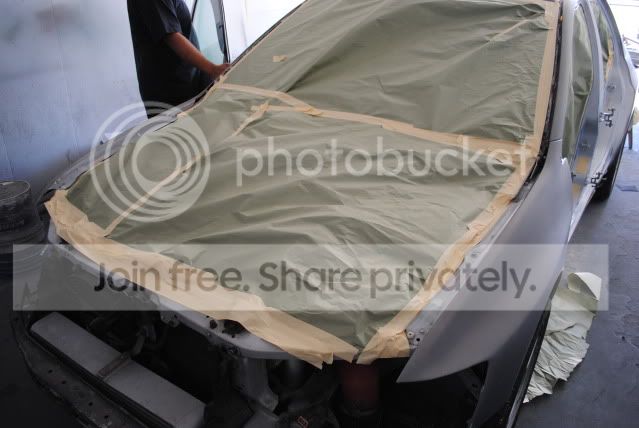
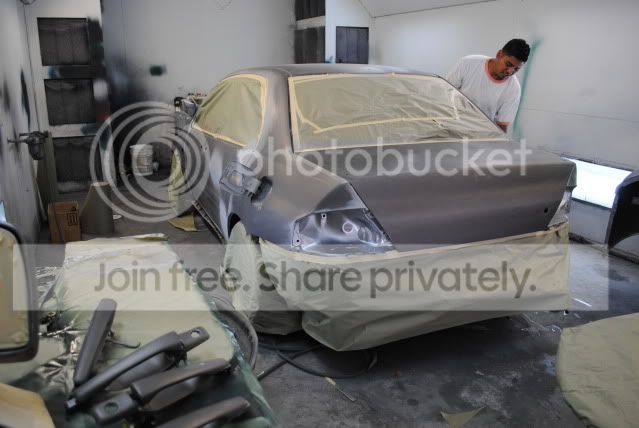
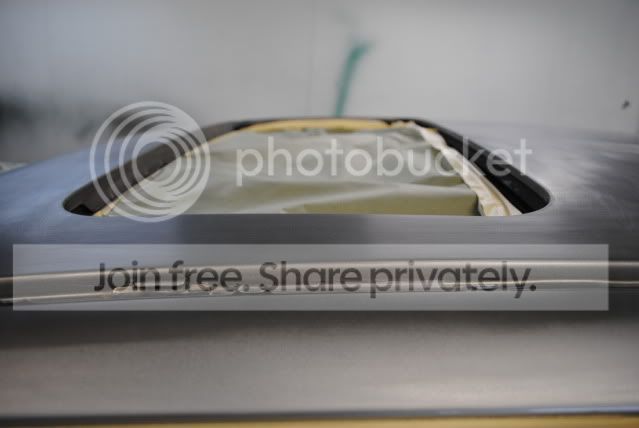
update 7/21/11 3:30 pm
finished paint last night around midnight and left in the booth to dry over night, and just painted the skirts and wing will post pics of wing and skirts tomorrow. now for the waiting game can't cut and buff paint until five days go by, so the clear and paint could sit and dry. P.S i did not dare to shoot a drop of paint/ clear i wouldn't have been able to live with my self if i ruined it after all this hard work, so thank you Paul and david.


update 7/22/11
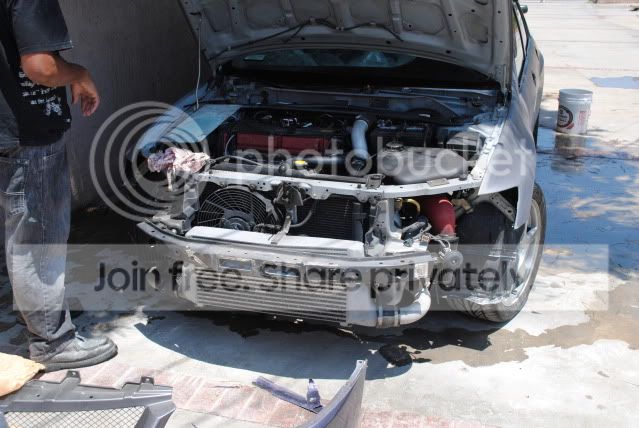
threw the bumpers on and taillights and drove it to my friends house to let it sit till Monday so the paint and clear sit .

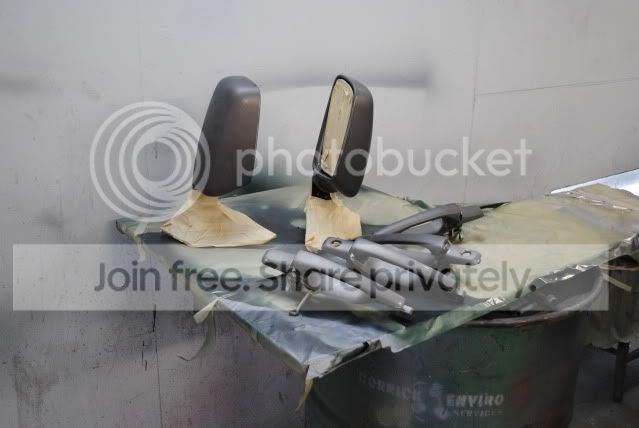
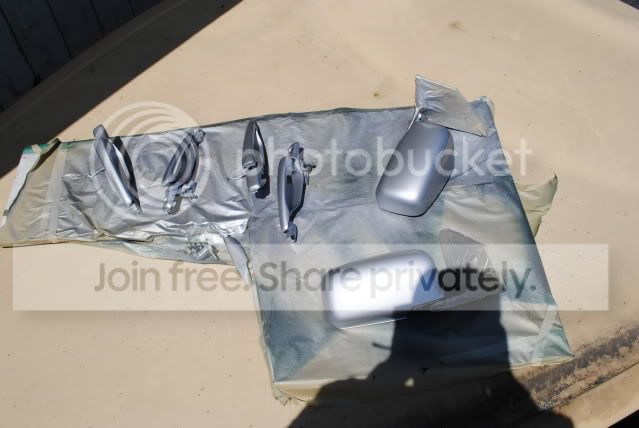
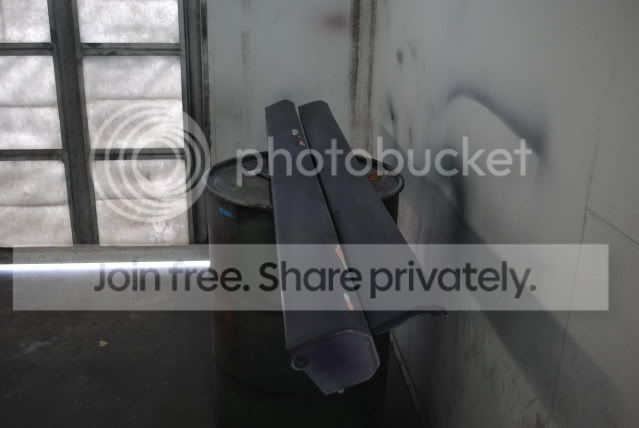
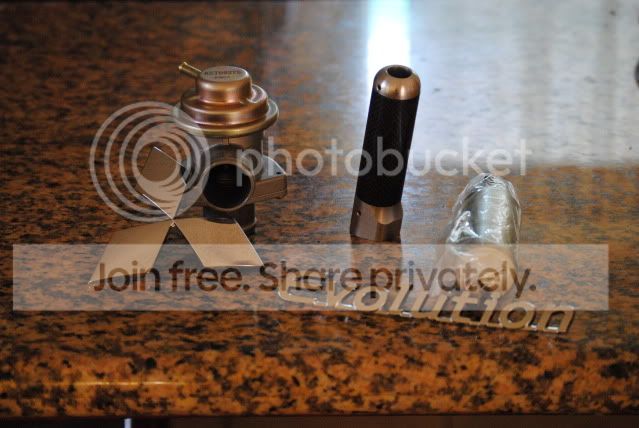
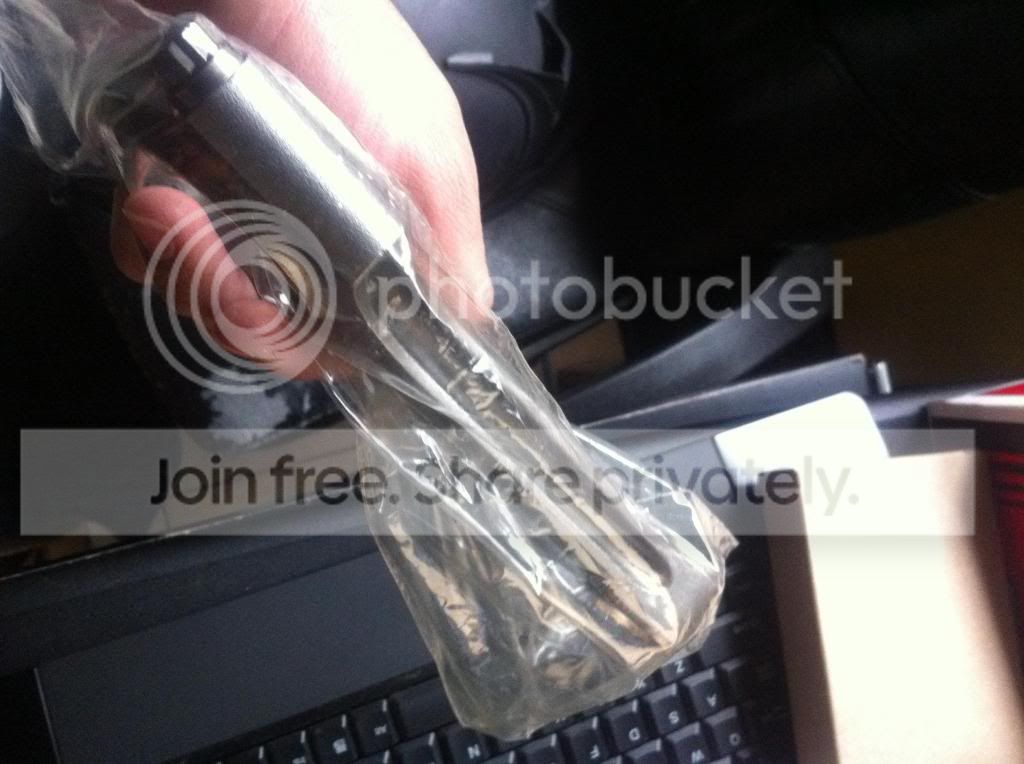
8/2/11 just a little update some of the many goodies i got
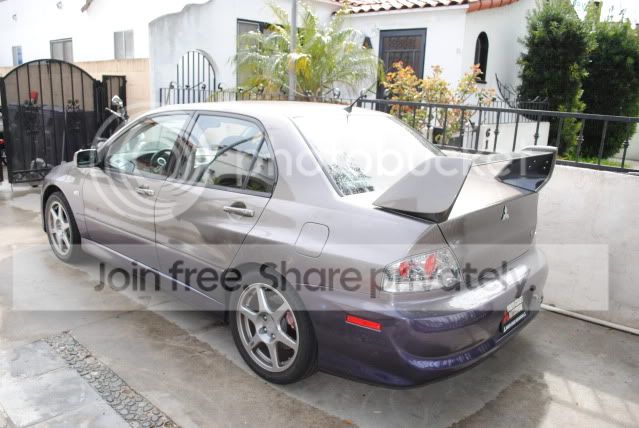
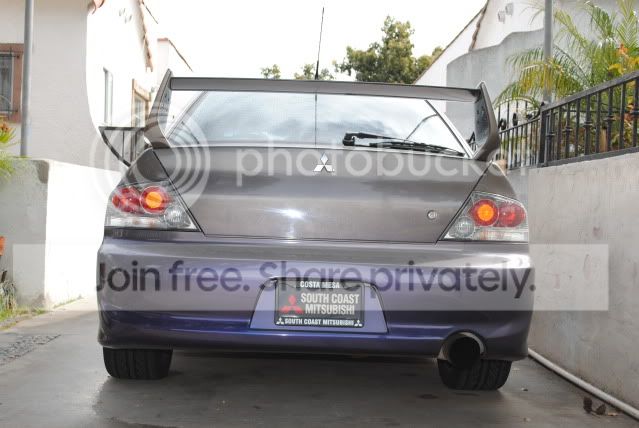
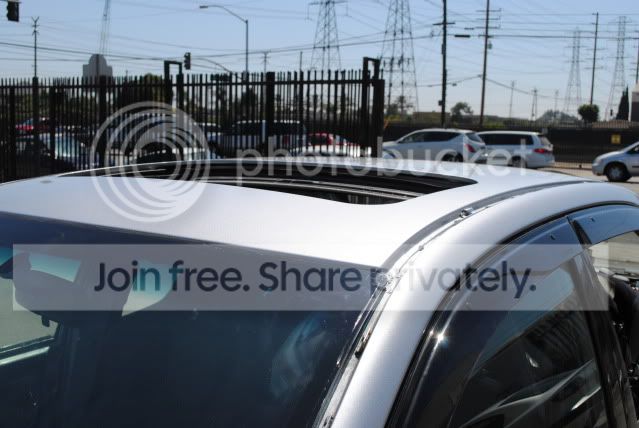
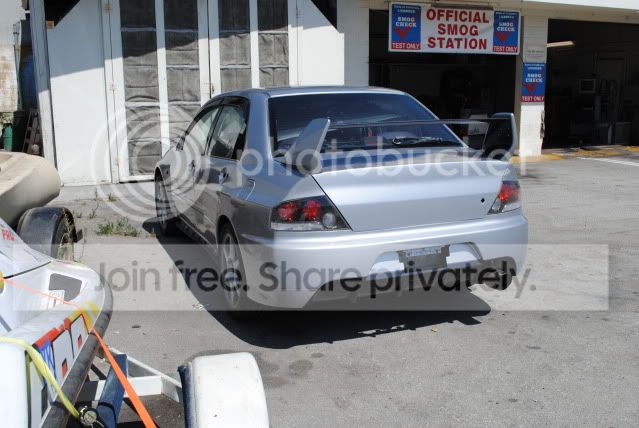
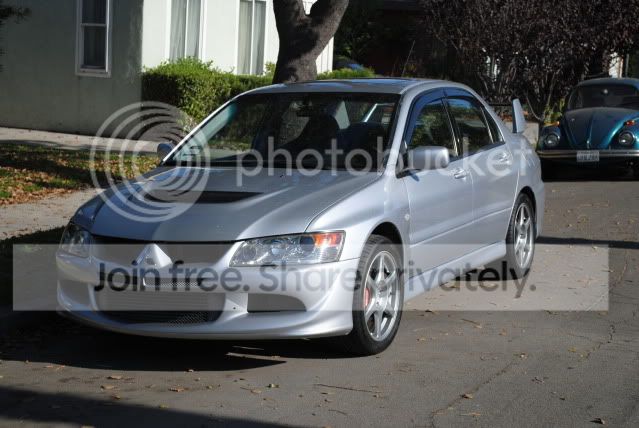
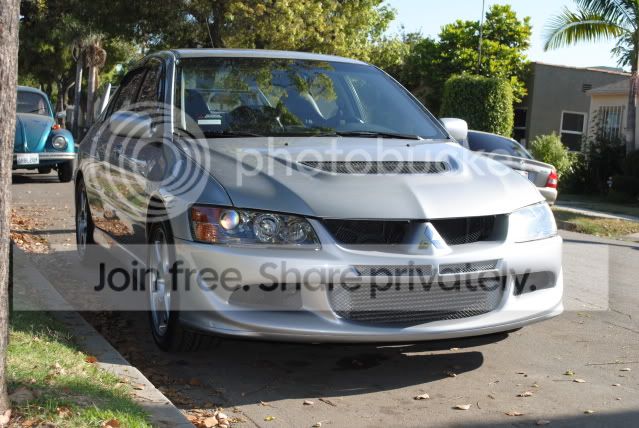
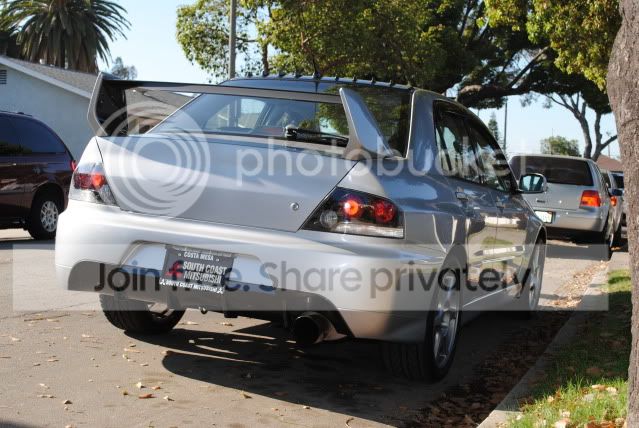
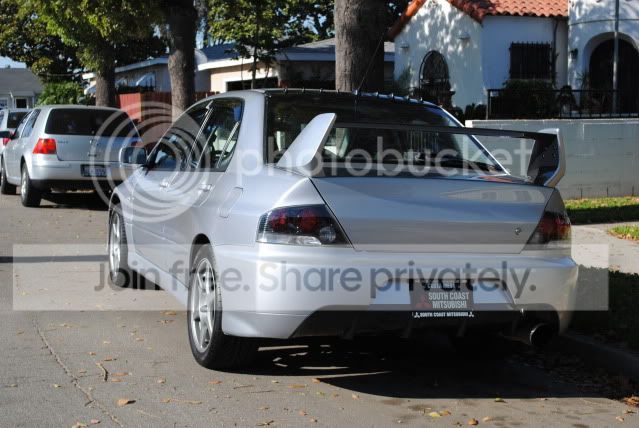
8/8/11 car was done on friday and just snapped some pics of it real quick, will do a small shoot tomorrow and post pics
8/15/11 update
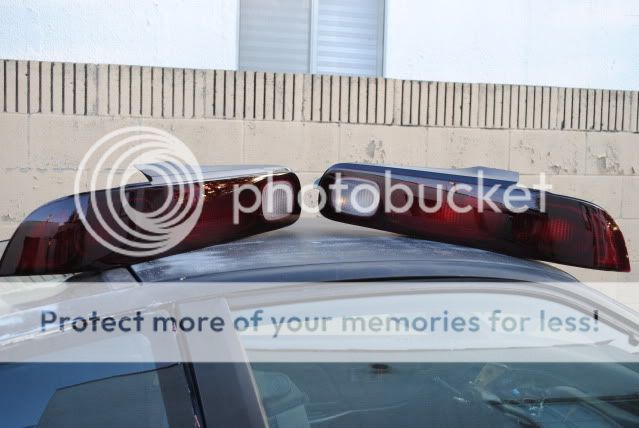
alright guys so i missed my VII replica tails so i had to replicate them again and here are the steps and the turn out.
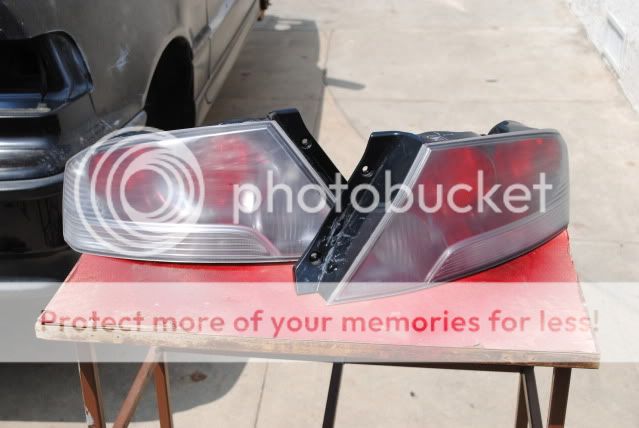
Intro and materials
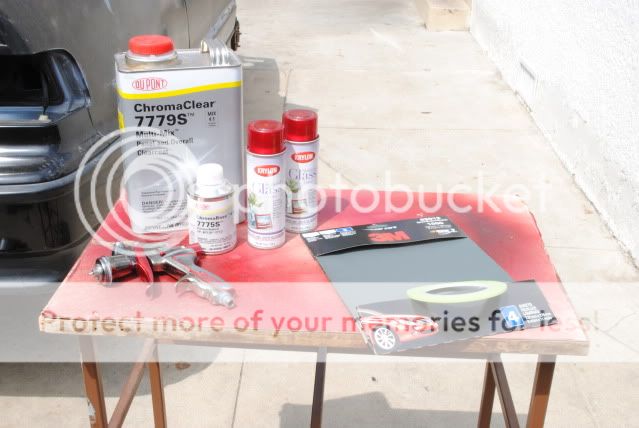
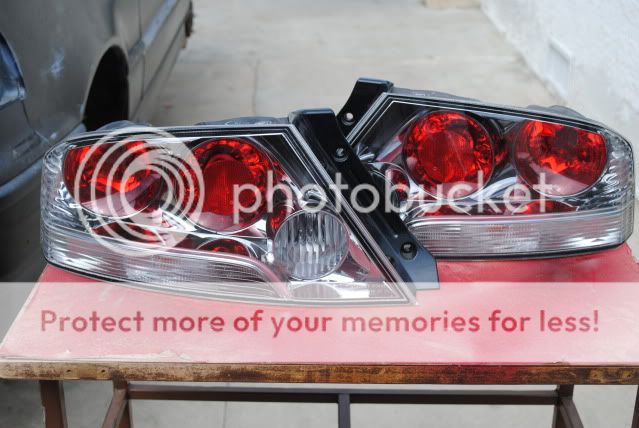
before pic
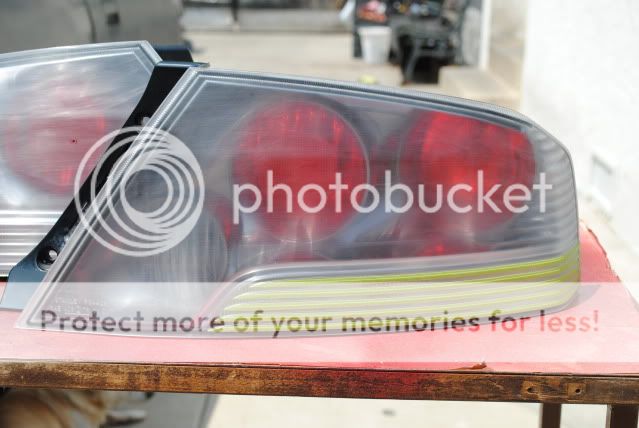
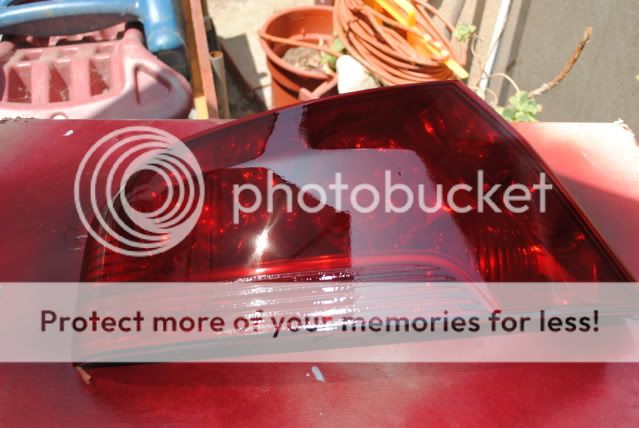
step 1: wet sand with a 1000 grit sand paper
how its suppose to look after wet sand
both tails wet sanded
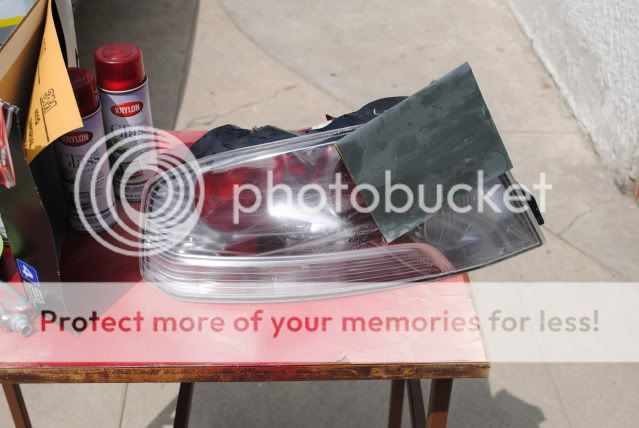
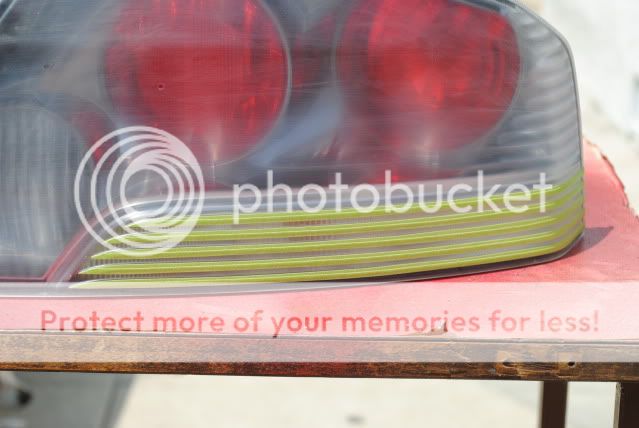
Step2: after wet sanding you need to tape the lights in the bottom portion to replicate the VII tails
step 3: with rubbing alcohol rub them down to remove any grease and dust
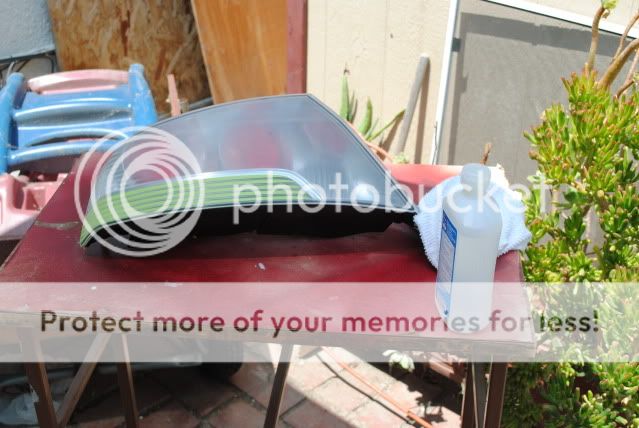
step 4: shoot the paint in a non windy shaded area this paint dries quick and will crate a hazy look (trust me i have to re do my first set 2 x not fun)
step 5: sorry guys no pic but details: after letting the tails sit for about 15 min remove the tape and shoot clear 3 coats first coat is a mist to become a adhesive, 5 min later second coat wet with out running the clear so it gets the shine, 3rd coast the last mist so it protects the shine>.
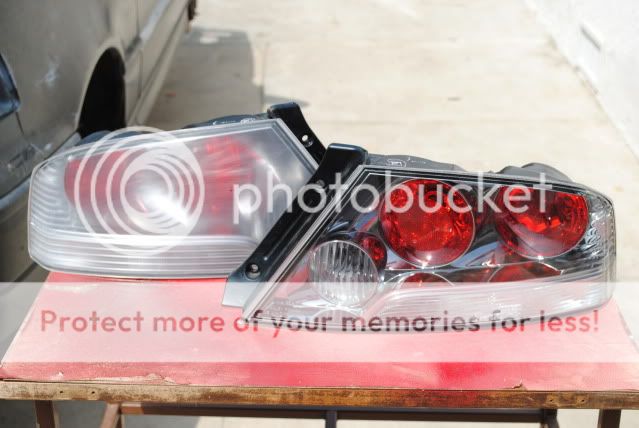
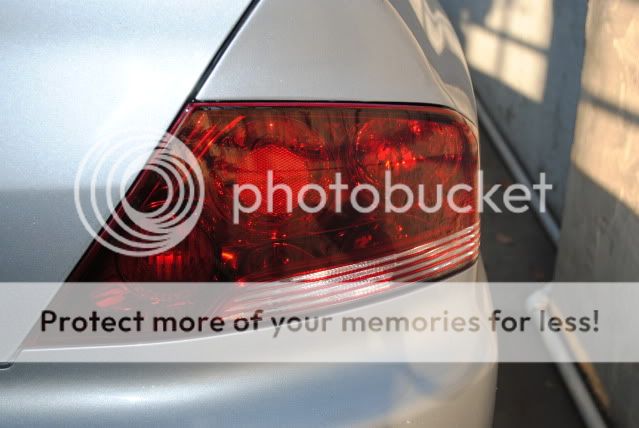
step 5: installing the finished product

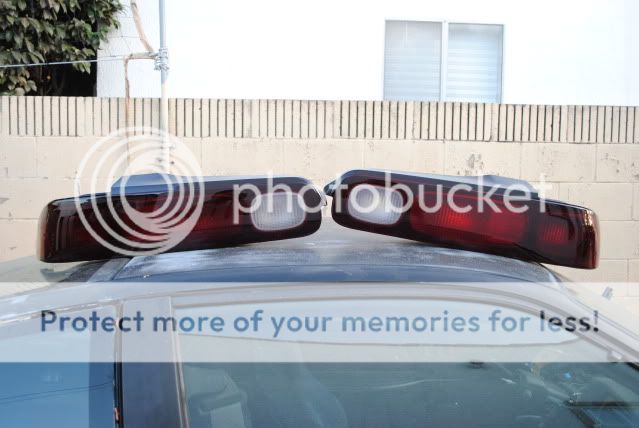
extra pics for you honda guys :P 94 integra lights converted to 99-01 all red tails
before

after
update : 2/9/2013
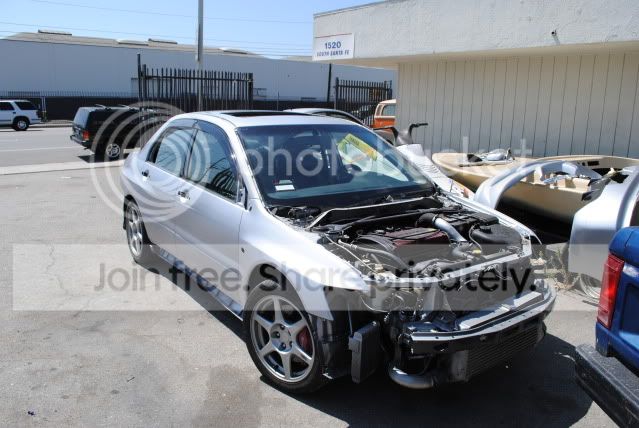
whats up guys Its been a year and 3 months since the evo took a poop and sitting in my back yard. since then i have been buying bits an pieces to get it back together and finally after a year and 3 months i could start the build. :twisted:
leaving the lbcc pcc campus ( for you lb guys ) the car bogged and popped, and wouldn't turn over any more so this is the damage
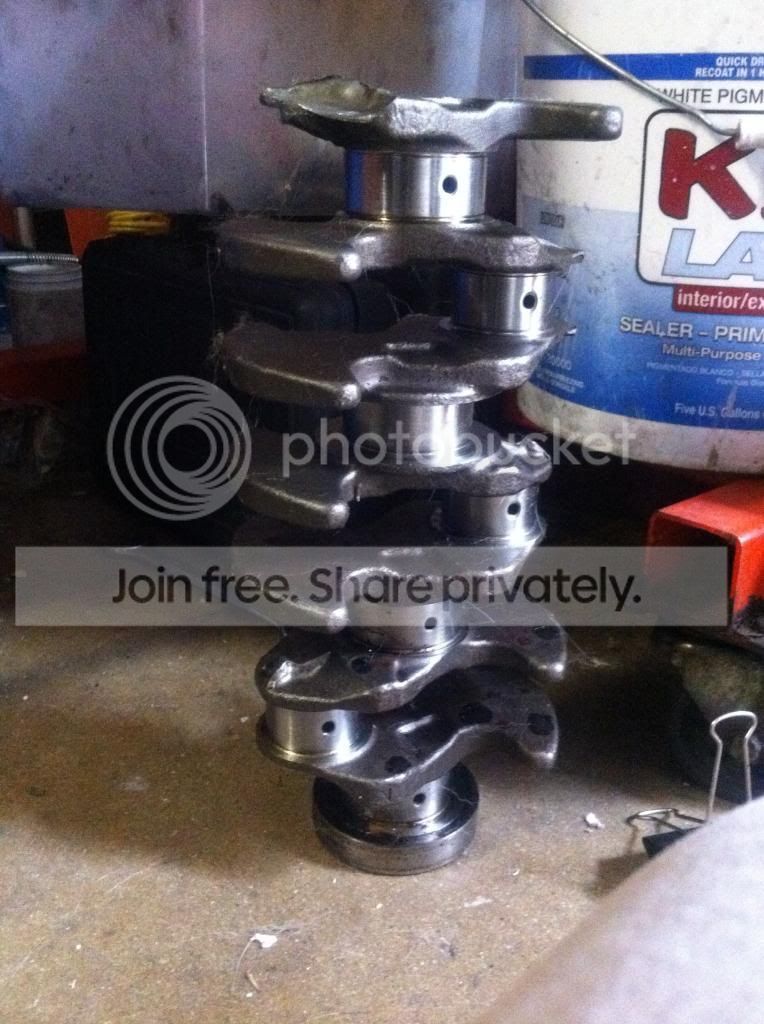
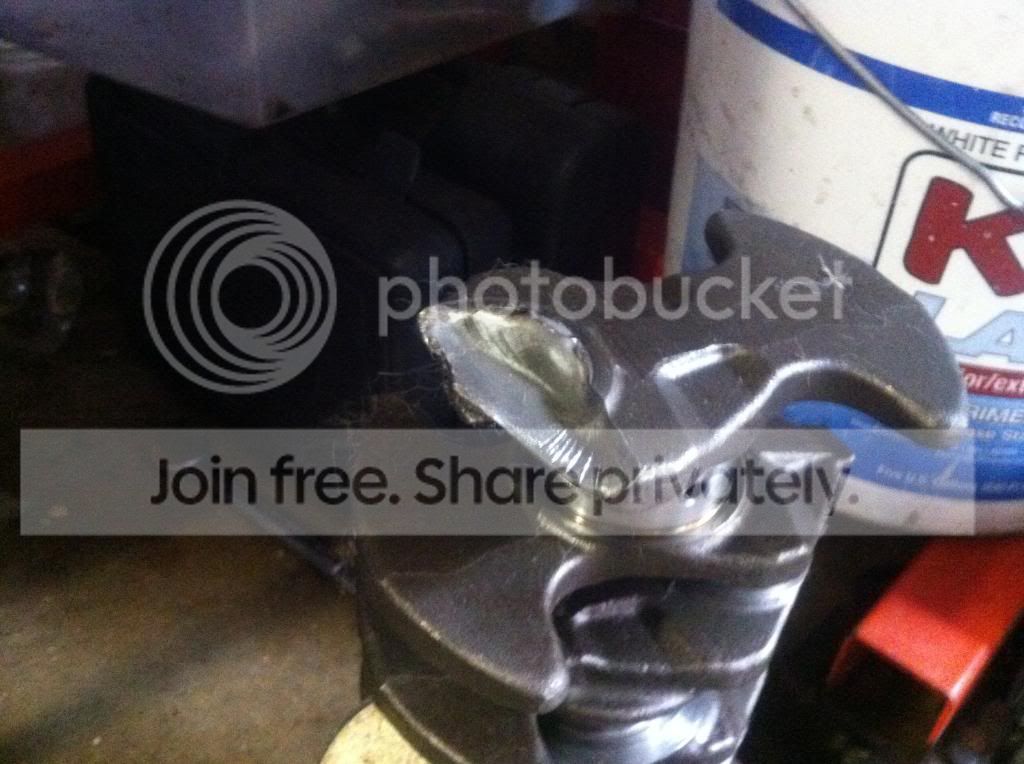
all valves bent broken crank shaft and clutch has a big burn mark on it from were the flywheel warped and hit the clutch.
most of the pics where on my desktop that crashed :'( this is all i scavenged up.
but on to the goodies new parts for the evo
10/12 picked up a set of painted bbs evo 9 wheels with minor curb damage for dirt cheap
pic to come
update: 2/9/13
the motor parts i have been collecting since day one that it broke down but ill just post it all at once
descriptions
first off the head
crower titanium valve springs
super tech valves and valve stems
portflow clean up and seat job
hks 264 and 272 cams
rc 1000 cc injectors
magnus heat barrier intake manifold gasket
the block
RS machine .020 over block my block
wiseco 1400 hd pistons .020
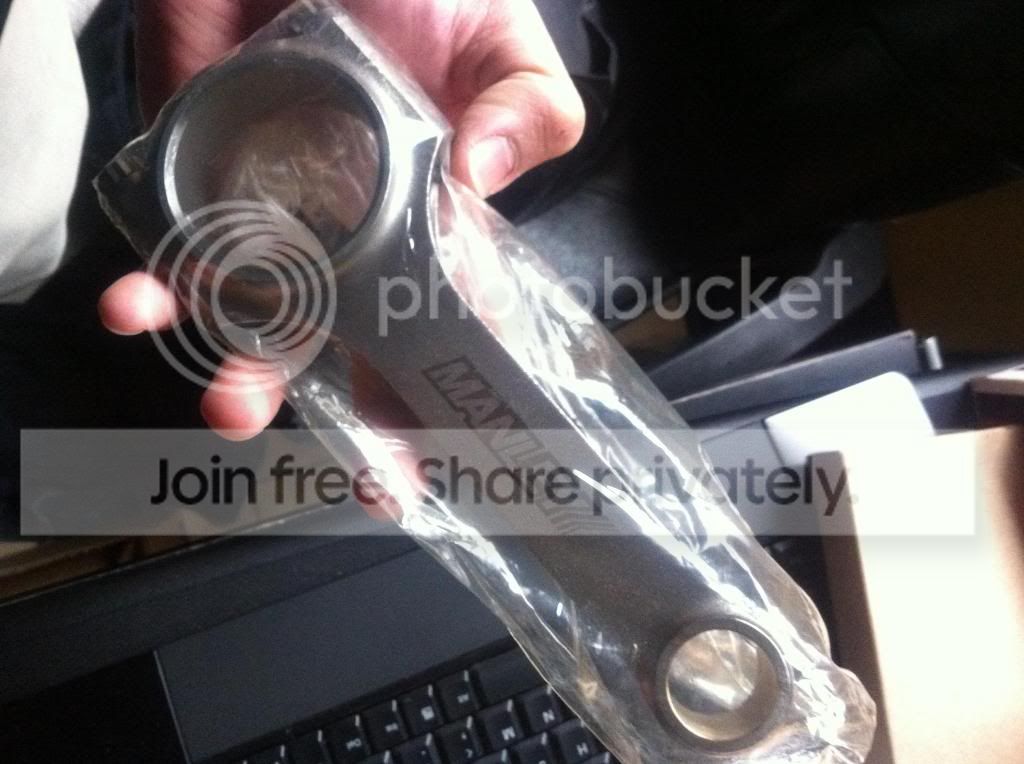
manley h beam rods
arp head studs
arp main studs
stock crank
acl race bearing standard
acl main bearings
balance shaft eliminator kit
cstillo's balanced and polished oem evo crank
drivetrains
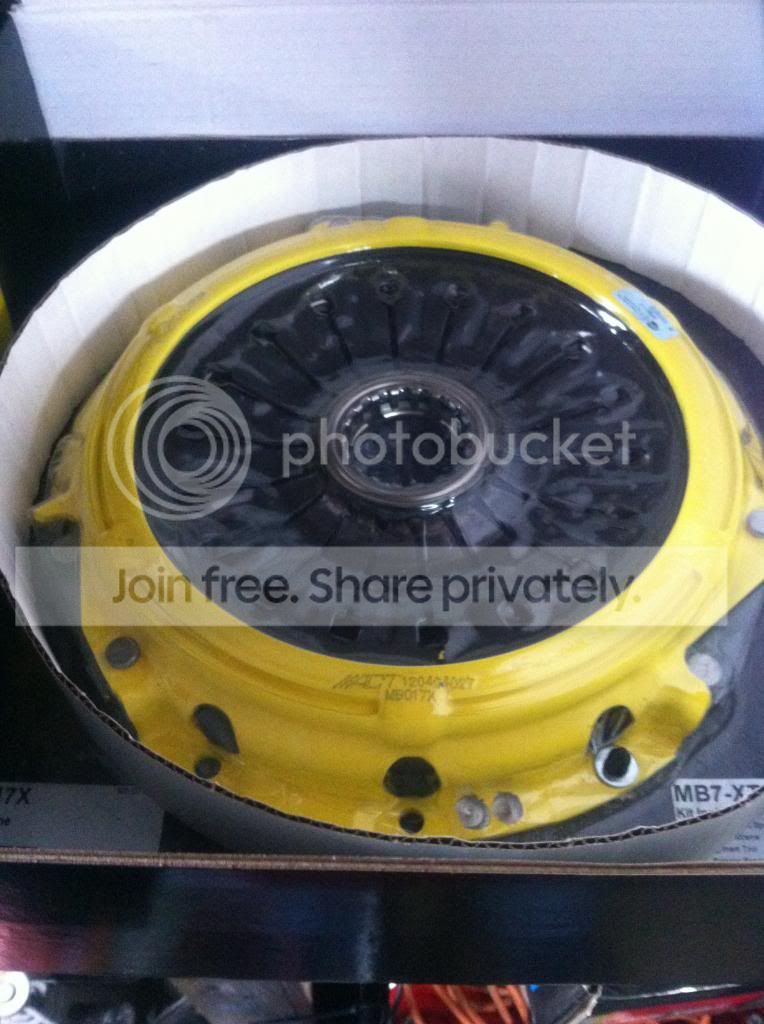
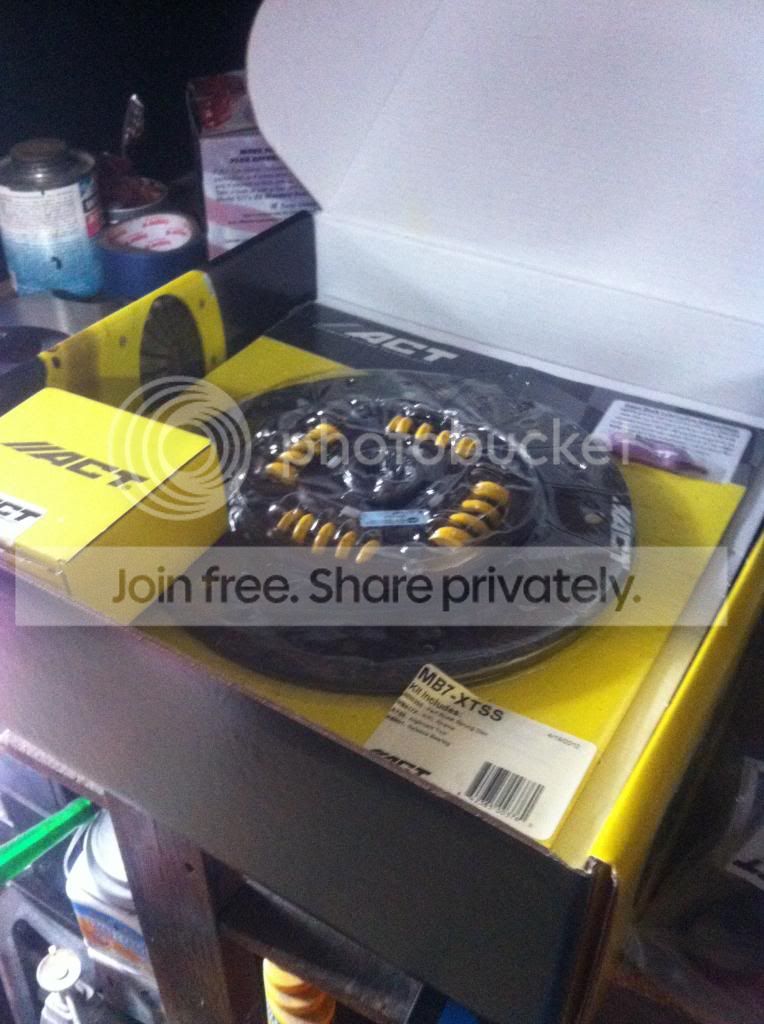
act clutch
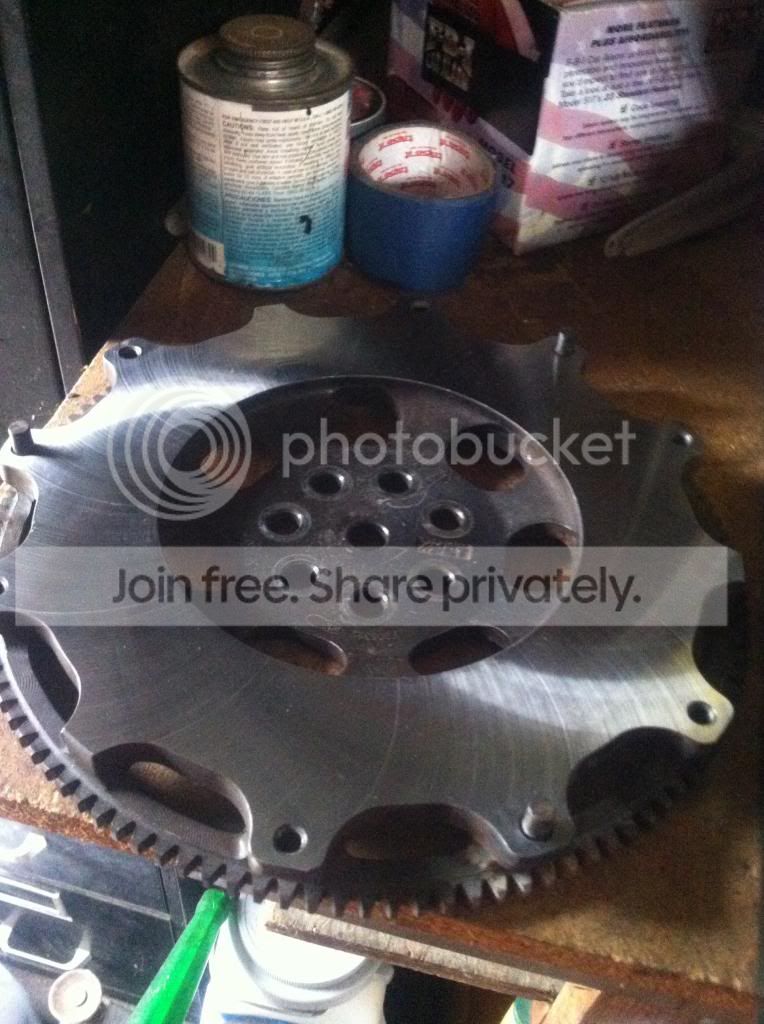
act lighten fly wheel
insane shaft prototype axles
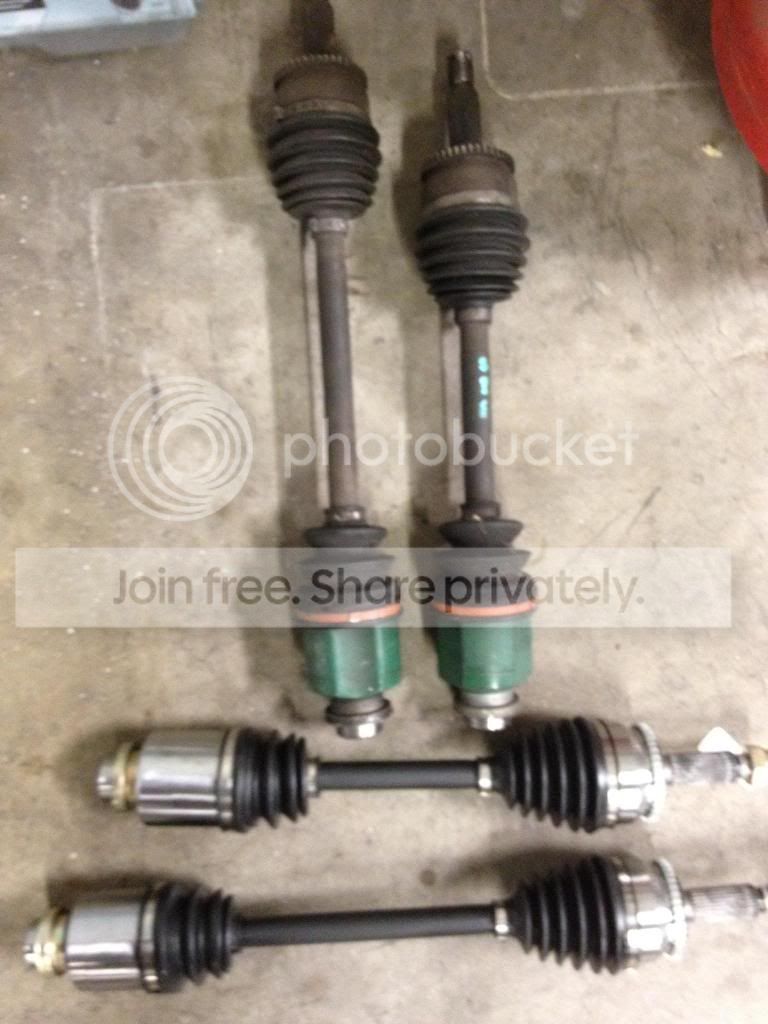
top axles are oem evo bottom axles are insane shaft prototype axles
the rest ill take pics tomorrow.
oh and also another diy i want to do with this to rep evo 9 head lights

to this work in progress
update 7/19/11
today doors where removed along with the hood and masked, to paint all the jams and small crevices. tomorrow the whole car chea
UPDATE 7/20/11 3 PM
door jams and seems are painted and cleared doors are back on and the exterior is going to be painted later on this afternoon
update 7/20/11 5:30ish pm 1st coat of apex silver
update 7/21/11 3:30 pm
finished paint last night around midnight and left in the booth to dry over night, and just painted the skirts and wing will post pics of wing and skirts tomorrow. now for the waiting game can't cut and buff paint until five days go by, so the clear and paint could sit and dry. P.S i did not dare to shoot a drop of paint/ clear i wouldn't have been able to live with my self if i ruined it after all this hard work, so thank you Paul and david.
update 7/22/11
threw the bumpers on and taillights and drove it to my friends house to let it sit till Monday so the paint and clear sit .
8/2/11 just a little update some of the many goodies i got
8/8/11 car was done on friday and just snapped some pics of it real quick, will do a small shoot tomorrow and post pics
8/15/11 update
alright guys so i missed my VII replica tails so i had to replicate them again and here are the steps and the turn out.
Intro and materials
before pic
step 1: wet sand with a 1000 grit sand paper
how its suppose to look after wet sand
both tails wet sanded
Step2: after wet sanding you need to tape the lights in the bottom portion to replicate the VII tails
step 3: with rubbing alcohol rub them down to remove any grease and dust
step 4: shoot the paint in a non windy shaded area this paint dries quick and will crate a hazy look (trust me i have to re do my first set 2 x not fun)
step 5: sorry guys no pic but details: after letting the tails sit for about 15 min remove the tape and shoot clear 3 coats first coat is a mist to become a adhesive, 5 min later second coat wet with out running the clear so it gets the shine, 3rd coast the last mist so it protects the shine>.
step 5: installing the finished product
extra pics for you honda guys :P 94 integra lights converted to 99-01 all red tails
before
after
update : 2/9/2013
whats up guys Its been a year and 3 months since the evo took a poop and sitting in my back yard. since then i have been buying bits an pieces to get it back together and finally after a year and 3 months i could start the build. :twisted:
leaving the lbcc pcc campus ( for you lb guys ) the car bogged and popped, and wouldn't turn over any more so this is the damage
all valves bent broken crank shaft and clutch has a big burn mark on it from were the flywheel warped and hit the clutch.
most of the pics where on my desktop that crashed :'( this is all i scavenged up.
but on to the goodies new parts for the evo
10/12 picked up a set of painted bbs evo 9 wheels with minor curb damage for dirt cheap
pic to come
update: 2/9/13
the motor parts i have been collecting since day one that it broke down but ill just post it all at once
descriptions
first off the head
crower titanium valve springs
super tech valves and valve stems
portflow clean up and seat job
hks 264 and 272 cams
rc 1000 cc injectors
magnus heat barrier intake manifold gasket
the block
RS machine .020 over block my block
wiseco 1400 hd pistons .020
manley h beam rods
arp head studs
arp main studs
stock crank
acl race bearing standard
acl main bearings
balance shaft eliminator kit
cstillo's balanced and polished oem evo crank
drivetrains
act clutch
act lighten fly wheel
insane shaft prototype axles
top axles are oem evo bottom axles are insane shaft prototype axles
the rest ill take pics tomorrow.
oh and also another diy i want to do with this to rep evo 9 head lights
Last edited by got_evo8; Feb 9, 2013 at 08:50 PM.

Sweet progress, what pinstrip did you use to perfectly cover the bottom lines on the evo 8 tails this is by far the best I have seen yet, I thought Darkn3ss was good but yours is damn near perfect, nice work man!


Trending Topics

yeah i used the 3m same size only thing you have to over lap it and with a razor blade carefully cut off the excess.
thanks
second comment
I didn't choose the 6 puck for drive ability and comfort since i want to daily my car .
.
thanks
second comment
I didn't choose the 6 puck for drive ability and comfort since i want to daily my car
.
ok guys so i did the head light diy evo 9 rep using the dupli color item
I AM NOT RESPONSIBLE FOR ANY DAMAGES THAT MAY OCCUR TO YOU ITEMS. THIS IS AT YOUR OWN RISK
tools needed :
long and short flat head screw driver
hobby knife
heat gun, hair dryer, or conventional oven
items to accomplish job
dupli color shadow paint
painters 3m tape
rubbing alcohol
cotton cloth
difficulty rating a 5/10 time duration about 1hr for both


step one
remove head lights from vehicle, once off get a nice clean are to work on. once accomplished heat up the edge of the head light where the lens and head light housing meet. Heat up evenly all around for about 3 min depending on the weather outside( today in cali at 01800 was about 50 degrees, not a great idea to work with paint but i have my tricks . ok after heating the area grab the flat head and bend the locking tabs up so only thing holding the lens on is the glue. after tabs are bent grab the thin flat head and place it in the seem between the head light and housing, after doing so pry it should give a little fight but if not budging heat it up a little longer. same steps go for the bottom of the head light. Now be careful if you place heat in one section for too long you would notice it gets shiny once this happen the plastic becomes to soft and upon hardening it becomes brittle and just snaps off.

second step
once you pry your lens off you should have 3 pieces lens, housing, and insert. when detaching the lens be careful with the glue on it, if it gets on your chrome insert its extremely difficult to remove, and or might peel the chrome off


step 3
putt away in a safe location your head light and lens you wont need them at the moment. Mask off the amber corner turn signal using 3m painters tape, I tried to remove it but ended up breaking both the tabs luckily no other damage, once the tape if placed make sure there is no excess over the chrome. i usually run a little over the chrome and run my finger nail on it to tuck it in,


step 4
once the insert is all masked and ready prep it for paint, clean it with a wax or grease remover or a simple house hold item rubbing alcohol and a cotton cloth = old shirt sleeve . just damp the cloth do not soak it if soak it will leave marks on the chrome and will show on the paint. make sure you clean the whole piece and every crevice, very important. give it about 5-10 min to completely dry

step 5
once clean grab your heat gun and warm the piece up so that way the paint will adhere better and wont have fish eyes all over the place. hold the heat gun at low heat about 5-10 inch away from the piece, remember just to get it warm not to warp it


step 6
grab the caned paint and shake it abruptly for about 5 min to get all the paint mixed up and to get it warmed up. begin laying down even coats of paint from left to right in one single shot until reached the bottom over lapping each spray pass. you might have to do about 5-6 coats to reach a dark chrome black color. between each coat of paint give it 5-10 min to dry if not the paint will begin to dry and the new paint will look hazy. once finishes with all coats grab the heat gun and treat warm up the piece for about 5 min, again at low heat 5-10 inch away form piece that way the paint evens out and gives a great shine.
1st and 2nd coat

3rd and 4th coat

5th coat i did not take pic of 6 but at six i accomplished my desired color

step 7
final product once dry grab the inset and place it back in to place the in re-peat the heating process on the lense and the housing to loosen the glue and press the lens. in my case i have not installed the lens Im going to wet sand and shoot a ppg automotive clear to give it that new look. Im tired of buffing every 4-5 months


I love how my head lights look now and for 18.00 bucks cant beat it
I AM NOT RESPONSIBLE FOR ANY DAMAGES THAT MAY OCCUR TO YOU ITEMS. THIS IS AT YOUR OWN RISK
tools needed :
long and short flat head screw driver
hobby knife
heat gun, hair dryer, or conventional oven
items to accomplish job
dupli color shadow paint
painters 3m tape
rubbing alcohol
cotton cloth
difficulty rating a 5/10 time duration about 1hr for both
step one
remove head lights from vehicle, once off get a nice clean are to work on. once accomplished heat up the edge of the head light where the lens and head light housing meet. Heat up evenly all around for about 3 min depending on the weather outside( today in cali at 01800 was about 50 degrees, not a great idea to work with paint but i have my tricks
. ok after heating the area grab the flat head and bend the locking tabs up so only thing holding the lens on is the glue. after tabs are bent grab the thin flat head and place it in the seem between the head light and housing, after doing so pry it should give a little fight but if not budging heat it up a little longer. same steps go for the bottom of the head light. Now be careful if you place heat in one section for too long you would notice it gets shiny once this happen the plastic becomes to soft and upon hardening it becomes brittle and just snaps off.second step
once you pry your lens off you should have 3 pieces lens, housing, and insert. when detaching the lens be careful with the glue on it, if it gets on your chrome insert its extremely difficult to remove, and or might peel the chrome off
step 3
putt away in a safe location your head light and lens you wont need them at the moment. Mask off the amber corner turn signal using 3m painters tape, I tried to remove it but ended up breaking both the tabs
luckily no other damage, once the tape if placed make sure there is no excess over the chrome. i usually run a little over the chrome and run my finger nail on it to tuck it in, step 4
once the insert is all masked and ready prep it for paint, clean it with a wax or grease remover or a simple house hold item rubbing alcohol and a cotton cloth = old shirt sleeve
. just damp the cloth do not soak it if soak it will leave marks on the chrome and will show on the paint. make sure you clean the whole piece and every crevice, very important. give it about 5-10 min to completely dry step 5
once clean grab your heat gun and warm the piece up so that way the paint will adhere better and wont have fish eyes all over the place. hold the heat gun at low heat about 5-10 inch away from the piece, remember just to get it warm not to warp it
step 6
grab the caned paint and shake it abruptly for about 5 min to get all the paint mixed up and to get it warmed up. begin laying down even coats of paint from left to right in one single shot until reached the bottom over lapping each spray pass. you might have to do about 5-6 coats to reach a dark chrome black color. between each coat of paint give it 5-10 min to dry if not the paint will begin to dry and the new paint will look hazy. once finishes with all coats grab the heat gun and treat warm up the piece for about 5 min, again at low heat 5-10 inch away form piece that way the paint evens out and gives a great shine.
1st and 2nd coat
3rd and 4th coat
5th coat i did not take pic of 6 but at six i accomplished my desired color
step 7
final product once dry grab the inset and place it back in to place the in re-peat the heating process on the lense and the housing to loosen the glue and press the lens. in my case i have not installed the lens Im going to wet sand and shoot a ppg automotive clear to give it that new look. Im tired of buffing every 4-5 months
I love how my head lights look now and for 18.00 bucks cant beat it

