


Evo X Mishimoto Radiator Install


Thread Starter
Account Disabled
iTrader: (1)
Joined: Feb 2005
Posts: 131
Likes: 0
From: Hatfield, PA
Evo X Mishimoto Radiator Install
EVO X Mishimoto Radiator Install
-Let car cool off!! Coolant/Radiator/Hoses are HOT!
-Drain engine coolant once everything is cool.
-Remove Plastic Intake Air Duct
: 2 plastic Screws
-Remove Plastic Cowl above radiator
: 3 plastic Screws
-Remove Upper (hot side) Intercooler Pipe
: 2 clamps, 2 12mm bolts
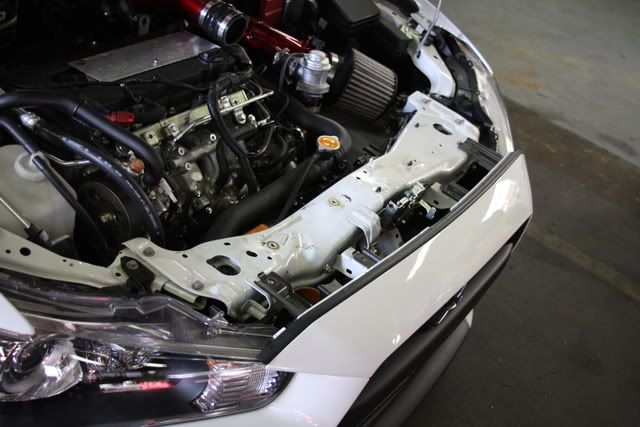
(In the above photo you can see the X with the upper plastic trim pieces and upper intercooler pipe removed for access)
-Remove 4 10mm Bolts into bumper tabs
-Remove 3 10mm Hood Latch Bolts and pop Cable out (Unplug harness directly behind core support (2 wires))
-Remove 10mm Bolts holding Radiator support
: 2 on each side up top, 3 under hood latch
-Unplug Horn Wire
-Remove 1 10mm Bolt holding headlight to Rad support on each side.
-Pop the 3 clips out for the Latch harness (behind support on drivers side).
-Pop the 3 clips out for the crash sensor harness (harness runs underneath rad support)
-Remove the 2 12mm Nuts for the crash sensors
: one next to the intercooler inlet, other far D/S of rad support
: then remove sensors
-Remove the Radiator support. Shouldn't need much more than a little wiggle and pull.

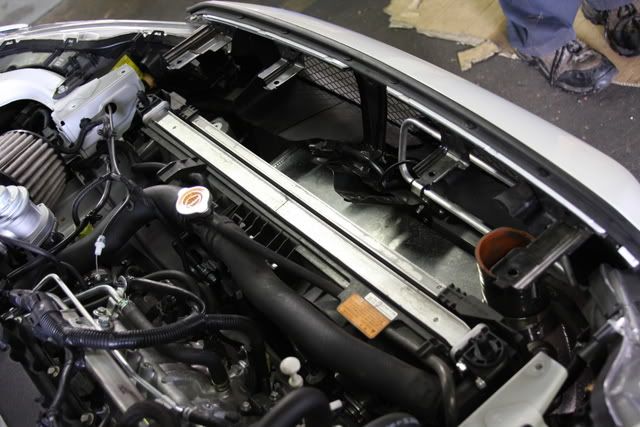
(In the above photos you can see the X with the upper radiator support removed.)
-Unplug and un-clip the radiator fan wiring harness.
-Remove the 12mm bolt holding the Coolant filler neck to the Fan Shroud.
-Next remove the A/C Condenser from the Radiator
: There are 2 tabs that need to be un-clipped halfway down the radiator on each side.
: Then there are 2 more tabs at the top of the radiator, on each side.
-Remove Clamp for Upper hose to Radiator then remove hose from radiator.
-Remove Clamp for Lower U-shaped hose to Coolant Pipe or Radiator.
: It was easier to leave the U-shaped hose attached to the rad, and disconnect it at the pipe end.
-Remove Radiator, lift up on passenger side of radiator first, then pull up to slide radiator w/fans out.
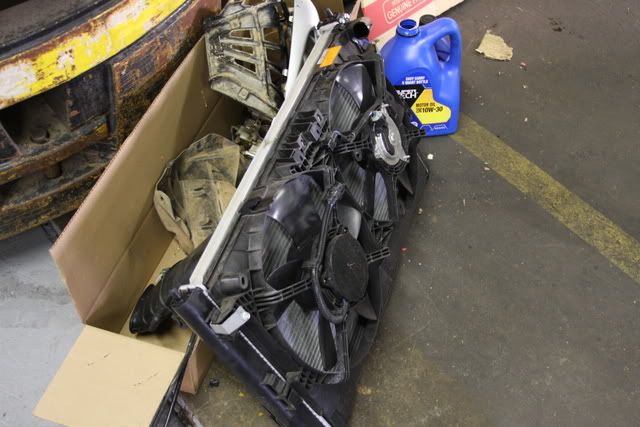
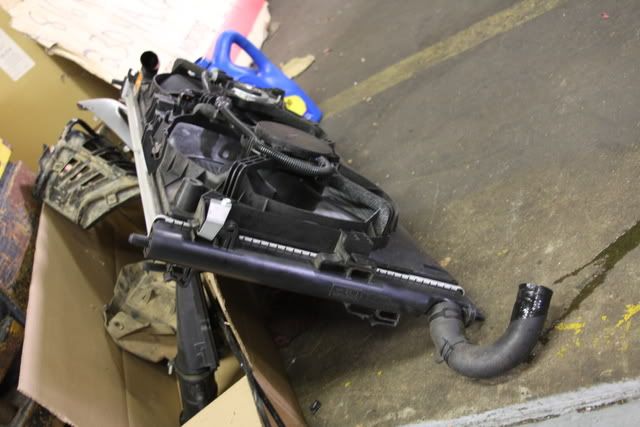
(Stock radiator removed with fans still attached)
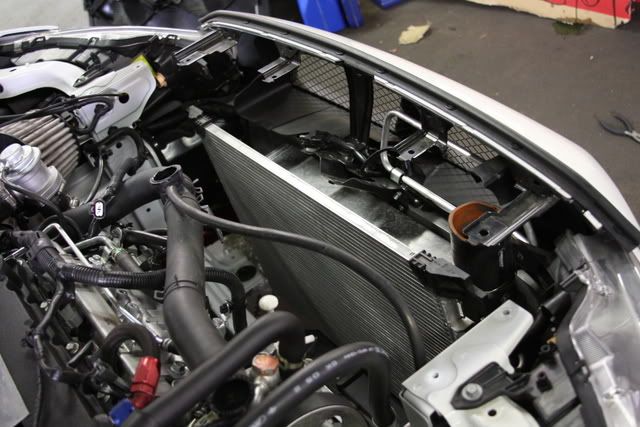
(Engine bay with the stock radiator removed)
-Stock Fan assembly has 4 clips and 2 10mm hold downs
: Remove the 10mm bolts and brackets
: Pop the 2 clips halfway down each side of the radiator, and the 1 on each top corner.
-If you left the U-shaped hose attached to the radiator, then swap it to the new one now.
-Swap fan assembly to the new radiator, and put the 10mm bolts back in with their brackets.
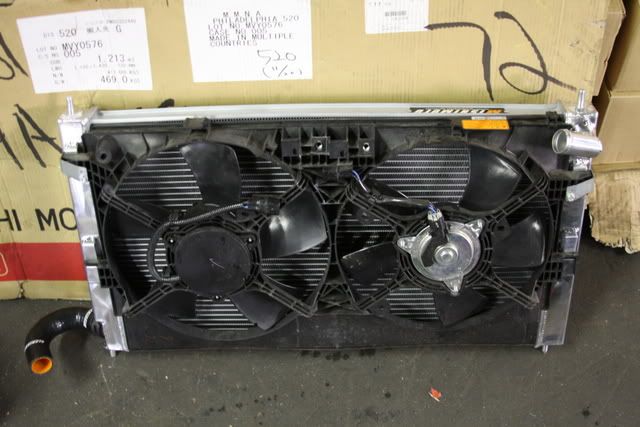
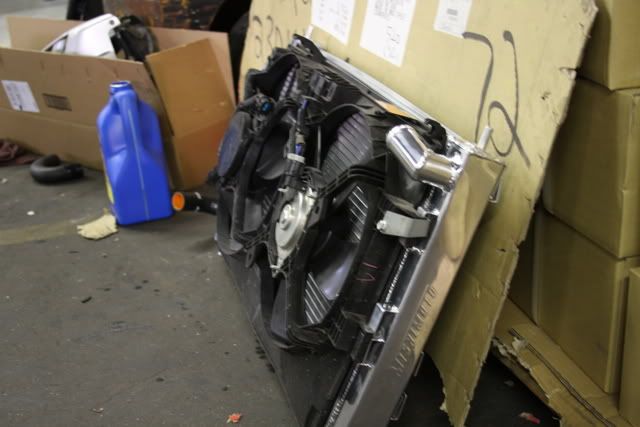
(The pictures above illustrate the installation of the stock fans to the Mishimoto aluminum radiator)
-Slide the radiator back down in, drivers side first to get the U-shaped hose to clear the side
-When the lower locating posts line up and drop into the rubber grommets, you are good to continue.
-Then lift up the A/C condenser and slide it down into the clips. Make sure it's all the way seated.
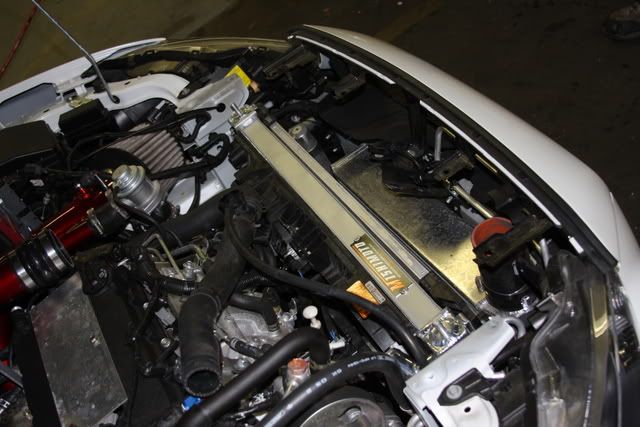
The Mishimoto radiator seated back in the stock location. Great fitment!
-Re-install the core support, watching the middle brace and bumper tabs.
: It is easier to run and clip in the harnesses now, while the rad support is loose
-Re-install the Hood latch and Crash sensors.
: The hood latch cable runs through the big hole on the right (d/s) of the latch
-Re-install the upper and lower coolant hoses, and the filler neck to the fan shroud.
-Re-install the Upper Intercooler pipe.
-Re-fill with coolant and start the Car
-Check for any leaks. If none, then finish the install of your performance Mishimoto Radiator.

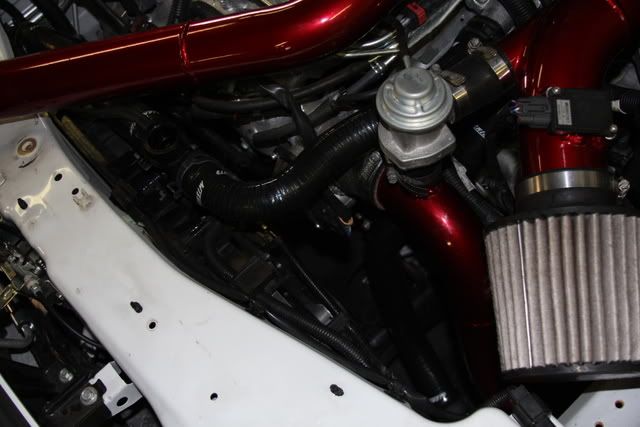
(JNZ Tuning upper intercooler pipe is re-installed. Upper and lower radiator hoses are also re-installed at this stage)
-Re-install the Plastic Cowl above the radiator.
: Also install the intake air duct to airbox if you still have the stock setup.

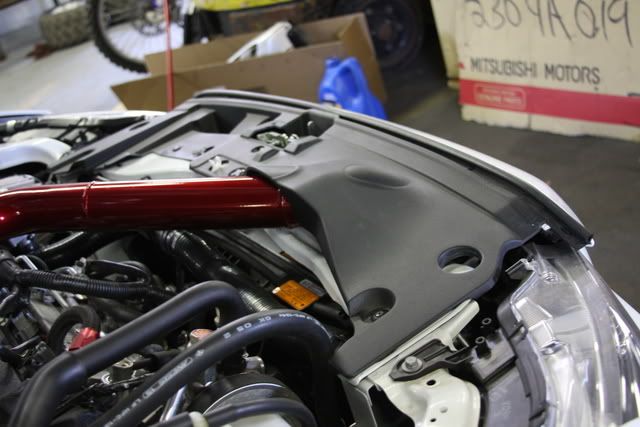
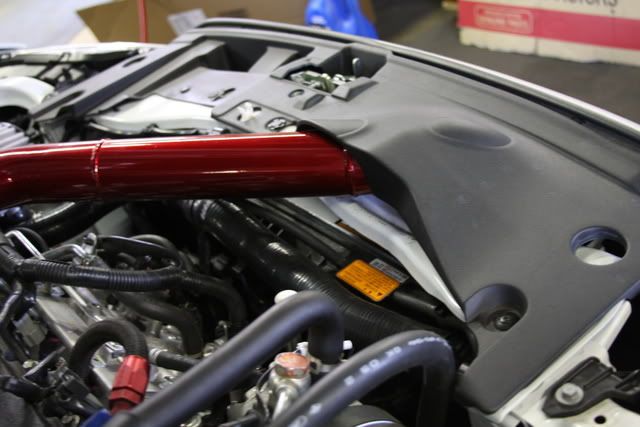
(Back how we started but with the additional cooling and great looks of the new Mishimotor radiator!)
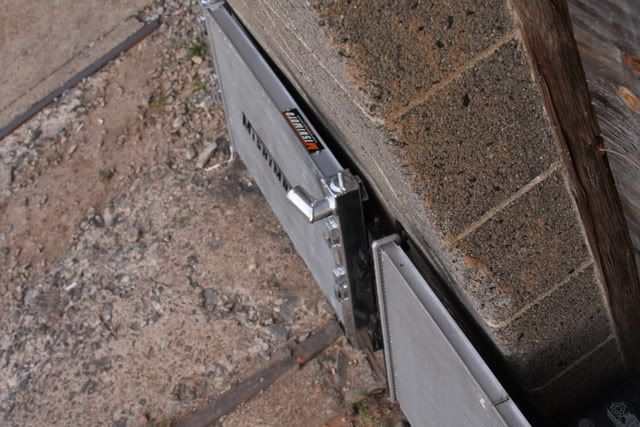
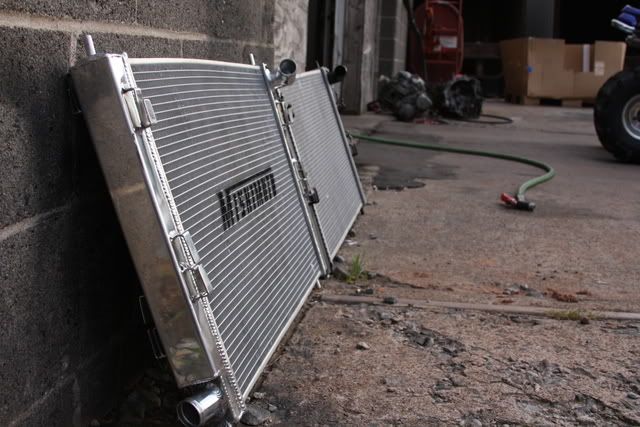
-In the pictures below you can see a side by side comparison of the Mishimoto aluminum radiator next to an OEM EvoX radiator. Notice the attention to detail in the fan shroud mounting points and radiator hose hookups.
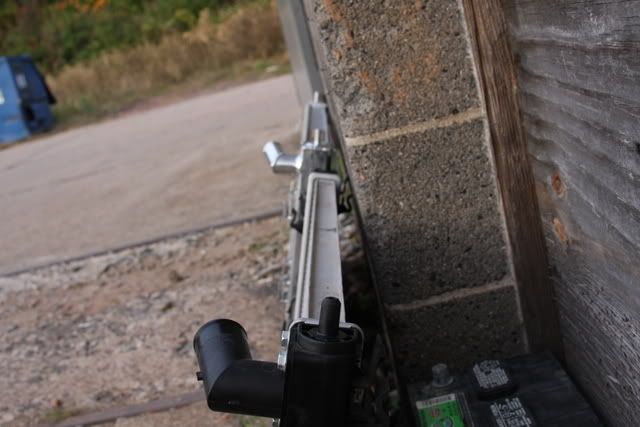

Stats on the Mishimoto radiator are as follows:
Quote:
Originally Posted by Mishimoto
Core Size: 700mm x 408mm
Rows: 2
Inlet: 35mm
Outlet: 35mm
Core Thickness: 40mm
Tank Wall Thickness: 2mm
Purchase Includes: Mishimoto Radiator and 1 Year Warranty
(courtesy of JNZ Tuning, Inc. www.jnztuning.net)
STEP 1
-Let car cool off!! Coolant/Radiator/Hoses are HOT!
-Drain engine coolant once everything is cool.
-Remove Plastic Intake Air Duct
: 2 plastic Screws
-Remove Plastic Cowl above radiator
: 3 plastic Screws
-Remove Upper (hot side) Intercooler Pipe
: 2 clamps, 2 12mm bolts
(In the above photo you can see the X with the upper plastic trim pieces and upper intercooler pipe removed for access)
STEP 2
-Remove 4 10mm Bolts into bumper tabs
-Remove 3 10mm Hood Latch Bolts and pop Cable out (Unplug harness directly behind core support (2 wires))
-Remove 10mm Bolts holding Radiator support
: 2 on each side up top, 3 under hood latch
-Unplug Horn Wire
-Remove 1 10mm Bolt holding headlight to Rad support on each side.
-Pop the 3 clips out for the Latch harness (behind support on drivers side).
-Pop the 3 clips out for the crash sensor harness (harness runs underneath rad support)
-Remove the 2 12mm Nuts for the crash sensors
: one next to the intercooler inlet, other far D/S of rad support
: then remove sensors
-Remove the Radiator support. Shouldn't need much more than a little wiggle and pull.
(In the above photos you can see the X with the upper radiator support removed.)
STEP 3
-Unplug and un-clip the radiator fan wiring harness.
-Remove the 12mm bolt holding the Coolant filler neck to the Fan Shroud.
-Next remove the A/C Condenser from the Radiator
: There are 2 tabs that need to be un-clipped halfway down the radiator on each side.
: Then there are 2 more tabs at the top of the radiator, on each side.
-Remove Clamp for Upper hose to Radiator then remove hose from radiator.
-Remove Clamp for Lower U-shaped hose to Coolant Pipe or Radiator.
: It was easier to leave the U-shaped hose attached to the rad, and disconnect it at the pipe end.
-Remove Radiator, lift up on passenger side of radiator first, then pull up to slide radiator w/fans out.
(Stock radiator removed with fans still attached)
(Engine bay with the stock radiator removed)
STEP 4
-Stock Fan assembly has 4 clips and 2 10mm hold downs
: Remove the 10mm bolts and brackets
: Pop the 2 clips halfway down each side of the radiator, and the 1 on each top corner.
-If you left the U-shaped hose attached to the radiator, then swap it to the new one now.
-Swap fan assembly to the new radiator, and put the 10mm bolts back in with their brackets.
(The pictures above illustrate the installation of the stock fans to the Mishimoto aluminum radiator)
STEP 5
-Slide the radiator back down in, drivers side first to get the U-shaped hose to clear the side
-When the lower locating posts line up and drop into the rubber grommets, you are good to continue.
-Then lift up the A/C condenser and slide it down into the clips. Make sure it's all the way seated.
The Mishimoto radiator seated back in the stock location. Great fitment!
STEP 6
-Re-install the core support, watching the middle brace and bumper tabs.
: It is easier to run and clip in the harnesses now, while the rad support is loose
-Re-install the Hood latch and Crash sensors.
: The hood latch cable runs through the big hole on the right (d/s) of the latch
-Re-install the upper and lower coolant hoses, and the filler neck to the fan shroud.
-Re-install the Upper Intercooler pipe.
-Re-fill with coolant and start the Car
-Check for any leaks. If none, then finish the install of your performance Mishimoto Radiator.
(JNZ Tuning upper intercooler pipe is re-installed. Upper and lower radiator hoses are also re-installed at this stage)
STEP 7
-Re-install the Plastic Cowl above the radiator.
: Also install the intake air duct to airbox if you still have the stock setup.
(Back how we started but with the additional cooling and great looks of the new Mishimotor radiator!)
-In the pictures below you can see a side by side comparison of the Mishimoto aluminum radiator next to an OEM EvoX radiator. Notice the attention to detail in the fan shroud mounting points and radiator hose hookups.
Stats on the Mishimoto radiator are as follows:
Quote:
Originally Posted by Mishimoto
Core Size: 700mm x 408mm
Rows: 2
Inlet: 35mm
Outlet: 35mm
Core Thickness: 40mm
Tank Wall Thickness: 2mm
Purchase Includes: Mishimoto Radiator and 1 Year Warranty
(courtesy of JNZ Tuning, Inc. www.jnztuning.net)
Last edited by DSSA; Oct 29, 2008 at 02:00 PM.


yes please, id like to see what the cooling differences would be going to the mishimoto (or any other aftermarket radiator for that matter)
like for example, does the mishimoto hold more coolant? are the dimensions bigger than stock?
stuff like that.
On the IX, radiator swap to koyo/pwr/etc was obvious... I cant really tell for the X.
Thanks in advance.
like for example, does the mishimoto hold more coolant? are the dimensions bigger than stock?
stuff like that.
On the IX, radiator swap to koyo/pwr/etc was obvious... I cant really tell for the X.
Thanks in advance.
Trending Topics

If you are interested: http://jnztuning.net/shop/catalog/in...?cPath=305_315
It drains through one of the pegs that sit the radiator in the rad. support.


If you look at the bottom of the passenger side portion of the radiator you will see a petcock. It's black and looks like mickey mouse ears. If you turn it it will drain down the cylinder on the mount. If you take it out because you are impatient, like I did, it will drain faster but you will be wearing most of it.

