
Remove and Polish Valve Cover

Remove and Polish Valve Cover
Do this at your own risk. I take no responsibility for any mishaps which may occur during your attempt for this how to.
For those of you on a tight budget, but still want the bling, this how to may be for you. Overall the project is very simple, only time consuming depending on the tools you have. The more time you spend on it the better it will look. I spent 5 hours.
Tools needed:
There are various tools which can be used from ordinary high grit automotive sandpaper and your bare hands to high speed buffer attachments and jewlers polish. I will walk you through what I used; but the same if not better results can be had with less.
To remove the valve cover:
1. 10mm socket (deep or short extension)
2. Ratchet
3. Pliers
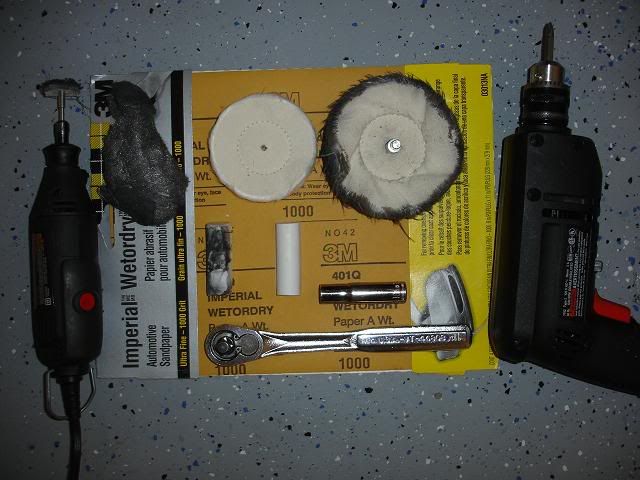
Polishing Beginner:
1. Hand(s)
2. 1000 grit automotive wet/dry sandpaper
3. 2000 grit automotive wet/dry sandpaper
4. Bucket w/water
5. Ultra-fine Steel wool
6. Mother's Aluminum/Magnesium Polish (or equal)
7. Terry/Microfiber cloth
Polishing Advanced (mirror shine):
In addition to above:
1. Drill with polishing wheel atachment
2. Dremmel tool with various polishing wheels
3. Jewlers polishing compound
Valve Cover:
Wait for the engine to be completely cool.
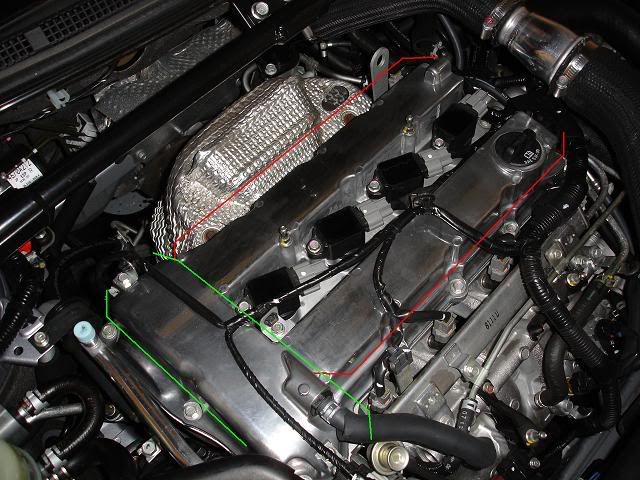
Start by removing the valve cover by disconnecting the weatherproof connectors from the wiring harness to the coil packs.
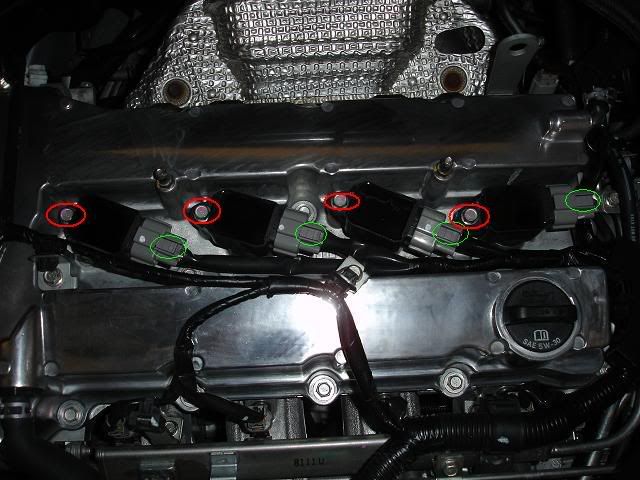
Then, using your 10mm socket and ratchet, remove the bolts holding the spark plug coil packs and the packs themselves.
Use your fingers or pliers to remove the wiring harness from the valve cover and PCV tubing.
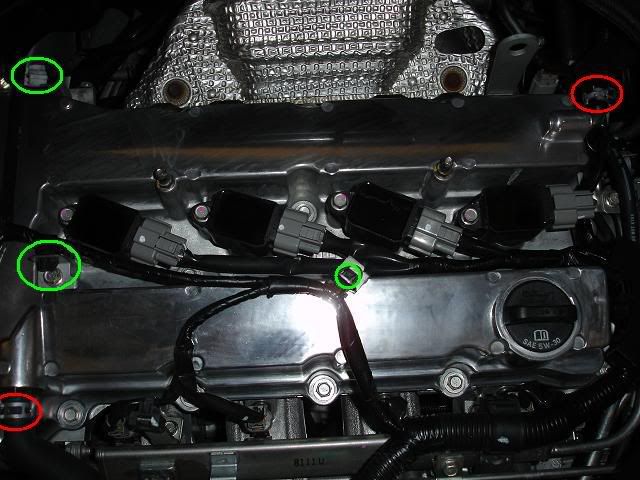
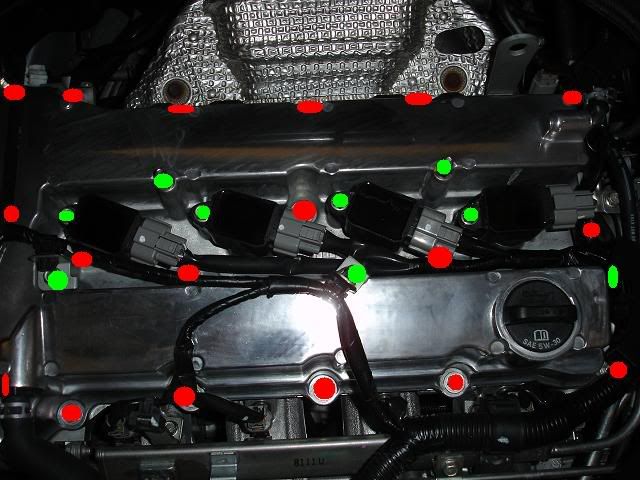
Remove the bolts on the valve cover and carefully lift it off.
Cover the open valvetrain with a lint free cloth or paper towel.
Polishing:
Wipe as much of the oil out of the valve cover as possible with a lint free cloth.
I started with the Mother's Polish with a quick rub down to see where the rough spots were.
Tear pieces of 1000 grit paper and soak it in the bucket of water
Begin sanding the valve cover in small painful circles avoiding going in straight lines where at all possible.
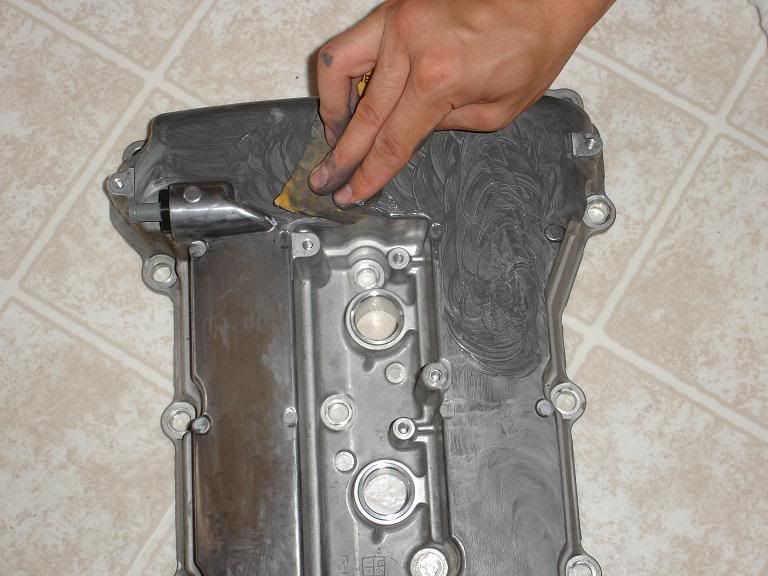
Wipe down the cover with a damp cloth often to see where more sanding is needed.
Continue until all areas are smooth.
Use your 2000 grit paper next for a finer result.
CAREFULLY use the ultra fine steel wool to work it even finer using faint pressure in rapid movements. The wool likes to tear apart into little pieces and can get under the cover and attach themselves to the residual oil. The steel wool is also an option.
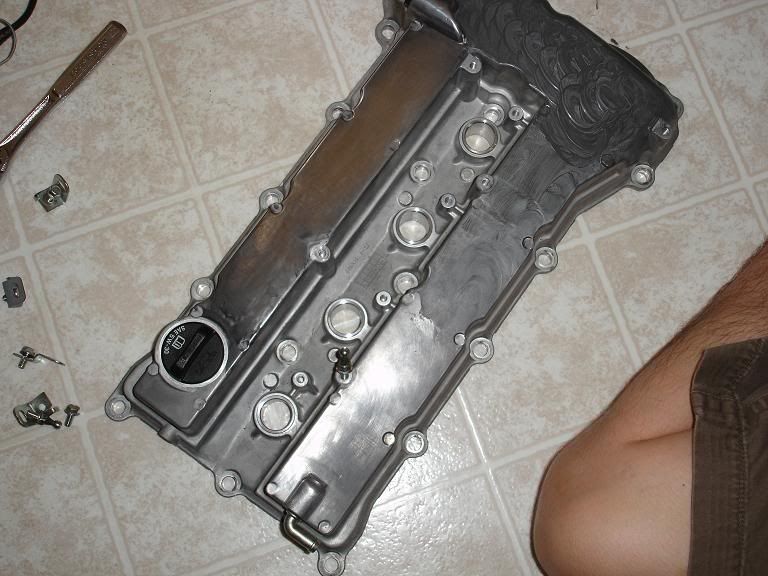
Do a final polish with Mother's polish and you're done! (GREEN)
Advanced Polishing:
For those who want that mirror shine, prepare yourself for even more work.
Start by attaching the buffing wheel to your low speed drill.
At full speed, run the wheel lightly against the jewlers polishing compound.
Begin buffing the cover and apply more compound as necessary to the wheel.
Wipe with a cloth to review the results and work more if necessary.
If this is not enough for you, you may use your dremmel tool with the buffing attachment and like before, apply more compound and begin buffing the cover.
Wipe as necessary and re-apply as necessary.
The dremmel spins at a much higher RPM and creates a beautiful luster.
Finish the job(for me, for now...) with a quick polish with Mother's.
(RED)
Re-install the valve cover by reversing the removal.
TIPS:
Take your time and section the cover into areas which you polish. Then blend those areas together.
I hope this helps anyone who has considered doing this. Please feel free to add advice on techniques and I will alter the posting if need be.
For those of you on a tight budget, but still want the bling, this how to may be for you. Overall the project is very simple, only time consuming depending on the tools you have. The more time you spend on it the better it will look. I spent 5 hours.
Tools needed:
There are various tools which can be used from ordinary high grit automotive sandpaper and your bare hands to high speed buffer attachments and jewlers polish. I will walk you through what I used; but the same if not better results can be had with less.
To remove the valve cover:
1. 10mm socket (deep or short extension)
2. Ratchet
3. Pliers
Polishing Beginner:
1. Hand(s)
2. 1000 grit automotive wet/dry sandpaper
3. 2000 grit automotive wet/dry sandpaper
4. Bucket w/water
5. Ultra-fine Steel wool
6. Mother's Aluminum/Magnesium Polish (or equal)
7. Terry/Microfiber cloth
Polishing Advanced (mirror shine):
In addition to above:
1. Drill with polishing wheel atachment
2. Dremmel tool with various polishing wheels
3. Jewlers polishing compound
Valve Cover:
Wait for the engine to be completely cool.
Start by removing the valve cover by disconnecting the weatherproof connectors from the wiring harness to the coil packs.
Then, using your 10mm socket and ratchet, remove the bolts holding the spark plug coil packs and the packs themselves.
Use your fingers or pliers to remove the wiring harness from the valve cover and PCV tubing.
Remove the bolts on the valve cover and carefully lift it off.
Cover the open valvetrain with a lint free cloth or paper towel.
Polishing:
Wipe as much of the oil out of the valve cover as possible with a lint free cloth.
I started with the Mother's Polish with a quick rub down to see where the rough spots were.
Tear pieces of 1000 grit paper and soak it in the bucket of water
Begin sanding the valve cover in small painful circles avoiding going in straight lines where at all possible.
Wipe down the cover with a damp cloth often to see where more sanding is needed.
Continue until all areas are smooth.
Use your 2000 grit paper next for a finer result.
CAREFULLY use the ultra fine steel wool to work it even finer using faint pressure in rapid movements. The wool likes to tear apart into little pieces and can get under the cover and attach themselves to the residual oil. The steel wool is also an option.
Do a final polish with Mother's polish and you're done! (GREEN)
Advanced Polishing:
For those who want that mirror shine, prepare yourself for even more work.
Start by attaching the buffing wheel to your low speed drill.
At full speed, run the wheel lightly against the jewlers polishing compound.
Begin buffing the cover and apply more compound as necessary to the wheel.
Wipe with a cloth to review the results and work more if necessary.
If this is not enough for you, you may use your dremmel tool with the buffing attachment and like before, apply more compound and begin buffing the cover.
Wipe as necessary and re-apply as necessary.
The dremmel spins at a much higher RPM and creates a beautiful luster.
Finish the job(for me, for now...) with a quick polish with Mother's.
(RED)
Re-install the valve cover by reversing the removal.
TIPS:
Take your time and section the cover into areas which you polish. Then blend those areas together.
I hope this helps anyone who has considered doing this. Please feel free to add advice on techniques and I will alter the posting if need be.
Last edited by cornercarver; Sep 8, 2009 at 08:40 PM.


Thanks for the honesty, but it's not finished. This is my D/D so I had to put it back on for work the next day. I'll update with more work into it.
Does the writeup at least help anyone?
Does the writeup at least help anyone?
Trending Topics

if that's true then yeah it's good info... I would stop at 1000, as the 2000 is work you don't need to do. There are compounds that will do plenty of cutting... even after 600 grit and then you can move right up and get a brilliant shine out of it. I got all my stuff years ago at caswell plating. Don't do all that extra work if you don't have to!


Nice job buddy!!!!. lot of sweat right?
I’m waiting for some decent aftermarket sparkplug cables to go in this kind of adventure.
I love the shiny valve cover, but still those ugly black taped cables doesn't inspire me to do the job.
I tried few weeks ago just with some mothers polish and rags and with a couple of applications it starts shining like a mirror, but the idea of those black cables on top push me down.
does anybody knows anyway to hide / reroute / replace the cables for something more decent?

Nice job buddy!!!!. lot of sweat right?
I�m waiting for some decent aftermarket sparkplug cables to go in this kind of adventure.
I love the shiny valve cover, but still those ugly black taped cables doesn't inspire me to do the job.
I tried few weeks ago just with some mothers polish and rags and with a couple of applications it starts shining like a mirror, but the idea of those black cables on top push me down.
does anybody knows anyway to hide / reroute / replace the cables for something more decent?