
[How-To] Carbon Fiber vinyl wrap

Thread Starter
Evolved Member
Joined: Jan 2013
Posts: 2,740
Likes: 27
From: Out towards the countryside of Dallas, TX (USA)
Just a simple vinyl wrap demo.
Tools & Materials needed:
Your choice of vinyl (3M Di-noc is durable enough for automotive usage.)
Sharp X-acto knife
Heatgun or wife's hair dryer**
Optional -
Squeegee
Spline Roller tool
Step 1:
Prep the part, wipe all surfaces thoroughly.

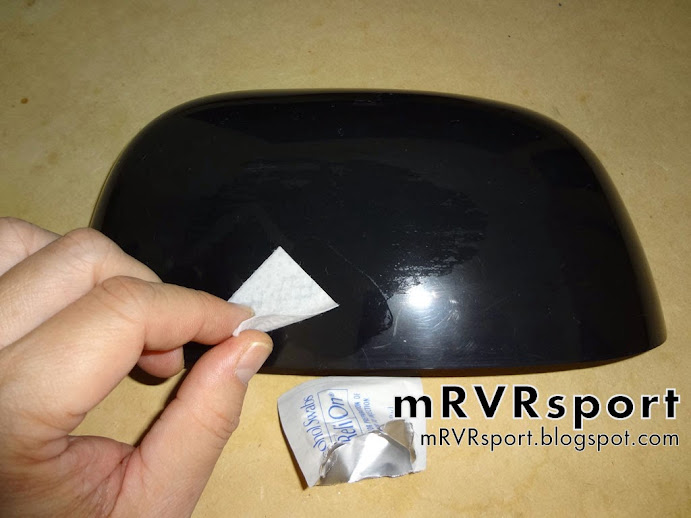
Step 2:
Cut a piece of vinyl big enough to cover the entire part AND extend beyond all edges of item by at least 3/4".


Step 3:
Peel and apply vinyl lightly near the center of part.

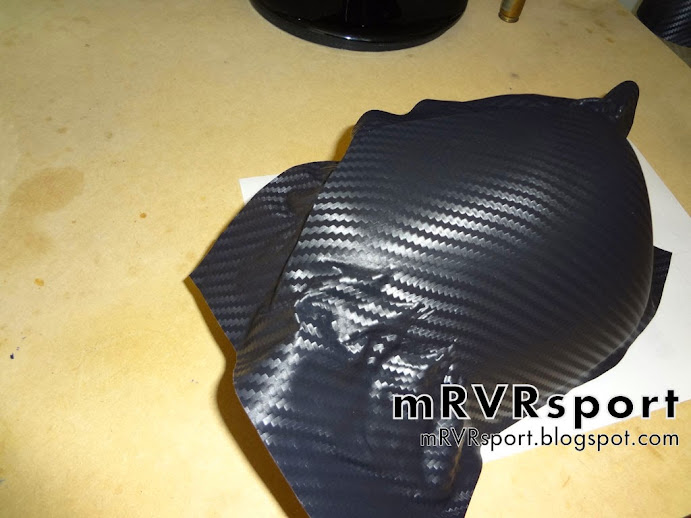
Step 4:
And this is where it takes the most time and patience > working the vinyl towards the edges. (I worked towards the side with the most complex curves first. That way if/when you need to peel the vinyl to release/relieve the wrinkles/air-bubbles/creases it's much easier to do so from the side that doesn't have such a complex shape.)

Apply heat from a heatgun or hair dryer as you work (Be Careful not to burn yourself or the vinyl. You only need enough to soften the vinyl.) Work the vinyl in sections.


Step 5:
Once you get the vinyl wrapped to the edges...
Use a Spline Roller to finish off the edges, if there are any grooves, lips, etc.

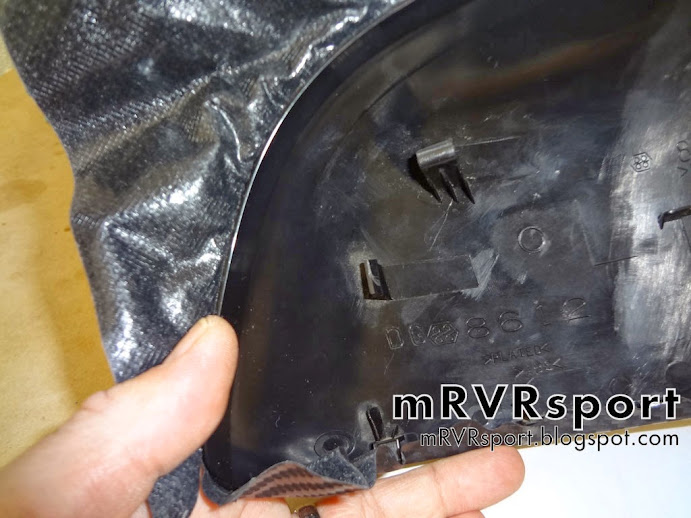
Step 6:
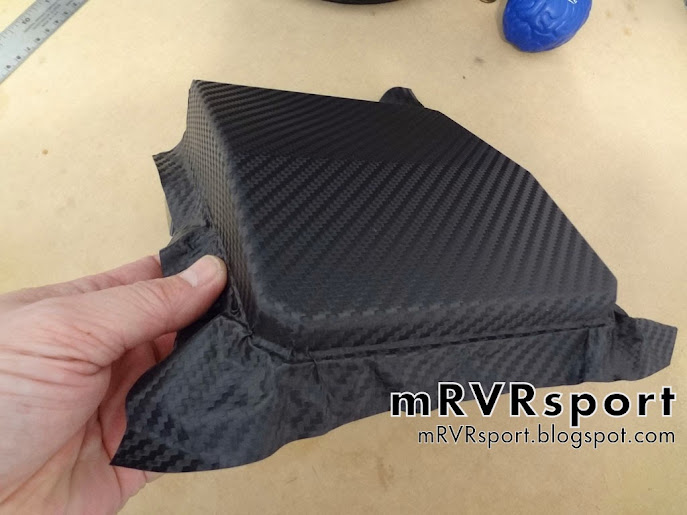
After you get your edges rolled to your liking, you will probably find a lot of vinyl "bunched up" around the corners and/or tight curves...
To solve this problem, make some relief cuts like this...

Step 7:
Now just fold over the vinyl to the back side of your part.

Apply heat as you need it and then trim off the remainder vinyl to a clean edge.


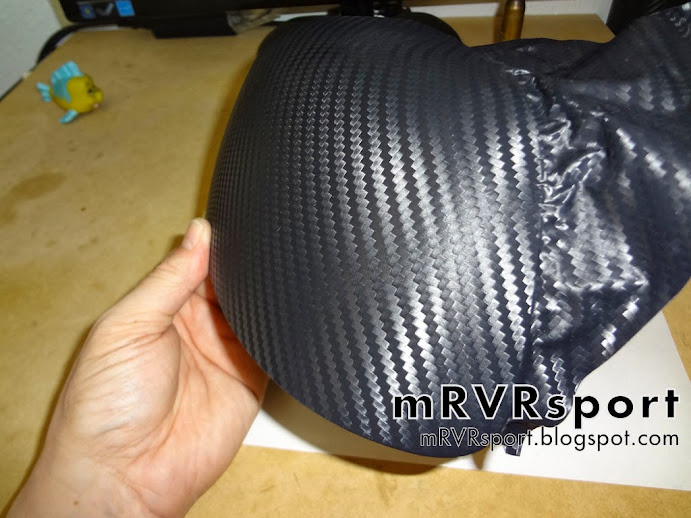
Here's the final result -


**don't let her catch you using it on vinyl like that.
Tools & Materials needed:
Your choice of vinyl (3M Di-noc is durable enough for automotive usage.)
Sharp X-acto knife
Heatgun or wife's hair dryer**
Optional -
Squeegee
Spline Roller tool
Step 1:
Prep the part, wipe all surfaces thoroughly.
Step 2:
Cut a piece of vinyl big enough to cover the entire part AND extend beyond all edges of item by at least 3/4".
Step 3:
Peel and apply vinyl lightly near the center of part.
Step 4:
And this is where it takes the most time and patience > working the vinyl towards the edges. (I worked towards the side with the most complex curves first. That way if/when you need to peel the vinyl to release/relieve the wrinkles/air-bubbles/creases it's much easier to do so from the side that doesn't have such a complex shape.)
Apply heat from a heatgun or hair dryer as you work (Be Careful not to burn yourself or the vinyl. You only need enough to soften the vinyl.) Work the vinyl in sections.
Step 5:
Once you get the vinyl wrapped to the edges...
Use a Spline Roller to finish off the edges, if there are any grooves, lips, etc.
Step 6:
After you get your edges rolled to your liking, you will probably find a lot of vinyl "bunched up" around the corners and/or tight curves...
To solve this problem, make some relief cuts like this...
Step 7:
Now just fold over the vinyl to the back side of your part.
Apply heat as you need it and then trim off the remainder vinyl to a clean edge.
Here's the final result -
**don't let her catch you using it on vinyl like that.
Last edited by mRVRsport; Mar 27, 2014 at 07:13 AM.
Newbie
Joined: Feb 2014
Posts: 12
Likes: 0
From: Indonesia
wooh that's neat, you cut the inside sticker evenly too, if it was me I would just cut them and shove it inside.Bubbles and wrinkles are the real problems I think. I heard some people use soap water before applying cutting sticker
Thread Starter
Evolved Member
Joined: Jan 2013
Posts: 2,740
Likes: 27
From: Out towards the countryside of Dallas, TX (USA)
For my particular auto part, you really want the vinyl to "stick & hold" in place while trying to wrap it around those funky compound curves.
Last edited by mRVRsport; Mar 26, 2014 at 10:06 PM.

Thread Starter
Evolved Member
Joined: Jan 2013
Posts: 2,740
Likes: 27
From: Out towards the countryside of Dallas, TX (USA)
Thank you very much.
It's all about the attention to details...
Takes more effort and time, but the end result turns out much better and with the over-edge wrap method, you don't ever have to worry about dirt, detergents/soaps, or moisture ever seeping under the leading edges of your vinyl to cause it to lift & peel. < That would drive me nuts.
Very nice.
Got to love those fairly flat parts for wrapping!
Now I need to start wrapping some of the interior parts.
It's all about the attention to details...
Takes more effort and time, but the end result turns out much better and with the over-edge wrap method, you don't ever have to worry about dirt, detergents/soaps, or moisture ever seeping under the leading edges of your vinyl to cause it to lift & peel. < That would drive me nuts.
Got to love those fairly flat parts for wrapping!
Now I need to start wrapping some of the interior parts.
Newbie
Joined: Mar 2014
Posts: 79
Likes: 0
From: Winterpeg,Canada
Thank you very much.
It's all about the attention to details...
Takes more effort and time, but the end result turns out much better and with the over-edge wrap method, you don't ever have to worry about dirt, detergents/soaps, or moisture ever seeping under the leading edges of your vinyl to cause it to lift & peel. < That would drive me nuts.
Very nice.
Got to love those fairly flat parts for wrapping!
Now I need to start wrapping some of the interior parts.
It's all about the attention to details...
Takes more effort and time, but the end result turns out much better and with the over-edge wrap method, you don't ever have to worry about dirt, detergents/soaps, or moisture ever seeping under the leading edges of your vinyl to cause it to lift & peel. < That would drive me nuts.
Very nice.
Got to love those fairly flat parts for wrapping!
Now I need to start wrapping some of the interior parts.

Trending Topics


Thread Starter
Evolved Member
Joined: Jan 2013
Posts: 2,740
Likes: 27
From: Out towards the countryside of Dallas, TX (USA)
^
I'm jealous of you guys with those massive (and easier to wrap) double-DIN stereo bezels... I have the silly stock radio bezel that's not friendly at all for vinyl wrapping, especially with those preset buttons and tiny lettering in the way.
I'm jealous of you guys with those massive (and easier to wrap) double-DIN stereo bezels... I have the silly stock radio bezel that's not friendly at all for vinyl wrapping, especially with those preset buttons and tiny lettering in the way.
Thread Starter
Evolved Member
Joined: Jan 2013
Posts: 2,740
Likes: 27
From: Out towards the countryside of Dallas, TX (USA)
Abbreviated INSTRUCTS (clifffnotes version) -
Cut a square piece of CF vinyl big enough to cover the entire part AND remember to add about an 1.5" of extra material near the rear of the piece to suitably cover the entire unit.


Apply heat to all major surfaces, using the Spline tool to help "edge" the vinyl down to the center "lip" of the cover
Make "special" relief cuts/slits on the two back corners..

Then, fold the cut slits together.

Trim all excess material


FINISHED.

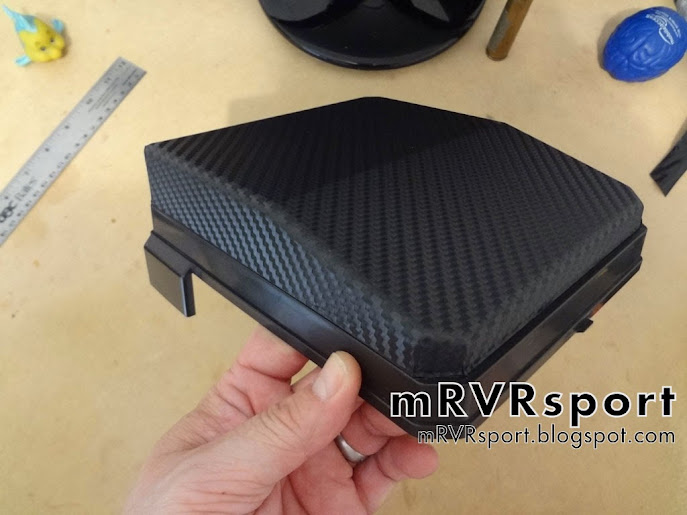

INSTALLED. >
https://www.evolutionm.net/forums/11161679-post24.html
Cut a square piece of CF vinyl big enough to cover the entire part AND remember to add about an 1.5" of extra material near the rear of the piece to suitably cover the entire unit.
Apply heat to all major surfaces, using the Spline tool to help "edge" the vinyl down to the center "lip" of the cover
Make "special" relief cuts/slits on the two back corners..
Then, fold the cut slits together.
Trim all excess material
FINISHED.
INSTALLED. >
https://www.evolutionm.net/forums/11161679-post24.html
Last edited by mRVRsport; Apr 5, 2014 at 07:32 AM.

