
//AWR EVO 9 2015 Build Thread: Part 1 (Tucked, Relocation, and Restoration)

//AWR EVO 9 2015 Build Thread: Part 1 (Tucked, Relocation, and Restoration)
Hey everyone, my name is Andrew and I own a 06 EVO IX
I mostly roam around evom and rarely post. But ever since I started the teardown of the evo in early October 2014, I decided to keep records of what I am doing so I can share my progress and knowledge with the evom community. I come from a DSM background and the evo was the natural progression for me. (I�m sure many of you can relate to that : ]) I�ve always appreciated build threads and those people who consistently updated them and kept them fresh with ideas and improvements. They weren�t selfish in their knowledge, so I want to follow the same path. Although I may not be doing anything groundbreaking with this platform; I still want to share what I�m doing with those who might benefit from it.
I am not new to build threads. Here is my first build from 6 years ago. I built a 97 GSX and it was the first car I ever hit over 500whp with. Little info 2.3 Stroker, PTE6262, FP4 cams, it was a fun car! And replacing t-case�s was much easier and cheaper lol.
http://www.dsmtuners.com/threads/95e...bullet.351762/
Little background on the car. I picked it up with 90k on the clock from a guy in Norfolk, Va. When I got the car it is was not in the best of shape. The Front bumper was cracked, passenger window blown out, All ACD lights were on, Oil light was on, Meagan manifold and O2 were leaking from cracks. The makeshift megan exhaust was hitting my driveshaft in certain places, leaking valve cover and so on. But it was a steal of a price that I couldn�t turn down. After about 4-5 months of down time and replacing many parts with quality ones followed with a new tune, the car ran great! And hasn�t given me a problem for the last two years.
Anyways� With this build I�m not really going for power or any major performance gains. My evo is fairly straight forward with bolt on�s and stock turbo. Made 349 whp tuned by Chris at Moore Auto in Fairfax, VA. I have autox�d a handful of times and loved every minute of it. Eventually I would like to get back in to it, only in a more competitive manner. But being a fairly new home owner and having to compete in the demanding SM class. ( I really think SM should stand for �Spending Money�, not �Street Modified� haha) I decided to put racing on the back burner for now.
For this build, I am looking to freshen up a lot parts that have become worn out along with cleaning up the engine bay in a way that will give it a much more appealing look. My evo currently has 106,000 Miles on the clock and is in fairly good shape. But just like my GSX I can�t ever leave well enough alone. There will be one or two performance upgrades to this build, but like I said power isn�t the goal here. That will be a whole other stage. On to the fun stuff�
To do list:
-Chasbays Tucked Radiator w/shroud and 12'' fans -16an coolant lines
-Intake manifold & Throttle body Porting (Put this on hold and just rebuilt my TB with Mil-spec seals. When I go for power I plan to switch over to the Curt Brown 70mm
-ACD Relocation(Trunk) TBD
-Battery Relocation (Trunk)
-Fuse Box Relocation(To ACD original location)TBD
-Mini Wire harness tuck
-Power steering relocationTBD
-Radium Fuel components install
-Powder Coating: IM, FMIC, Random Plates = Texture Black
-Re-spraying core support OEM Black
-Upgraded Catchcan & AN line setup
-Engine bay, fire wall, Core support cleaning
-Aero & more suspension tuning. Stay tuned!!!
You can also follow my build on: Blogger, and Instagram for quicker updates.
Blogger: http://awrperformance.blogspot.com/2...blog-post.html
Instagram: http://instagram.com/Awrperformance
Feel free to comment or leave suggestions. I�m open to feedback!
Thanks Drew. R
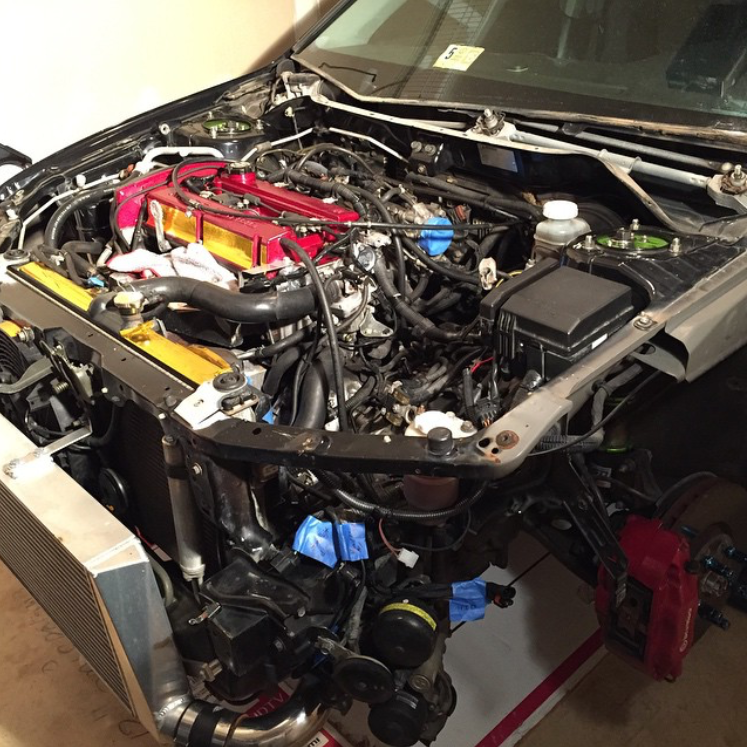
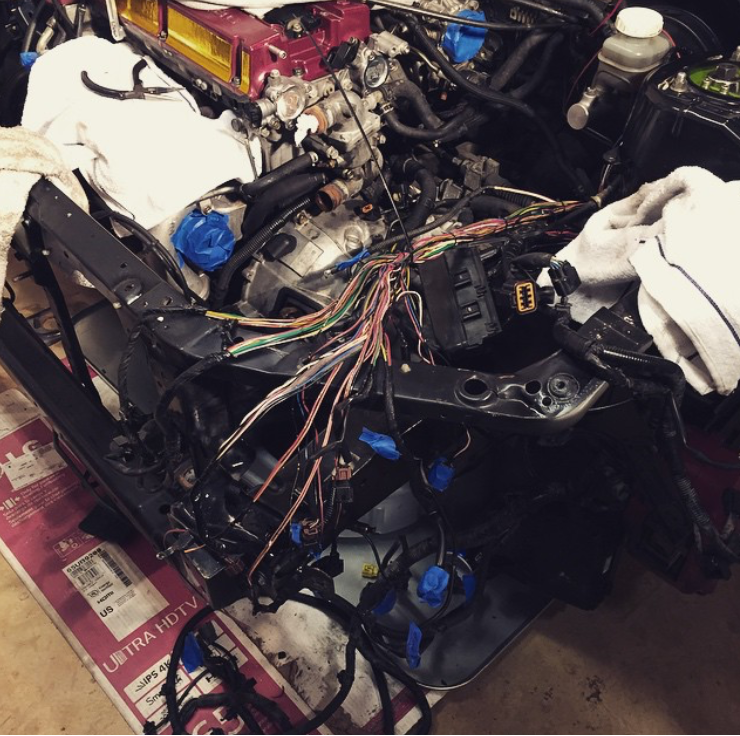
How she looked before tear down began.


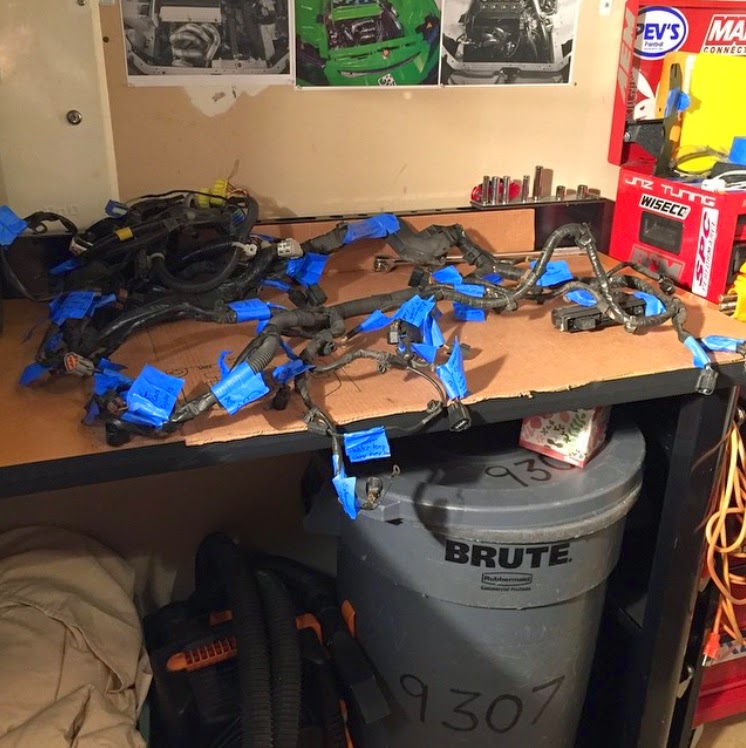
Started working on the spare harness.
Mocking up the fuse box.

More tear down

Got more done on the spare harness. Don't mind my inspiration wall in the back ground lol

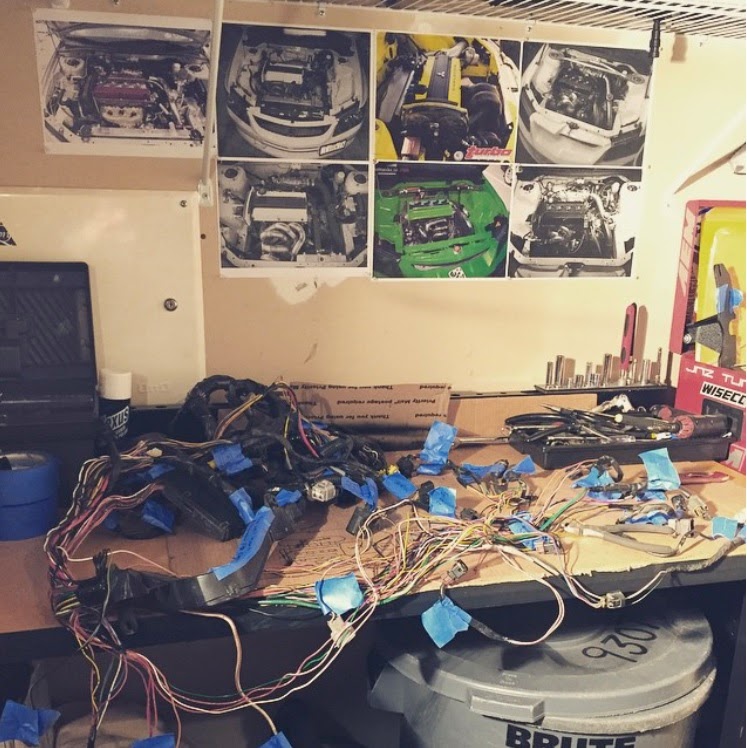
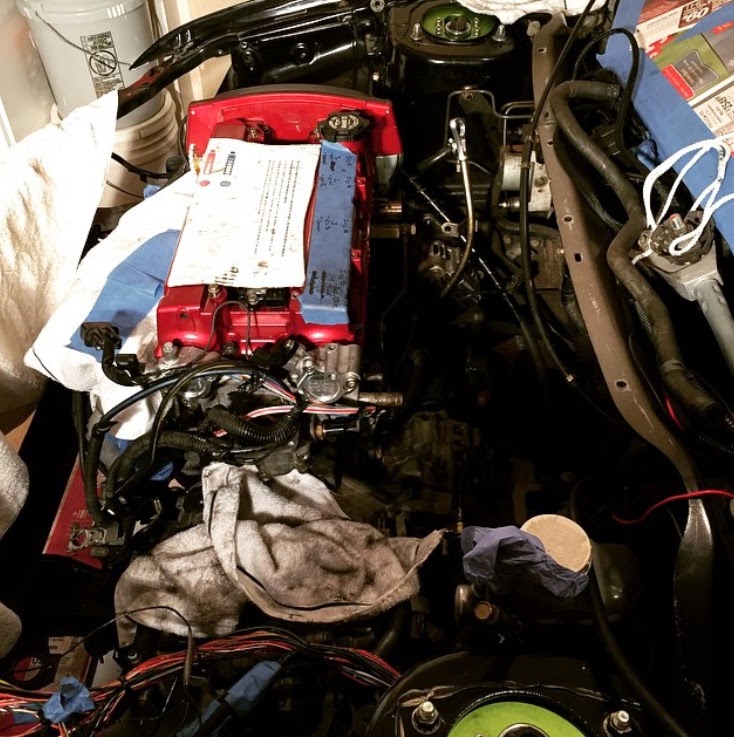
Switched over to the original harness, I'll be working on this one mostly. I plan to do a half tuck and use the spare harness for a project down the road.

Pretty happy with this location for the fuse box.
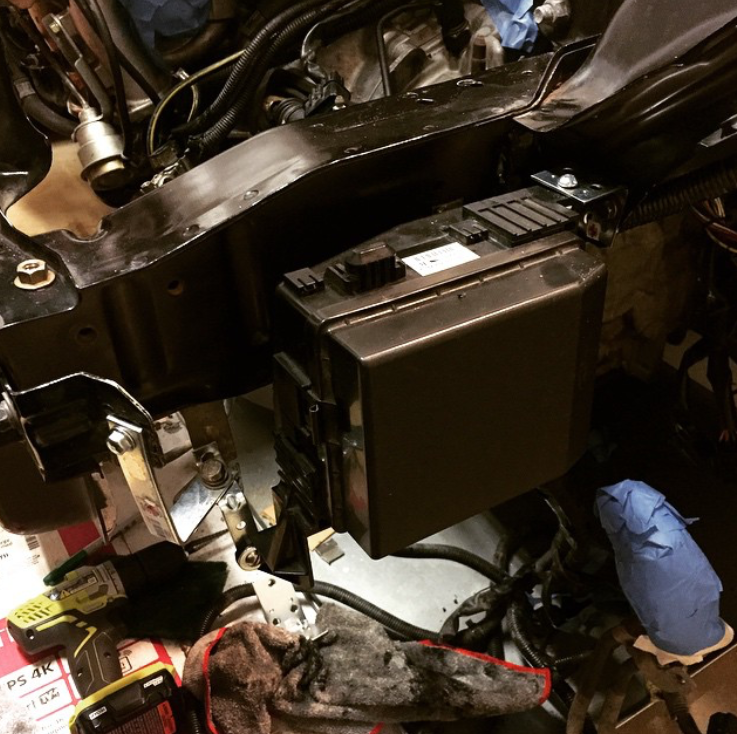
Much cleaner with no AC lines.
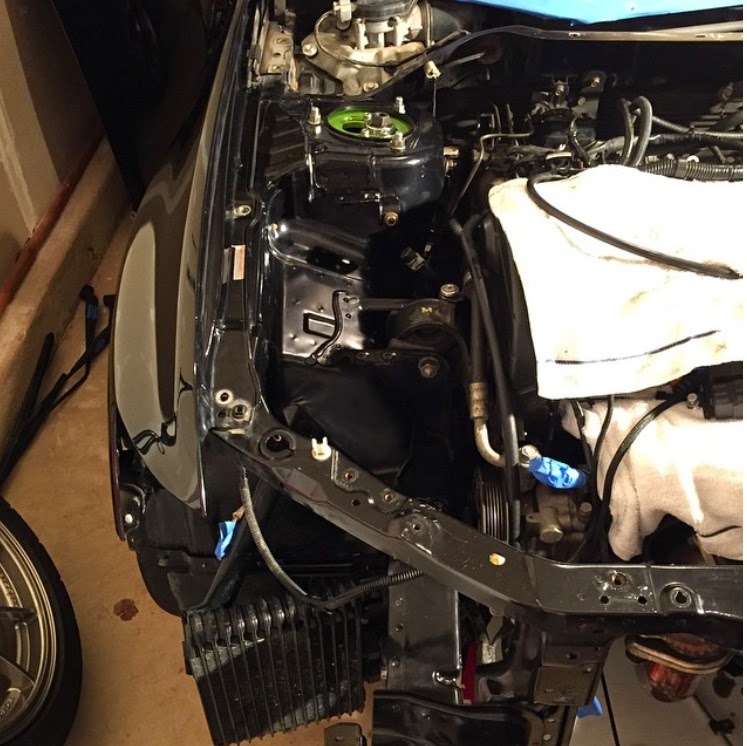
Pulled the IM to get access to the water pipe. Im going to be Running -16 Coolant lines with my new radiator.
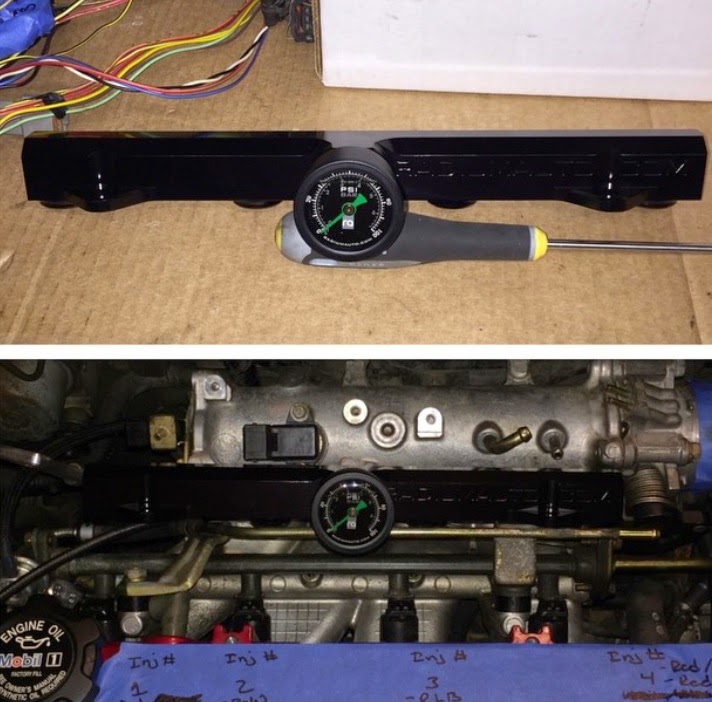
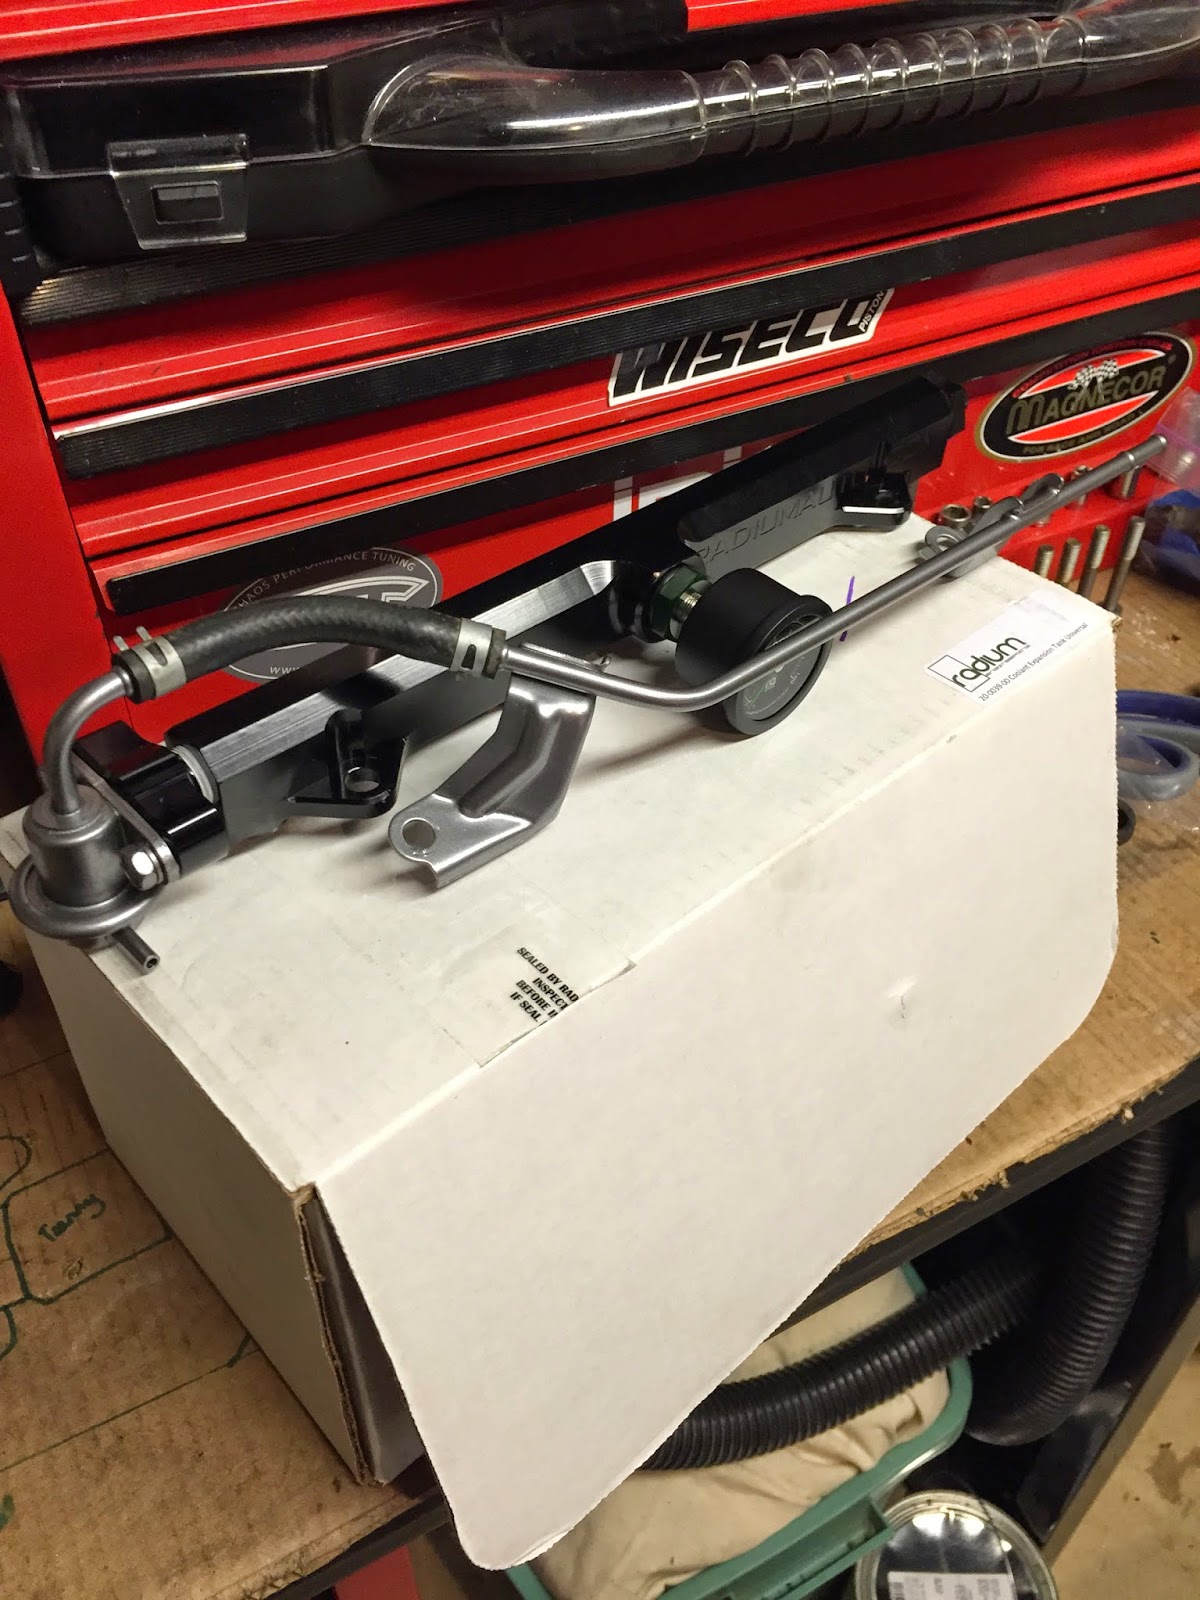
Started receiving some goodies. Radium Fuel rail for OEM configuration.
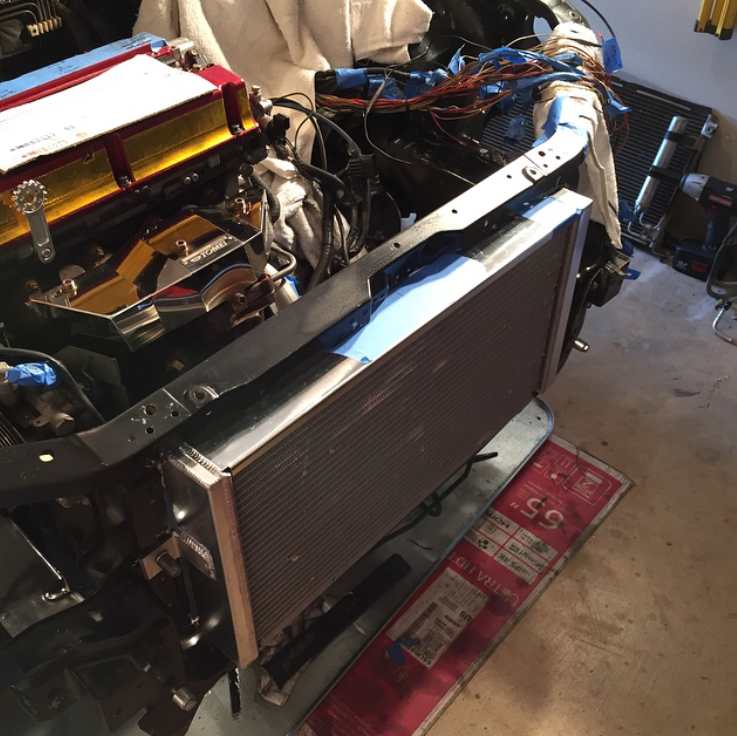
Chasebays 14" tucked radiator w/ dual 12" fans and shroud. This setup will produce over 1800 CFM's. These guys were great with response and technical support. Very please with my experience with them thus far.

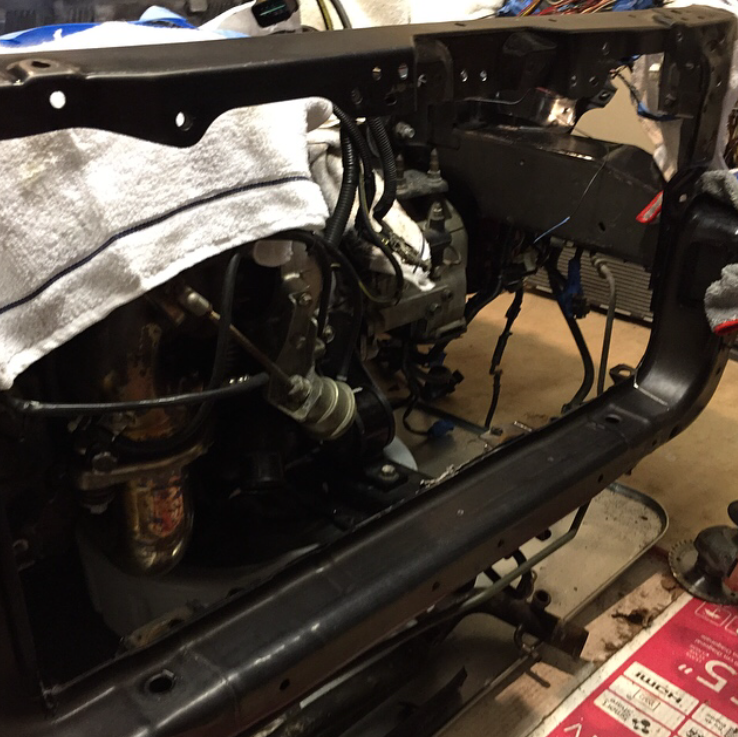
Here is where the cutting comes into play. No turning back now.
Unit is in. This unit will sit back a little further on final assembly.
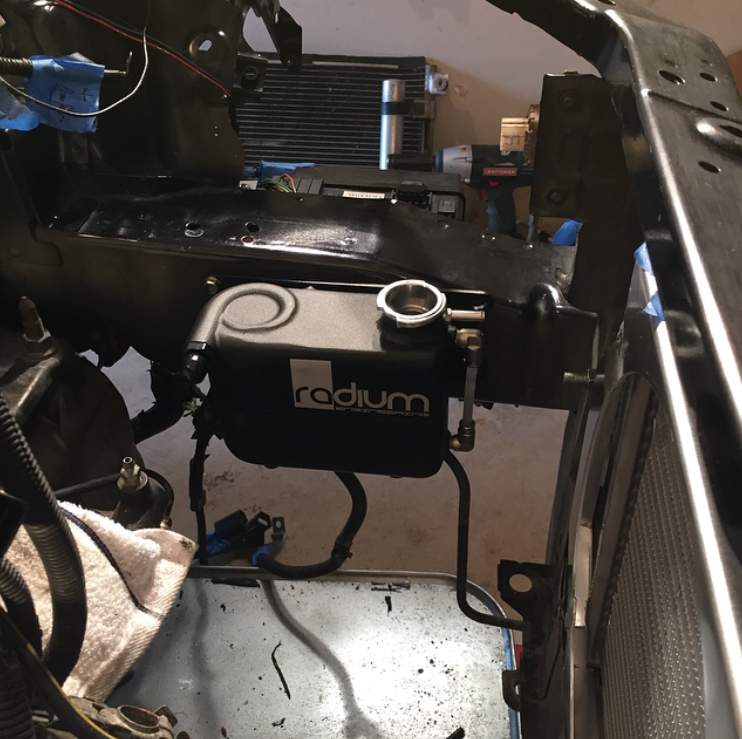
Radium Coolant swirl pot mounted.
Radium Rail assembly. Cleaned up the OEM brackets with some fresh paint.
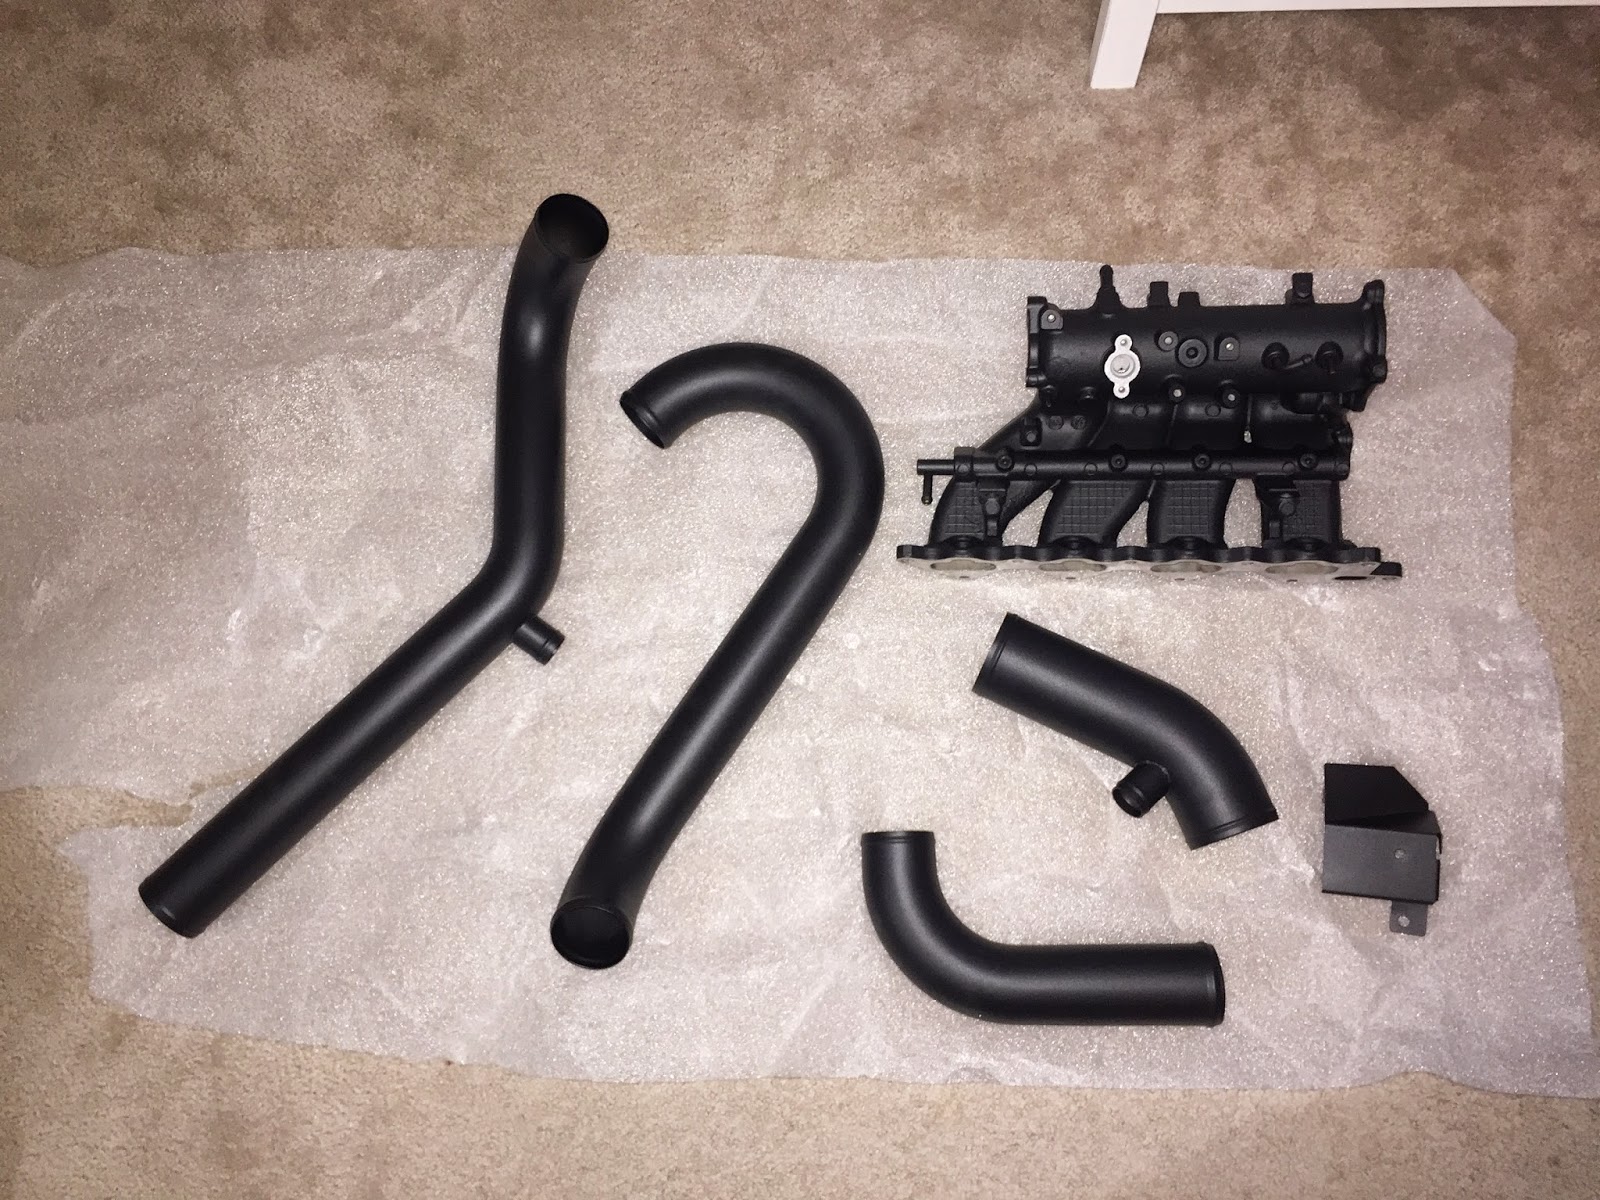
Got my FMIC pipes back from Dominion Powder Coating. Texture Black. Very happy with their service, and turn around.
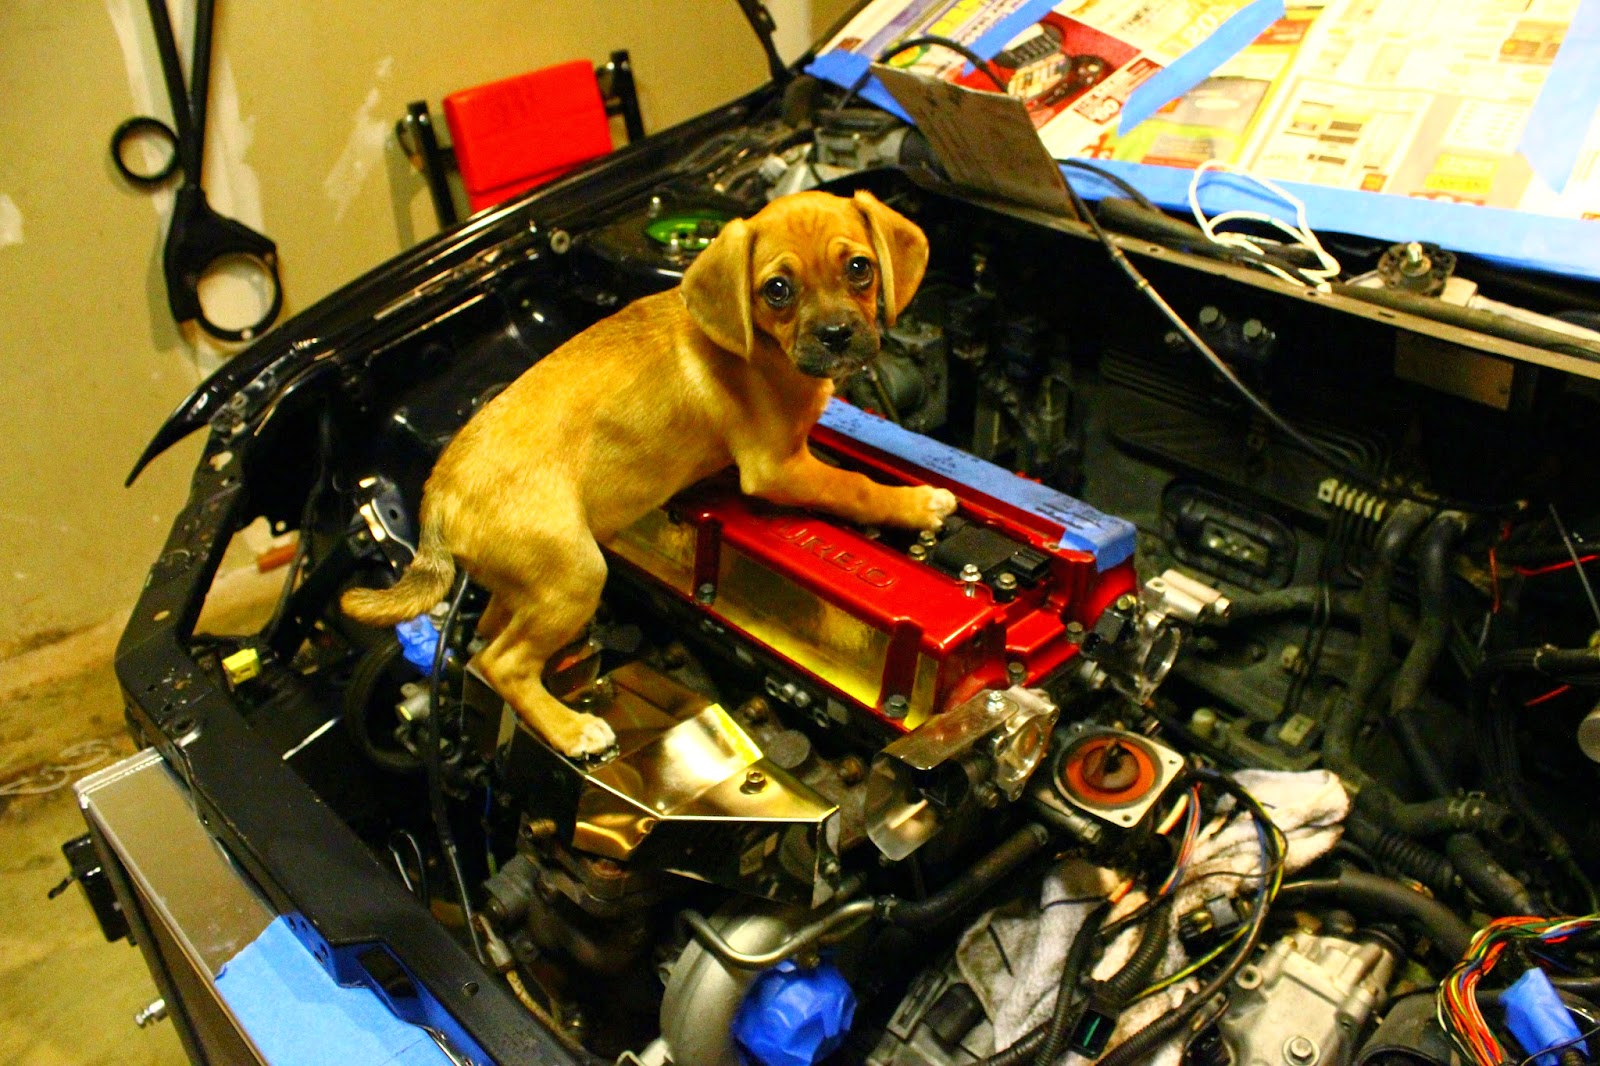
Helping me plan out our next steps.
I mostly roam around evom and rarely post. But ever since I started the teardown of the evo in early October 2014, I decided to keep records of what I am doing so I can share my progress and knowledge with the evom community. I come from a DSM background and the evo was the natural progression for me. (I�m sure many of you can relate to that : ]) I�ve always appreciated build threads and those people who consistently updated them and kept them fresh with ideas and improvements. They weren�t selfish in their knowledge, so I want to follow the same path. Although I may not be doing anything groundbreaking with this platform; I still want to share what I�m doing with those who might benefit from it.
I am not new to build threads. Here is my first build from 6 years ago. I built a 97 GSX and it was the first car I ever hit over 500whp with. Little info 2.3 Stroker, PTE6262, FP4 cams, it was a fun car! And replacing t-case�s was much easier and cheaper lol.
http://www.dsmtuners.com/threads/95e...bullet.351762/
Little background on the car. I picked it up with 90k on the clock from a guy in Norfolk, Va. When I got the car it is was not in the best of shape. The Front bumper was cracked, passenger window blown out, All ACD lights were on, Oil light was on, Meagan manifold and O2 were leaking from cracks. The makeshift megan exhaust was hitting my driveshaft in certain places, leaking valve cover and so on. But it was a steal of a price that I couldn�t turn down. After about 4-5 months of down time and replacing many parts with quality ones followed with a new tune, the car ran great! And hasn�t given me a problem for the last two years.
Anyways� With this build I�m not really going for power or any major performance gains. My evo is fairly straight forward with bolt on�s and stock turbo. Made 349 whp tuned by Chris at Moore Auto in Fairfax, VA. I have autox�d a handful of times and loved every minute of it. Eventually I would like to get back in to it, only in a more competitive manner. But being a fairly new home owner and having to compete in the demanding SM class. ( I really think SM should stand for �Spending Money�, not �Street Modified� haha) I decided to put racing on the back burner for now.
For this build, I am looking to freshen up a lot parts that have become worn out along with cleaning up the engine bay in a way that will give it a much more appealing look. My evo currently has 106,000 Miles on the clock and is in fairly good shape. But just like my GSX I can�t ever leave well enough alone. There will be one or two performance upgrades to this build, but like I said power isn�t the goal here. That will be a whole other stage. On to the fun stuff�
To do list:
-Chasbays Tucked Radiator w/shroud and 12'' fans -16an coolant lines
-Intake manifold & Throttle body Porting (Put this on hold and just rebuilt my TB with Mil-spec seals. When I go for power I plan to switch over to the Curt Brown 70mm
-ACD Relocation(Trunk) TBD
-Battery Relocation (Trunk)
-Fuse Box Relocation(To ACD original location)TBD
-Mini Wire harness tuck
-Power steering relocationTBD
-Radium Fuel components install
-Powder Coating: IM, FMIC, Random Plates = Texture Black
-Re-spraying core support OEM Black
-Upgraded Catchcan & AN line setup
-Engine bay, fire wall, Core support cleaning
-Aero & more suspension tuning. Stay tuned!!!
You can also follow my build on: Blogger, and Instagram for quicker updates.
Blogger: http://awrperformance.blogspot.com/2...blog-post.html
Instagram: http://instagram.com/Awrperformance
Feel free to comment or leave suggestions. I�m open to feedback!
Thanks Drew. R
How she looked before tear down began.
Started working on the spare harness.
Mocking up the fuse box.
More tear down
Got more done on the spare harness. Don't mind my inspiration wall in the back ground lol
Switched over to the original harness, I'll be working on this one mostly. I plan to do a half tuck and use the spare harness for a project down the road.
Pretty happy with this location for the fuse box.
Much cleaner with no AC lines.
Pulled the IM to get access to the water pipe. Im going to be Running -16 Coolant lines with my new radiator.
Started receiving some goodies. Radium Fuel rail for OEM configuration.
Chasebays 14" tucked radiator w/ dual 12" fans and shroud. This setup will produce over 1800 CFM's. These guys were great with response and technical support. Very please with my experience with them thus far.
Here is where the cutting comes into play. No turning back now.
Unit is in. This unit will sit back a little further on final assembly.
Radium Coolant swirl pot mounted.
Radium Rail assembly. Cleaned up the OEM brackets with some fresh paint.
Got my FMIC pipes back from Dominion Powder Coating. Texture Black. Very happy with their service, and turn around.
Helping me plan out our next steps.
Last edited by PureDsm; Mar 23, 2015 at 10:27 AM.


love the use of radium parts and interested what you do with the chase bay rad and FMIC. How do you plan to route the wiring where the fuse box needs to run to the battery? Under the frame rail?
Thank you.
For the FMIC and Rad. The Rad will sit back another 1.5-2" before everything is said and done. I burned out a grinder cutting up the core support. So I need to grab another one and finish the job. The FMIC should clear after that.
The Battery Wires and ACD wires will be routed under the car in some type of weather proof loom. I'm planning to mount the ACD on the Driver side trunk area. Although for weight distribution and balance it should go on the right side.
Little project update:
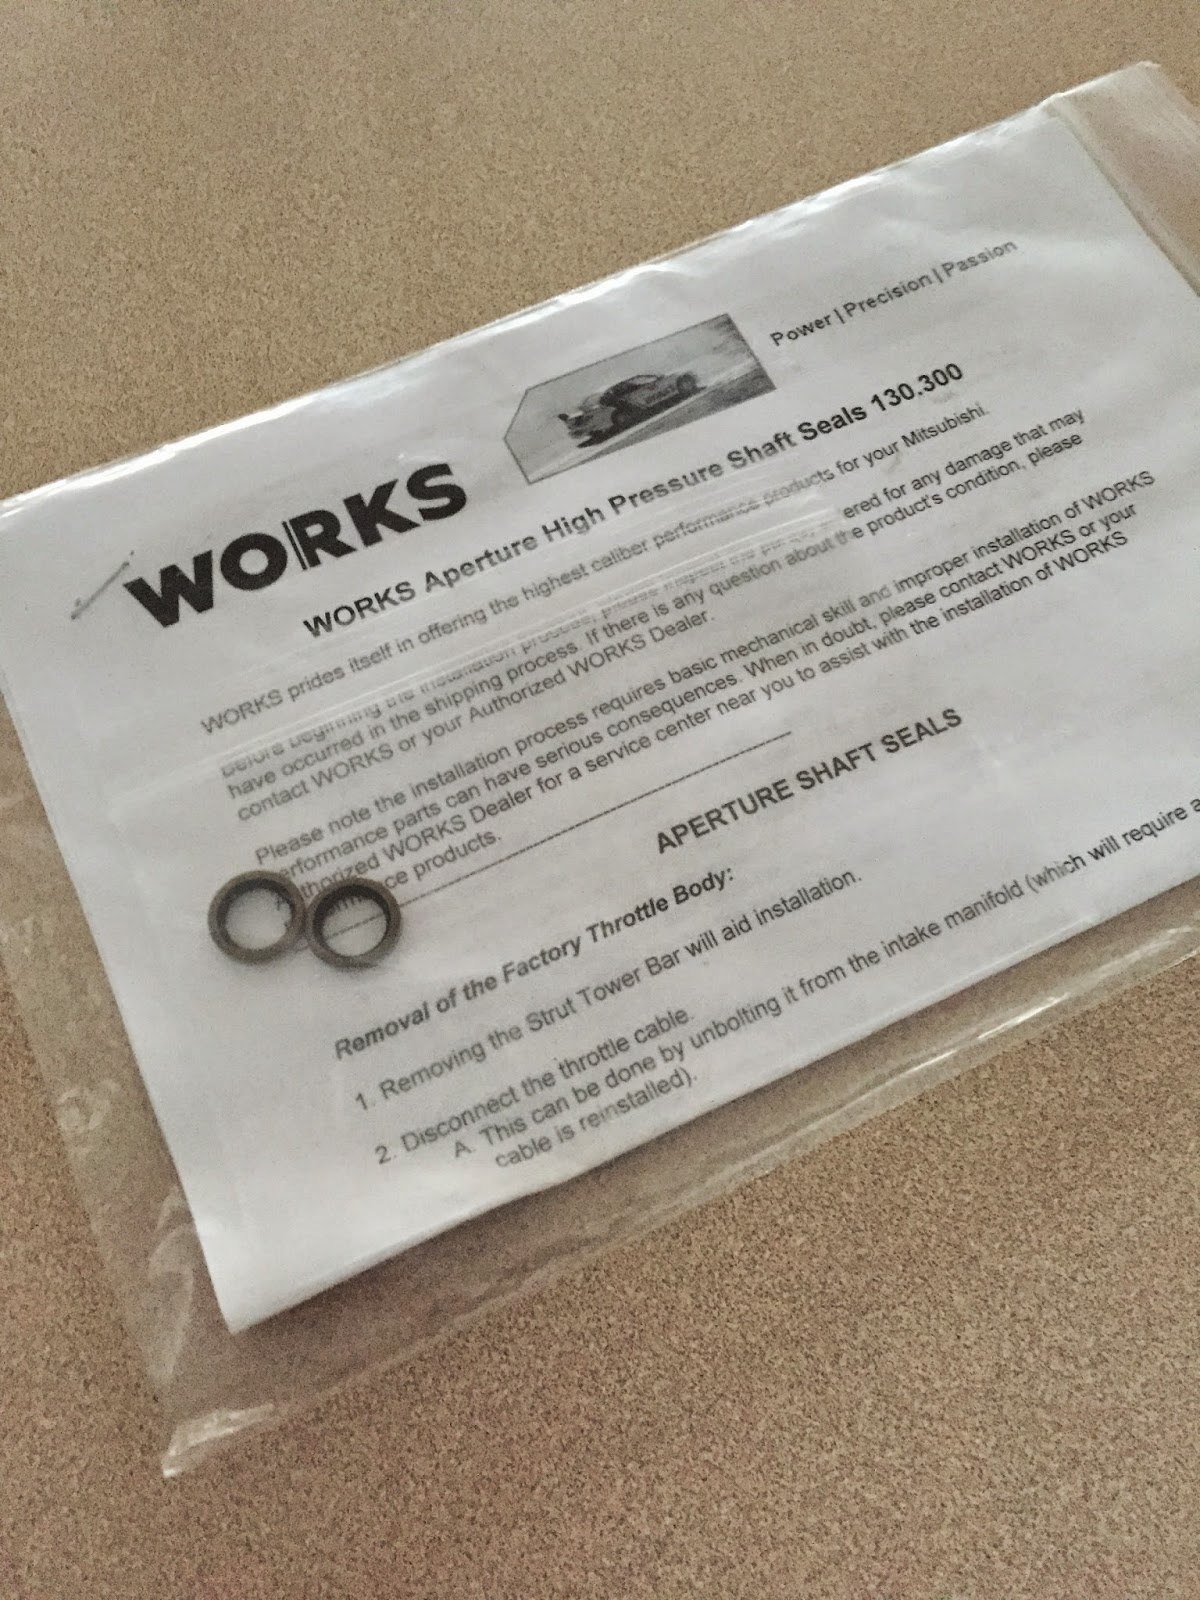
- My Mil.spec seals came in. Went to install the final one and pinched the lip. . I need to order a new one at this point, but its my fault for rushing it.
-Ordered OEM paint from automotive touch up paint. 2qty of Black 1qty of their glossy clear. should be here in the next week. I plan to re-spray my entire core support once all the cutting is done.
-Also placed a order for some powder coating products this weekend.
I went with Bentley Blue PPB-4711 I will be doing my Valve cover and BOV in this color.
http://www.prismaticpowders.com/colo.../BENTLEY-BLUE/
&
Mega Grey PMB-6831 (for accent colors) I plan to use this color on my water pipe, water neck, and thermo housing.
http://www.prismaticpowders.com/colo...831/MEGA-GREY/
Thanks for looking!
love the use of radium parts and interested what you do with the chase bay rad and FMIC. How do you plan to route the wiring where the fuse box needs to run to the battery? Under the frame rail?
The Battery Wires and ACD wires will be routed under the car in some type of weather proof loom. I'm planning to mount the ACD on the Driver side trunk area. Although for weight distribution and balance it should go on the right side.
Little project update:
- My Mil.spec seals came in. Went to install the final one and pinched the lip.
. I need to order a new one at this point, but its my fault for rushing it. -Ordered OEM paint from automotive touch up paint. 2qty of Black 1qty of their glossy clear. should be here in the next week. I plan to re-spray my entire core support once all the cutting is done.
-Also placed a order for some powder coating products this weekend.
I went with Bentley Blue PPB-4711 I will be doing my Valve cover and BOV in this color.
http://www.prismaticpowders.com/colo.../BENTLEY-BLUE/
&
Mega Grey PMB-6831 (for accent colors) I plan to use this color on my water pipe, water neck, and thermo housing.
http://www.prismaticpowders.com/colo...831/MEGA-GREY/
Thanks for looking!

Trending Topics

Well done, this thread exudes with properness
I will be ordering a HLA for the EVO soon. Thanks Drew. R

2.18.15 Project Update.
-All my powder showed up from Prismatic powders. I went with Bentley blue and Mega Grey.
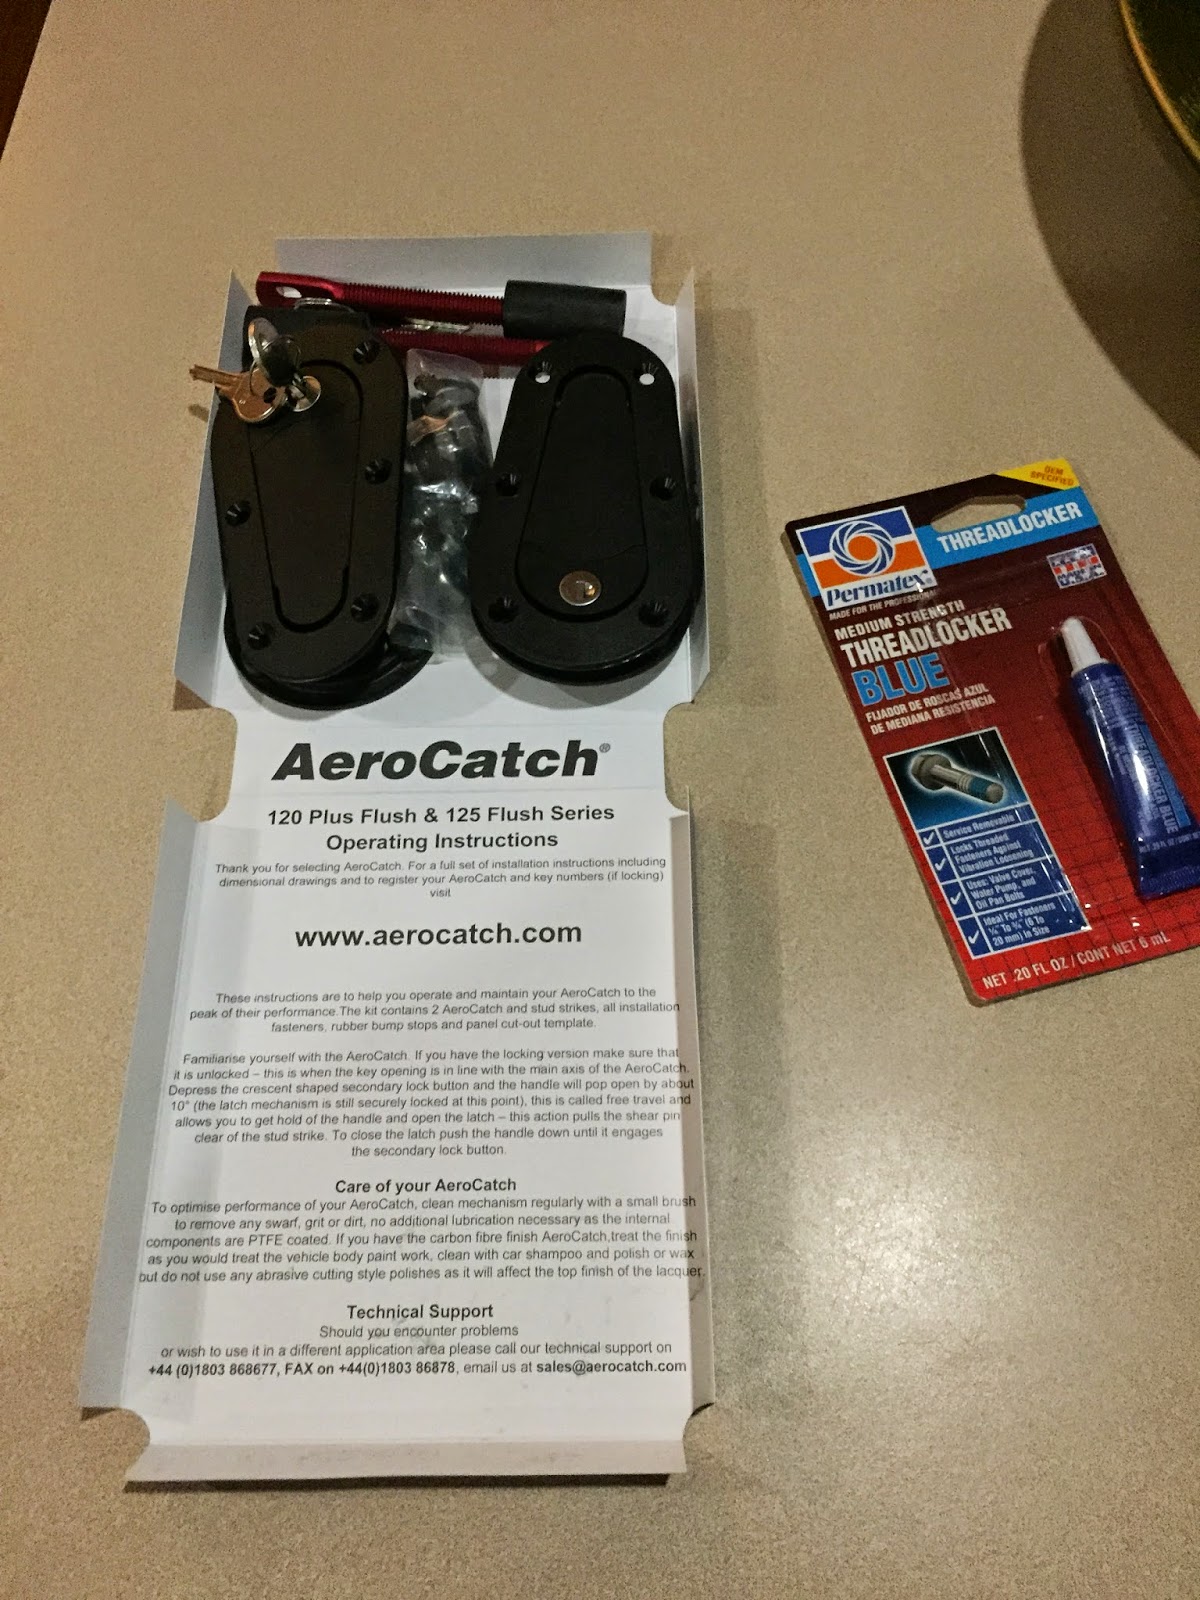
-Aero Catch Hood Latches arrived this weekend.
-I found the correct size GM rad cap to fit my inline filler neck.

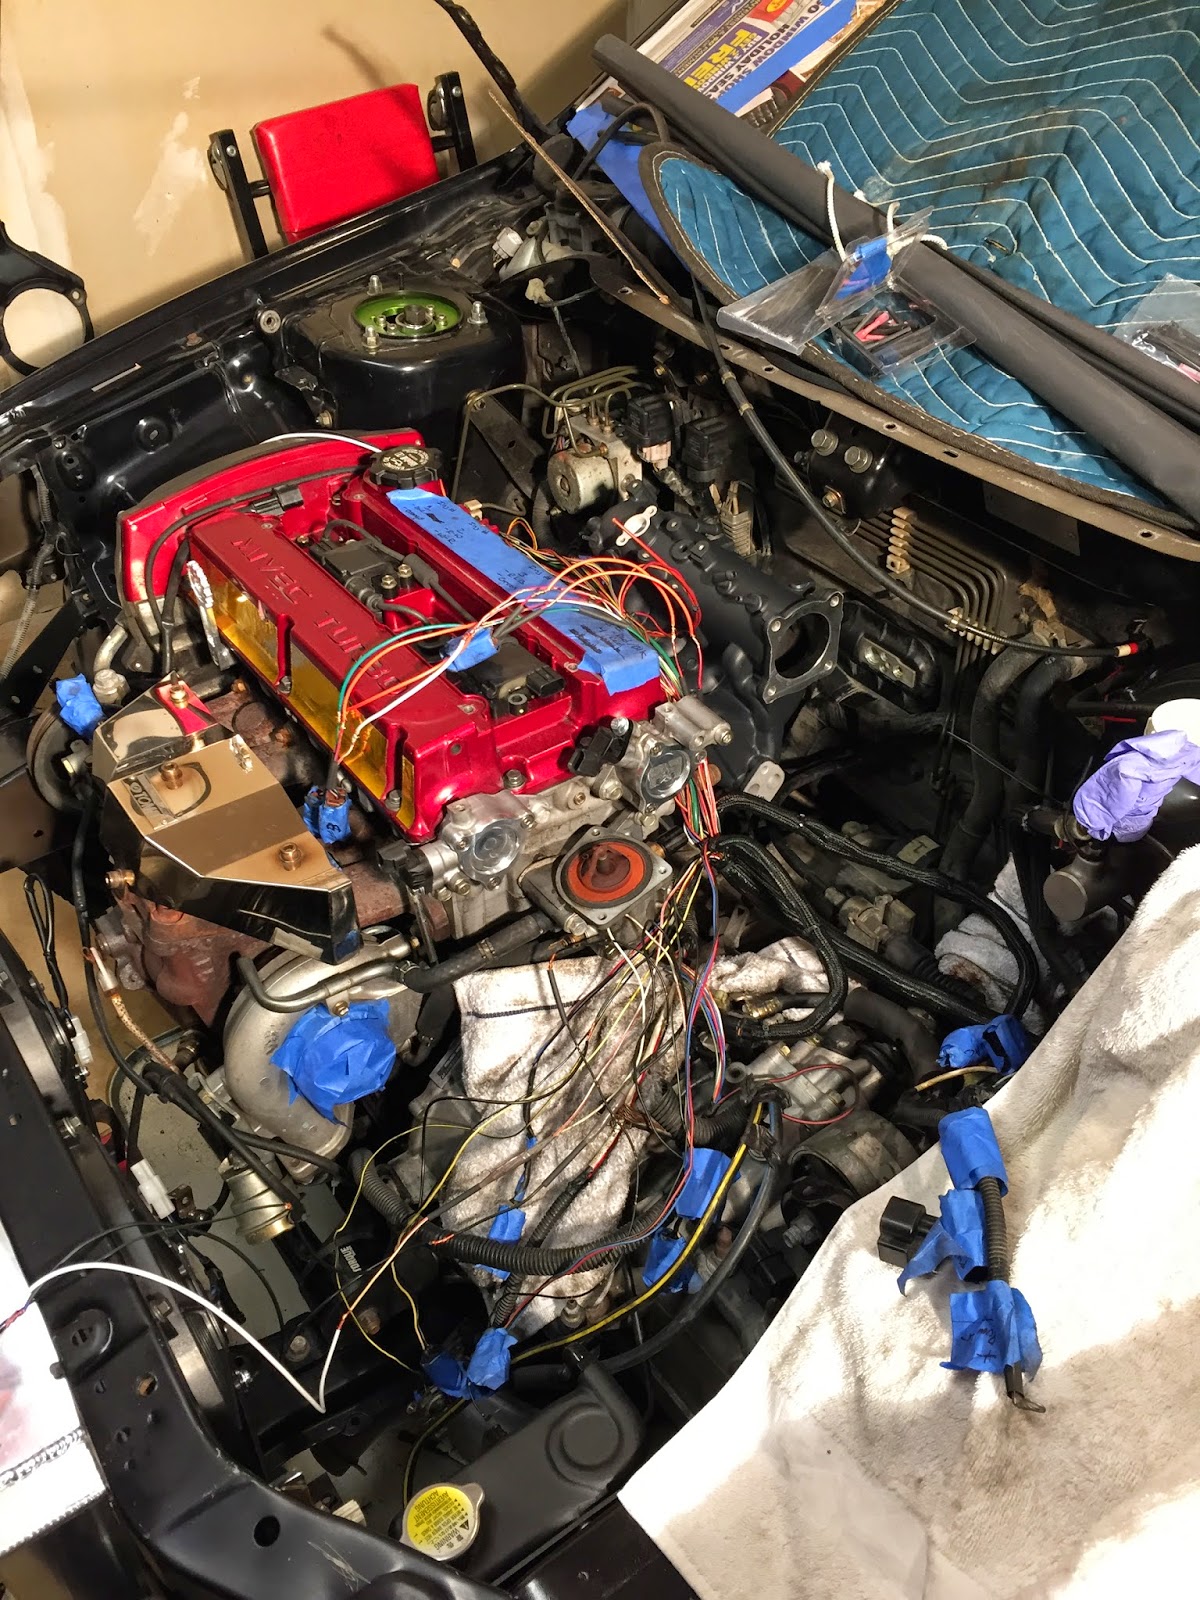
-Reinstalled my Throttle body butterfly with and added blue Loctite to the screws for added protection.


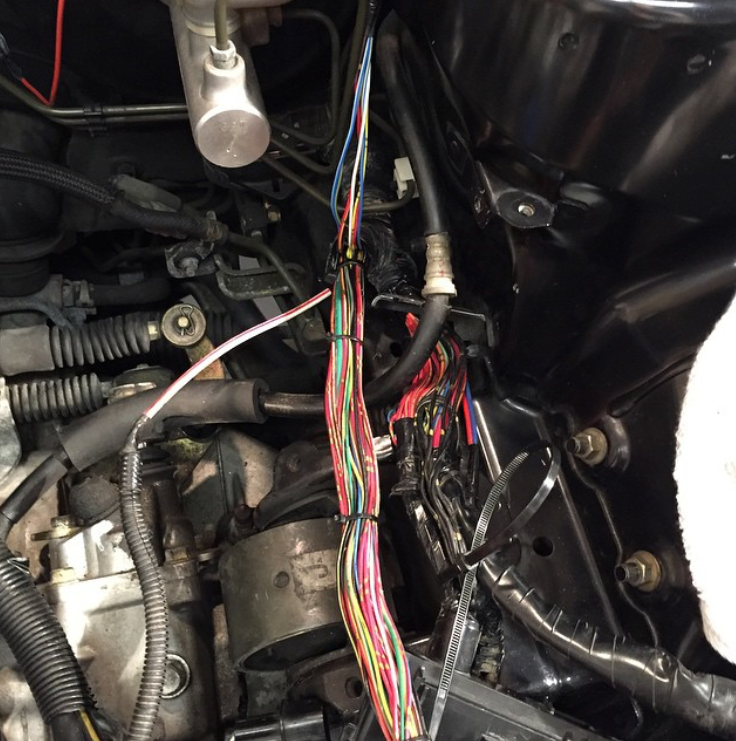
-Started extending wires on my harness, with the help of Chris H from Moore Automotive. After I find some better solder wire the harness should be complete by the following weekend. If you look in the bottom right corner of the bay you can see were I started to sleeve wires with the loom.
.JPG)
Thanks for looking
-All my powder showed up from Prismatic powders. I went with Bentley blue and Mega Grey.
-Aero Catch Hood Latches arrived this weekend.
-I found the correct size GM rad cap to fit my inline filler neck.
-Reinstalled my Throttle body butterfly with and added blue Loctite to the screws for added protection.
-Started extending wires on my harness, with the help of Chris H from Moore Automotive. After I find some better solder wire the harness should be complete by the following weekend. If you look in the bottom right corner of the bay you can see were I started to sleeve wires with the loom.
Thanks for looking
Looking good Andrew! I hate wiring so I cringe when I see those pics. Looks like your pup is quite the the little worker. The most I get from my pups is a couple sniffs and head tilts. They never get their paws up in there like that 
If you are planning on keeping the coolant passages of your TB blocked off I would recommend you pick up some higher quality silicon/ neoprene or whatever caps as those auto parts store ones crack pretty quickly...
Other than that looks like you are making some good progress so keep up the good work!