EvolutionM - Mitsubishi Lancer and Lancer Evolution Community
  • LOG IN
  • REGISTER
  • Forums
    • EvoM Forums
      • The Loft / EvoM Car Talk Corner
      • EvoM Announcements
      • EvoM New Member / FAQs / EvoM Rules
      • EvoM Newsletter Archives
      • EvoM Featured Car of the First Quarter!
      • Site Feedback / Suggestions
      • The Great EvoM Banner Relay
      • Future Lancer / Evo Models
      • Member Unresolved Disputes
      • Vendor Service / Parts / Tuning Review
      • Project Cars / Build Threads
    • Lancer Evo XI Forums
      • Discussion / Rumors
      • Evo XI Wish List
      • Links to Published Articles
    • Lancer Evo X Forums
      • Evo X General
      • Evo X Dyno Results
      • Evo X Engine Management / Tuning Forums
      • Evo X Engine / Turbo / Drivetrain
      • Evo X Tires / Wheels / Brakes / Suspension
      • Evo X How Tos / Installations
      • Evo X Show / Shine
      • Evo X Electrical / Audio / Security
    • Lancer Evo 1-9 Forums
      • Evo General
      • Evo Dyno Tuning / Results
      • Evo Engine Management / Tuning Forums
      • Evo Engine / Turbo / Drivetrain
      • Evo Tires / Wheels / Brakes / Suspension
      • Evo How Tos / Installations
      • Evo Show / Shine
      • Evo Electrical / Audio / Security
    • Lancer Ralliart Forums
      • 09+ Lancer Ralliart General
      • 09+ Ralliart Engine/Turbo/Drivetrain
      • 09+ Ralliart Brakes/Wheels/Suspension
      • 09+ Ralliart How-To/Installations
      • 09+ Ralliart Show and Shine
      • 04-06 Ralliart General
      • 04-06 Ralliart Engine/Drivetrain
      • 04-06 Ralliart Aftermarket Forced Induction Tech
      • 04-06 Ralliart Tires/Wheels/Brakes/Suspension
      • 04-06 Ralliart How-to's/Installations
      • 04-06 Lancer Ralliart Show & Shine
      • Lancer Ralliart Audio & Security (All models)
    • Lancer Forums
      • Lancer General
      • Lancer (ES, LS, OZ) 2002-2007 Forums
      • Lancer (DE,ES,GTS) 2008+ Forums
      • Lancer Show / Shine
      • Lancer Audio and Security (All models)
      • AWD Lancer (2012 +)
      • Mitsubishi Vehicles (Airtrek / Outlander)
    • Classifieds
      • Marketplace
      • Vendor Announcements
      • Vendor Classifieds
      • Vendor 'Used Parts' Classifieds
      • Evo X Vendor 'For Sale' Classifieds
      • Evo Vendor 'For Sale' Classifieds
      • Evo Vendor 'Group Buy / Specials' Classifieds
      • Lancer Vendor 'For Sale' Classifieds
      • Auto Dealer Classifieds
      • Private 'Evo 1 - 9' For Sale / Wanted
      • Private 'Evo X' For Sale / Wanted
      • Private 'Lancer (DE,ES,GTS) 2008+' For Sale / Wanted
      • Private 'Lancer' For Sale / Wanted
      • Private "Regional" For Sale
      • Other Cars - For Sale - Wanting To Buy (WTB) Or Trade (WTT)
      • Motor Sports Parts
    • Vendor Forums
    • Competition
      • Motor Sports
      • Drag Racing
      • Driving Techniques
    • U.S. Regional & International Forums
      • US Regional Forums
      • Clubs
      • International Forums
  • News
  • Marketplace
    • Evo X Cars For Sale
    • Evo 9 Cars For Sale
    • Evo 8 Cars For Sale
    • Evo X Parts For Sale
    • Evo 8-9 Parts For Sale
    • Vendor Directory
    • Become a Vendor
    • Marketplace
  • New Posts
  • Tools
    • Car Payment Calculator
    • Tire Rim Calculator
    • Vin Decoder
    • Recalls
    • Technical Service Bulletins (TSBs)
    • Members List
    • Live Feed
  • Gallery
  • About
  • View Dark Mode
    • Please register or login to enable Dark Mode.
  • Log In
  • Register
EvolutionM - Mitsubishi Lancer and Lancer Evolution Community
    • Threads
      • Advanced
Dark Mode

Please register or login to enable Dark Mode.

Log In

Forgot your Password?

By logging into your account, you agree to our Terms of Use and Privacy Policy, and to the use of cookies as described therein.
or
 
  • Recent
  • Commented
  • Albums
  • My Pictures

My Post Pictures

Justinandcecil
June 25, 2016
 137
 0
Sort:
Default
  • Default
  • Most Recent
Old head bolts
Old head bolts
0 2016/07/27 10:05:29 Justinandc
Old head bolts, ok so they look normal...all except one, notice below
0 2016/07/27 10:06:18 Justinandc
Notice anything different about 1 of the bolts?
0 2016/07/27 10:08:25 Justinandc
Here's a closer look, for some reason the threads of this one bolt is covered in a really thick milky substance...very interesting. And what is more is it literally stinks. I has a real stinky smell to it. Definitely smells like something different. Could be some kind of a sealant. But it's only on this one bolt, all other bolts are clean(only covered in oil of course)
0 2016/07/27 10:09:59 Justinandc
Just some process pics
0 2016/07/27 10:16:54 Justinandc
Here you can see what the alternator tensioner adjuster officially turned out to look like hehe. But anyway this pic shows how I'm trying/hoping/praying the timing doesn't get messed up. I used some paint to mark on the pulley and belt. I did this on the front side here and on the back also. So if the belt doesn't move, and the pulleys don't move, the timing should stay the same right?
0 2016/07/27 10:18:14 Justinandc
Just some progress pics, and yes in case you're wondering...yes I do plan to remove the blue paint from the intake manifold before everything gets reassembled :)
0 2016/07/27 10:26:38 Justinandc
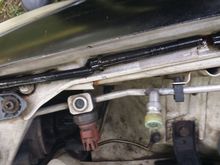
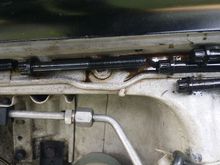
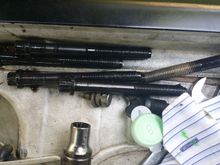
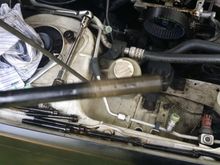
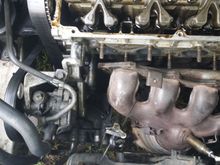
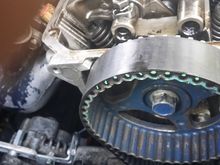
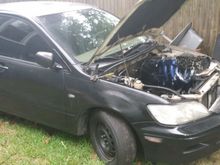
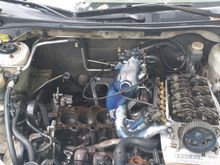
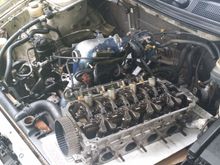
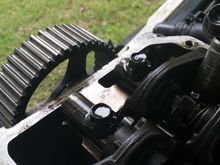
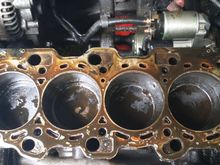
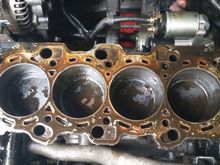
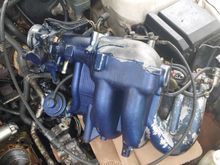
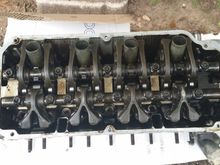
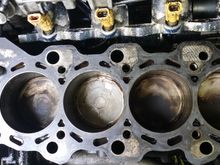
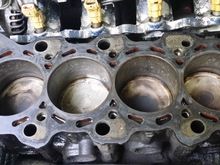
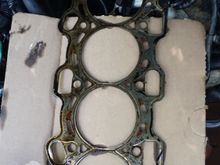
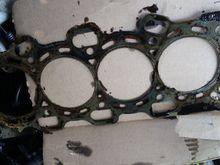
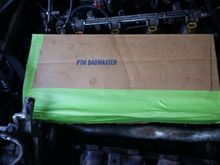
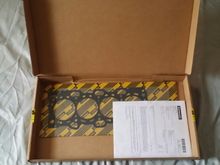
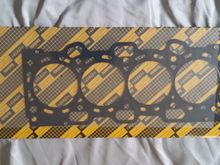
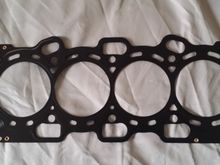
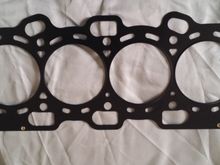
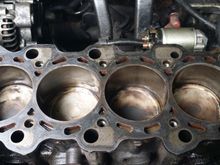
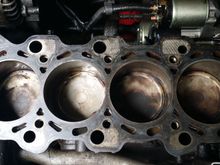
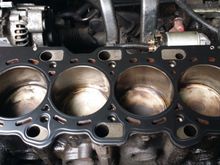
Now remember guys this is the work of a first timer, and at this point in the process, I'm so excited and thrilled about what I'm seeing...wow I've never removed and engine head before lol. One thing I'm experiencing with this Lancer is there's a first time for everything, and, you learn something new everyday. Guess that's 2 things.
0 2016/07/27 10:30:26 Justinandc
Just some progress pics, got it up on a slab of cardboard
0 2016/07/27 10:37:58 Justinandc
Just some progress pics, the timing belt btw is secured with tape so it wont drop down, so at this point in the process everything should be intack as far as the timing. Am I right?
0 2016/07/27 10:39:40 Justinandc
Hang on time!!! Haha joke
0 2016/07/27 10:45:14 Justinandc
Got the paint marks also on the inside of the cam gear, also on the belt
0 2016/07/27 10:47:13 Justinandc
Ok guys here's some pics of the situation
0 2016/07/27 10:49:15 Justinandc
Only looks this bad because oil came off the head and got over and in everything
0 2016/07/27 10:51:02 Justinandc
0 2016/07/27 10:52:39 Justinandc
Looking forward to removing this paint
0 2016/07/27 10:54:16 Justinandc
Everythings intack, and the bottom of the head is resting on a nice soft piece of cardboard. We'll get to that another day as far as cleaning and checking/inspecting the head, I've set it aside for now I'm focusing cleaning and preping the block and bolt holes. I'm using brake cleaner to remove all the oil from inside the wells and from the gasket area. And I'm using the blue scotch pad to gently clean the gasket area
0 2016/07/27 10:55:45 Justinandc
So guys after a thorough cleaning this is what the situation looks like after all the dirt grease and grim was cleaned off. I used brake cleaner and loads of paper towels and rags.
0 2016/07/28 21:27:55 Justinandc
I also used...yep you guessed it lol, a blue scotch pad to buff the gasket area to a smooth shine
0 2016/07/28 21:30:20 Justinandc
This by the way is the old gasket. I could not find any specific faults, but the whole gasket looks fried and could indeed be the "it" problem guys.
0 2016/07/28 21:32:21 Justinandc
Yeah it really looks fried and defected guys. Ok also after I cleaned and prept the block I did take a good close look around the bolt holes and I could not find any cracks. So I'm hoping the gasket itself is the culprit
0 2016/07/28 21:36:30 Justinandc
This is after a thorough cleaning and removal of dirt grease and grime guys inside the piston wells and ontop the gasket area
0 2016/07/28 21:42:28 Justinandc
I used brake cleaner and loads of paper towels and rags. And I used...yep you guessed it lol, I used a blue scotch pad to clean and buff the gasket area to a smooth shine. I gotta tell yeah the steel wool and scotch pads have really been coming in handy for me lately for cleaning tasks hehehe
0 2016/07/28 21:44:30 Justinandc
This is the old head gasket, I could not find any specific faults, but the whole gasket looks fried and defected and could have a fault anywhere
0 2016/07/28 21:50:14 Justinandc
It certainly looks like it could be the culprit :)
0 2016/07/28 21:52:33 Justinandc
Ok guys so I called the local Advance Auto parts and their price for the head gasket is a wopping $50. They didn't have it in stock so he asked if I wanted him to check the other local stores and I said NO THANK YOU SIR! lol. Because I already knew they are cheaper online. I knew they went for around $20, but I got an even better deal.
0 2016/07/28 21:57:58 Justinandc
It ships from California and the seller has a 100% positive customer feed back. And did I mention free shipping? Nice. Ok so I made the purchase guys today, the company processed my order today and was shipped out same day today via Fedex and I already got my tracking nunber (wow fast service) and the estimated delivery on the email is August 3.
0 2016/07/28 22:04:38 Justinandc
Oh and BTW in case you're wondering yes a made a shield cover to protect all my cleaning and prep work until time to install the new gasket
0 2016/07/28 22:14:09 Justinandc
0 2016/07/28 22:16:24 Justinandc
0 2016/08/03 10:17:35 Justinandc
0 2016/08/03 10:17:50 Justinandc
0 2016/08/03 10:23:18 Justinandc
0 2016/08/03 10:26:16 Justinandc
0 2016/08/03 10:26:52 Justinandc
0 2016/08/03 10:27:28 Justinandc
0 2016/08/03 10:27:47 Justinandc
So before I put the gasket on, I did one last prep job on the block gasket surface, and cleaned debri from the bolt holes and the coolant holes and the oil holes, and also it was suggested to rub a little oil inside the piston well walls so it wont have a ruff start. So that's all done and the gasket has been placed. Please see the following pics
0 2016/08/03 10:32:36 Justinandc
0 2016/08/03 10:33:50 Justinandc
0 2016/08/03 10:45:21 Justinandc
0 2016/08/03 10:46:22 Justinandc
First
Page
3 of 4
Last
Go To
Page
  • 1
  • 2
  • 3
  • 4
3 of 4
Go To GO
Go to page of 4 pages
  • 1
  • 2
  • 3
  • 4

Top
EvolutionM - Mitsubishi Lancer and Lancer Evolution Community
  • Contact Us
  • FAQ
  • Archive
  • Advertising
  • Cookie Policy
  • Privacy Statement
  • Terms of Service
  • About Us
  • Your Privacy Choices
  • Manage Preferences

© 2026 MH Sub I, LLC dba Internet Brands

Follow Us      


When you click on links to various merchants on this site and make a purchase, this can result in this site earning a commission. Affiliate programs and affiliations include, but are not limited to, the eBay Partner Network.