How to Remove/Swap Rear Differential for Evo X
 Aug 22, 2016, 06:18 PM
#1
How to Remove/Swap Rear Differential for Evo X
I recently did a Rear Differential Swap for an Evo X. I decided to make a write up of the work involved.
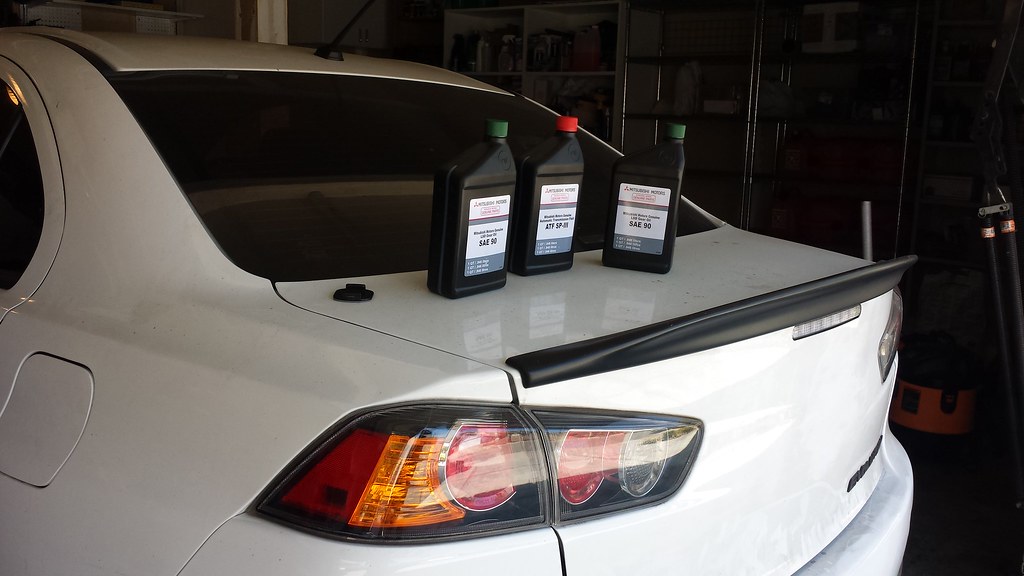
Make sure you have these fluids/parts before you begin.
1 qt of Diamond ATF SP3 : MZ320200
1 qt of Gear Oil Diaqueen: MZ320345
2 drain plug washers : MN130495
First thing to do is jack up the Evo. I would recommend jacking up all four corners into the air. This makes it slightly easier than jacking up the rear only.
My friend bought this Rear Differential as a replacement. His original Rear Differential was making a horrible clicking sound and according to him it was locked up. This is the replacement.
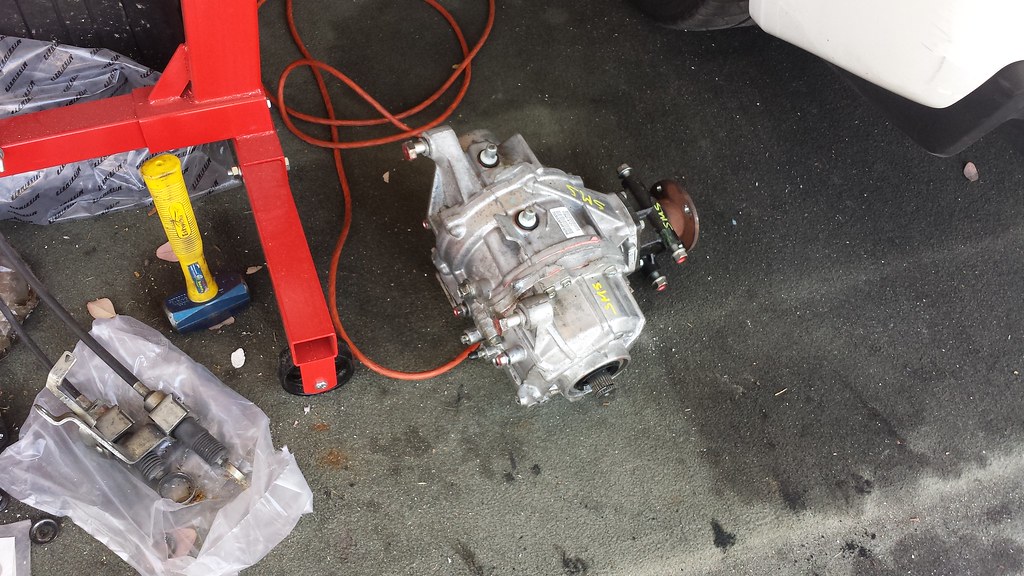
It had suffered minor damage due to improper packaging when shipped. The two bleed nipples for the AYC were damaged. Luckily the original had the nipples in good condition. I swapped them over and that was that.
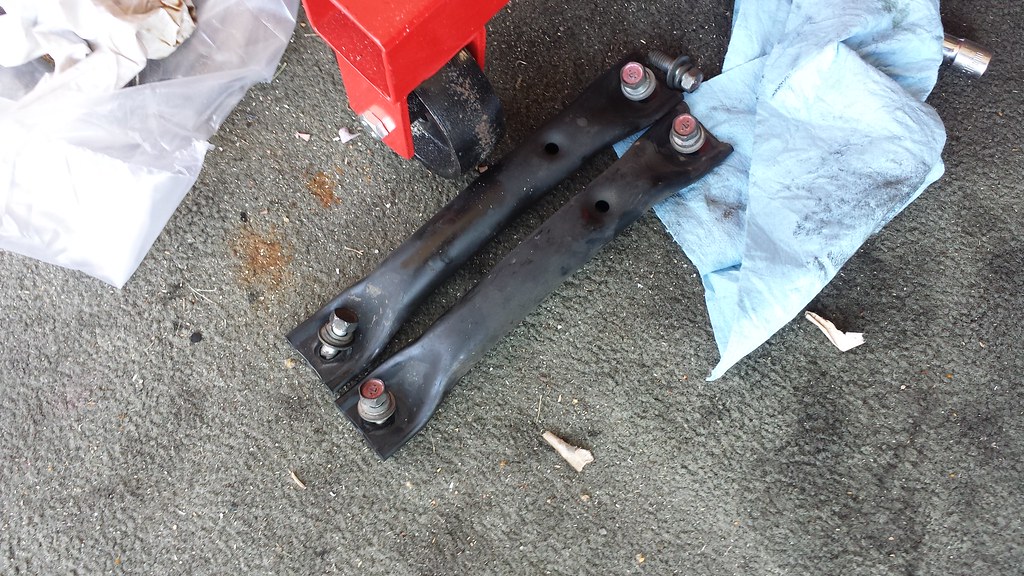
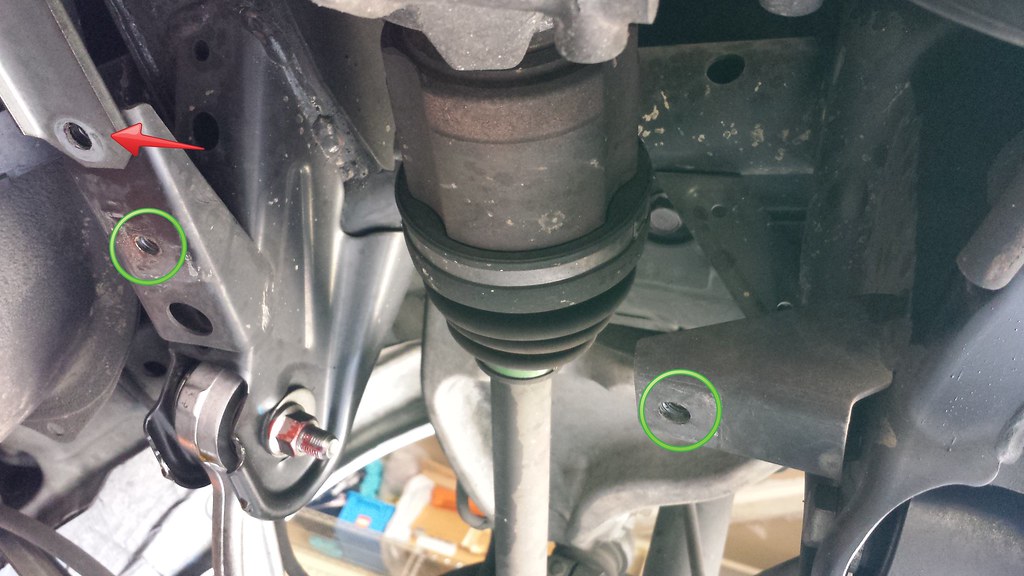
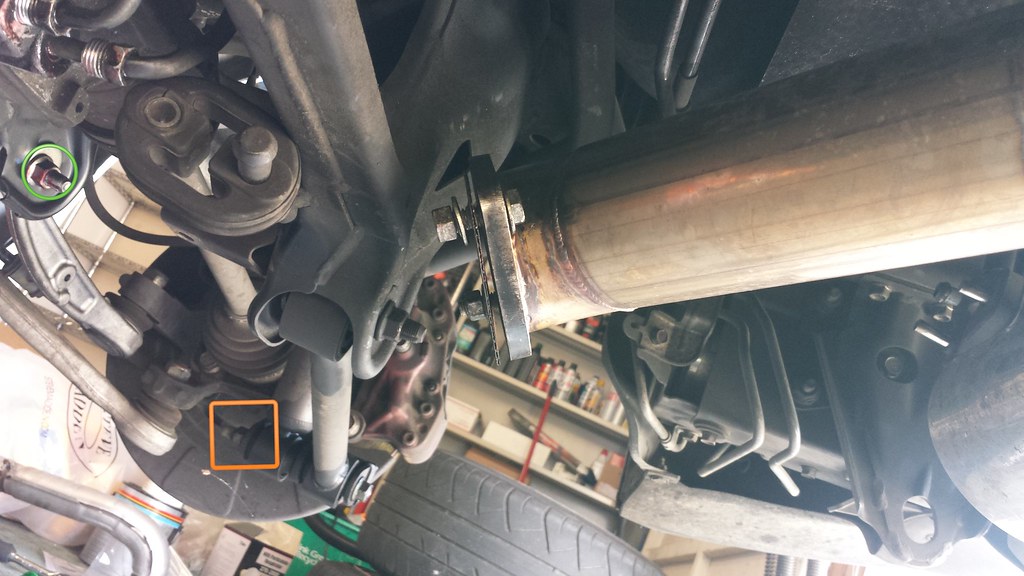
These are axle brace loops? Not really sure what they are called but they are right underneath the rear axles. They can only go back on one way. You will need a 12mm socket to undo the bolts that hold these.
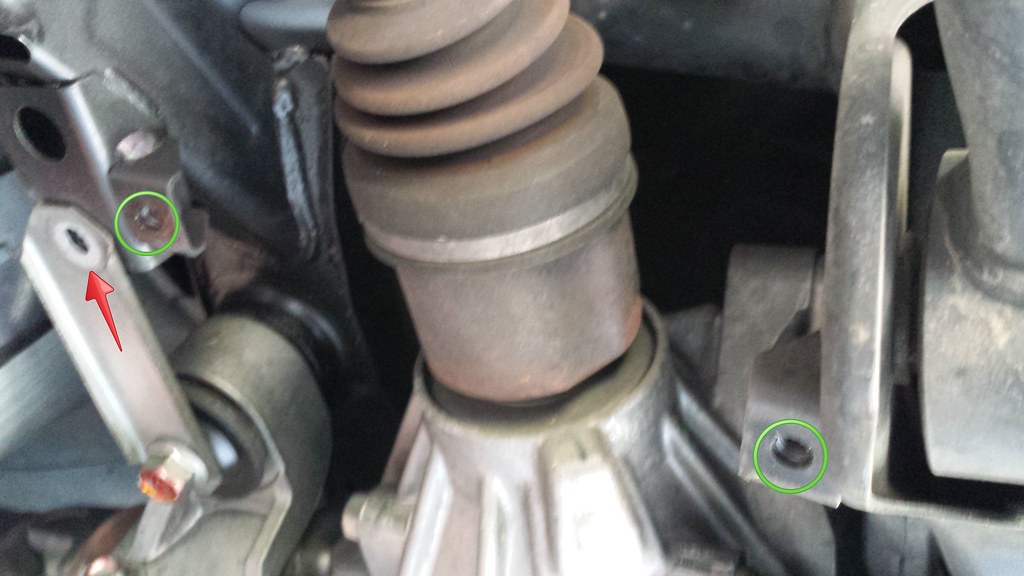
The green circles show where the bolts go for the braces. Also undo the bolt for the Rear Differential Bolt Brace. This is shown by the red arrow.
Unbolt the midpipe for the exhaust. The idea is to make room for the axles.
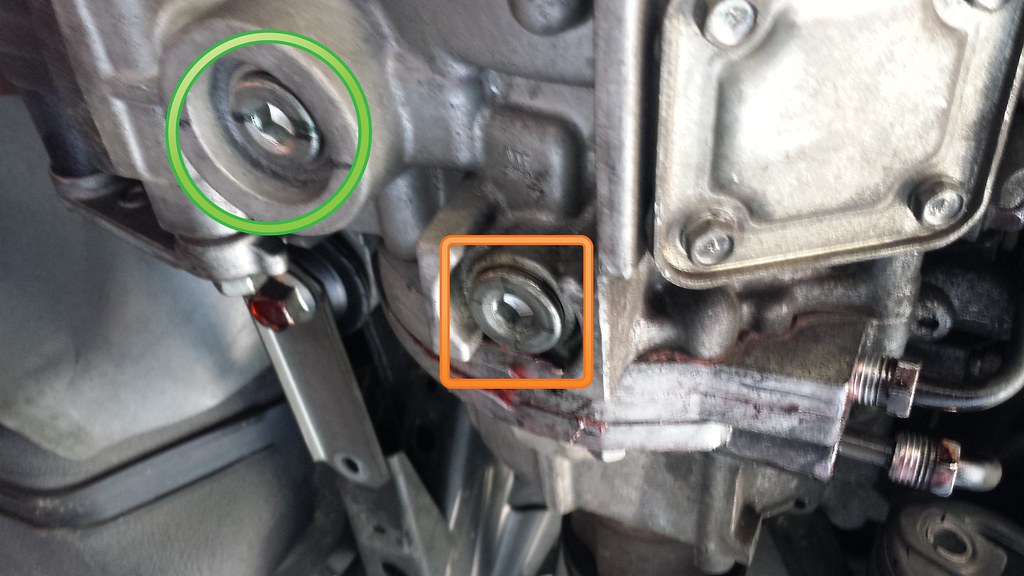
Next grab a drain pan. Then drain all the fluid from the Rear Differential.
The Green Circle is for the Rear Differential Gear Oil. The red square is for the AYC ATF SP3 oil.
Undo both the AYC hard lines that go into the Rear Differential. Use a flare nut 14mm wrench or a regular 14 mm wrench. Be careful with these. Make sure the wrench is engaged properly to prevent rounding the nut.
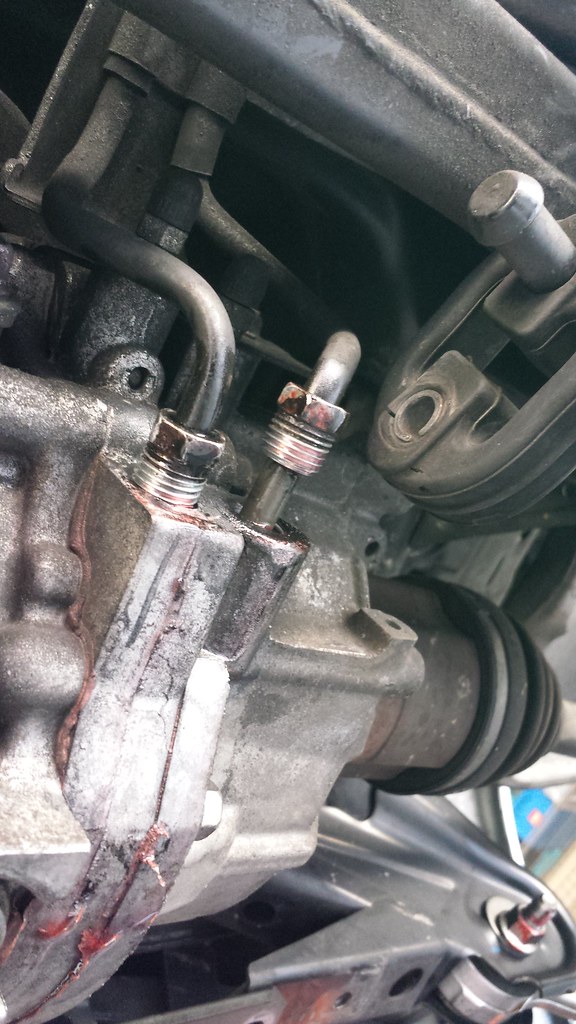
Some more ATF fluid will come out from these lines. Let it drain out into the pan.
Now its time to remove the Rear Axles. Mark the toe arms if you want to match the toe that the Evo previously had. Loosen the nuts for the eccentric bolts for the toe arms so they slide in their slot. Next undo the Bottom Rear suspension Strut nut to disconnect the Rear Suspension from the Rear hub and the Rear Lower control arm. I did this so that all the independent arms could be pulled so that the Rear Axle can slid out more easily.
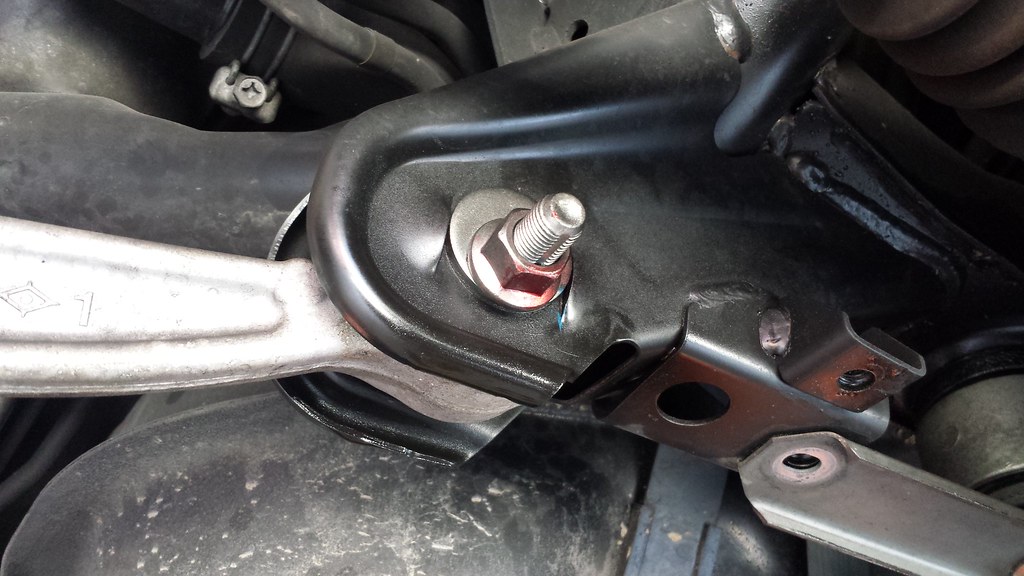
The green circle is for the Toe Arm Nut. The square is the Rear Suspension Strut Nut.
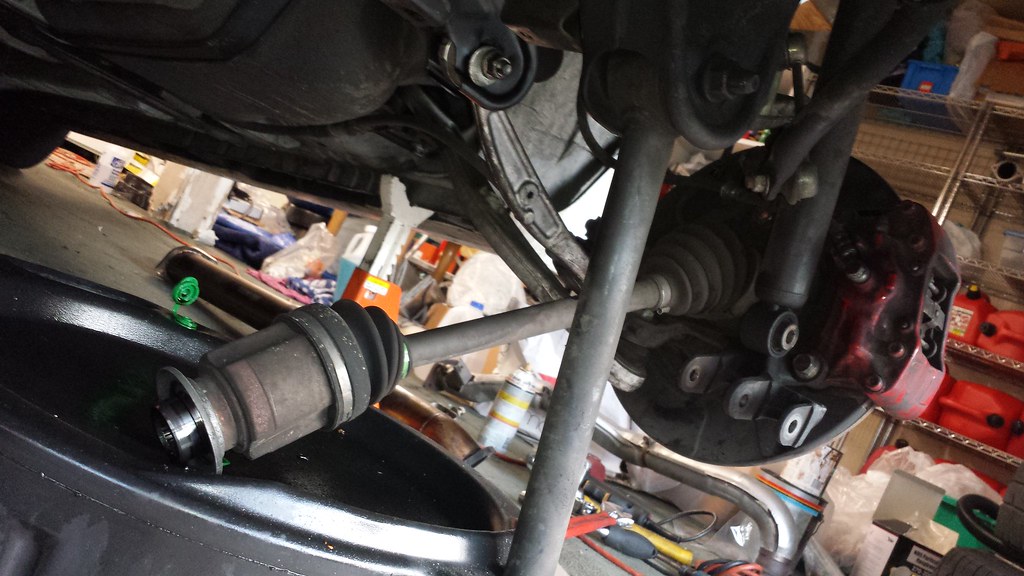
After this is completed the Rear Hub should still be able to be held up. Now is a good time to remove the axles.
When I did this job I ended up completely removing the Rear Driver Side Axle. In order to do this I undid the Axle Split Pin, Axle Nut and Axle Lock Washer. If you choose to go this route you will need to replace these parts as they are one time use.
OEM Mitsubishi Evo VIII-X/DSM/3000GT Axle Nut (MB109029)
OEM Mitsubishi Evo VIII-X/DSM/3000GT Cotter Pin (MF472087)
OEM Mitsubishi Evo VIII-X/DSM/3000GT Lock Washer (MB109025)
As you can see I have a flat head positioned on the rear axle cup. I hit this with a sledge hammer to chisel out the Rear axle on both sides. This will back the axle out of the diff and you should be able to move it out of the way and if you cant follow the next step.
The next step is going to cause the rear hub to drop. This would a good time to get a bungee cord with hooks and support the hub with it to prevent stressing the rear brake line or abs speed sensor wire.
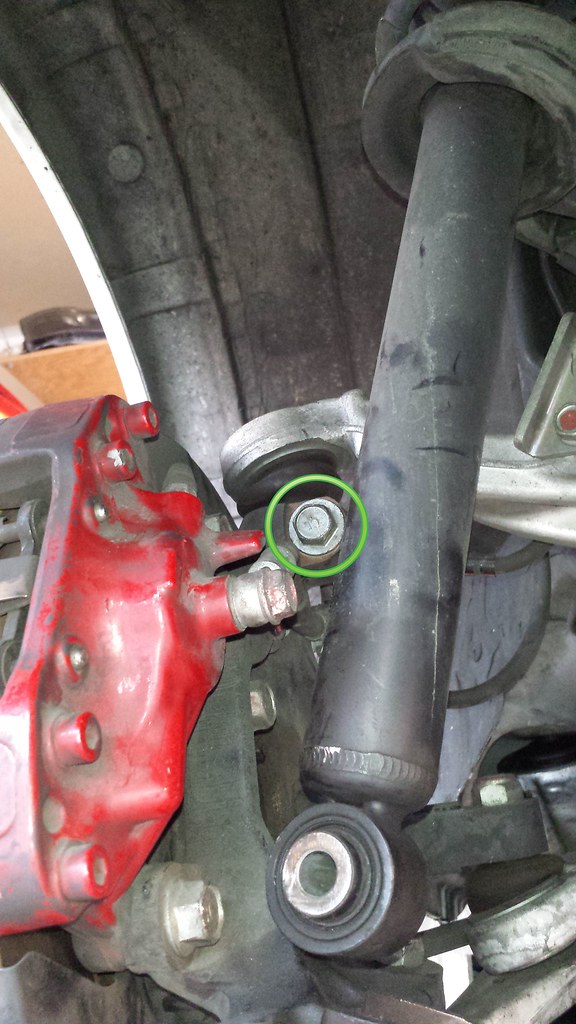
The Green Circle is showing the top ball joint that connects the top rear control arm to the Rear Hub. Undo the nut on the other side and pull the bolt out. You might need to lift up the entire hub assembly to get the bolt to loosen up to be able to pull it out. The ball joint has a notch in it. Unless you line up the notch you will not be able to put the bolt back in.
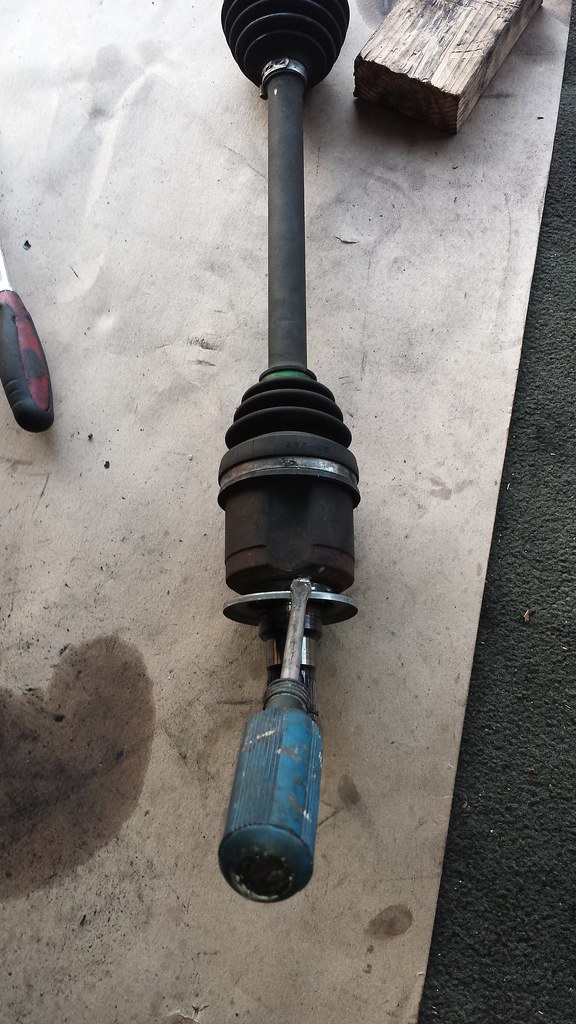
This is the Passenger Side Axle. Notice it has a different end.
This bolt holds the Rear Diff Backend Brace(? I made up this title) to the Rear SubFrame. Remove the bolt.
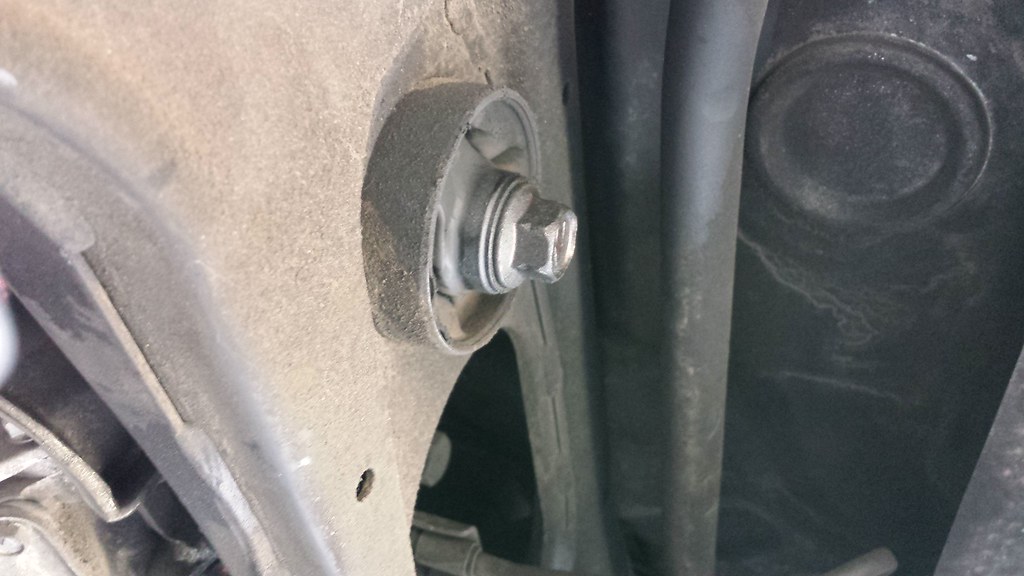
The next step is to disconnect the Rear Differential from the Driveshaft. Make a mark or line up the driveshaft in the same orientation as evidenced by the rust outline on the Rear Diff hub. You will need a 14mm socket and a 14mm closed end wrench. Make sure the nuts are undone one at a time and put back on the same bolt once its removed. Also use a jack stand to support the driveshaft.

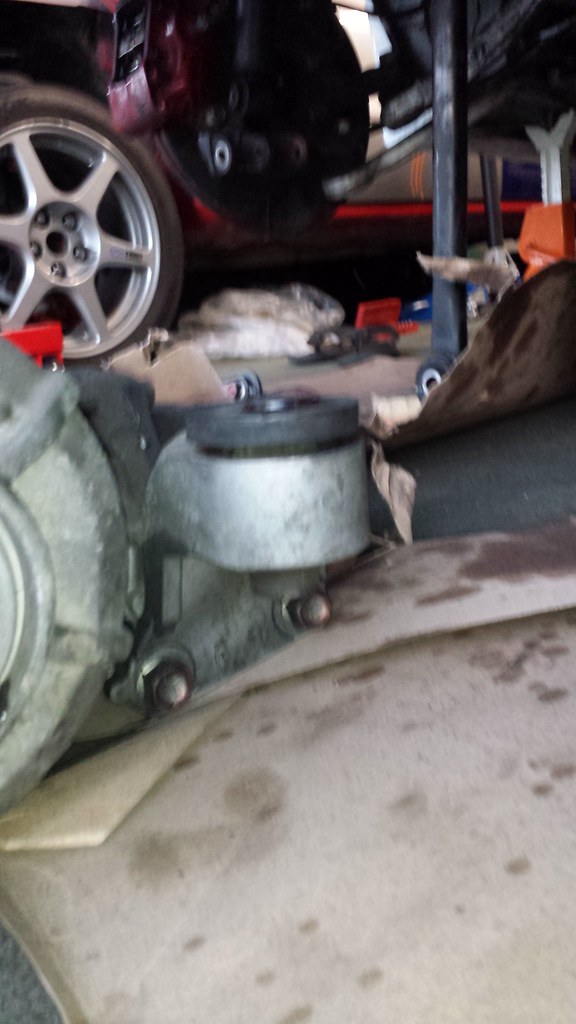
After this there are only 2 more bolts holding the Rear Diff to the Evo. Remove the Bolts in the side mounts. Use a jack with a large jack point to support the Rear Diff so it doesn't crash down.
Once removed there should be two black rubber washers/spacers.
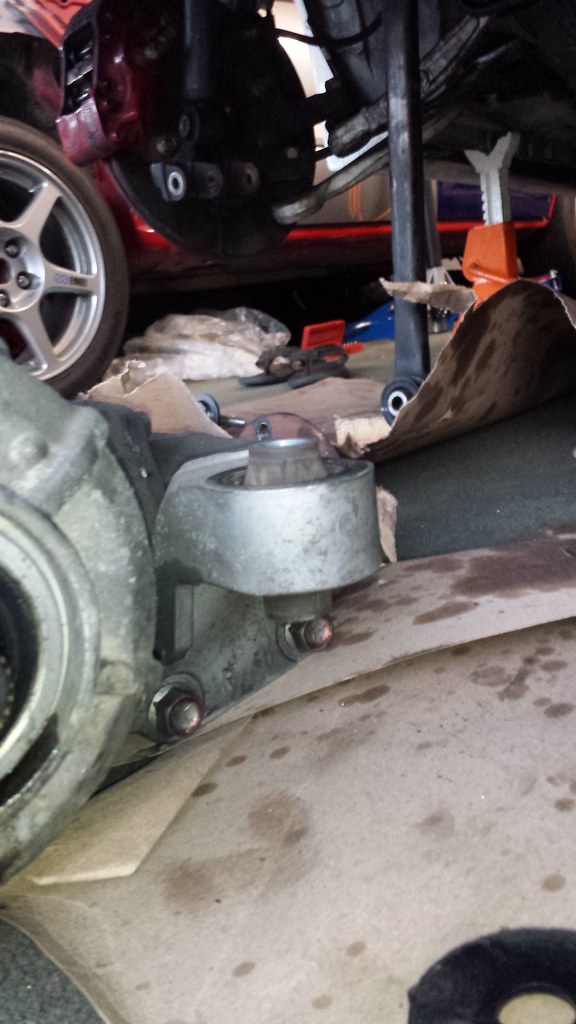
This is the orientation that they need to be reinstalled.
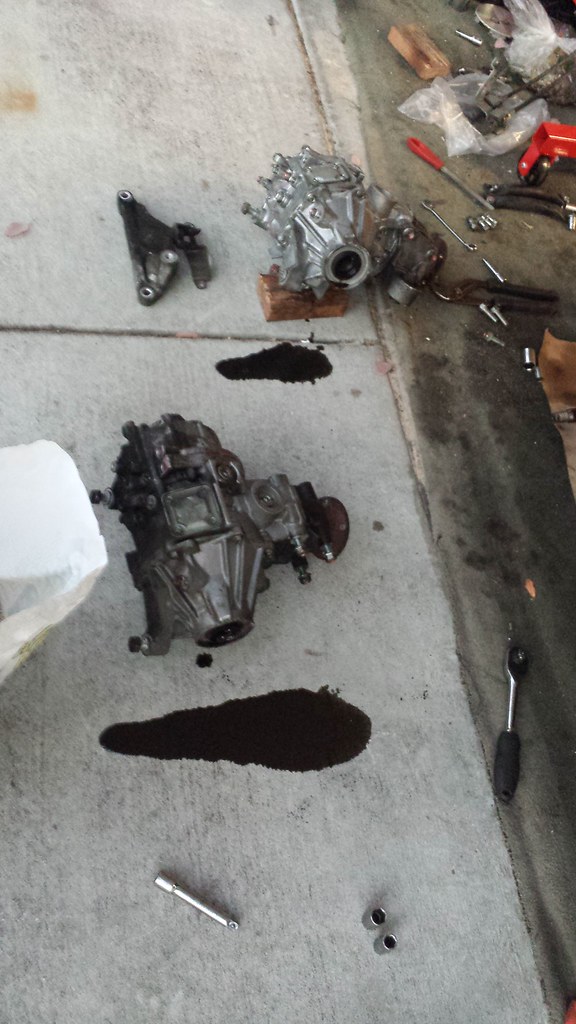
Once the Rear Differential is out I had to swap small things like the Diff Mustache Bar, bleeder screws, and Rear Diff Mounts. Word to the wise is that you never want to put the Rear Differential down on the passenger side axle seal. Diff fluid leaks out easily as seen here. I forgot the Torque specs for the Bolts for the mustache bar. I do remember that the two big bolts require a 22mm socket or a 7/8 socket.
Here are the Torque Specs for the major items. I advise you to check them with the factory torque specs.
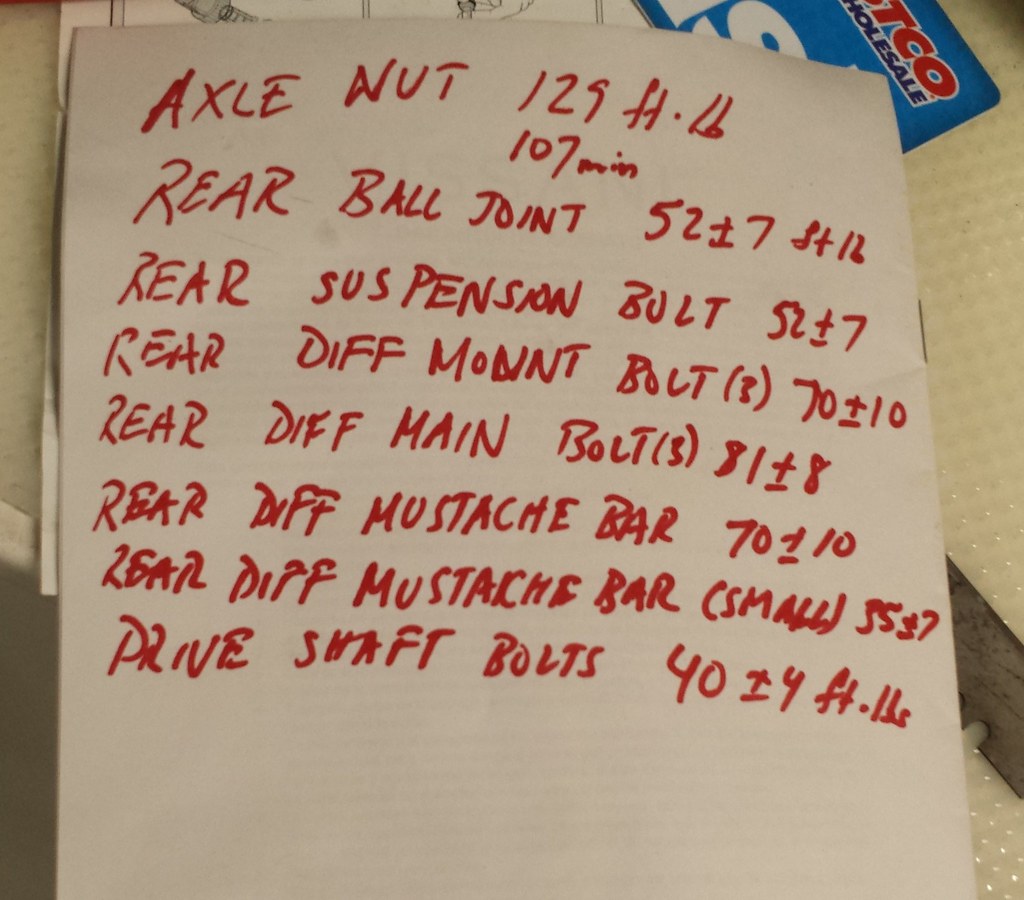
All you need to do now is to Reverse the order of installation. Replace both Drain plug washers. Torque drain plugs and fill plugs to 24 ft lbs. Pump into the Rear Diff with .55 qts of Gear oil. Pump the Rear Diff with ATF SP3 fluid. Top off the ACD/AYC reservoir. Bleed the AYC. Check the Driven Fab website for bleeding info.
I apologize if some pictures came out blurry. I blame my phone.
Make sure you have these fluids/parts before you begin.
1 qt of Diamond ATF SP3 : MZ320200
1 qt of Gear Oil Diaqueen: MZ320345
2 drain plug washers : MN130495
First thing to do is jack up the Evo. I would recommend jacking up all four corners into the air. This makes it slightly easier than jacking up the rear only.
My friend bought this Rear Differential as a replacement. His original Rear Differential was making a horrible clicking sound and according to him it was locked up. This is the replacement.
It had suffered minor damage due to improper packaging when shipped. The two bleed nipples for the AYC were damaged. Luckily the original had the nipples in good condition. I swapped them over and that was that.
These are axle brace loops? Not really sure what they are called but they are right underneath the rear axles. They can only go back on one way. You will need a 12mm socket to undo the bolts that hold these.
The green circles show where the bolts go for the braces. Also undo the bolt for the Rear Differential Bolt Brace. This is shown by the red arrow.
Unbolt the midpipe for the exhaust. The idea is to make room for the axles.
Next grab a drain pan. Then drain all the fluid from the Rear Differential.
The Green Circle is for the Rear Differential Gear Oil. The red square is for the AYC ATF SP3 oil.
Undo both the AYC hard lines that go into the Rear Differential. Use a flare nut 14mm wrench or a regular 14 mm wrench. Be careful with these. Make sure the wrench is engaged properly to prevent rounding the nut.
Some more ATF fluid will come out from these lines. Let it drain out into the pan.
Now its time to remove the Rear Axles. Mark the toe arms if you want to match the toe that the Evo previously had. Loosen the nuts for the eccentric bolts for the toe arms so they slide in their slot. Next undo the Bottom Rear suspension Strut nut to disconnect the Rear Suspension from the Rear hub and the Rear Lower control arm. I did this so that all the independent arms could be pulled so that the Rear Axle can slid out more easily.
The green circle is for the Toe Arm Nut. The square is the Rear Suspension Strut Nut.
After this is completed the Rear Hub should still be able to be held up. Now is a good time to remove the axles.
When I did this job I ended up completely removing the Rear Driver Side Axle. In order to do this I undid the Axle Split Pin, Axle Nut and Axle Lock Washer. If you choose to go this route you will need to replace these parts as they are one time use.
OEM Mitsubishi Evo VIII-X/DSM/3000GT Axle Nut (MB109029)
OEM Mitsubishi Evo VIII-X/DSM/3000GT Cotter Pin (MF472087)
OEM Mitsubishi Evo VIII-X/DSM/3000GT Lock Washer (MB109025)
As you can see I have a flat head positioned on the rear axle cup. I hit this with a sledge hammer to chisel out the Rear axle on both sides. This will back the axle out of the diff and you should be able to move it out of the way and if you cant follow the next step.
The next step is going to cause the rear hub to drop. This would a good time to get a bungee cord with hooks and support the hub with it to prevent stressing the rear brake line or abs speed sensor wire.
The Green Circle is showing the top ball joint that connects the top rear control arm to the Rear Hub. Undo the nut on the other side and pull the bolt out. You might need to lift up the entire hub assembly to get the bolt to loosen up to be able to pull it out. The ball joint has a notch in it. Unless you line up the notch you will not be able to put the bolt back in.
This is the Passenger Side Axle. Notice it has a different end.
This bolt holds the Rear Diff Backend Brace(? I made up this title) to the Rear SubFrame. Remove the bolt.
The next step is to disconnect the Rear Differential from the Driveshaft. Make a mark or line up the driveshaft in the same orientation as evidenced by the rust outline on the Rear Diff hub. You will need a 14mm socket and a 14mm closed end wrench. Make sure the nuts are undone one at a time and put back on the same bolt once its removed. Also use a jack stand to support the driveshaft.
After this there are only 2 more bolts holding the Rear Diff to the Evo. Remove the Bolts in the side mounts. Use a jack with a large jack point to support the Rear Diff so it doesn't crash down.
Once removed there should be two black rubber washers/spacers.
This is the orientation that they need to be reinstalled.
Once the Rear Differential is out I had to swap small things like the Diff Mustache Bar, bleeder screws, and Rear Diff Mounts. Word to the wise is that you never want to put the Rear Differential down on the passenger side axle seal. Diff fluid leaks out easily as seen here. I forgot the Torque specs for the Bolts for the mustache bar. I do remember that the two big bolts require a 22mm socket or a 7/8 socket.
Here are the Torque Specs for the major items. I advise you to check them with the factory torque specs.
All you need to do now is to Reverse the order of installation. Replace both Drain plug washers. Torque drain plugs and fill plugs to 24 ft lbs. Pump into the Rear Diff with .55 qts of Gear oil. Pump the Rear Diff with ATF SP3 fluid. Top off the ACD/AYC reservoir. Bleed the AYC. Check the Driven Fab website for bleeding info.
I apologize if some pictures came out blurry. I blame my phone.
Last edited by deylag; Aug 22, 2016 at 06:26 PM.

The following 3 users liked this post by deylag:
Aug 22, 2016, 06:35 PM
#2
Evolved Member
Holy Lord Almighty! deylag, are you a professional mechanic or something?!

Thread
Thread Starter
Forum
Replies
Last Post
TxFAkuma
Evo X General
2
Dec 6, 2017 08:53 AM
Freebs
Evo X Engine / Turbo / Drivetrain
34
Jan 8, 2014 05:19 PM
03evo4g63
For Sale/WTB - Engine / Drivetrain / Power
2
Oct 9, 2009 09:10 AM
ENVY-THIS
Evo How Tos / Installations
2
Mar 2, 2008 08:04 AM